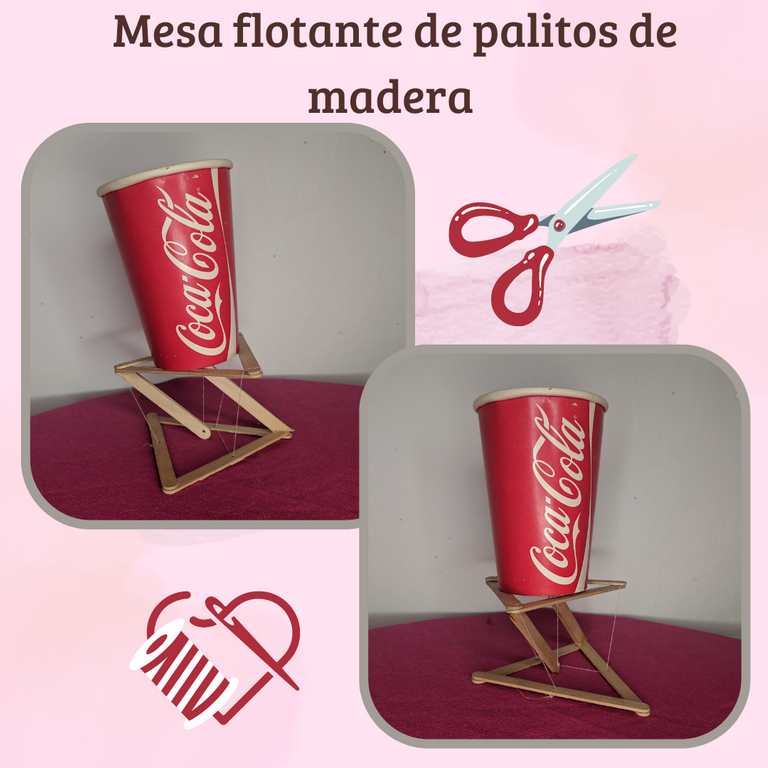
Hola amigos de hive, hoy quiero compartir ustedes esta mesa flotante con paletas de madera, hacía tiempo la había visto y me había llamado la atención, así que al fin decidí ponerme a realizarla, puedo decir que me llevo algo de tiempo ya que fue ensayo y error no sé cuántas veces hasta que por fin lo logré, ya que había no se ve tan difícil, pero al final si salió y estaba feliz.
Hello friends of hive, today I want to share with you this floating table with wooden pallets, I had seen it some time ago and it had caught my attention, so I finally decided to make it, I can say that it took me some time because it was trial and error I don't know how many times until I finally succeeded, since it doesn't look so difficult, but in the end it came out and I was happy.
Materiales/ Materials
- Paletas de madera
- Silicón
- Tijera
- Hilo
- Aguja
- clavo
- Cortador
- Wooden pallets
- Silicone
- Scissors
- Thread
- Needle
- nail
- Cutter

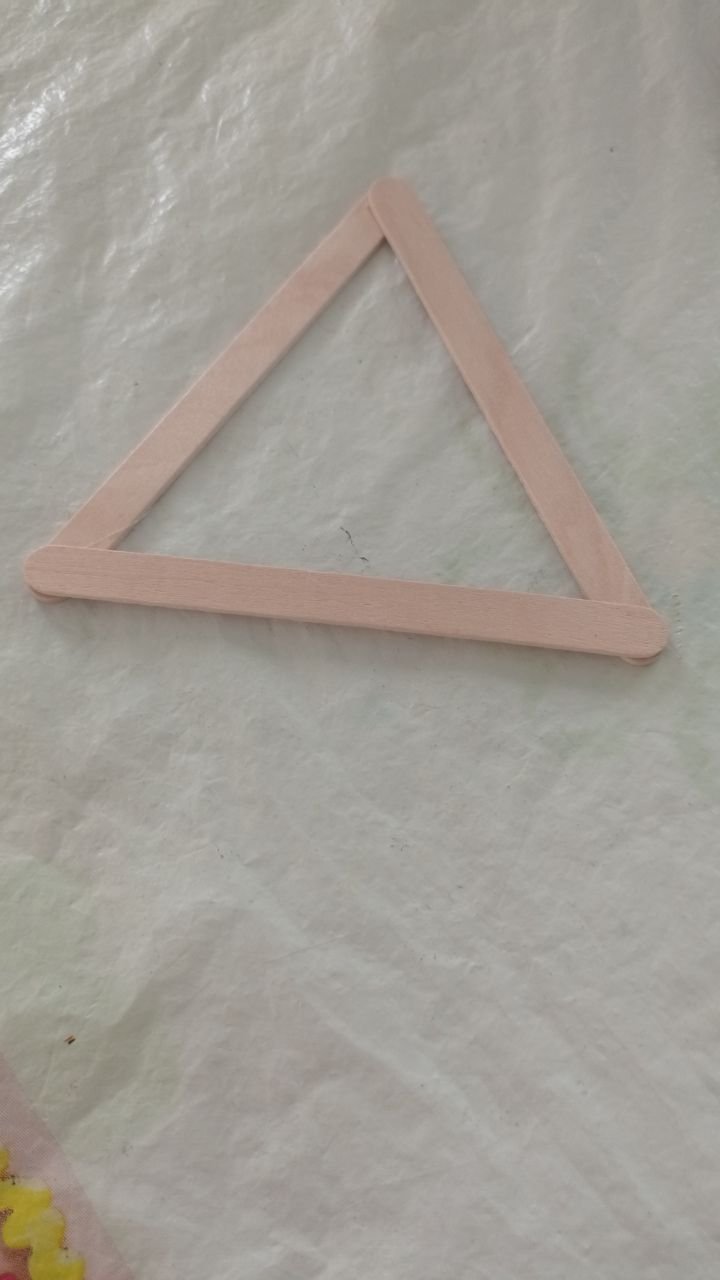
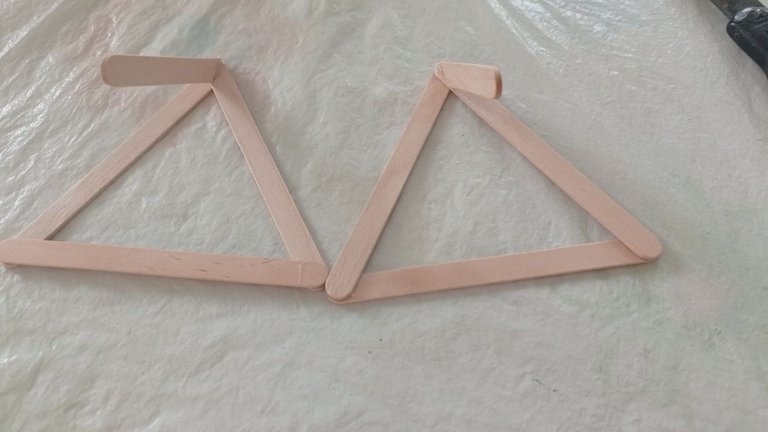
Lo que empezamos es a sacar las paletas de madera para armar esto es la parte más sencilla, agarramos 6 paletas y las pegamos con el silicón en forma de triángulo, al terminar tendremos dos triángulos iguales.
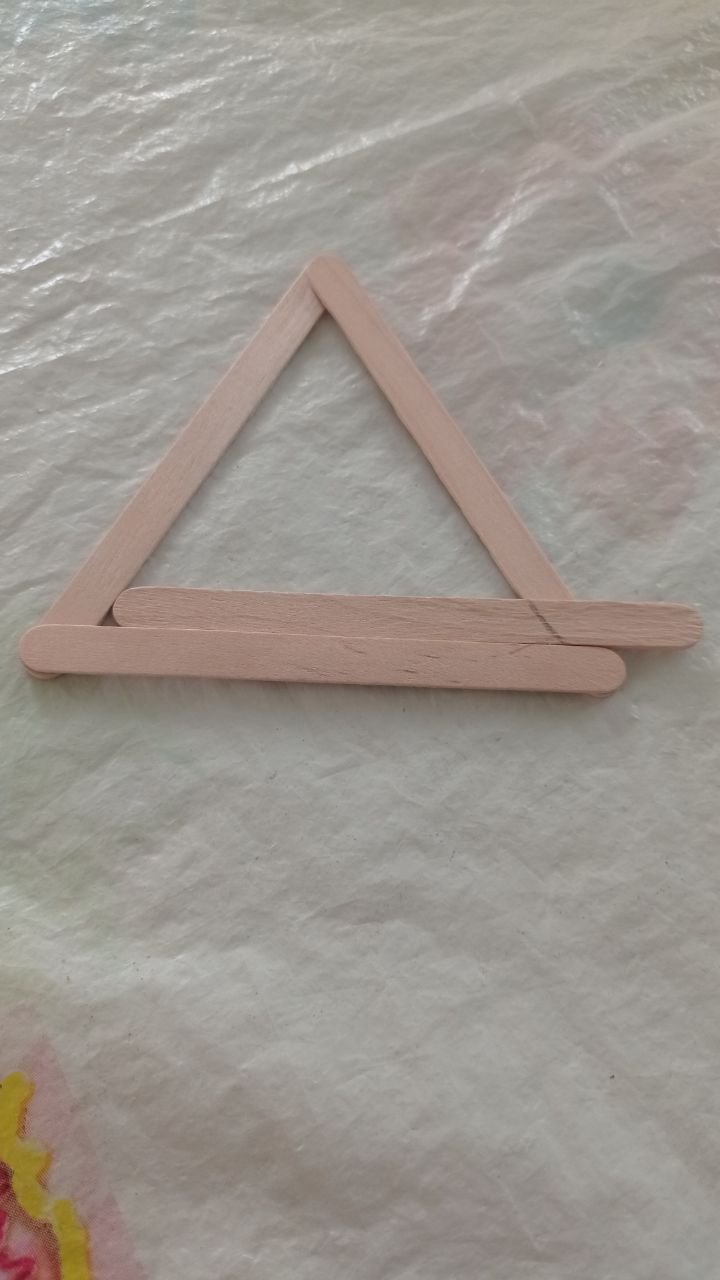
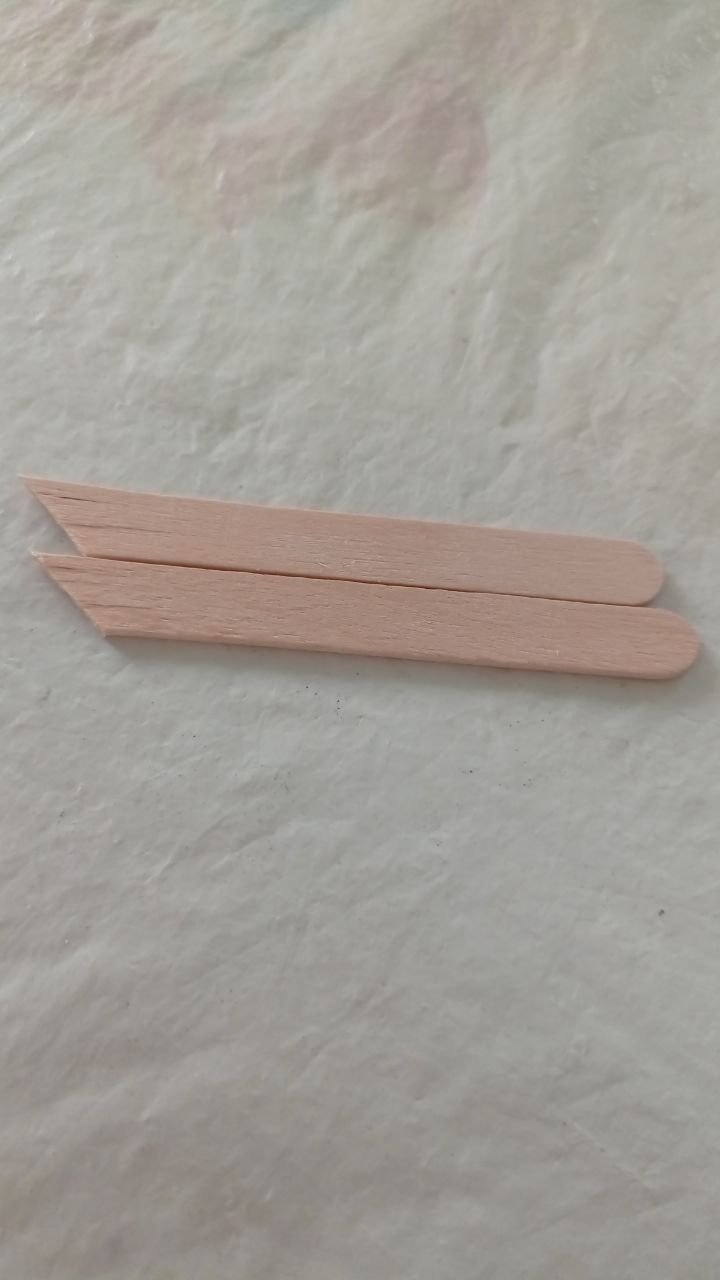
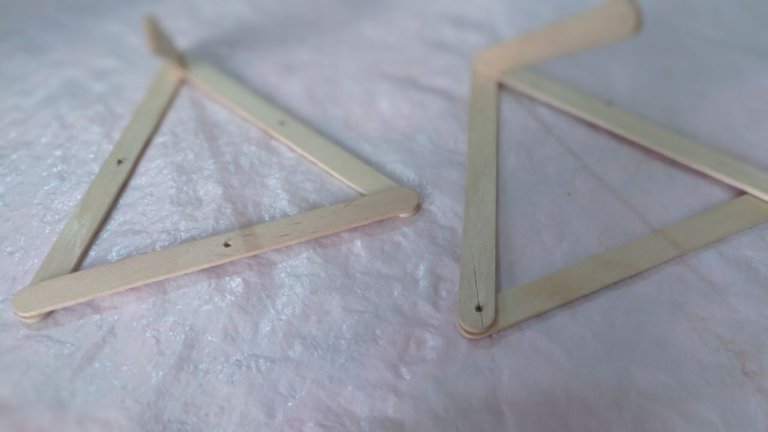
Cuando tengamos los dos triángulos listos seguimos colocando una paleta en la parte inferior del triángulo y con un lápiz marcamos justamente dónde se va a cortar, luego con una tijera o un cortador lo que se haga más cómodo, ya cortado, l que sigue es pegar en cualquier punta del triángulo.
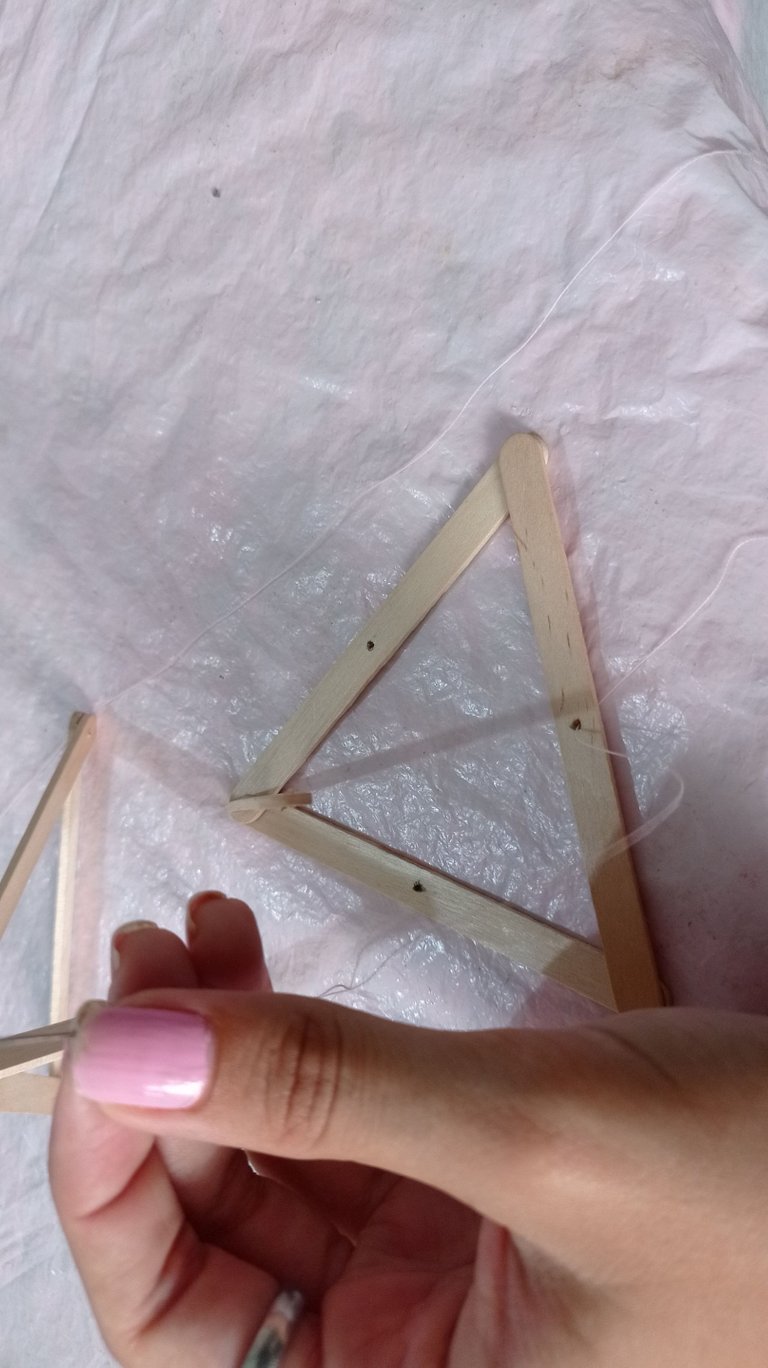
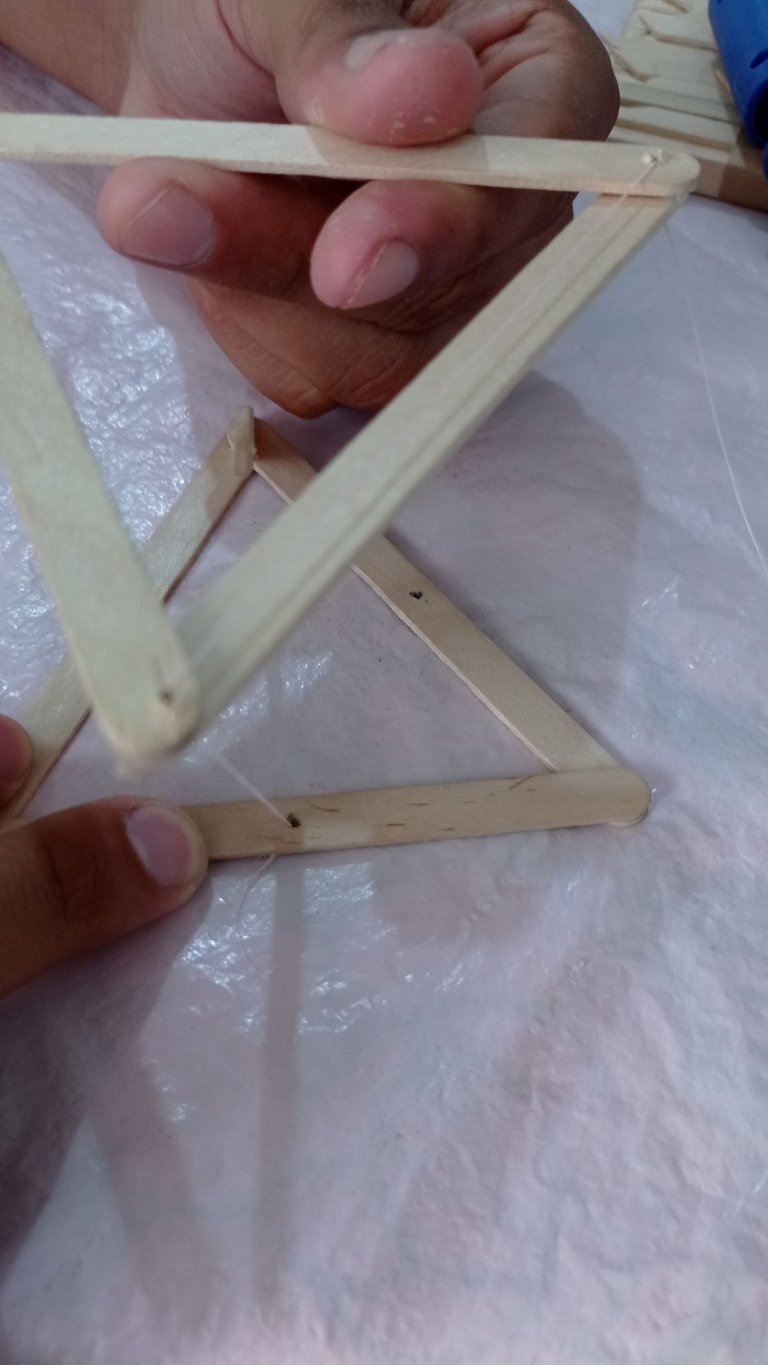
When we have the two triangles ready we continue by placing a trowel at the bottom of the triangle and with a pencil we mark exactly where it will be cut, then with a scissors or a cutter whichever is more comfortable, already cut, what follows is to glue at any point of the triangle. Ahora lo que sigue es hacer los pequeños agujeros, primero marcamos con un lápiz para estar seguros, el primer triángulo en cada punta, y al otro todo lo contrario en la mitad de palito de madera, además también marcamos a los que pegamos en cada triángulo, cuando hayamos terminado de marcar todos lo que hacemos son los agujeros con un calvo pequeño con mucho cuidado ya que por ahí se meterá la aguja, cuando ya lo hayamos hecho, agarramos la aguja y colocamos el hilo amarramos la punta y podemos seguir con el siguiente paso.
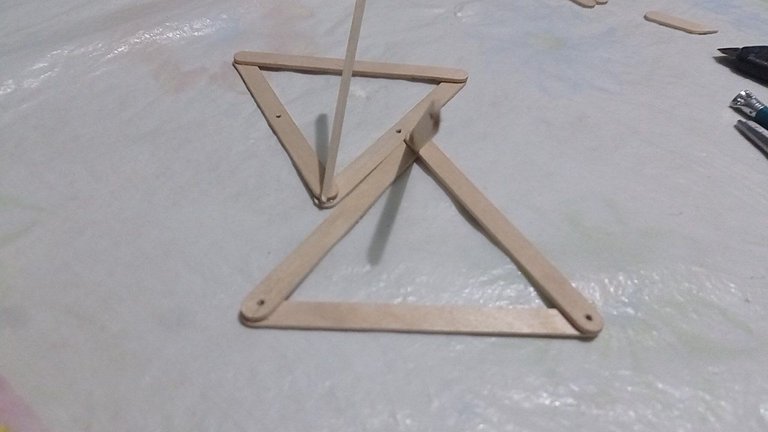
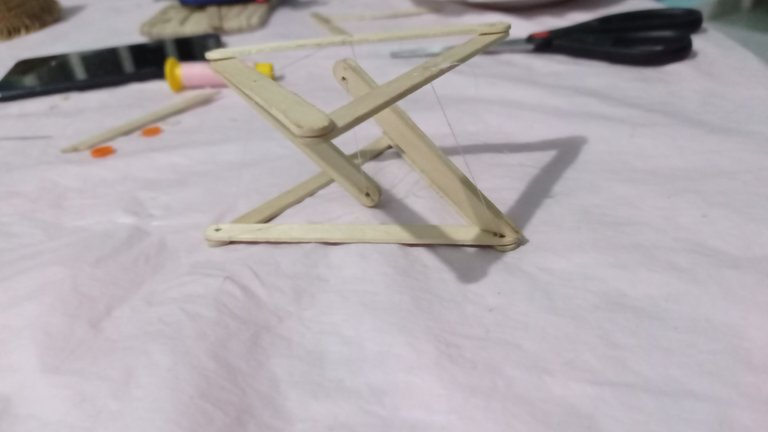
Sigue la parte más complicada de todas que es unir las dos piezas y que estén en perfecto equilibrio, para eso agarramos el primer triángulo que tiene los agujeros en la parte del centro y metemos la aguja en el de la parte inferior de abajo hacia arriba, luego el otro triángulo en la parte de arriba de forma invertida al que está el de abajo y metemos la agua por esa punta, vamos templando para que esté fijo y lo metemos en la punta siguiente de la derecha y bajamos al otro y así hasta que terminamos y le hacemos un nudo en ambos lado o pegamos las puntas para que se quede fijo.
The most complicated part of all is to join the two pieces and that they are in perfect balance, for that we take the first triangle that has the holes in the center and put the needle in the bottom from the bottom up, then the other triangle at the top in the opposite way to the one at the bottom and we put the water through that point, we are tempering so that it is fixed and we put it in the next point on the right and down to the other and so on until we finish and we make a knot on both sides or glue the tips so that it is fixed. Uno de los pasos finales es que en cada punta entre los dos triángulos metemos la aguja y ajustamos el hilo para que quede tenso y así quede fijo la mesa flotante con el equilibrio, esto puede llevar un poquito de tiempo hasta que se le agarre la vuelta.
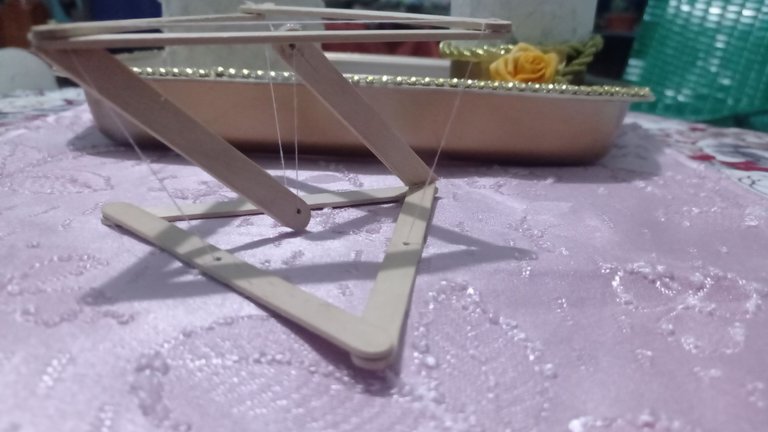
Ese era el último detalle ahora está lista la mesa flotante para utilizarse de la forma que ustedes quieran, está será para colocarlo objetos livianos, a pesar de tantos inconvenientes para terminarla que tuve pude lograrlo asi que ustedes también.
Espero les guste. I hope you like it. Fotos de mi propiedad. Fotos tomadas por Teléfono Xiaomi Redmi note 9📱 Edición realizada en Canva
What we start is to remove the wooden pallets to assemble this is the easiest part, we take 6 pallets and glue them with silicone in the shape of a triangle, when finished we will have two equal triangles.

Now what follows is to make the small holes, first we mark with a pencil to be sure, the first triangle at each end, and the other all the opposite in the middle of wooden stick, we also mark the ones we stick in each triangle, when we have finished marking all what we do are the holes with a small bald with great care because there will get the needle, when we have done, we grab the needle and place the thread tie the tip and we can continue with the next step.

One of the final steps is that at each point between the two triangles we put the needle and adjust the thread so that it is taut and thus fixes the floating table with the balance, this may take a little time until it takes the turn.

That was the last detail now the floating table is ready to be used in the way you want, it will be to place light objects, in spite of so many inconveniences to finish it I was able to achieve it so you too.

Habia visto de estos impresos en 3D pero en ingun momento se me ocurrio que podian fabricarse de esta manera.