Blessed Friday, I hope you have a wonderful weekend ahead
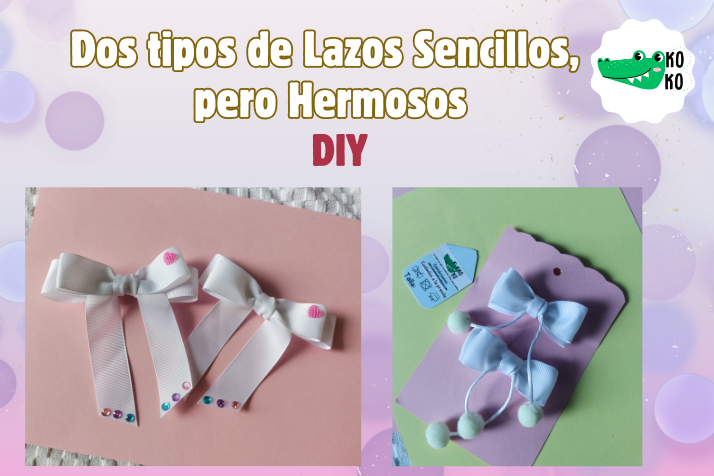
Los lazos, siempre han sido un accesorio hermoso para niñas, jovenes y hasta adultas. Existe una amplia variedad de estos, que incluyen la implementación de diversos materiales, técnicas, texturas, combinaciones y tamaños, por mencionar algunas caracteristicas. Por ello, hoy quiero compartir con ustedes dos tipos de lazos diferentes, tiernos y sencillos que puedes elaborar fácilmente para un obsequio, una familiar o quizás vender.
Bows have always been a beautiful accessory for girls, young people and even adults. There is a wide variety of these, which include the implementation of various materials, techniques, textures, combinations and sizes, to mention a few characteristics. Therefore, today I want to share with you two different types of bows, tender and simple that you can easily make for a gift, a family member or perhaps to sell.
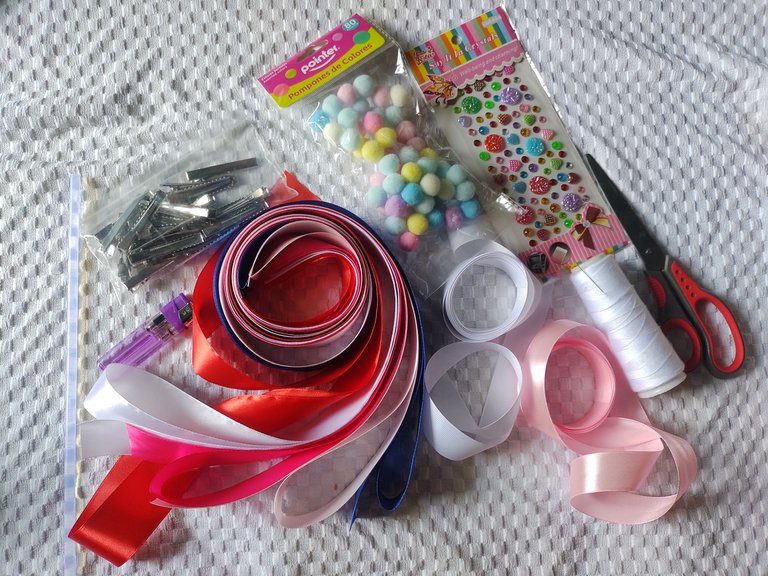
Para materiales he usado cinta gross, algunos apliques, pompones y silicon. He colocado los lazos en pinza caimán, aunque bien puedes usar colitas elásticas de colores que combinen con el lazo. Éstas últimas son espectaculares para cuando deseamos colocarle un par de colitas a nuestras niñas, los peinados simplemente realzan de manera impecable.
For materials I used gross tape, some appliqués, pompoms and silicone. I have placed the bows in alligator clips, although you can use colored elastic tails that match the bow. The latter are spectacular for when we want to add a pair of pigtails to our girls, the hairstyles simply enhance them impeccably.

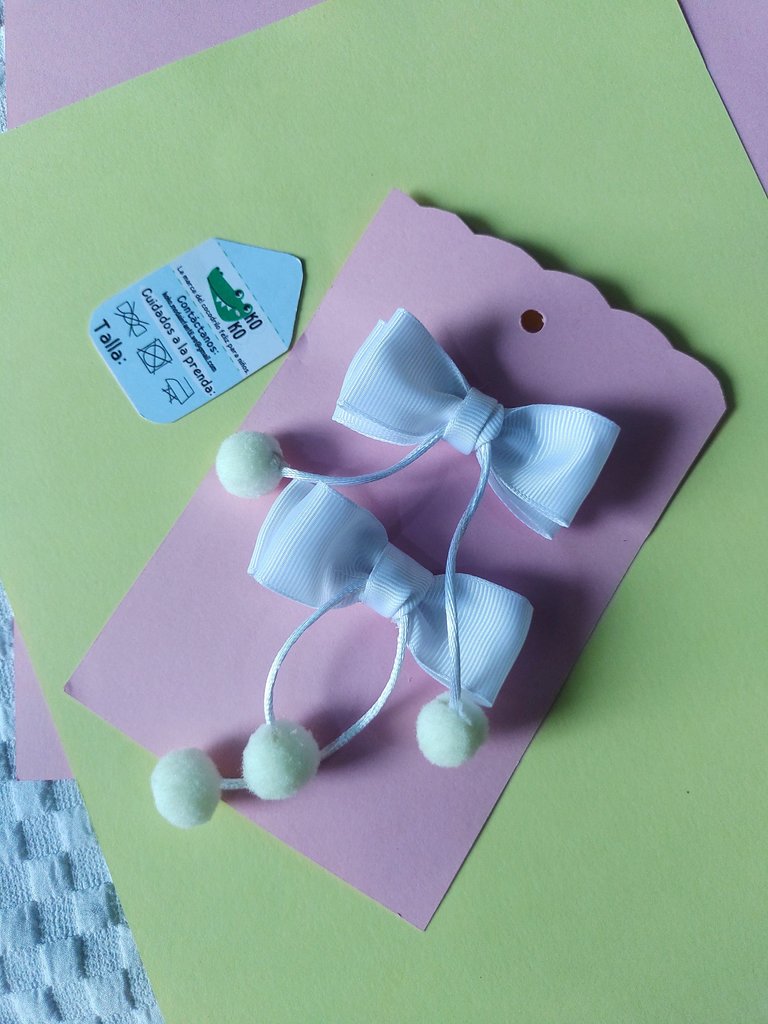
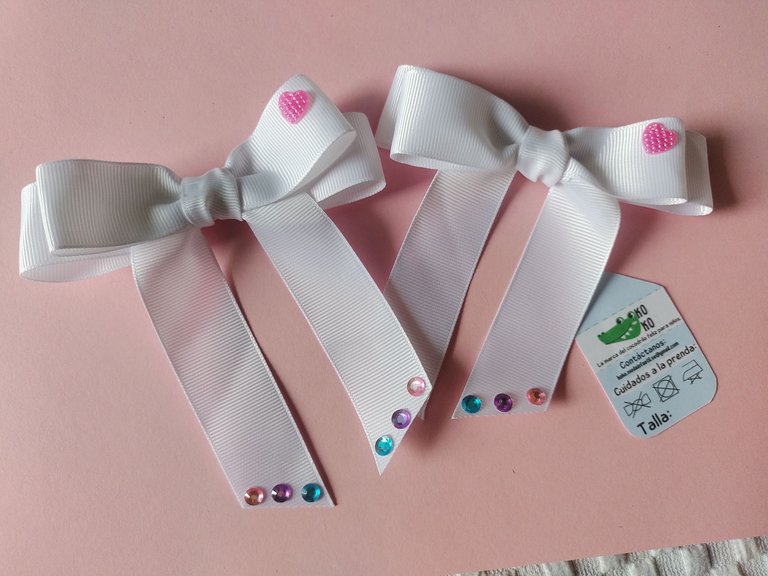
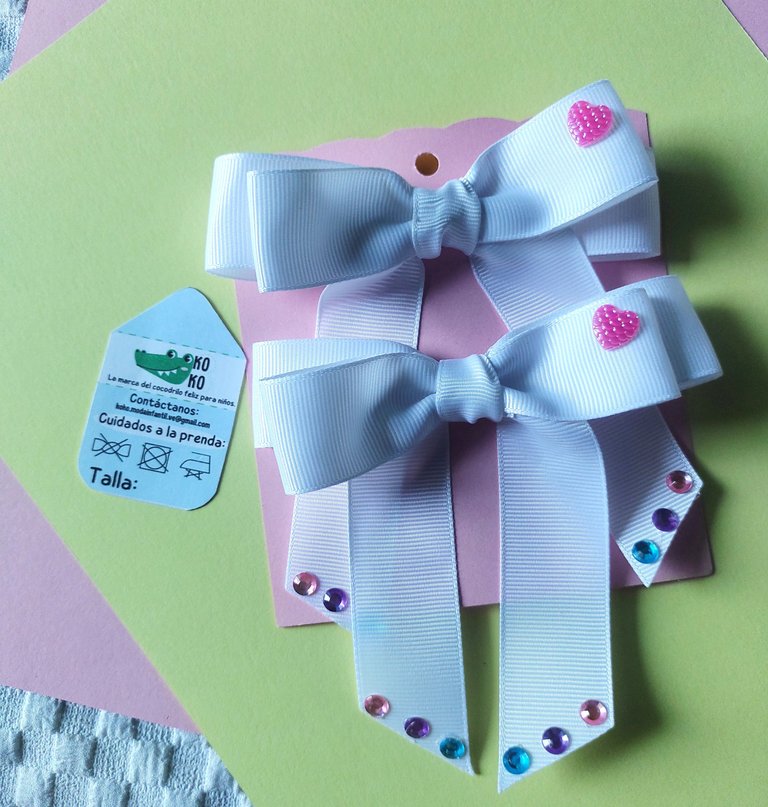
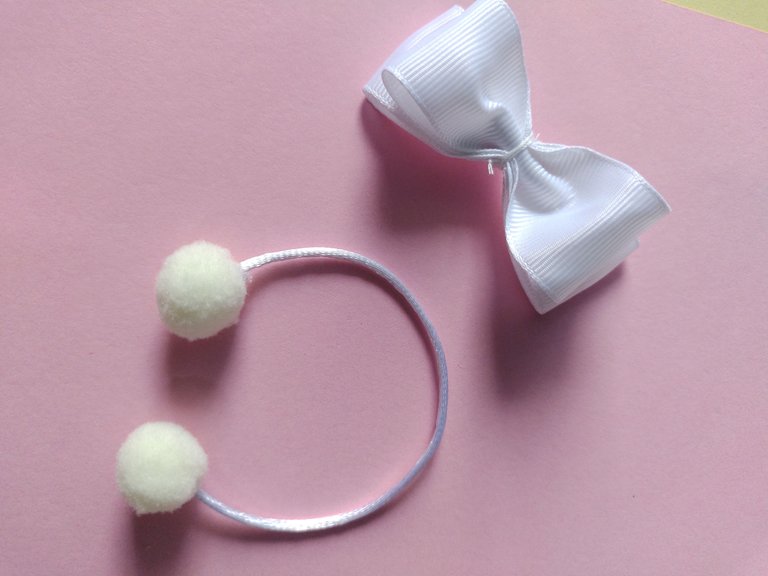
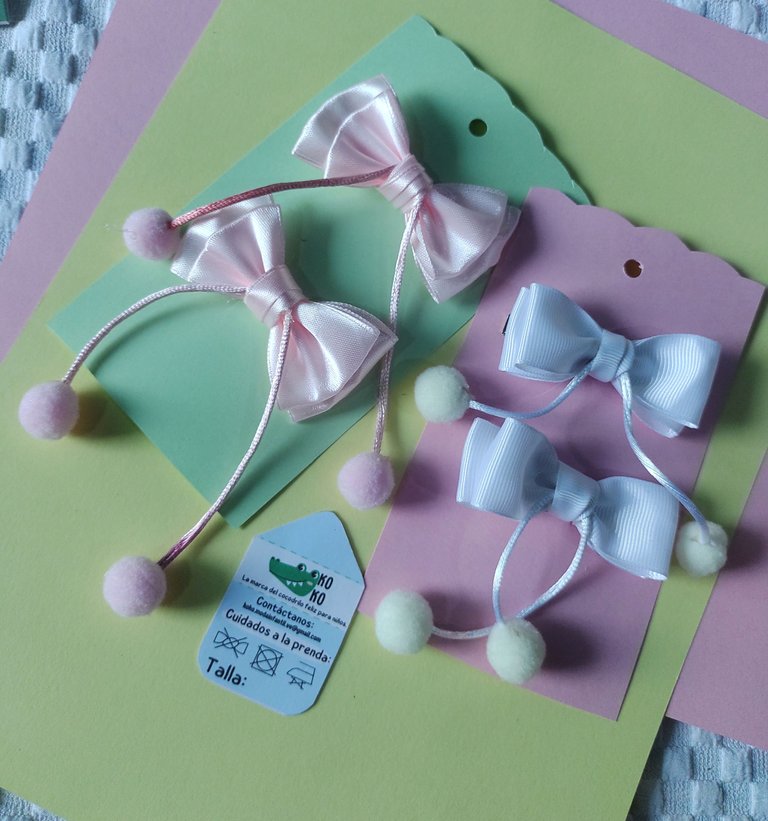
Este par de modelos de lazos pertenecen a la línea disponible de accesorios de cabello que ofrezco en mi pequeño emprendimiento llamado KOKO. Las madres han amado lo lindos que son, quedan encantadas por los colores y porque son además un componente rápido para el look de las niñas. Por otro lado, las niñas siempre emocionadas por lucir cositas lindas. Uno de los que más ha gustado entre el público, es el de Pompones. Es un lazo, con un par de tirantes satinados que al final tienen pompones de colores a tono con el lazo o variados para agregar color.
This pair of bow models belongs to the available line of hair accessories that I offer in my small business called KOKO. Mothers have loved how cute they are, they are delighted by the colors and because they are also a quick component for the girls' look. On the other hand, girls are always excited to show off cute things. One of the ones that the public liked the most is Pompones. It is a bow, with a pair of satin straps that at the end have colored pom poms that match the bow or a variety of colors to add color.
🐊🐊🐊🐊🐊🐊
Materiales
- Cinta Gross
- Pinzas Caimán
- Silicon - Encendedor
- Cinta Metrica
- Pompones de colores
- Hilo de seda o cola de ratón (si conocen un mejor nombre por favor indicarmelo en los comentarios😣)
- Aguja e Hilo
Materials
- Gross Ribbon
- Alligator Clips
- Silicon - Lighter
- Measuring tape
- Colored pompoms
- Silk thread or mouse tail (if you know a better name, please tell me in the comments😣)
- Needle and thread
🐊🐊🐊🐊🐊🐊
Proceso de Creación / Creation Process
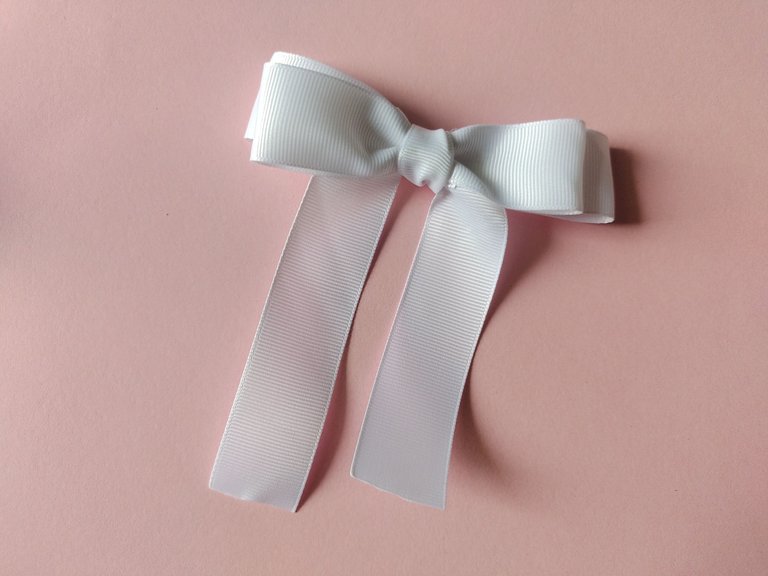
Lazo 1 - Loop 1
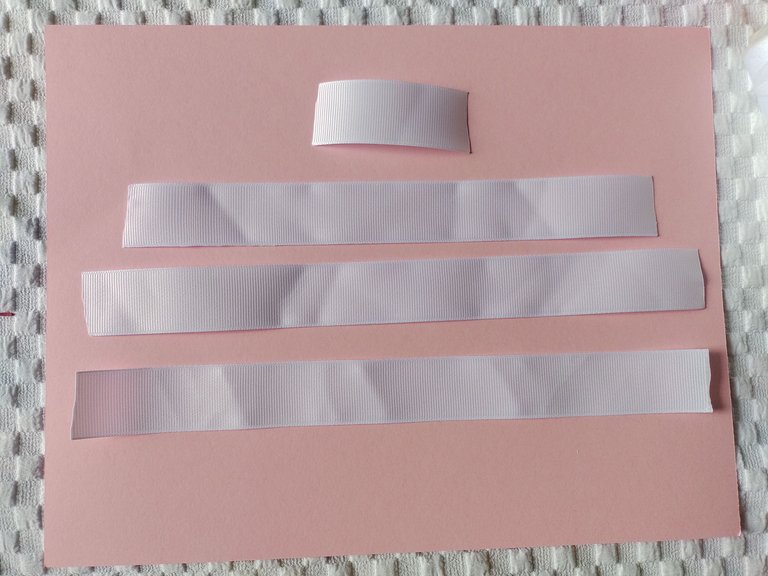
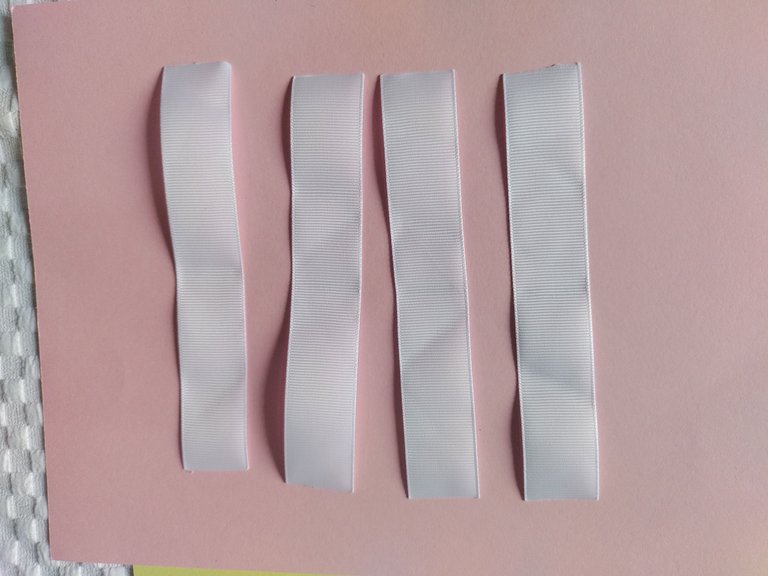
Cortaremos las siguientes medidas, sellamos con fuego las orillas y marcamos el centro.
- 2 de 25.50 CM
- 1 de 22 CM
- 1 de 6 CM
We will cut the following measurements, seal the edges with fire and mark the center.
- 2 de 25.50 CM
- 1 de 22 CM
- 1 de 6 CM
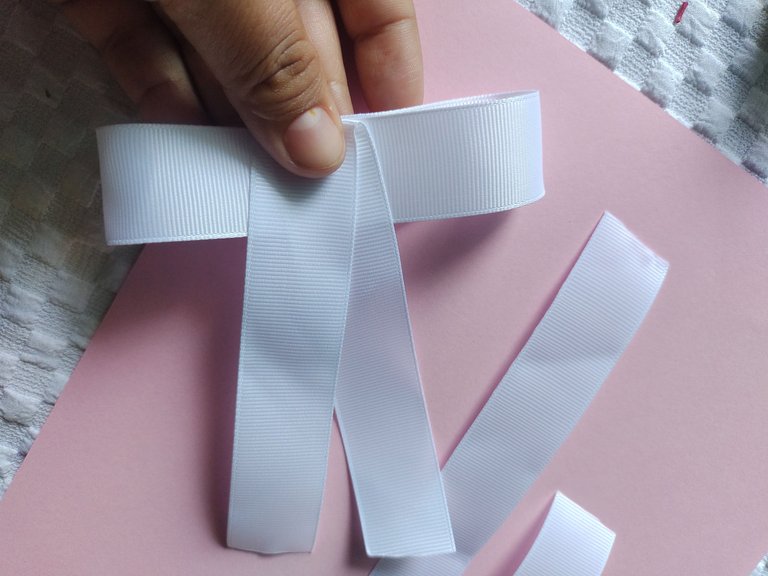
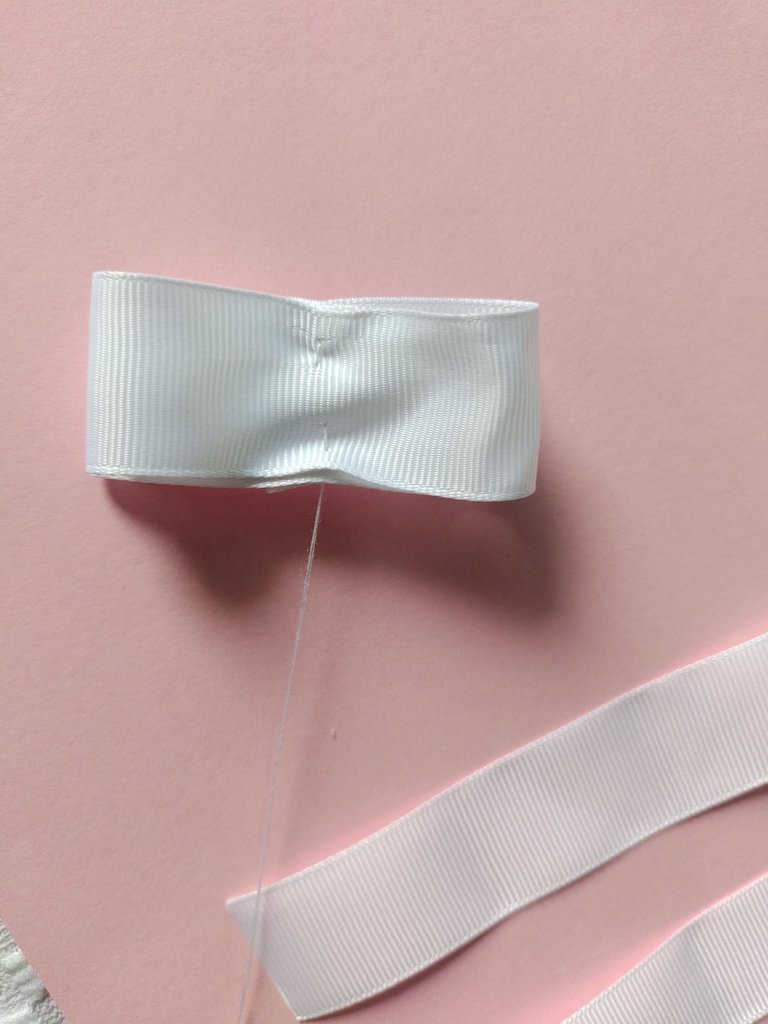
Tomaremos una de 25,50 CM para unir puntas al centro y formar la capa base. Seguidamente tomamos la segunda de la misma medida y doblando de la manera en que se observa en la foto, le ubicamos en el centro. Ahora tomaremos la de 22 cm y unimos puntas al centro, colocamos sobre la anterior y con aguja e hilo haremos unas puntadas.
We will take a 25.50 CM to join tips to the center and form the base layer. Next, we take the second one of the same size and folding it as shown in the photo, we place it in the center. Now we will take the 22 cm one and join the points to the center, place it on top of the previous one and with a needle and thread we will make some stitches.
 | 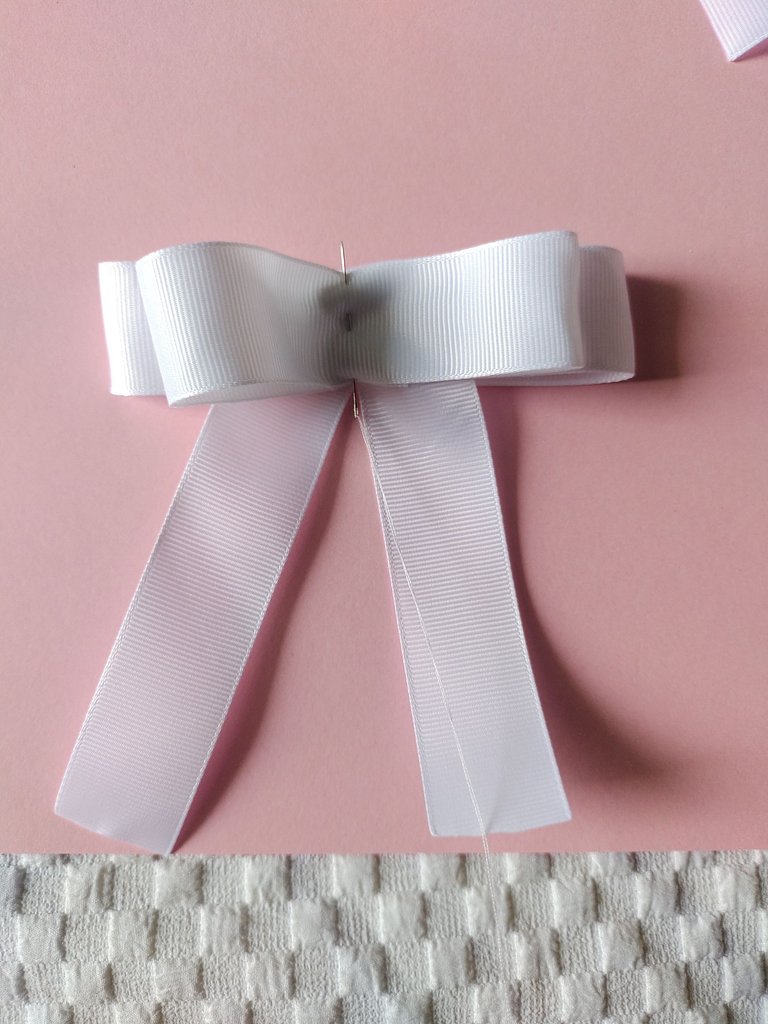 |
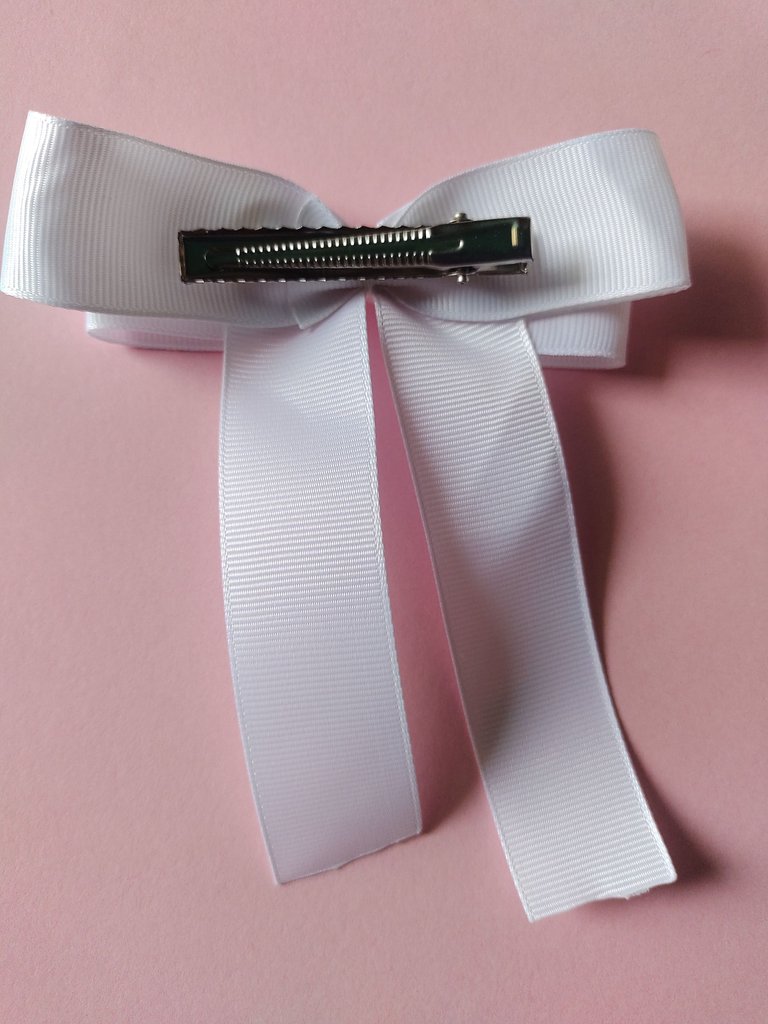
Ataremos dando varias vueltas con aguja e hilo, para asegurar. Fijamos con silicon la pinza caimán en la parte trasera.
We will tie several turns with a needle and thread, to secure. We fix the alligator clip on the back with silicone.
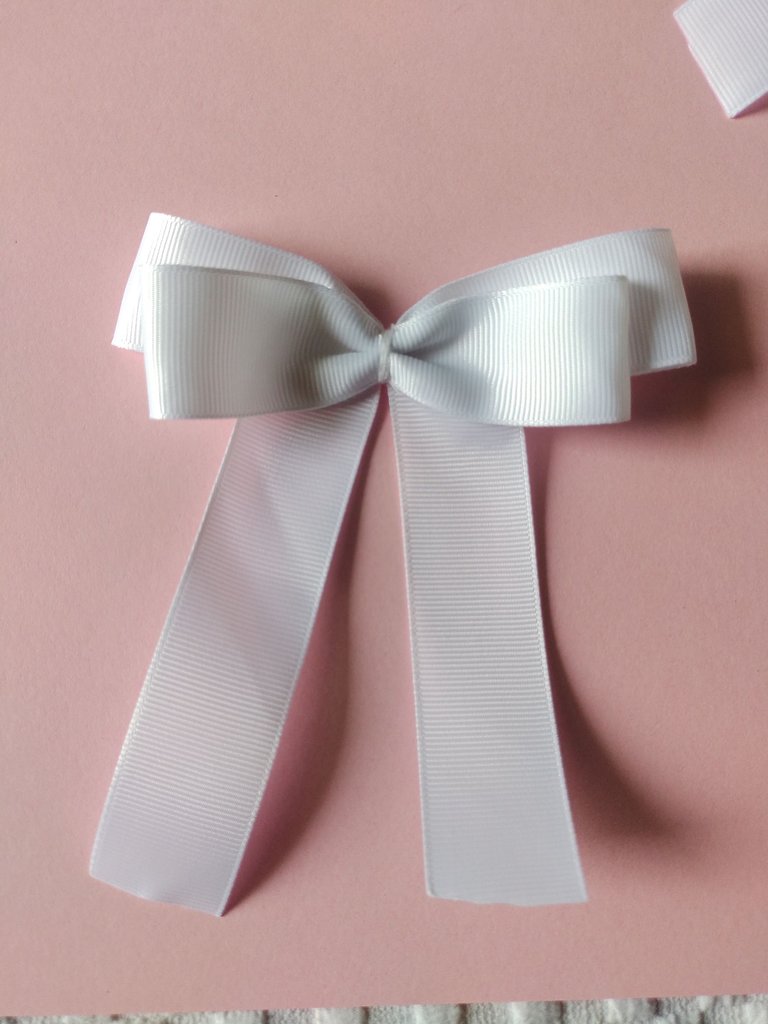 |  |
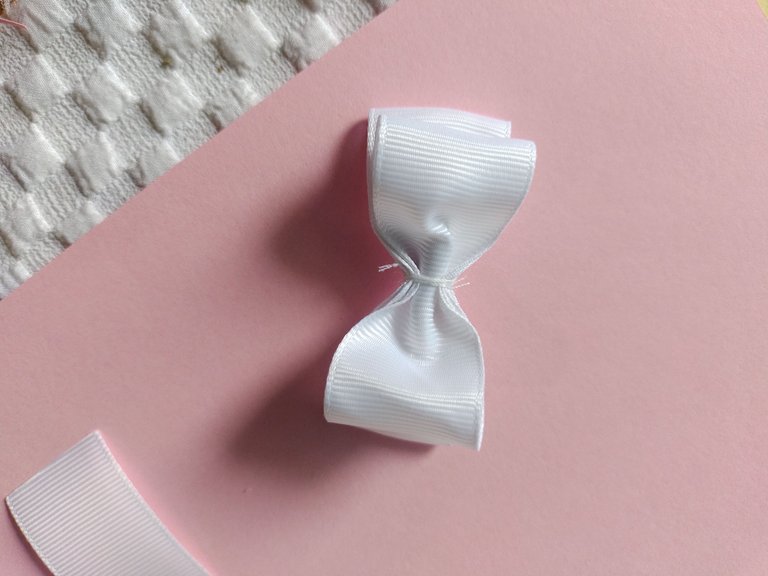
Fijamos la cinta restante en el centro, usamos para ello silicon. Cortamos las puntas de la cola colgante y sellamos con fuego.
We fix the remaining tape in the center, using silicone for this. We cut the tips of the hanging tail and seal with fire.
 | 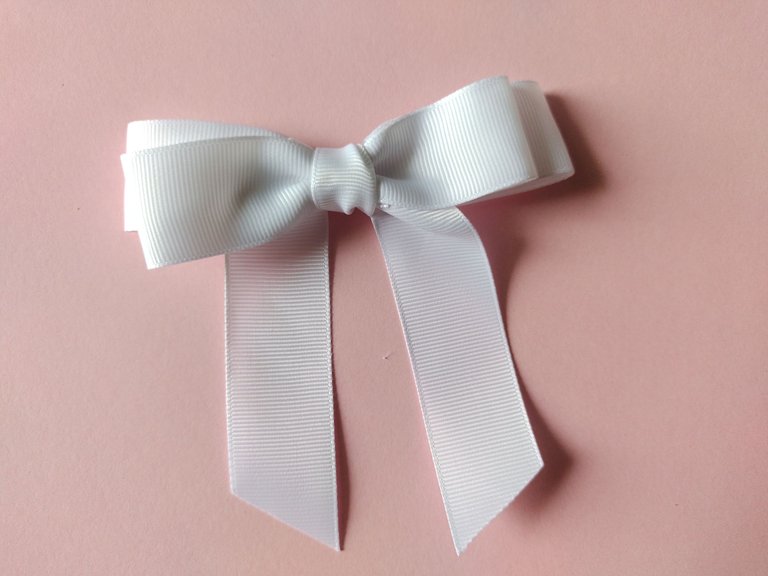 |
Por último decoramos con los apliques de piedras de colores. Para unir bien, he usado silicon. Si desean realizar el par, deben cortar todas las piezas X2.
Finally we decorate with colored stone appliqués. To join well, I used silicone. If you want to make the pair, you must cut all the X2 pieces.

🐊🐊🐊🐊🐊🐊
Resultado / Result :
🐊🐊🐊🐊🐊🐊
Lazo 2 - Loop 2
Empezamos cortando las cintas, las medidas son 4 listones de 15 CM. Aunque si lo desean pueden hacer una variante de 2 de 12 CM y 2 de 15 CM. De esta última medida se aprecian mejor las dos capas de los mini lazos.
We start by cutting the ribbons, the measurements are 4 15 CM ribbons. Although if you wish you can make a variant of 2 of 12 CM and 2 of 15 CM. From this last measurement, the two layers of the mini bows can be better appreciated.
Tomamos un listón al que ambos extremos uniremos al centro. Repetimos el proceso y con aguja e hilo, haremos unas puntadas centrales para unir. Posteriormente fruncimos y obtendremos un lindo moño.
We take a ribbon to which we will attach both ends to the center. We repeat the process and with a needle and thread, we will make some central stitches to join. Later we gather and we will obtain a nice bow.
 |  |
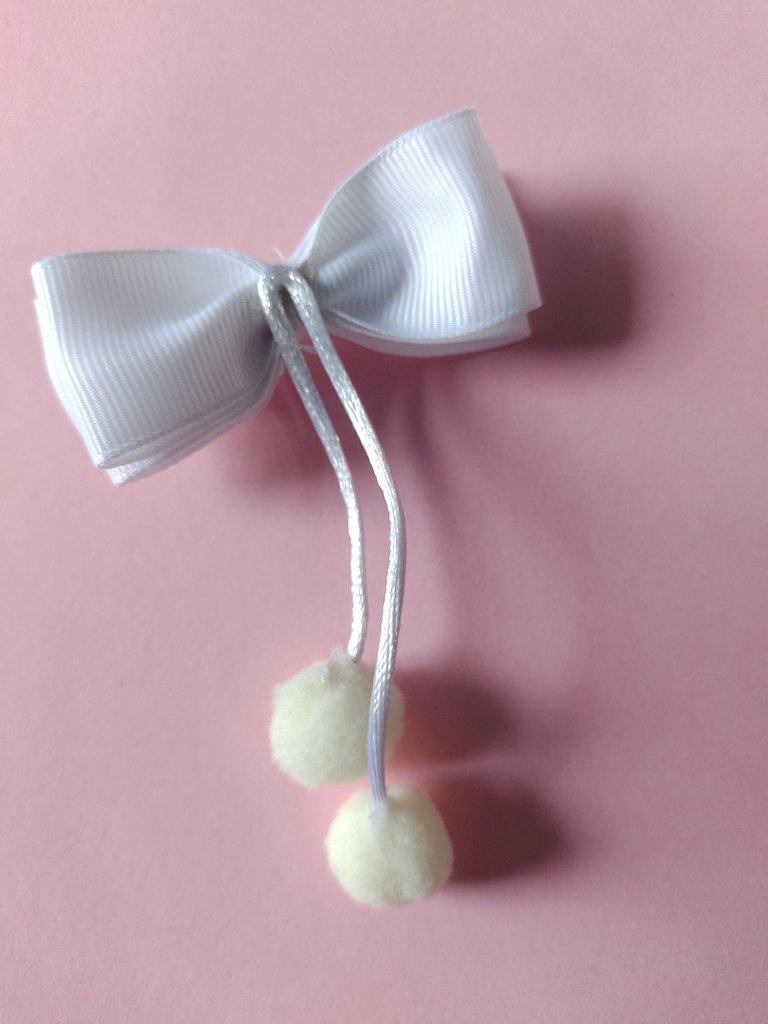
Ahora, cortamos el hilo de seda o también conocido como rabo de ratón, el largo es de 15 CM. Tomamos un pompón y con mucho cuidado cortamos un poco el centro del mismo. Con silicon fijamos el hilo dentro del pompón. Repetimos el proceso con el otro extremo del hilo.
Now, we cut the silk thread or also known as mouse tail, the length is 15 CM. We take a pompom and very carefully cut the center of it a little. With silicone we fix the thread inside the pompom. We repeat the process with the other end of the thread.Now, we cut the silk thread or also known as mouse tail, the length is 15 CM. We take a pompom and very carefully cut the center of it a little. With silicone we fix the thread inside the pompom. We repeat the process with the other end of the thread.
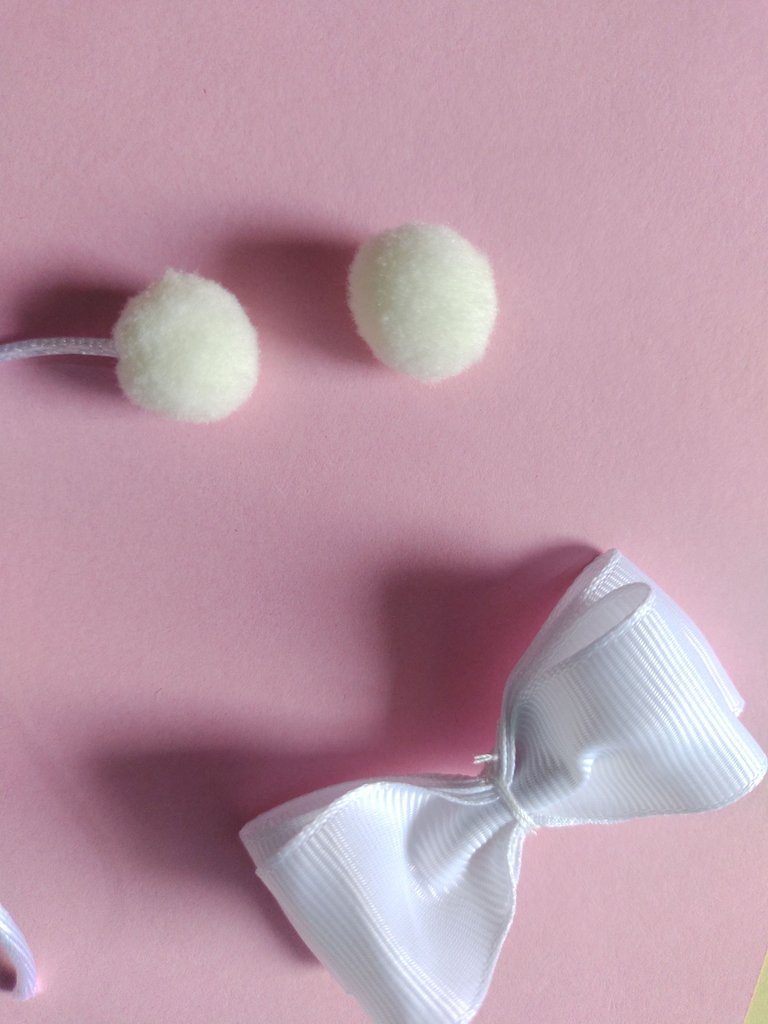 |  |
Con silicon fijamos este hilo de forma igual o no, en el centro. Colocamos la pinza caimán en la parte trasera. Ahora con la cinta pequeña de 6 cm de largo, cubrimos el centro. Repetimos el proceso para elaborar la pareja y así tenerle par.
With silicone we fix this thread equally or not, in the center. We place the alligator clip on the back. Now with the small 6 cm long ribbon, we cover the center. We repeat the process to make the pair and thus have a pair.
 |  |
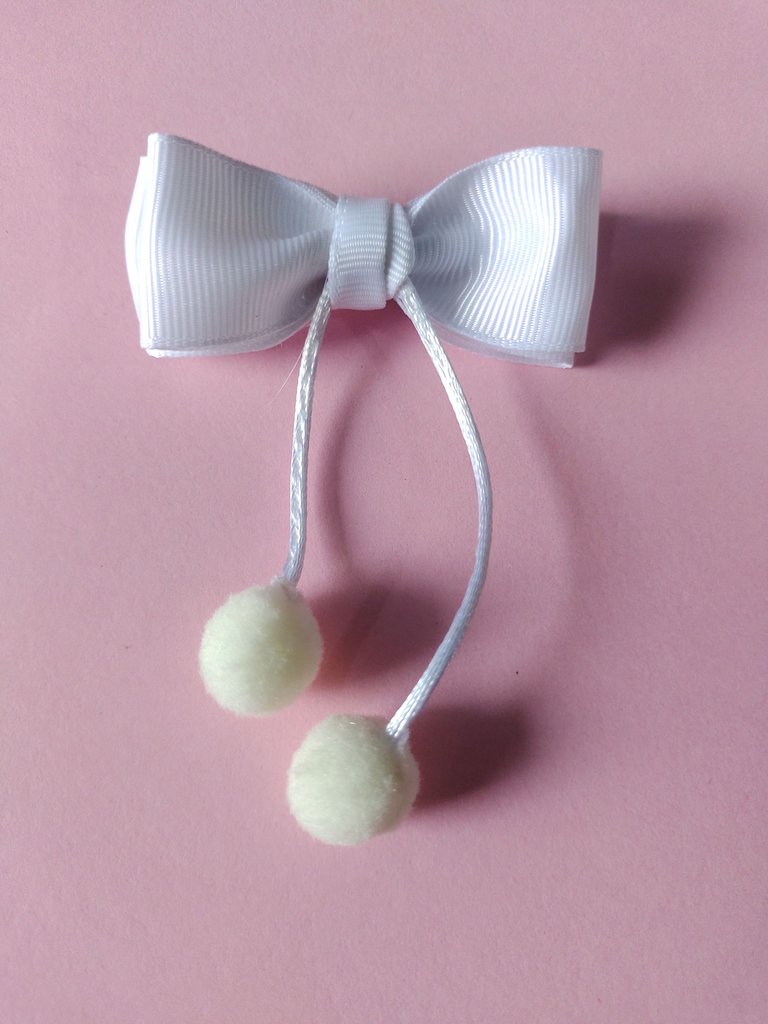
🐊🐊🐊🐊🐊🐊
Resultado / Result :
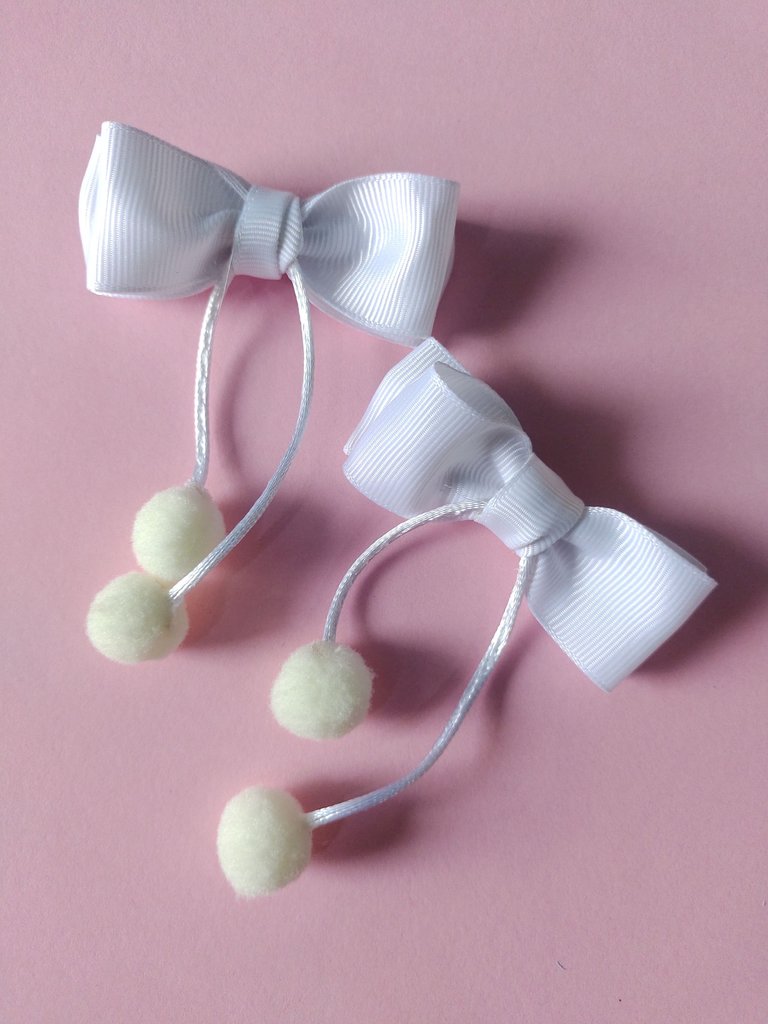
🐊🐊🐊🐊🐊🐊
¡Y hasta aquí el proyecto del día! Espero les haya gustado tanto como a mí.
Si tienes alguna duda o sugerencia, no dudes en dejar un comentario. Las fotos que he colocado a lo largo del texto, las he tomado desde mi móvil Infinix.
¡Hasta la próxima!, tengan todos un bendecido día cargado de salud, paz y amor.
And that's it for the project of the day! I hope you liked it as much as I did.
If you have any questions or suggestions, don't hesitate to leave a comment. The photos that I have placed throughout the text were taken from my Infinix mobile.
Until next time, everyone have a blessed day full of health, peace and love.
Bendiciones, ciertamente son muy bonitos los lazos, el color se ve espléndido
Muchas gracias, amén. Bendiciones para ti también.
Tal como los describistes amiga, son sencillos, pero realmente hermosos!
Saludos!
Muchas gracias. Y si, sencillos y hermosos, algunos detalles le dan realce. Bendiciones, gracias.
¡¡¡Buen trabajo!!! Gracias por publicar tu excelente contenido en Hive Diy, los lazos que nos has compartido él día de hoy son muy lindos y coquetos, me gusto mulo la parte de los pompones, se ven tan adorables.
Tu comunidad artesana ahora es testigo

Agradecida profundamente por el apoyo que me han brindado. Y si, el toque de Pompón le da un sentido muy cuchi. Bendiciones y gracias nuevamente
que hermoso tu trabajo! Hasta ahora he sido malisima haciendolos, pero probare tu tutorial a ver si me quedan tan lindos como a ti💜
Muchas gracias. Y bueno hay algunas cosas de practicar, o quizás cuidar detalles como que el centro sea el mismo para todas las capas del lazo, la cantidad de puntadas, que tanta es la fuerza del fruncido, entre otras. Mi recomendación, paciencia y todo poco a poco. Espero te salgan geniales, Bendiciones.
Son unos adorables lazos, me encantos tonos, me recuerda cuando mis hijas estban pequeñas y me encantaba combinarles los lazos.
Me contenta haber evocado a ti esos lindos recuerdos, bendiciones.