
Buen día,
Hoy continuamos con este proyecto que ya va tomando forma. Puedes revisar la publicación anterior haciendo click aquí.
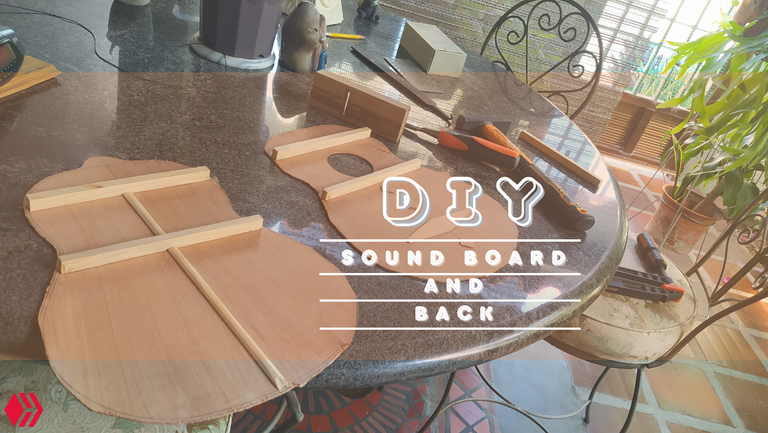
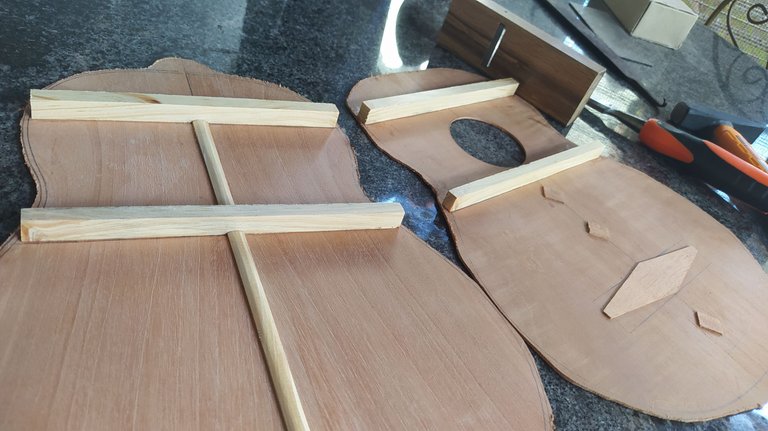
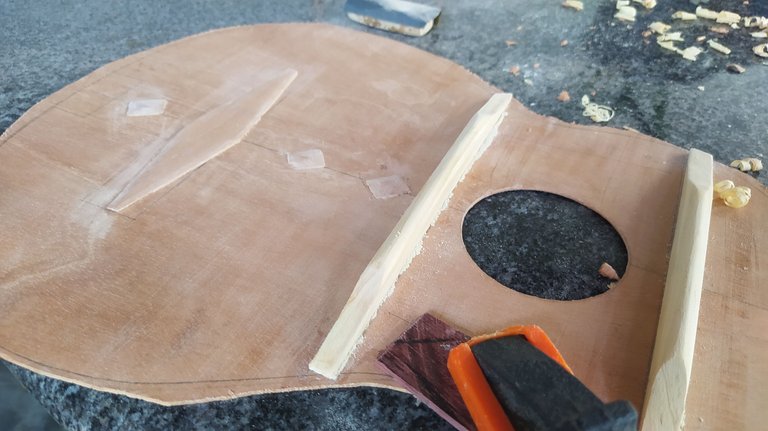
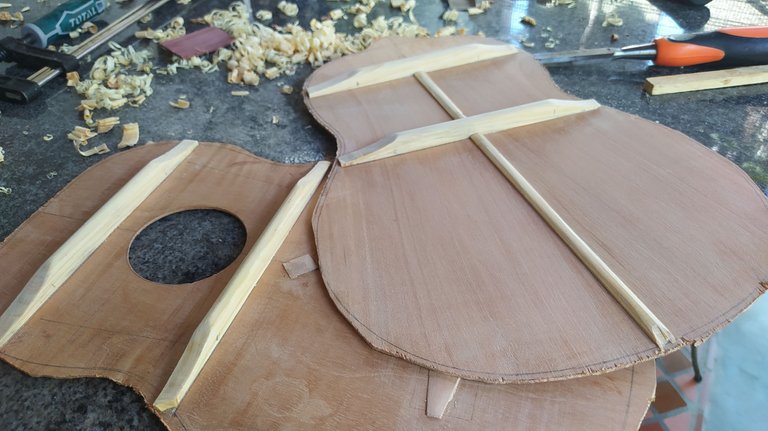
El día de hoy nos enfocaremos en el resto de los refuerzos para completan estas dos piezas: la tapa armónica y el fondo.
Contexto
Los refuerzos en estas partes de cualquier cordófono (instrumento de cuerdas) cumplen la misma función. Más allá de lo estructural, que es necesario. Sirven para dar el tono. Sí, esto es parte fundamental del sonido que producirá el instrumento una vez haya sido completado.
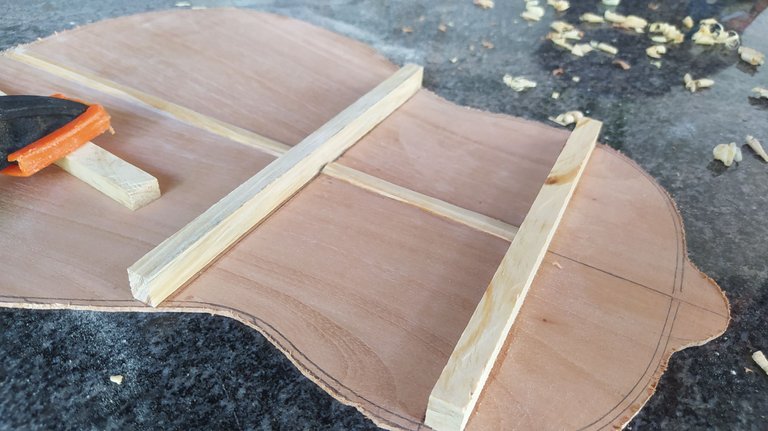
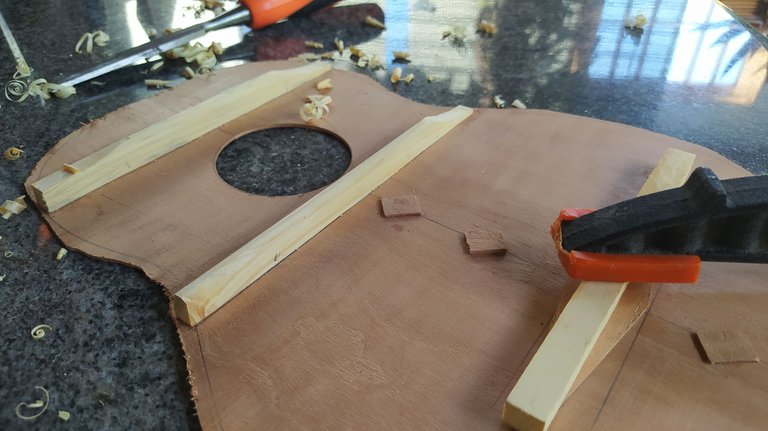
Labrado
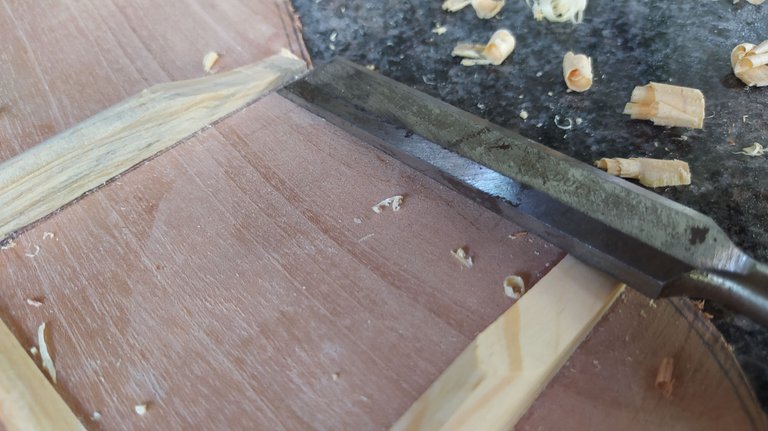
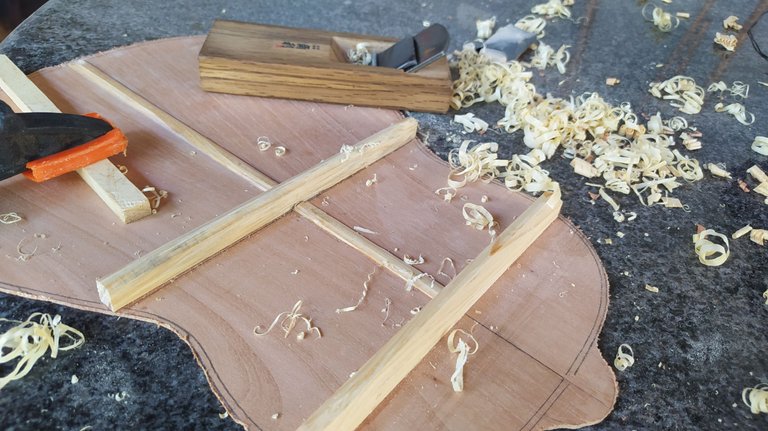
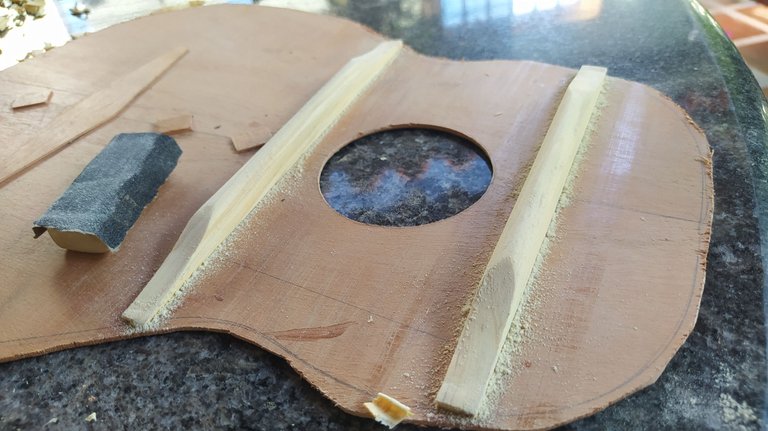
Una vez que las barras armónicas están en su lugar, es hora que darles la forma deseada. Aquí cada quien busca un tipo de estética de acuerdo a sus gustos.
Ya que este es un instrumento sencillo, no hay mucho detalle, pero hay luthiers que hacen obras de arte de sus barras armónicas. Es una cosa increíble y que requiere de una habilidad y precisión quirúrgica. Eso y herramientas muy costosas.
Siguiendo el trabajo, la idea es mantener la simetría en las pendientes al final de la barras. Luego de remover el material en las puntas, se procede a redondear el tope de la barra con papel de lija.
Tono
Un tema muy importante a considerar a la hora de trabajar en estas piezas es la selección de madera. No me refiero al tipo de madera como tal ya que muchas son aptas para la fabricación de instrumentos. Me refiero a los tonos que produce la madera como tal.
Todo material tiene propiedades sonoras. Si son buenas o malas depende mucho de las características de cada uno. En el caso de la madera, la disposición de las fibras nos da la posibilidad de encontrar variedad incluso en los cortes de una misma tabla.
Pero me voy un poco más a lo técnico en el sentido musical con el tono. Me refiero a alguno de los doce tonos de la escala cromática occidental que muchos conocemos (Do, Re, Mi, Fa, Sol, La, Si, y sus alteraciones). El punto es que cada pieza de madera al ser golpeada produce uno de estos tonos.
Cuando queremos obtener una buena sonoridad en un instrumento de este tipo tenemos que asegurarnos de que haya diferencias de al menos un semitono entre el fondo y la tapa armónica. Seguro se estarán preguntando <<¿Con qué se come esto?>> Ya se los explico.
Imaginemos este caso que ocurre con esta dos piezas. Hay una diferencia de tono y medio entre fondo y tapa armónica. Al hacer sonar la segunda con un poco de percusión con los dedos, esta da un Si. Por el contrario, al hacer lo mismo en el fondo, el tono es un Do sostenido.
La importancia de esta diferencia en tonos está ligada a la producción de sonido. Si ambas piezas tuvieran el mismo tono, las frecuencias dentro del instrumento se cancelarían entre sí. Ergo, el instrumento quedaría básicamente sordo. Así de le dice coloquialmente a un instrumento que no produce casi nada de sonido por un defecto de fabricación.
Y con esta nota muy importante y algo confusa sobre la importancia del tono en la construcción de instrumentos musicales y su selección de materiales, me despido. Espero que hayan disfrutado de esta información.
¡Nos veremos en la siguiente entrega! Recuerden que sus comentarios siempre son bienvenidos.
Hi there,
Today, we continue with the process of this project. It has been taking shale steadily. You can check the previous entry by clicking here.
In this entry, we'll focus on the last reinforcements that complete these two pieces: the sound board and the back.
Context
Almost all cordophones (strings instruments) have these kind of reinforcements. Their function goes beyond the structural. They limit the vibrating areas of these prices and gives us the tone they will have. Yes, on these depend the whole sound projection of the instrument.
Carving
Once these bars are in place, it's take to give them shape. And this is a deeply personal process. According to one's perception of aesthetics.
Since this is a simple build, the carving is very straightforward. Some luthiers make of this a work of art. It's unbelievable! That requires a surgeon' skills and really expensive tools.
Once the ends of the bars have been shaped, it's time to round the whole piece with some sandpaper. Something to keep in mind during this stage is that we are trying to keep the ends symmetrical.
Tone
We need to pay attention to the materials we choose for ours builds. And I'm not referring to the kind of wood. A lot of woods are good for making instrumentos. The tone of the wood is an even more important piece of information during the process.
All materials have sound properties. Whether they are good or bad depends of the nature is said material. Wood, in specific, tends to have some great tone qualities because of its fibers. Not two pieces are alike. This gives us a lot of variety even from two pieces coming from the same plank.
However, with the idea of tone, I have delve into some technical aspects of music. We are talking about the tones of the western musical scale (C, D, E, F, G, A, B, and their sharps of flats). Each piece of wood produces one of these sounds when we tap it.
When we are trying to build an instrument with good sound, we need to pay attention to the differences in sound between the sound board and the back. It has to be of at least a semitone. You must be wondering "what's this about?" Don't worry I will explain it as simple as possible.
Let's take the two pieces I have as an example. When I tap them, they produce a sound. The sound board produces a B. Anything I want it pair with it should produce a sound that's lower or higher than it. Fortunately, the back produces a C sharp when I tap it. That's a difference of a tone and half. So they should pair up nicely.
This is important because when an instrument with a sound board and back with the same tone is made, an instrument with poor sound is born. What happens with this is simple. Since both prices produce the same tone, once the strings are stuck the frequencies in the body of the instrument cancel each other out. We call this a deaf instrument.
And on this very important yet confusing note about the relevance of the tones of wood and how to pair then correctly in a build, I shall take my leave. I hope this information was of some interest for you.
I'll see you on the next entry! An remember all your comments are more than welcome.
Follow me on Instagram for enquires and commission.
If you'd like to help the workshop grow, you can make a donation here. You can find me at discord as bertrayo#1763
The rewards earned on this comment will go directly to the people( @bertrayo ) sharing the post on Twitter as long as they are registered with @poshtoken. Sign up at https://hiveposh.com.
Will you sell this Guitar? it seems like making one is such a complicated process but fascinating too. I can say after trying wood-working, they are not easy at all😂 and my most fear is always getting splinters.
It is already sold. Commissions always start with 50% upfront.
It's a very interesting process. The more you do it the easier it becomes and the more you learn about how to make it better. Splinters are a pain, but I've never gotten one from these pieces. It's kind of processed to the point getting a splinter is a very rare thing. I have gotten more from bad broomsticks.
Gran aporte, espero sigas en éxitos totales...
Muchas gracias. ✨
Poco a poco va tomando forma tu nuevo hijo de madera... Eres como un gepetto instrumental!!
Ja, ja, ja, ja, ja. Eso me decía una profesora. Quizá sí, pero estos cuatros no hablan y mucho menos quieren ser niños de verdad.
No hablan pero cantan!! Que es hasta mejor sobre todo su van afinados... Yo imagino al Gepetto escuchando toooodo el día a Pinoccio y yo misma lo arrojaba al Mary contrataba a la bsllena
Ja, ja, ja, ja, ja. ¡Qué malvada! 🤣🤣🤣
Pero supongo que esto es mejor que hacer muñecos de madera.
Espectacular
Gracias 😄
Congratulations @bertrayo! You have completed the following achievement on the Hive blockchain and have been rewarded with new badge(s):
Your next target is to reach 6500 replies.
You can view your badges on your board and compare yourself to others in the Ranking
If you no longer want to receive notifications, reply to this comment with the word
STOPCheck out the last post from @hivebuzz:
Veo tu crecimiento creativo en tu taller de forma espectacular @ , pero yo quiero un cuatro.
¡Felicitaciones por estar en HIVE!
Muchas gracias.
Bueno, si quiere unos de los míos, ahí al final de la publicación hay información de contacto para que sepa sobre los precios y tiempos de fabricación. Se acepta pagos por varios medios siendo HIVE uno de ellos.
Me conmueve ver tu publicación, me trae tantos recuedos del taller de mi papá. Te felicito por tu trabajo
Con ese apellido me imagino que es familia del maestro Navarro, ¿no?
Gracias por sus palabras. ✨😁
Sí, soy la hija menor de él 😊
¡Qué pequeña es la Blockchain! 😁
Un gusto concerla. ✨
Igualmente, mucho gusto 😄