
Buen día a todos,
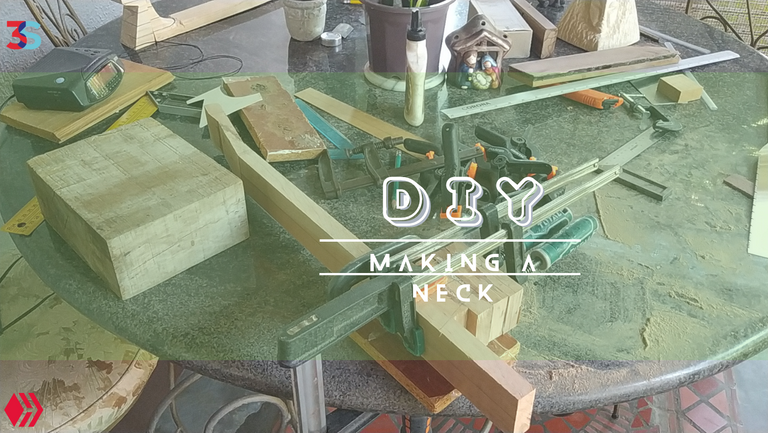
Estamos de vuelta con la sección Miércoles de Carpintería para mostrar el progreso de este proyecto. ¡Sin más preámbumos vamos allá!
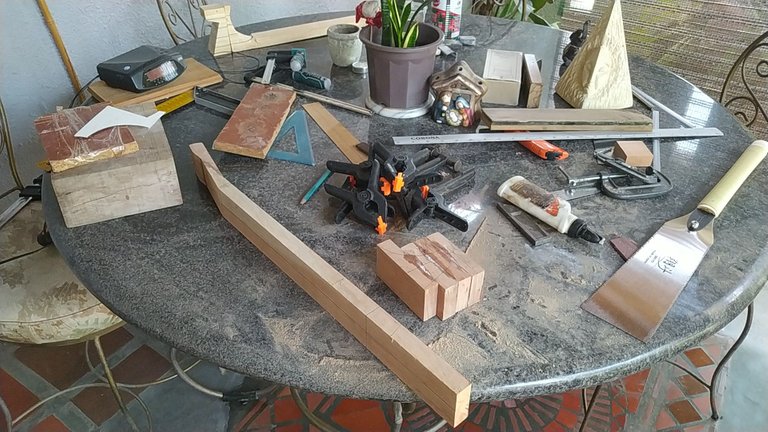
Recapitulando
La última vez que vimos este cuatro venezolano, ya teníamos listas la tapa armónica y el fondo. Aquí veremos el proceso de fábrica de un mástil a partir de listones de madera de cedro ( cedrela odonata.
Nivelación
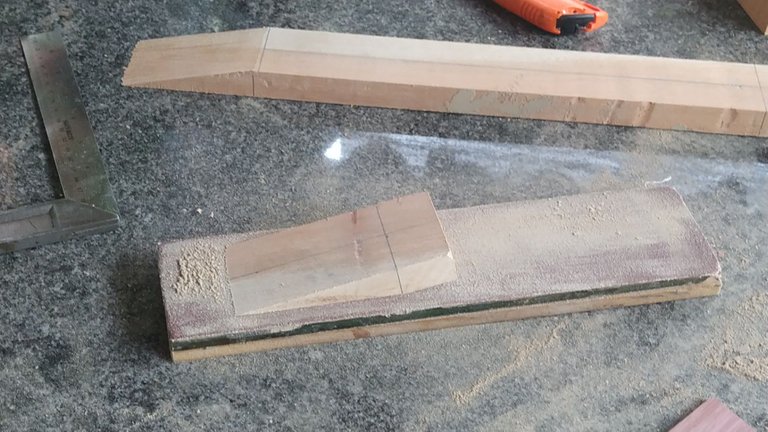
La primera fase del proceso es la nivelación de las superficies del listón. Esto se hace para poder trazar líneas por todas las caras y que todas que den a "escuadra". Este termino implica que todas las caras de una pieza de madera quedan perfectamente planas.
La manera de comprobar si esto es cierto es trazar líneas lo ancho de todas las caras con ayuda de una escuadra de carpintería y ver si todas las líneas se tocan y están derechas.
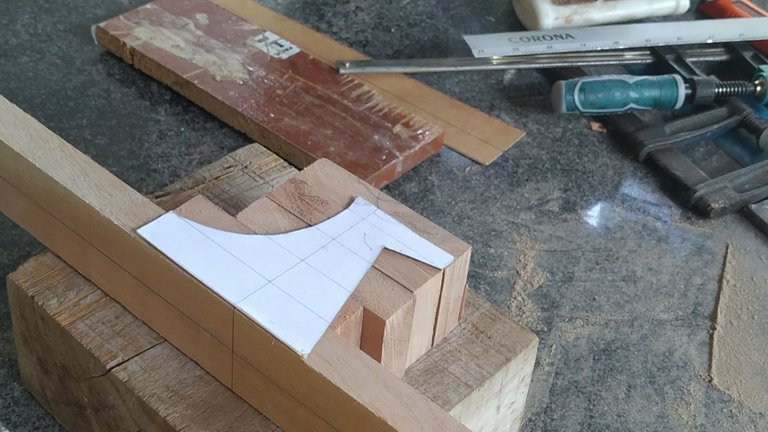
Trazo
Después de nivel y comprobar si las caras están plantas, es hora de trazar las líneas para marcar dónde va a ir el diapasón y dónde se realizarán los cortes de la cabeza y los aros.
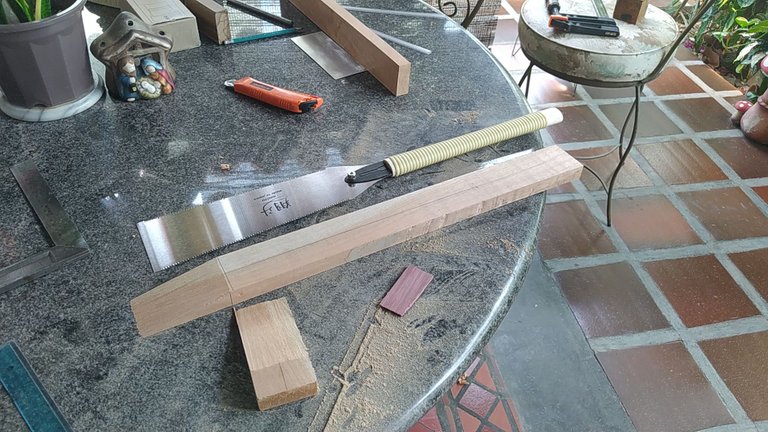
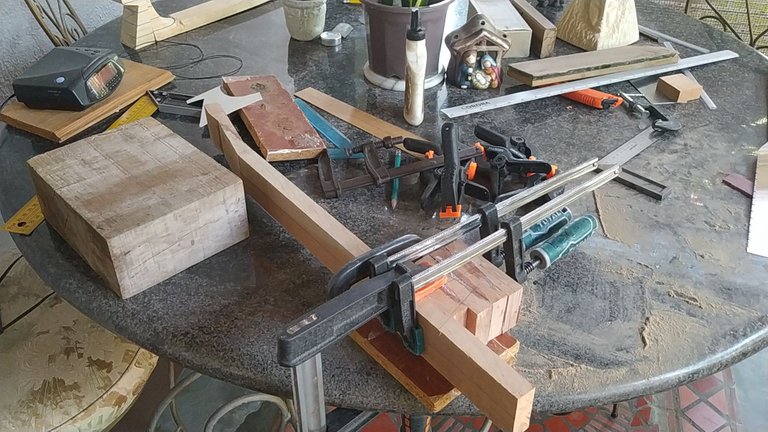
Corte
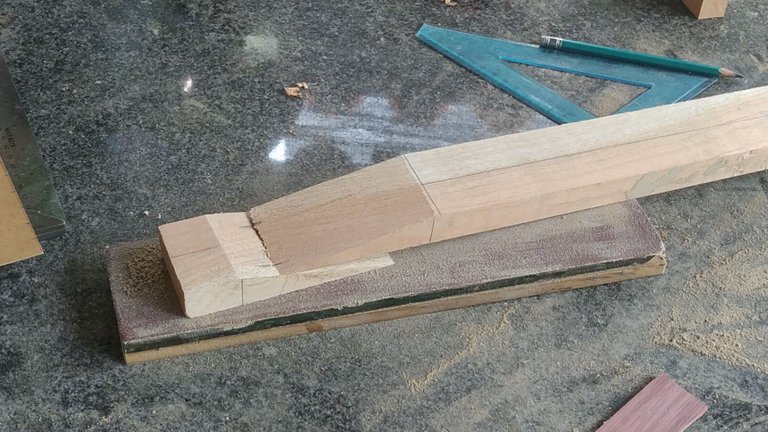
Una vez que tenemos el corte de la cabeza marcado, procedemos a cortar con mucho cuidado. De esta manera, tendremos que hacer menos trabajo pegar la pieza que saldrá de este corte.
Una vez se haya hecho el corte. Se procede a limpiar la superficie cortada para poder pegarla al listón. De esta manera, tenemos lista la base de la cabeza del instrumento.
Nota: este proceso es un poco difícil de llevar acabo. En el video corte todas las veces que no me salió bien o la pieza se movía.
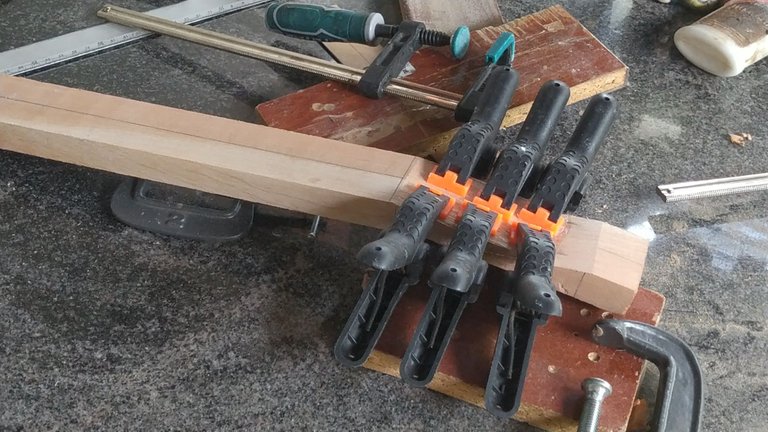
Estructura del tacón
En el lado opuesto a la cabeza, tenemos el tacón. Aquí encajan los aros del instrumento. Para hacerlo, cortamos otro listón más corto para tener tacos de más o menos la misma longitud. Luego de emparejar las caras que van a estar en contacto, procedemos a pegar todas en un solo bloque antes de pegarlas al mástil.
La idea de tener un tacón compuesto de varias piezas es darle una estructura más sólida a la pieza. En el tacón convergen muchas cosas. Podría decirse que en el sentido estructural, es el corazón del instrumento. Así que una estructura firme es necesaria.
Al tener varias piezas pegadas de esta manera, podenos cruzar las fibras de la madera. Así no solo estamos haciendo una estructura sólida, también estamos preparándonos para cualquier movimiento de la madera que pueda ocurrir por los cambios de la humedad en el ambiente.
Nota: por si no lo sabían, la madera aún después de ser cortada y estar seca, se sigue moviendo. Por esta razón muchas mesas y otros muebles tienen detalles de construcción para compensar la naturaleza del material. Los instrumentos, al ser piezas de madera funcionales y en tension constante, necesitan este tipo de compensación.
Conclusión
Hasta aquí llega el proceso por ahora. En la próxima entrega, veremos el resto de los procesos para darle forma al resto del mástil y trabajaremos un poco en su estética.
¡Que tengan un gran día!
Hi there,
We are back with Woodworking Wednesdays. Today, we'll take a look at the process of this project. This time we are working on the neck of the instrument.
Recap
Last time we saw this project, we were working on both back and sound board. Those are done for the moment. It's time to tackle the neck of the instrument, so we can start to assemble the whole thing.
Flattening
We start off by fattening all the faces of the strip of wood. This is done with a sanding block and a trick. If your draw pencils lines on the surface and sand until you remove them, the surface is magically flattened.
To check this out, we can draw lines along the width using a carpenter's square. If all lines are aligned and straight, everything is good to go!
Drawing
Once all the faces are even, we can draw the guiding lines. This are for the fretboard and side cut. Also we'll mark the exact place of the head cut and the cutting angle.
Cut
With the drawing in place, we can start cutting the head with a saw. If you are careful enough, we will save us sanding time. Of course, we will still need to sand some more to even out the resulting wedge.
And once the wedge is ready, we can glue it back to the neck to form the base of the head of the instrument.
Note: this process is very difficult and frustrating at times. In the video, I cut a whole lot of time. The piece moves a lot and it's hard to keep the place it should be.
Making the heel
While the head glues, we move onto the heel. This is the piece where the sides meet the neck. It is one of the important building blocks of this kind of instrument. To make it, we need to cut some wood blocks of around the same length. We even their faces and then, go ahead and glue them together. Once they are one block, we proceed to glue them on the other end of the neck.
The reason behind using several blocks of wood for the heel has todo with structure. When we use pieces of wood like this, we have to make sure to make a alternating the grain of the wood. This will give us a very strong foundation for such an important piece of the instrument.
The heel is like the heart of the instrument if we are talking about it's structure. All the go glued to it. It needs to be solid. Alternative the grain not only serves this purpose, but it also prevents wood from bending when there are humidity changes.
Note: in case you didn't know wood keeps moving even when after is has been cut and dried out. The grain keeps shifting while it absorbs humidity and dries up. Many pieces of furniture have mechanism to deal with this changes. Instruments are no different. As they are always in tension, there's a need to prevent wood from moving too much as it could alter the sounds and function of the whole thing.
Conclusion.
We are done for today. Next time we will see how the rest of the details are done. And we'll have a finished neck ready to start the whole assembly process.
I hope you have a great day!
- Portada/Thumbnail: @bertrayo, made with Canva.
- Fotos/Photos 📷: @bertrayo (Redmi Note 8).
- Video 📹: @bertrayo (Redmi Note 8)
- Edición/Edición: @bertrayo, made with Capcut.
- Música/Music: Free of copyright.
Follow me on Instagram for enquires and commission.
If you'd like to help the workshop grow, you can make a donation here. You can find me at discord as bertrayo#1763 ▶️ 3Speak
¿Que onda amigo?
Con este trabajo me trajiste recuerdo de mi época de secundaria en el colegio técnico, más precisamente de la hora de carpintería. Trabajar la madera es algo muy satisfactorio, talvéz un poco sucio el trabajo, pero creo que es es lo de menos; Lo mas importante creo que es cuando la pieza va tomando forma.
Genial como siempre amigo.
Saludos.
Hola, Marcelo
Bueno, por aquí no había liceos dónde el trabajo técnico fuera con madera, pero sin duda eso me hubiera hecho comenzar antes en este oficio. Es como dices, el trabajo es sucio y un poco difícil, pero cuando todo va tomando forma, vale todo el esfuerzo.
Gracias por comentar.
Saludos.
Claro que si amigo, cuando va tomando forma, todo vale la pena.
Saluodos.
Exactamente.
The rewards earned on this comment will go directly to the people( @bertrayo ) sharing the post on Twitter as long as they are registered with @poshtoken. Sign up at https://hiveposh.com.
Click on the badge to see your board.
Thank you to our sponsors. Please consider supporting them.
Berro, ahora sí que no entendí nada del video, jajajaja, muchas cuestiones que no sé qué significan pero se ve que es muchísimo trabajo, sobre todo esa lijadera. Espero poder entender un poco mejor en videos siguientes.
Besos 😘❤️
Los videos siguientes van a ir más o menos de lo mismo. Solo que el mástil va a tener mejor forma. Eso es lo que va a cambiar. Mientras, más términos y cosas locas de carpintería. 🤣
🥰😘❤️
Ay no, jajajajaja, voy a seguir perdida, aunque espero aprender algo con tantos videos 😅
😘
Es probable que sí. Siempre podemos aprender algo nuevo aunque no lo apliquemos en nada.
😘❤️
Click on the badge to see your board.
Thank you to our sponsors. Please consider supporting them.
El proyecto es una labor de estética y mucha dedicación para lograr un excelente instrumento @bertrayo
En líneas generales, por ahí. Luego está el trabajo esotérico para lograr que suene bien. 🤣
I love the process, i love the steps, i love the achievement.
Thank you so much for sharing.
Thanks a lot. It takes a lot of work and it's nice the hard work is appreciated!