

Welcome back! Today, it's time to make the head stock for this project. We'll see how everything goes on the next photos and explanation of the processes!
Let's jump to it!
Solid Footing
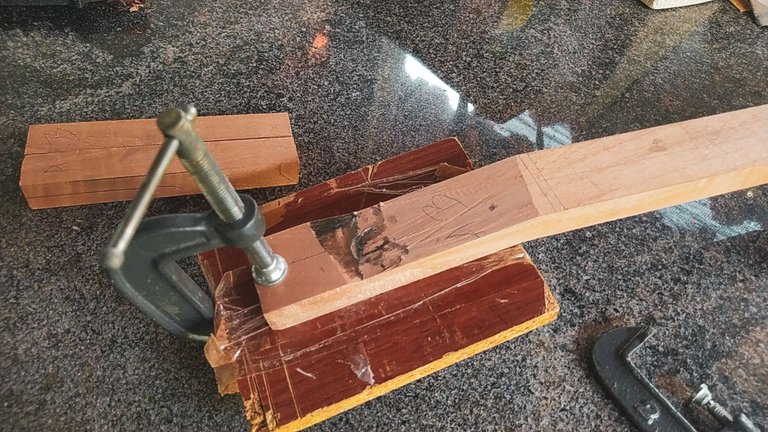

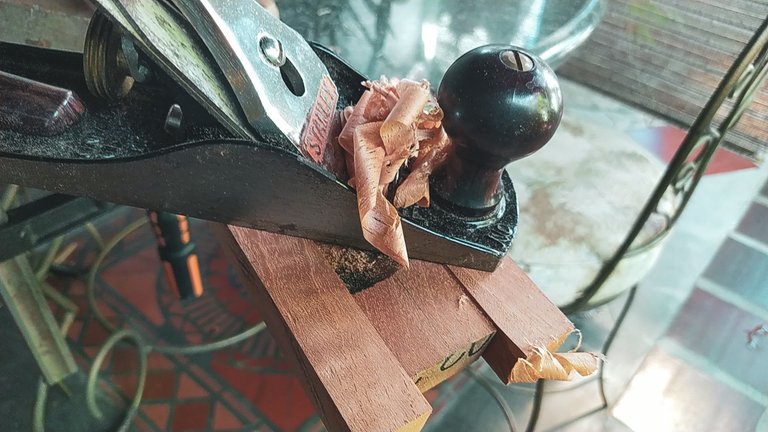
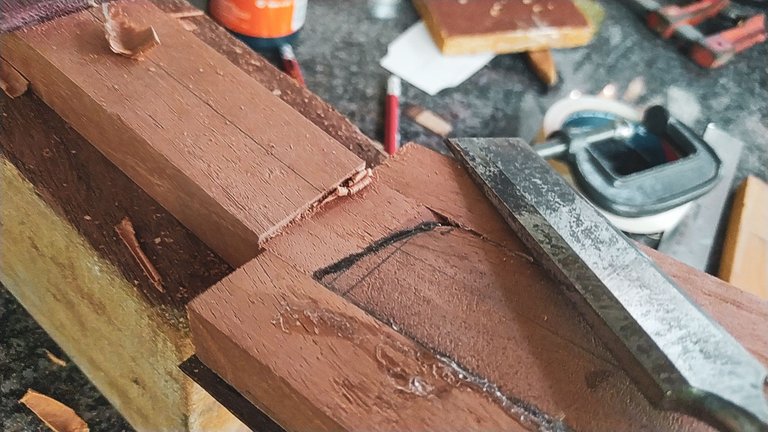
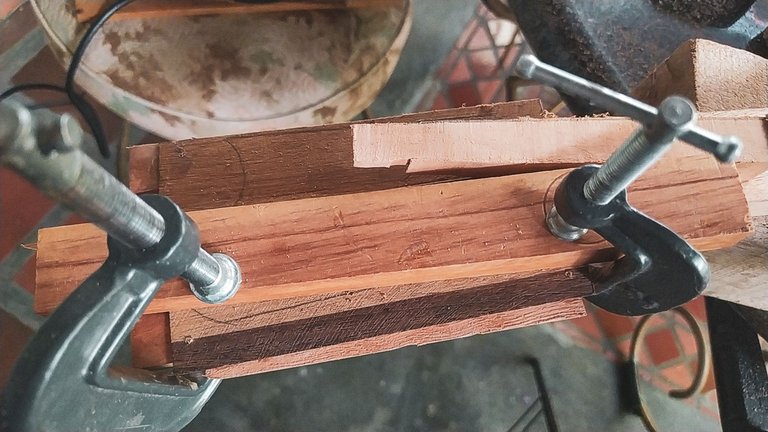
Last time, we made some progress on this part by giving it shape to both the neck and the ears (the other pieces of wood). So the next step is to glue this pieces at each side of the neck to create the base of the head stock for the tuning machines. That piece you see on the bottom on the first photos is one used to keep everything flat against a surface. It helps a lot to prevent movement of one direction.
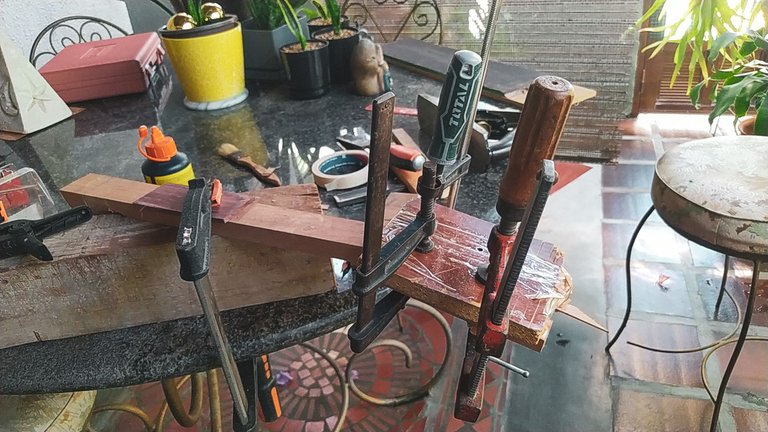
Next, we apply glue on the ears and press them against the neck. They will move a bit, but being careful we can have them set on the right place. Then, we press down with a clamp and another piece of wood to prevent the ears from coming up.
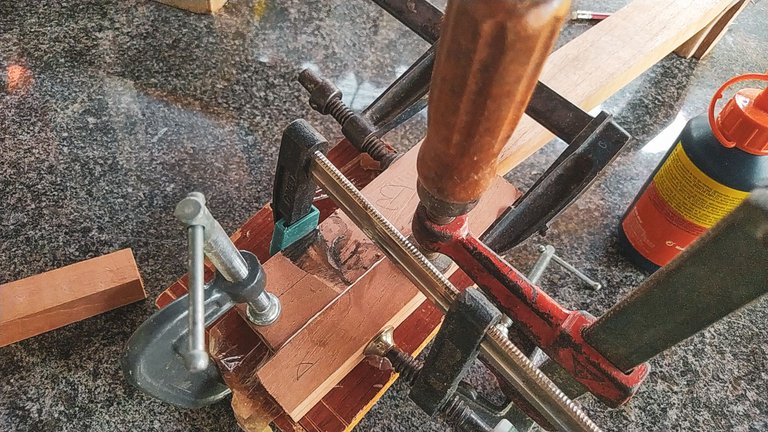
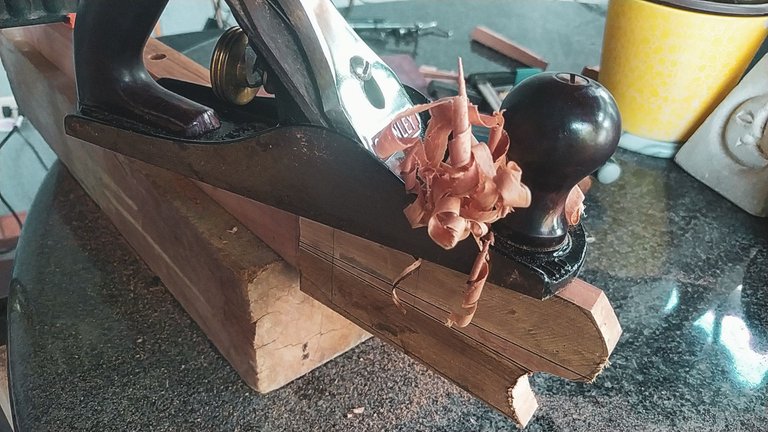
Once these are glued in place, we'll need to make the surface even to get the ornament in place. We use our smoothing plane to remove material carefully from this area and end with a flat surface to add the ornament.
Both faces

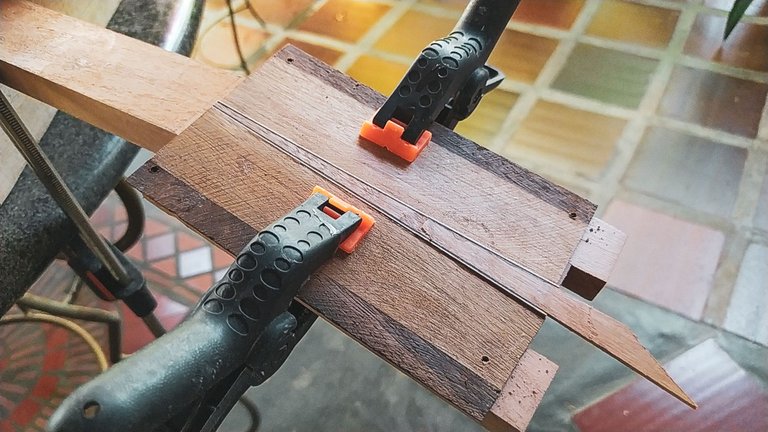


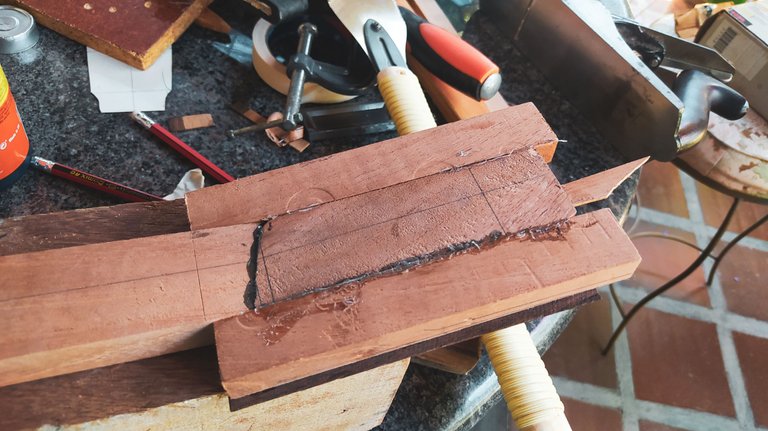
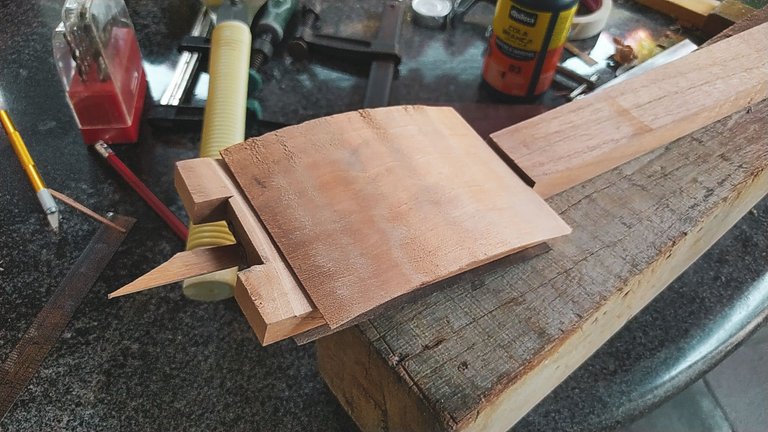
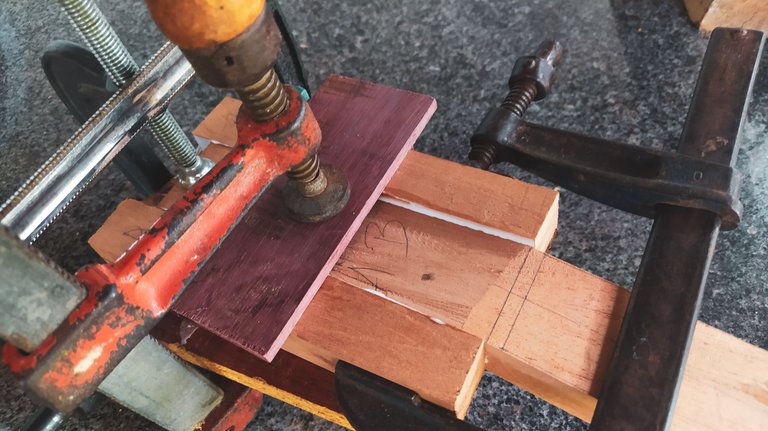
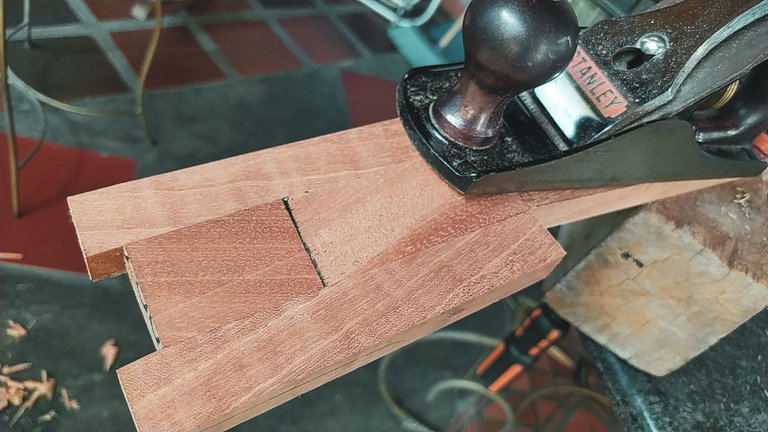
Now, we'll need to cover both sides. This is to hide the glue marks from the previous step and also add some resistance to this piece. We start with the front ornament. This one was made a long time ago when I was starting in this craft, but never saw it fit for any build until now. It's always nice to put something like this to use. To make this part easier, we make a cut at the bottom of the ornament to make it flush with the neck. Then, we hold it in place and make holes for wood anchors on the corners.
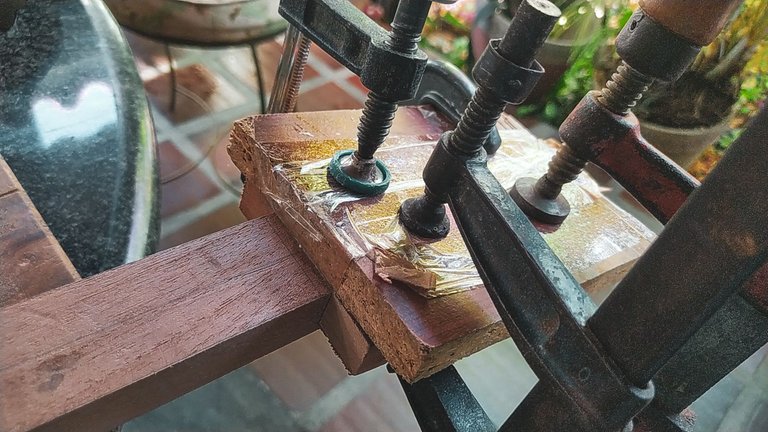
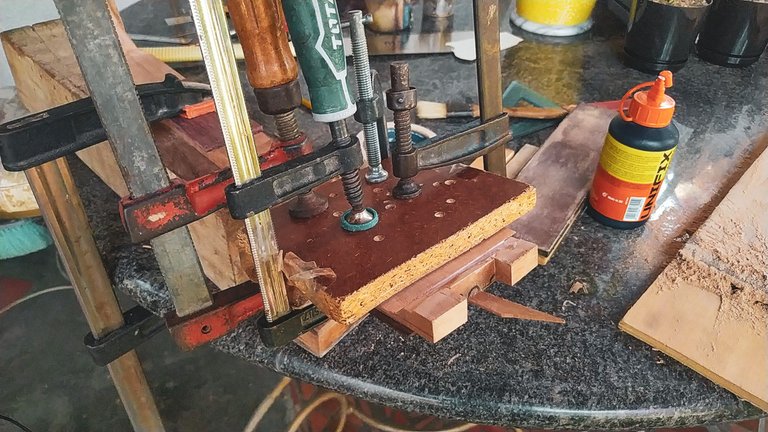
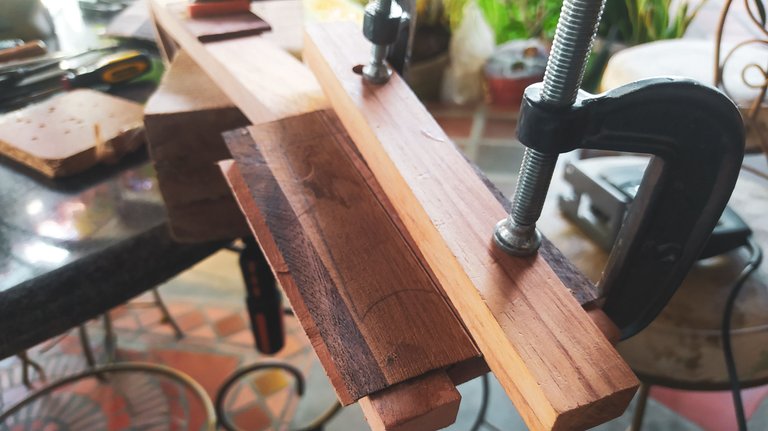
This last step makes it way easier to make a proper glue up of anything that is flat and goes on a flat surface. After this one is ready, it's time to work on the other side. We start by removing some material from the base and working on the whole side to make it flat. Then, we glue a piece of cedrela to cover the marks and have a nice face.
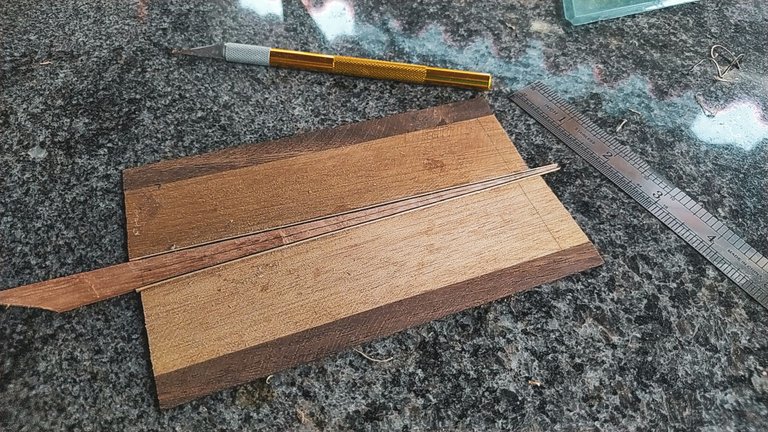
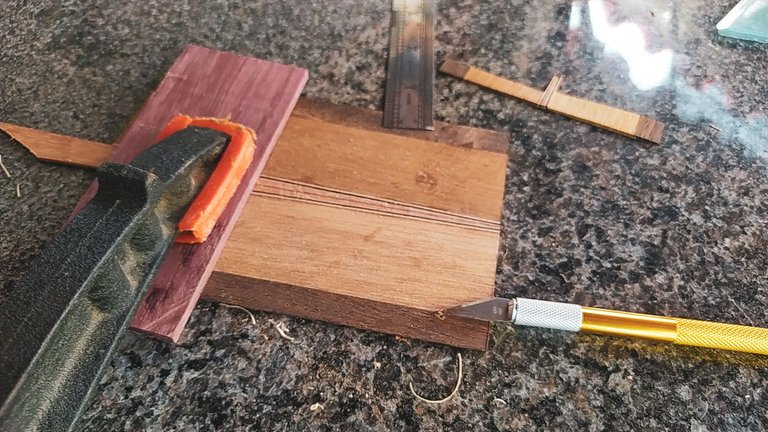
Shape and holes
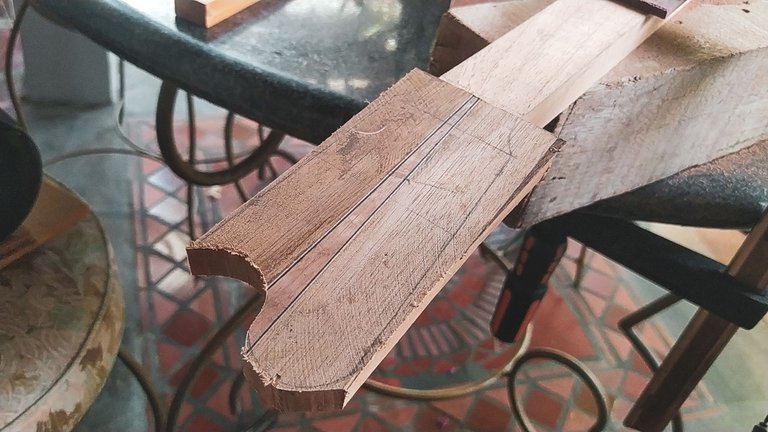
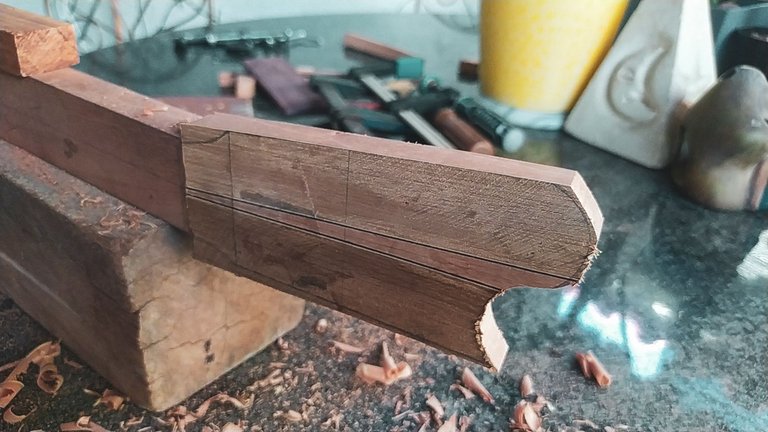
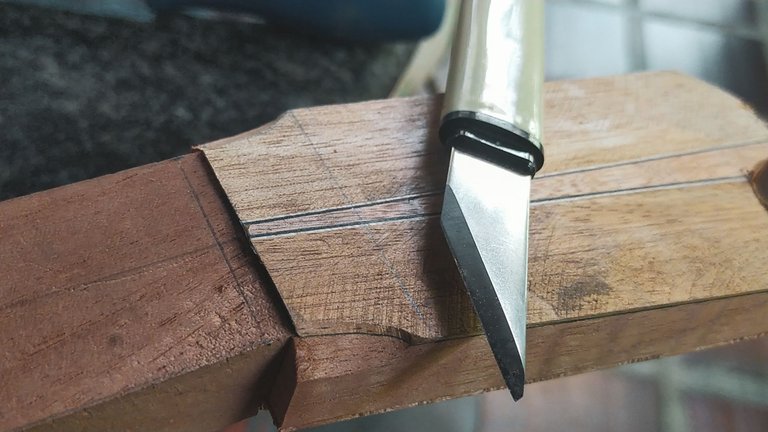
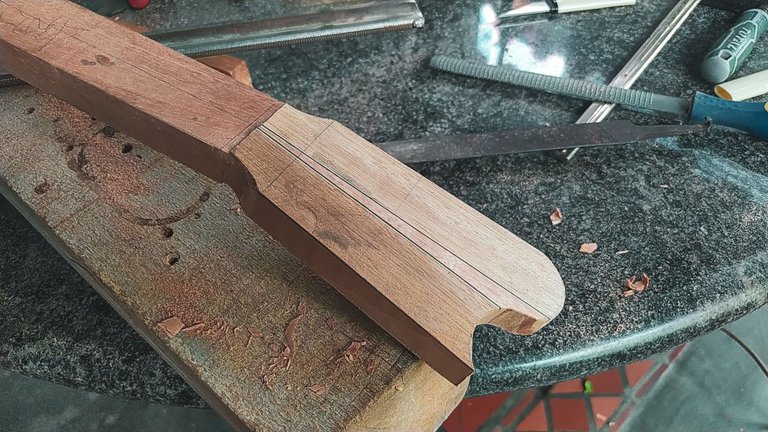

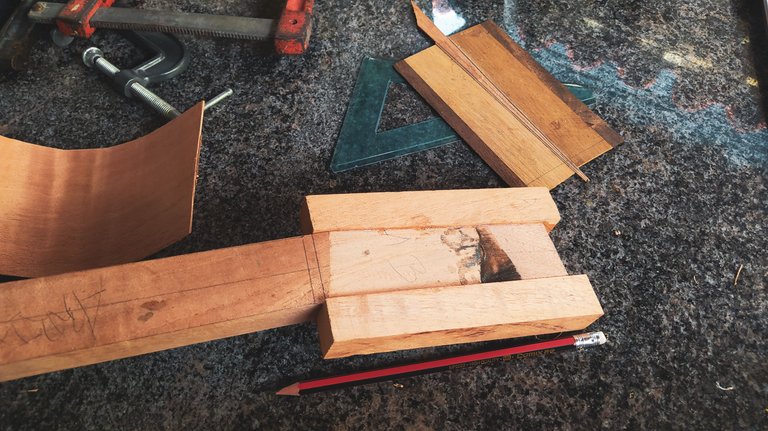
With both faces covered, we can make our drawing for the design of the head stock. Having the lines in place, we can start cutting bit by bit until we are close to the lines. To make things easier, an electric jigsaw makes quick work of this rough cuts. The rest of the work is done by plane, file and knife. That we get to the lines without being at risk of damaging the design.
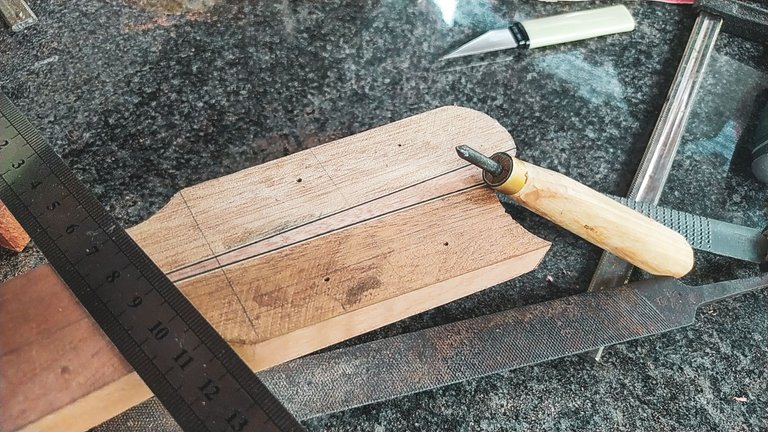
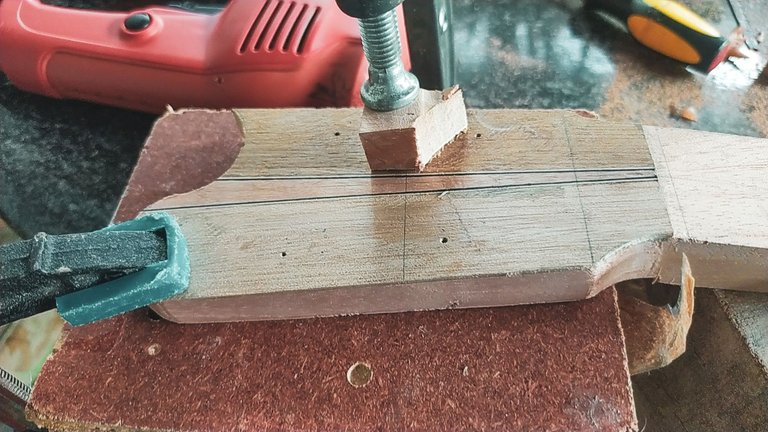
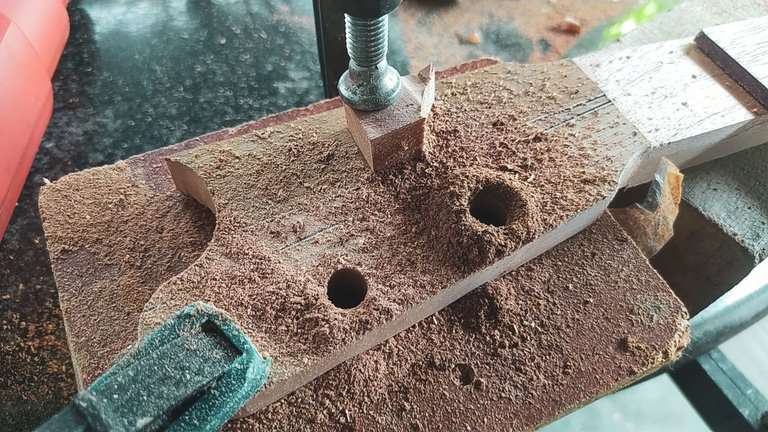
To finish work, we need to mark the center of each hole. This is to give the tuning machines enough space to be on the back of the head stock and not falling outside of a margin. We do all the marks with a ruler and get the exact center with the help of our hole marker. The last bit of work comes from using the drill and a spade drill bit to make room for the tuning machines. These are special one so they need a bigger hole to fit in the instrument. That's why the spade we use has 1cm of diameter.
Having this piece ready, we can move ahead to the assembly process that will start on next entry and go on for another one!
Thanks a lot for reading! See you next time!
Un Clavijero Más
¡Bievenidos de vuelta! Hoy continuamos con el proceso de este proyecto. En esta ocasiónm vamos a trabajar en un clavijero.
¡Vamos allá!
Una base sólida
La última vez que vimos este proyecto, habíamos adelantado parte del trabajo en el mástil y las orejas. Ahora el próximo paso es pegarlas para crear la base de la estructura del clavijero. La pieza de madera que pueden ver al fondo en estas primeras fotos es para evitar el movimiento de las orejas en esa dirección. Ayuda mucho evitar que algo se mueva en un sentido cuando se están pegando las piezas.
Lo siguiente es aplicar pegamento y presionas las orejas contra el mástil. Aquí se van a mover un poco, pero con cuidado podemos dejarlas en el lugar correcto. Luego, aumentamos la presión con prensas y añadimos otra pieza de madera por encima para presionar las orejas hacia abajo.
Cuando estén bien pegadas, hay que trabajar la superfiecie y dejar todo al mismo nivel para poder colocar el adorno del clavijero. Utilizamos un cepillo con mucho cuidado para hacer este trabajo sin dificultad.
Ambos lados
Ahora hay que cubrir ambos lados. Esto no es solo para cubrir las marcas entre las piezas de madera. Agregar otras piezas de madera en ambas caras del clavijero nos da algo más de resistencia. Comenzamos con el lado que se irá al frente del instrumento. Aquí tenía este adorno hecho desde hace mucho tiempo y nunca había combinado con ninguno de los instruentos que he hecho hasta ahora. Al fin salió uno donde sí. Siempre es útil tener algo así en la reserva. Comenzamos por cortar una parte del adorno para hacerla recta y luego lo fijamos sobre la base. Aquí aprovechamos de crear espacio para colocar unas anclas en las esquinas y facilitar el pegado de la pieza. Siempre que se tiene que pegar dos piezas planas con cierta área, esto facilita el proceso.
Una vez tenemos esto listo, podemos trabajar en el otro lado. Comenzamos por remover un poco de material en la parte inferior del clavijero. Luego, trabajamos la superficie hasta dejarla plana. Finalmente, colocamos una pieza de cedro sobre el reverso para tapar las marcas y tener una apariencia más estética.
Forma y agujeros
Con las dos caras cubiertas, podemos dibuijar el diseño del clavijero. Después de hacerlo, empezamos a cortar siguiendo estas líneas poco a poco hasta casi llegar a ellas. Esto lo hacemos con la ayuda de una caladora manual. El resto del trabajo se hace poco a poco con cepillo, lima y cuchillo para llegar a las líneas sin arruinar el trabajo.
Para terminar el trabajo, marcamos el centro de cada agujero que necesitamos. Esto es para tener el espacio adecuado desde el centro al borde para las clavijas. Así no se verá más que el poco de la clavija hacia los lados de la estructura. Con una regla marcamos las medidas necesarias. Luego, con un punzón hacemos un agujero de guía en el centro exacto para cada clavija. Para abrir los agujeros, utilizamos una mecha de taladro tipo pala de 1cm de diámetro. Con esto abrimos cada uno sin muchos problemas y tenemos lista la estructura de nuestro clavijero.
Ahora que todos estos pasos están listos, podemos empezar a ensamblar el instrumento en la próxima entrega.
Gracias por leer. Nos vemos en la próxima.
Fotos/Photos 📷: taken by me (Redmi Note 8)
Portada/Thumbnail 🖼️: by me, created with Canva.
Edición/Editing 🎬: by me, made with Adobe Photoshop Lightroom.

Follow me on Instagram for enquires and commission.
If you'd like to help the workshop grow, you can make a donation here. You can find me at discord as bertrayo#1763
Me gustó mucho la última parte donde dibujas y diseñas el clavijero, y las fotos son geniales, con el paso a paso. Gracias Andrés!!😀
El único tipo de dibujo que sé hacer. Ja, ja, ja, ja.
Bueno, no importa, lo sabes hacer jajaja
Eso sí
🤗