🇺🇸
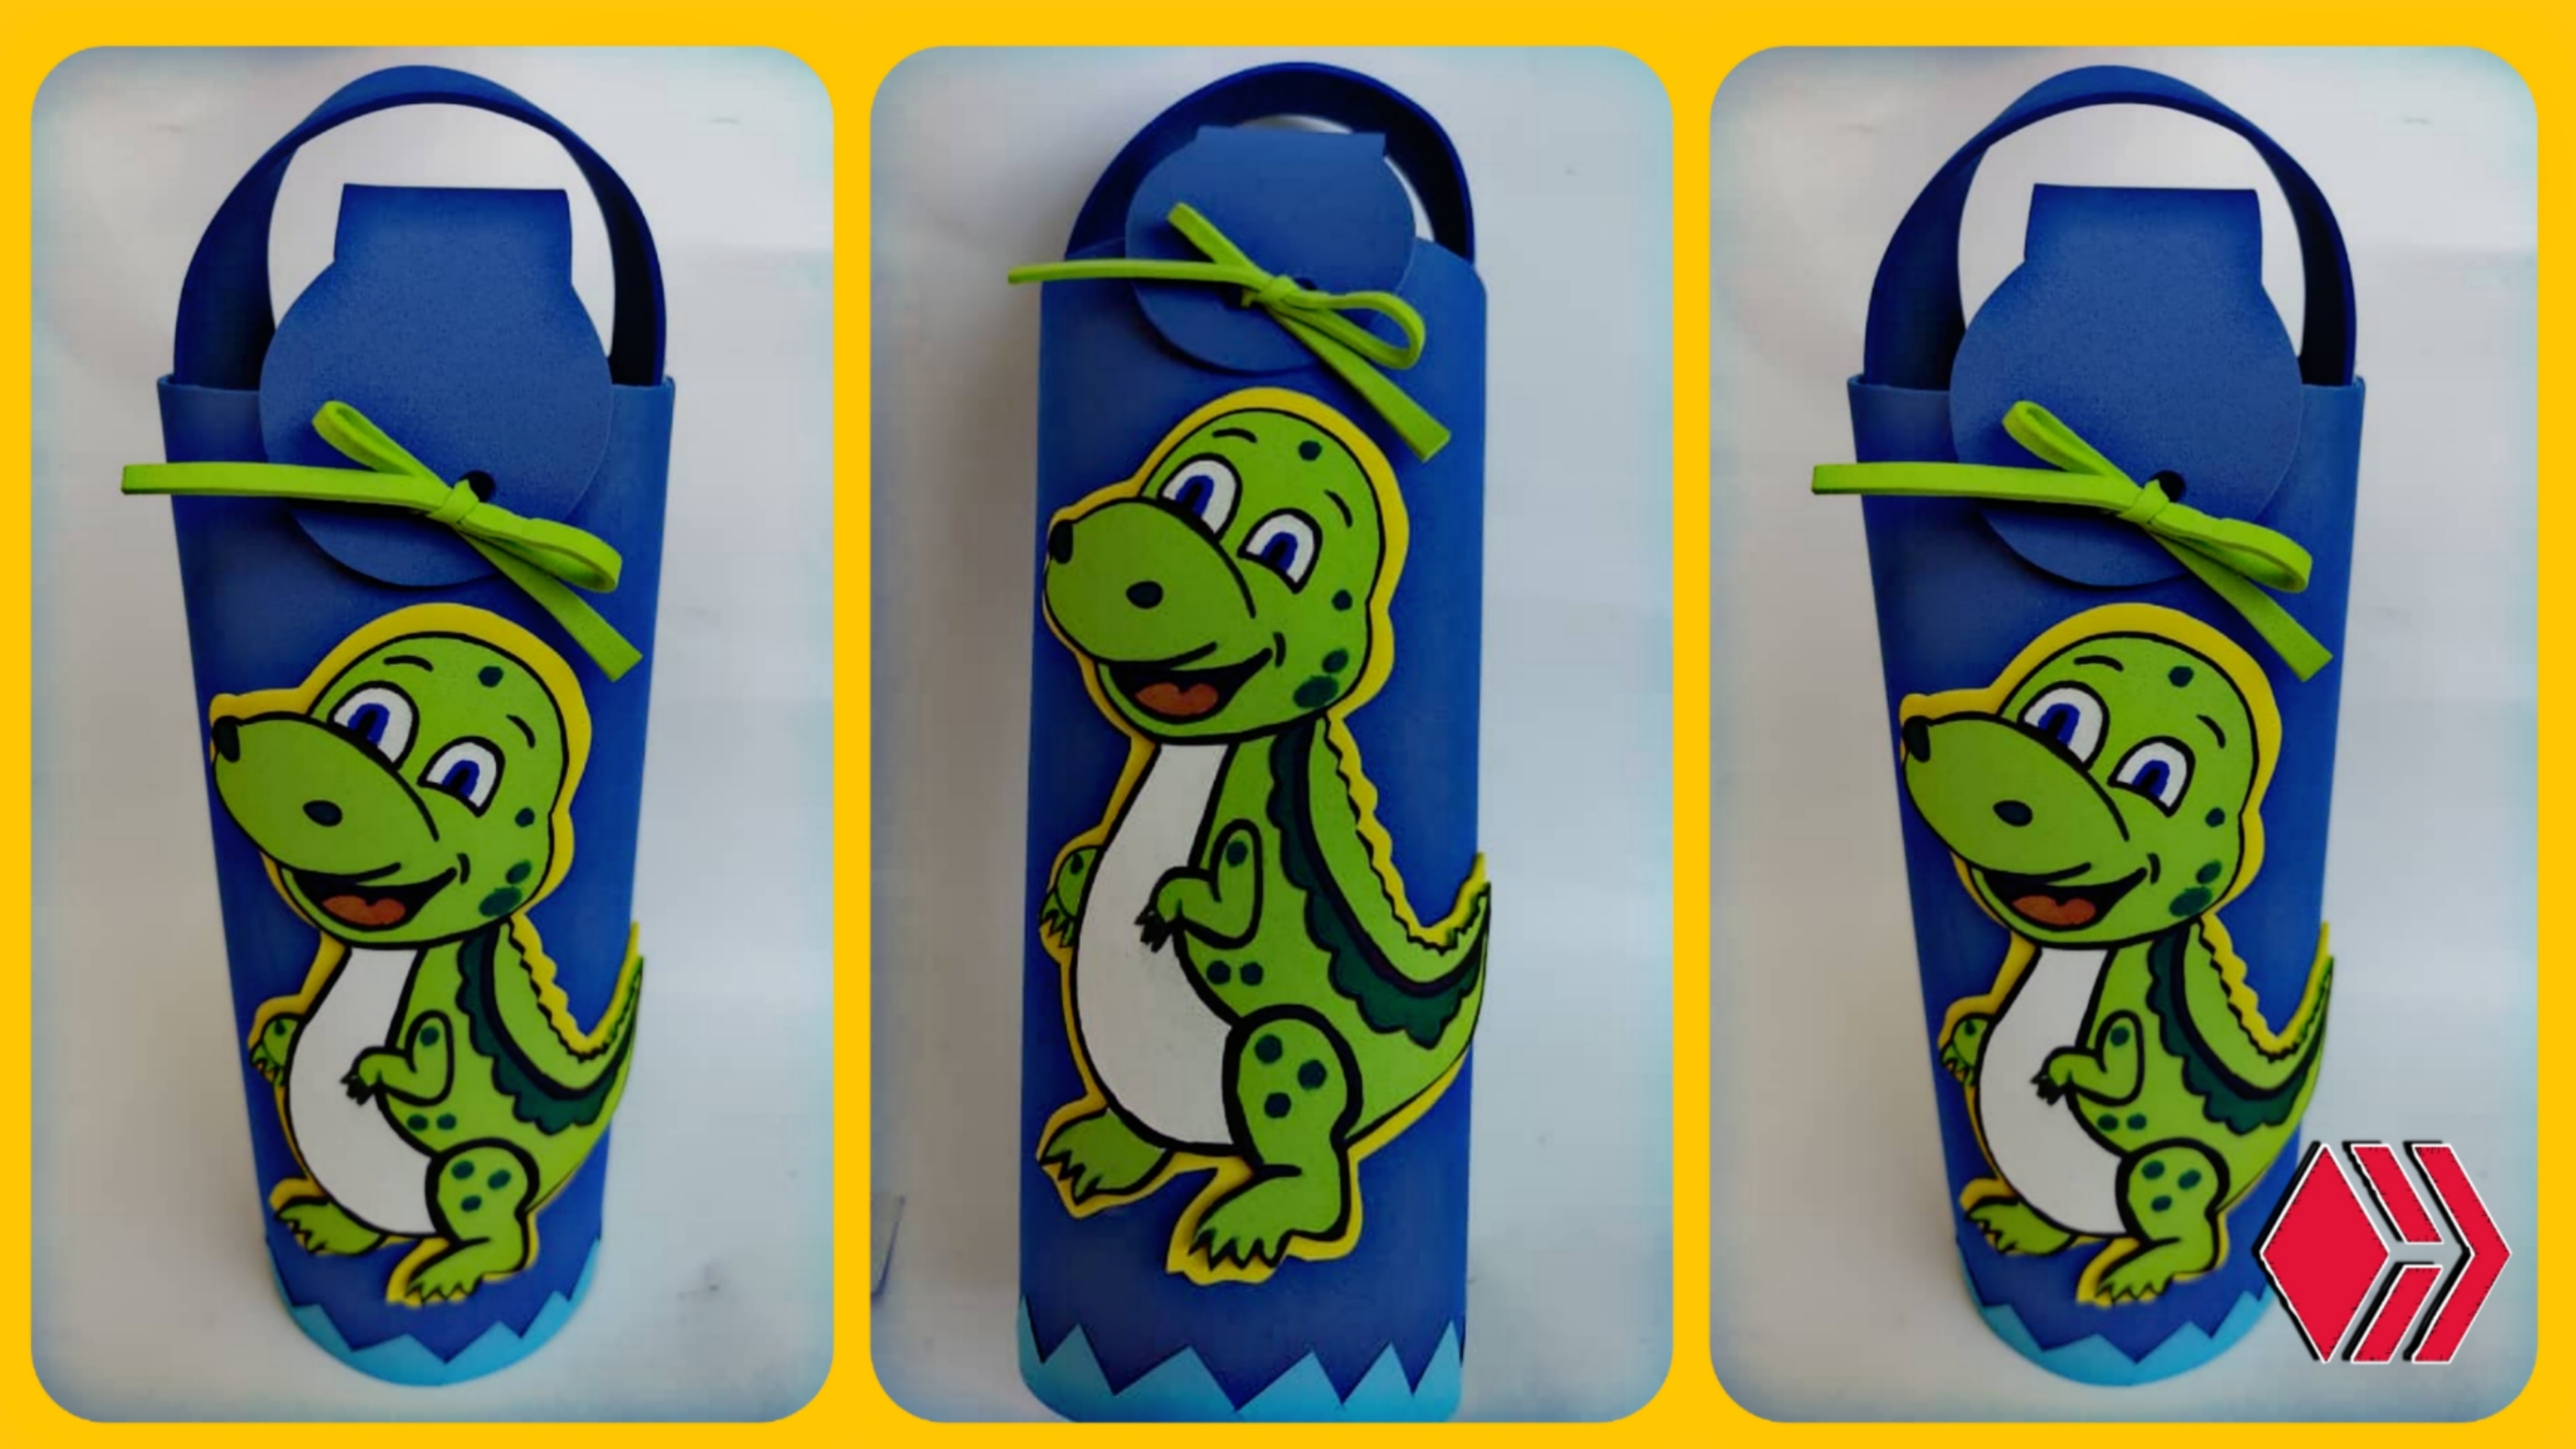
Hello beautiful HiveDiy community, this new day I have made a beautiful foamy thermal cup bag decorated with a beautiful dinosaur, the best thing is that everyone will be able to see how I did it, since for that I have described a very simple step by step that anyone can follow and try it at home, you can even make more of these for sale and thus get some extra income or just give it as a gift to any boy or girl. I hope you can join me and enjoy my content for the day.
🇪🇸
Hola hermosa comunidad HiveDiy, este nuevo día he realizado un hermoso bolso para vasos térmicos de foamy decorado con un bello dinosaurio, lo mejor es que todos podrán ver como lo hice, ya que para eso he descrito un paso a paso muy sencillo que cualquiera puede seguir e intentarlo en casa, incluso hasta pueden hacer mas estos para su venta y así obtener algunos ingresos extras o simplemente regalárselo a cualquier niño o niña. Espero que puedan acompañarme y disfrutar de mi contenido del día.
☆ Thermos cup bag ☆
-- Materials --
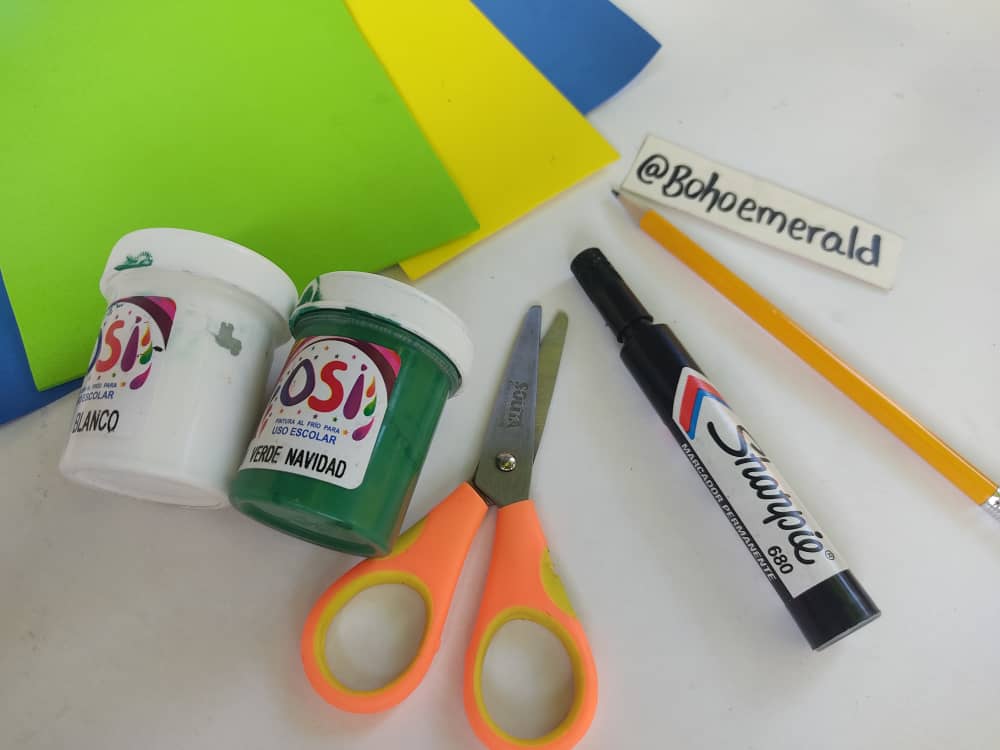
To make this thermal cup bag I used different colored foamy sheets, glue, graphite pencil, marker, scissors, paints, brushes, and a graduated ruler.
-- Materiales --
Para hacer este bolso para vasos térmicos utilicé hojas de foamy de diferentes colores, pegamento, lápiz de grafito, marcador, tijera, pinturas, pinceles, y una regla graduada.
--Step by step - Paso a paso --
Step-Paso.1
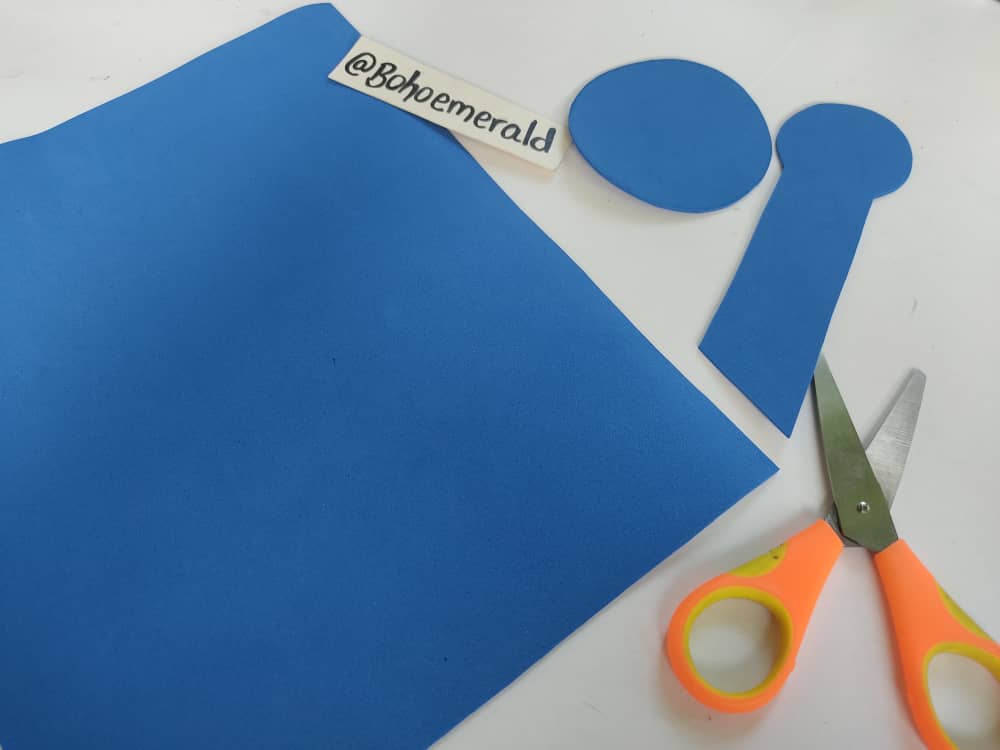
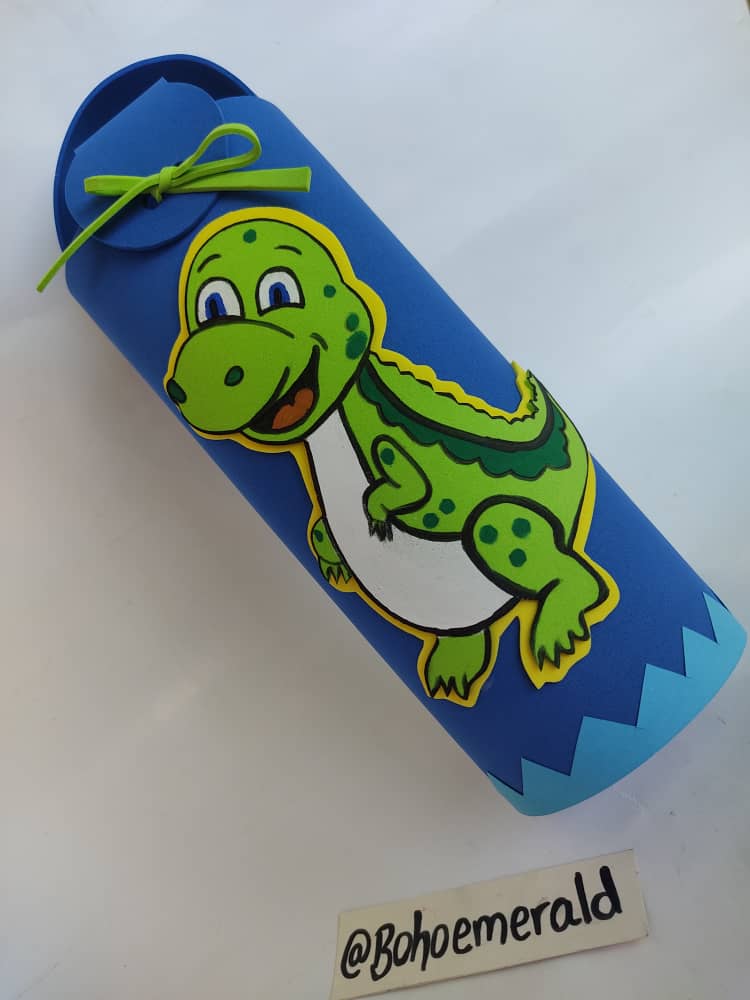
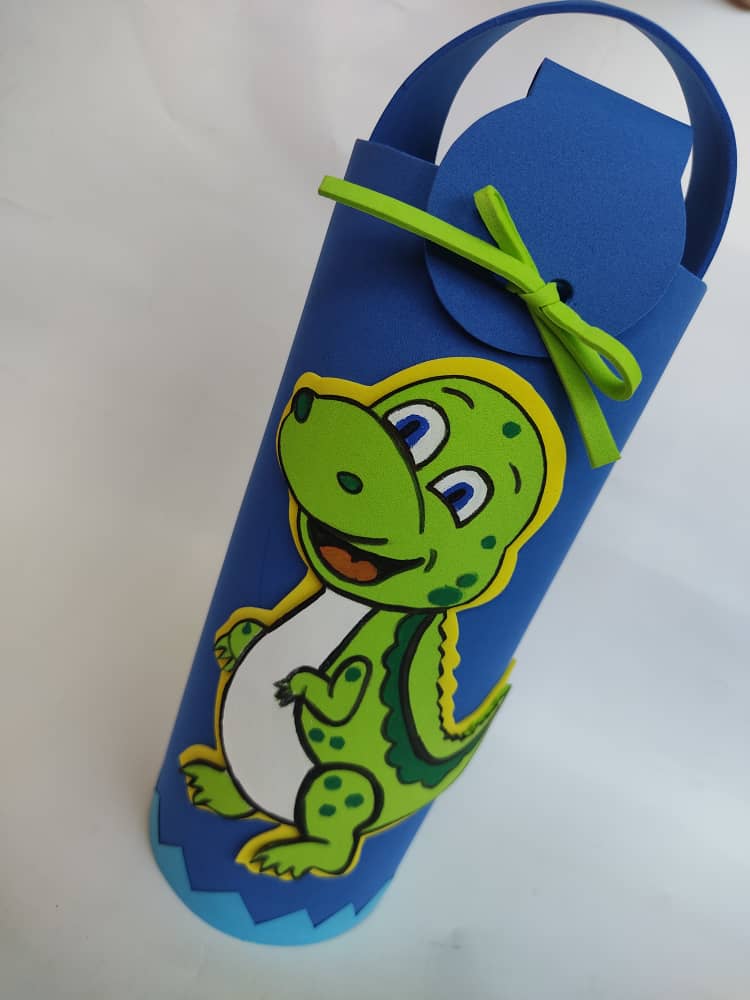
Draw and cut out a large rectangle of 21 x 26cm on a sheet of foamy, and also cut out the base, which is a foamy circle and a small strip to be the clasp of the bag.
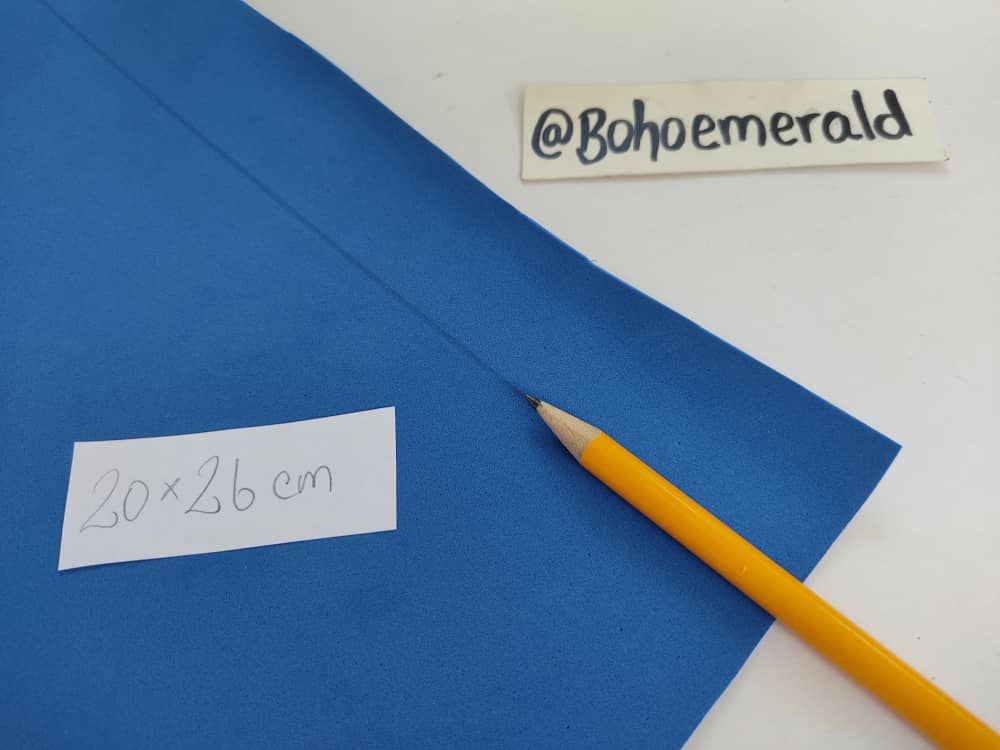
Dibuja y recorta en una hoja de foamy, un gran rectángulo de 21 x 26cm, y también recorta la base, que es un círculo de foamy y una pequeña tira para que sea el broche del bolso.
Step-Paso.2
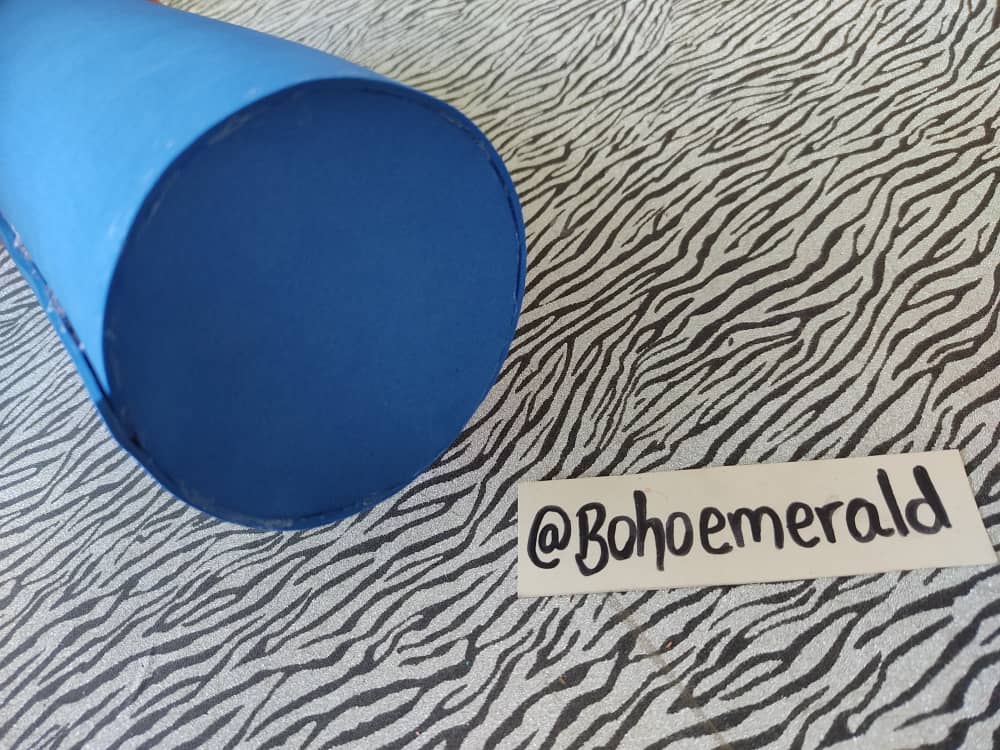
Assemble the body of the bag by joining the two side ends with glue, and also glue the base to the formed body of the bag.
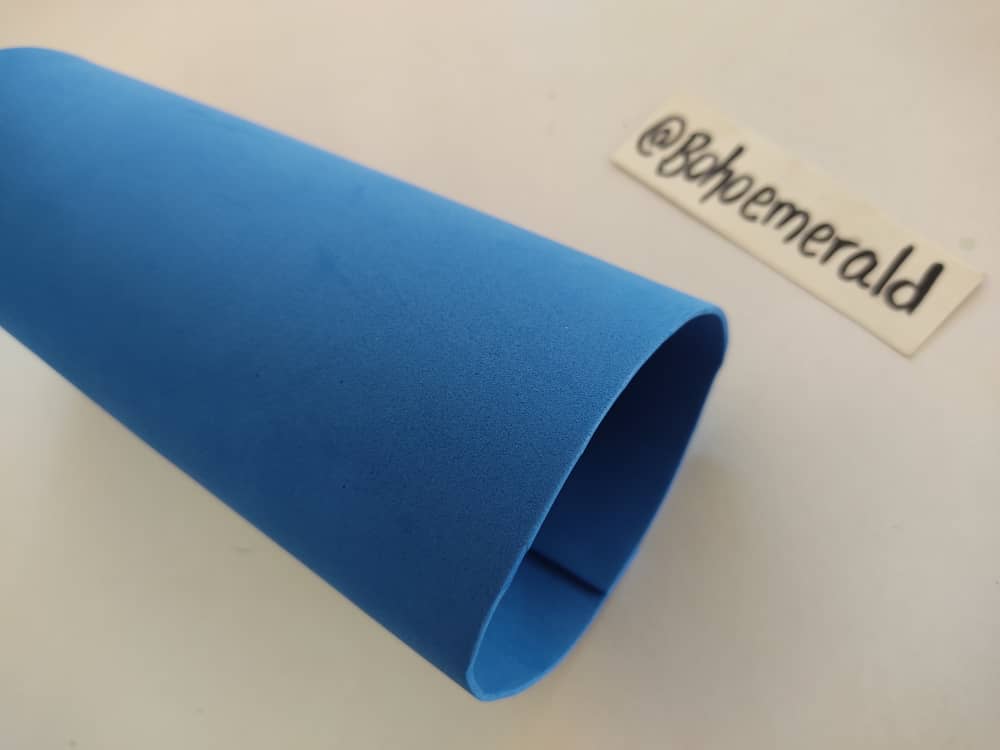
Arma el cuerpo del bolso uniendo los dos extremos laterales con pegamento, y también pega la base al cuerpo formado del bolso.
Step-Paso.3
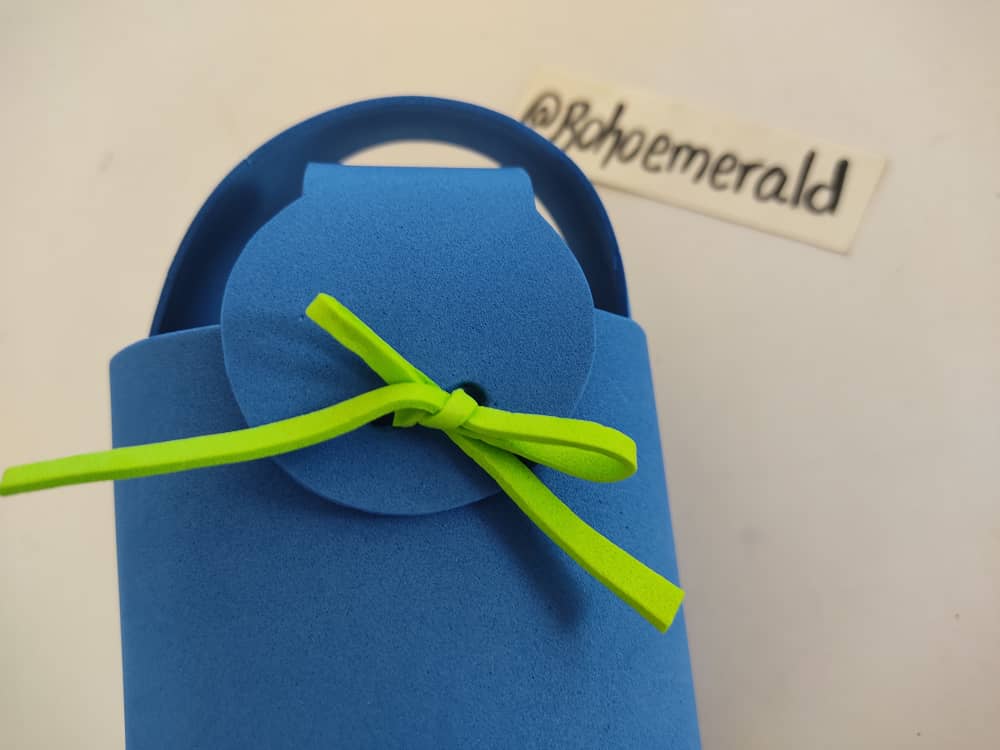
Glue the strap or handle and the clasp to the body and make a loop with a foamy strip to close the bag.
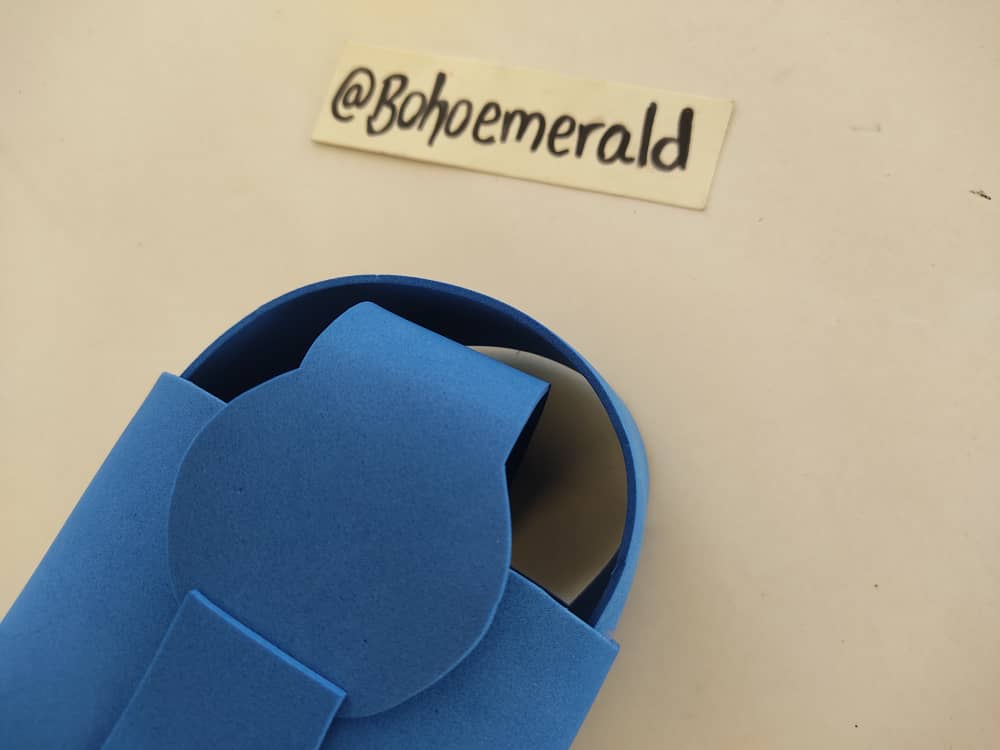
Pega la tira o agarradera y el broche al cuerpo y elabora un lazo con una tira de foamy para cerrar el bolso.
Step-Paso.4
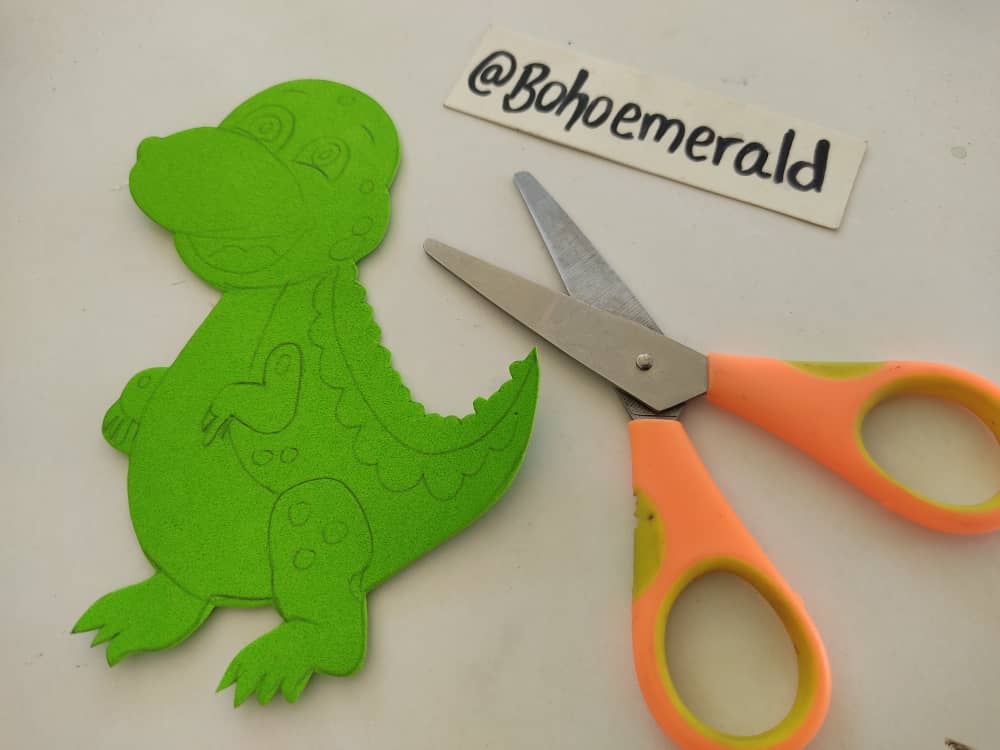
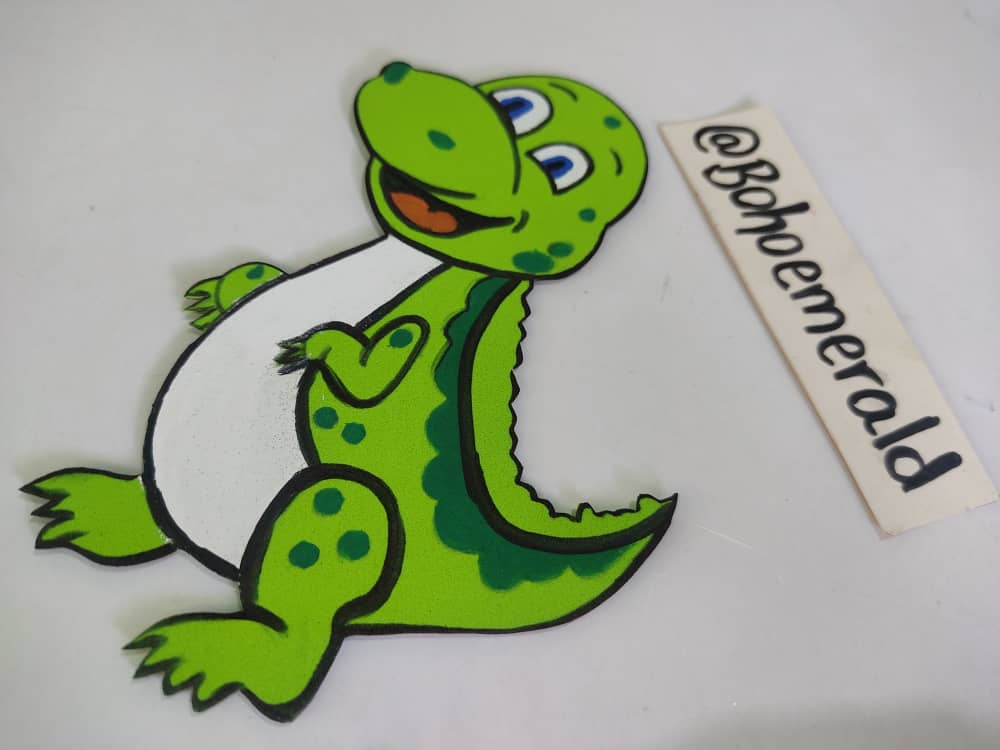
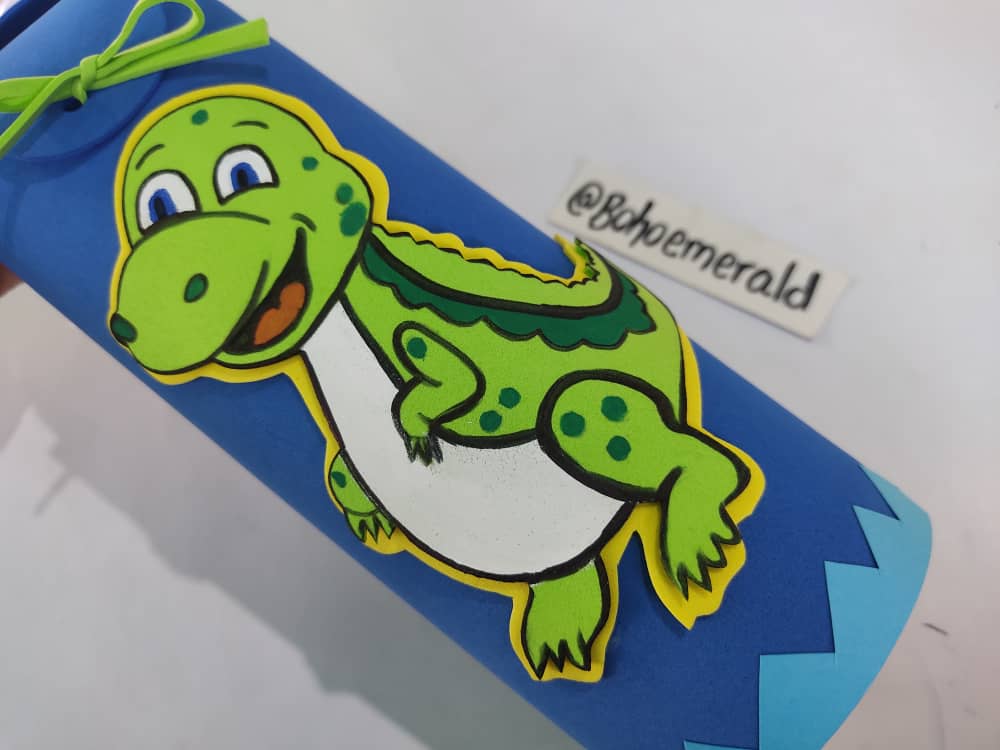
Draw a cute baby dinosaur on green foamy and cut it out carefully.
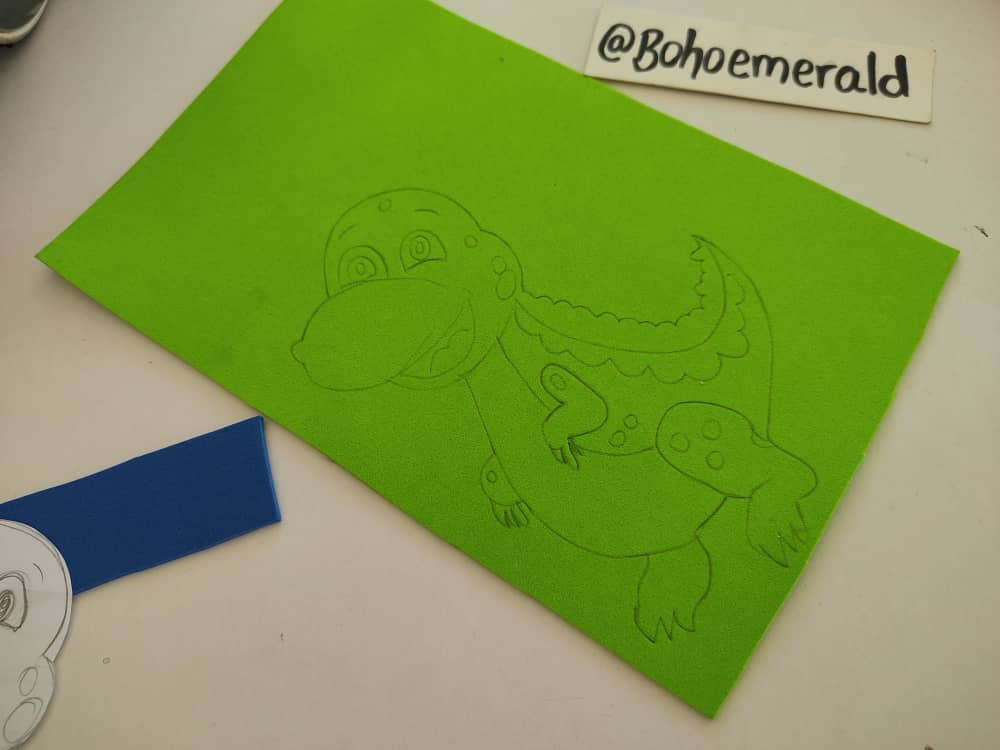
Dibuja un lindo dinosaurio bebé sobre foamy verde y recórtalo cuidando el dibujo.
Step-Paso.5
Paint the dinosaur in white on its chest, also some green spots, its cute face, and its edges and details in black.
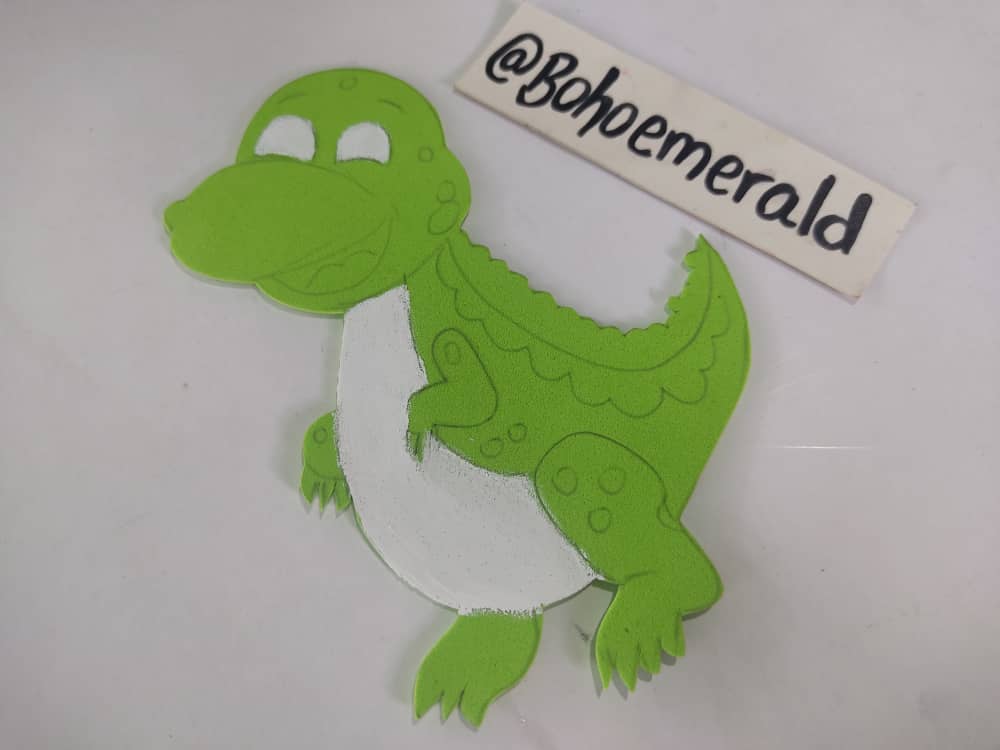
Pinta el dinosaurio de blanco en la parte de su pecho, también algunas manchas verdes, su linda cara, y sus bordes y detalles de negro.
Step-Paso.6
Cut out a slightly larger silhouette of the dinosaur on a piece of yellow foamy, and glue the dinosaur on this silhouette. The idea is to make this silhouette a nice yellow border.
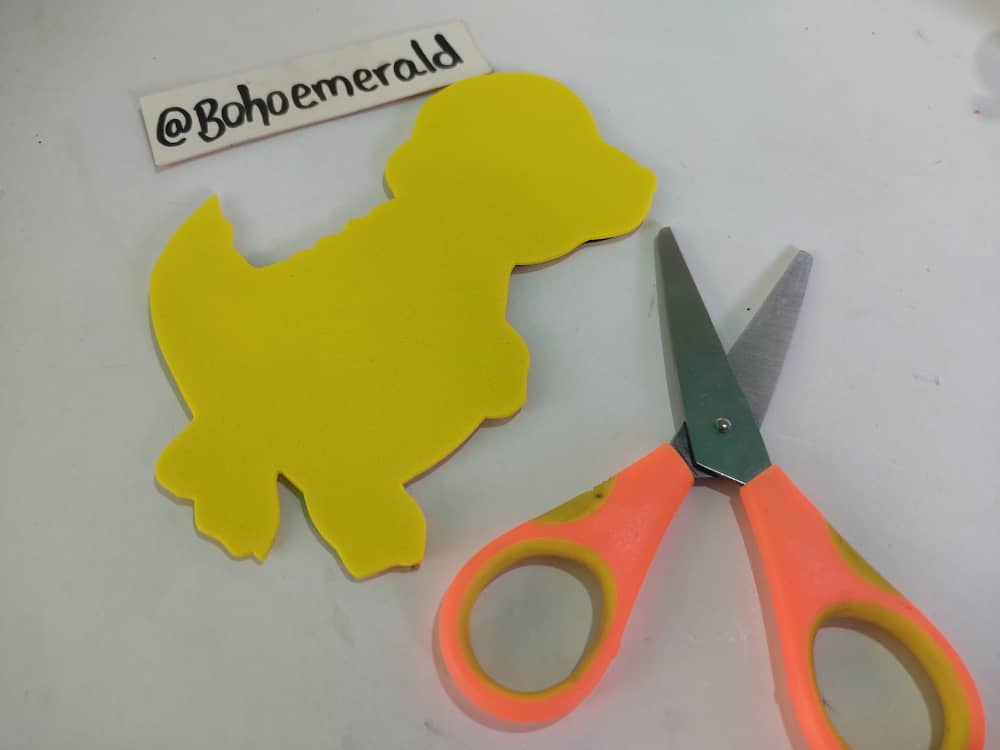
Recorta una silueta del dinosaurio un poco más grande sobre un pedazo de foamy amarillo, y pega el dinosaurio sobre esta silueta. La idea es que esta silueta sea un borde amarillo bien lindo.
Step-Paso.7
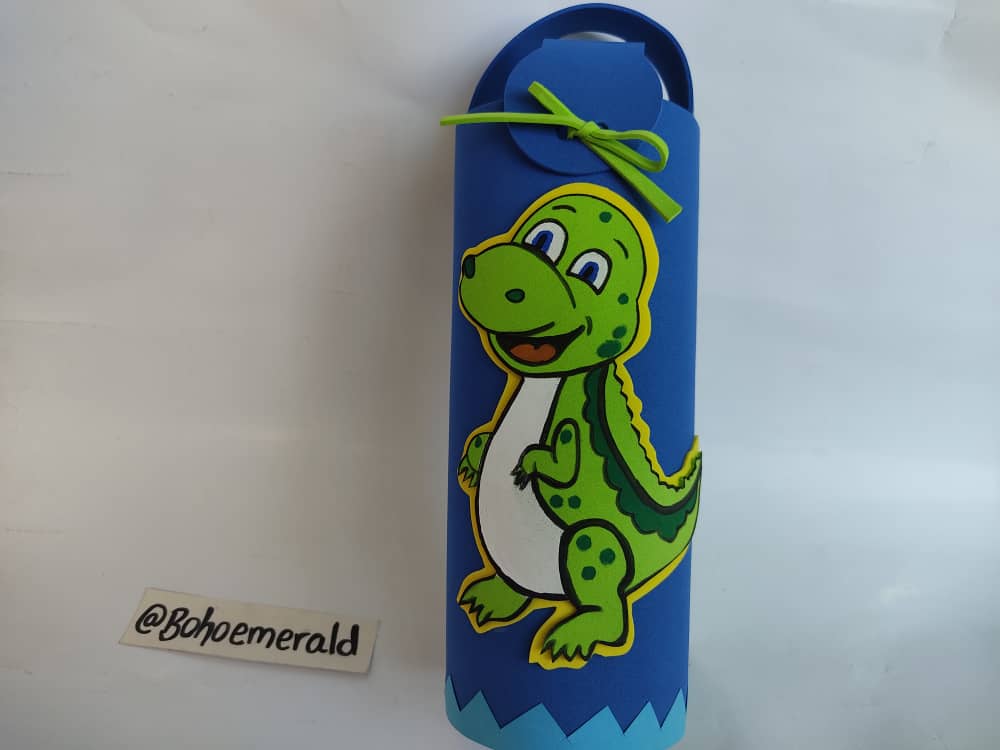
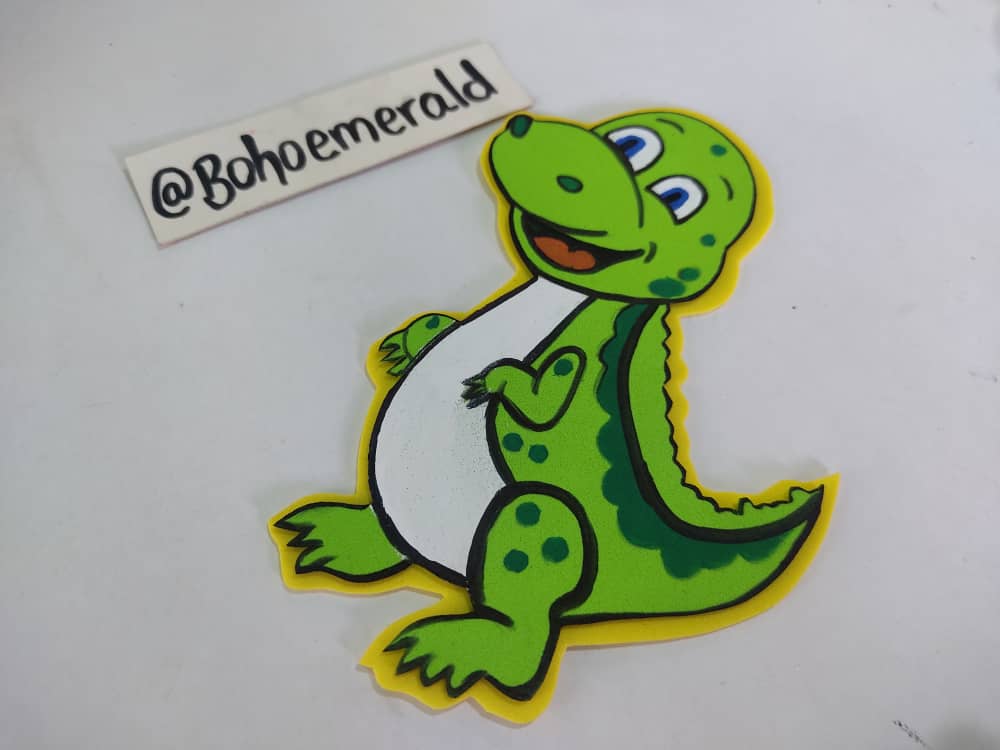
Glue this cute dinosaur to the bag and cut out a blue strip with one of the ends cut out like a zic zac and glue it to the bottom of the bag. This will be a great option to carry our water thermos very comfortable and original.
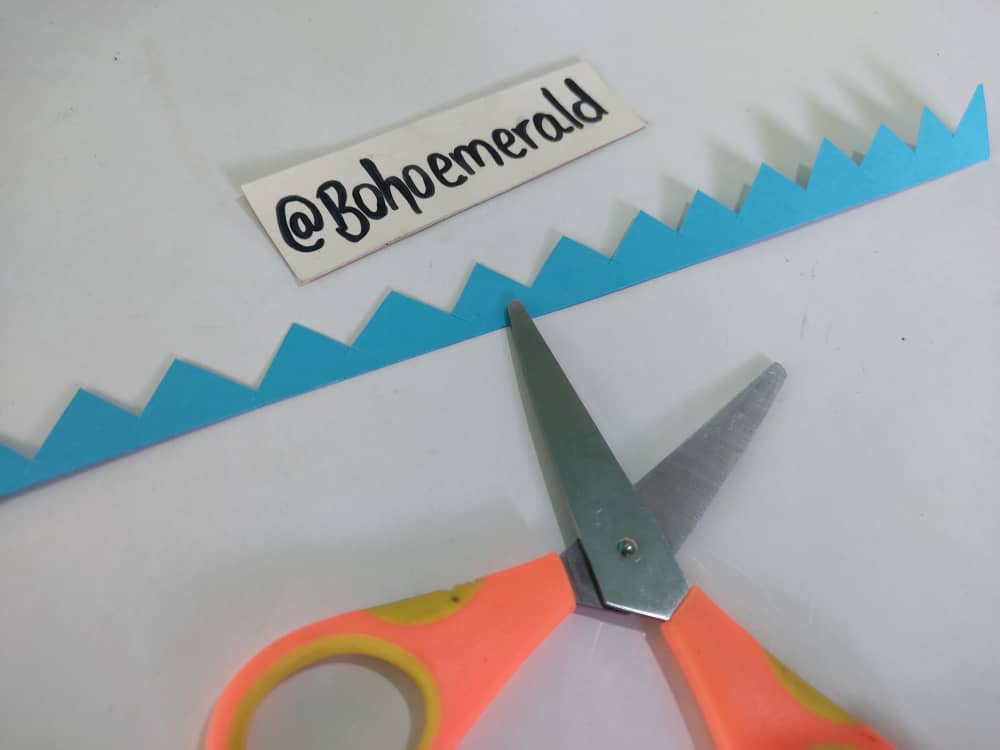
Pega este bonito dinosaurio al bolso y recorta una tira de color azul y que uno de los extremos sea recortado tipo zic Zac y pégala en la parte inferior del bolso. Esta será una opción muy genial para llevar nuestro termo de agua muy cómodo y original.
Making crafts like this is a lot of fun, especially to see the final result of what we put so much effort and love into. And even better if they are made in the company of the smallest of the house and even in pairs. I hope you liked this thermal cup bag made with lots of love for the hive community.
Hacer manualidades como esta es algo muy divertido, sobre todo ver el resultado final de aquello a que le pusimos tanto esfuerzo y amor. Y mejor aún si se hacen en compañía de los mas pequeños de la casa e incluso en parejas. Espero que les haya gustado este bolso de vaso térmico hecho con mucho amor para la comunidad de hive.
Thank you very much for coming to join me in this new adventure, I hope you can get to know me a little more, and that you invite me to be part of your groups of friends.
Muchas gracias por venir a acompañarme en esta nueva aventura, espero que puedan conocerme un poco mas, y que me inviten a formar parte de sus grupos de amigos.
Hola te quedó bello el bolsito para termos, se ve muy práctico y sencillo de realizar,
What a beautiful container for thermos, very nice work, I loved it, greetings🤗