🇺🇸
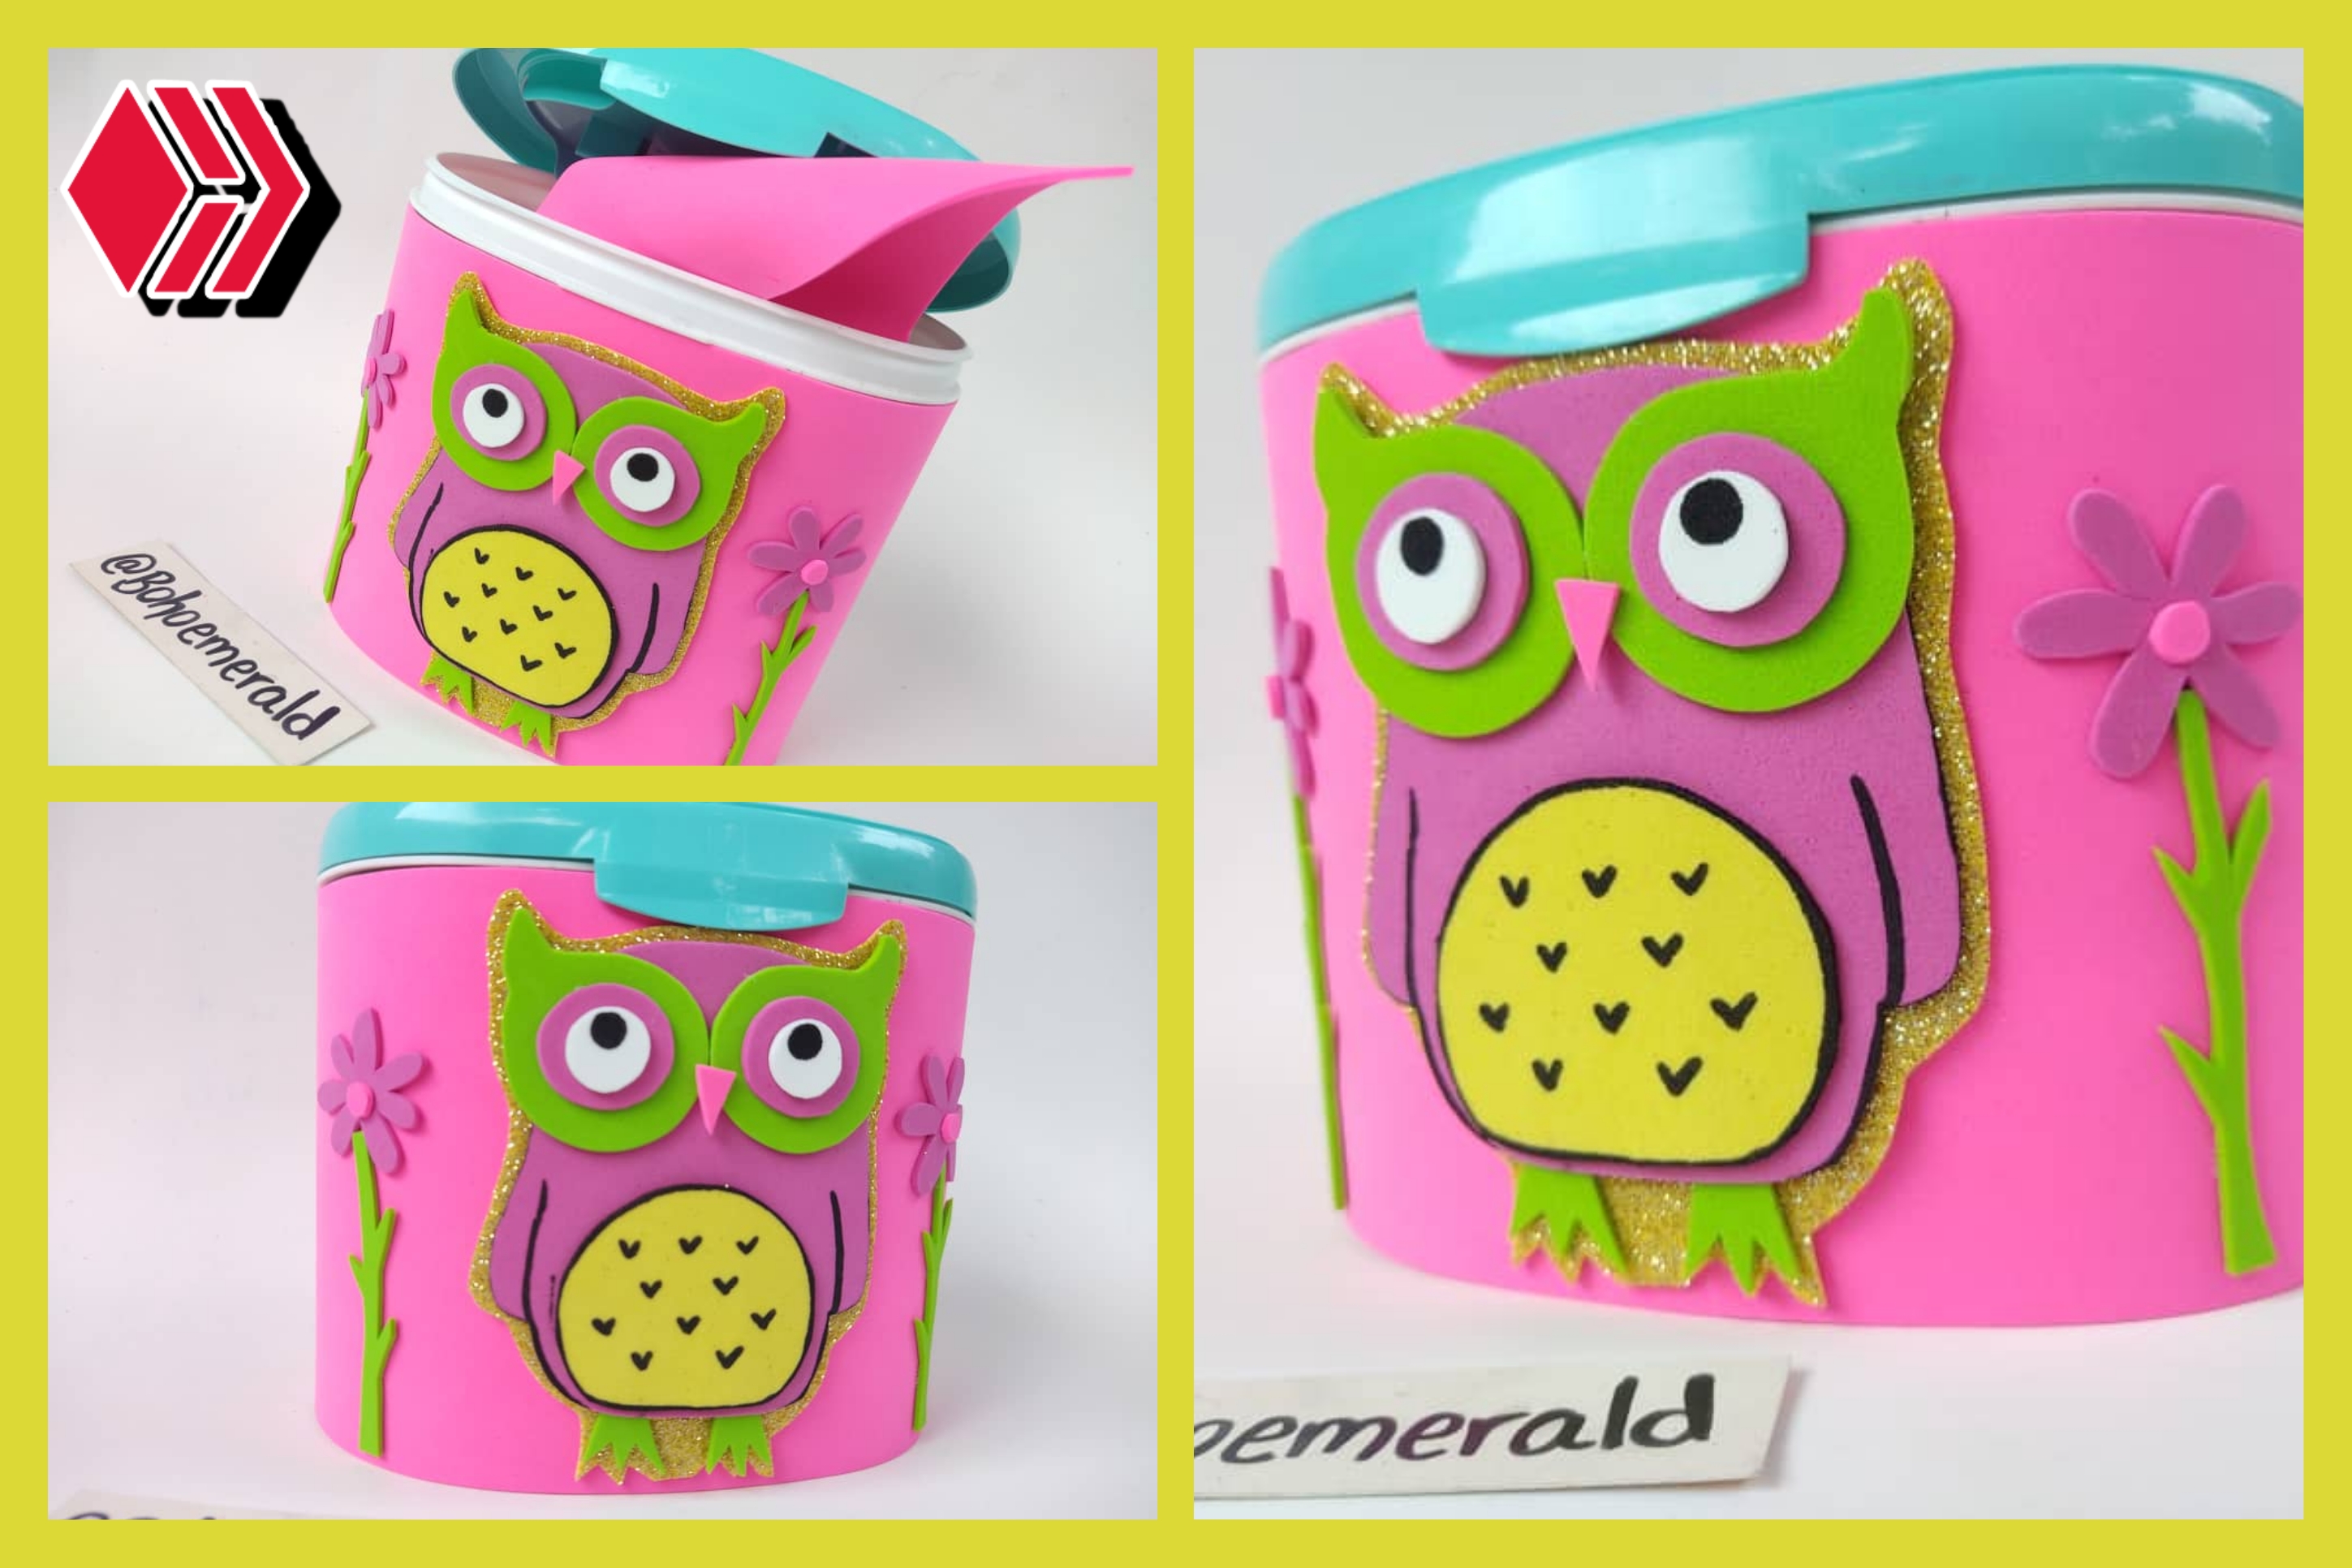
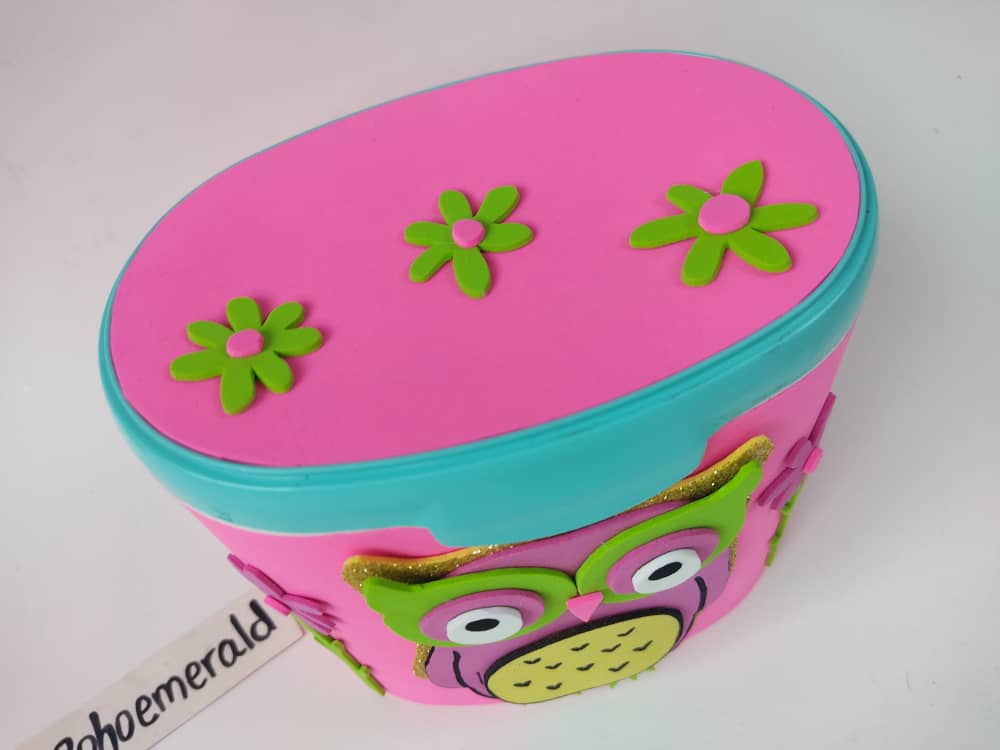
Hello again beautiful HiveDiy community, this new day I have made a multipurpose container for with Owl appearance and the best thing is that everyone will be able to see how I did it, since for that I have described a very simple step by step that anyone can follow and try it at home, you can even make more these for sale and thus get some extra income or just give it as a gift to any boy or girl. I hope you can join me and enjoy my content for the day.
🇪🇸
Hola nuevamente hermosa comunidad HiveDiy, este nuevo día he realizado un envase multiuso para con apariencia de Búho y lo mejor es que todos podrán ver como lo hice, ya que para eso he descrito un paso a paso muy sencillo que cualquiera puede seguir e intentarlo en casa, incluso hasta pueden hacer mas estos para su venta y así obtener algunos ingresos extras o simplemente regalárselo a cualquier niño o niña. Espero que puedan acompañarme y disfrutar de mi contenido del día.
☆ Thermos cup bag ☆

-- Materials --
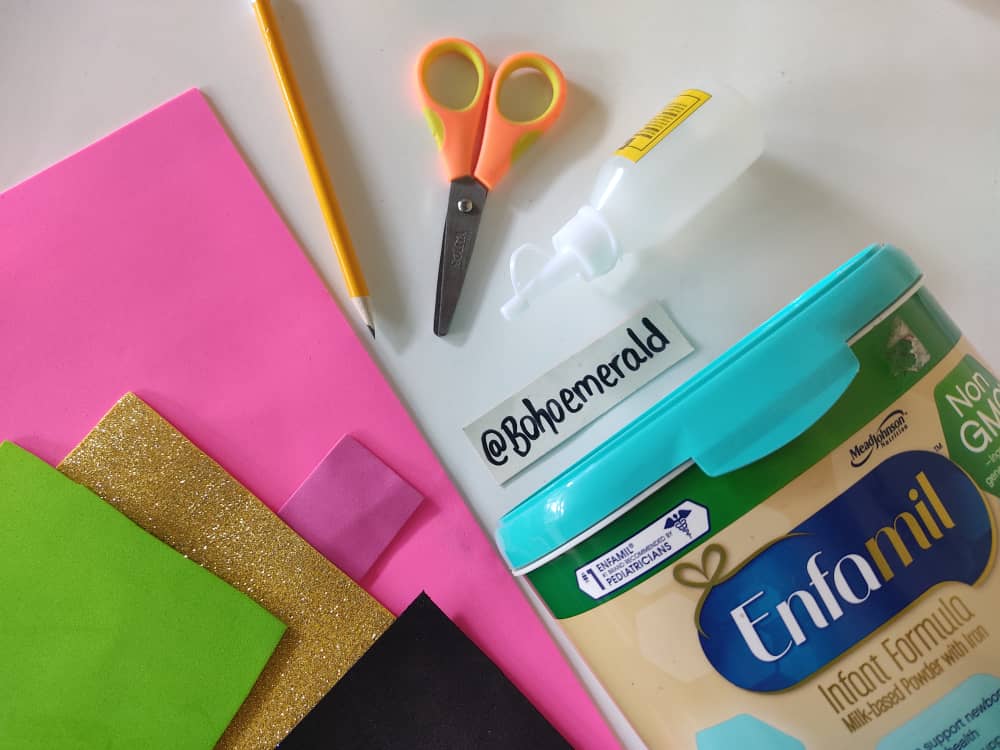
To make this owl-like container I used different colored foamy sheets, glue, graphite pencil, marker, scissors, paints, brushes, and a graduated ruler.
-- Materiales --
Para hacer este envase con apariencia de búho utilicé hojas de foamy de diferentes colores, pegamento, lápiz de grafito, marcador, tijera, pinturas, pinceles, y una regla graduada.
--Step by step - Paso a paso --
Step-Paso.1
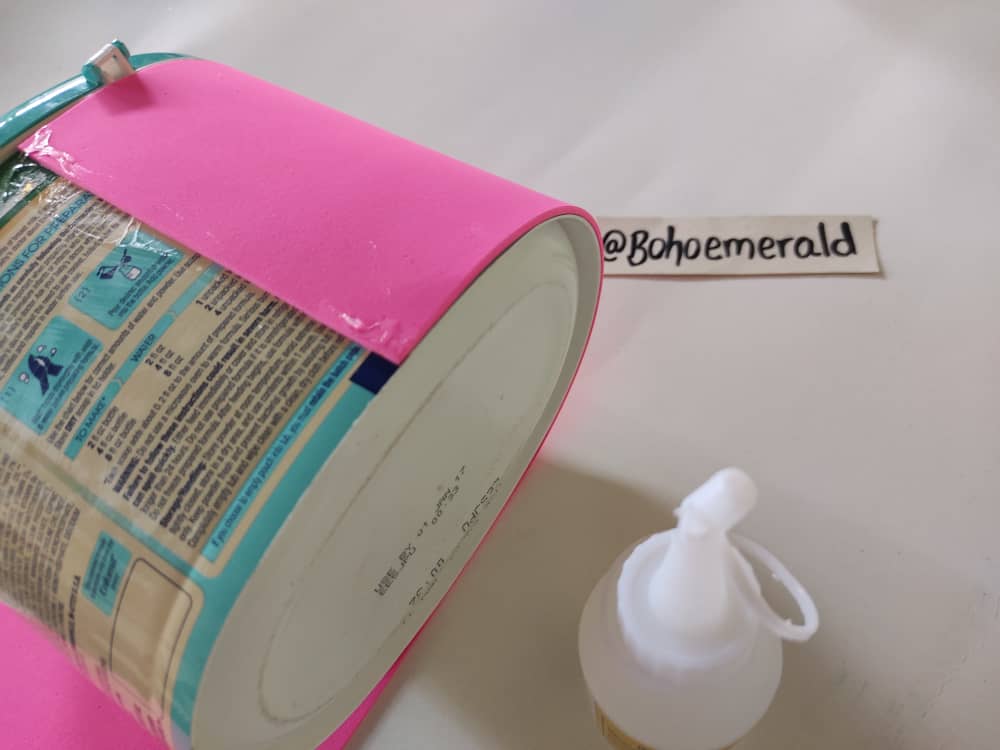
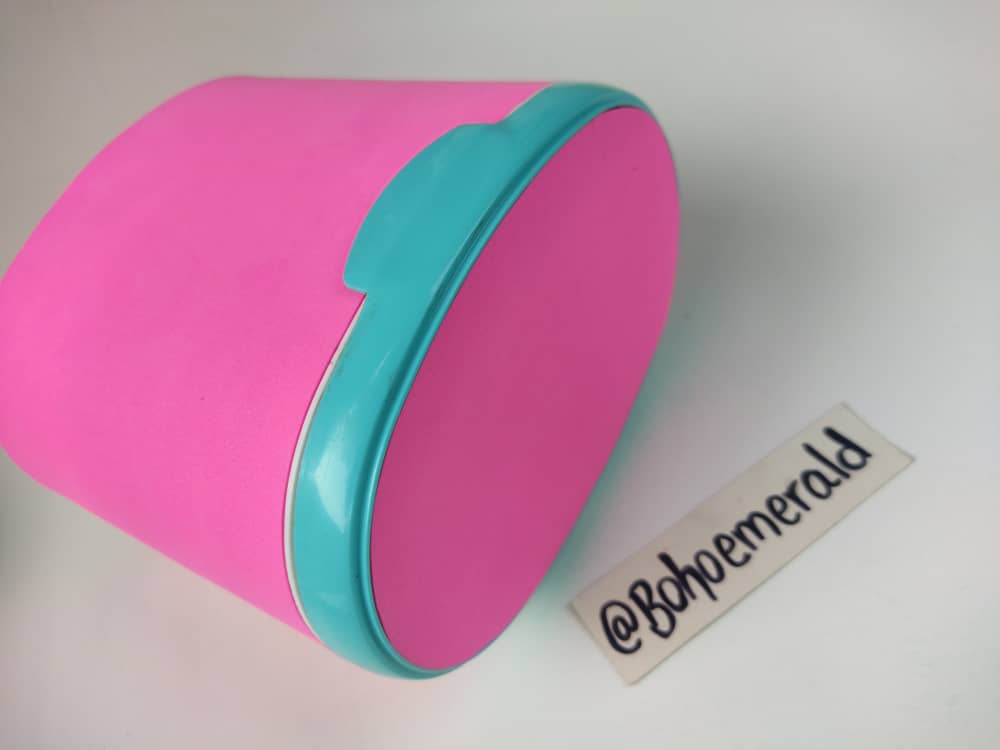
Trace the size of the body of the disposable container on a sheet of fuchsia colored foamy or any other color you have at hand. To get the cover of the body you only have to measure the height and diameter and then get a perfect rectangle that will cover the body of the can. Then we just have to glue it very well using a good glue.

Traza la medida del cuerpo del envase descartable en una hoja de foami de color fucsia o del color que tengas a la mano. Para obtener la cubierta del cuerpo solo debes medir la altura y el diámetro para luego obtener un rectángulo perfecto que cubrirá el cuerpo de la lata. Después solo debemos pegarlo muy bien utilizando un buen pegamento.
Step-Paso.2
Do the same procedure with the lid, mark the measurement, cut it out, and glue it to give shape to this new item.
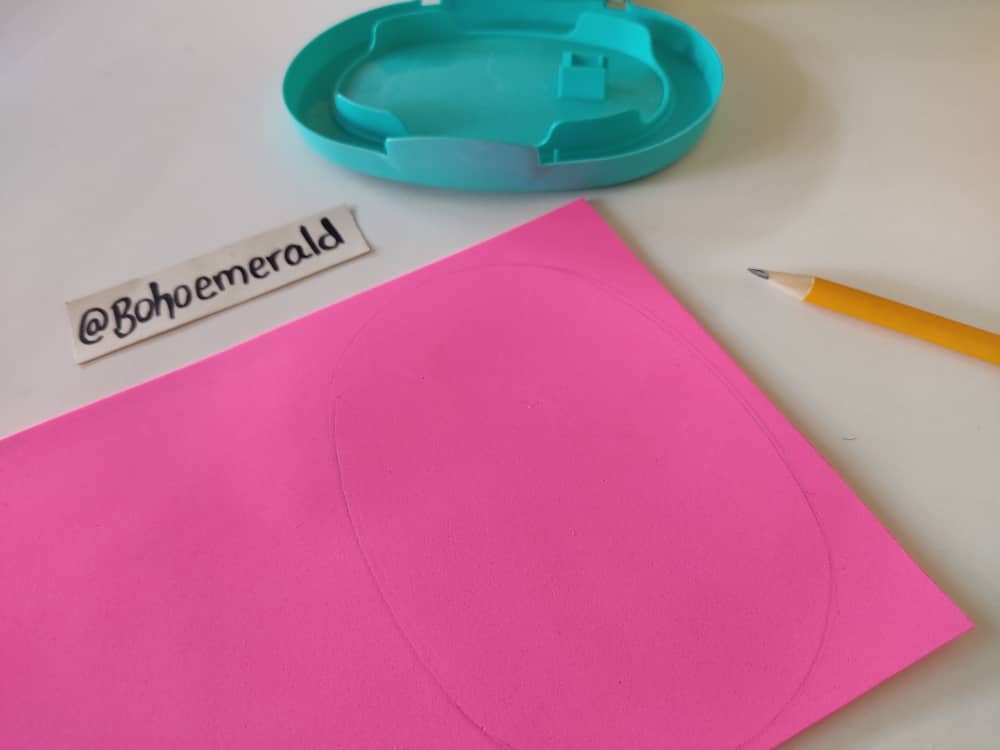
Realiza el mismo procedimiento con la tapa, marca la medida, recorta, y pégala para darle forma a este nuevo articulo.
Step-Paso.3
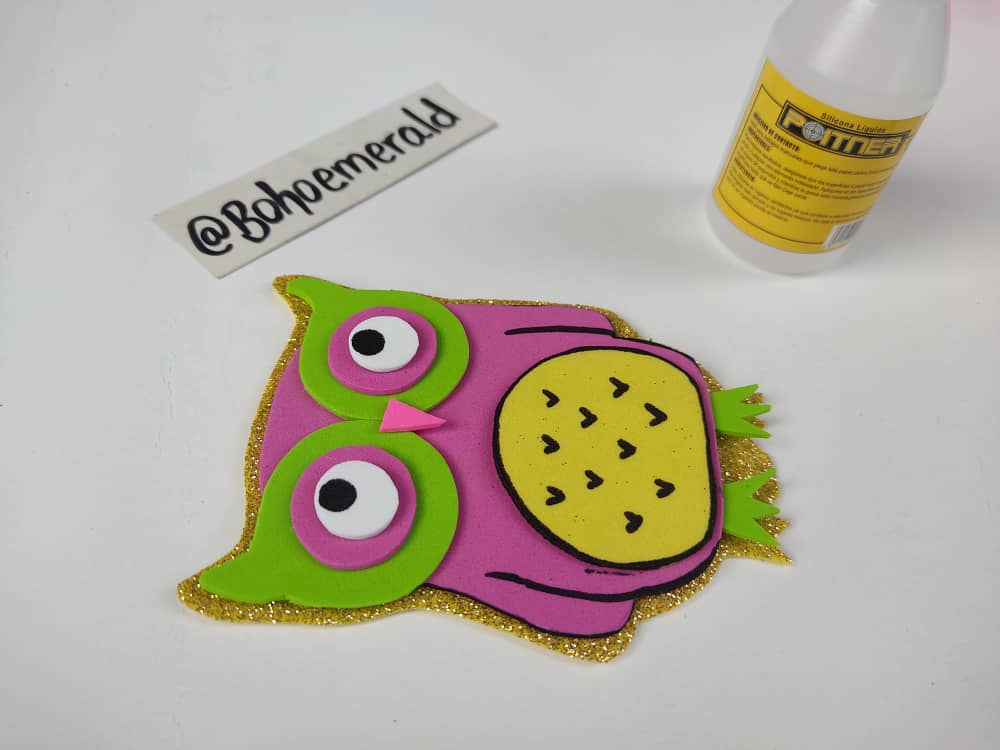
To give the authentic touch, design a cute owl with big eyes and little legs, all in foamy of different colors.
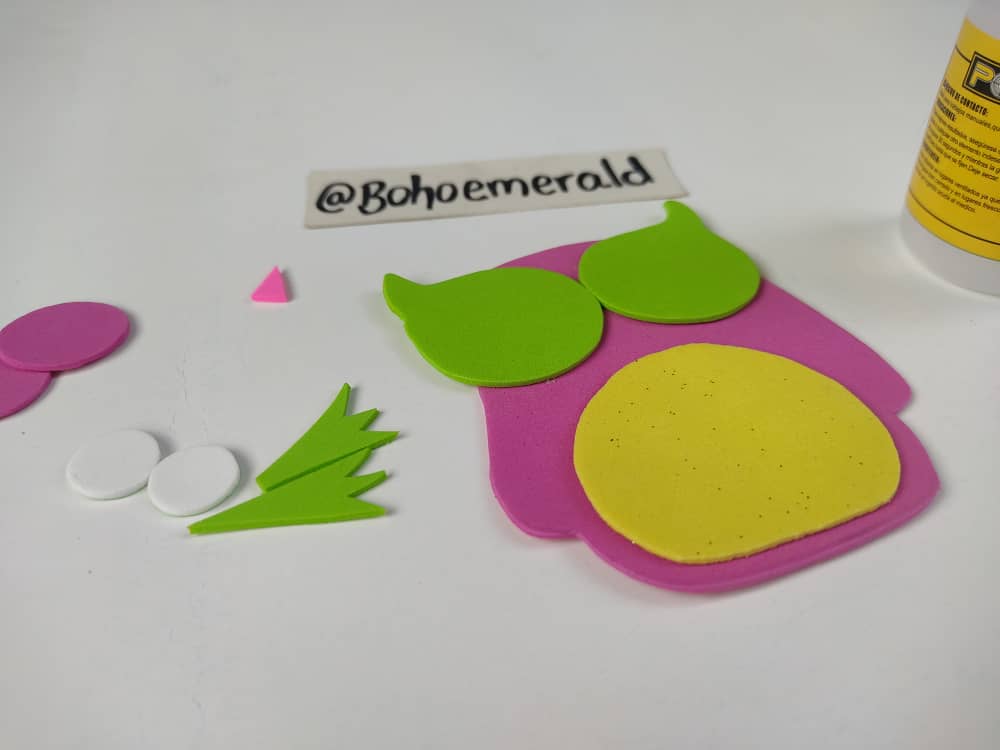
Para dar el toque auténtico diseña un lindo búho con unos ojos bien grandes y sus patitas sinigual, todo en foamy de diversos colores.
Step-Paso.4
To finish, design some foamy flowers to decorate the lid and glue the owl on the body of the container, and that's it.
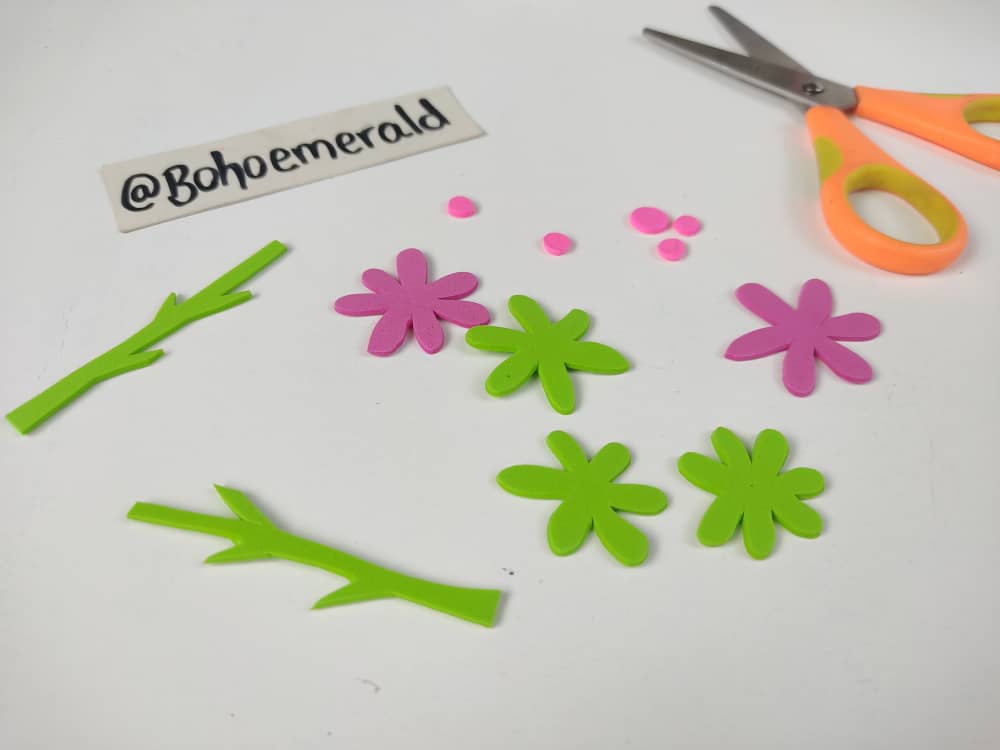
Para terminar, diseña unas florecitas de foamy para decorar la tapa y pega el búho en el cuerpo del envase, y listo.

Making crafts like this is a lot of fun, especially to see the final result of what we put so much effort and love into. And even better if they are made in the company of the smallest of the house and even in pairs. I hope you liked this thermal cup bag made with lots of love for the hive community.
Hacer manualidades como esta es algo muy divertido, sobre todo ver el resultado final de aquello a que le pusimos tanto esfuerzo y amor. Y mejor aún si se hacen en compañía de los mas pequeños de la casa e incluso en parejas. Espero que les haya gustado este bolso de vaso térmico hecho con mucho amor para la comunidad de hive.
Thank you very much for coming to join me in this new adventure, I hope you can get to know me a little more, and that you invite me to be part of your groups of friends.
Muchas gracias por venir a acompañarme en esta nueva aventura, espero que puedan conocerme un poco mas, y que me inviten a formar parte de sus grupos de amigos.
The rewards earned on this comment will go directly to the people sharing the post on Twitter as long as they are registered with @poshtoken. Sign up at https://hiveposh.com.
Congratulations @bohoemerald! You have completed the following achievement on the Hive blockchain and have been rewarded with new badge(s):
Your next target is to reach 3500 upvotes.
You can view your badges on your board and compare yourself to others in the Ranking
If you no longer want to receive notifications, reply to this comment with the word
STOPSupport the HiveBuzz project. Vote for our proposal!
Te quedó hermosa esta decoración. Gracias por compartir.
🎆🎇🎉🎊🌧️💐✨🌾🌱🌹🌙🌿🍃🥀⚡🌺☘️🍀🌈🌷⭐🪴🌵🌸🌟💮🌴🌳💫☀️💮☔🌲🌳🌍🌌🌠☄️🏵️🐝🌻🌼🍄🐞🦋💙☕💜🍍🎆🎇🎉🎊
Quedó bellísimo!! El búho me encanta🤗 excelente idea.
Hola bello trabajo me gusto mucho, es una manualidad multifuncional se puede usar como cotillón, para guardar las colitas de las nenas en fin para el uso que le de cada quién, gracias por compartir🤗