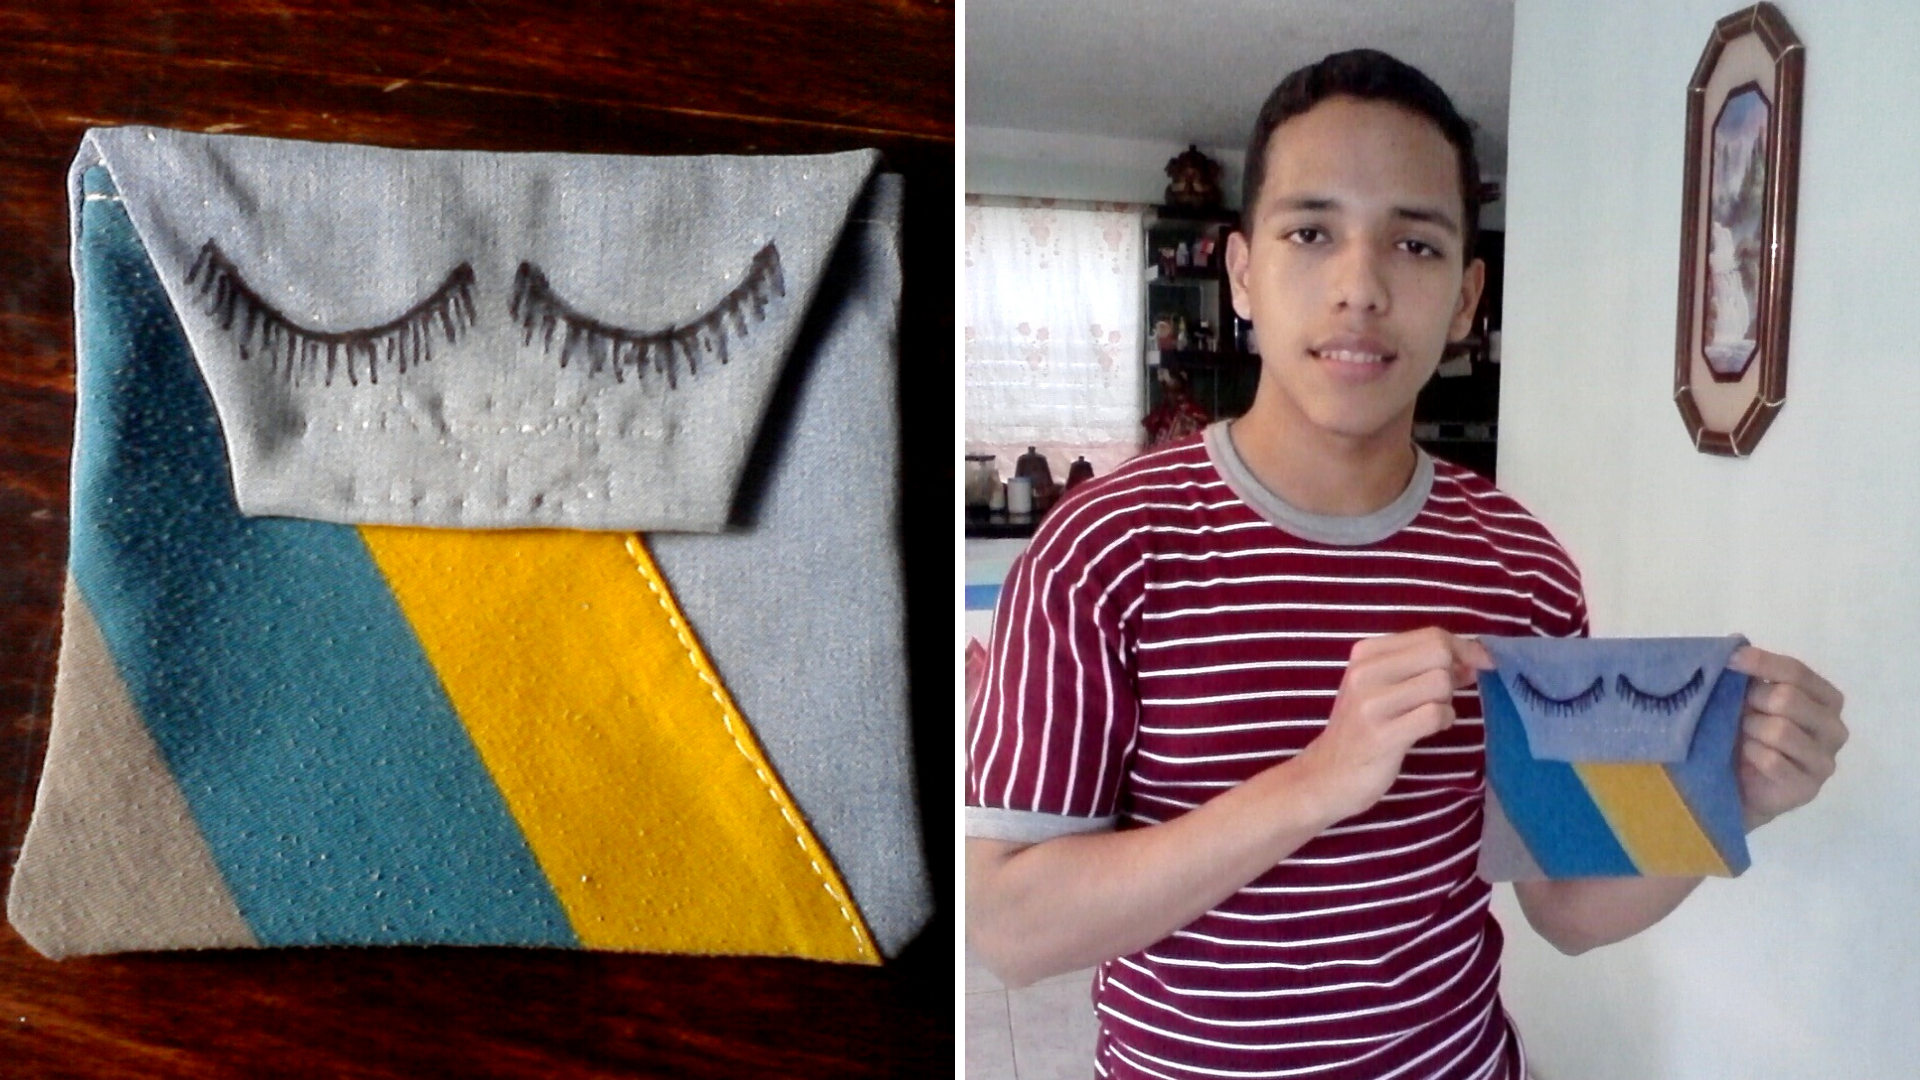
Hello friends of Hive diy, today I am going to share with you my participation in this week's contest which is to make a cosmetic holder, at first when I saw it, the first thing I said was hey I will not be able to participate this week in the contest, because that is for women, but today I decided to make one, I started to think why not do it and so I give it to my aunt who needs one. Let's start.
Español:
Materiales:
- Un retazo de tela de un pantalón jeans que ya no usaba.
- Un retazo de tela de raya de varios colores.
- Hilo.
- Aguja.
- Tijera.
- Cierre mágico.
- Lápiz.
- Marcador.
English:
Materials:
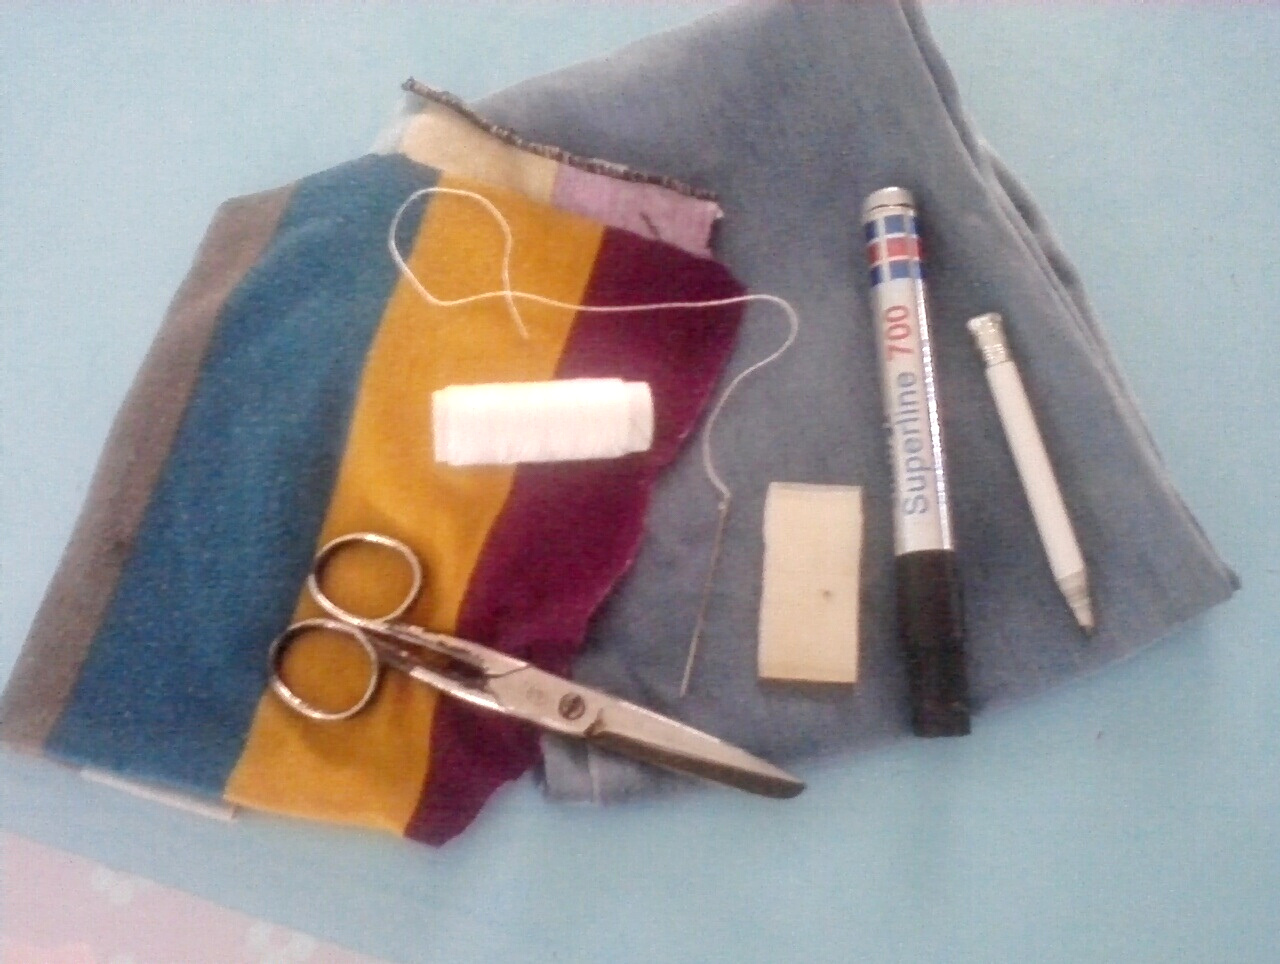
- A piece of fabric from a pair of jeans that I no longer wore.
- A piece of stripe fabric of various colors.
- Thread.
- Needle.
- Scissors.
- Magic zipper.
- Pencil.
- Marker pen.

Español:
Paso 1:
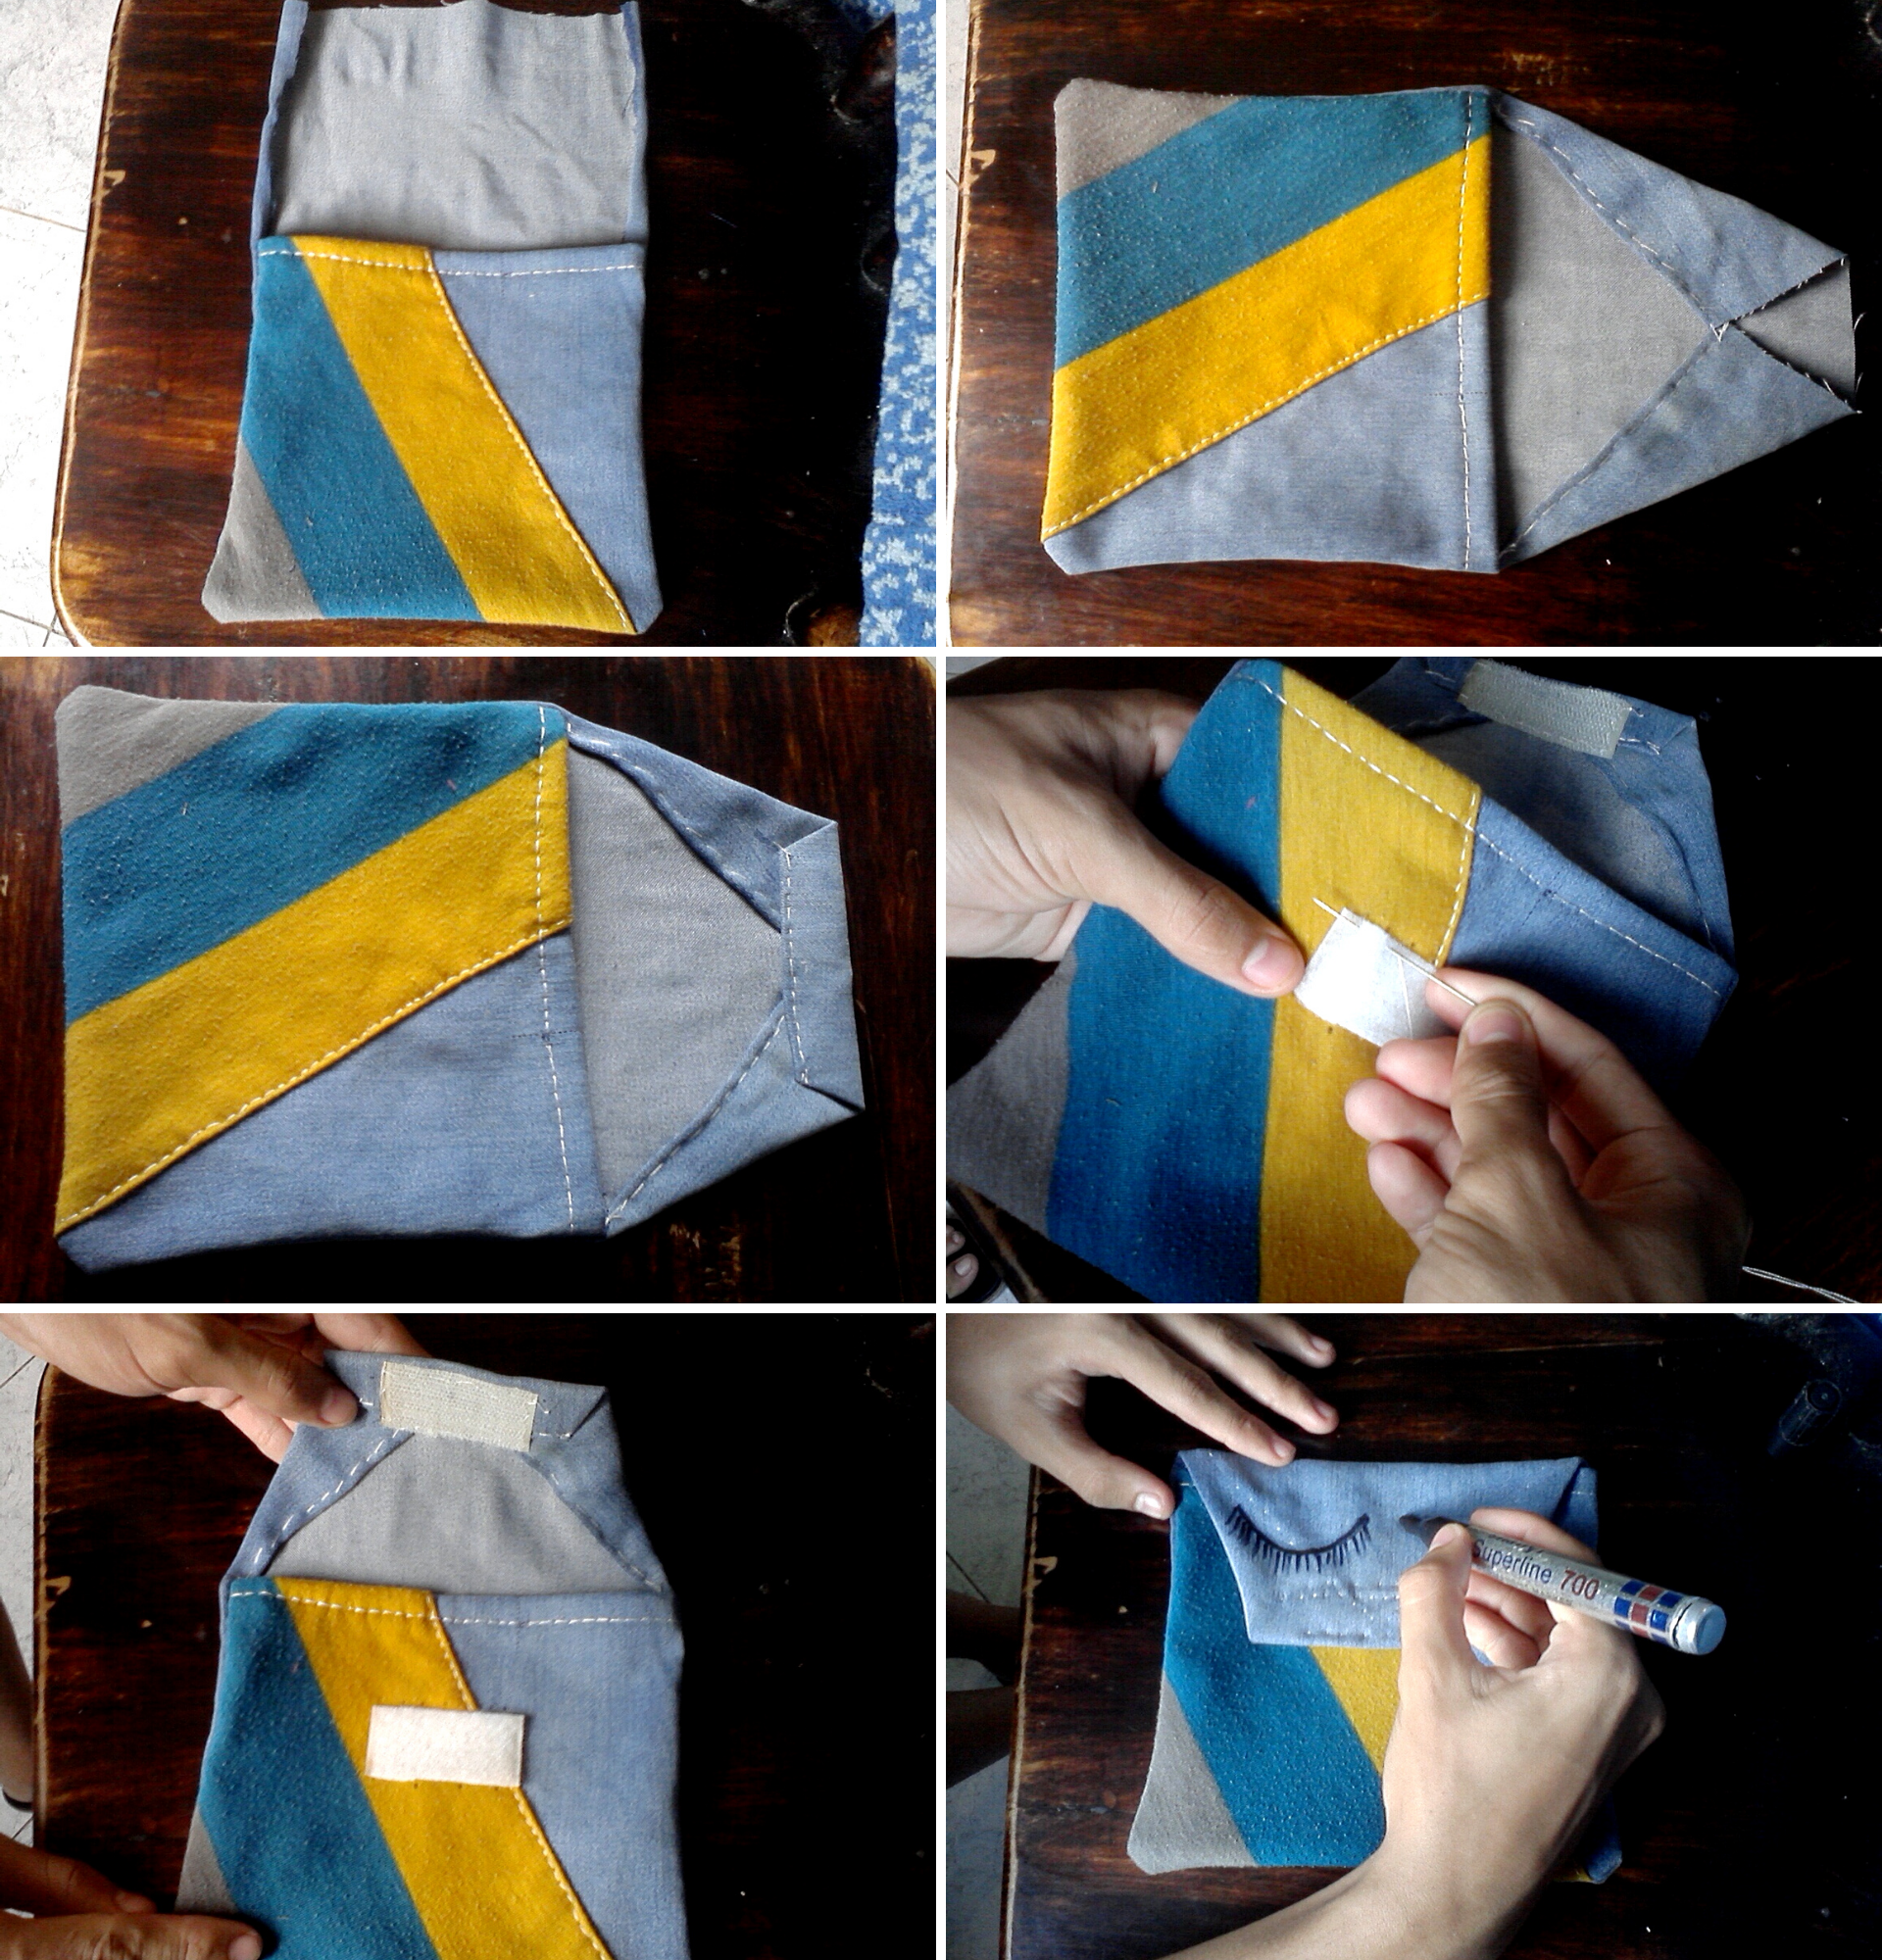
- Recorte dos pedacitos de la tela de jeans, uno de 30 cm de largo x 19 cm de ancho, y el otro más pequeño de 19 cm de ambos lados. luego recorte la tela de raya del mismo tamaño de la tela pequeña pero en forma triangular, ahora comienzo a coser la tela jeans pequeña junto con la de raya, haciendo un dobles de 1 cm hacia dentro por la parte inclinada de la tela de rayas. Y continuo cosiendo en la parte superior de la tela.
English:
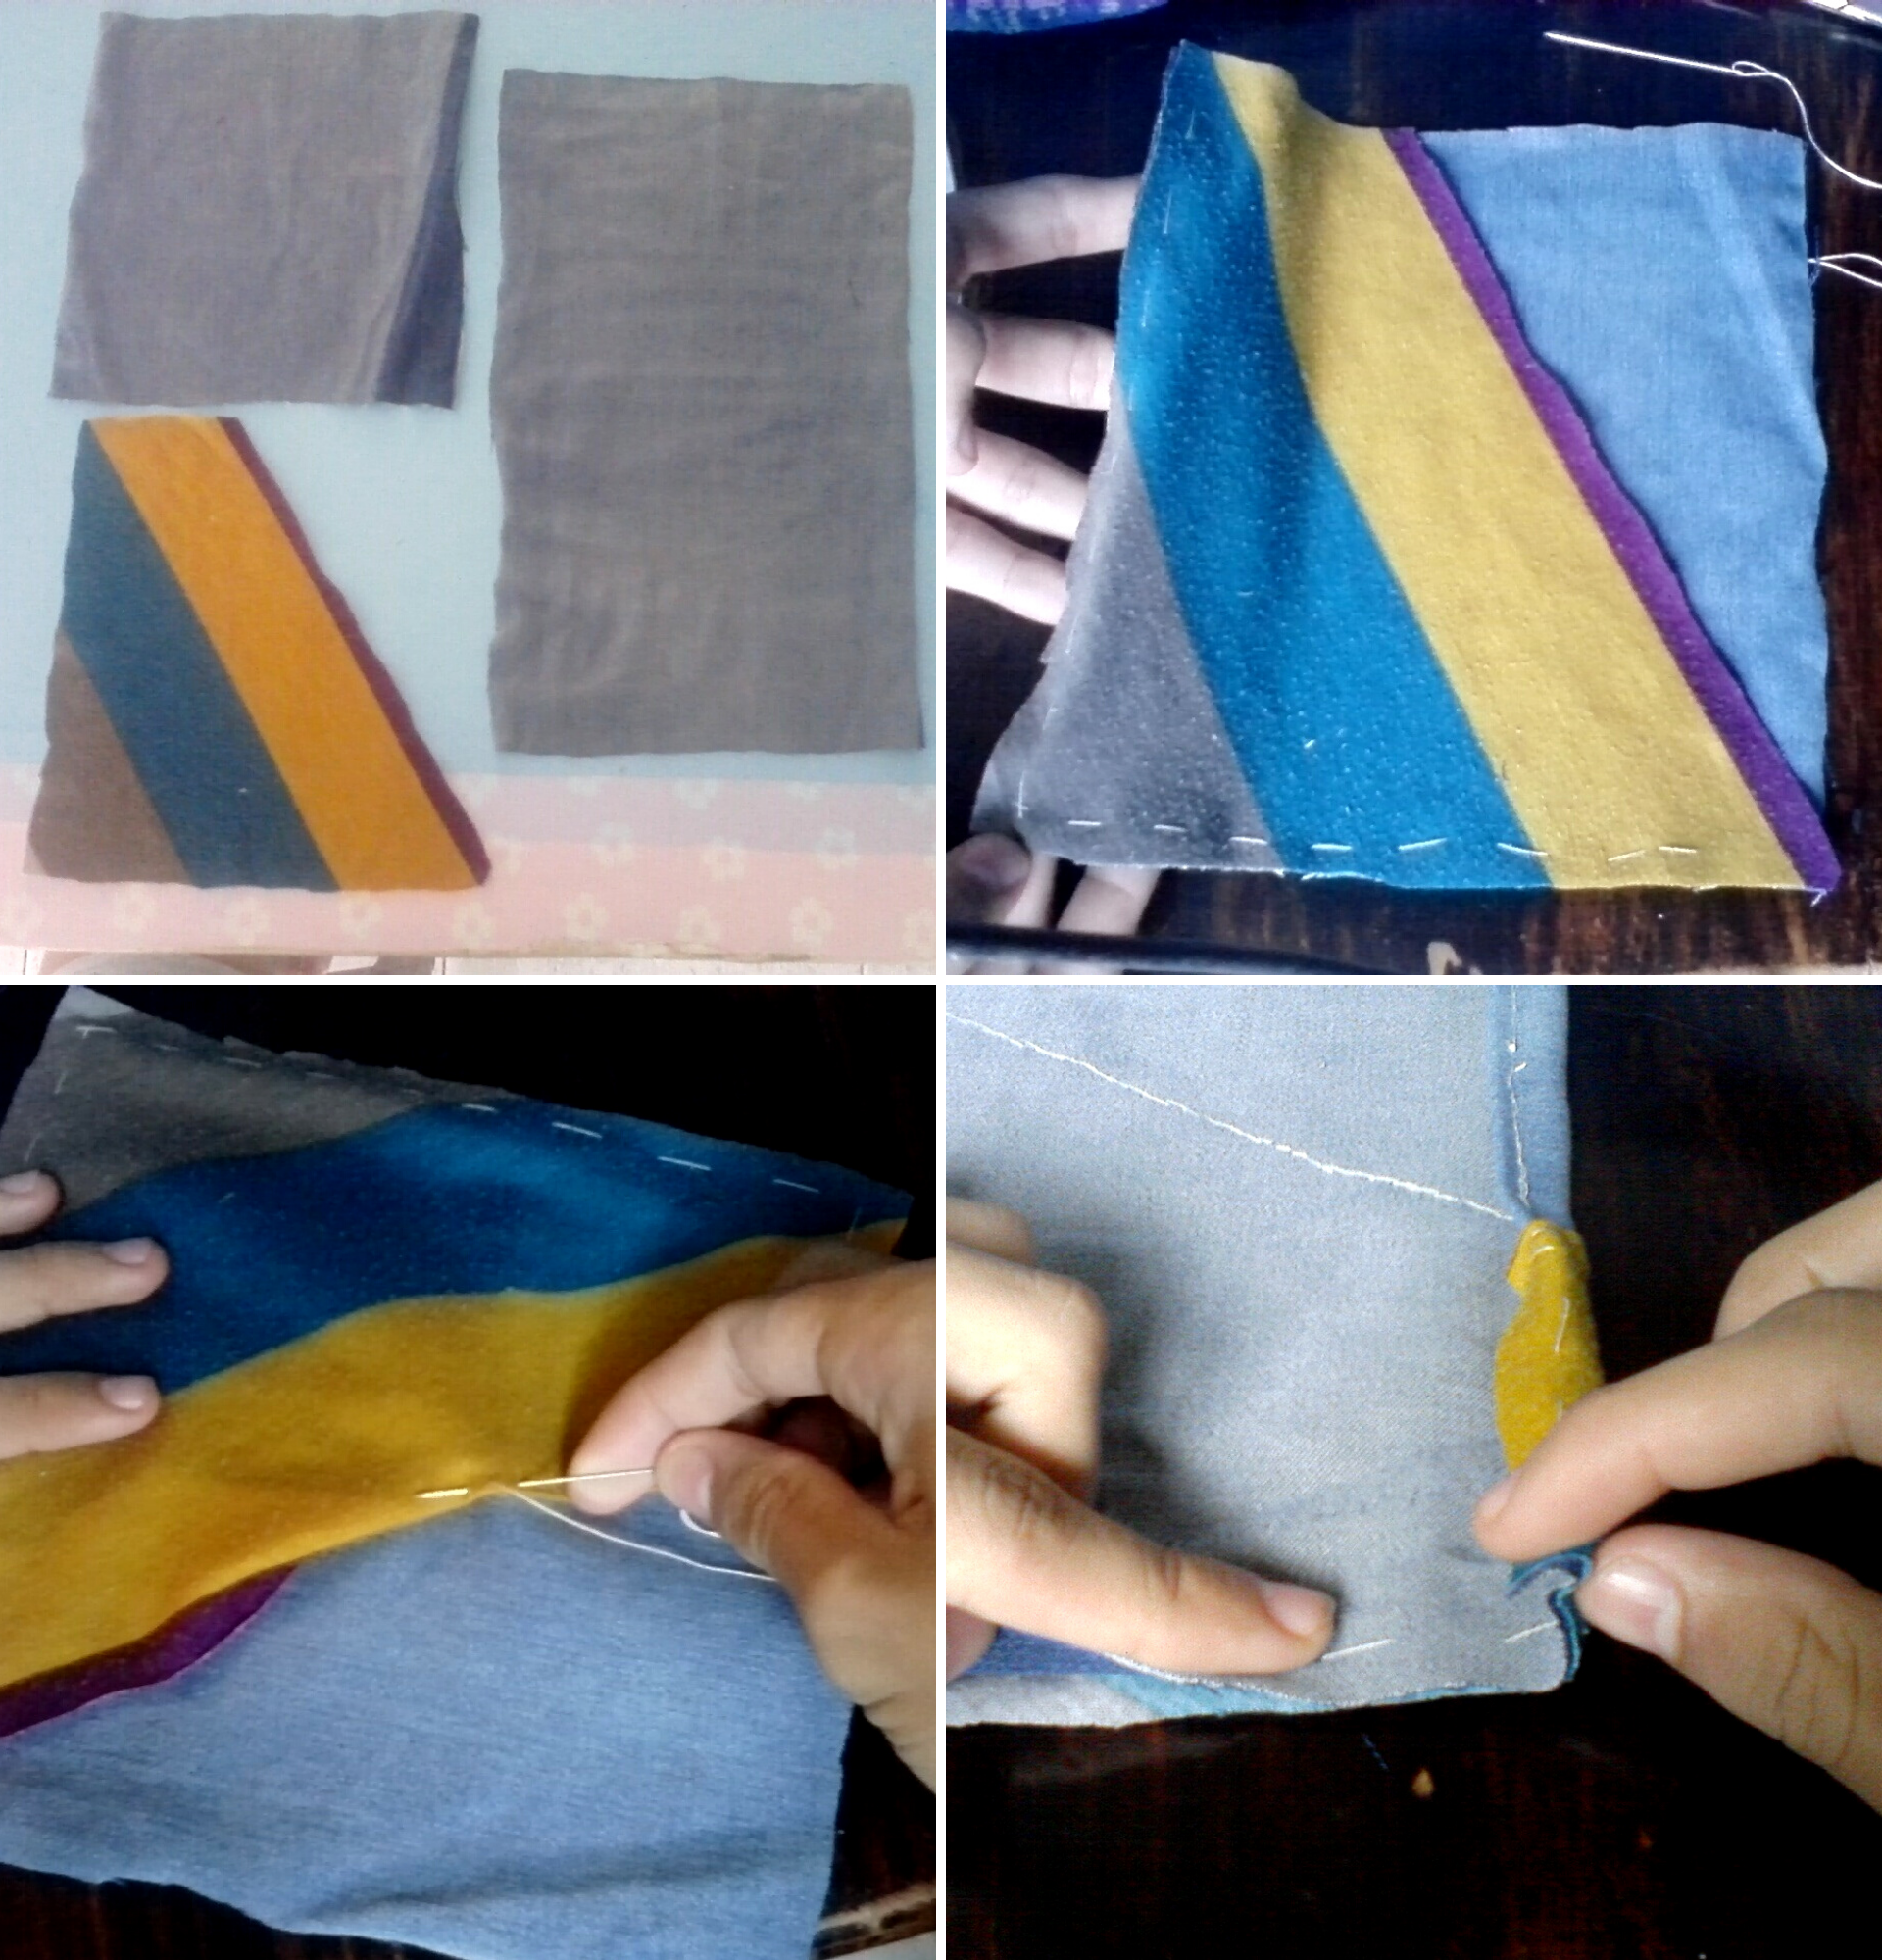
Step 1:
- Cut out two small pieces of the jeans fabric, one 30 cm long x 19 cm wide, and the other smaller 19 cm on both sides. then cut out the stripe fabric of the same size as the small fabric but in a triangular shape, now I start sewing the small jeans fabric together with the stripe fabric, making a 1 cm fold inwards on the slanted part of the stripe fabric. And I continue sewing on the top of the fabric.
Español:
Paso 2:
- Después que tengo la parte frontal del porta cosmético, la coloco del lado al revés en la parte inferior de la otra tela de jeans, la cosemos por los tres lados menos la parte de arriba, y la volteo del lado derecho.
English:
Step 2:
- After I have the front of the cosmetic holder, I place it upside down on the bottom of the other denim, sew it on all three sides except the top, and flip it right side out.
Español:
Paso 3:
- Ahora la dos puntas de arriba la doblamos hacia dentro, uniendo punta con punta, luego se hace otro dobles como lo muestro en la foto y cosemos, para luego coser el cierre mágico, y termino realizando un pequeño detalle dibujando con el marcador negro unas pestañas.
English:
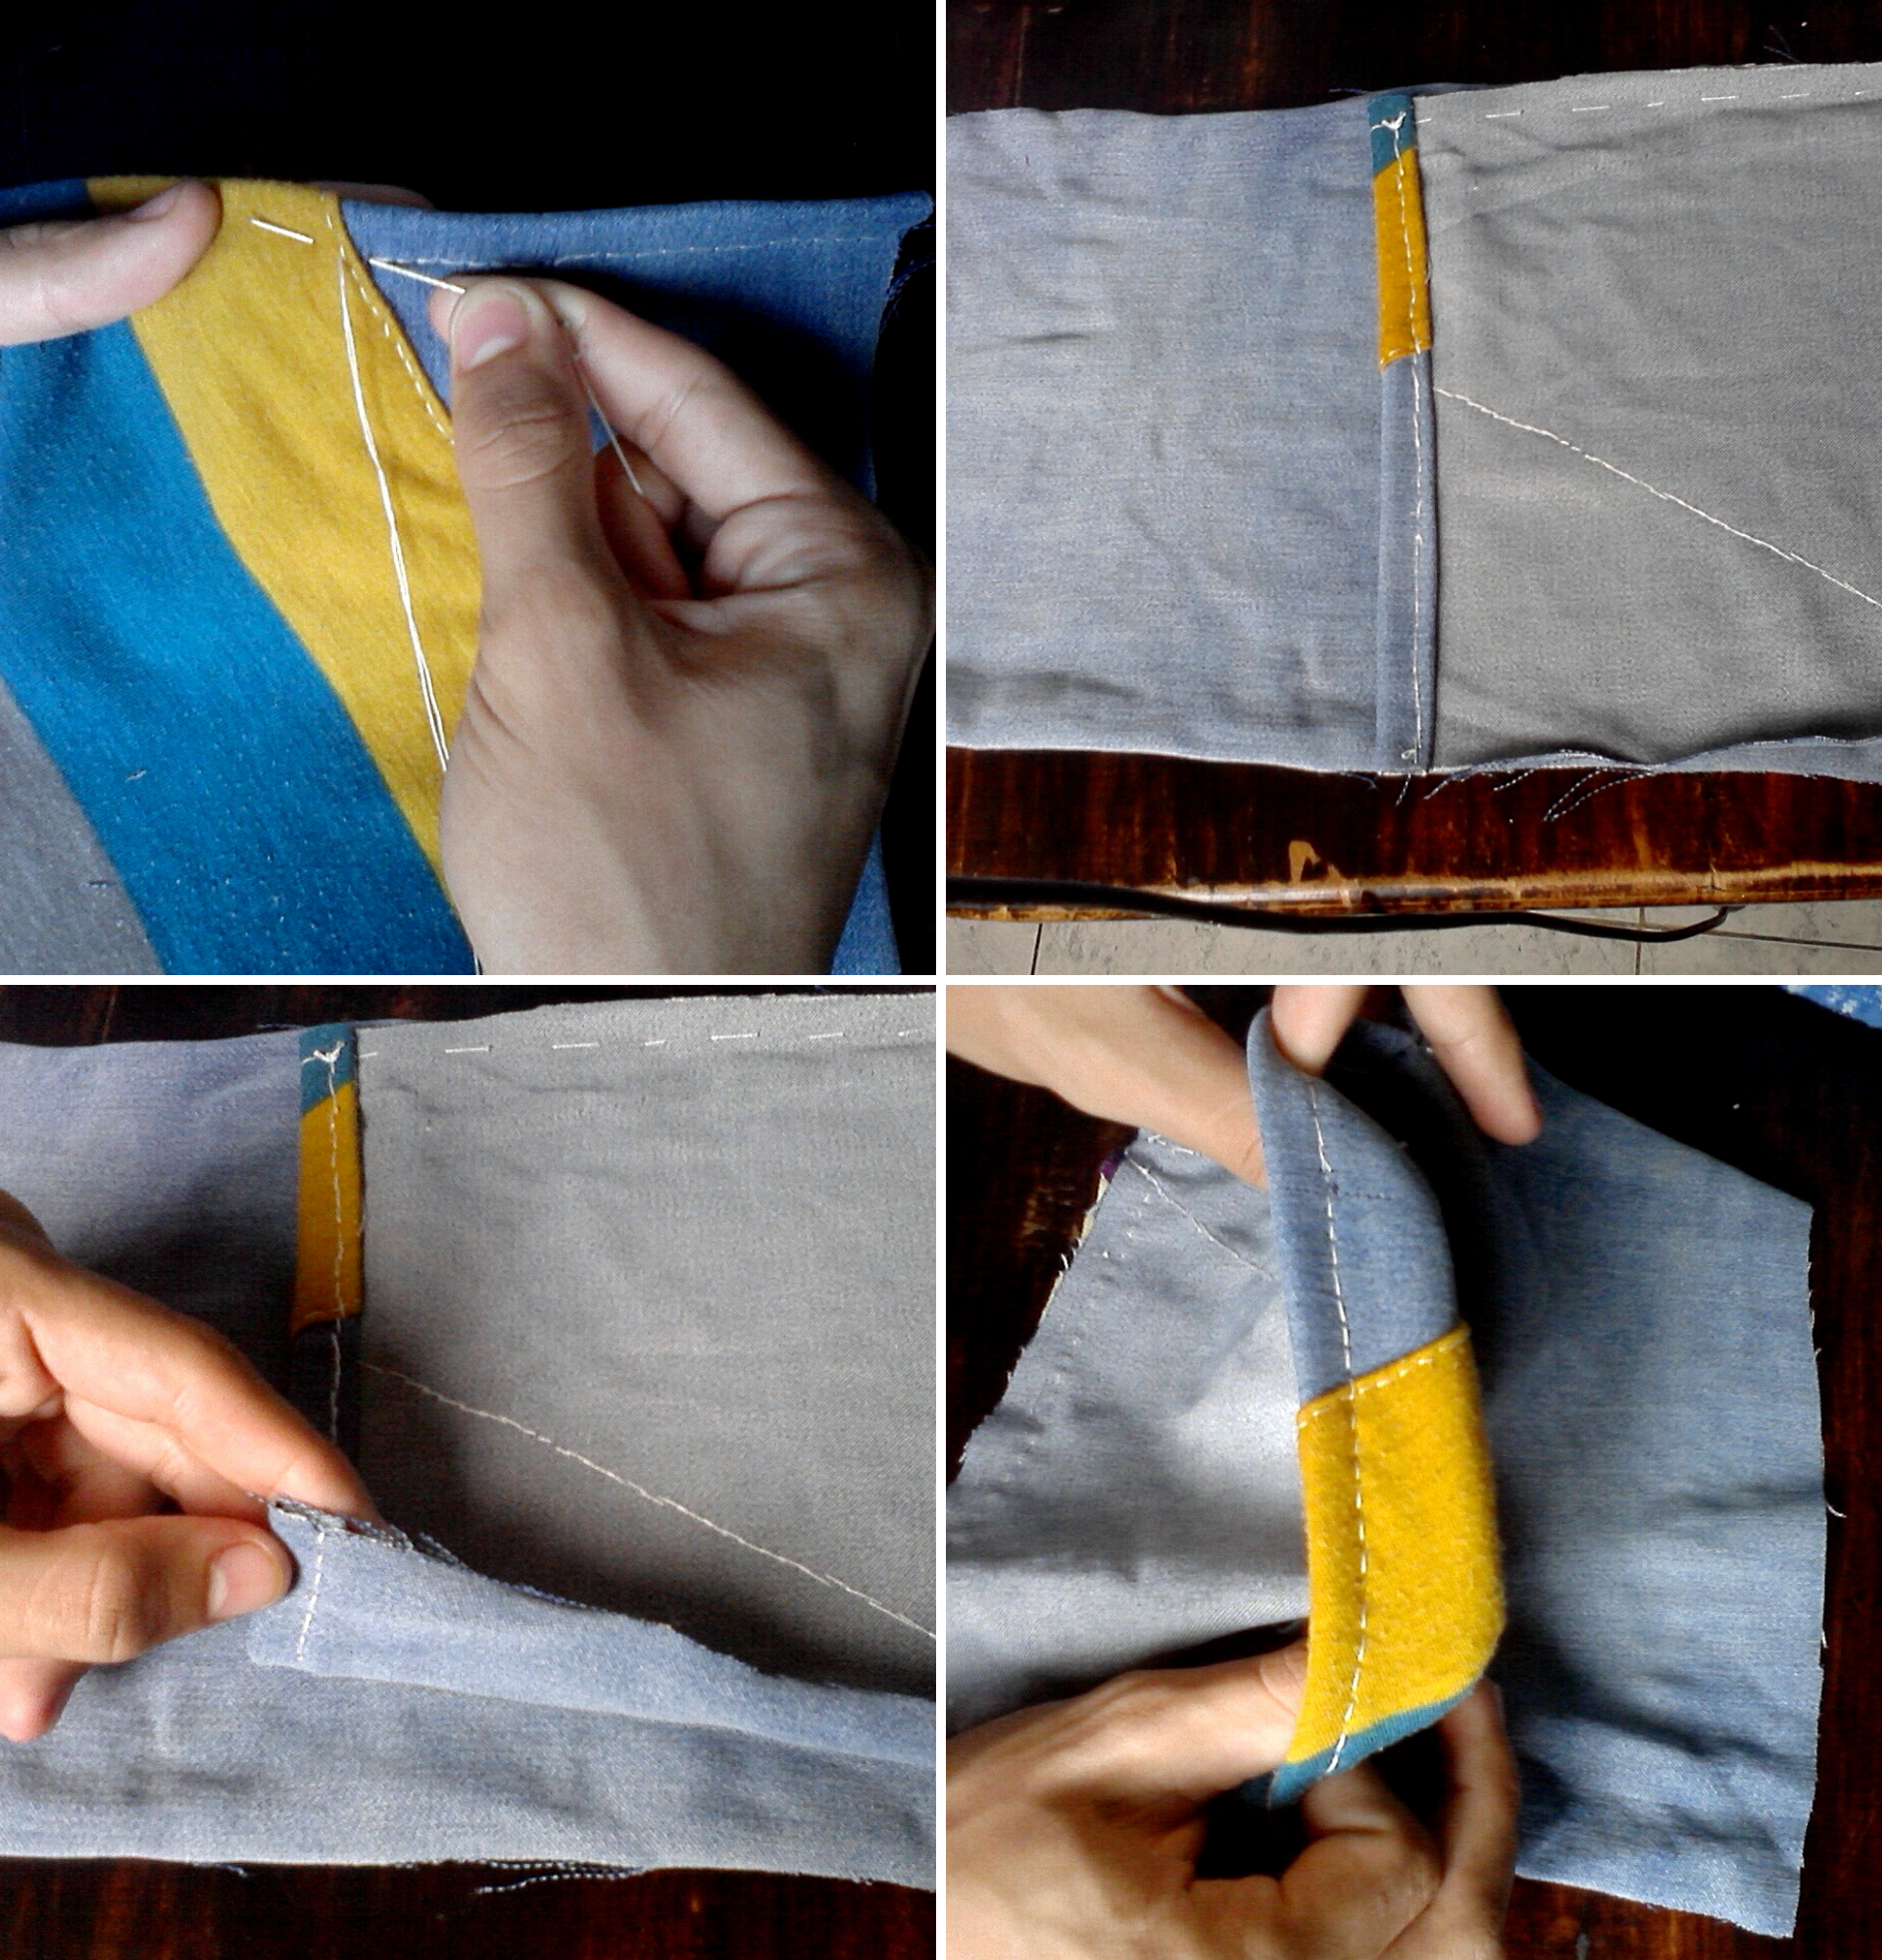
Step 3:
- Now we fold the top two ends inwards, joining end to end, then we make another fold as shown in the photo and sew, and then sew the magic clasp, and I finish making a small detail by drawing with the black marker some tabs.
Este es el resultado final, espero les haya gustado. Invito a mi amiga @eribetzi a participar, saludos a todos.
This is the final result, I hope you liked it. I invite my friend @eribetzi to participate, greetings to all.
.png)
.png)
.png)
.png)
Todas las fotos son de mi autoria y editadas con Canva.
All the photos were taken by me and edited with Canva.
Estoy segura que tu tía a quedado muy contenta. El concurso no es para mujeres solamente querido, que hay de los sastres? los que elaboran estos bolsos para la venta? que hay de los maquillistas?. Nosotros somos felices que todos participen. Déjame felicitarte por que el cosido que hiciste te ha quedado muy prolijo.