Saludos Cordiales/Best regards
Amigos, Bienvenidos una vez más a mi Blog/Friends, welcome once again to my Blog
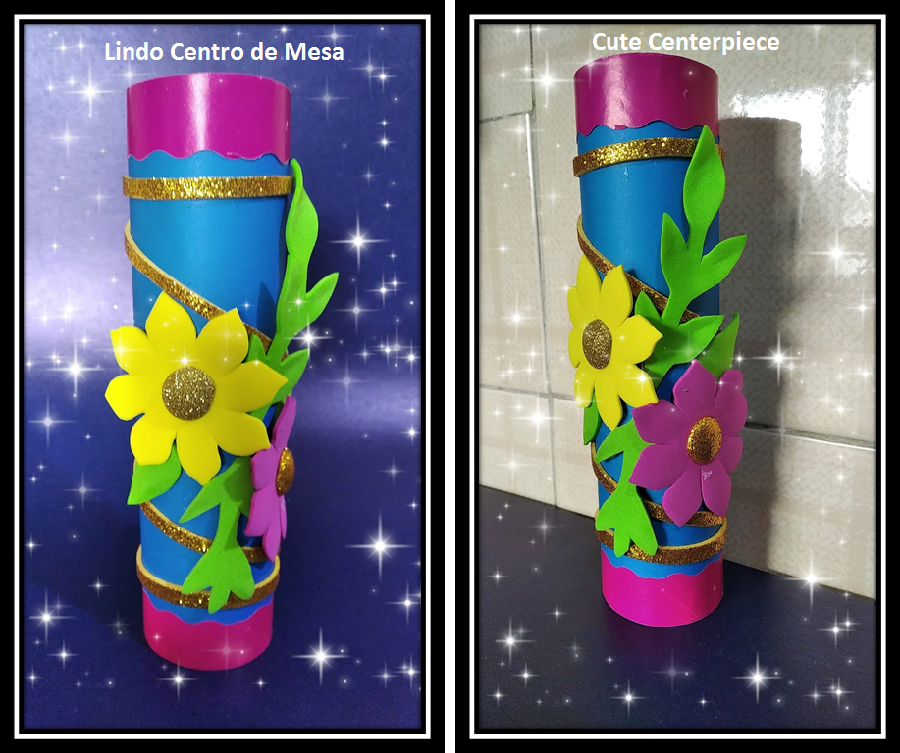
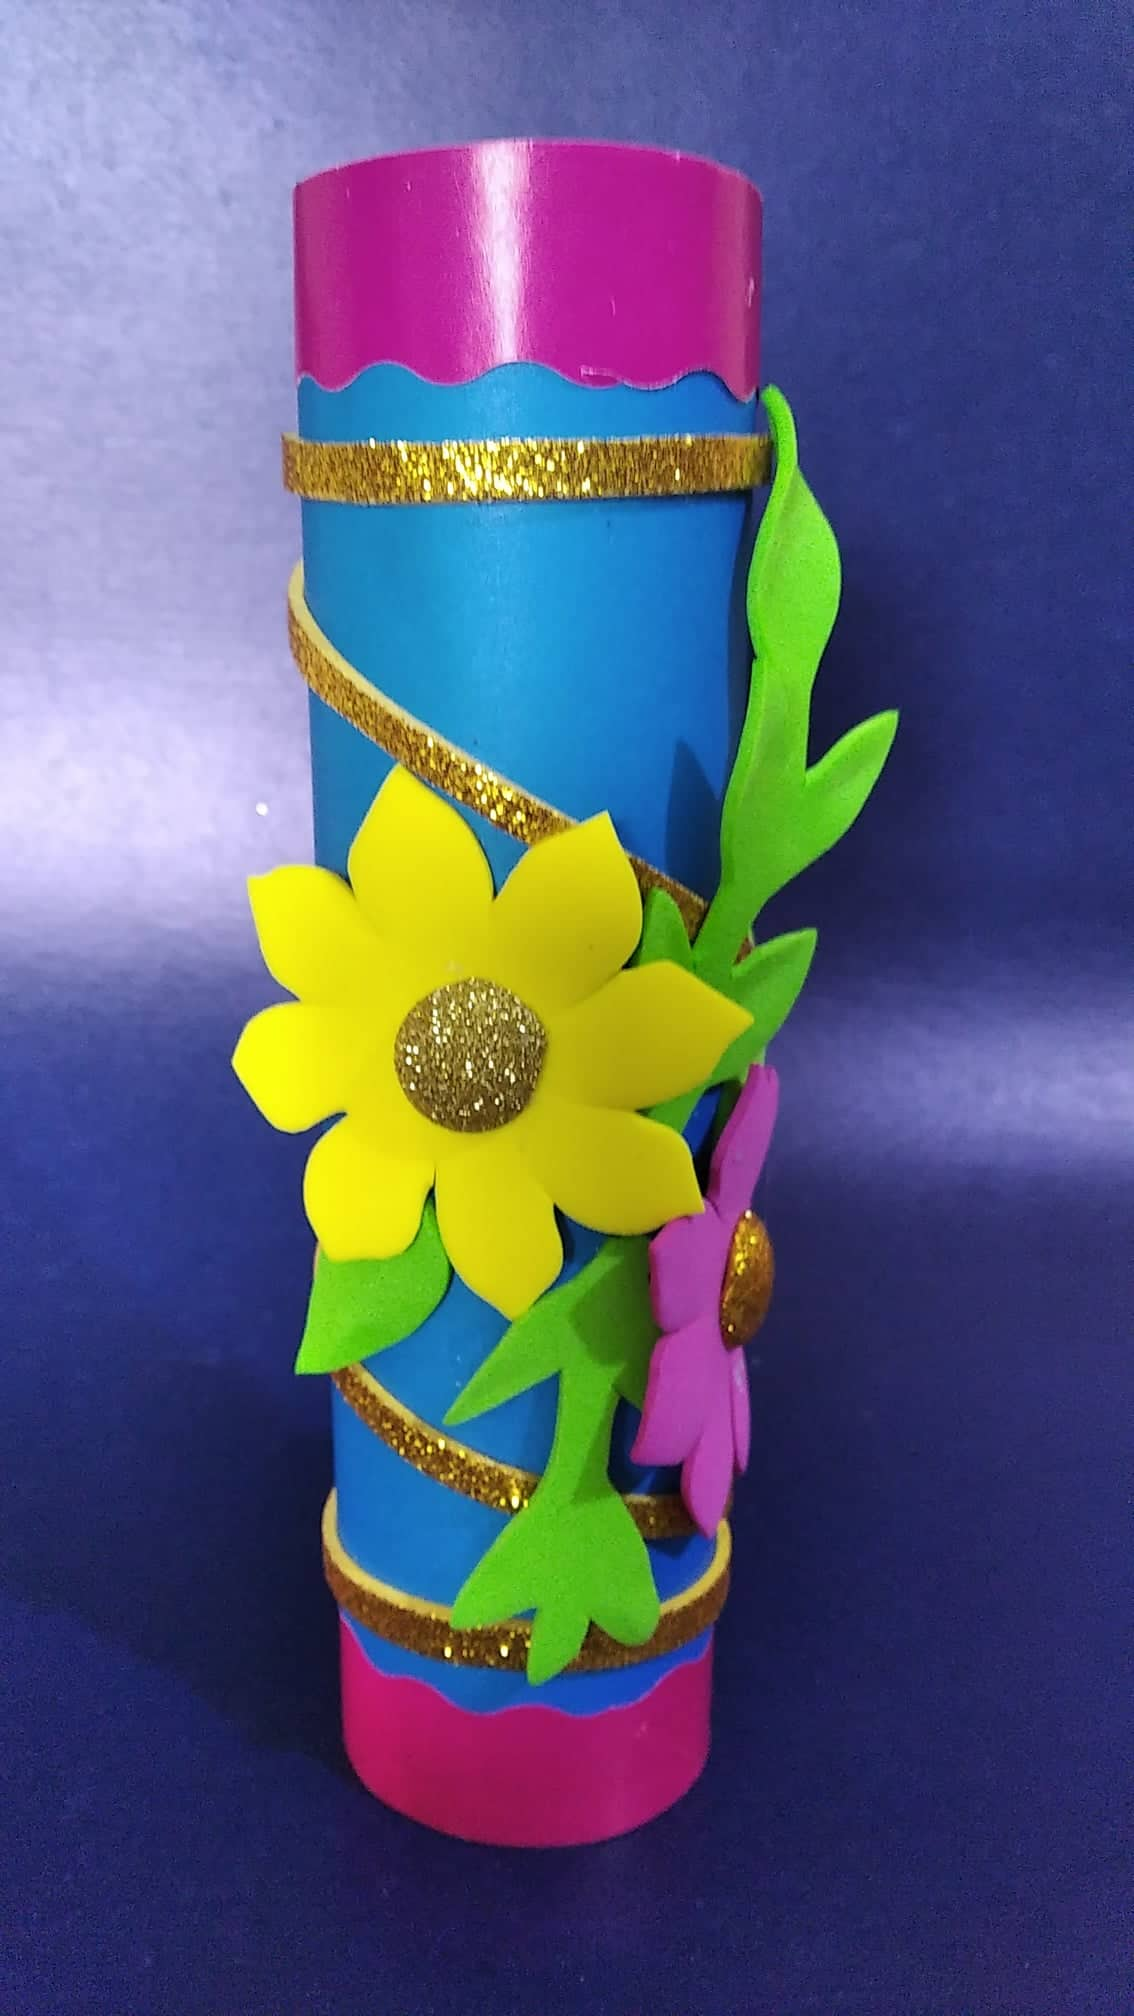
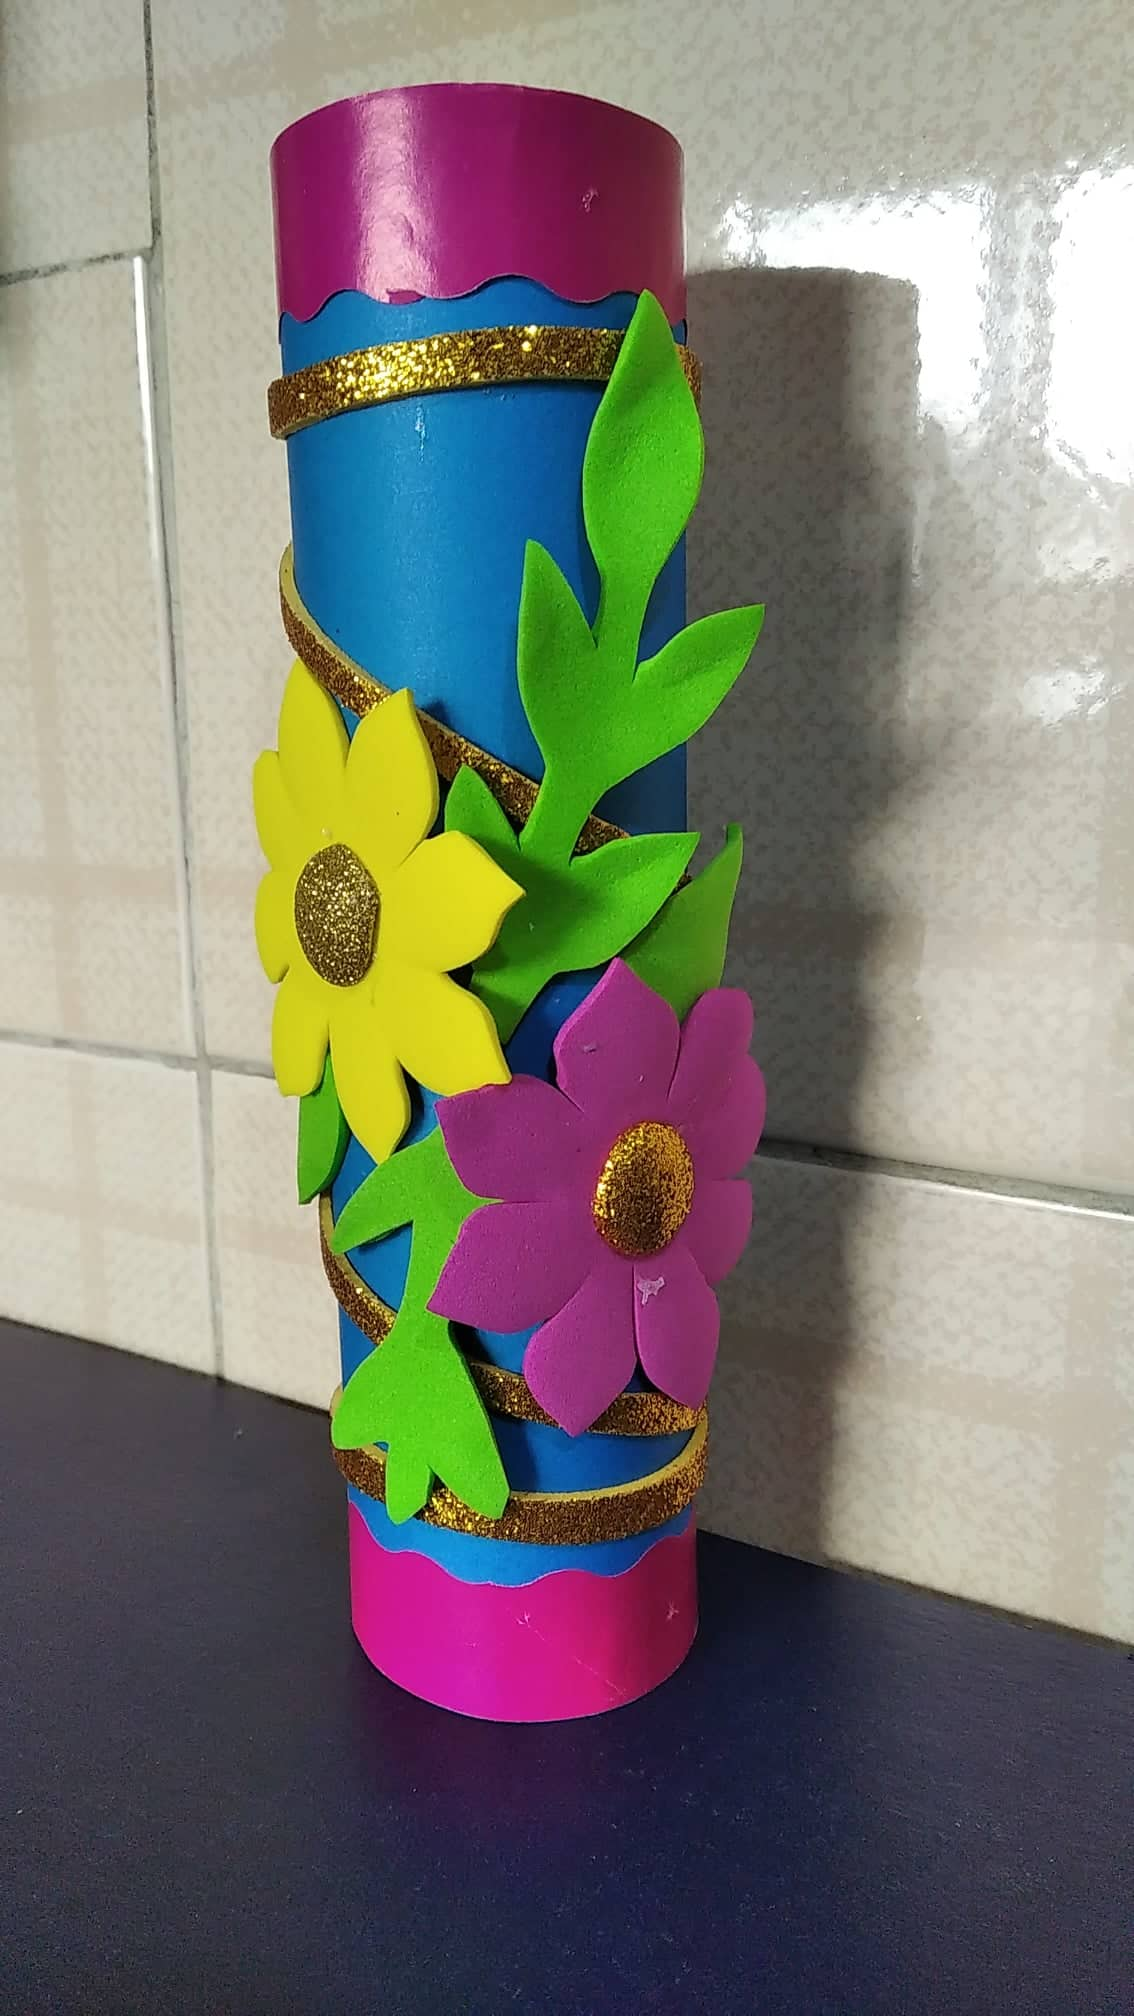
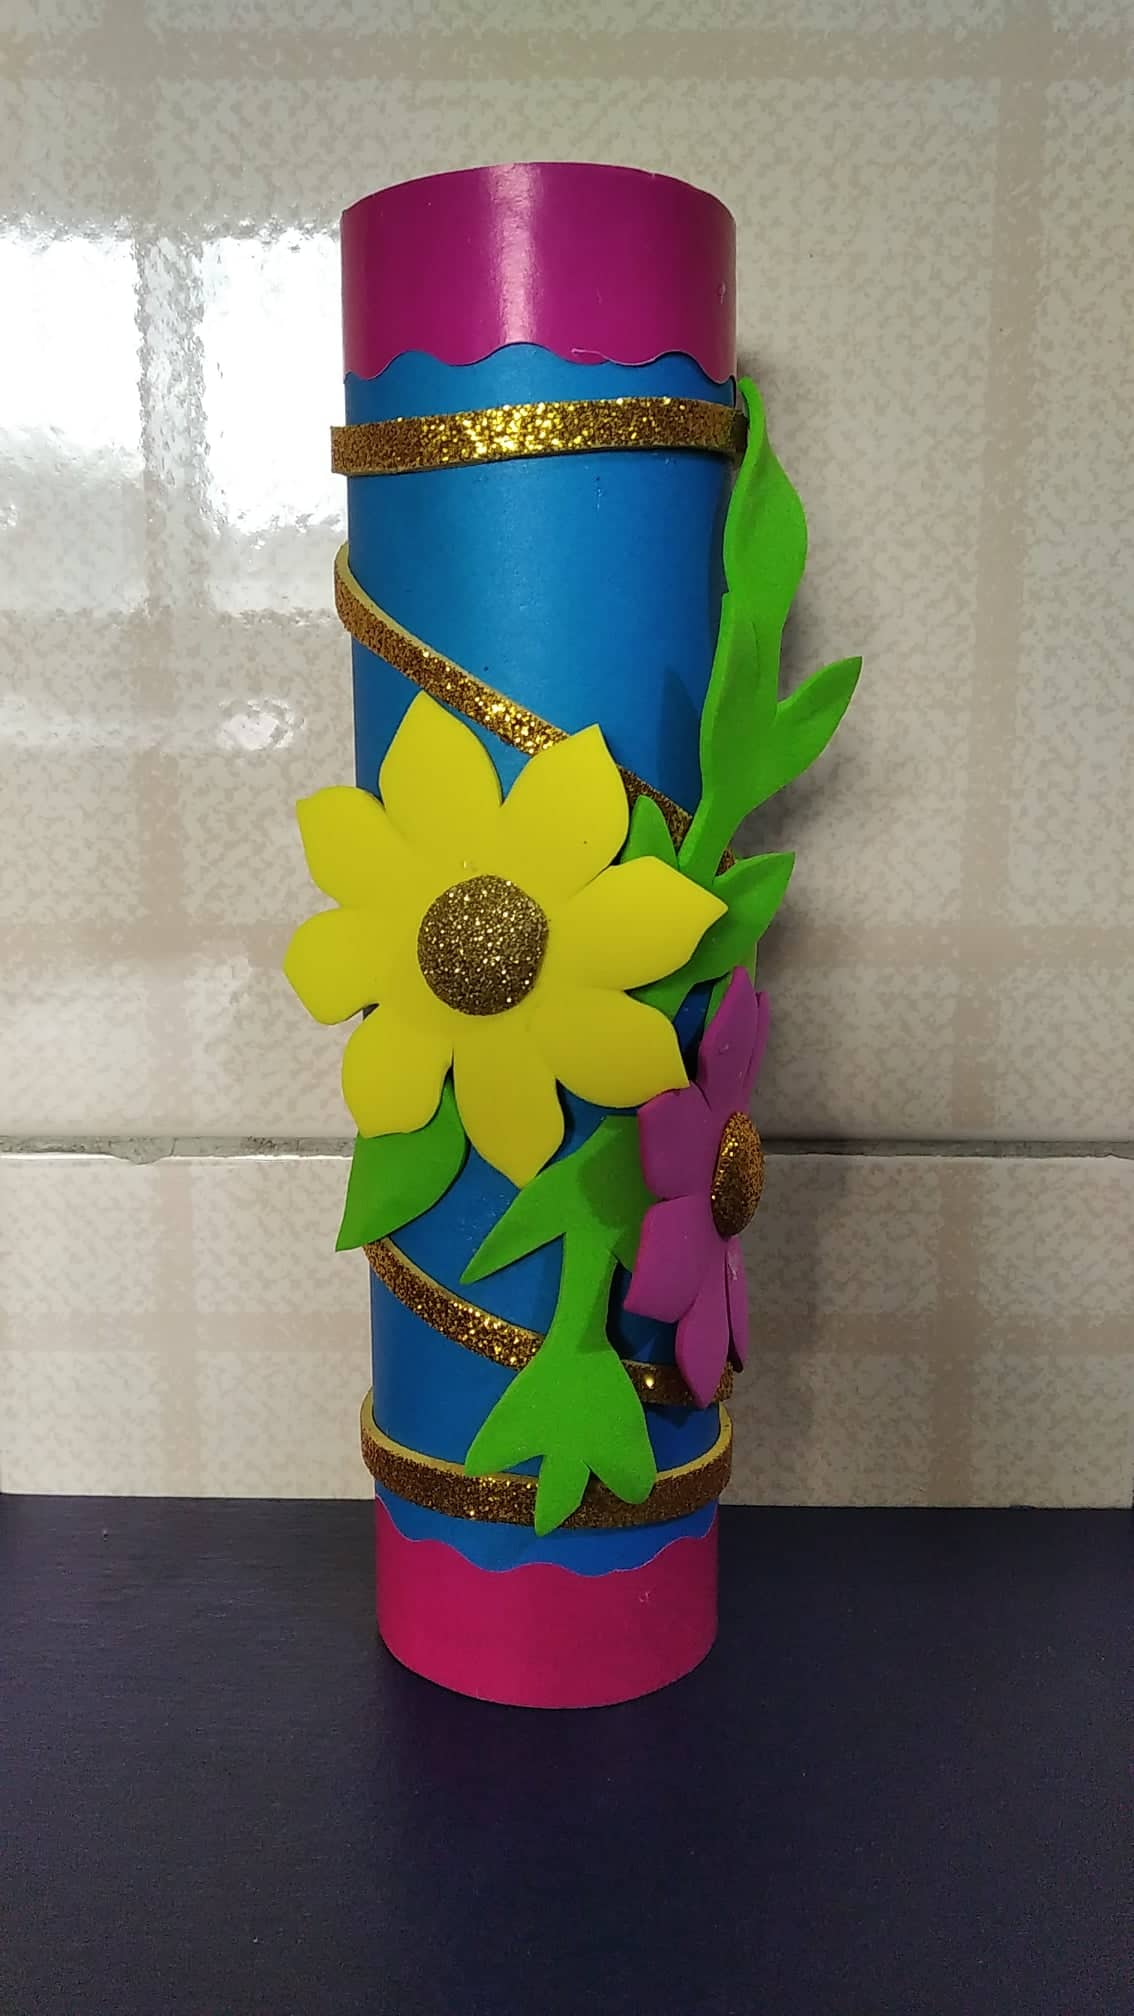
Comenzando esta hermosa noche con la bendición de Dios. Espero su día haya sido fructífero y se hallan divertido realizando sus manualidades. Hoy les quiero mostrar como realice un lindo Centro de Mesa con dos tubos de cartón y goma Eva. Se me ocurre que también se podría utilizar como porta lápices o como cotillón, en realidad es muy versátil se me ocurren muchas formas de uso, si a ustedes se les ocurre cualquier otra háganmelo saber en los comentarios. A continuación, les muestro el paso a paso de esta hermosa manualidad
Starting this beautiful night with God's blessing. I hope your day has been fruitful and you are having fun doing your crafts. Today I want to show you how to make a beautiful Centerpiece with two cardboard tubes and Eva rubber. It occurs to me that it could also be used as a pencil holder or as a party favor, it is actually very versatile, I can think of many ways to use it, if you think of any other, let me know in the comments. Next, I show you the step by step of this beautiful craft
MATERIALES A UTILIZAR/THE MATERIALS TO USE
DOS TUBOS DE CARTON, CARTULINA AZUL, FOAMI VERDE, FOAMI FUCSIA, FOAMI AMARILLO, FOAMI DORADO, SILICON LIQUIDO, TIJERA, LAPIZ
TWO CARDBOARD TUBES, BLUE CARDBOARD, GREEN FOAMI, FUCHSIA FOAMI, YELLOW FOAMI, GOLDEN FOAMI, LIQUID SILICON, SCISSORS, PENCIL
PASO A PASO/STEP BY STEP
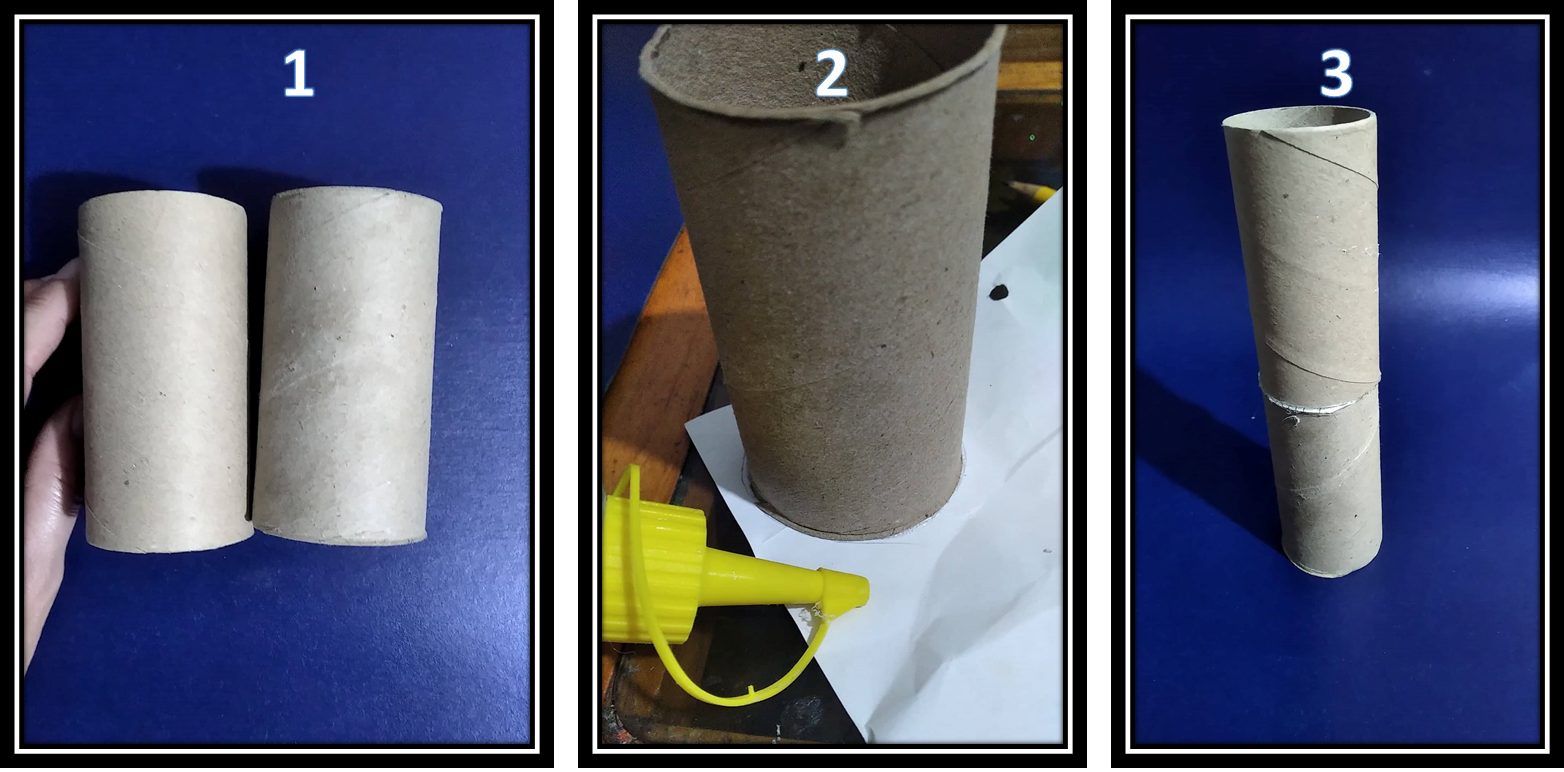
El primer paso es muy sencillo, se recorta un circulo en una hoja de papel del tamaño del diámetro del tubo de cartón, luego se pega sobre un trozo de cartón delgado, sobre este se pega el segundo tubo de cartón. La idea de pegarle esta tapa es para que se pegue mejor el tubo que va en la parte de arriba. Quedando de esta forma
The first step is very simple, a circle is cut out of a sheet of paper the size of the diameter of the cardboard tube, then it is glued on a thin piece of cardboard, on which the second cardboard tube is glued. The idea of sticking this lid on it is so that the tube that goes on top sticks better. Staying this way
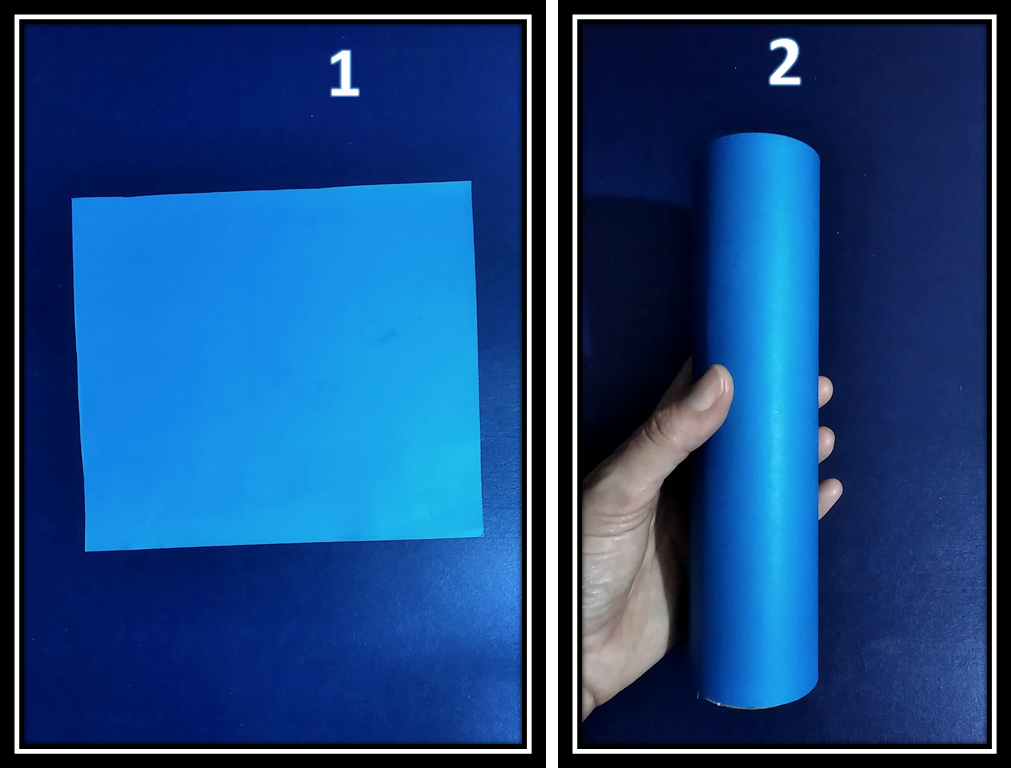
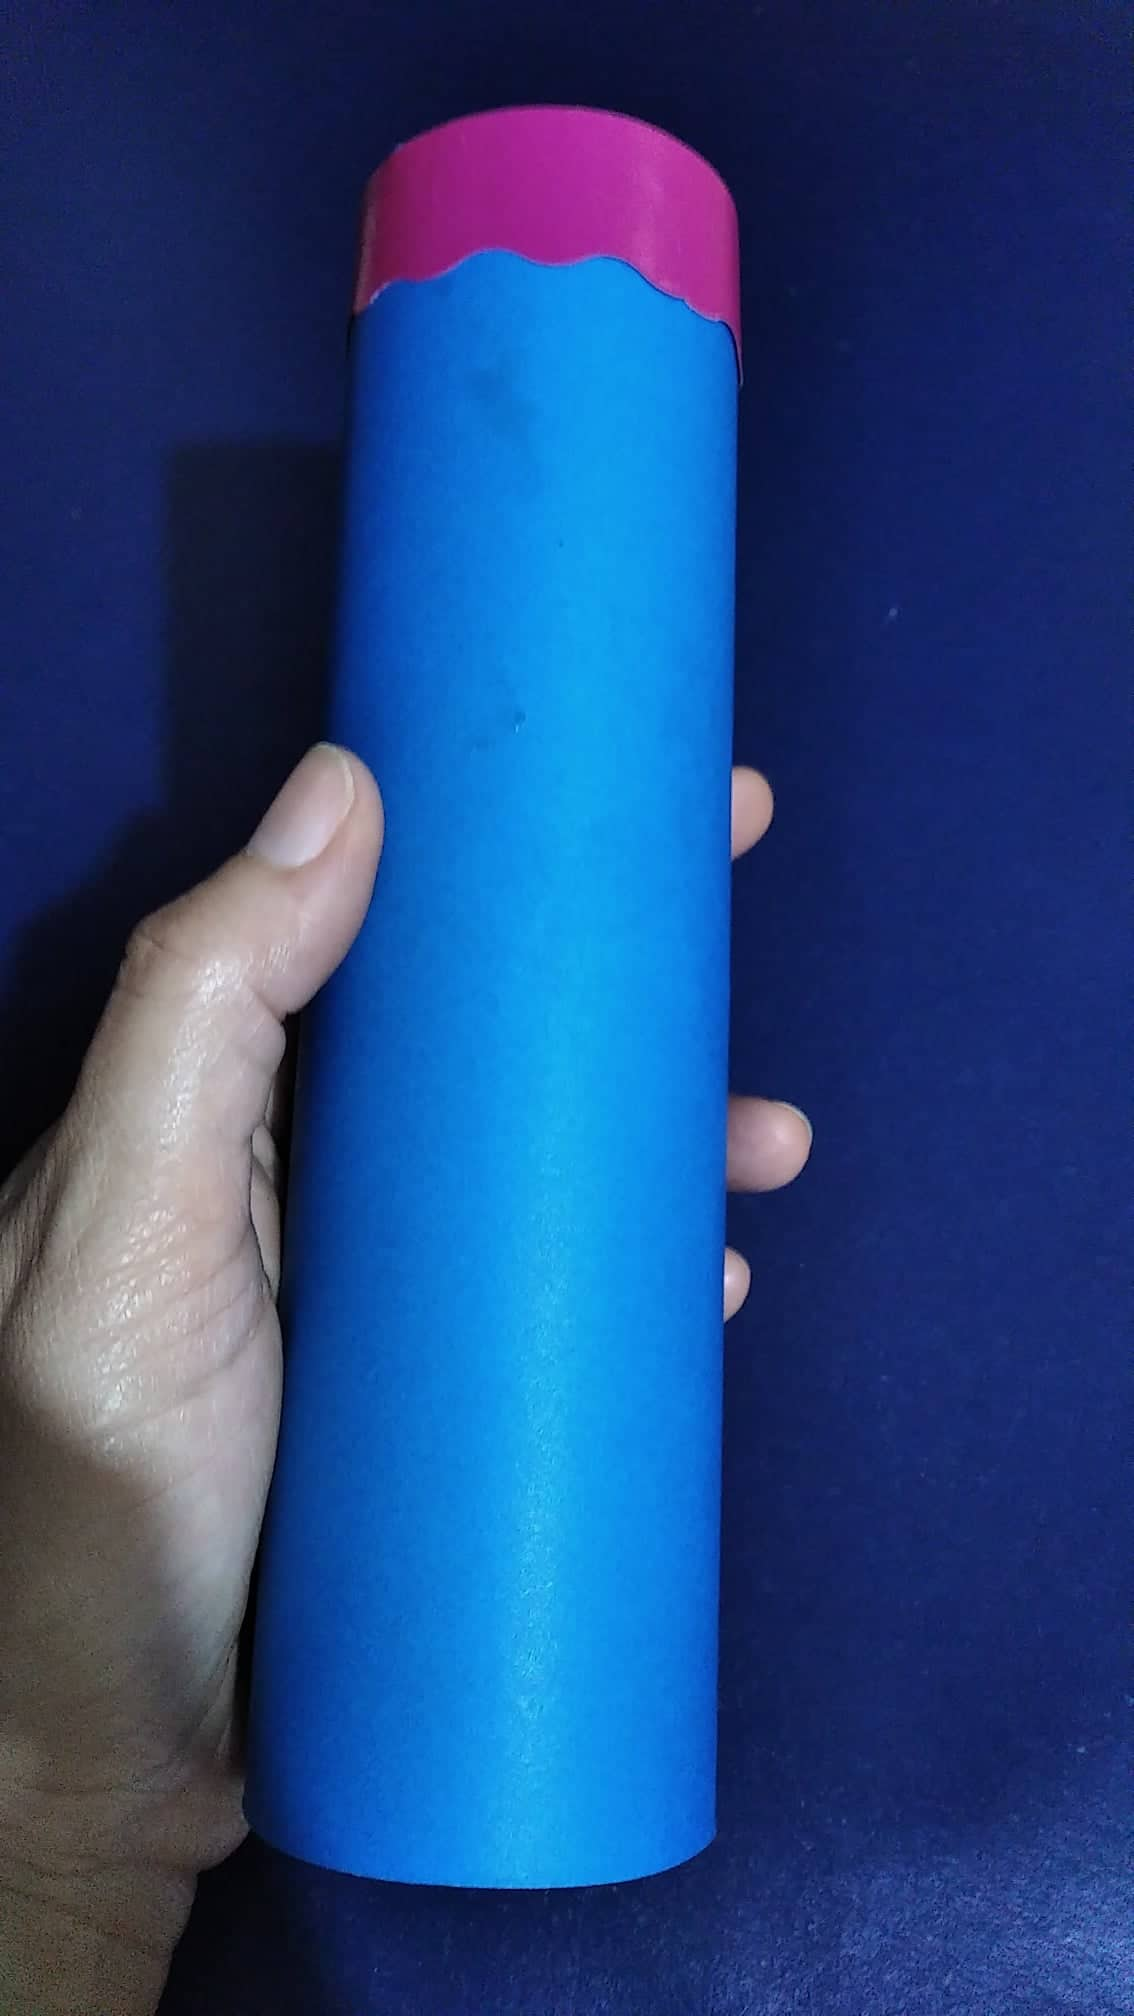
Luego medimos el largo y ancho de gran tubo que quedo al unirlos los dos tubos y lo forramos con cartulina azul
Then we measure the length and width of the large tube that remains when joining the two tubes and we cover it with blue cardboard
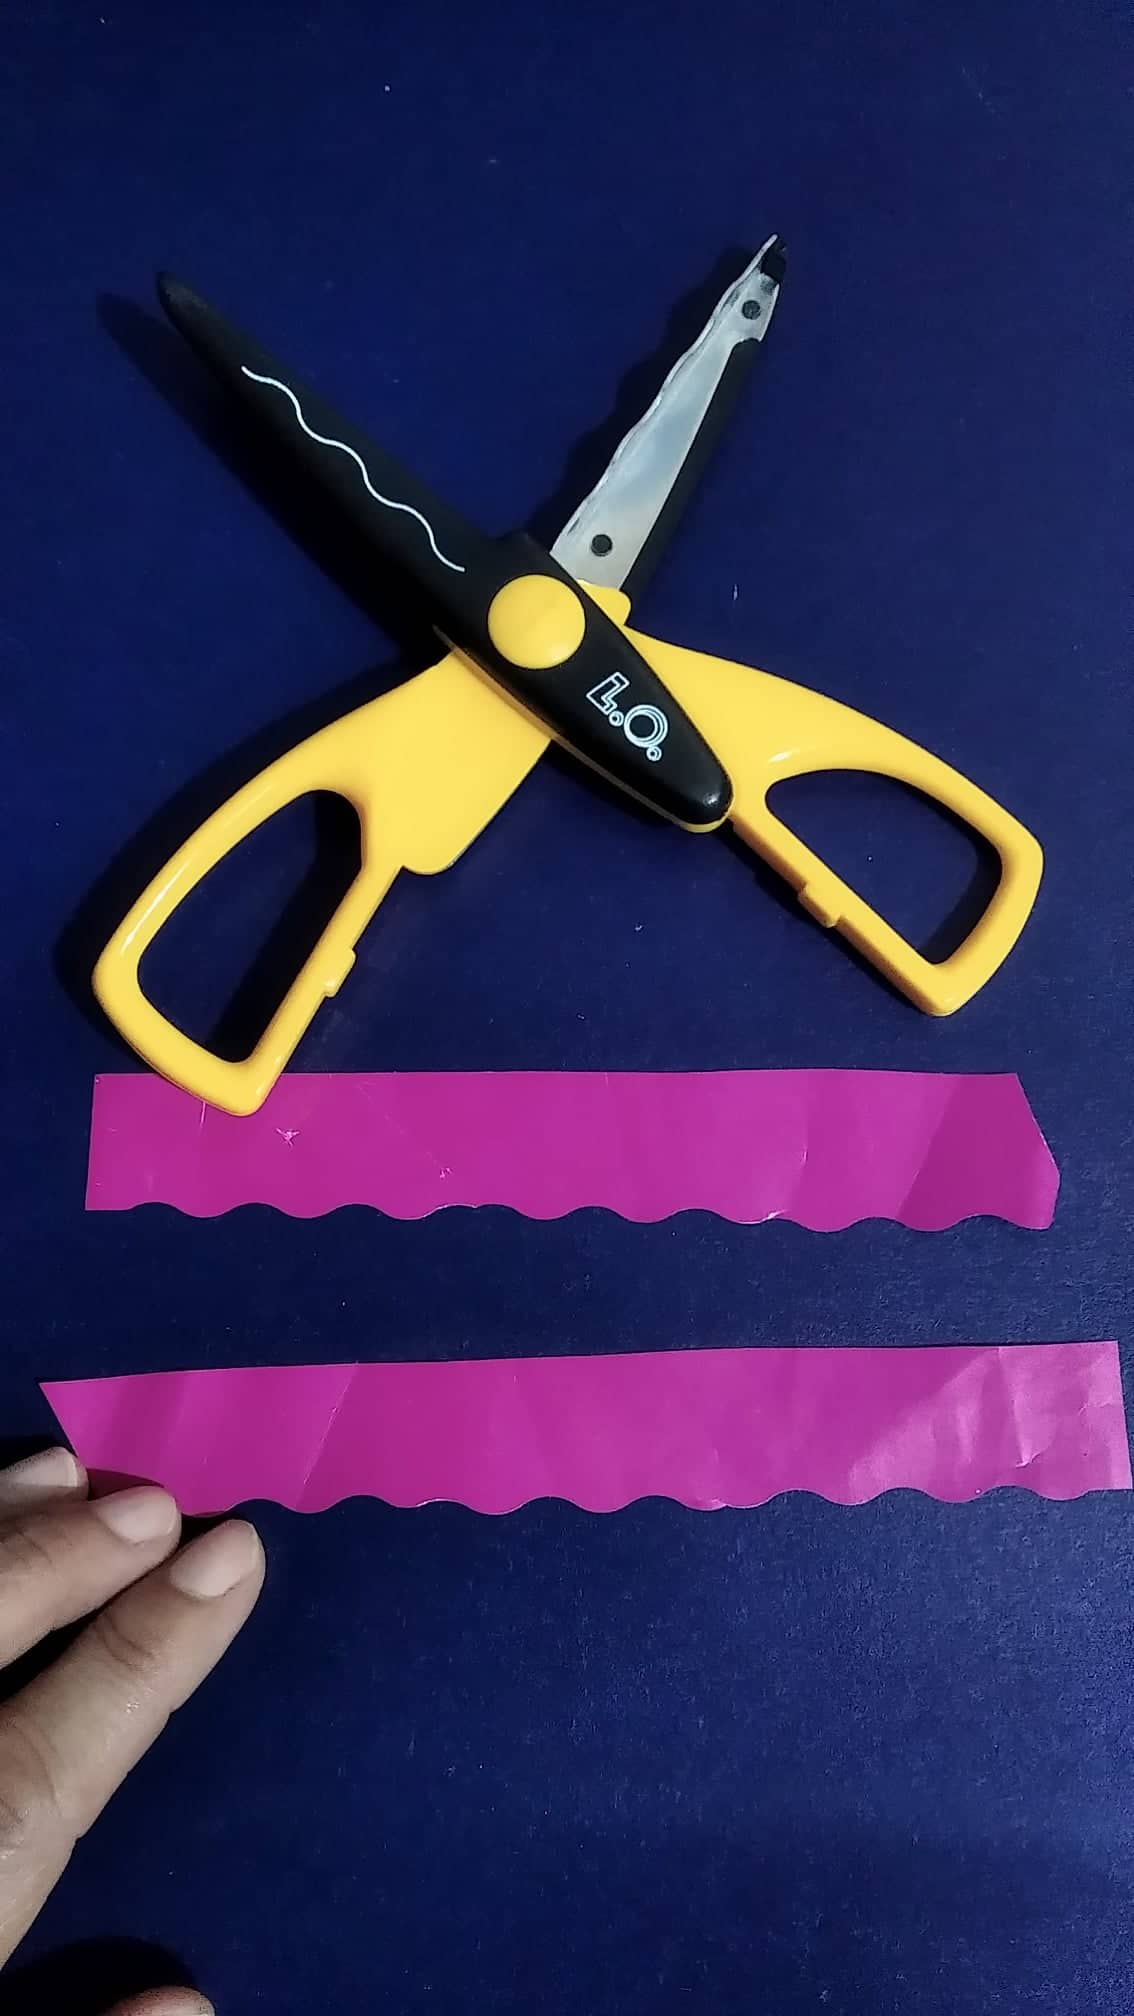
Se recortan dos listones de papel lustrillo de color fucsia y se les da forma utilizando una tijera picos ondulado,pueden escoger cualquier forma que les guste hay variedad de tijeras con lindas formas
Cut two strips of fuchsia colored glossy paper and shape them using wavy scissors, you can choose any shape you like, there are a variety of scissors with pretty shapes
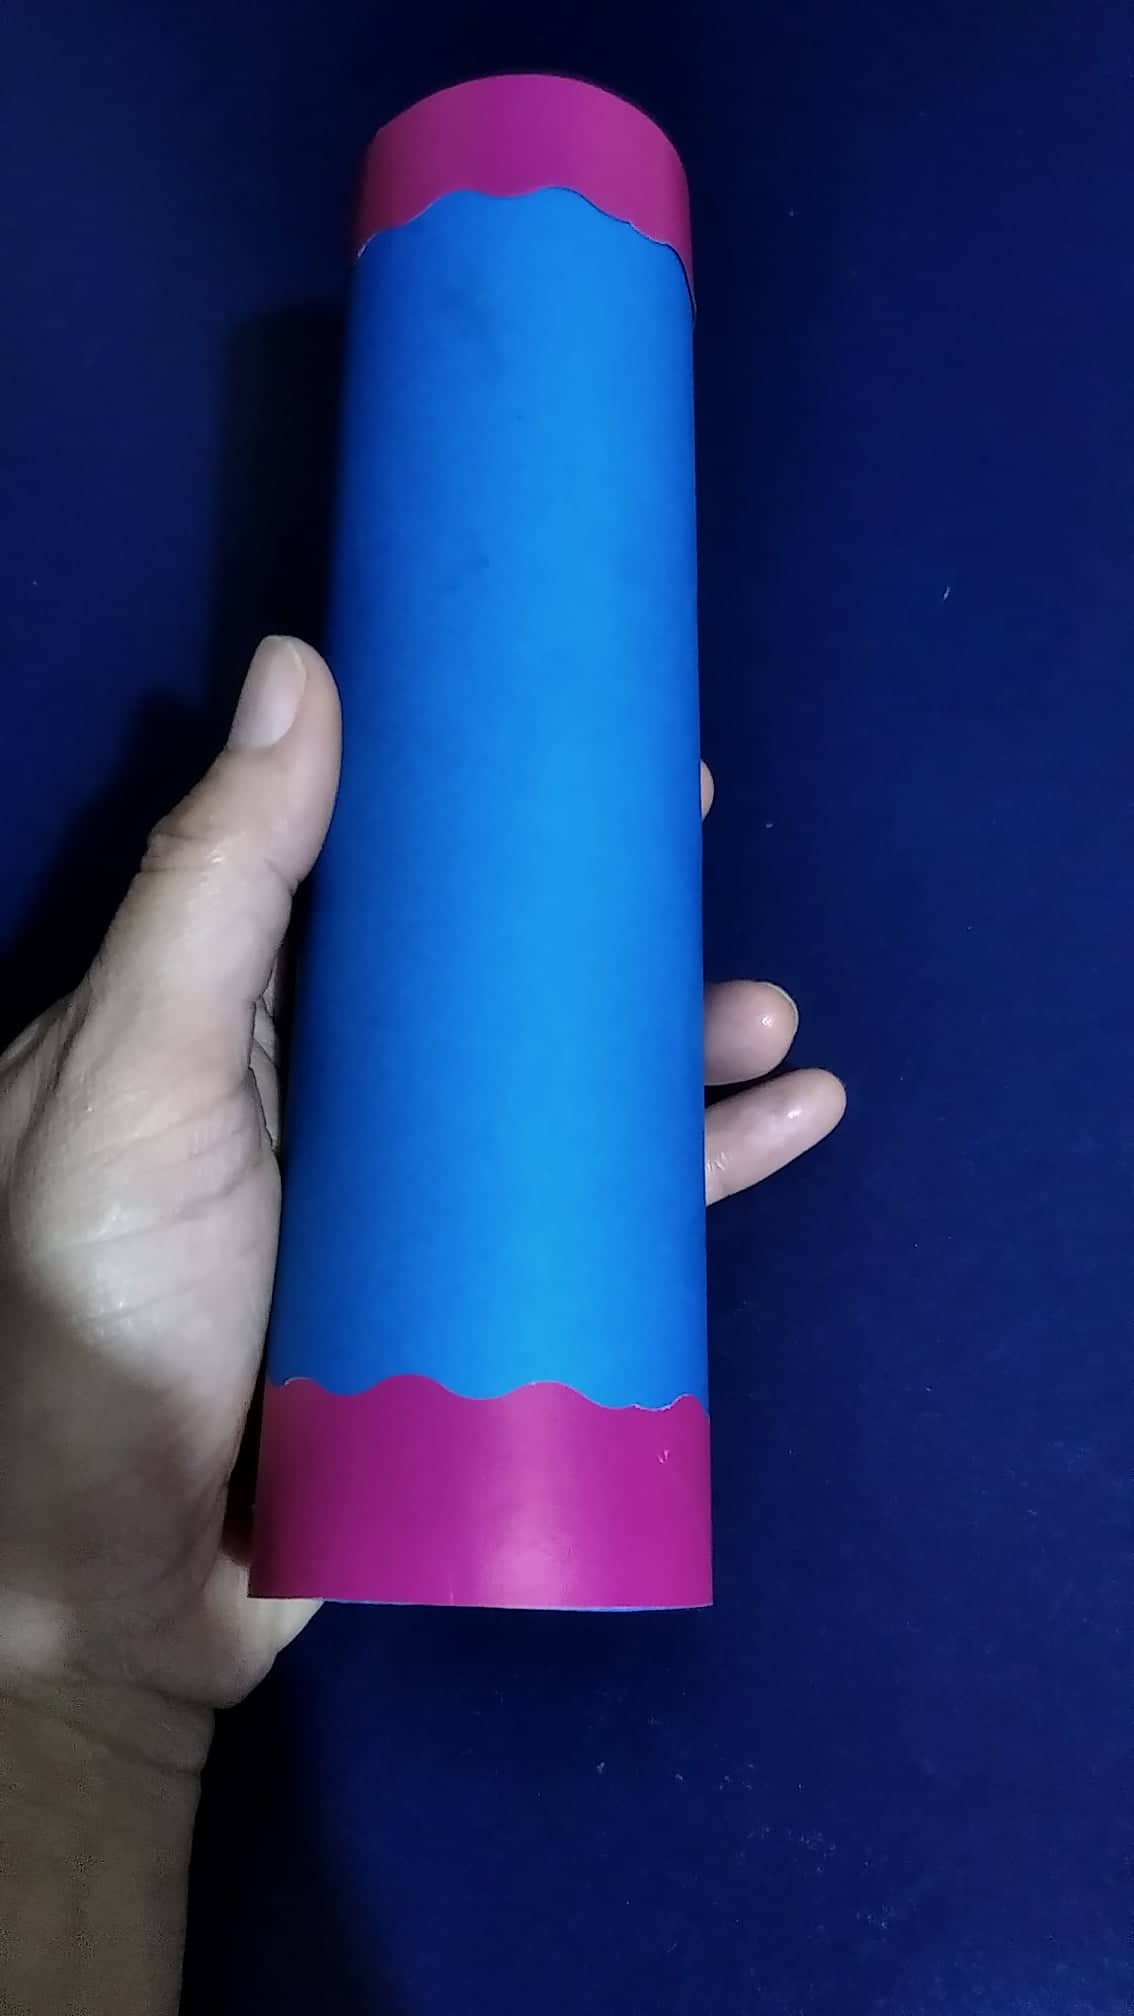
El otro listón de color fucsia se pega en la parte de abajo
The other fuchsia ribbon is glued to the bottom
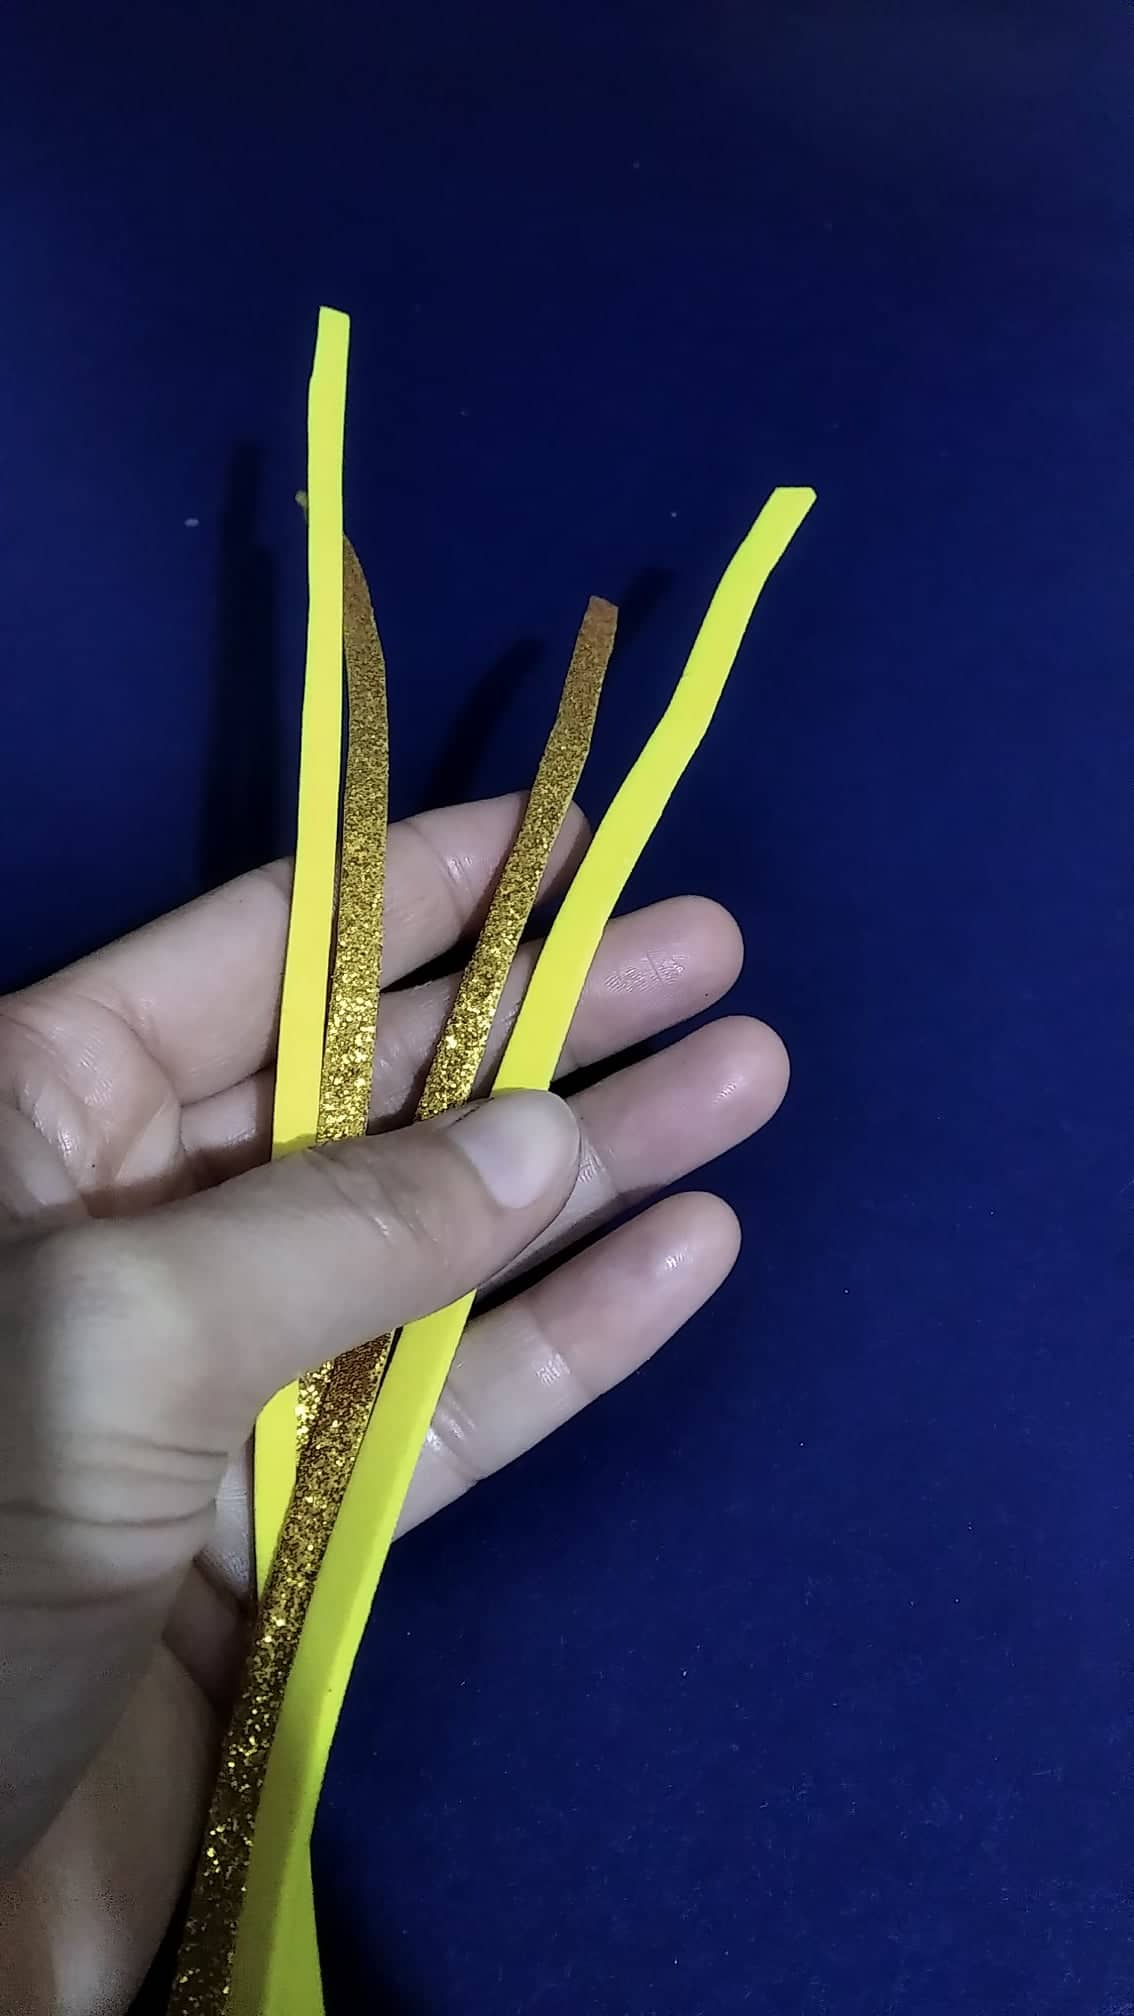
Para darle el toque brillante, recorte cuatro listones en foami dorado. Pegue un listón en la parte de arriba y luego pegue otro listón un poca más abajo jugando un poco con mi imaginación y esta fue la forma que más me gusto
To give it a shiny touch, cut four ribbons in gold foami. I glued a ribbon on the top and then glued another ribbon a little further down playing a little with my imagination and this was the way that I liked the most
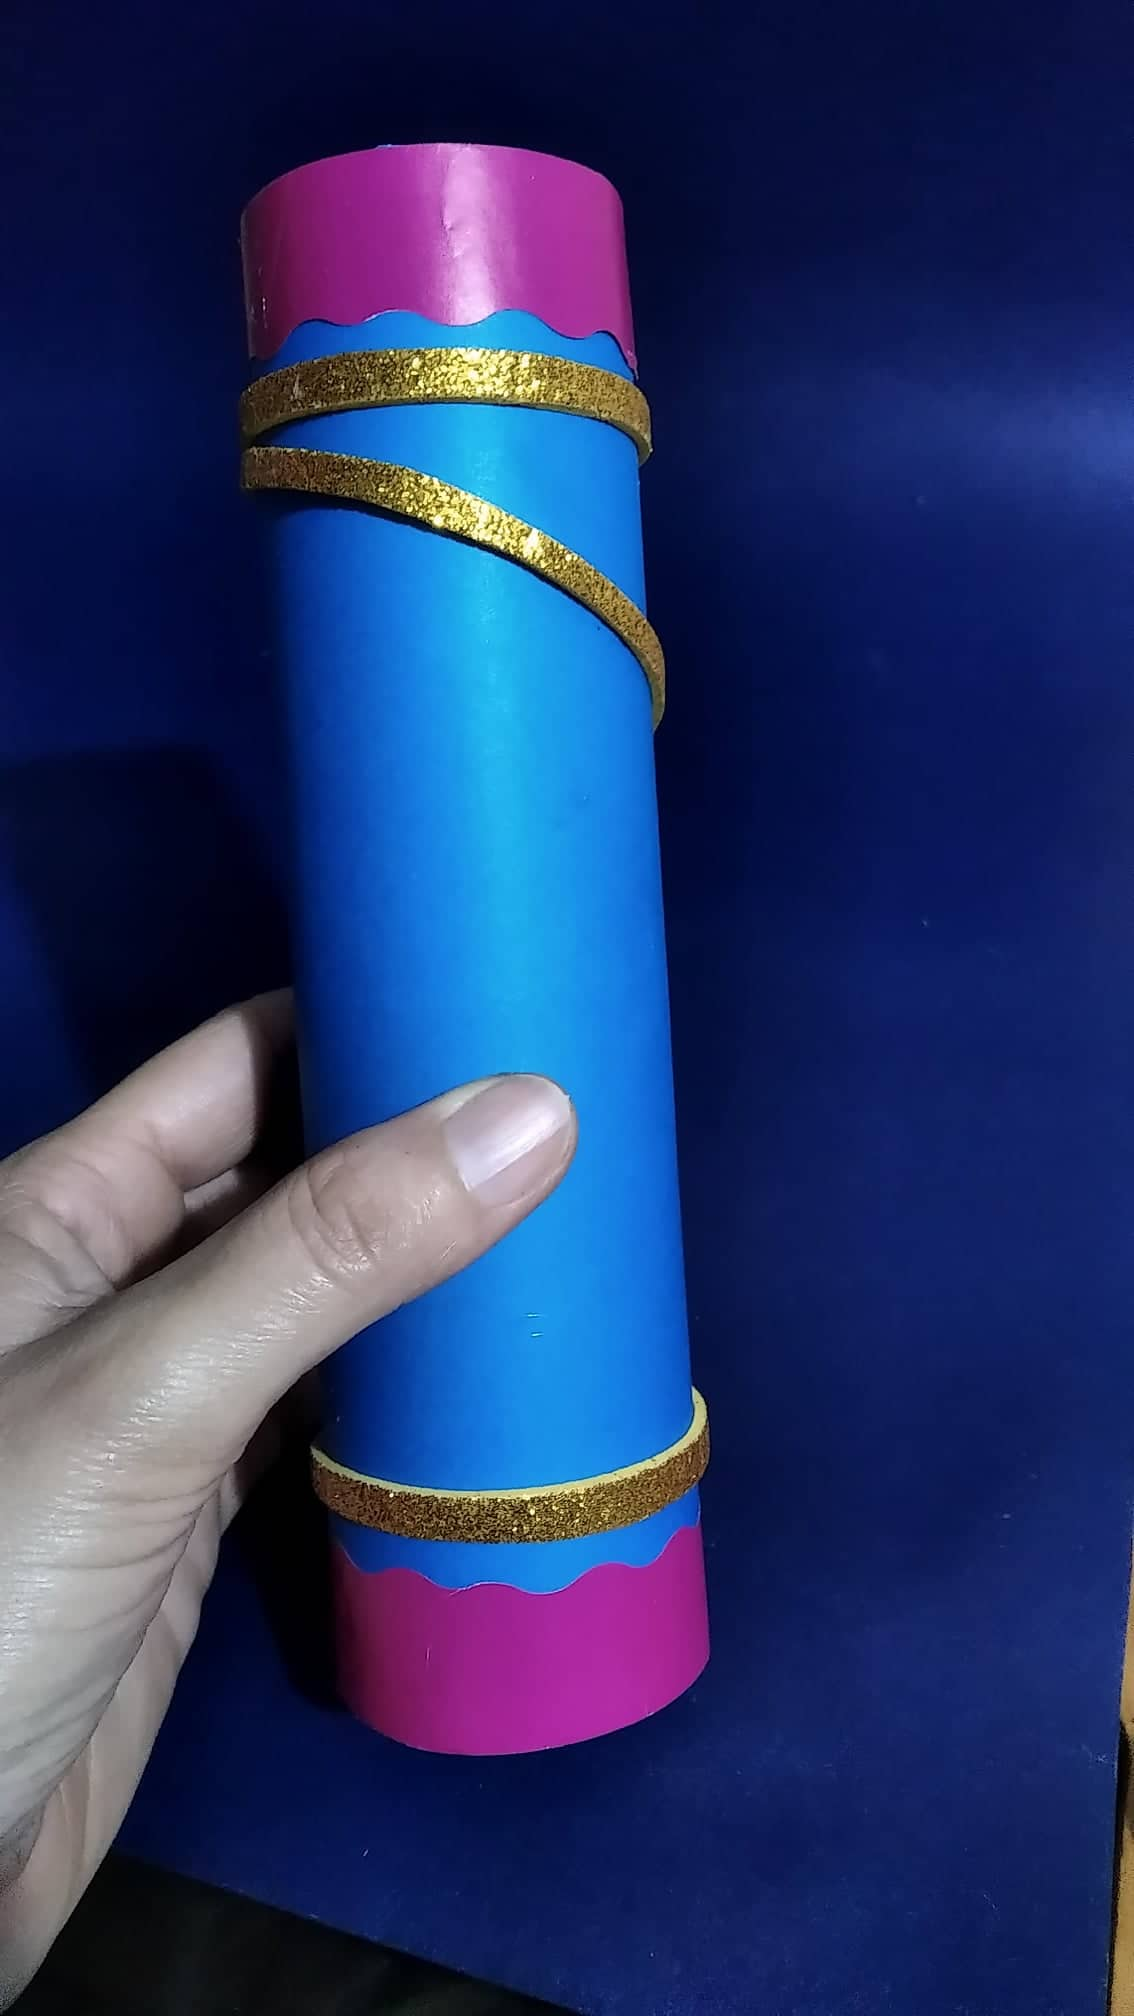
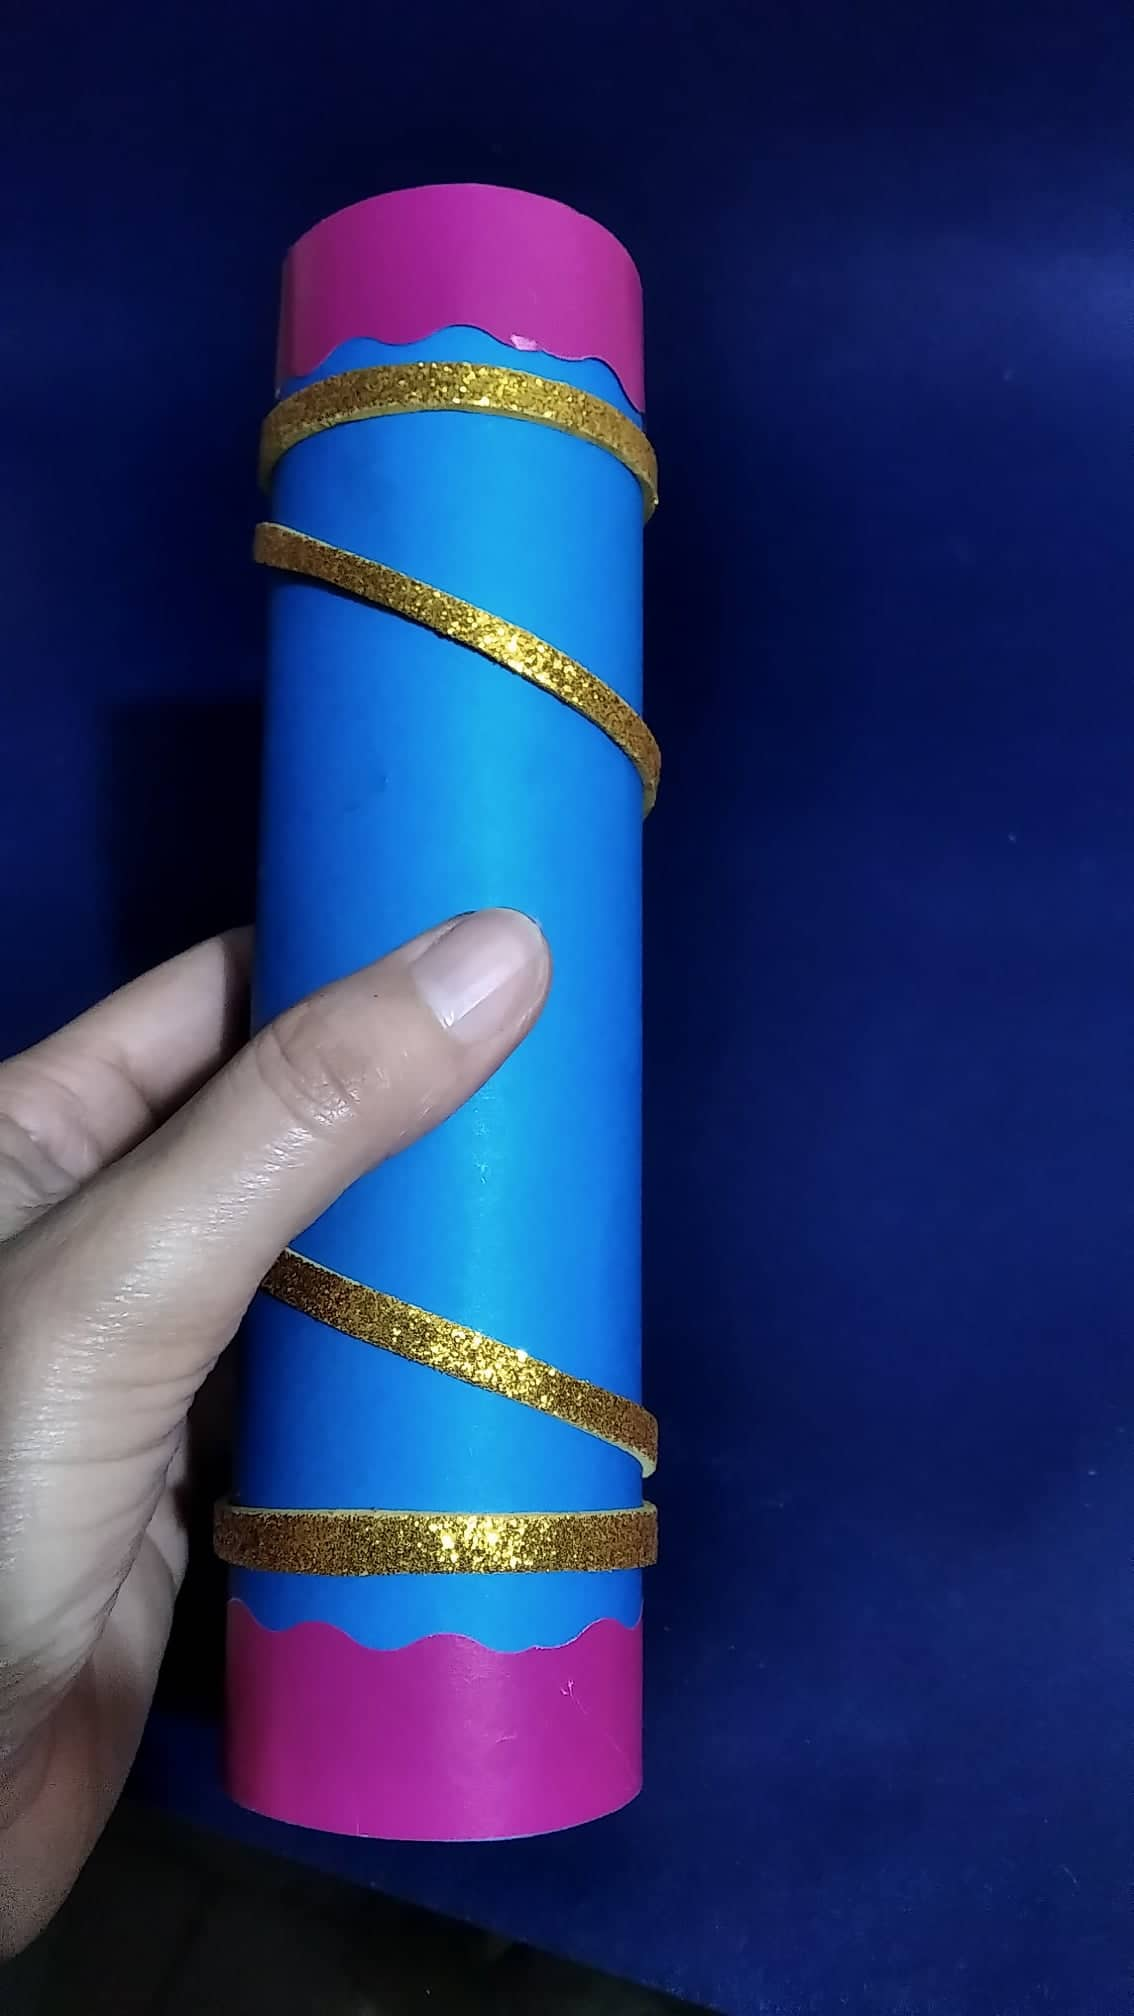
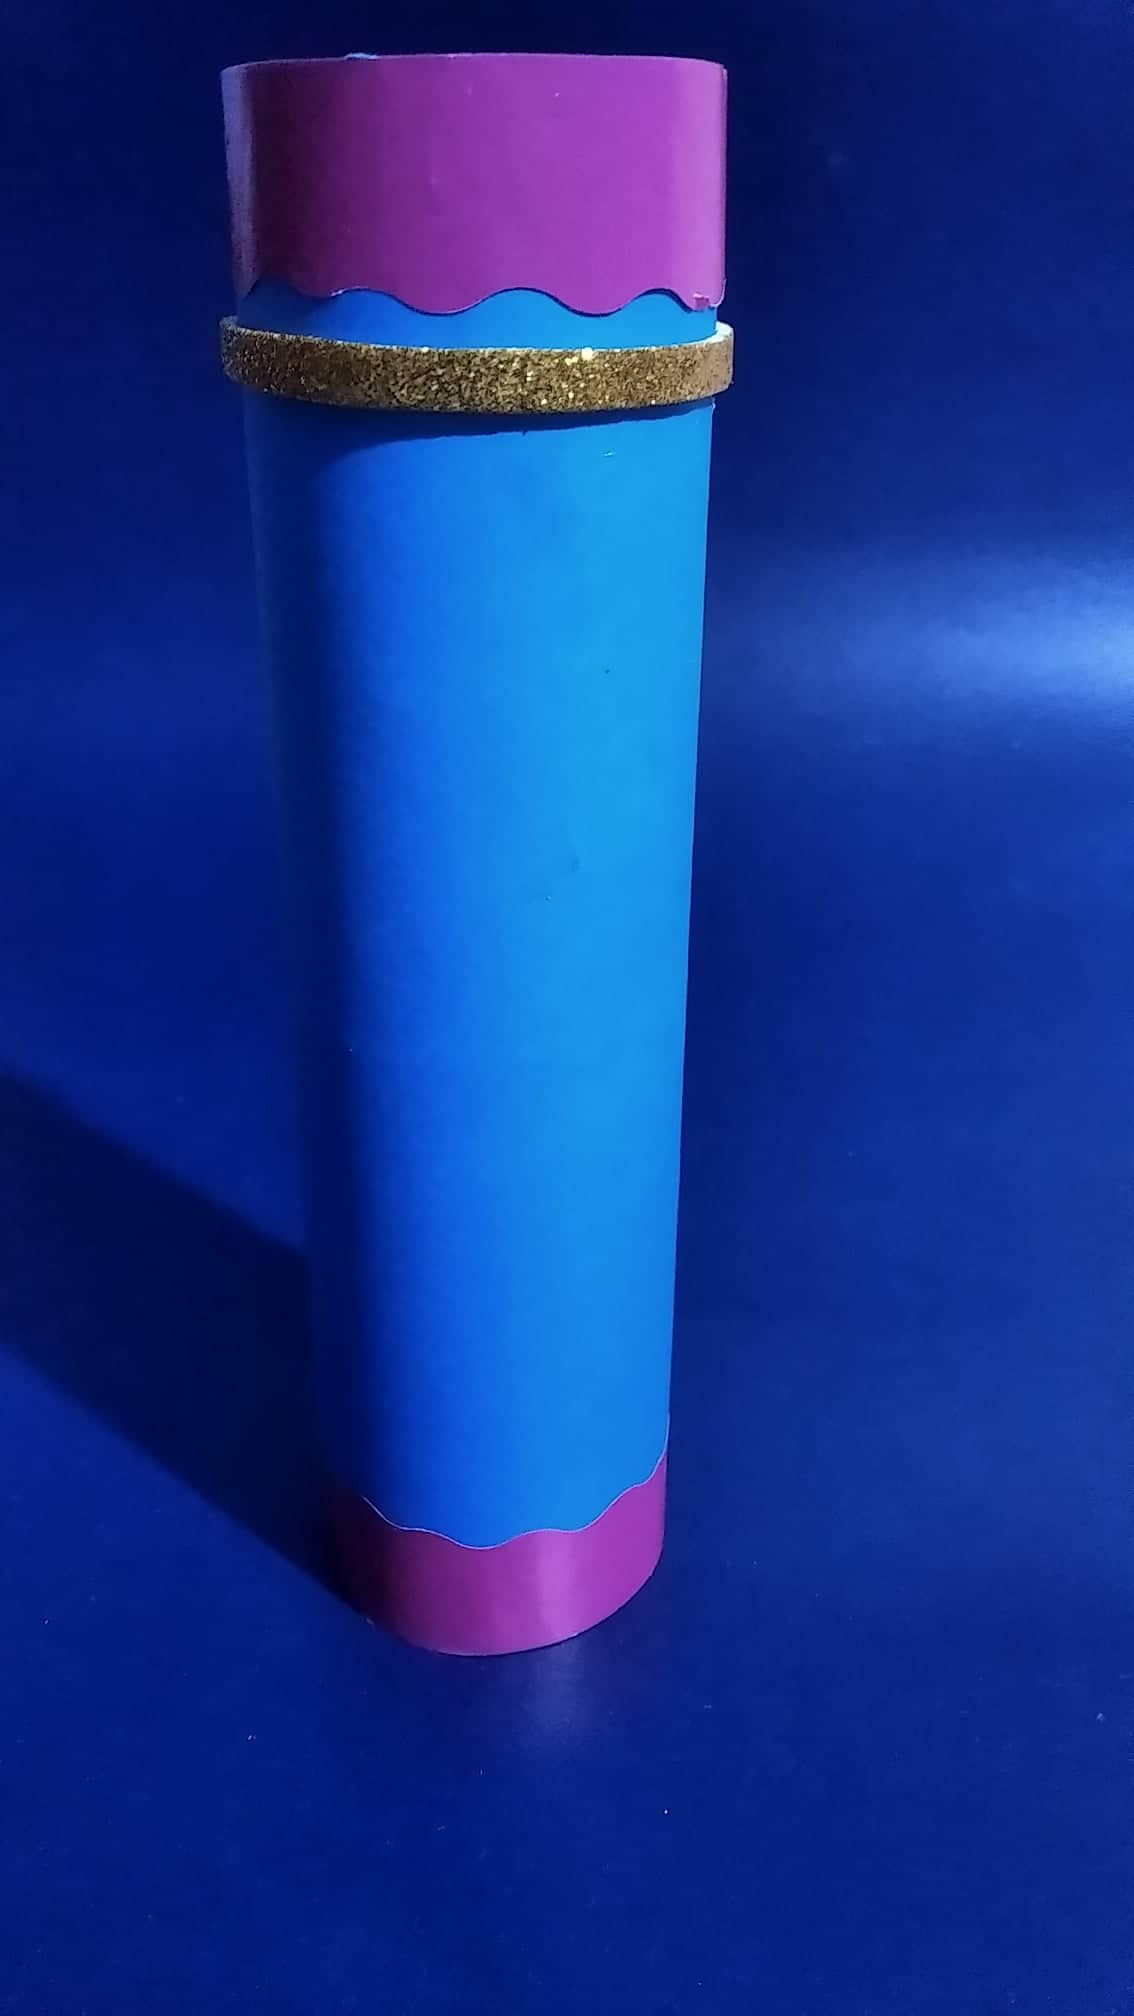
En la parte de abajo realizamos el mismo paso anterior,pegamos los listones dorados de la misma forma
In the lower part we carry out the same previous step, we glue the golden ribbons in the same way
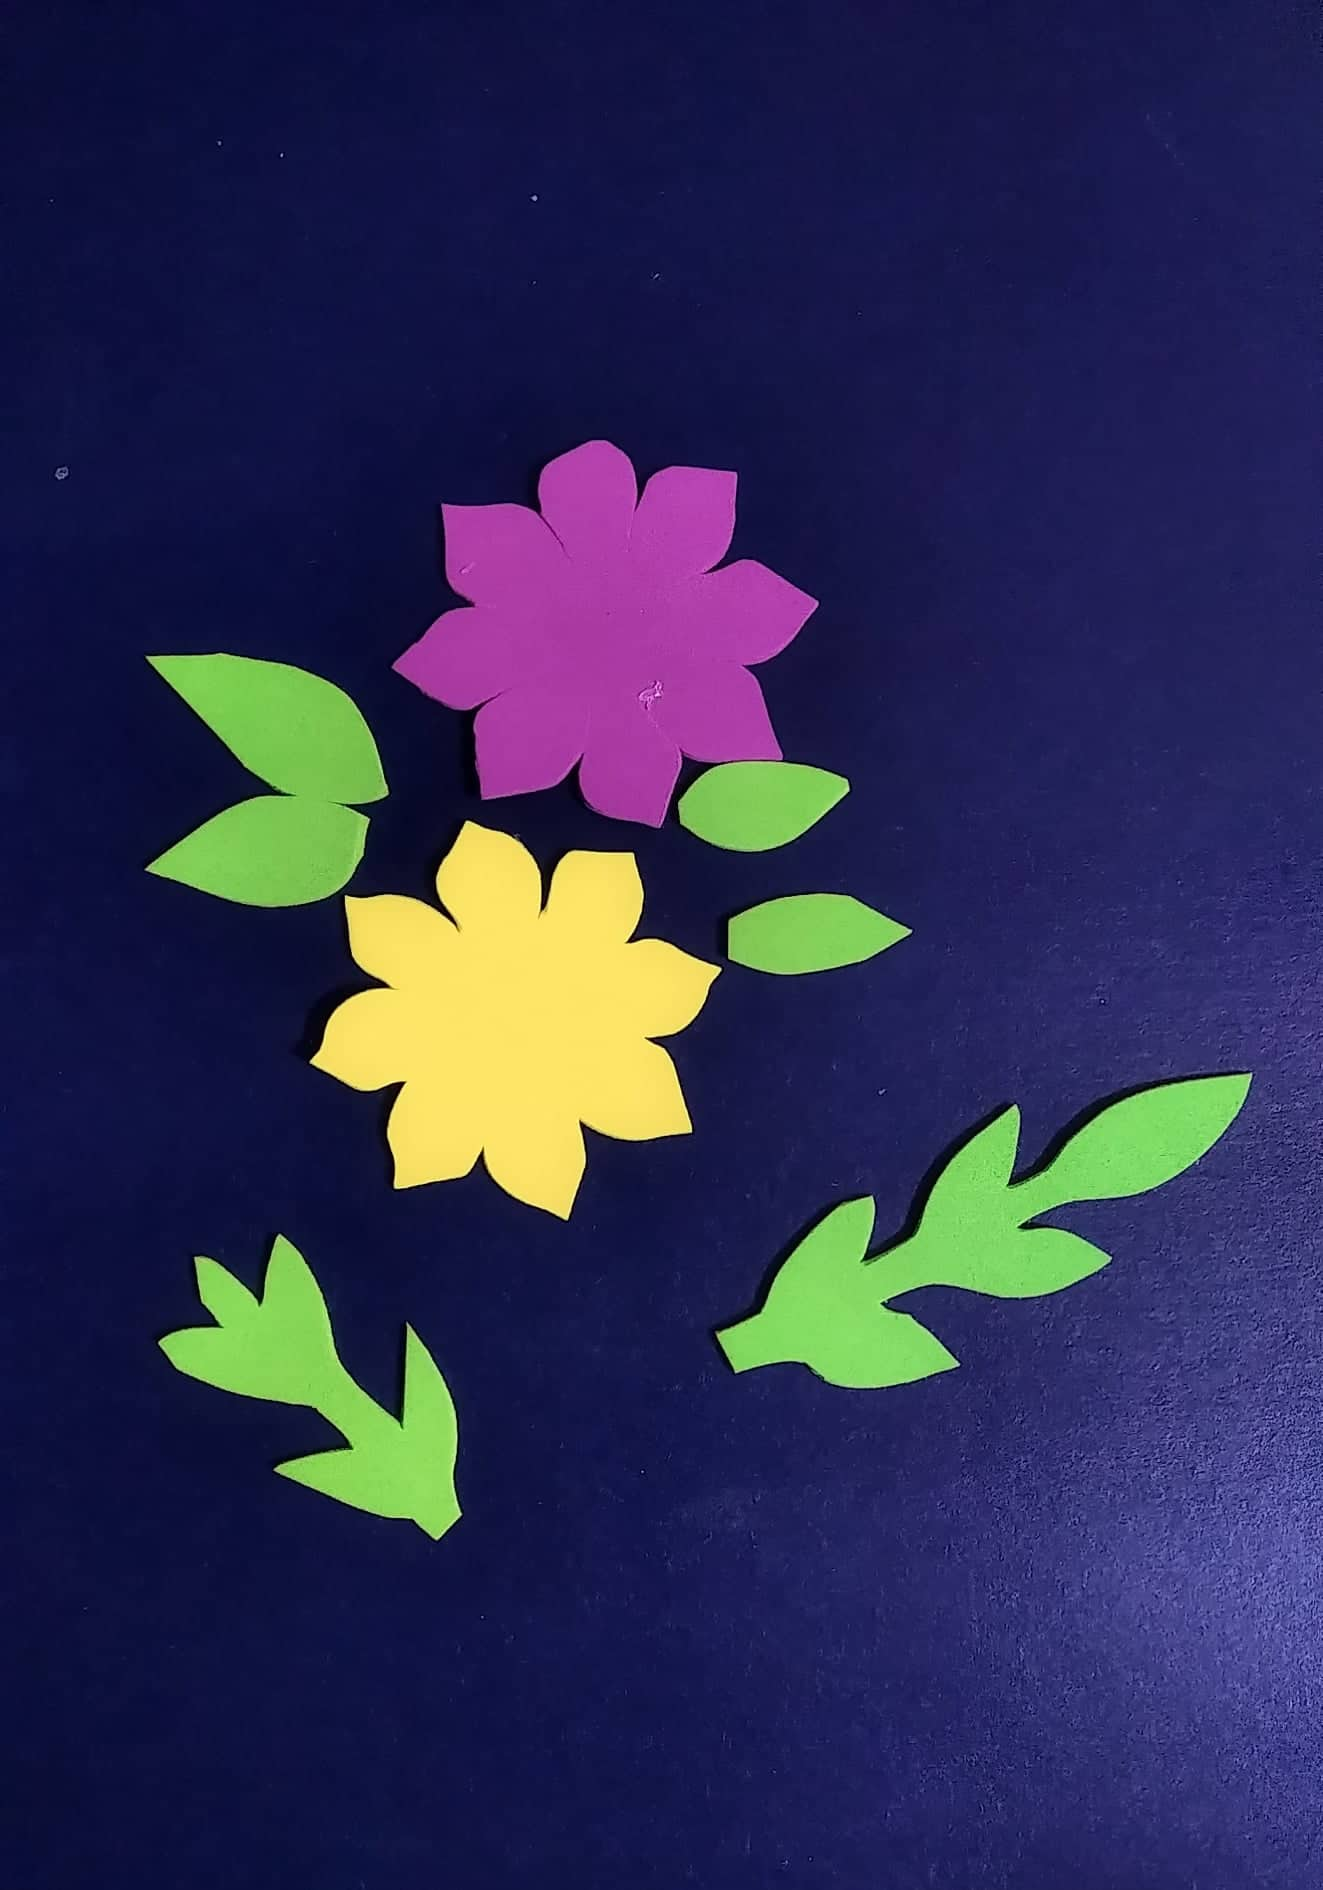
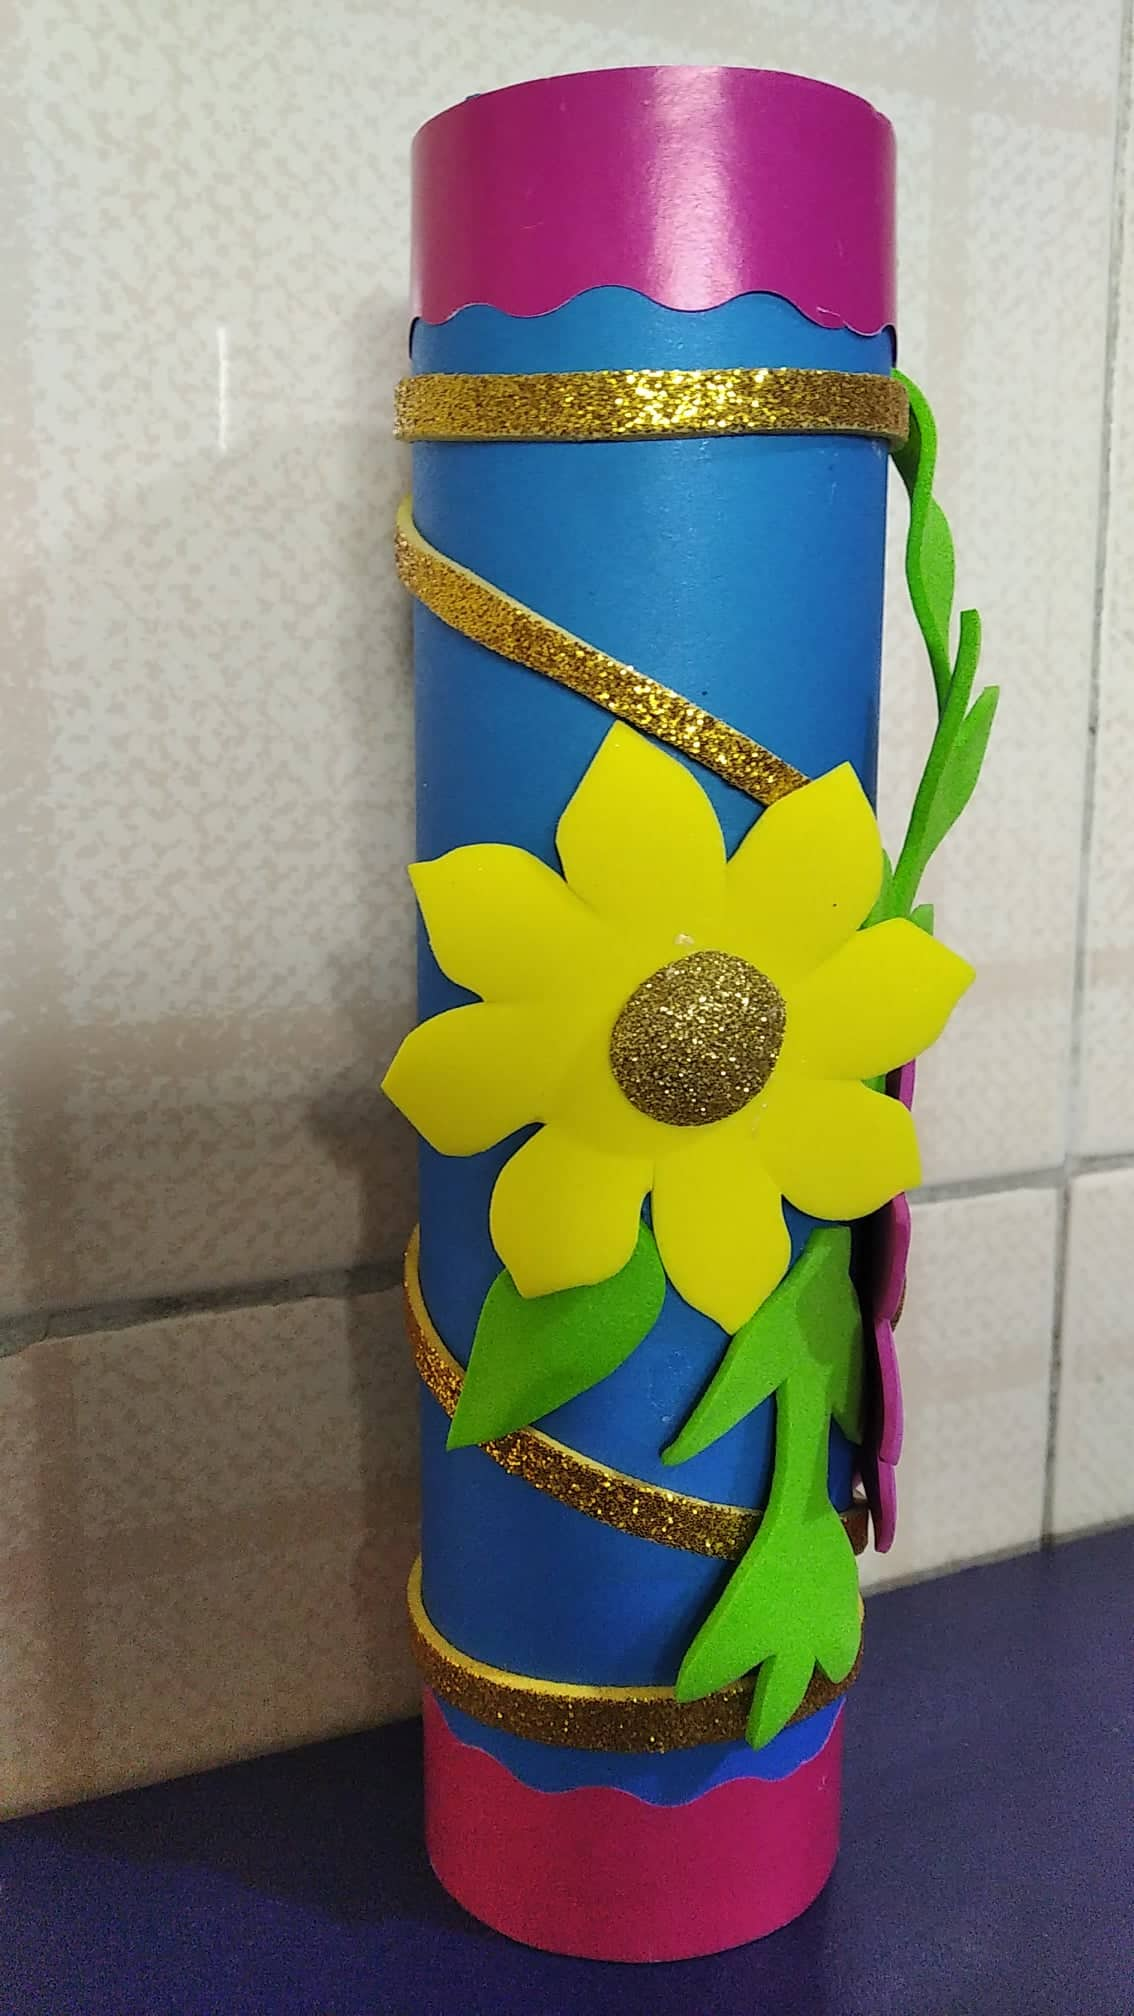
Para la decoración recorte una flor de color fucsia y otra de color amarillo. En foami verde dibuje y recorte dos ramas con hojas y cuatros hojas las cuales pegue en el centro de mesa quedando de esta forma muy bonito y colorido. Espero se animen a realizarlo mis amigos
For decoration, cut out a fuchsia flower and a yellow flower. In green foami draw and cut out two branches with leaves and four leaves which I glued in the center of the table, thus being very beautiful and colorful. I hope my friends are encouraged to do it
RESULTADO FINAL /FINAL RESULT
Las fotos son de mi autoría y fueron tomadas con mi celular Xiaomi Redmi 7A
Traducido con www.DeepL.com/Translator (versión gratuita)
Edite las fotos con PowerPoint
The photos are my own and were taken with my Xiaomi Redmi 7A cell phone
Translated with www.DeepL.com/Translator (free version)
Edit the photos with PowerPoint
Bello trabajo, gracias por compartir tu técnica.
🎆🎇🎉🎊🌧️💐✨🌾🌱🌹🌙🌿🍃🥀⚡🌺☘️🍀🌈🌷⭐🪴🌵🌸🌟💮🌴🌳💫☀️💮☔🌲🌳🌍🌌🌠☄️🏵️🐝🌻🌼🍄🐞🦋💙☕💜🍍🎆🎇🎉🎊
Hola @chacald.dcymt, me alegra que te guste mi técnica. Me gusta trabajar con tubos de papel una vez que están decorados son irreconocibles, saludos
Thank you for sharing this amazing post on HIVE!
Your content got selected by our fellow curator @rezoanulvibes & you just received a little thank you via an upvote from our non-profit curation initiative!
You will be featured in one of our recurring curation compilations and on our pinterest boards! Both are aiming to offer you a stage to widen your audience within and outside of the DIY scene of hive.
Join the official DIYHub community on HIVE and show us more of your amazing work and feel free to connect with us and other DIYers via our discord server: https://discord.gg/mY5uCfQ !
If you want to support our goal to motivate other DIY/art/music/homesteading/... creators just delegate to us and earn 100% of your curation rewards!
Stay creative & hive on!
Thank you for your support, I appreciate it.