Saludos cordiales/Best regards
Bienvenidos una vez más a mi Blog/Welcome once again to my Blog
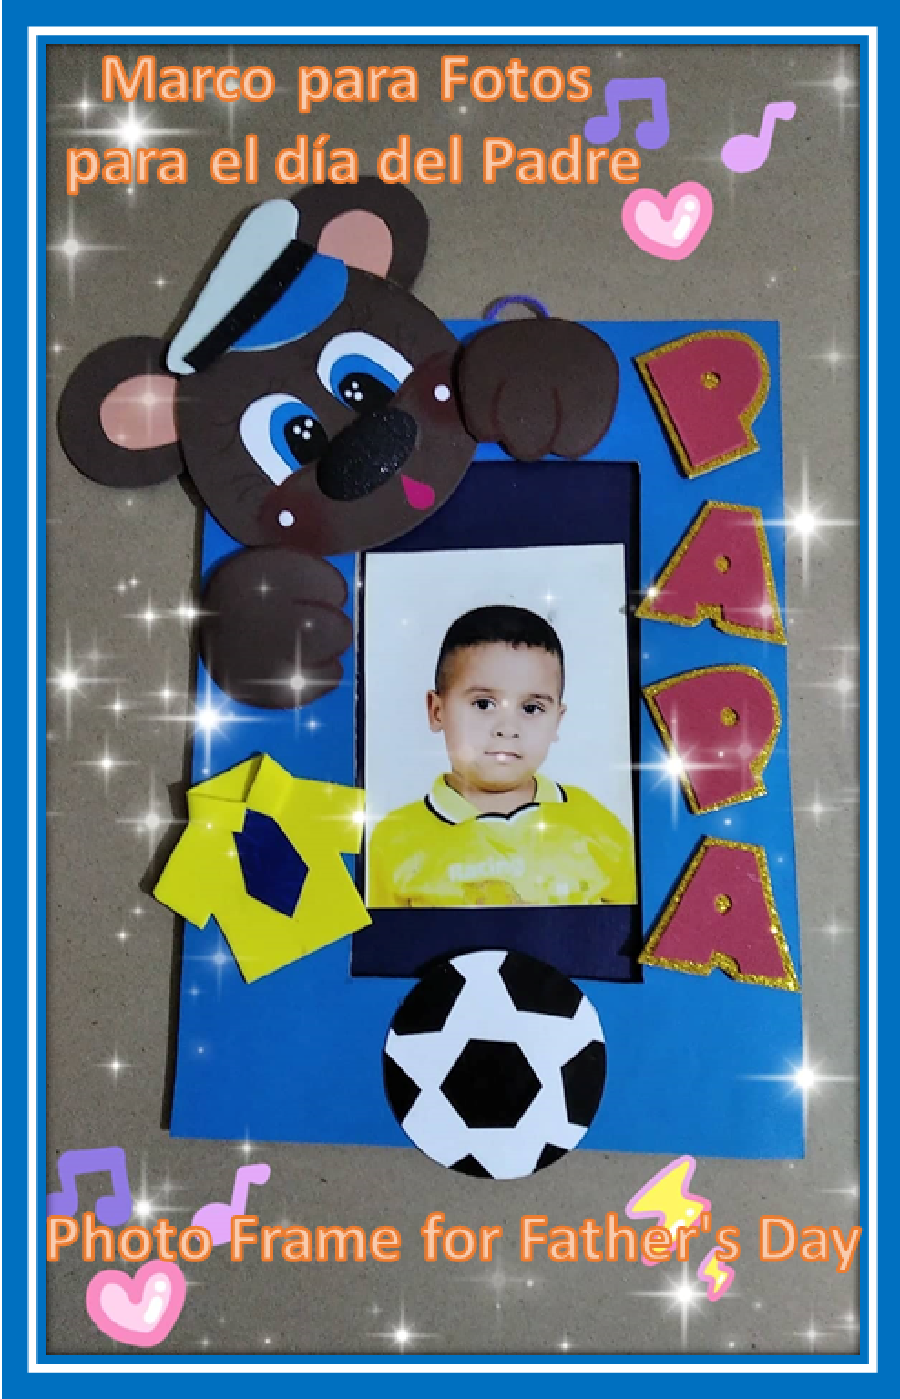

Que tal mis amigos lectores comenzando el día con la bendición de Dios, espero esten teniendo un excelente día. Ya se acerca el Día del Padre y la imaginación está a mil, las madres con sus hijos ingeniando que se le puede obsequiar a papi en su día y que mejor regalo que algo realizado con nuestras propias manitas, eso lo hará sentir súper orgulloso de su hijo, así que hoy le traigo un lindo portarretrato de un osito realizado con goma Eva y cartón. A continuación, les muestro como lo hice
How about my reader friends starting the day with God's blessing, I hope you are having a great day. Father's Day is approaching and the imagination is a thousand, mothers with their children concocting what can be given to daddy on his day and what better gift than something made with our own little hands, that will make him feel super proud of his son, so today I bring you a cute portrait of a bear made with Eva rubber and cardboard. Here I show you how I did it
PASO A PASO/STEP BY STEP
MATERIALES:
GOMA EVA NEGRA ESCARCHADA CARTULINA BLANCA
GOMA EVA DORADA ESCARCHADA
PAPEL LUSTRILLO NEGRO
GOMA EVA AMARILLA
GOMA EVA MARRON
SILICON CALIENTE
CARTULINA ZUL
GOMA EVA ROJA
SILICON FRIO
EXACTO
CARTON
TIJERA
MATERIALS:
BLACK FROSTED EVA FOAM WHITE CARDBOARD
FROSTED GOLD EVA FOAM
BLACK GLOSS PAPER
YELLOW EVA FOAM
BROWN EVA FOAM
HOT SILICONE
BLUE CARDBOARD
RED EVA FOAM
COLD SYLICON
EXACT
CARDBOARD
SCISSORS
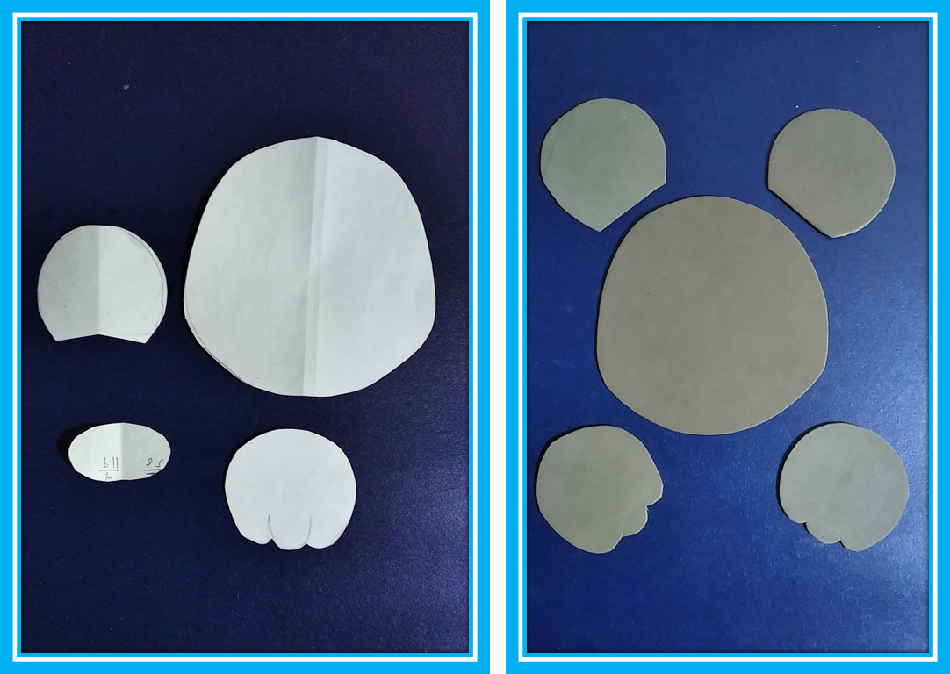
El primer paso es traspasar el molde a la goma Eva marrón y recortar la forma de la cara las orejas y las patas
The first step is to transfer the mold to the brown Eva rubber and cut out the shape of the face, ears and legs.
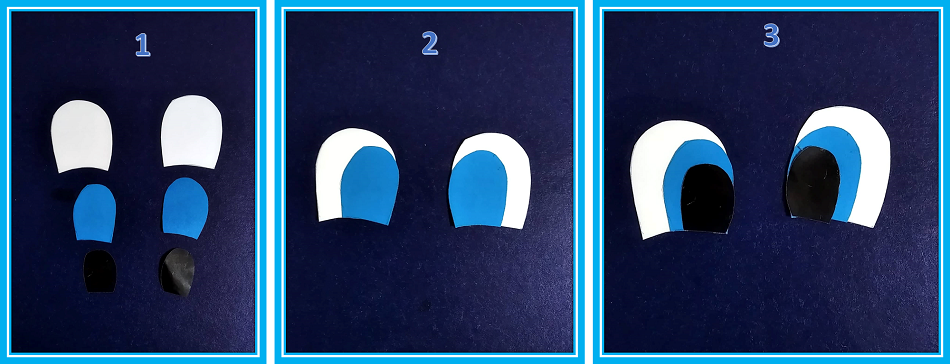
Luego se recortan los ojos en cartulina blanca, cartulina azul y por ultimo en papel lustrillo negro
Then the eyes are cut out in white cardboard, blue cardboard and finally in black luster paper.
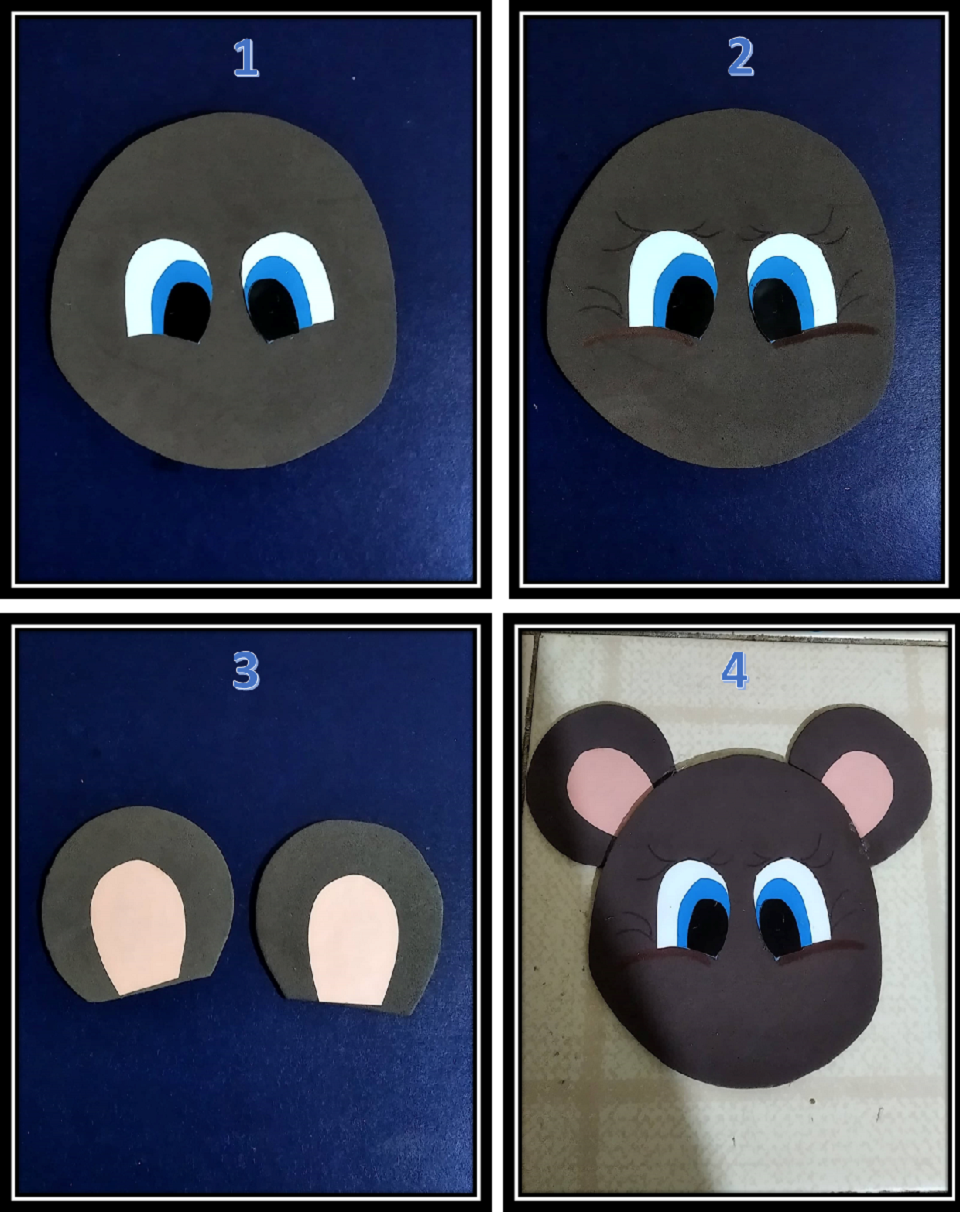
Después de tener los ojos ya listos se pegan en la cara con silicón frio ya que si no nos convence como quedo lo podemos despegar y volver a pegar. Hay cosas que es mejor pegar con silicón caliente, pero hay otras en las que es recomendable utilizar silicón frio. Dibuje las pestañas con marcador negro y coloque cartulina rosada a las orejas, luego las pegue por la parte de atrás de la cabeza
After having the eyes ready, they are glued on the face with cold silicone because if we are not convinced how it turned out, we can take it off and stick it again. There are things that it is better to stick with hot silicone, but there are others in which it is advisable to use cold silicone. Draw the eyelashes with a black marker and attach pink construction paper to the ears, then glue them to the back of the head


Para la gorra del oso marinero primero, dibuje el molde en hoja blanca y luego la traspase al foami o goma Eva blanco. Después recorte el molde en tres partes y tome la visera de la gorra y la dibuje en cartulina azul, dibuje una línea en foami negro escarchado, luego las uní con silicón frio
Tambien dibuje la nariz en foami negro escarchado y la pase por la plancha caliente para darle volumen
For the sailor bear cap first, draw the pattern on a white sheet and then transfer it to foam or white Eva rubber. Then cut the mold into three parts and take the visor of the cap and draw it on blue cardboard, draw a line on black frosted foami, then join them with cold silicone
I also drew the nose in frosty black foami and passed it through the hot iron to give it volume
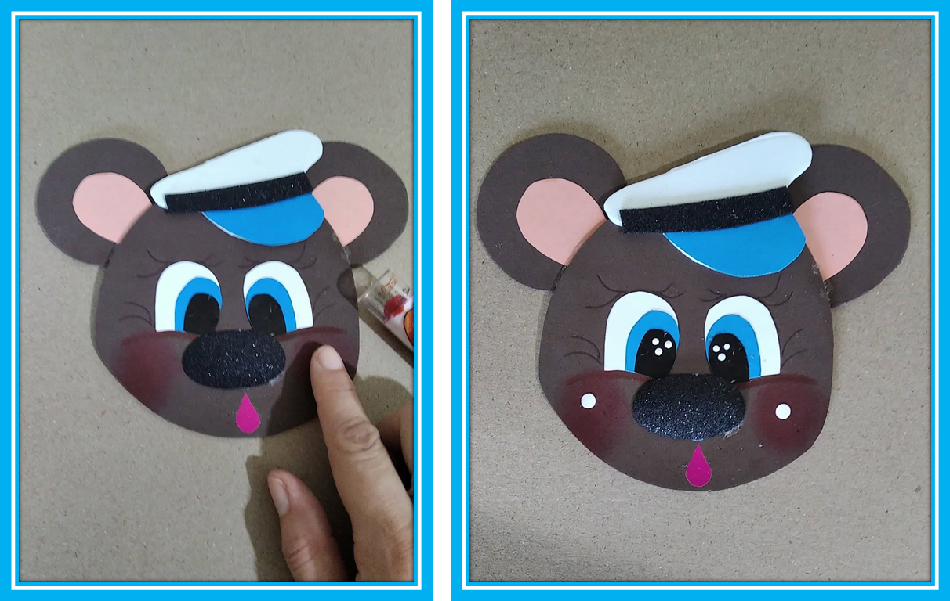
El rubor de las mejillas fue realizado con pintura labial, para la boca solo recorte papel lustrillo fucsia en forma de gota y la pegue debajo de la nariz, coloque tres puntos blancos en la pupila de cada ojo y un punto blanco en cada mejilla
The blush of the cheeks was made with lipstick, for the mouth just cut out fuchsia glitter paper in the shape of a drop and paste it under the nose, place three white dots in the pupil of each eye and a white dot on each cheek
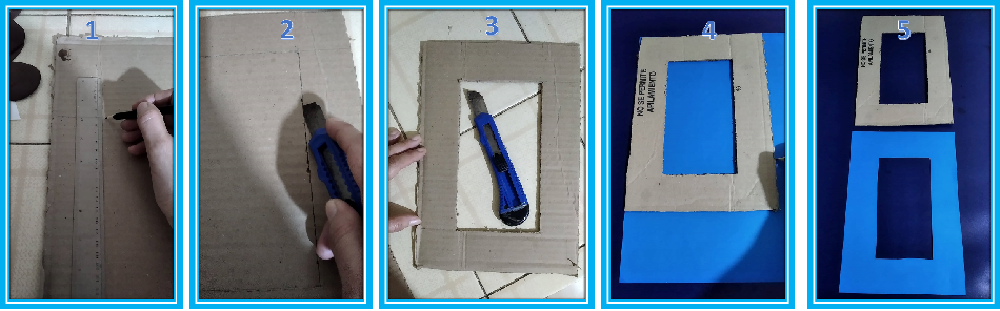
Para el marco utilice un trozo de cartón con las siguientes medidas 28 centímetros de largo por 20 centímetros de ancho. Después medí 5 centímetros de cada lado y recorte con el exacto. Se forro el marco con cartulina azul.
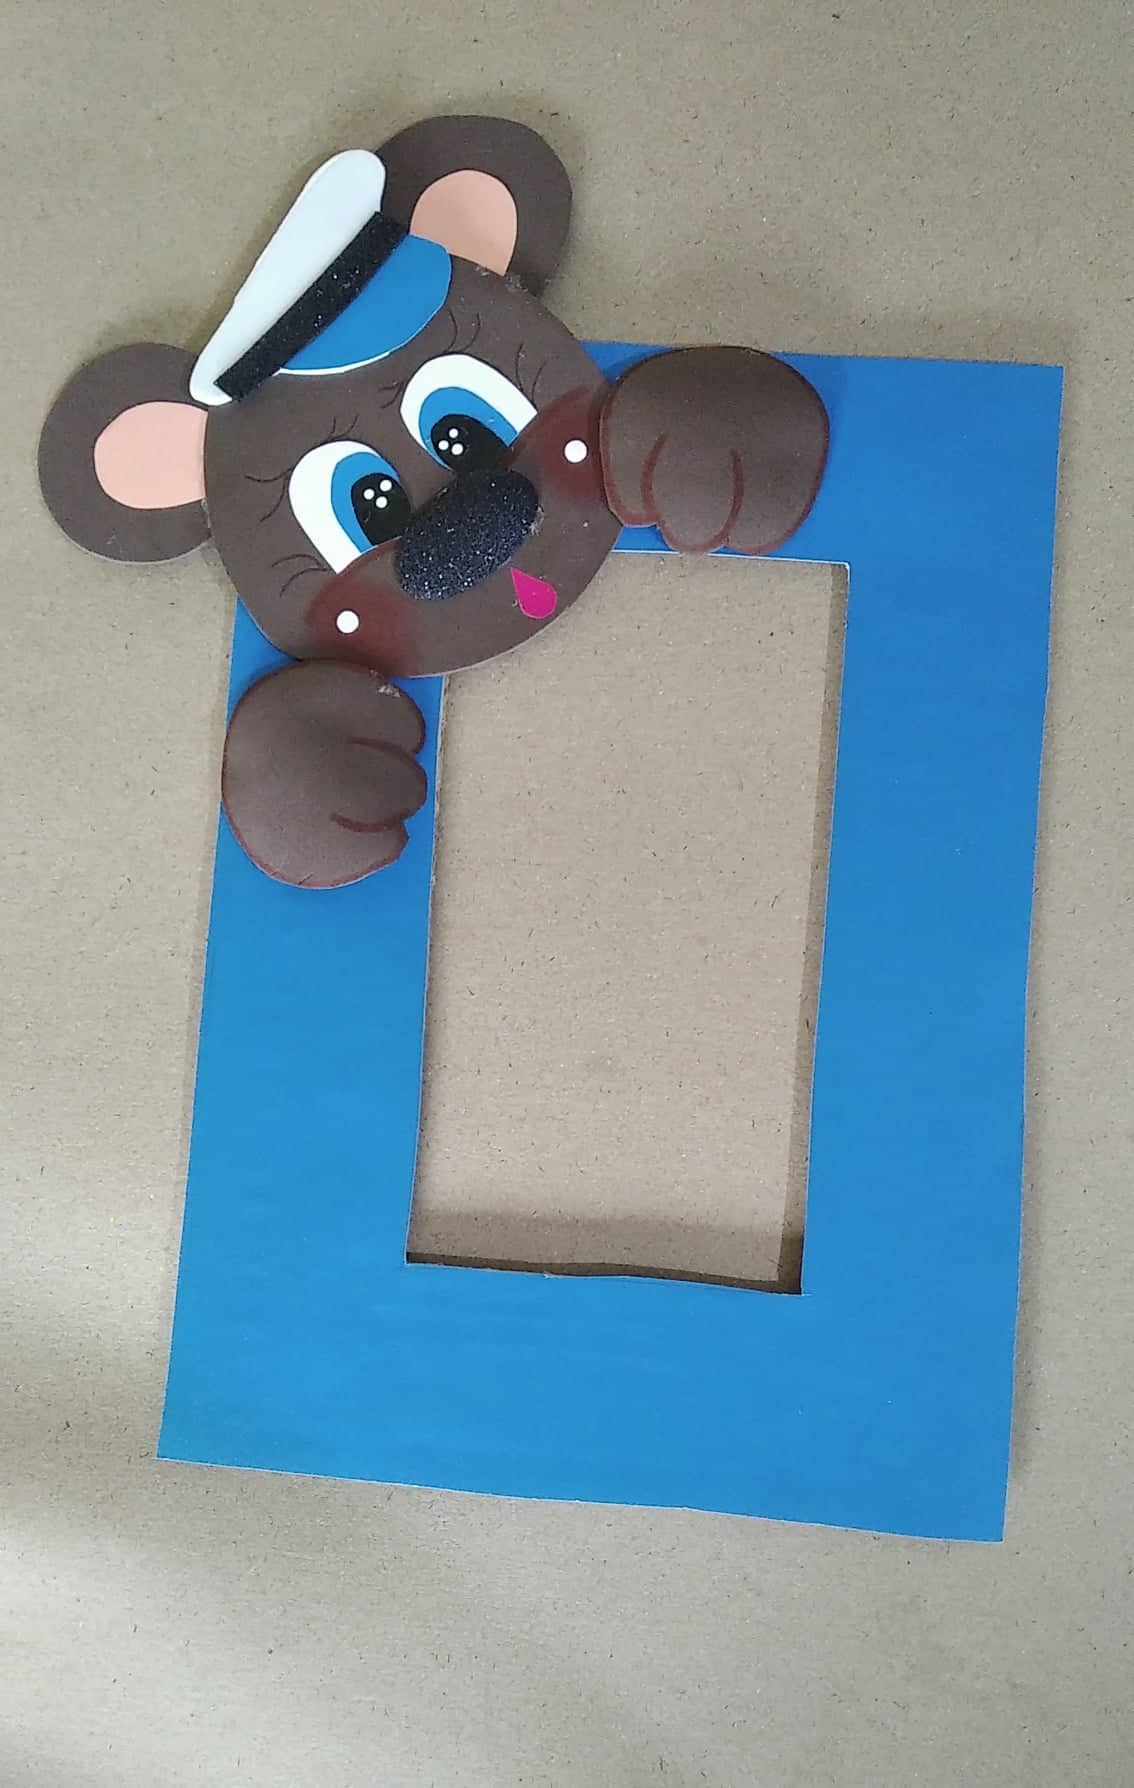
Cuando el marco se encontraba forrado pegue la cara del oso en la esquina izquierda y coloque las manos a los lados de la cara
For the frame, use a piece of cardboard with the following measurements: 28 centimeters long by 20 centimeters wide. Then I measured 5 centimeters on each side and cut with the exact one. The frame was lined with blue cardboard.
When the frame was lined, paste the bear's face in the left corner and place your hands on the sides of the face
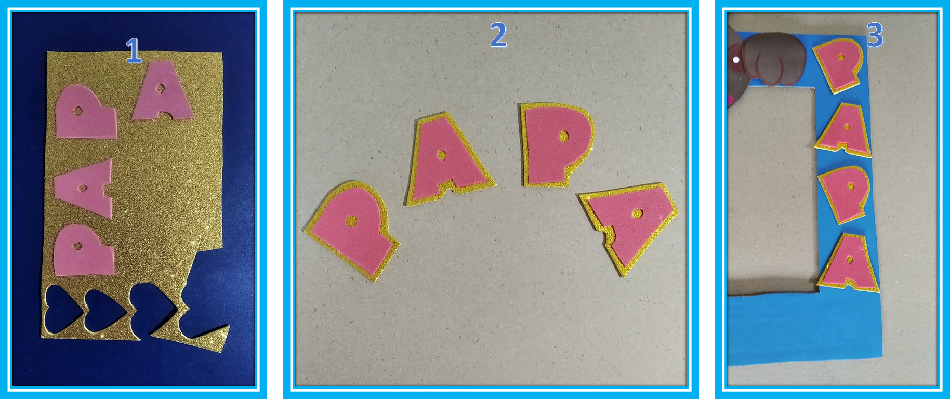
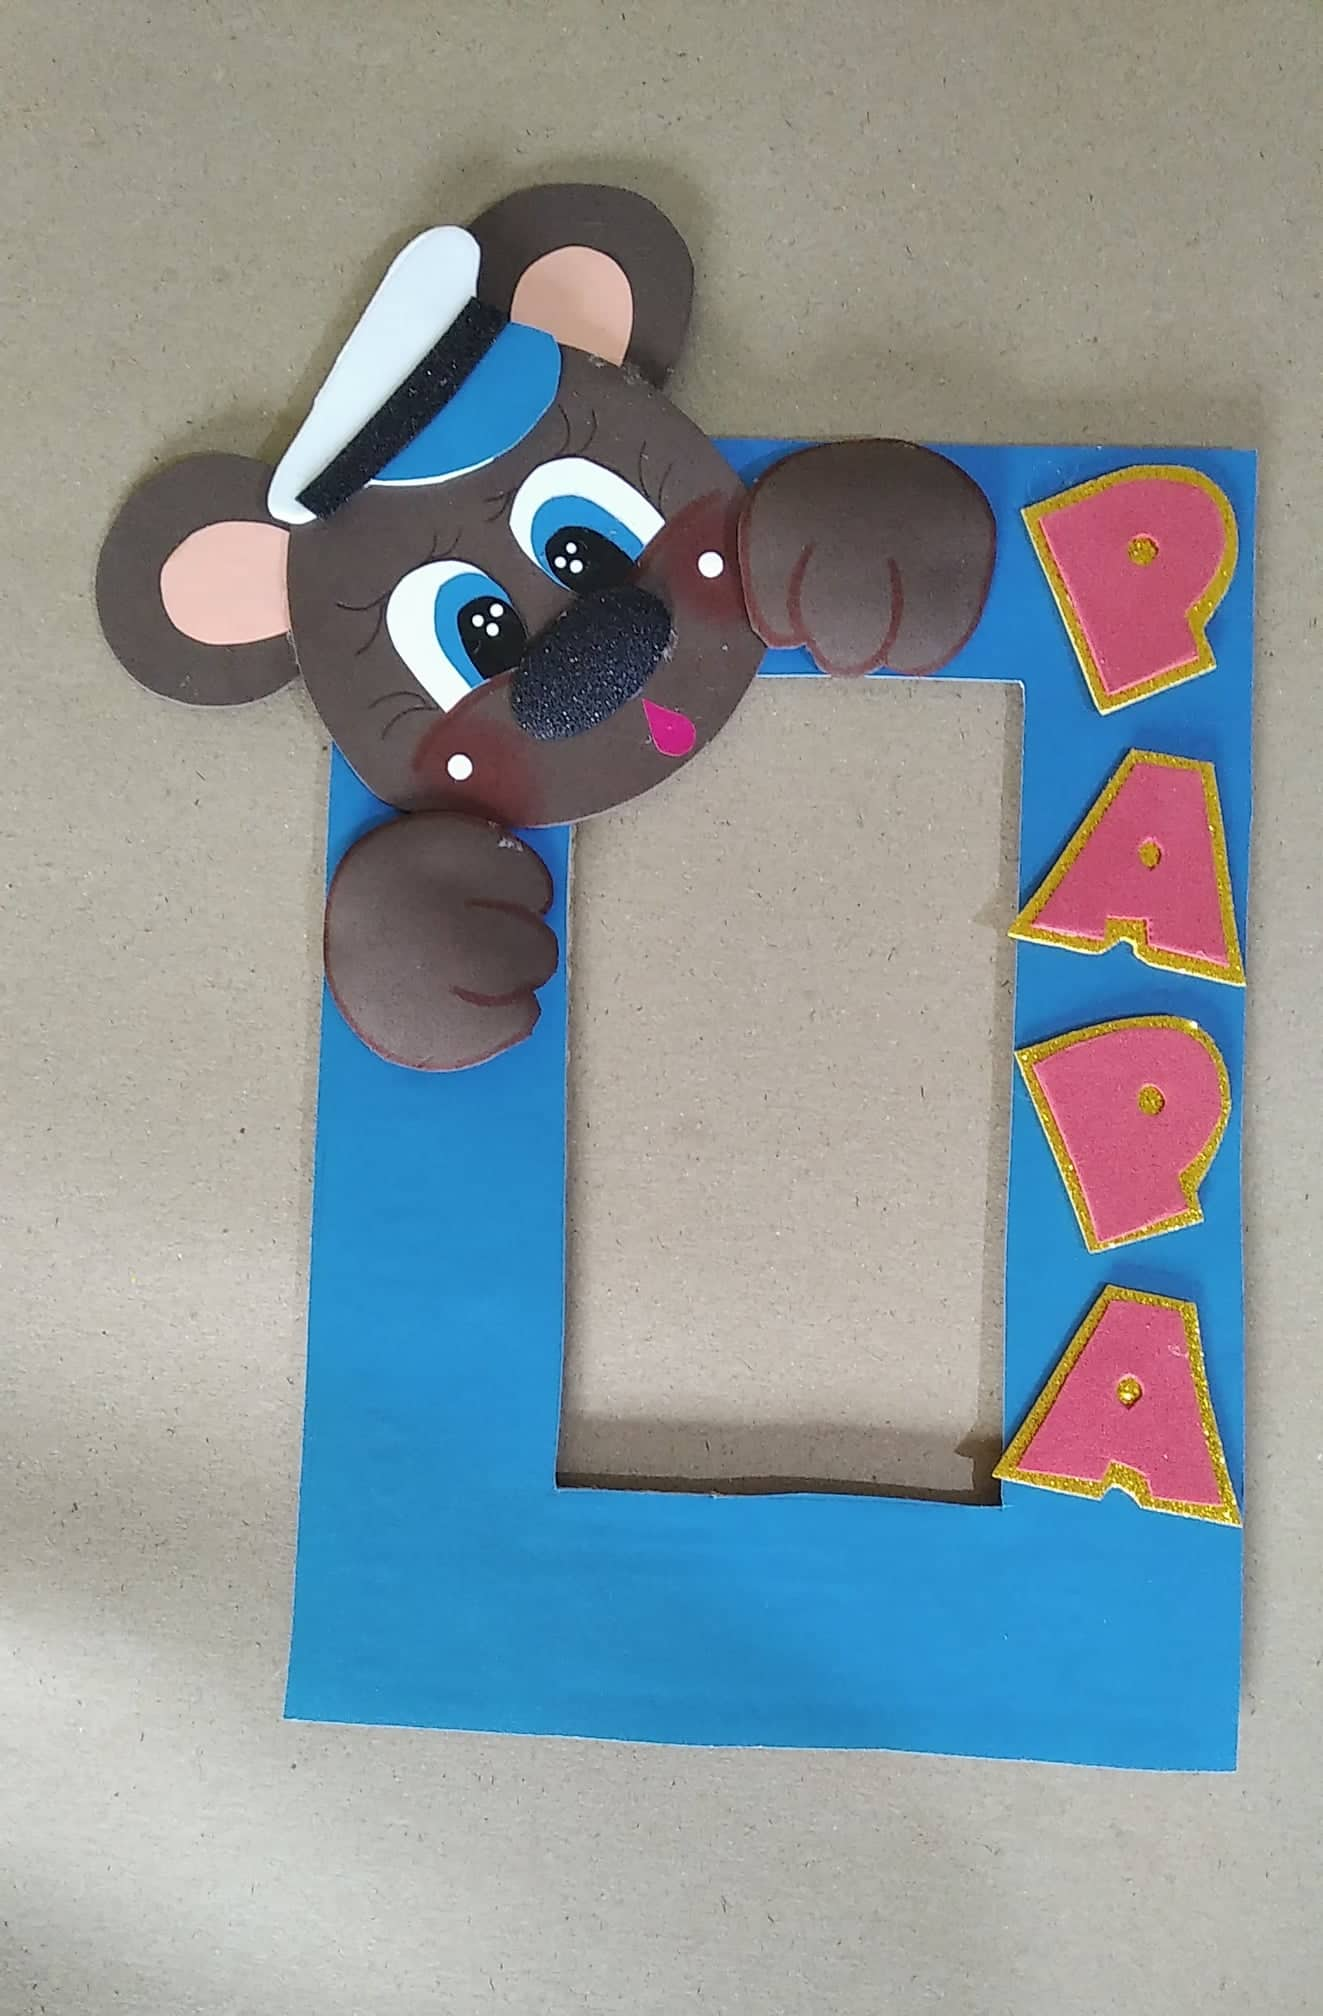
Para realizar las letras utilice foami rojo luego de recortarlas las pegue sobre foami dorado escarchado y recorte. Las coloque a la derecha del marco una debajo de la otra en forma un poco desordenada
To make the letters, use red foami after cutting them, paste them on frosted gold foami and cut. Place them to the right of the frame one below the other in a slightly messy way
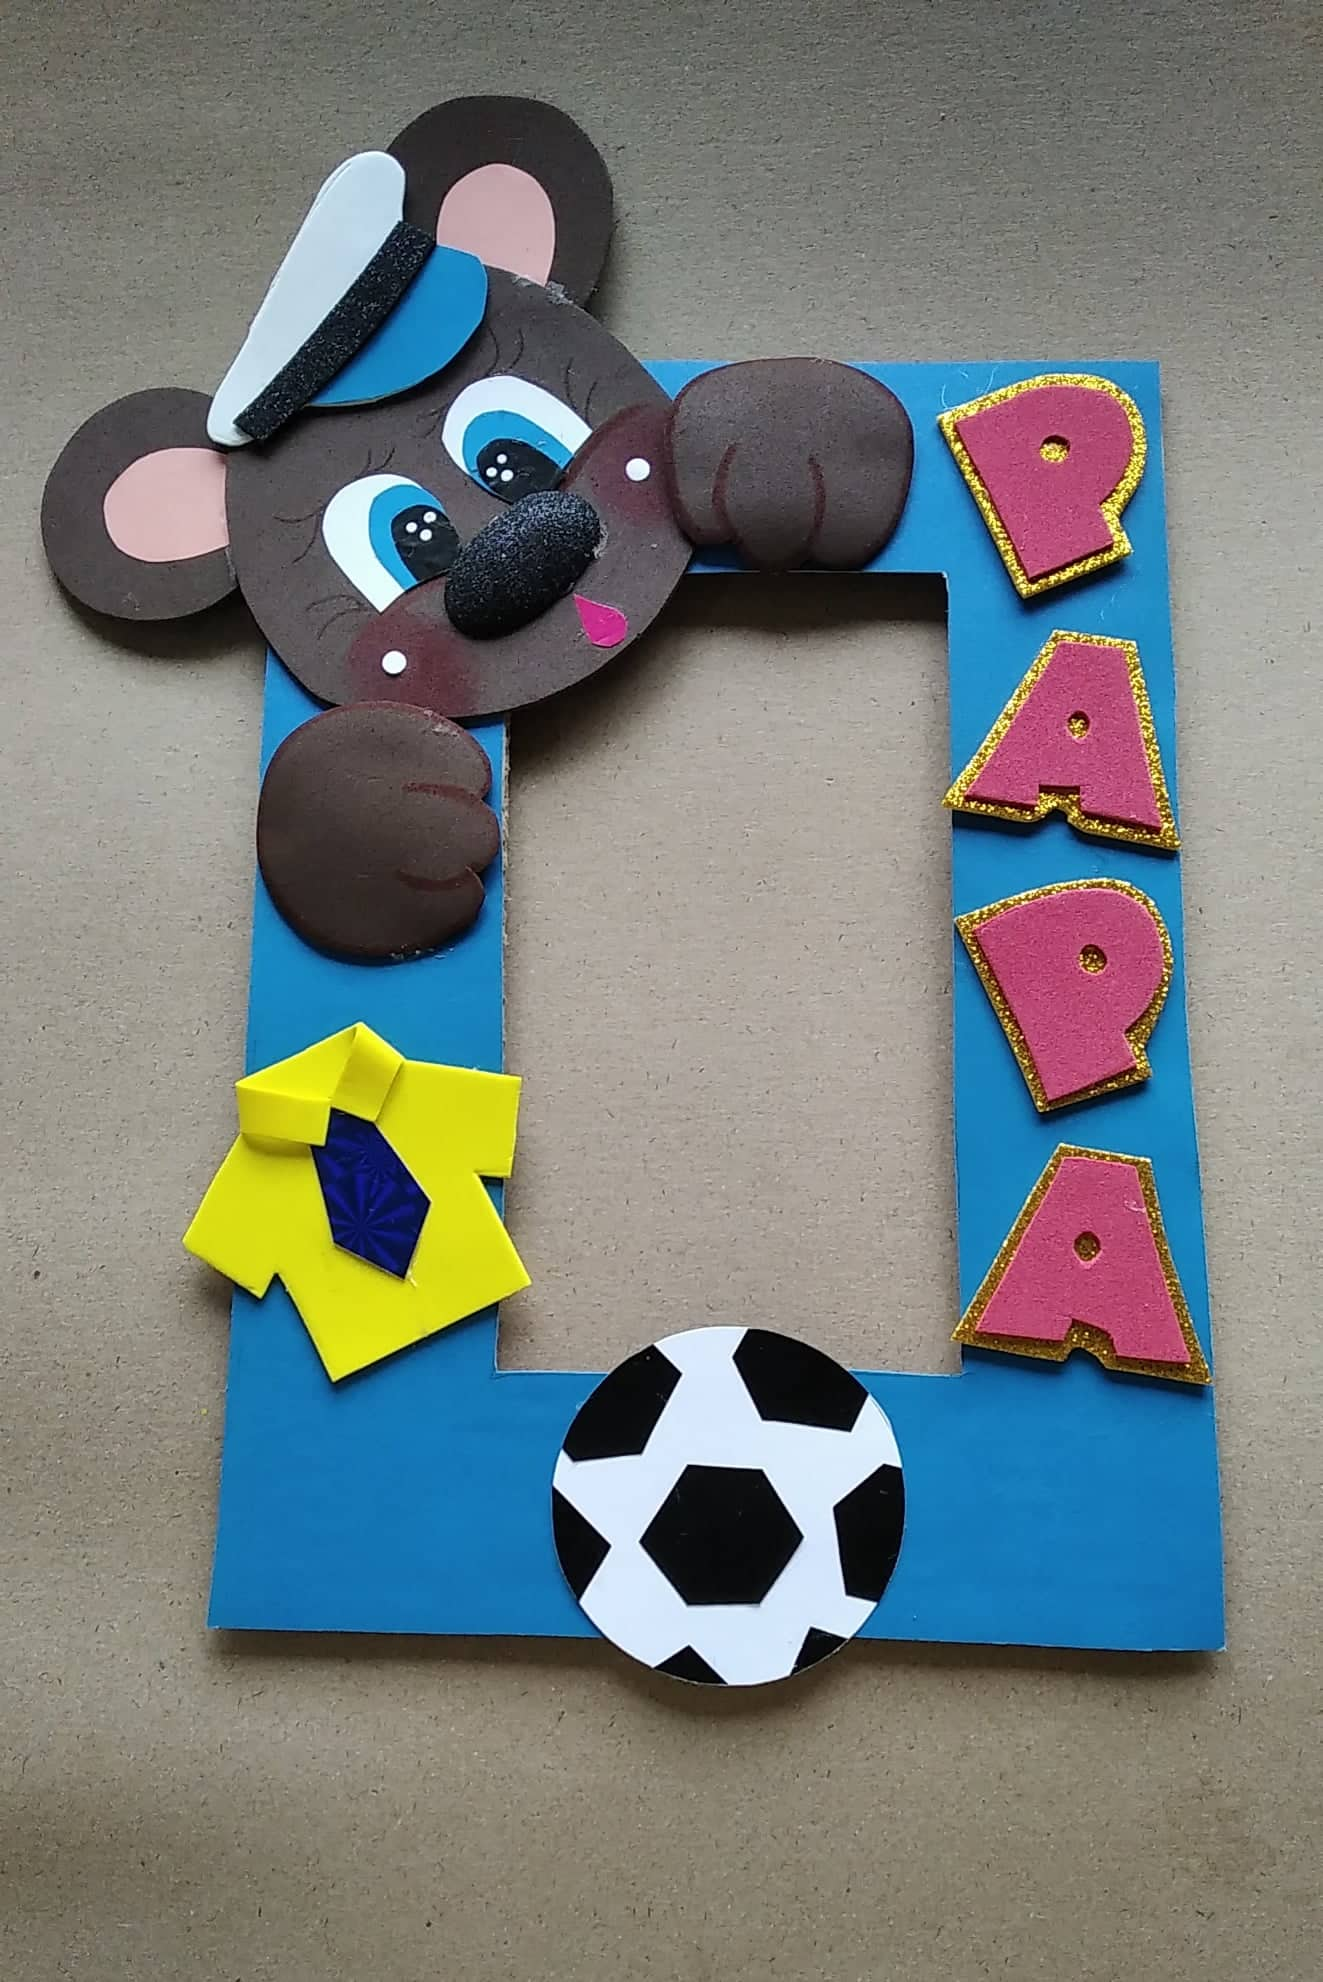
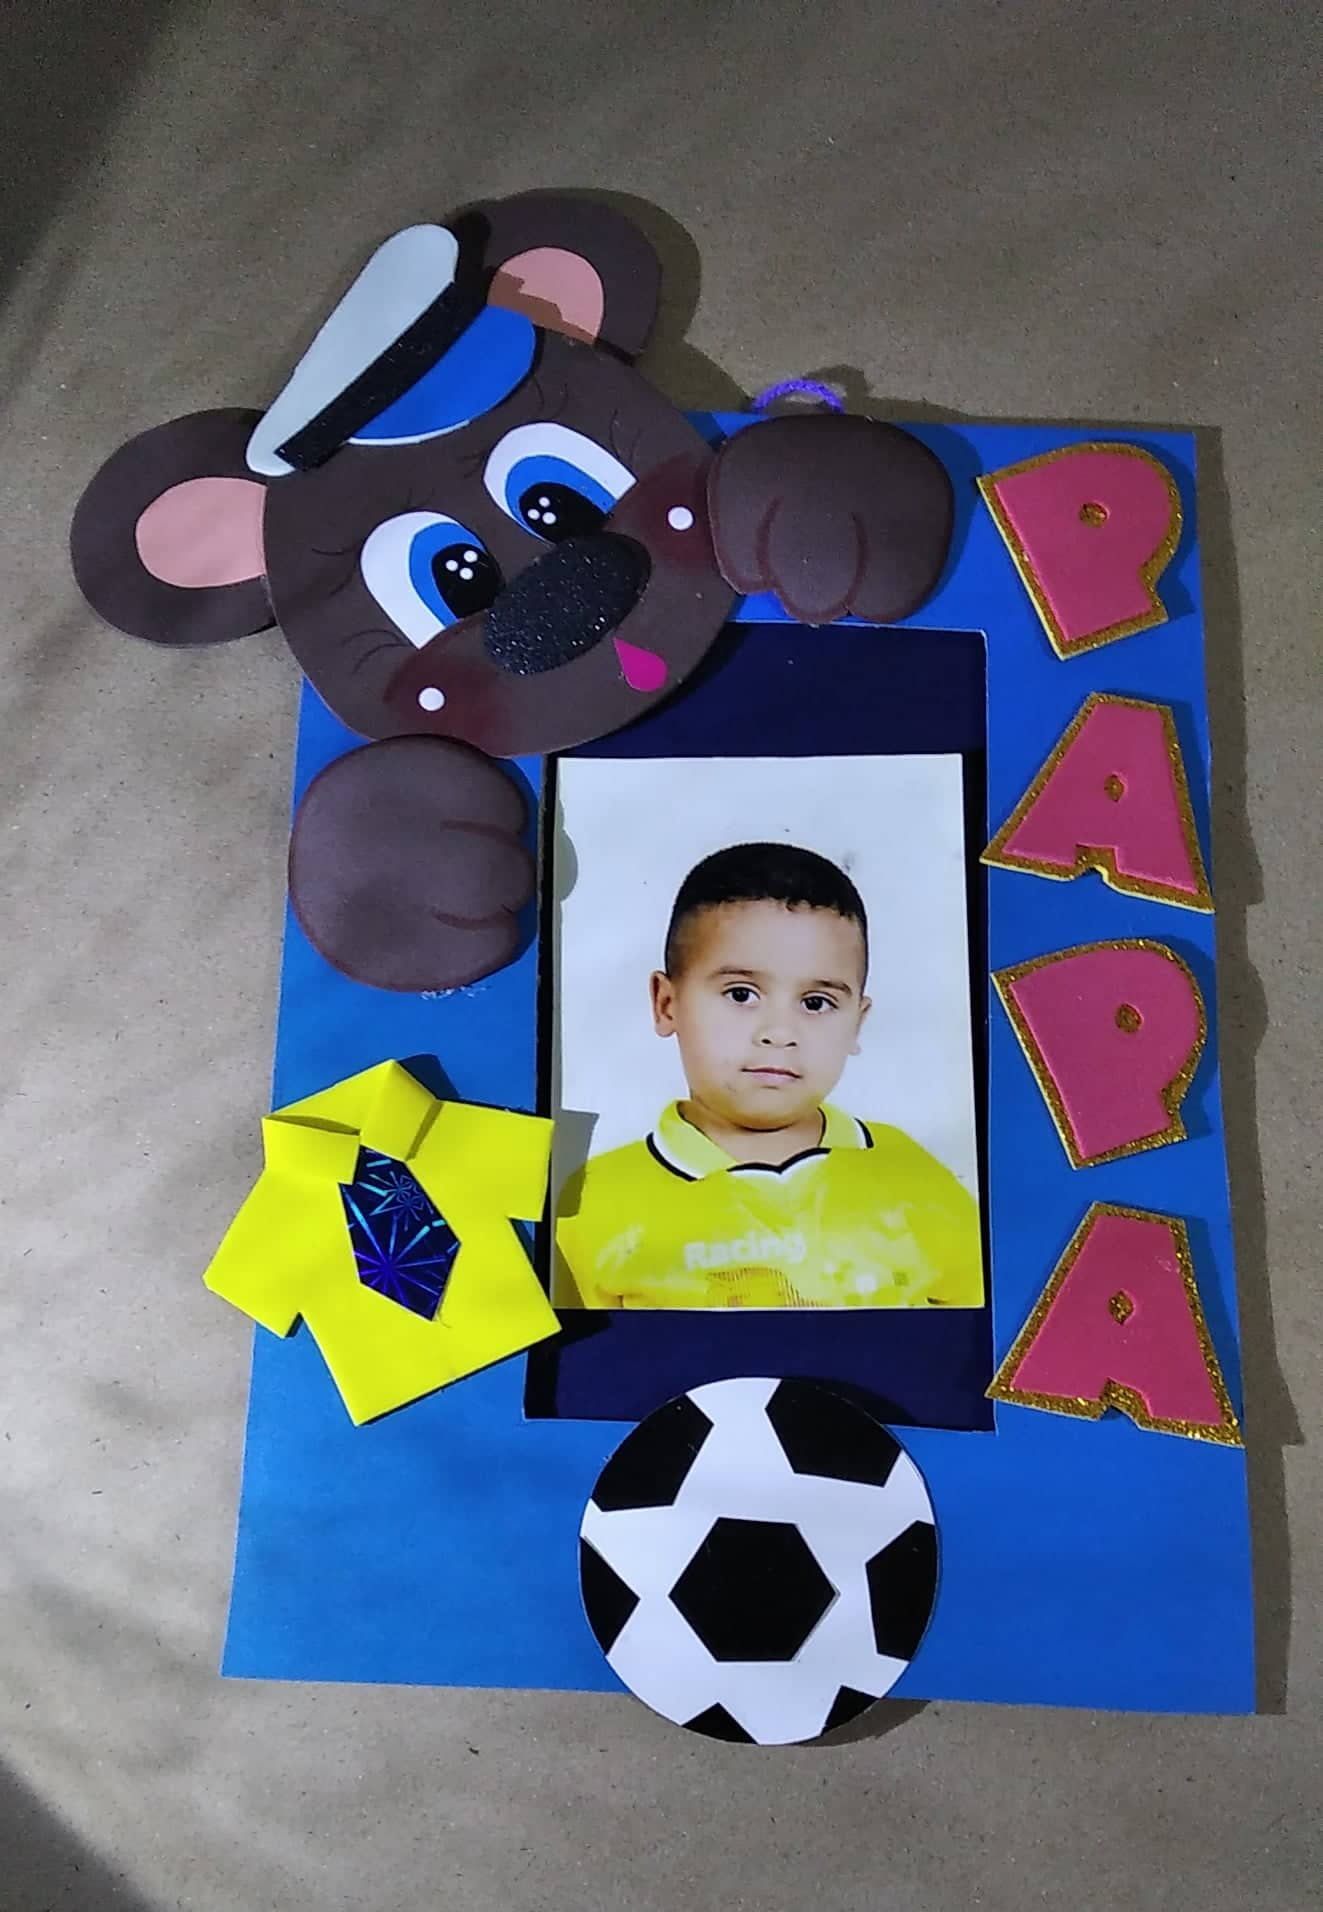
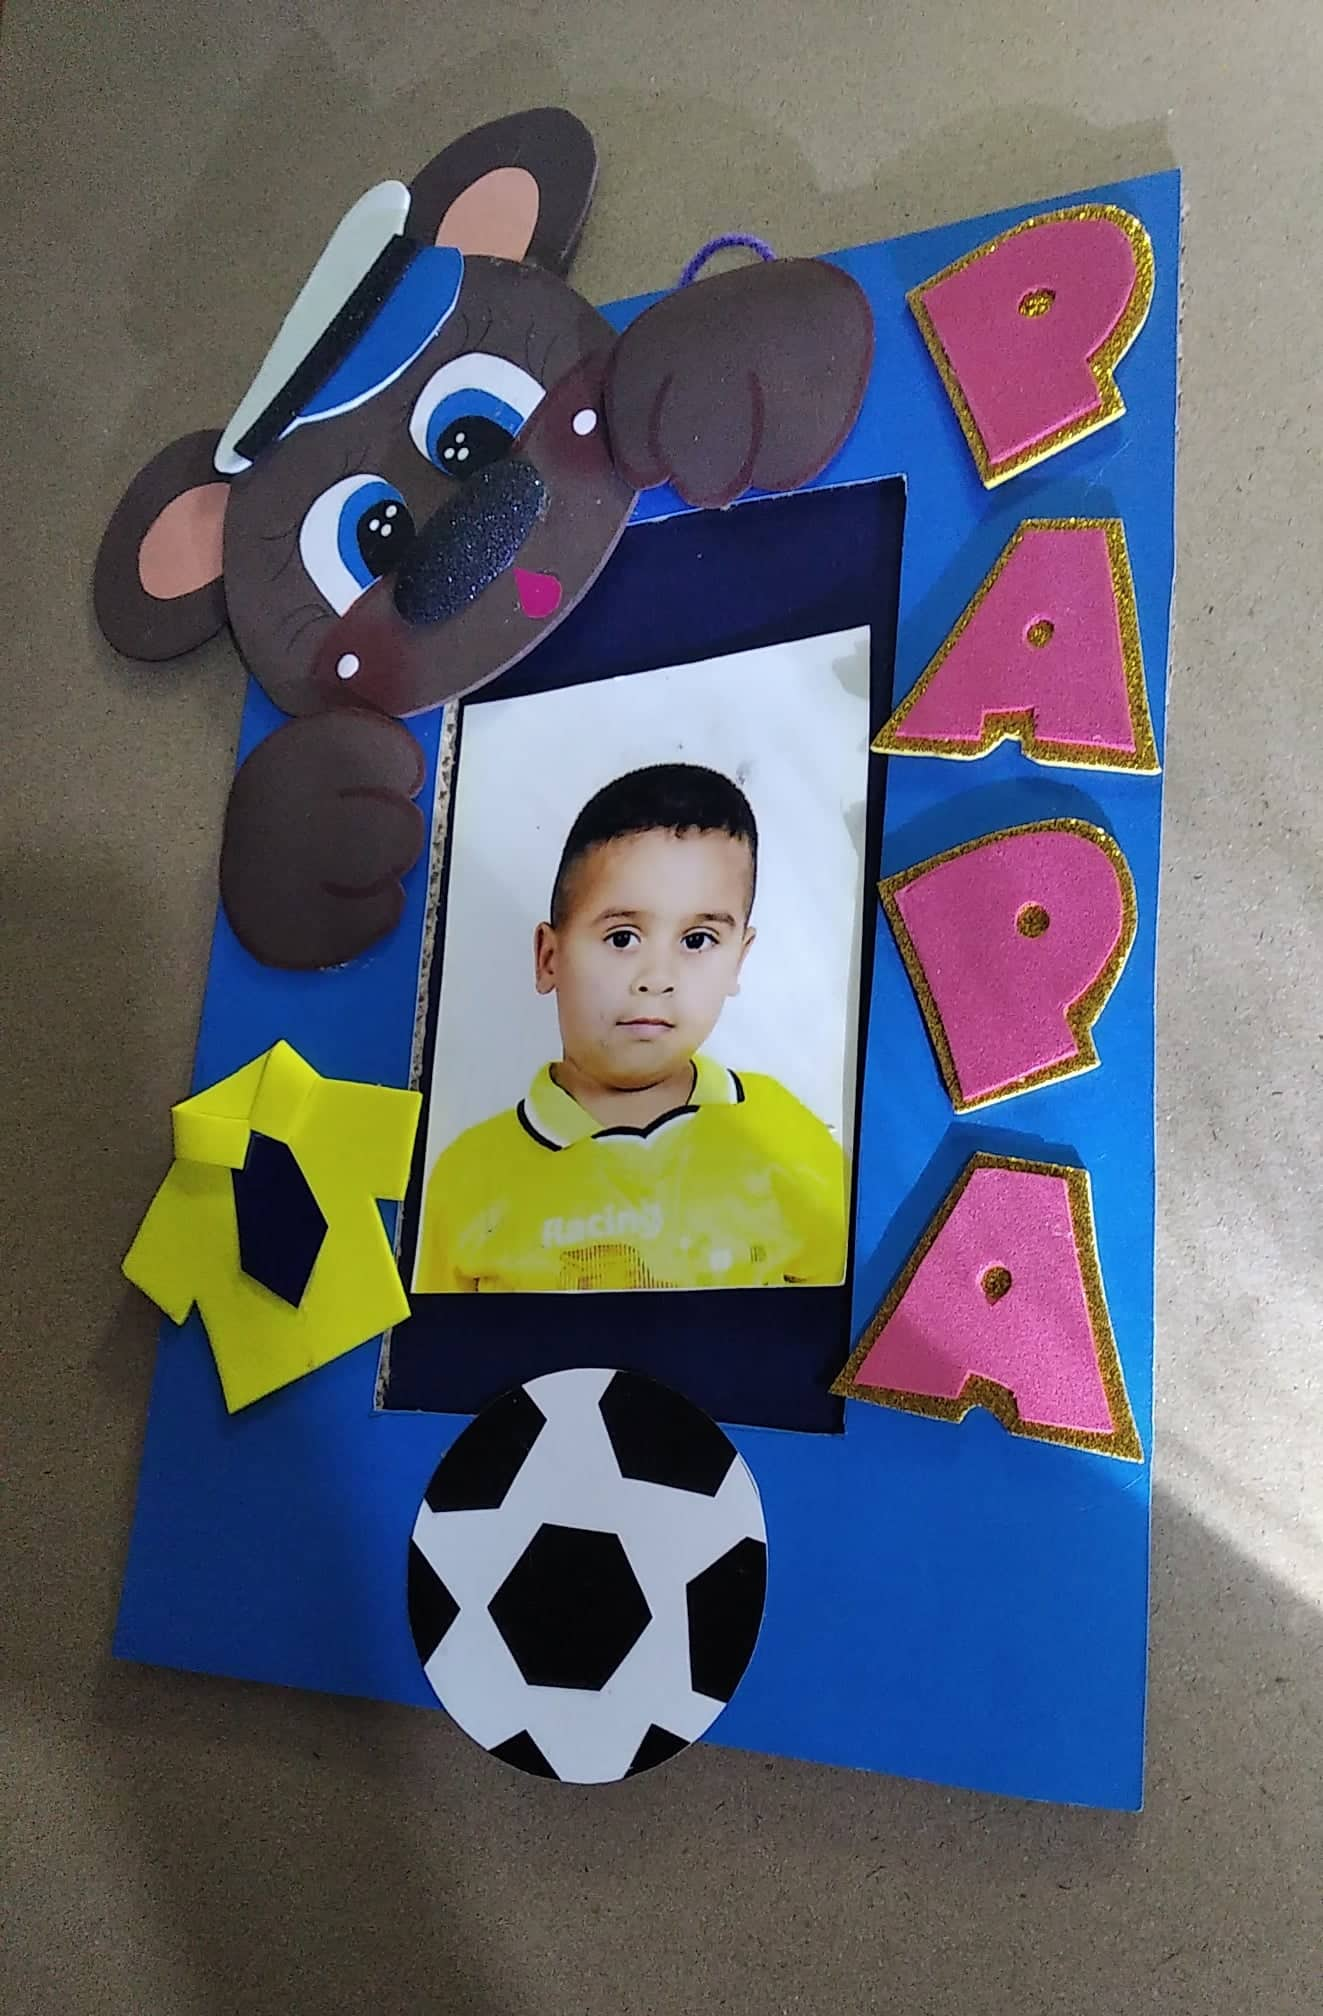
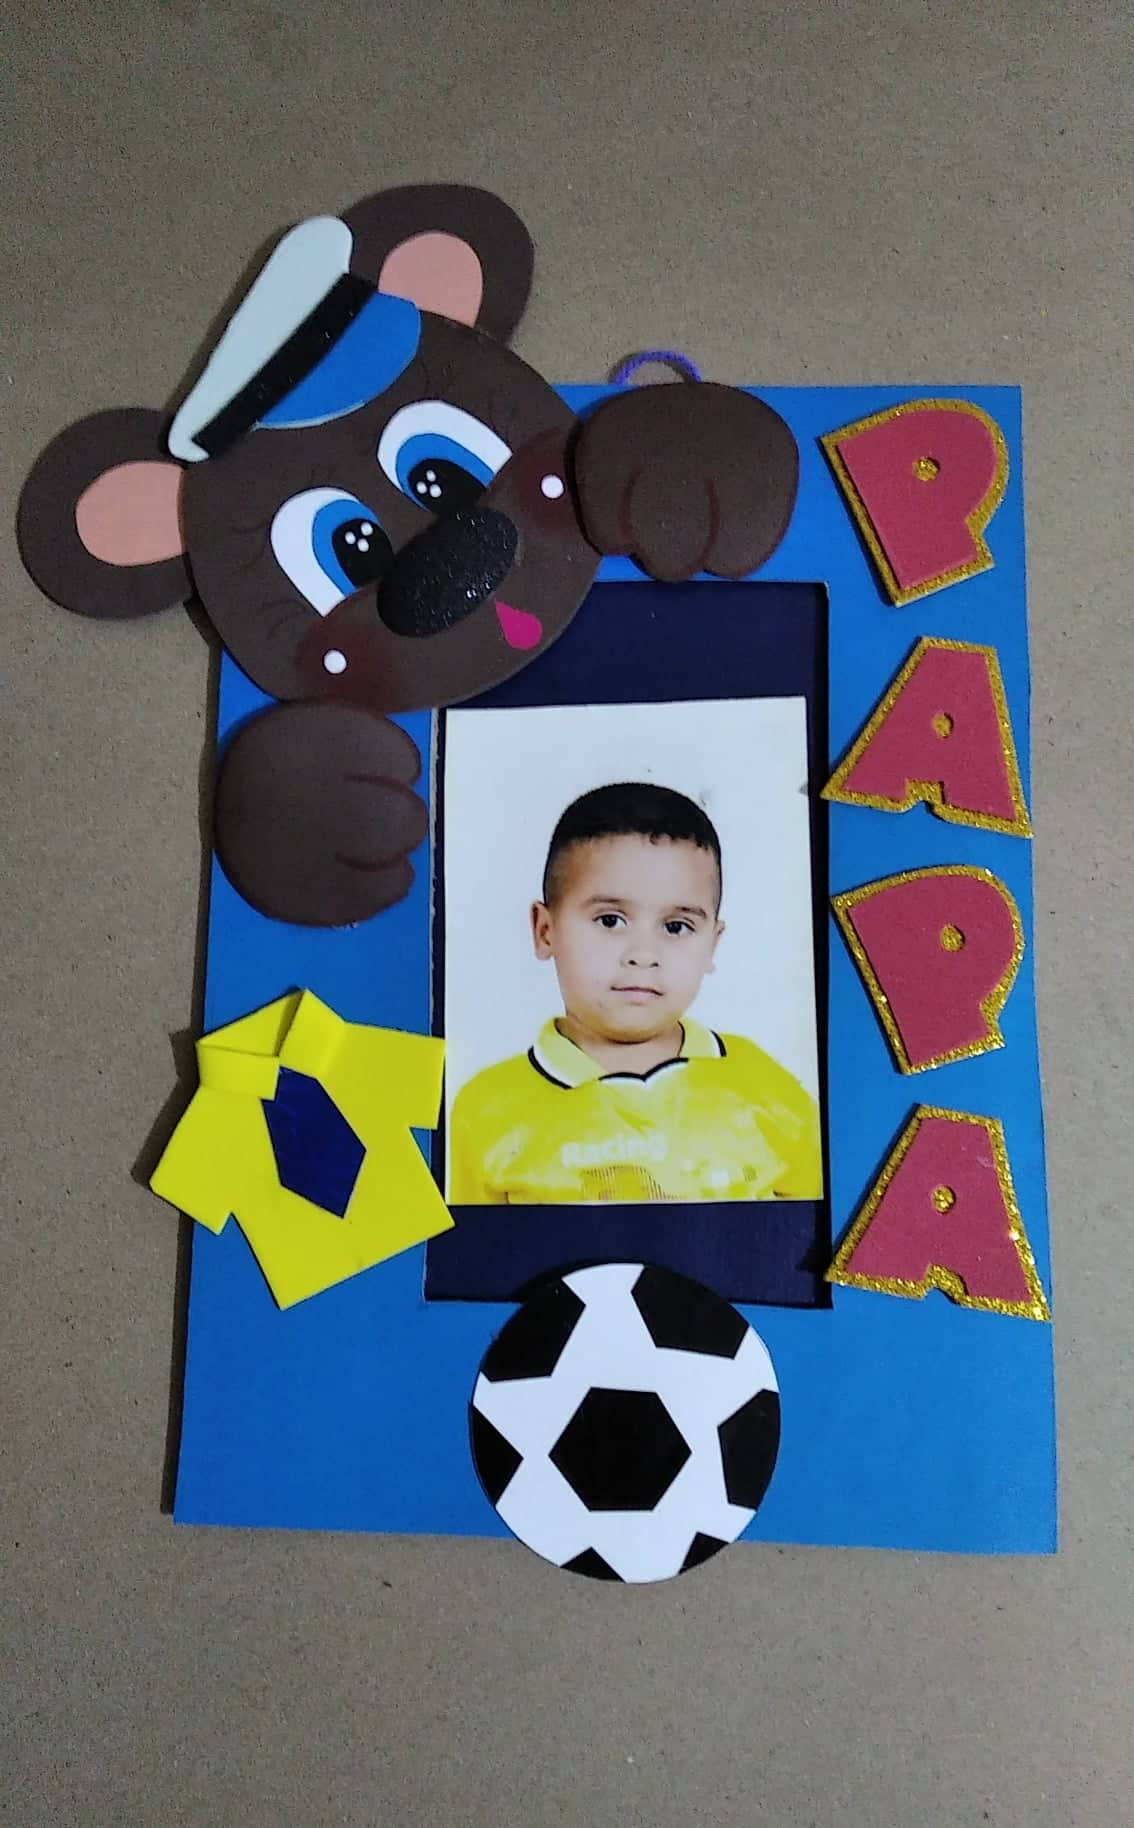
Ya para finalizar decore el marco con una camisa amarilla y un balón de futbol, además pegue una cartulina azul oscuro en la parte de atrás para sostener la foto. Queda muy hermoso y no es complicado de realizar, espero sea de su agrado y puedan pasar un rato agradable realizando esta preciosa manualidad para papa en su día
To finish, decorate the frame with a yellow shirt and a soccer ball, and glue a dark blue cardboard on the back to hold the photo. It is very beautiful and it is not complicated to make, I hope you like it and you can spend a pleasant time doing this beautiful craft for dad on his day
RESULTADO FINAL /FINAL RESULT
Las fotos son de mi autoría y fueron tomadas con mi celular Xiaomi Redmi 7A
Traducido con www.DeepL.com/Translator (versión gratuita)
Edite las fotos con PowerPoint
The photos are my own and were taken with my Xiaomi Redmi 7A cell phone
Translated with www.DeepL.com/Translator (free version)
Edit the photos with PowerPoint
Separadores @eve66/Separators @eve66
Gracias por apoyar mi Blog, hasta la próxima oportunidad, se les quiere/Thank you for supporting my Blog, until the next opportunity, you are loved
Te quedo precioso
Gracias amiga,lo hago con mucho cariño
Thank you for sharing this amazing post on HIVE!
Your content got selected by our fellow curator @hafizullah & you just received a little thank you via an upvote from our non-profit curation initiative!
You will be featured in one of our recurring curation compilations and on our pinterest boards! Both are aiming to offer you a stage to widen your audience within and outside of the DIY scene of hive.
Join the official DIYHub community on HIVE and show us more of your amazing work and feel free to connect with us and other DIYers via our discord server: https://discord.gg/mY5uCfQ !
If you want to support our goal to motivate other DIY/art/music/homesteading/... creators just delegate to us and earn 100% of your curation rewards!
Stay creative & hive on!
Thank you for your support, I really appreciate it.
Un bonito detalle 😍... gracias por compartir tu idea.
🎆🎇🎉🎊🌧️💐✨🌾🌱🌹🌙🌿🍃🥀⚡🌺☘️🍀🌈🌷⭐🪴🌵🌸🌟💮🌴🌳💫☀️💮☔🌲🌳🌍🌌🌠☄️🏵️🐝🌻🌼🍄🐞🦋💙☕💜🍍🎆🎇🎉🎊