En este tutorial les muestro como elaborar este fondo original, fusionando el dibujo manual y digital mostrando como podemos plasmar nuestras ideas artísticas en un una foto.
In this tutorial I show you how to make this original background, merging manual and digital drawing showing how we can capture our artistic ideas in a photo.

Hola gente bella de esta comunidad, ¿Qué tal como se la están pasando?, mis mejores deseos para todos ustedes.
En esta oportunidad les mostrare como crear un fondo que nos guste, desde cero y ayudarte a plasmar lo que te imaginas de la manera más fiel en un lienzo digital uses el programa que uses, si eres un fanático de las artes manuales y digitales. Como es en mi caso, este post, te podría ser de mucha utilidad.
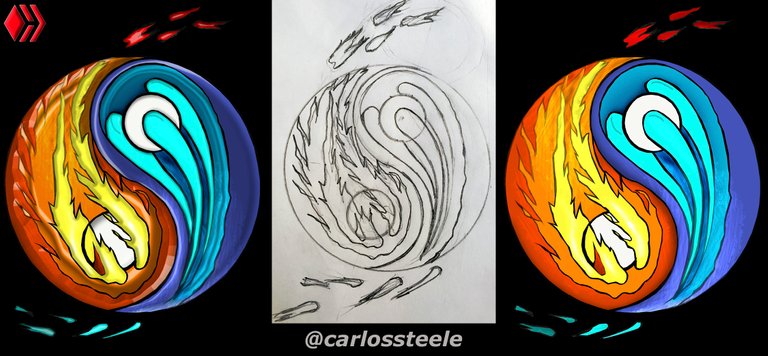
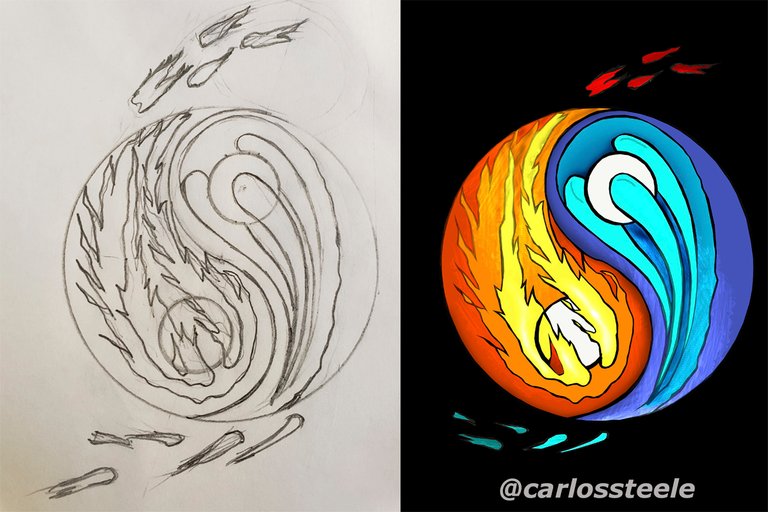
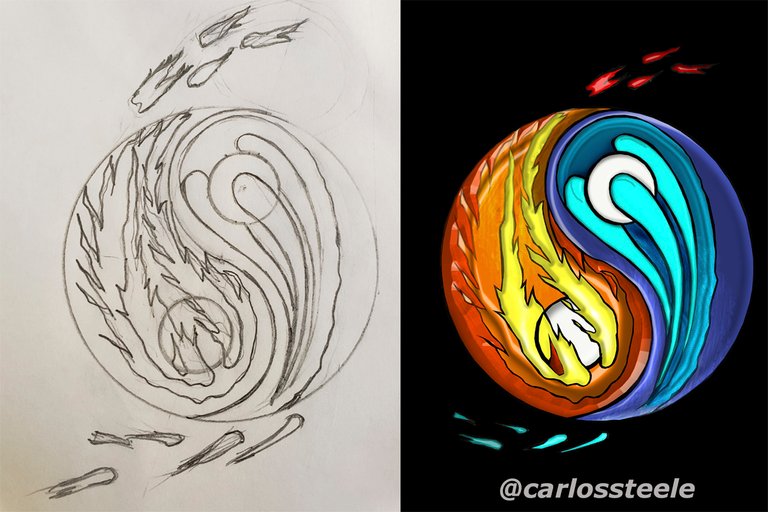
Decidí recrear el símbolo del yin y el yang personalizándolo con un motivo, fuego y el agua, que para mí representa el equilibrio de las fuerzas supremas de los elementos más poderosos de nuestro entorno, siendo estos una digna representación de polos opuestos.
Es por eso que se me ocurrió utilizar este método, dibujo a mano alzada en una libreta a grafito, para luego sacarle una foto y por consiguiente utilizar las mismas líneas de mi dibujo a grafito para darle color, efectos y textura. Agregándole vida, sentimientos y forma a lo que queremos expresar.
Espero que les sea de su agrado, comenzamos:
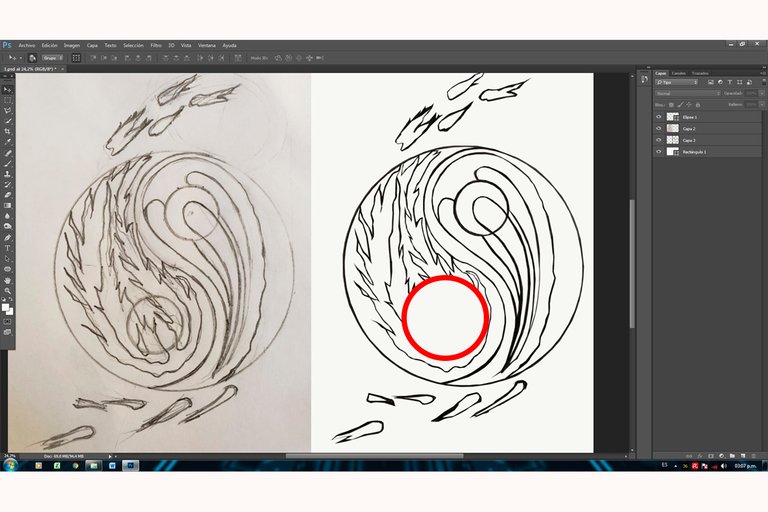
Utilice una libreta, hoja reciclada blanca, lápiz, borrador y un compás. Luego de realizar mi dibujo sobre la hoja, le saque una foto y procedí a editarla con Photoshop, utilizando varias de muchas técnicas para realizar lo que te mostraré a continuación.
Hello beautiful people of this community, how are you doing? My best wishes to all of you.
In this opportunity I will show you how to create a background that we like, from scratch and help you capture what you imagine in the most faithful way on a digital canvas, regardless of the program you use, if you are a fan of manual and digital arts. As it is in my case, this post could be very useful to you.
I decided to recreate the yin and yang symbol, personalizing it with a motif, fire and water, which for me represents the balance of the supreme forces of the most powerful elements in our environment, these being a worthy representation of opposite poles.
That is why it occurred to me to use this method, freehand drawing in a graphite notebook, and then take a photo of it and therefore use the same lines of my graphite drawing to give it color, effects and texture. Adding life, feelings and form to what we want to express.
I hope you like it, let's start:
Use a notebook, recycled white sheet, pencil, eraser and a compass. After making my drawing on the sheet, I took a photo of it and proceeded to edit it with Photoshop, using several of many techniques to do what I will show you next.
Pasos de elaboración:
Preparation steps:
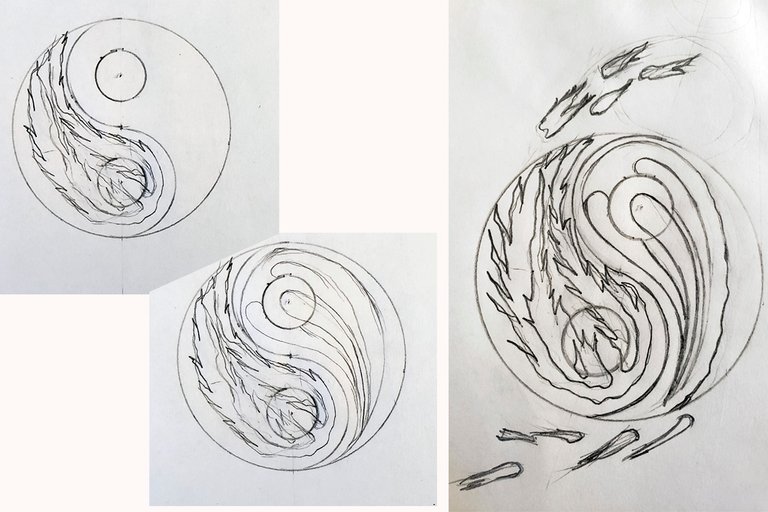
Creamos una circunferencia con el compás con el diámetro que más nos guste, seccionamos el diámetro en tres partes iguales para poder así crear nuestra figura lo más simétrica posible.
We create a circumference with the compass with the diameter that we like the most, we section the diameter into three equal parts in order to create our figure as symmetrically as possible.

Usamos el borrador para eliminar las líneas guías y procedemos a darle forma con los diseños generado por nuestro cerebro que más nos guste.
TWe use the eraser to eliminate the guide lines and proceed to shape it with the designs generated by our brain that we like the most.

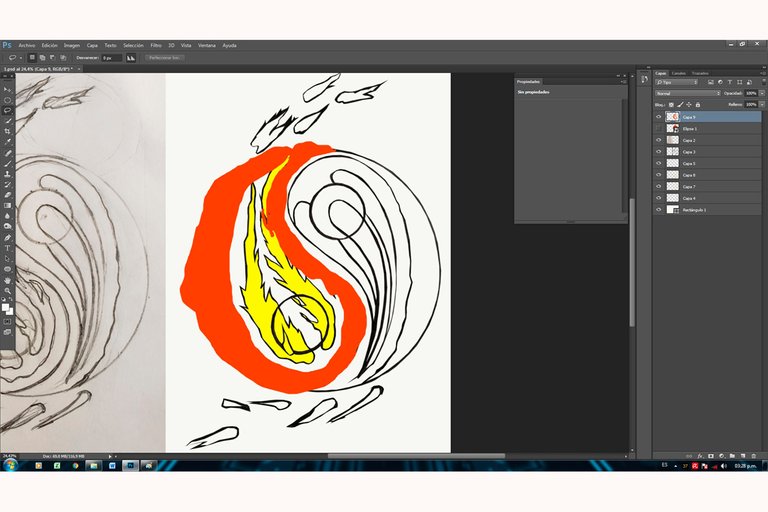
Para recrear el fuego nos vamos a la forma básica de lo que sería una llama y por ende es importantísimo nuestro borrador, este nos permitirá dar con las líneas y figuras deseadas a lo que nos imaginábamos al principio.
En el caso del agua, imagine una esfera con mucho poder saliendo del océano creando el efecto mostrado. Agregando salpicaduras en ambos elementos.
To recreate the fire we go to the basic shape of what a flame would be and therefore our draft is very important, this will allow us to find the desired lines and figures to what we imagined at the beginning.
In the case of water, imagine a sphere with a lot of power coming out of the ocean creating the effect shown. Adding splashes on both elements.
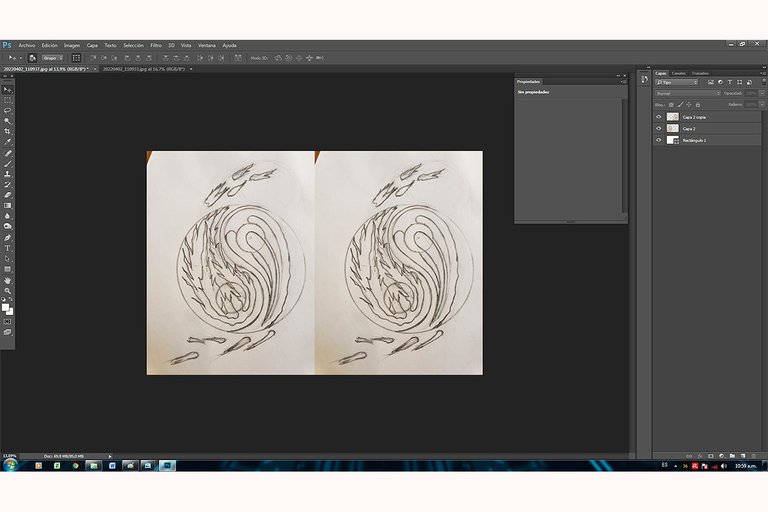
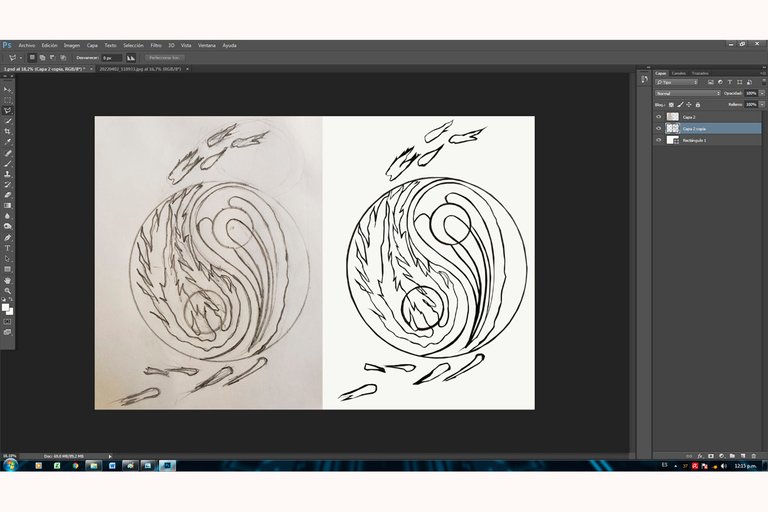
Pasada la foto y abierta en el programa de edición, hago una copia para tenerla como referencia visual a lo que originalmente me imaginaba.
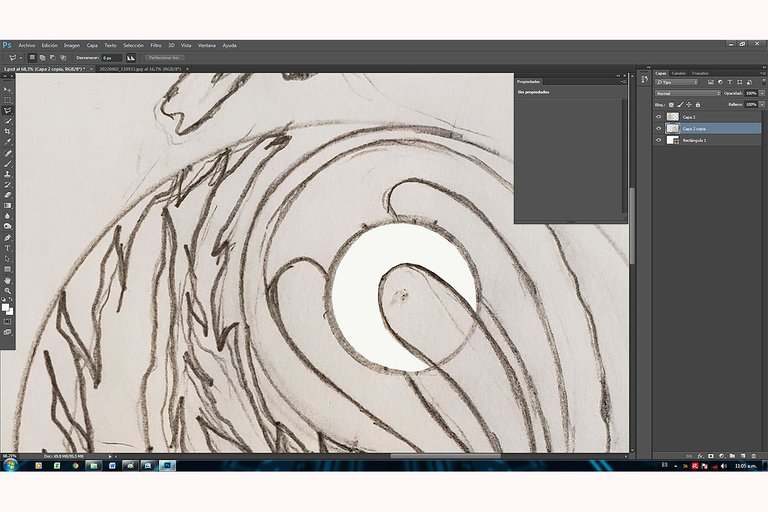
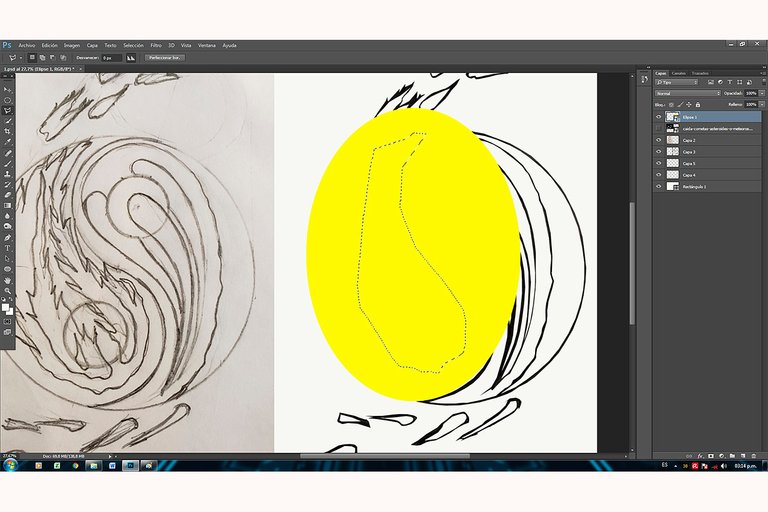
Borro el interior del dibujo dejando intactas las líneas de grafito, ya que estas líneas las oscurecemos.
Once the photo is passed and opened in the editing program, I make a copy to have it as a visual reference to what I originally imagined.
I erase the inside of the drawing leaving the graphite lines intact, since we darken them to give the lines darkness.
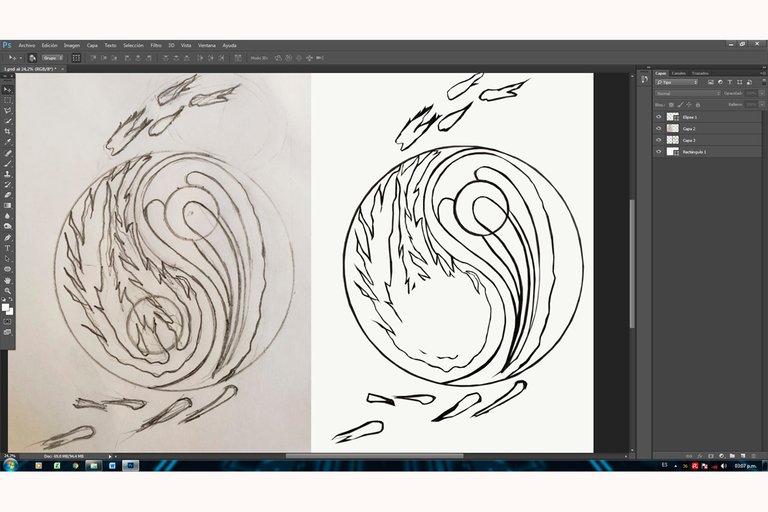
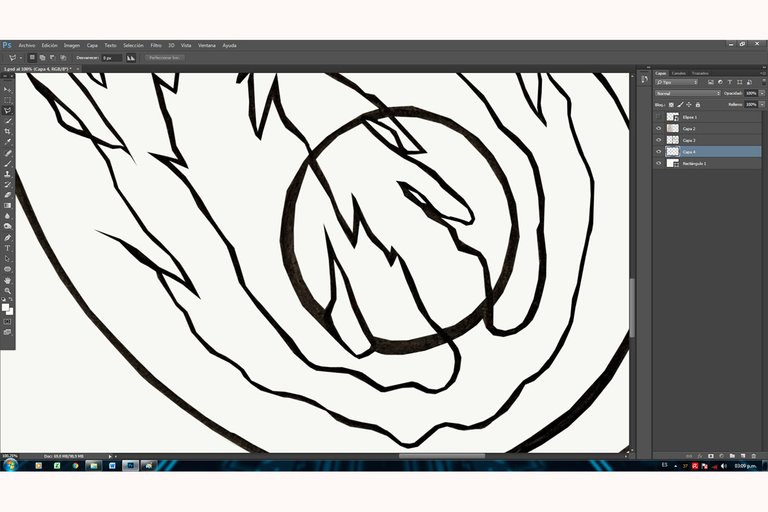
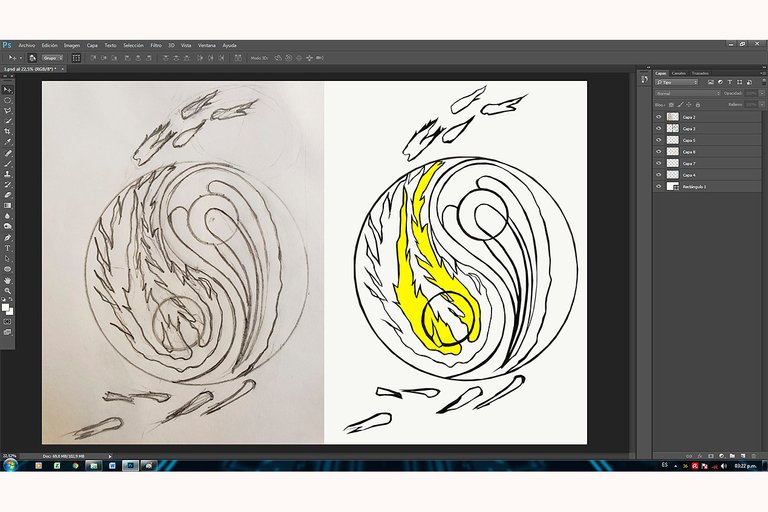
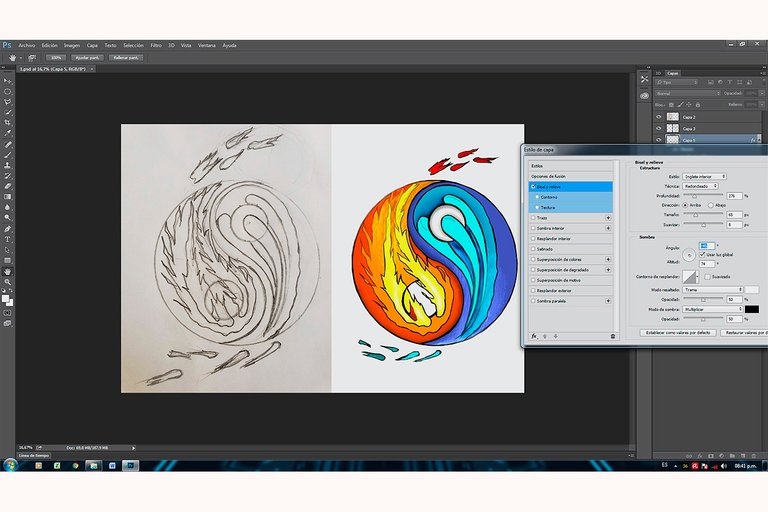
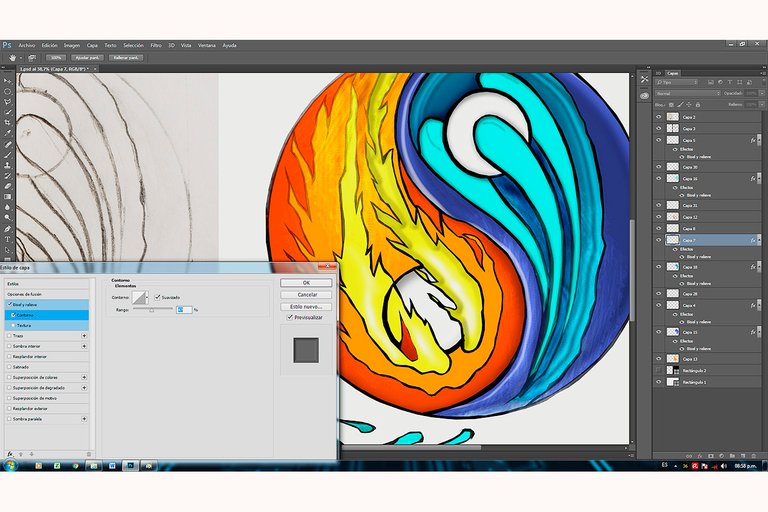
Usé la técnica de corte, delimitando el interior de cada pieza del dibujo, como esferas, candela, y agua. Dándole una capa única según los colores elegidos por mí.
I used the cutting technique, delimiting the interior of each piece of the drawing, such as spheres, candle, and water. Giving it a unique layer according to the colors chosen by me.
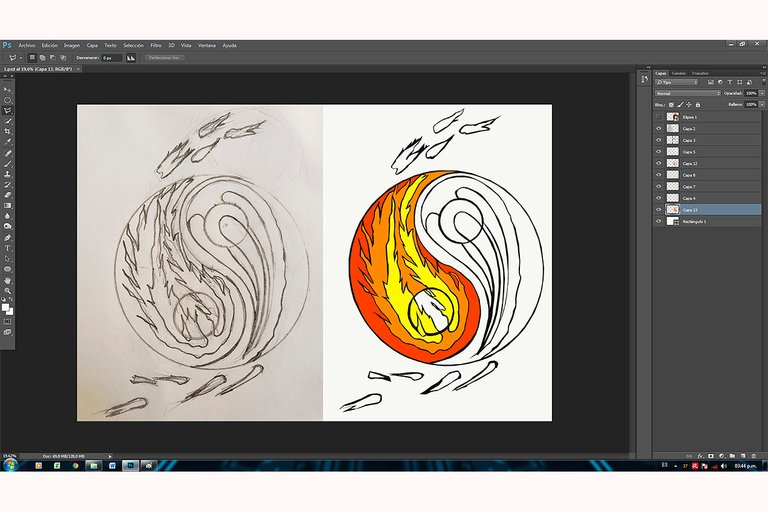
Podemos agregarle efecto de burbujas a la fuerza del agua, utilizando la herramienta de sobreexponer/iluminaciones/80% con la opción de pincel 100.
Para el efecto de la candela y el brillo igualmente a la anterior pero con la opción de pincel difusión según el espesor del brillo a resaltar.
We can add a bubble effect to the force of the water, using the dodge/highlights/80% tool with the brush option 100.
For the effect of the candle and the brightness, the same as the previous one but with the diffusion brush option according to the thickness of the brightness to be highlighted.
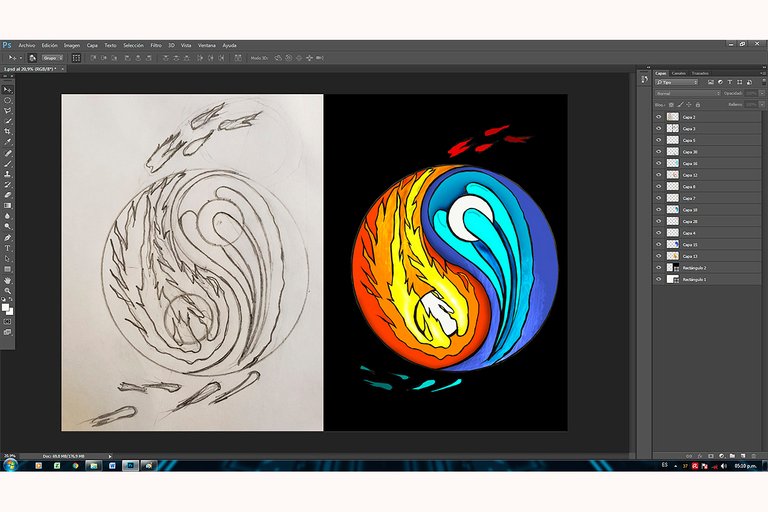
Lo coloque en un fondo negro y deje dos opciones, un dibujo con una paleta de colores básica, el otro con un efecto 3D usando la herramienta de difusión/relieve a gusto y criterio.
Place it on a black background and leave two options, one drawing with a basic color palette, the other with a 3D effect using the diffuse/emboss tool to your liking.
¡Saludos gente bella y hasta un próximo post!
Greetings beautiful people and until a next post!
fascinating drawing :)
Thank you very much friend, I'm glad you liked it. 😀👍
Me encantó...es espectacular 👍🏼
Me gusta mucho tu diseño, felicidades 👏🏼🙂🤗😉😊
Muchas gracias @chacald.dcymt, me alegra muchísimo que te haya gustado, lo hice con mucho cariño. Saludos. 👍🏼💙
Congratulations @carlossteele! You have completed the following achievement on the Hive blockchain and have been rewarded with new badge(s):
Your next target is to reach 8000 upvotes.
You can view your badges on your board and compare yourself to others in the Ranking
If you no longer want to receive notifications, reply to this comment with the word
STOPCheck out the last post from @hivebuzz:
Support the HiveBuzz project. Vote for our proposal!