This accessory is essential for handling our phone and it bears a lot of wear and tear, and it happens that many times this accessory deteriorates aesthetically but mechanically it is functional and still has a useful life.
Continuous use by rubbing and hitting it breaks or deteriorates the original design, that's why I decided to make this post to show you an idea of how to customize our popsocket in a great way before throwing it away.
Hello, how are you dear friends of HIVE, I hope you are having a great time, for this opportunity I bring you a step by step on how to restore an old worn out popsocket, using other elements that we may have stored in our recycling.
For restoration you only need a compact disc, oil paint and glue.
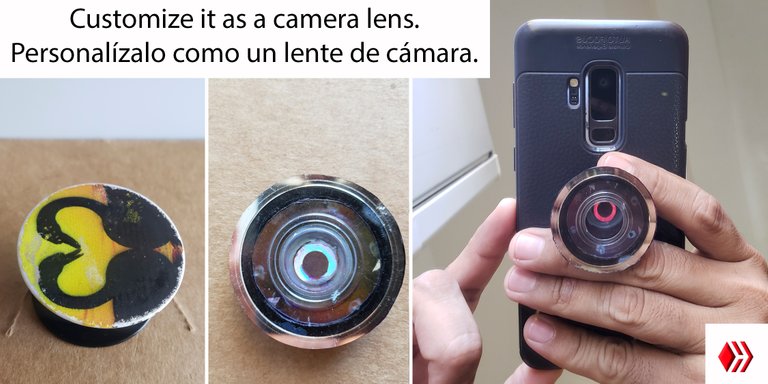
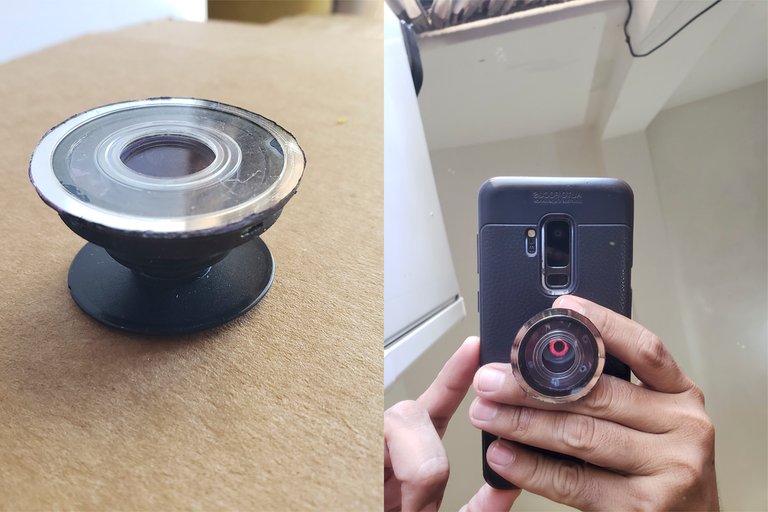
My intention when customizing it is that it would have a camera lens aspect which would combine in a very aesthetic way with any cover or phone of any range.
Without further ado, let's start:
Materials:
• Compact disc.
• Oil paint.
• Strong glue and silicone.
Tools:
• Scissor.
• Sandpaper.
Este accesorio es indispensable para la manipulación de nuestro teléfono y es mucho el desgaste que soporta, y pasa que muchas veces este accesorio estéticamente se deteriora pero mecánicamente está funcional y aún con vida útil.
El uso continuo mediante el roce y golpes este se rompe o deteriora el diseño original, es por eso que decidí realizar este post para mostrarles con una idea de cómo personalizar nuestro popsocket de manera genial antes de tirarlo.
Hola que tal queridos amigos de HIVE, deseo que la estén pasando genial, para esta oportunidad les traigo un paso a paso de cómo restaurar un viejo popsocket desgastado, utilizando otros elementos que podamos tener guardado dentro de nuestros reciclajes.
Para la restauración solo necesite un disco compacto, pintura de aceite y pega.
Mi intención a la hora de personalizarlo es que tuviera un aspecto de lente de cámara la cual este combinaría de manera muy estética con cualquier forro o teléfono de cualquier gama.
Sin más que añadir comenzamos:
Materiales:
• Disco compacto.
• Pintura de aceite.
• Pega fuerte y silicón.
Herramientas:
• Tijera.
• Lijas.

Step 1
• As a first step we make sure that our popsocket is in mechanically acceptable condition; It contracts or expands without problems.
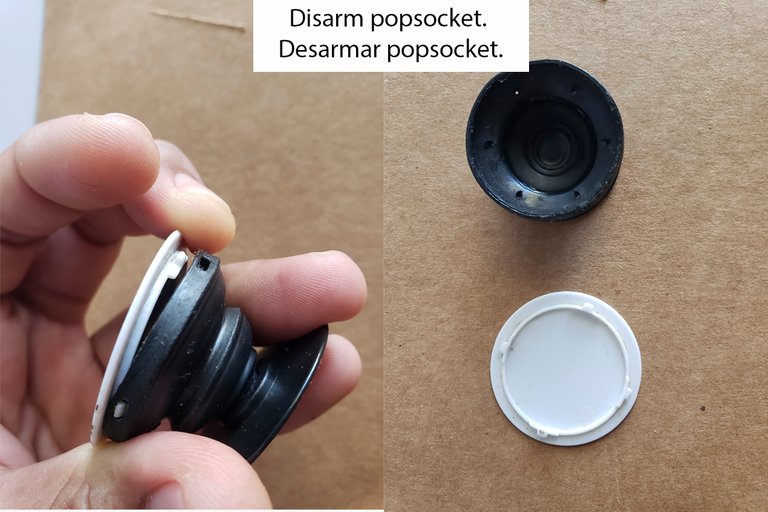
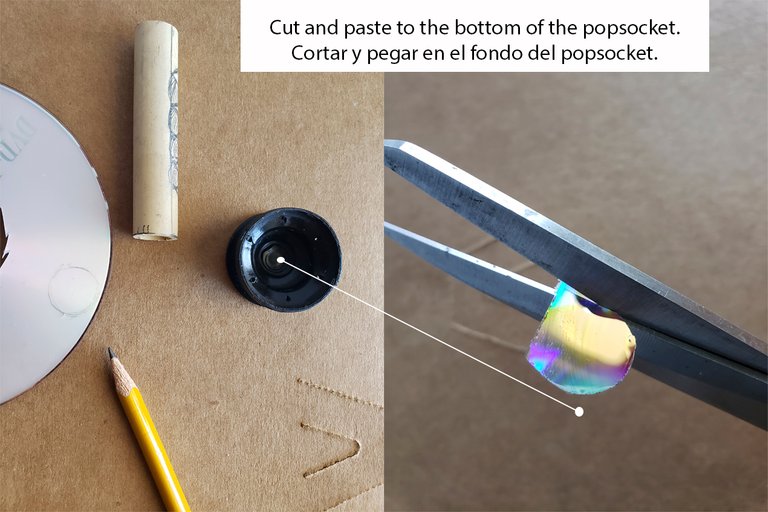
• We disassemble it and for this example of transformation to make it look like a real lens we will have to remove the central cover to reveal the inside of the flexible mechanism.
• With the help of cuticle scissors we can make this cut, followed by sanding the edges and leaving it as perfect as we can without damaging the locking mechanism that this cover originally has to join the part of the cover and the flexible part.
Paso 1
• Como primer paso nos aseguramos que nuestro popsocket se encuentre en condiciones aceptables mecánicamente; que se contraiga o expanda sin problemas.
• Lo desarmamos y para este ejemplo de transformación para hacerlo parecer un lente real tendremos que retirar la tapa central para dejar visible el interior del mecanismo flexible.
• Con la ayuda de una tijera corta cutícula podemos hacer este corte, seguido a esto lijamos los bordes y lo dejamos lo más perfecto que podamos sin dañar el mecanismo de traba que esta tapa tienen originalmente para unir la parte de la tapa y la flexible.
Step 2
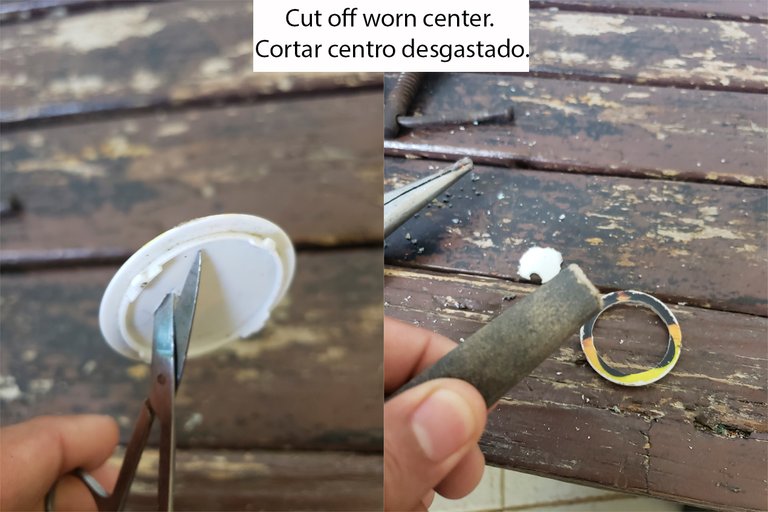
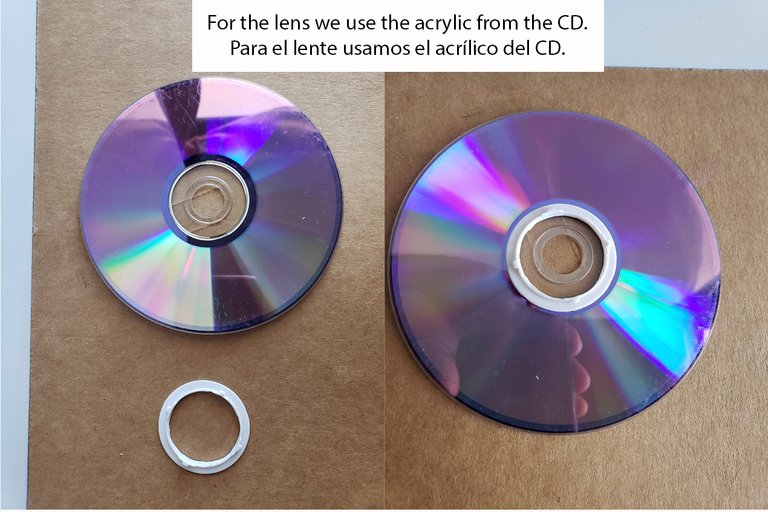
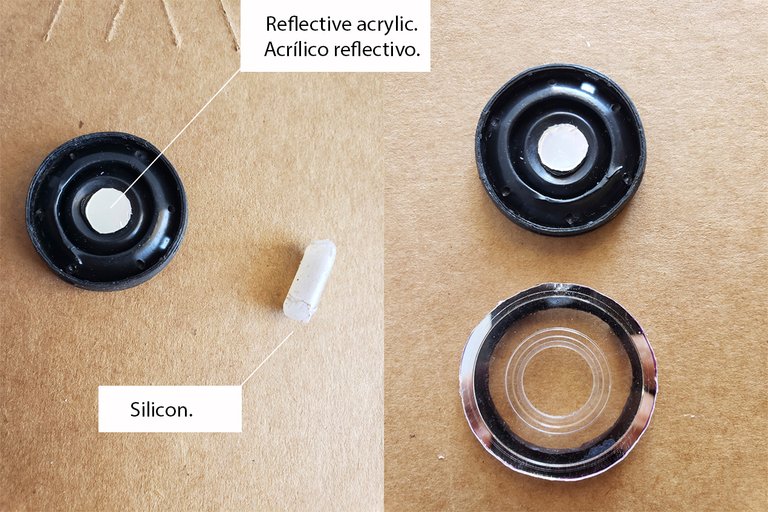
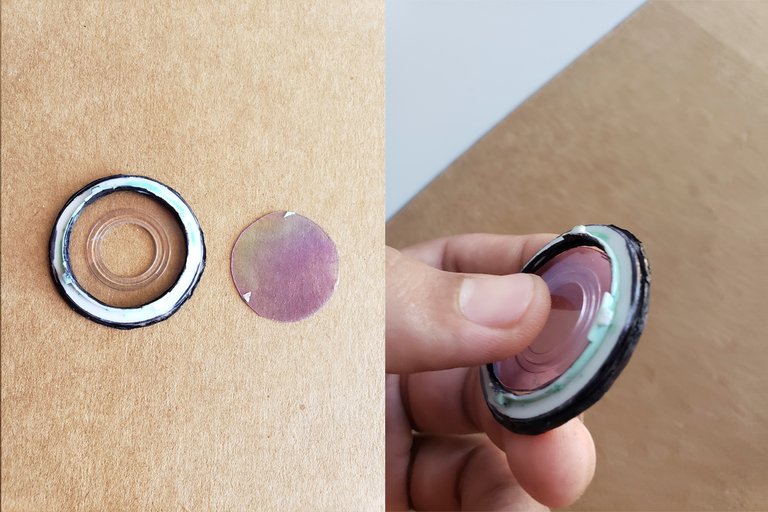
• We choose a compact disc that fits the circumference of the popsocket and proceed to cut.
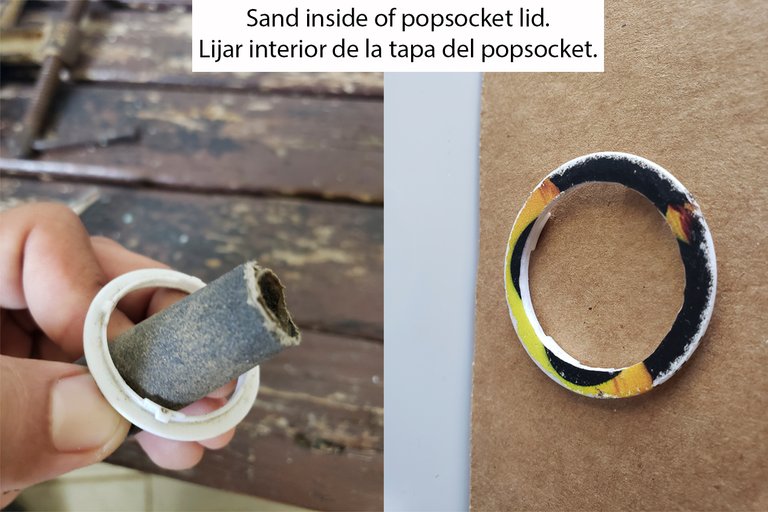
• We paint black with a marker, and join these two elements with strong glue.
• For the reflective that is glued to the end of the popsocket's flexible mechanism, use the same compact disc, but only the top layer, this element distorts the light by defragmenting it and that is why you can see various colors in a rainbow, generating an excellent appearance to our decorative novelty.
Paso 2
• Escogemos un disco compacto que se adapte a la circunferencia del popsocket y procedemos a cortar.
• Pintamos de color negro con marcador, y unimos estos dos elementos con pega fuerte.
• Para el reflectivo que va pegado al final del mecanismo flexible del popsocket, utilice el mismo disco compacto, pero solo la capa superior, este elemento distorsiona la luz desfragmentándola y es por eso que se puede ver varios colores como en un arcoíris generando un excelente aspecto a nuestra novedad decorativa.
Step 3
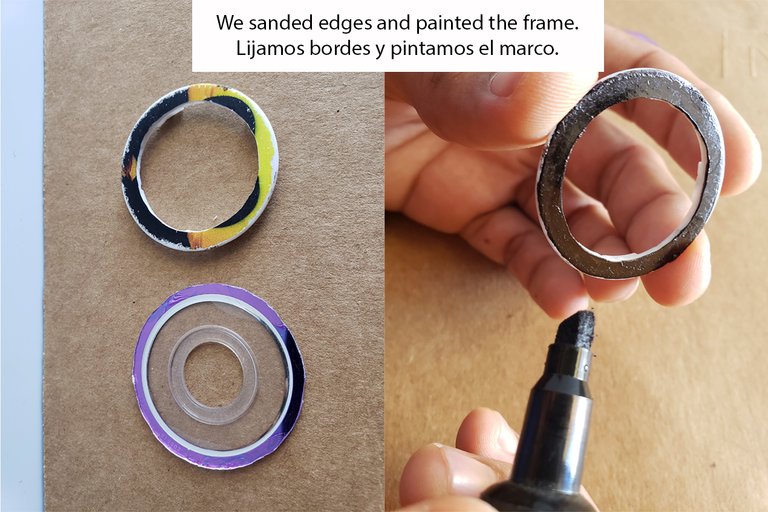
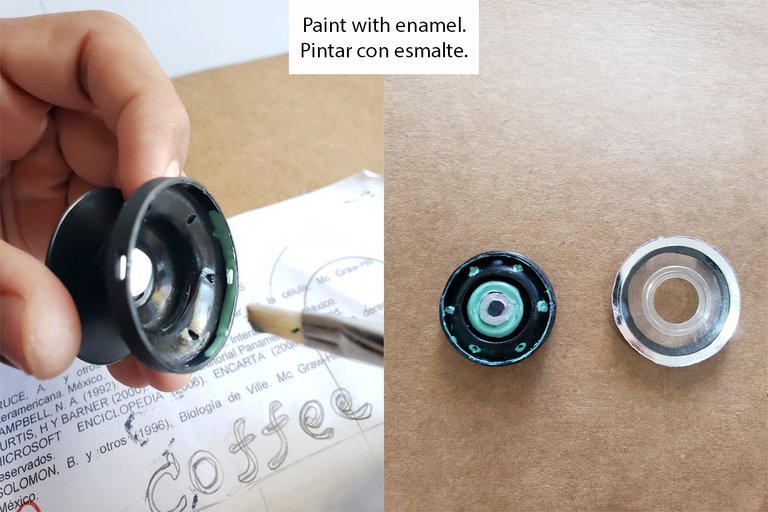
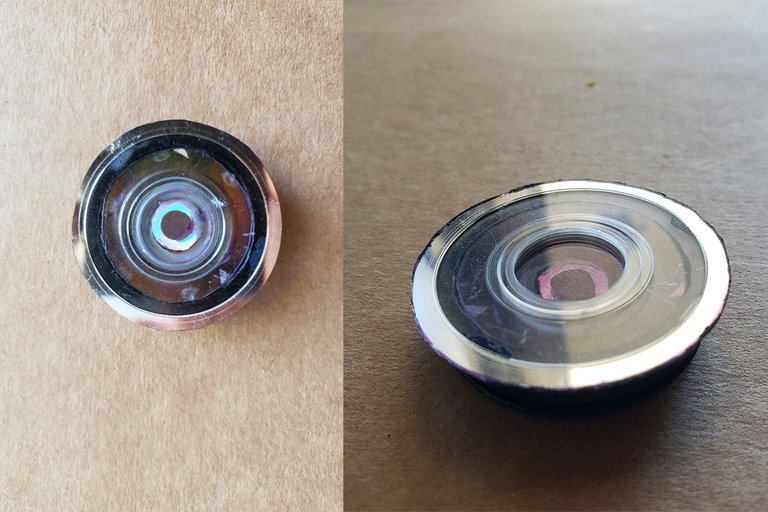
• We paint the interior with the colors of our choice, make sure it dries and then outline the imperfections to give it the cleanest possible finish.
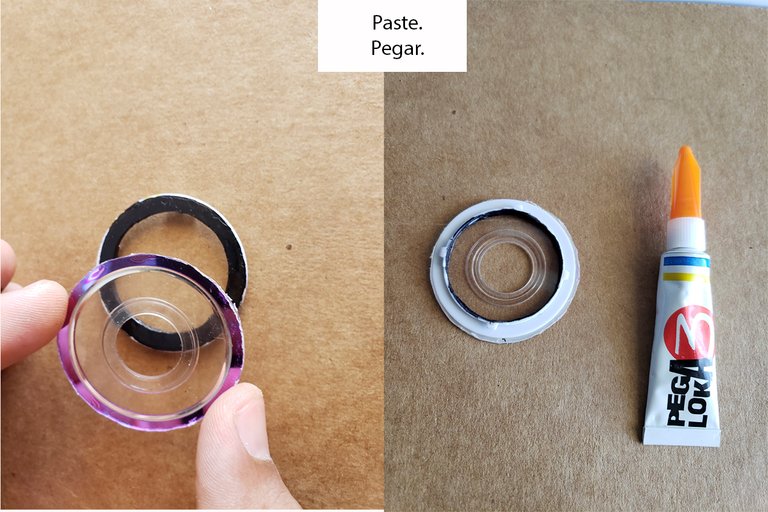
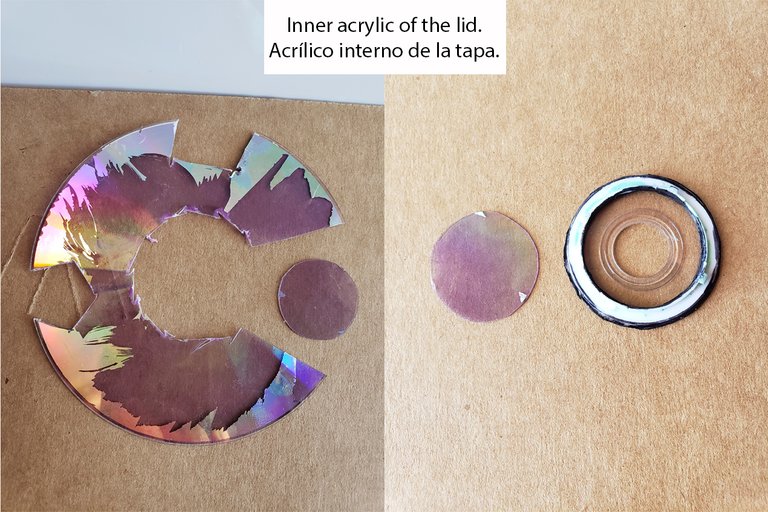
• We completely seal the transparent cover with the upper acrylic of the compact disc.
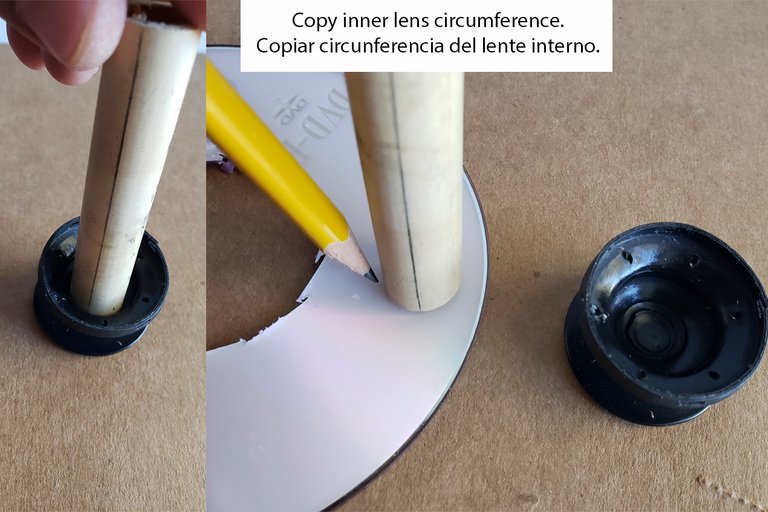
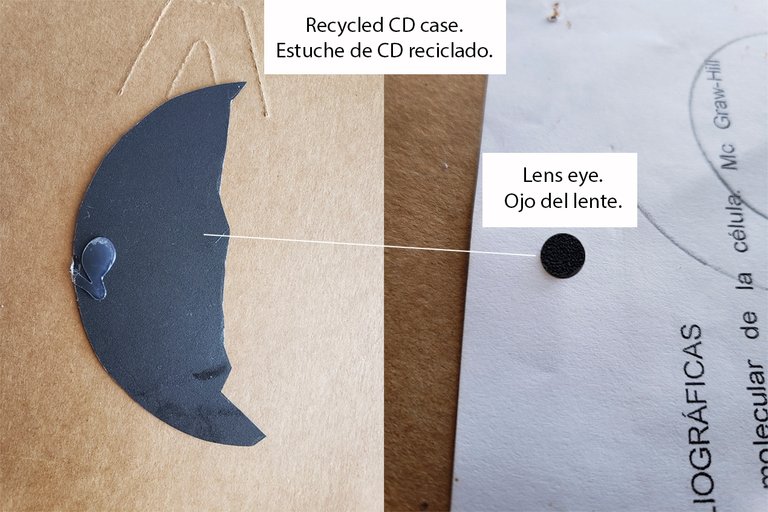
• For the camera eye use a CD case as it is very handy when cutting with scissors.
• We join the parts and that's it.
Paso 3
• Pintamos el interior con los colores de nuestra preferencia, nos aseguramos que seque y luego delineamos las imperfecciones para darle un acabado lo más limpio que se pueda.
• Sellamos por completo la tapa transparente con el acrílico superior del disco compacto.
• Para el ojo de la cámara use estuche de CD ya que es muy manejable a la hora de cortar con una tijera.
• Unimos las partes y listo.
This has been my post for today I hope you liked it, greetings, see you in a next publication.
Este ha sido mi post por hoy espero les haya gustado, saludos, nos vemos en una siguiente publicación.
Resource // Recursos
Teléfono Samsung A10
Edition // Edición
Photoshop S6
Translator // Traductor;
https://translate.google.com/?hl=es&sl=auto&tl=en&op=translate

Yay! 🤗
Your content has been boosted with Ecency Points, by @carlossteele.
Use Ecency daily to boost your growth on platform!
Support Ecency
Vote for new Proposal
Delegate HP and earn more
Muchísimas gracias por el apoyo, siempre es un placer para mí poder compartir para todos ustedes ❤️
A su orden, feliz día.
Thank you for sharing this amazing post on HIVE!
Your content got selected by our fellow curator @stevenson7 & you just received a little thank you via an upvote from our non-profit curation initiative!
You will be featured in one of our recurring curation compilations and on our pinterest boards! Both are aiming to offer you a stage to widen your audience within and outside of the DIY scene of hive.
Join the official DIYHub community on HIVE and show us more of your amazing work and feel free to connect with us and other DIYers via our discord server: https://discord.gg/mY5uCfQ !
If you want to support our goal to motivate other DIY/art/music/homesteading/... creators just delegate to us and earn 100% of your curation rewards!
Stay creative & hive on!