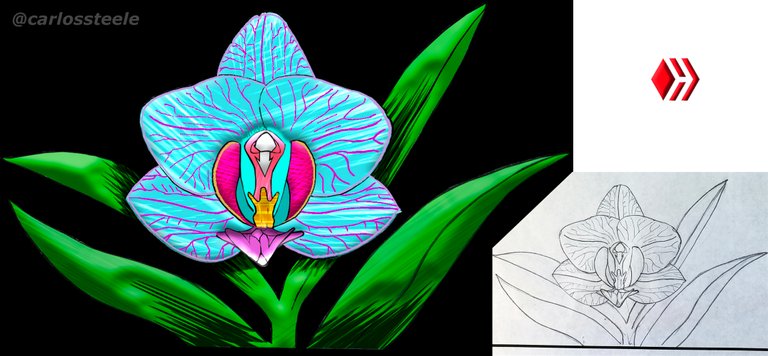
Te quiero mostrar como realice esta original orquídea azul, los efectos y algunos tips que utilicé mostrando mi punto de vista según mi percepción para dar con una imagen perfecta digna de mostrar en un fondo de pantalla.
I want to show you how I made this original blue orchid, the effects and some tips that I used showing my point of view according to my perception to find a perfect image worthy of showing on a wallpaper.

Hola que tal amigos, prospero día para todos ustedes les mandos las mejores energías del universo.
Para esta ocasión les quiero mostrar cómo partir con una idea desde cero y crear algo que nos guste, para colocar en nuestro fondo de pantalla, bien sea de nuestro móvil o PC.
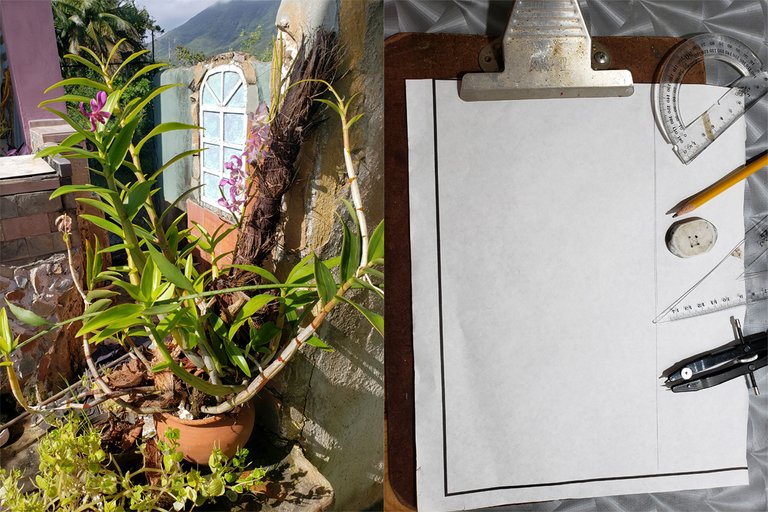
Para recrear esta flor exótica, me inspire en la planta real que mi madre tiene en su jardín la cual es fanática y orgullosa de sus plantas.
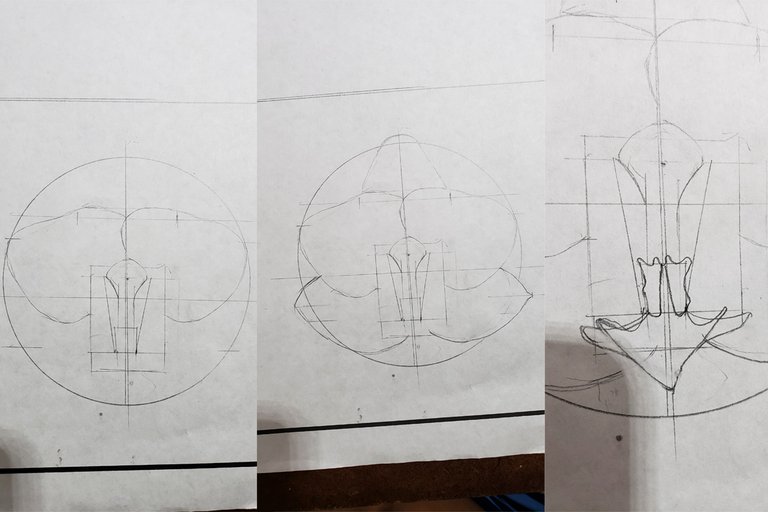
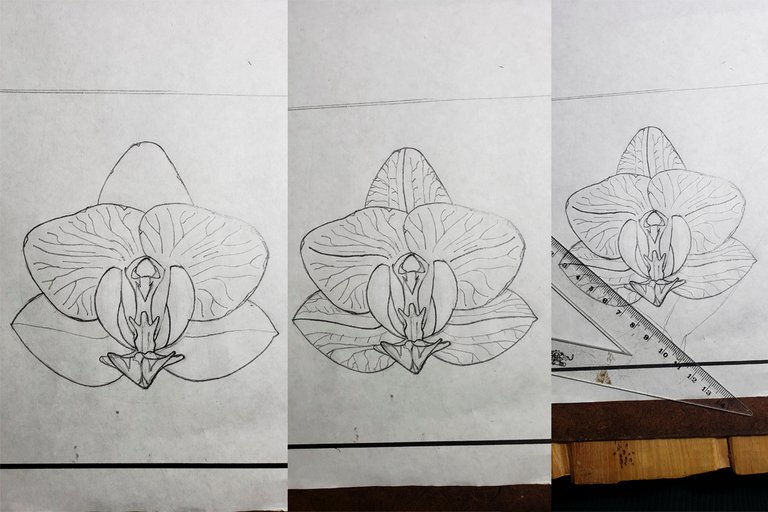
Lo primero será utilizar el método para estructurar la orquídea que más nos resulte, mi método consiste en usar la geometría a mi favor, ya que soy dibujante de estructuras, lo que quiere decir que se dibujar círculos y rectángulos con escuadras, reglas y compas. Decidí crear esta hermosa orquídea azul ya que mi madre la ha estado buscando y se la quise representar en un hermoso fondo de pantalla.
Les comento que dentro de mis planes estaba en comprarme una tabla de dibujo para mi ordenador, pero se me ocurrió fusionar estos dos mundos, el manual con el digital. Solucionando así lo que desde hace rato quería hacer con mi ordenador.
Espero disfruten el recorrido, comenzamos:
Para el dibujo a mano alzada; Utilice una libreta, hoja reciclada blanca, lápiz, borrador y un compás.
Para el dibujo digital; Photoshop, capturando el dibujo en el papel con una cámara de teléfono y transfiriendo el archivo al ordenador.
Hello friends, prosperous day for all of you I send you the best energies of the universe.
For this occasion I want to show you how to start with an idea from scratch and create something that we like, to place on our wallpaper, either on our mobile or PC.
To recreate this exotic flower, I was inspired by the real plant that my mother has in her garden, which is a fan and proud of her plants.
The first thing will be to use the method to structure the orchid that works best for us, my method consists of using geometry in my favor, since I am a structure designer, which means that I can draw circles and rectangles with squares, rulers and compasses. I decided to create this beautiful blue orchid since my mother has been looking for it and I wanted to represent it to her in a beautiful wallpaper.
I tell you that within my plans was to buy a drawing table for my computer, but it occurred to me to merge these two worlds, the manual with the digital. Thus solving what I wanted to do with my computer for a long time.
I hope you enjoy the tour, we begin:
For freehand drawing; Use a notebook, recycled white sheet, pencil, eraser and a compass.
For digital drawing; Photoshop, capturing the drawing on paper with a phone camera and transferring the file to the computer.
Pasos de elaboración:
Preparation steps:
Con una planta real como ejemplo, capturo con una fotografía su mejor ángulo para así poder inspirarme en mi dibujo.
Hago mi circunferencia con un compás, no uso medidas para crear mis dibujos solo estimo sus proporciones.
El circulo me ayuda a mantener su centro y voy ubicando sus pétalos lo más simétricos posible.
With a real plant as an example, I capture its best angle with a photograph so that I can be inspired by my drawing.
I make my circumference with a compass, I don't use measurements to create my drawings, I only estimate their proportions.
The circle helps me maintain its center and I place its petals as symmetrically as possible.
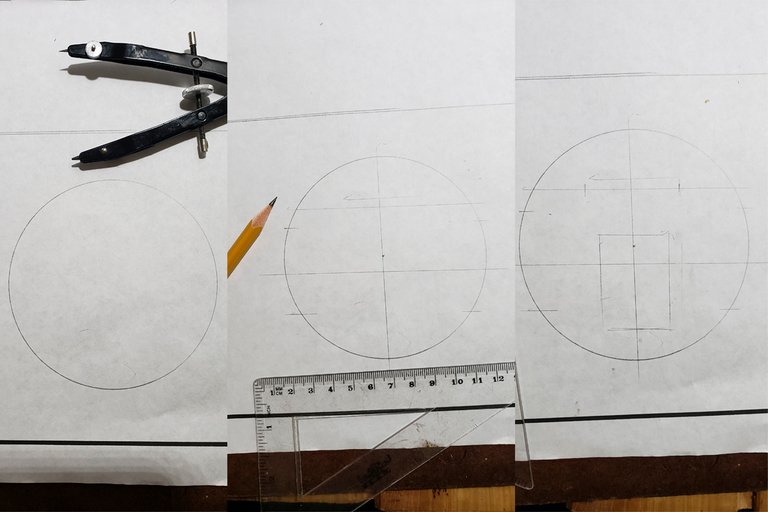
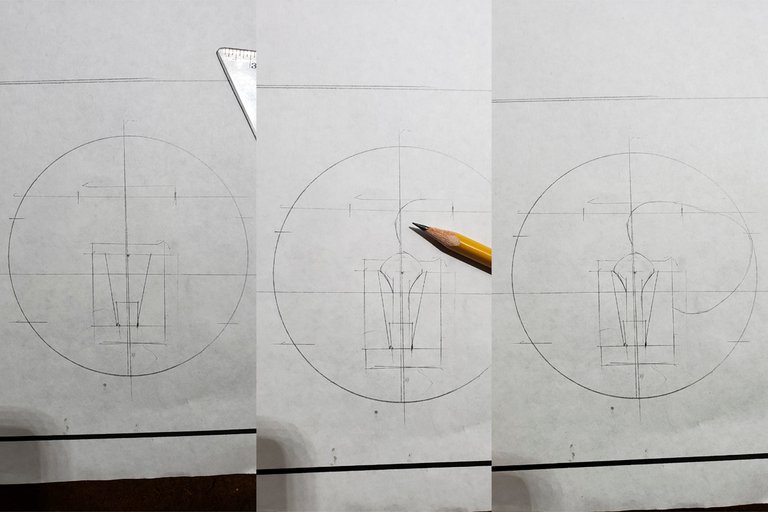
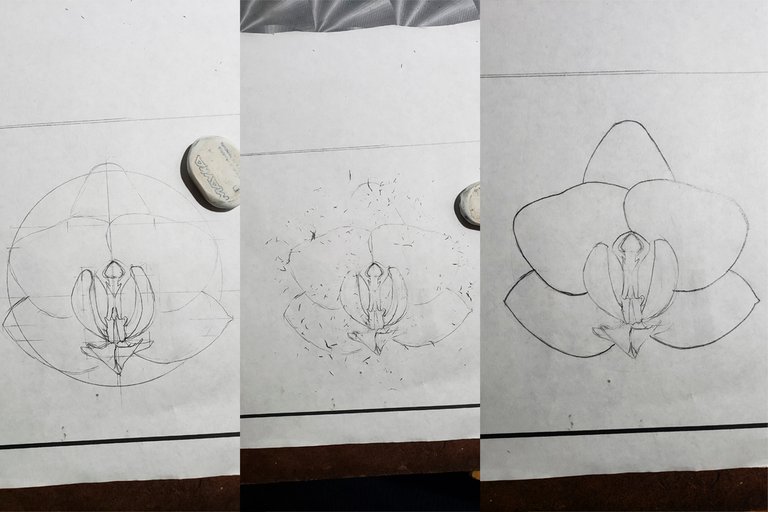
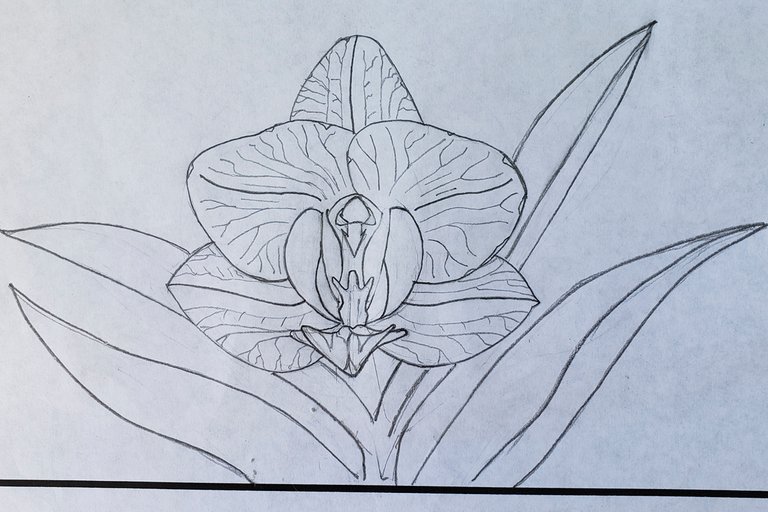
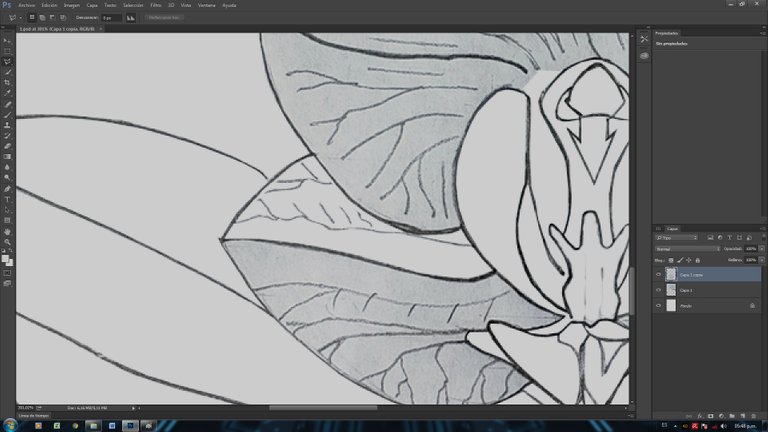
Borro las líneas guías, estas líneas como lo son, los rectángulos y las rallas me ayudan a ubicarme con respecto a su eje central de cada elemento.
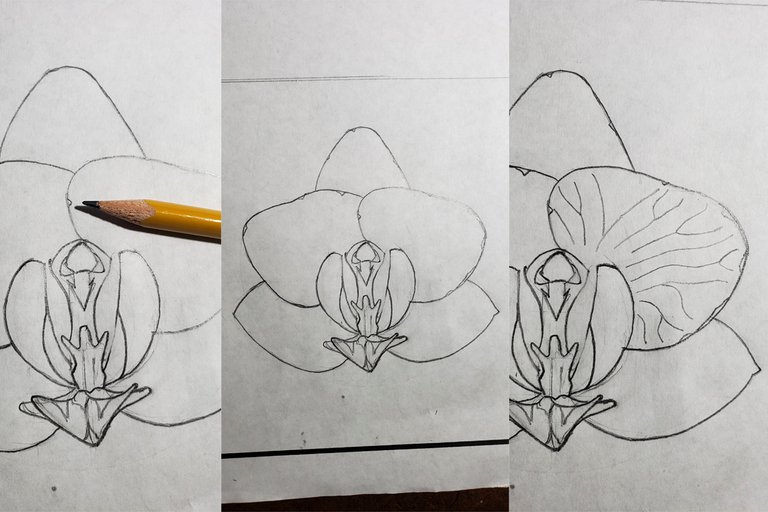
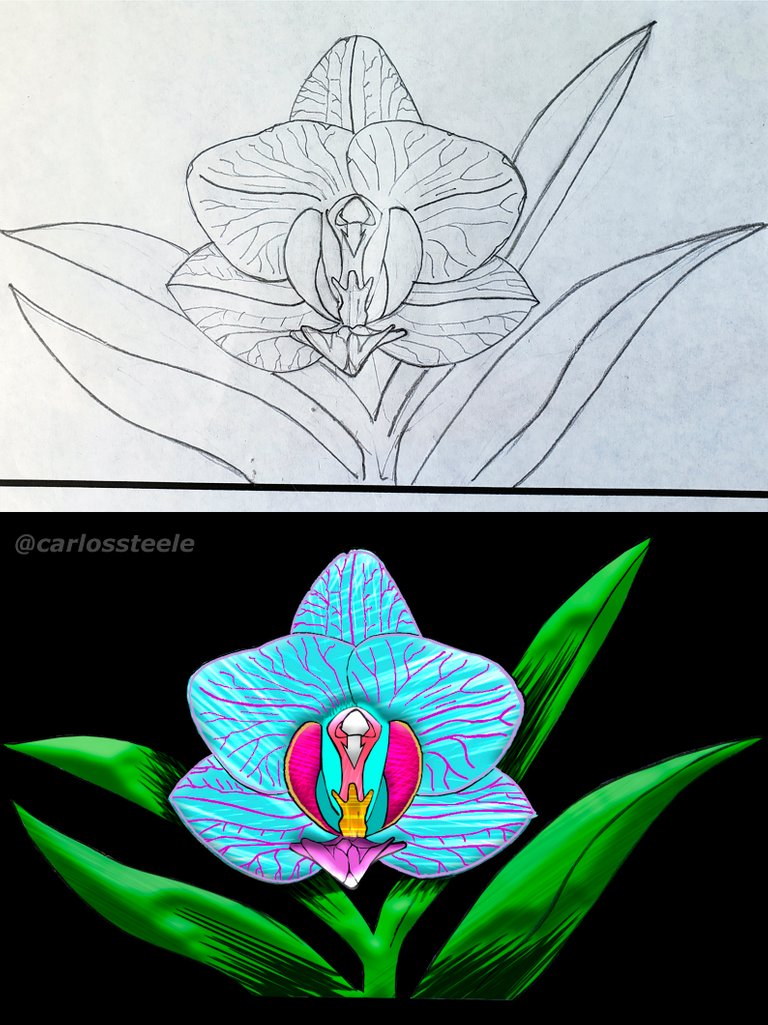
Estructurada el contorno de mi flor, comienzo a dar detalles y a corregir formas indeseadas en los pétalos exagerando o suavizando su forma para darle el aspecto deseado.
I erase the guide lines, these lines, such as the rectangles and the lines, help me to locate myself with respect to the central axis of each element.
Structured the outline of my flower, I begin to give details and correct unwanted shapes in the petals, exaggerating or softening their shape to give it the desired look.
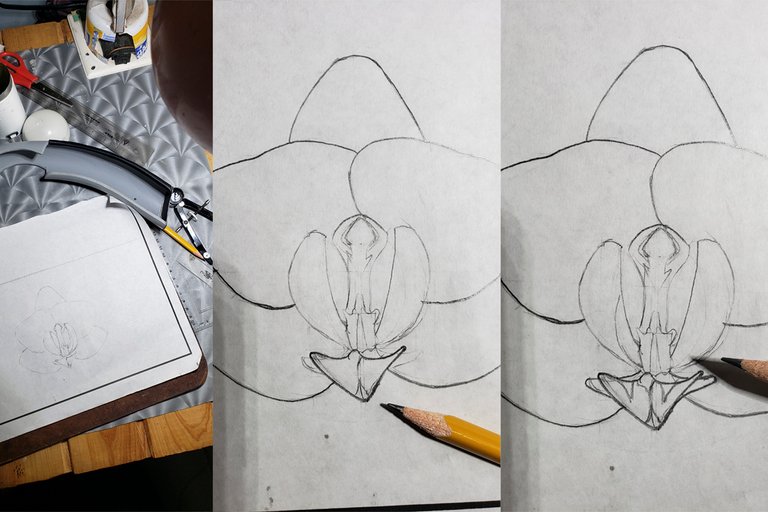
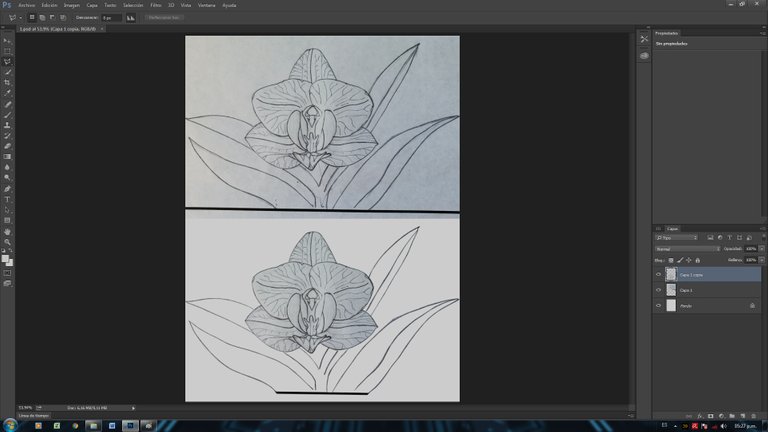
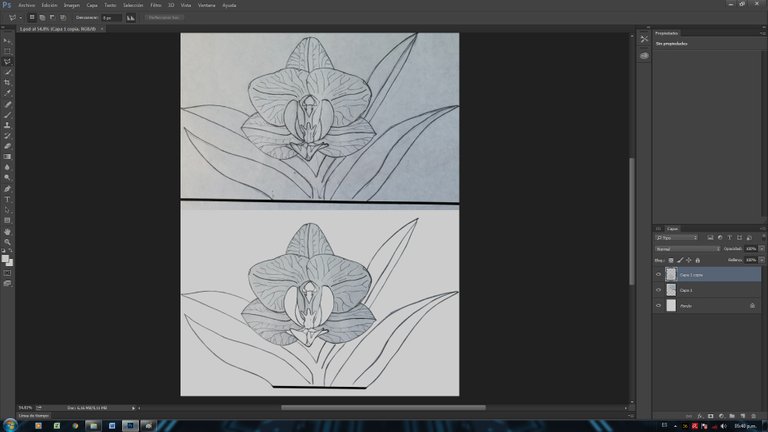
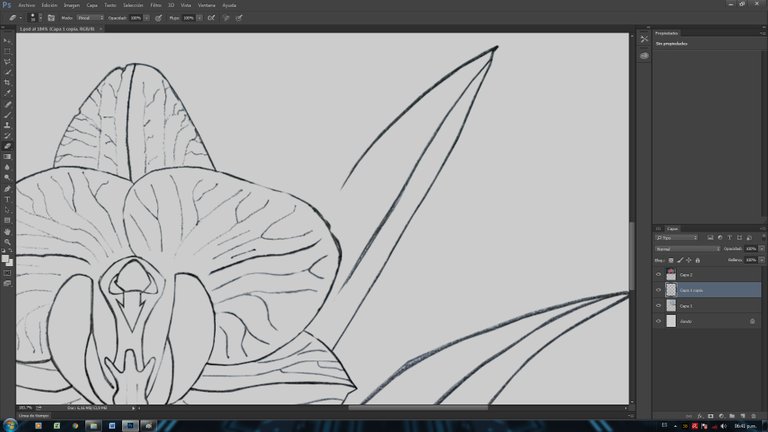
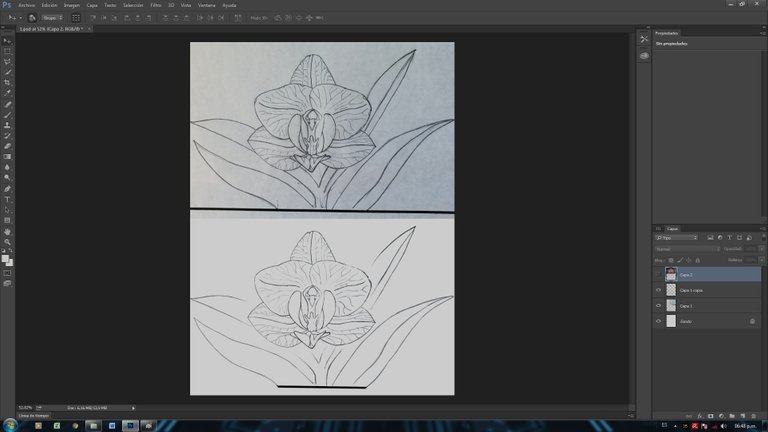
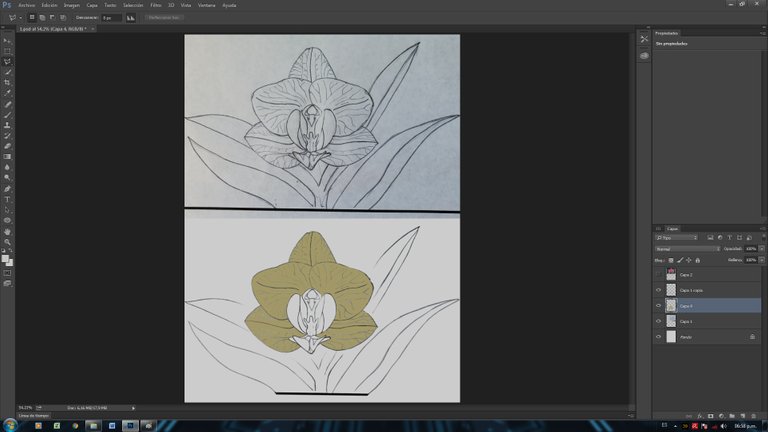
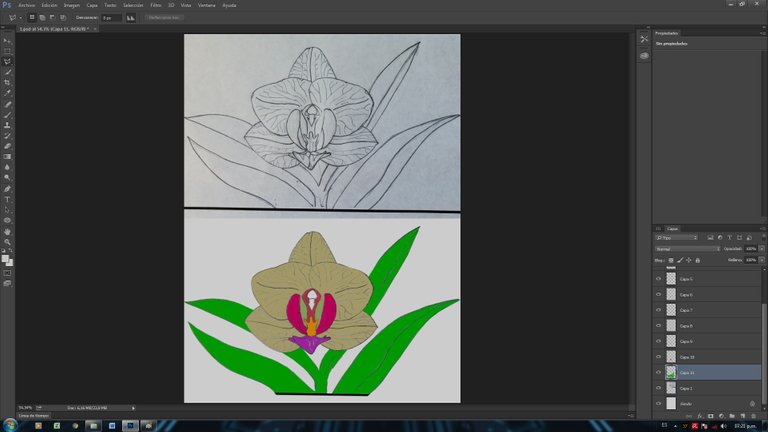
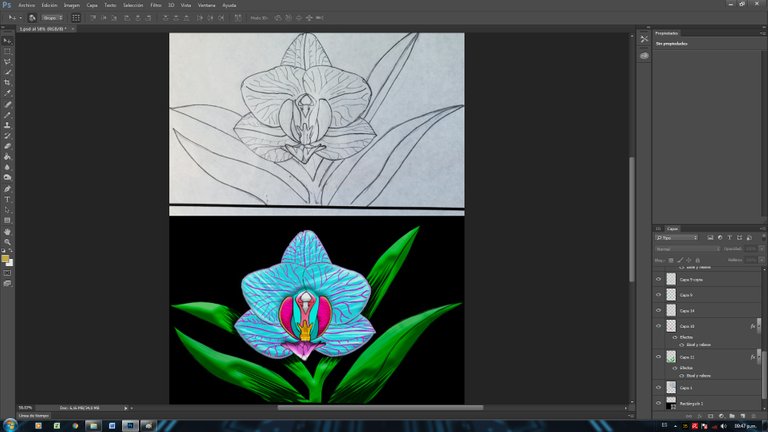
Terminada mi flor en el papel, capturamos la imagen bien sea con una buena cámara o un escáner y lo llevamos al editor.
Hacemos una copia del dibujo, y comenzamos el proceso de seleccionar solo las líneas de grafito trabajándola en una sola capa única.
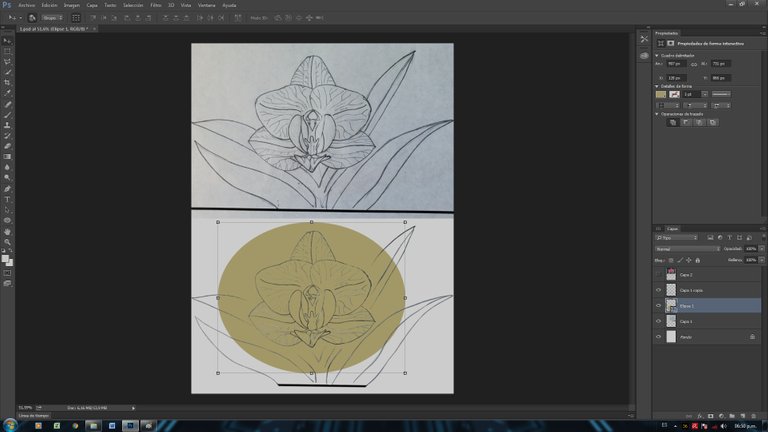
Uso la herramienta elipse solido escogiendo colores parecidos a lo que usaré como resultado final, los recorto usando los moldes de las mismas líneas en grafito, para luego en esta capa que tiene el color seleccionado lo convierto en un objeto inteligente; esto nos permite modificarlo.
Finished my flower on the paper, we capture the image either with a good camera or a scanner and take it to the editor.
We make a copy of the drawing, and begin the process of selecting just the graphite lines by working it into a single single layer.
I use the solid ellipse tool choosing colors similar to what I will use as the final result, I cut them using the molds of the same lines in graphite, and then I convert this layer of the selected color into a smart object; this allows us to modify it.

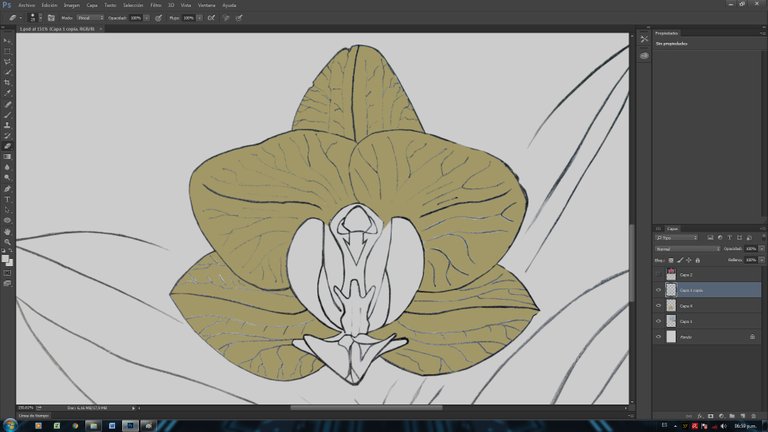
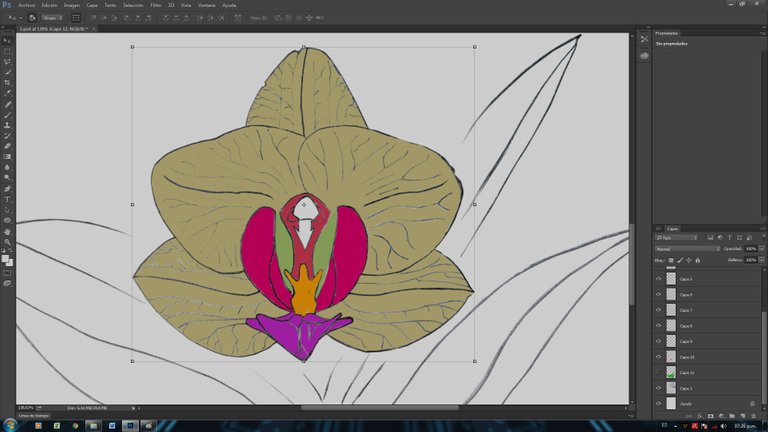
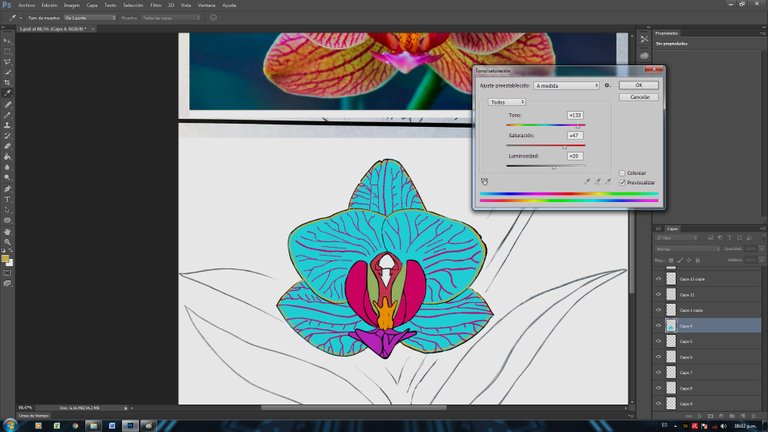
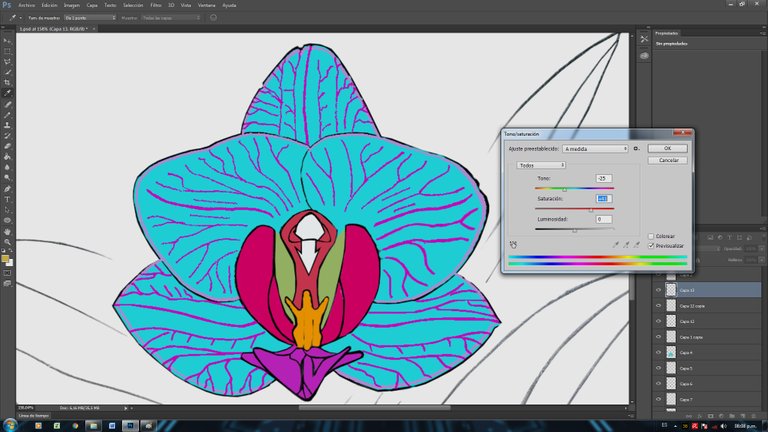
Oscurecemos las líneas del dibujo con la herramienta del brillo.
Pintamos las líneas de los pétalos con los colores que más nos gusten usando la herramienta pintura.
Hacemos una copia de las líneas externas de los pétalos con la herramienta duplicar con la finalidad de hacer una doble pared y ésta a sus ves darle otra tonalidad.
We darken the lines of the drawing with the brightness tool.
We paint the lines of the petals with the colors that we like the most using the paint tool.
We make a copy of the external lines of the petals with the duplicate tool in order to make a double wall and this in turn gives it another tonality.
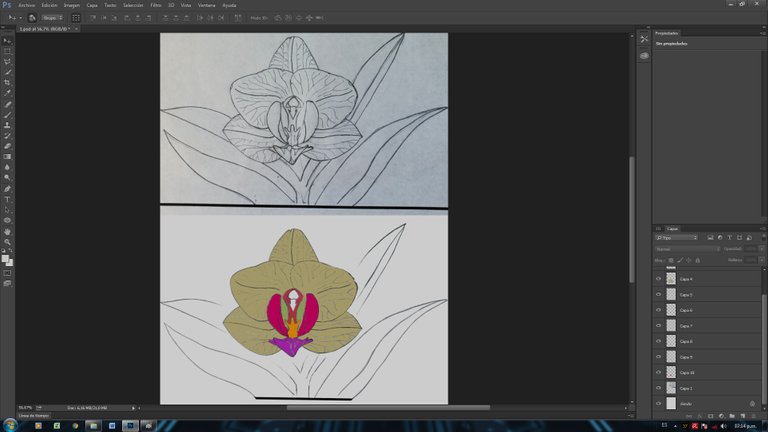
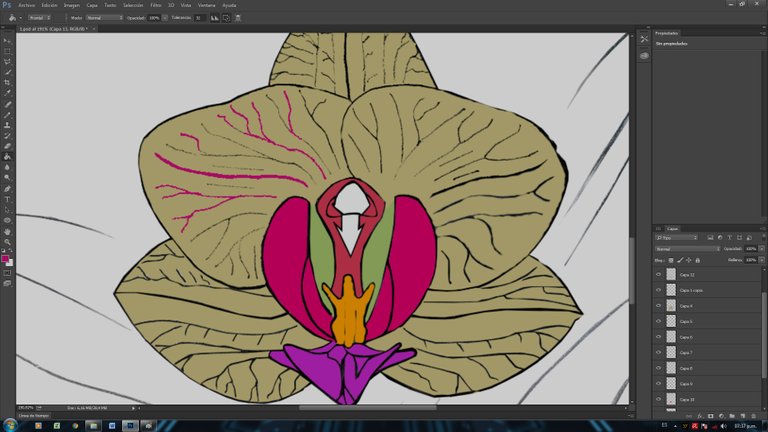
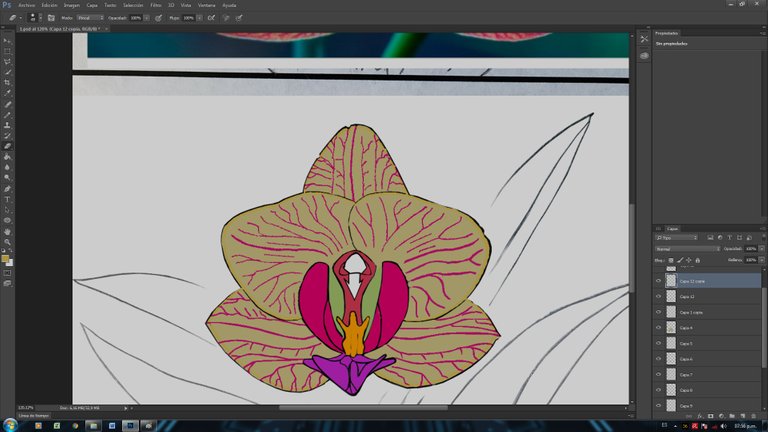
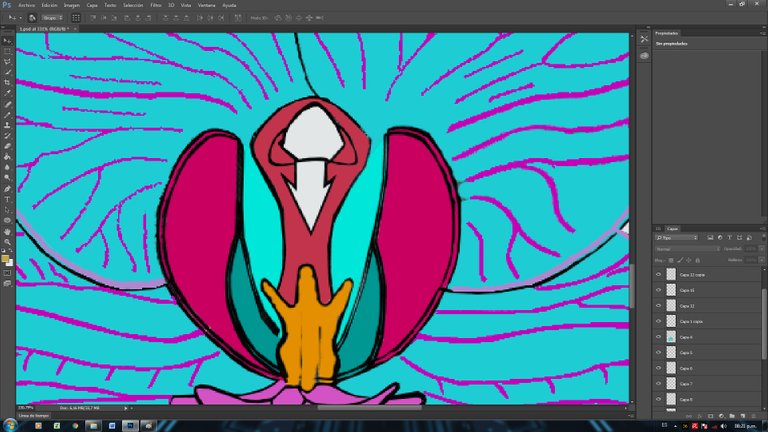
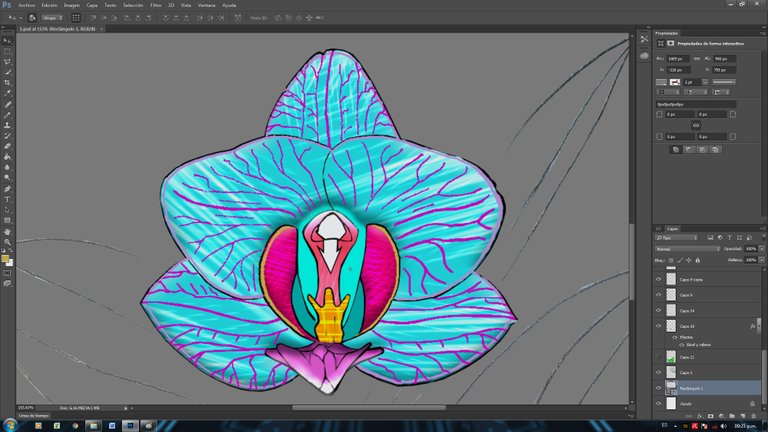
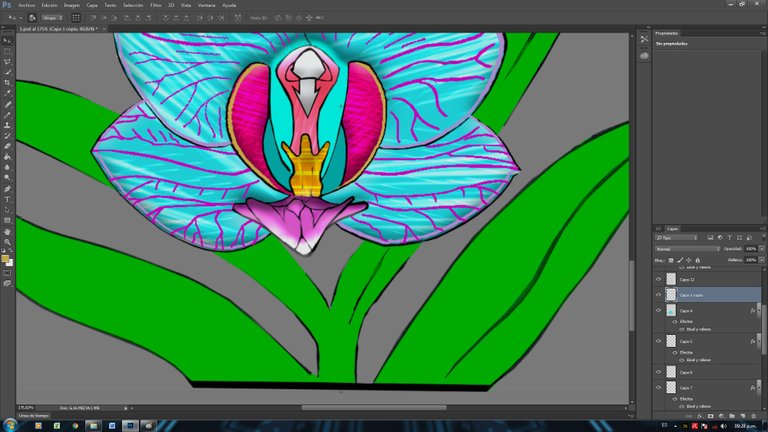
Con la herramienta sobre exponer podemos darles infinidades de efectos al color de fondo de nuestros pétalos y hojas.
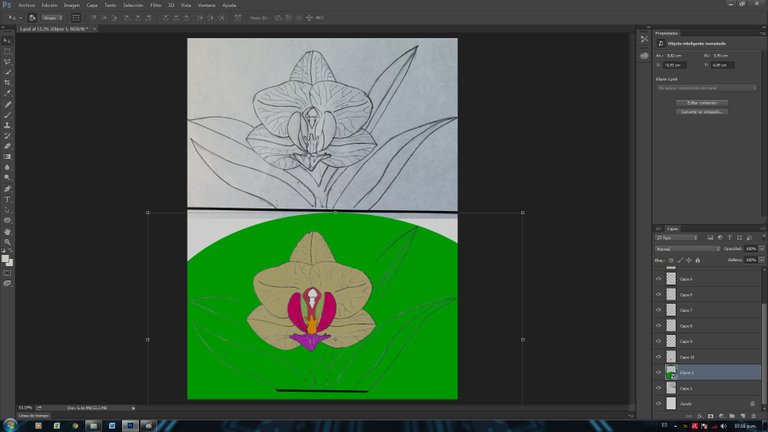
Satisfecho con sus efectos en plano, podemos agregarle efectos en 3D con la herramienta difusión haciendo clip en el botón derecho sobre la capa que se va a modificar y allí te abre una cantidad de efectos para que personalices usando profundidad, sombras entre muchas funciones muy interesantes.
With the over expose tool we can give infinite effects to the background color of our petals and leaves.
Satisfied with its flat effects, we can add 3D effects with the diffusion tool by clicking the right button on the layer to be modified and there it opens a number of effects for you to customize using depth, shadows among many very interesting functions .

Agradecido gente hermosa por su apoyo, bendiciones y saludos.
Grateful beautiful people for your support, blessings.

Que bonito diseño, la Orquídea es una flor muy hermosa, siempre quw6 he visto flores de esta especie me quedo maravillada. Saludos 🤗
Hola @irenenavarroart, muchas gracias, me alegra mucho que te haya gustado y si es considerada unas de las plantas más hermosas cuando empiezan a florecer son una hermosura. Gracias por pasar y comentar, saludos. 💙