Hola, creadores de Hive Diy. El día de hoy les traigo una nueva manualidad que tiene una muy buena utilidad para todos ustedes. Hoy les traigo un lapicero de dinosaurios bastante fácil y sencillo de hacer.
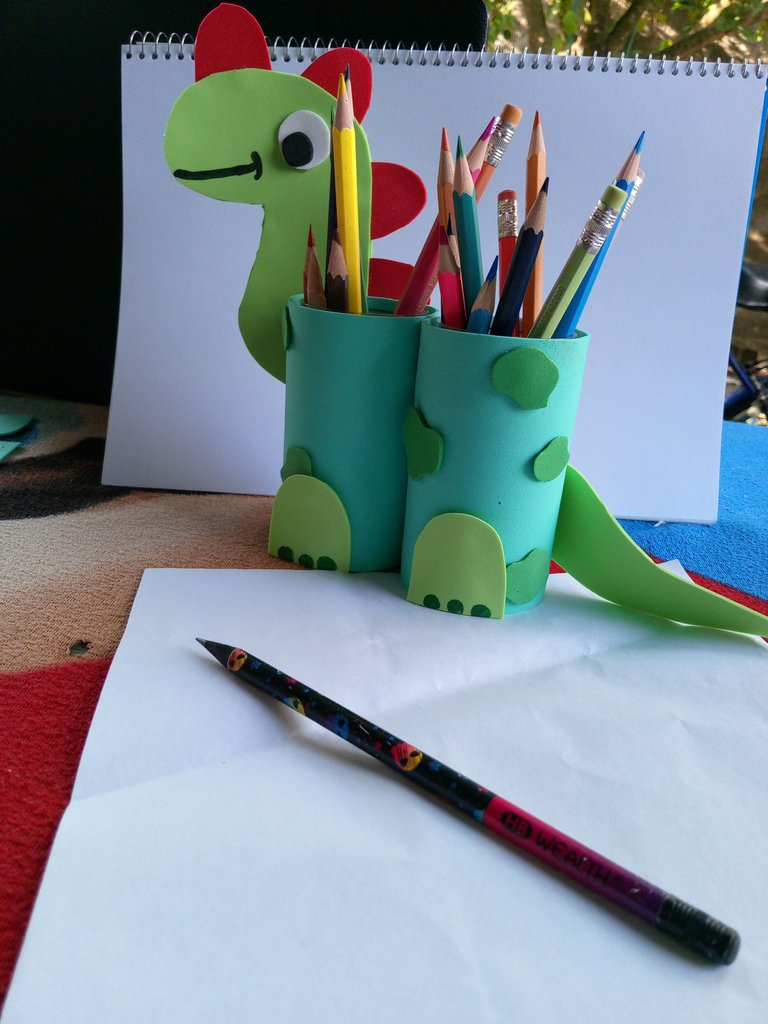
Esta manualidad les será demasiado útil a todos ustedes, ya que podrán guardar sus colores, lápices, pinceles o marcadores. Lo mejor de este lapicero es que es demasiado creativo y bonito.
A mí, por mi lado, me gustan los dinosaurios, por eso hice este lapicero.
Ahora sí, sin más nada que decir, ¡empecemos a trabajar!
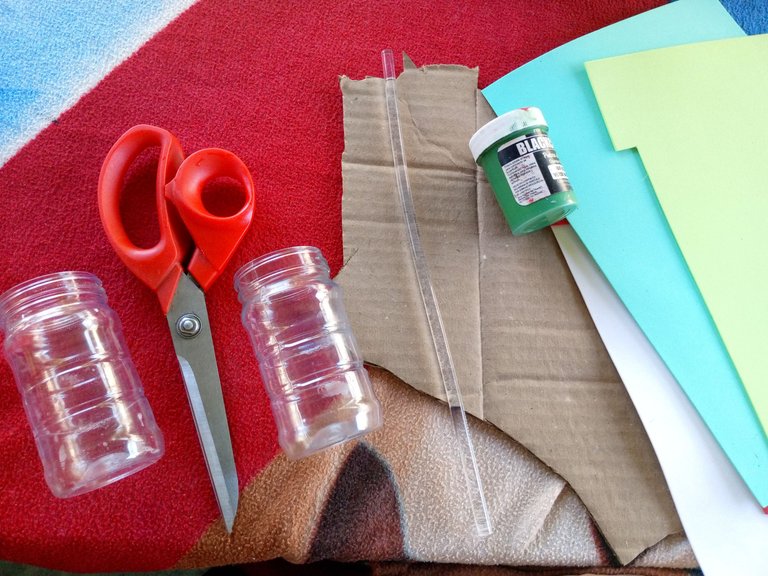
Primero debemos asegurarnos de contar con los siguientes materiales para trabajar:
- Tijeras
- Una barra de silicona
- Frascos de mayonesa
- Foami color rojo
- Foami color verde manzana
- Foami color verde turquesa
- Foami color negro o marcador
- Foami color blanco
- Foami color verde oscuro
- Pintura color verde oscuro
Ya con estos materiales en nuestra mesa, ¡podemos comenzar!
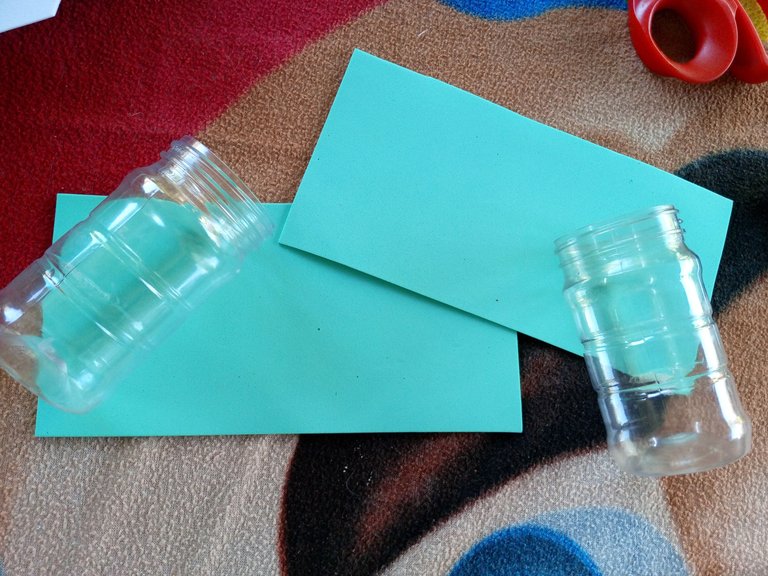
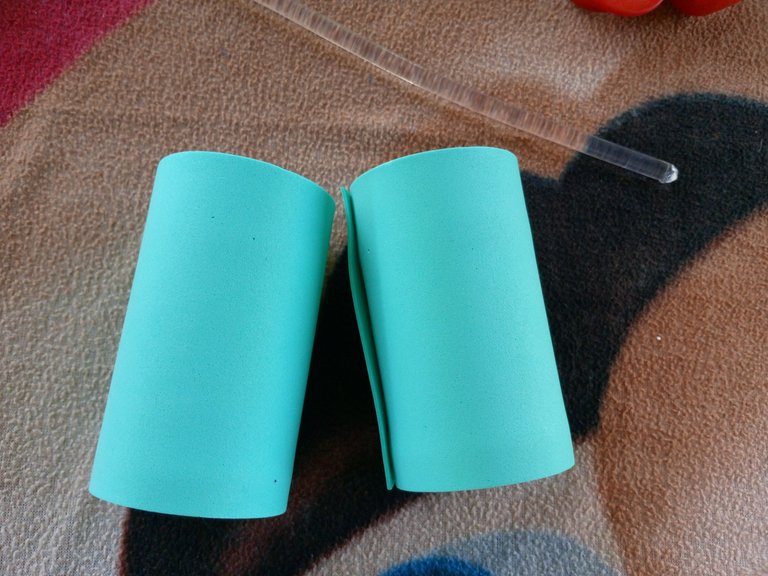
Primero tomaremos los 2 frascos de mayonesa y los forraremos con foami color turquesa.
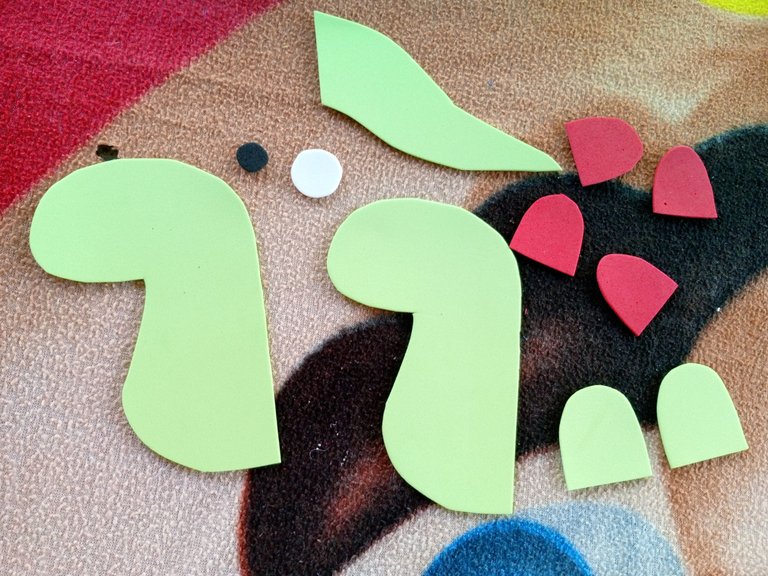
Seguido de esto, tomaremos los foamis color verde manzana, foami color rojo, foami color blanco y negro, y haremos las piezas que se visualizan en las siguientes fotos:
Posdata: Si ven un agujero en esta foto es porque usando una barra de silicona abrí ese pequeño agujero. Debido a que cayó un poco de silicón en la cobija y la traspasó, y al momento de tomar la foto no me percate.
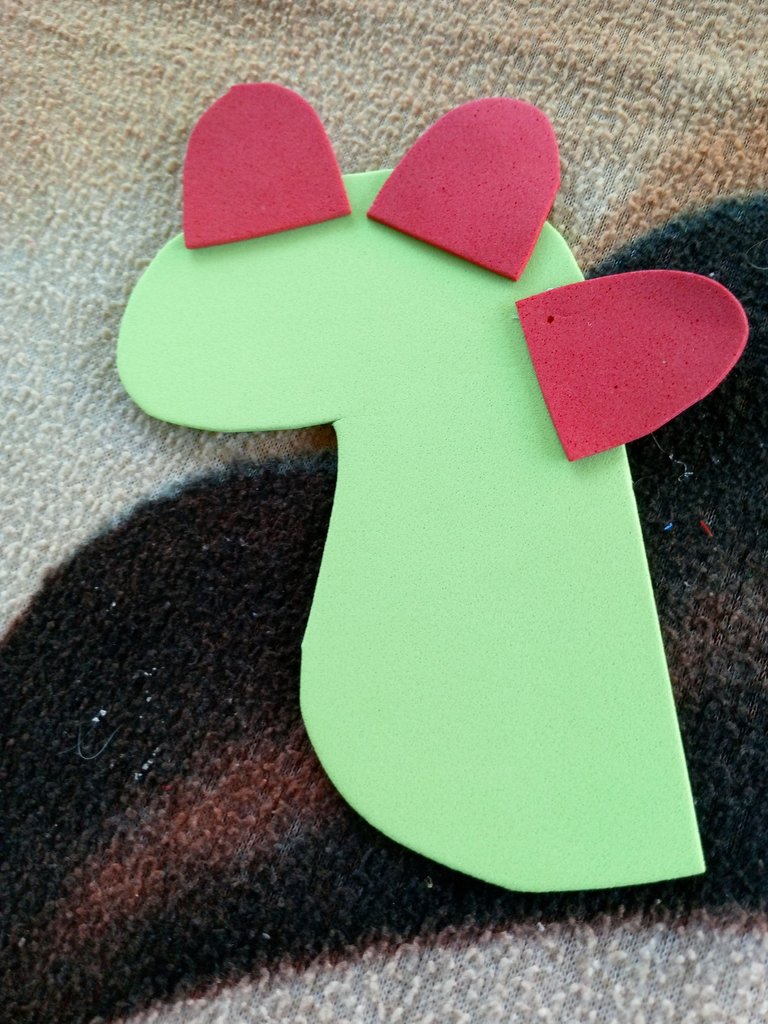
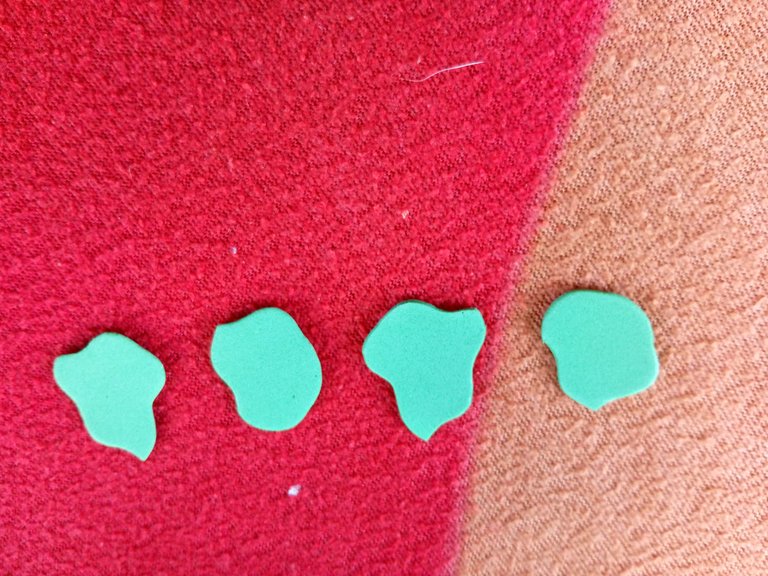
Ahora tenemos que tomar una parte de la cabeza de nuestro dinosaurio y colocarle las escamas que ellos poseen.
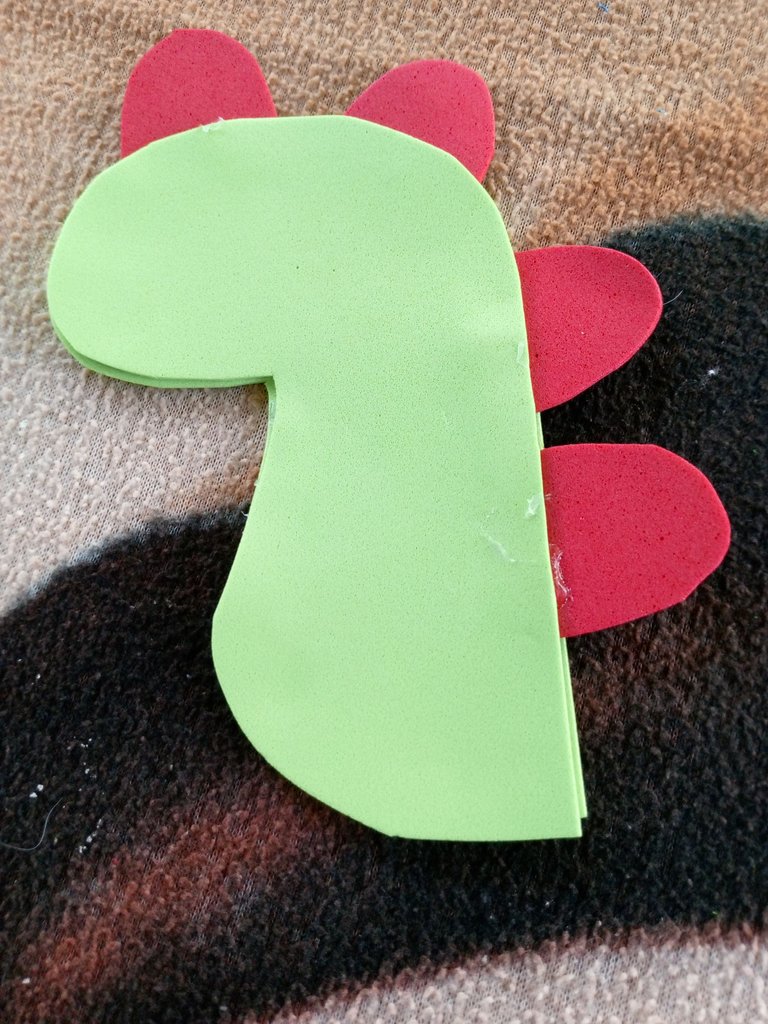
Seguido de esto, debemos colocarle la otra escama que faltaba y también tenemos que juntar su otra parte de la cabeza con esta.
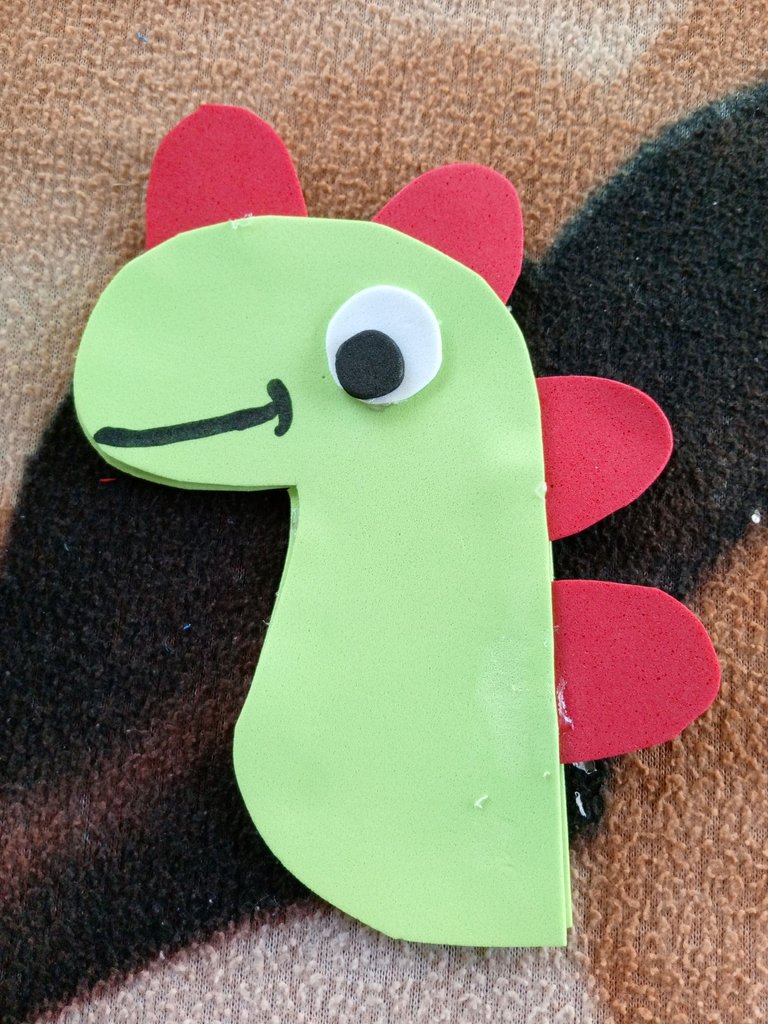
Posteriormente, realizaremos con foami color blanco el ojo de nuestro dinosaurio y con un marcador color negro debemos hacer la pupila. (Yo en mi caso use foami color negro.) A parte, hay que realizar su boca con marcador negro o con foami color negro.
¿Recuerdan los frascos los cuales forramos anteriormente? Pues bueno, ahora los juntaremos con ayuda de una barra de silicona en la cabeza de nuestro dinosaurio.
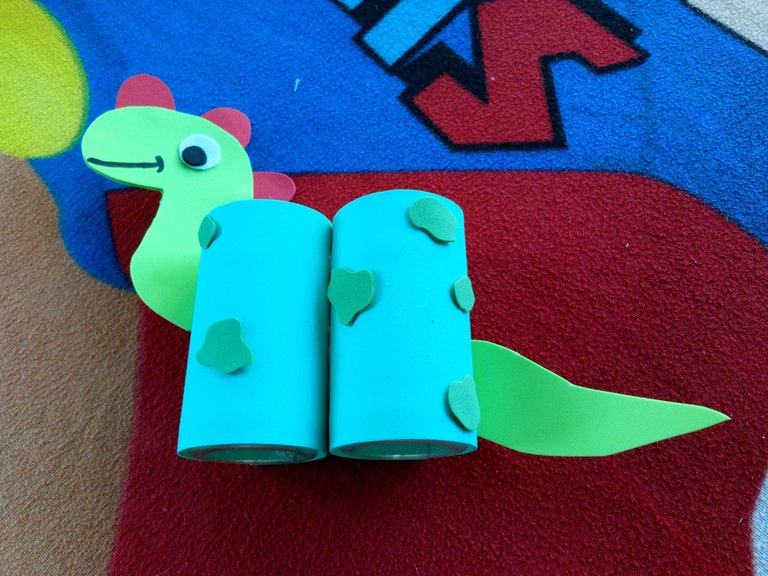
Seguido de hacer esto, haremos las piezas que se ven en las siguientes fotos y las pegaremos a los frascos que forramos.
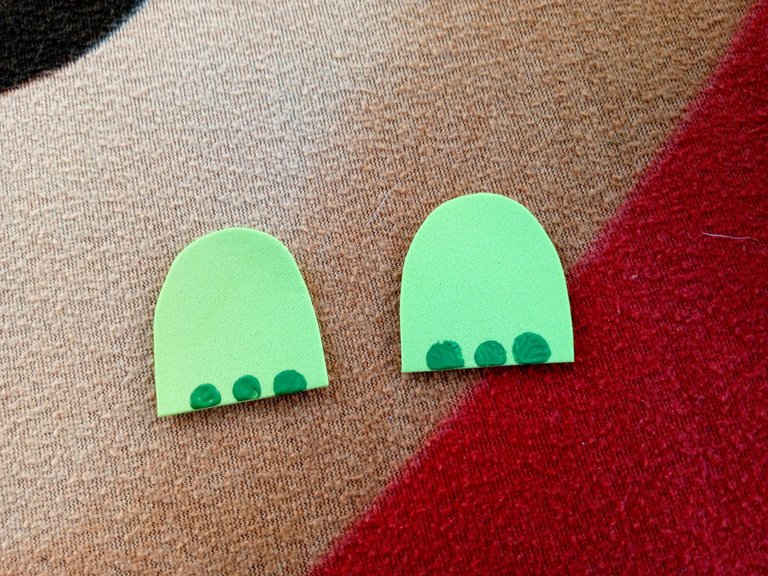
Ahora haremos sus patitas las cuales las elaboraremos con foami color verde manzana y pintaremos sus pezuñas con pintura color verde oscuro.
Luego las juntaremos y ya con eso ¡terminaríamos nuestra manualidad!
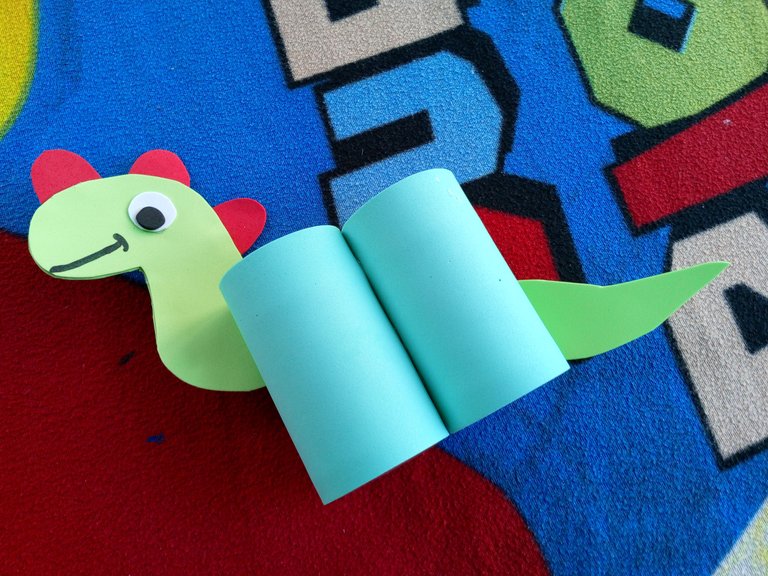
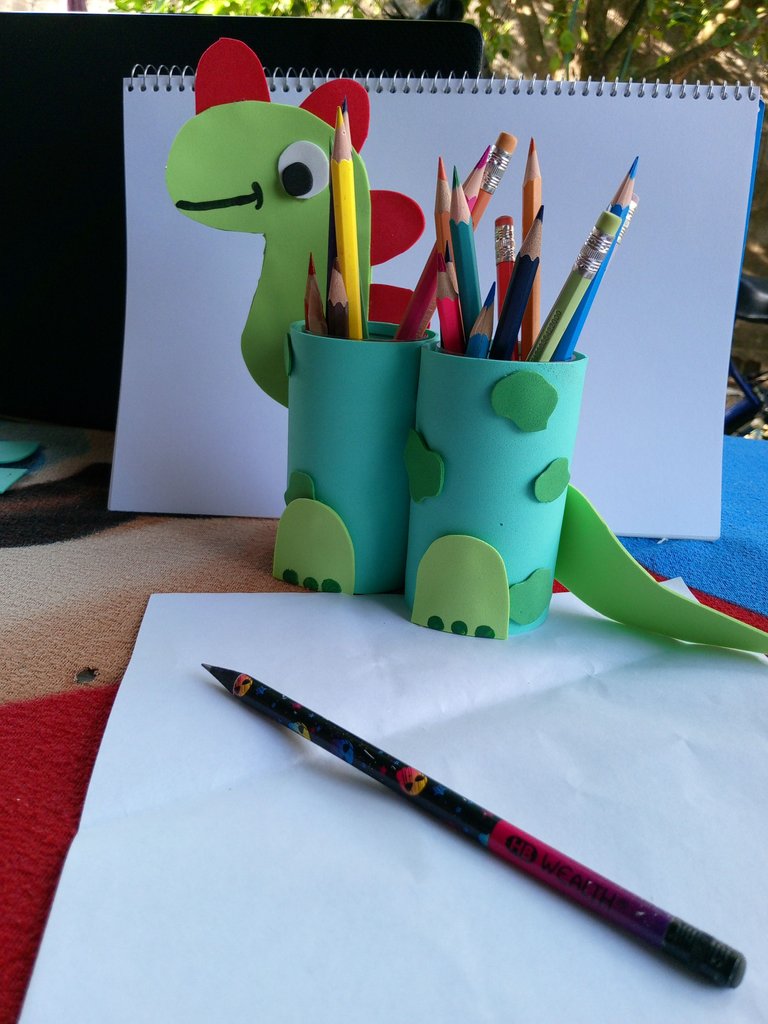
Resultado:
Para esta manualidad necesite ayuda de mi mamá, ya que se me complicaba un poco hacerla.
Pues bueno, muchas gracias a todos por haber leído mi publicación, espero les haya gustado y lo intenten en sus casas. Sin más nada que decir, me despido.
English Versión:
Hello Hive Diy creators. Today I bring you a new craft that is very useful for all of you. Today I bring you a dinosaur pencil case that is quite easy and simple to make.
This craft will be very useful to all of you, since you can save your colors, pencils, brushes or markers. The best thing about this pen is that it is too creative and pretty.
For my part, I like dinosaurs, that's why I made this pen.
Now, without anything else to say, let's start working!
First we must make sure we have the following materials to work with:
- Scissors
- A silicone bar
- Mayonnaise jars
- Red foam
- Apple green foami
- Turquoise green foam
- Black foam or marker
- White foam
- Dark green foami
- Dark green paint
Now with these materials on our table, we can begin!
First we will take the 2 mayonnaise jars and line them with turquoise foam.
Following this, we will take the apple green foam, red foam, white and black foam, and make the pieces shown in the following photos:
Postscript: If you see a hole in this photo it is because using a silicone bar I opened that small hole. Because a little silicone fell on the blanket and passed through it, and when I took the photo I didn't notice it.
Now we have to take a part of our dinosaur's head and place the scales that they have on it.
Following this, we must place the other missing scale and we also have to join the other part of the head with this one.
Later, we will make the eye of our dinosaur with white foam and with a black marker we must make the pupil. (In my case I used black foam.) Additionally, you have to make your mouth with a black marker or with black foam.
Do you remember the jars we lined earlier? Well, now we will put them together with the help of a silicone bar on the head of our dinosaur.
After doing this, we will make the pieces that you see in the following photos and we will glue them to the jars that we line.
Now we will make their legs which we will make with apple green foam and we will paint their hooves with dark green paint.
Then we will put them together and with that we would finish our craft!
Result:
For this craft I needed help from my mom, since it was a little complicated for me to do.
Well, thank you all very much for reading my publication, I hope you liked it and try it at home. Without anything else to say, I say goodbye.
Que lindura, me encantan los dinosaurios jaja si fuera por mi, decoraria toda mi casa con estos bichitos ❤️
Esta muy util y practica tu creacion, tanto para los mas chicos como para los mas grandes, todos amamos los dinosaurios jeje gracias por la idea.
Super tierno y original!
Me encantó tu proyecto, es realmente hermoso. Ahora esperar una excusa para hacerlo siguiendo tu tutorial, me hará quedar muy bien con un regalo así.
Felicitaciones @carlpia
Te ha quedado muy lindo. Además de que es interesante porque permite usar algunos frascos que usualmente irían a parar a la basura. Este tipo de manualidades son muy buenas, porque nos permite solventar algo y a la vez, es una respuesta creativa y económica. Bendiciones