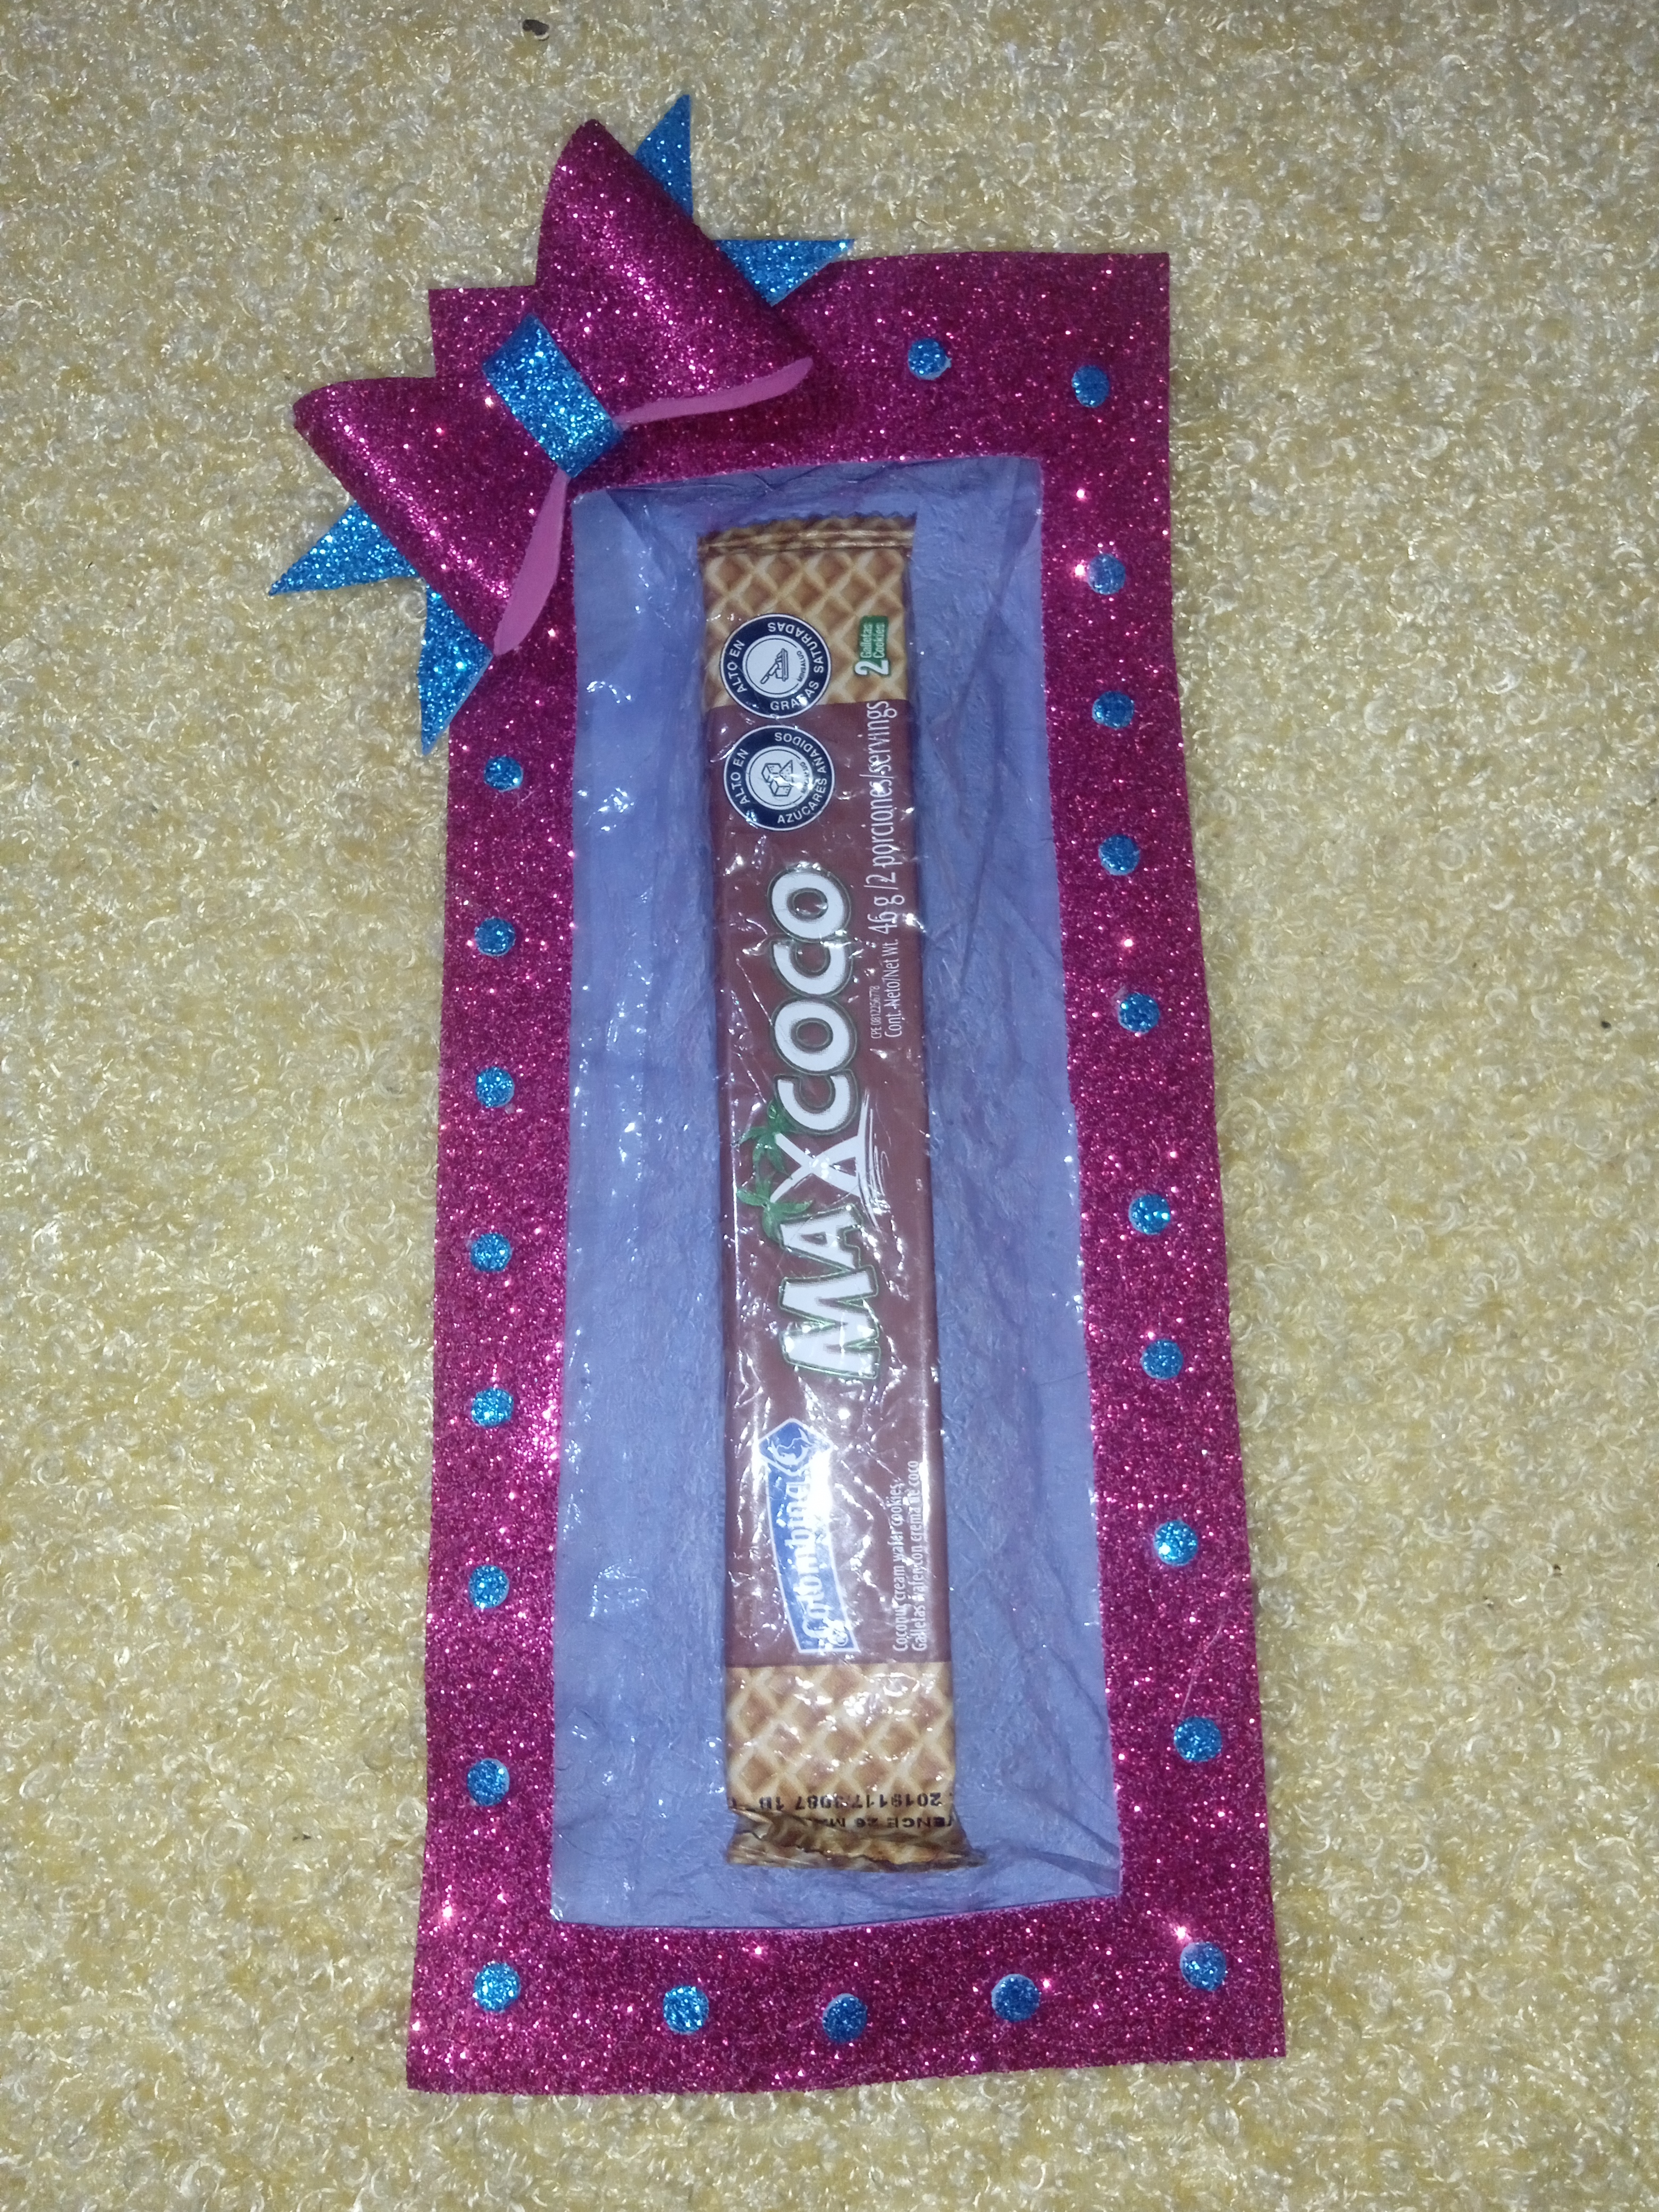
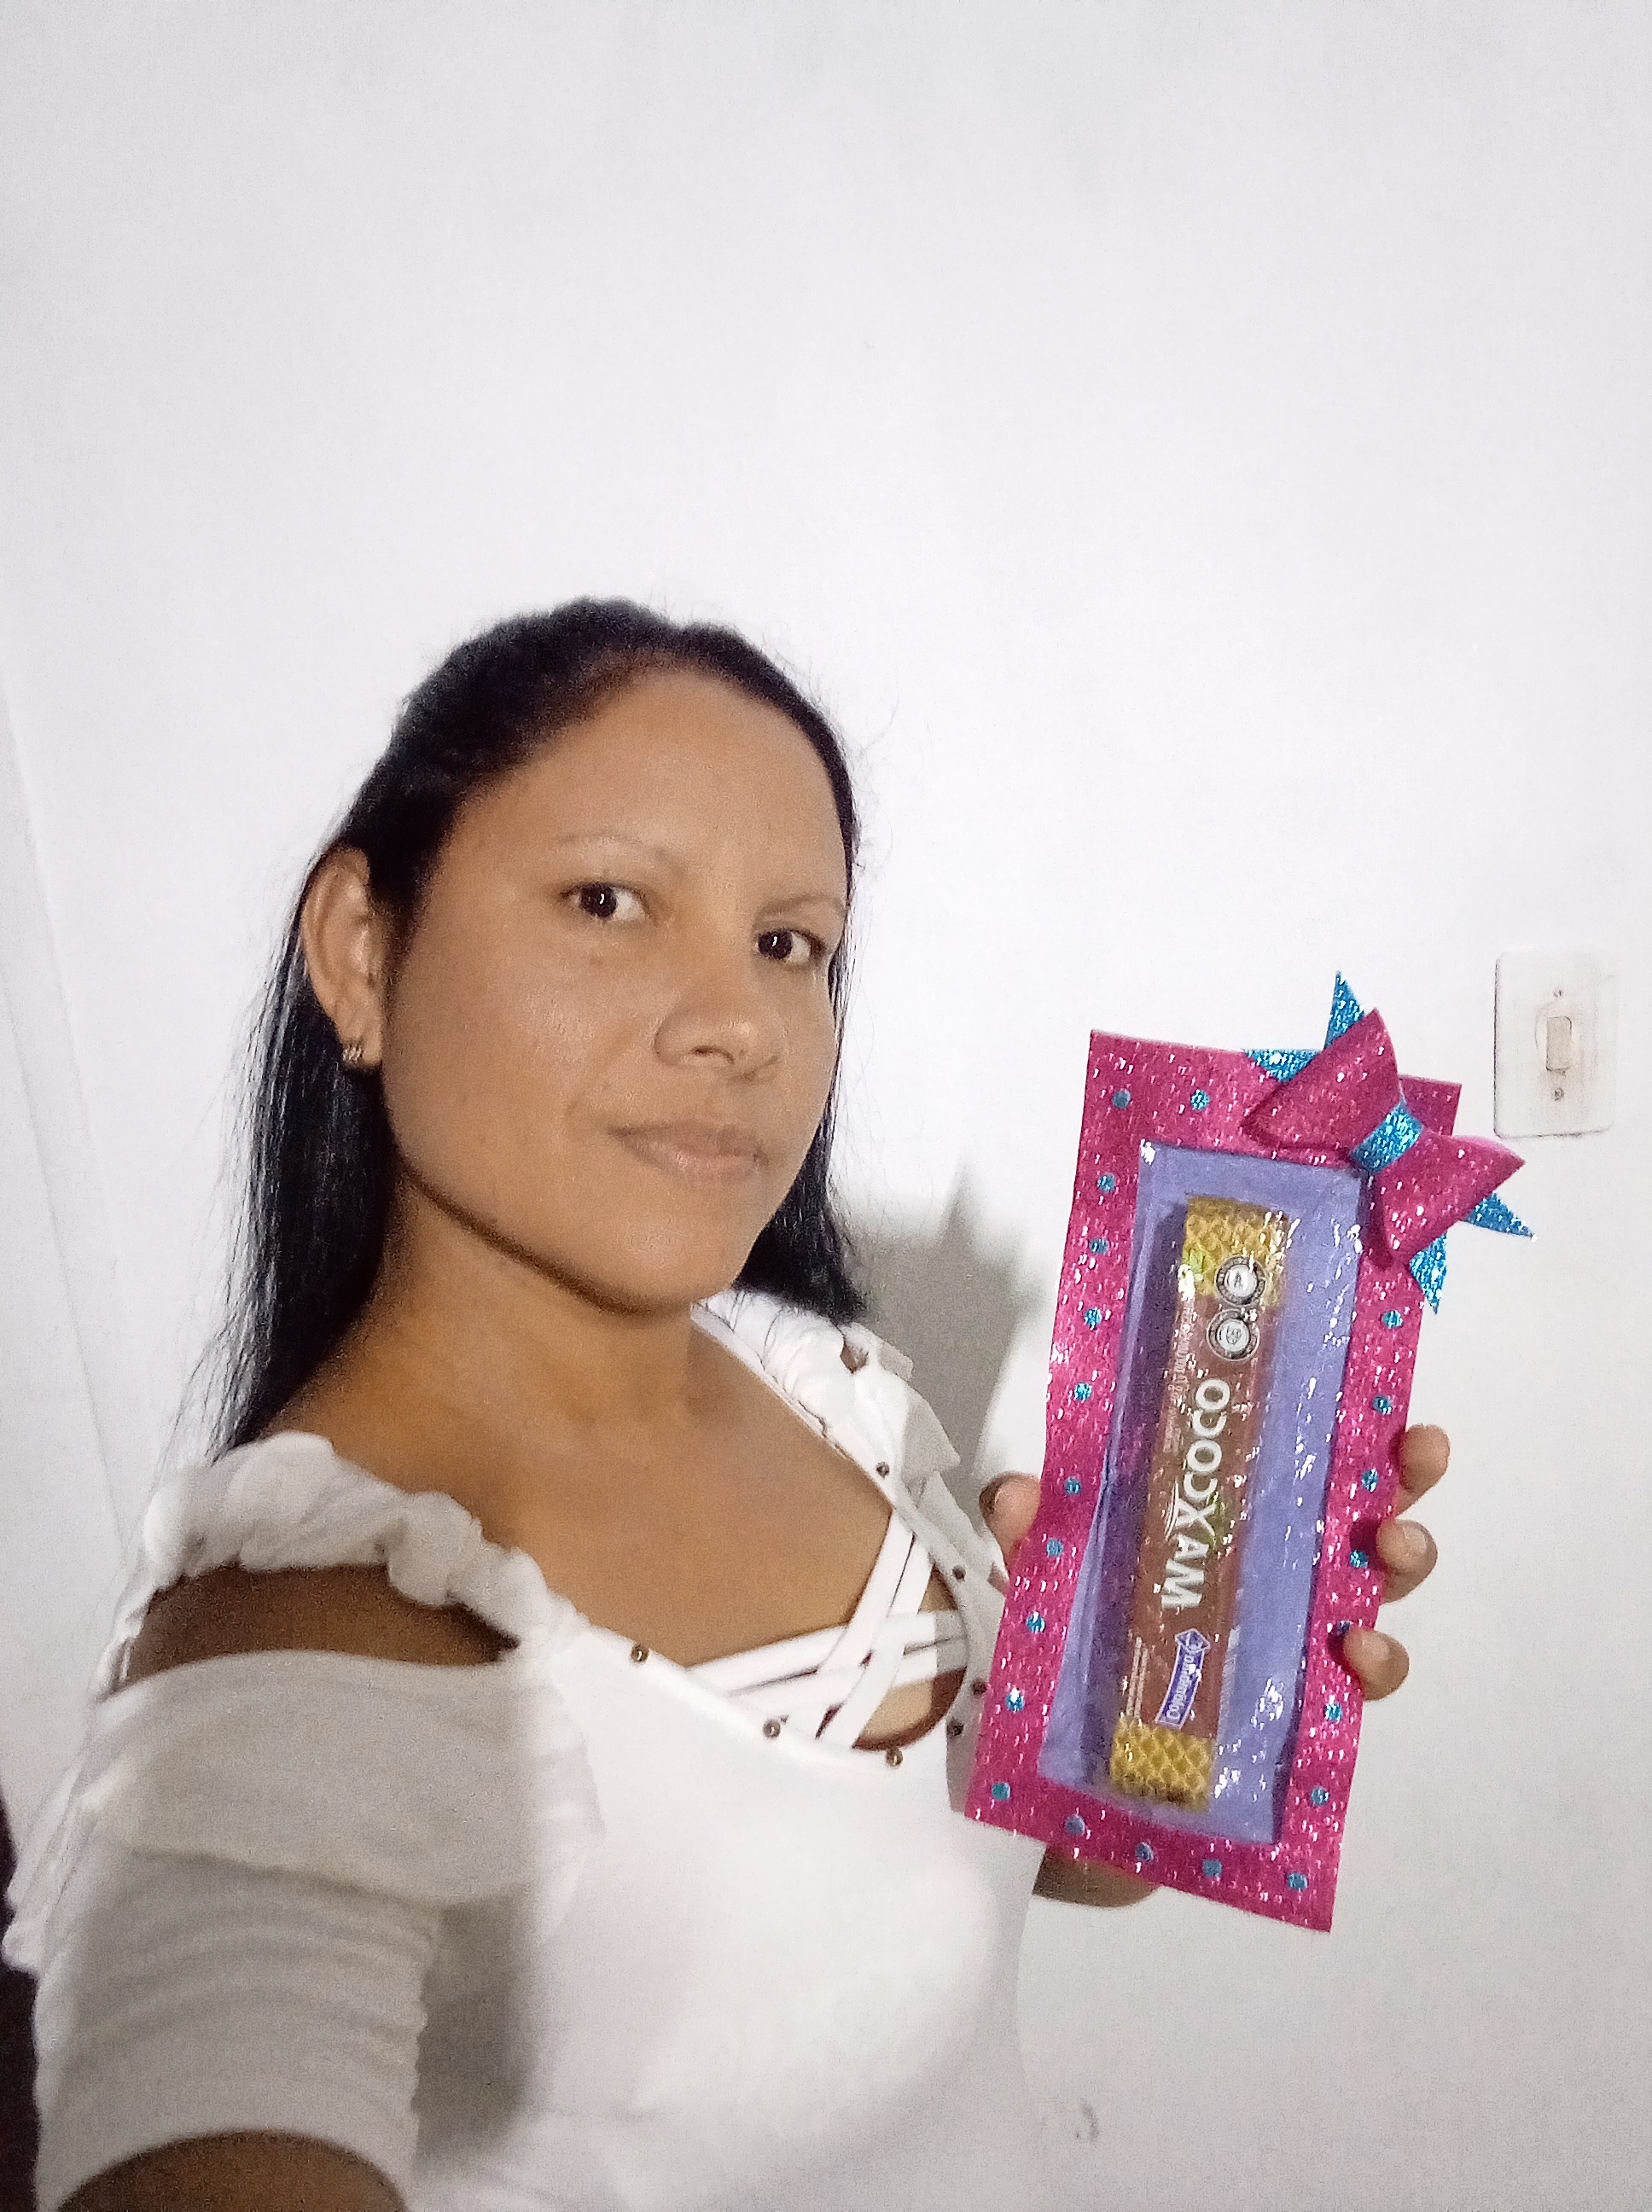
Hoy vengo a mostrarles un estuche para cualquier obsequio, yo lo realice para colocar allí una galleta rellena de coco que me encanta, a veces cumpleaños una persona allegada y de esta manera podemos compartir con ellos la alegría que nos da dándoles un pequeño presente.
Son pocos pasos y queda muy lindo este detalle realizado en foami.
🎁English Version
Hello, greetings to the entire Hivediy creative family, I hope you are well so that you continue contributing to this great platform by showing us your beautiful works.
Today I come to show you a case for any gift, I make it to place a coconut-filled cookie that I love, sometimes on a loved one's birthday and in this way we can share with them the joy it gives us by giving them a small present.
There are just a few steps and this detail made of foam looks very nice.
Los materiales que necesite fueron:
- Foami color fucsia y azúl
- Cartulina color azúl
- Papel transparente reciclado
- Tijera
- Silicón
🎁English Version
The materials I needed were:
- Fuchsia and blue foami
- Blue cardboard
- Recycled transparent paper
- Scissors
- Silicone

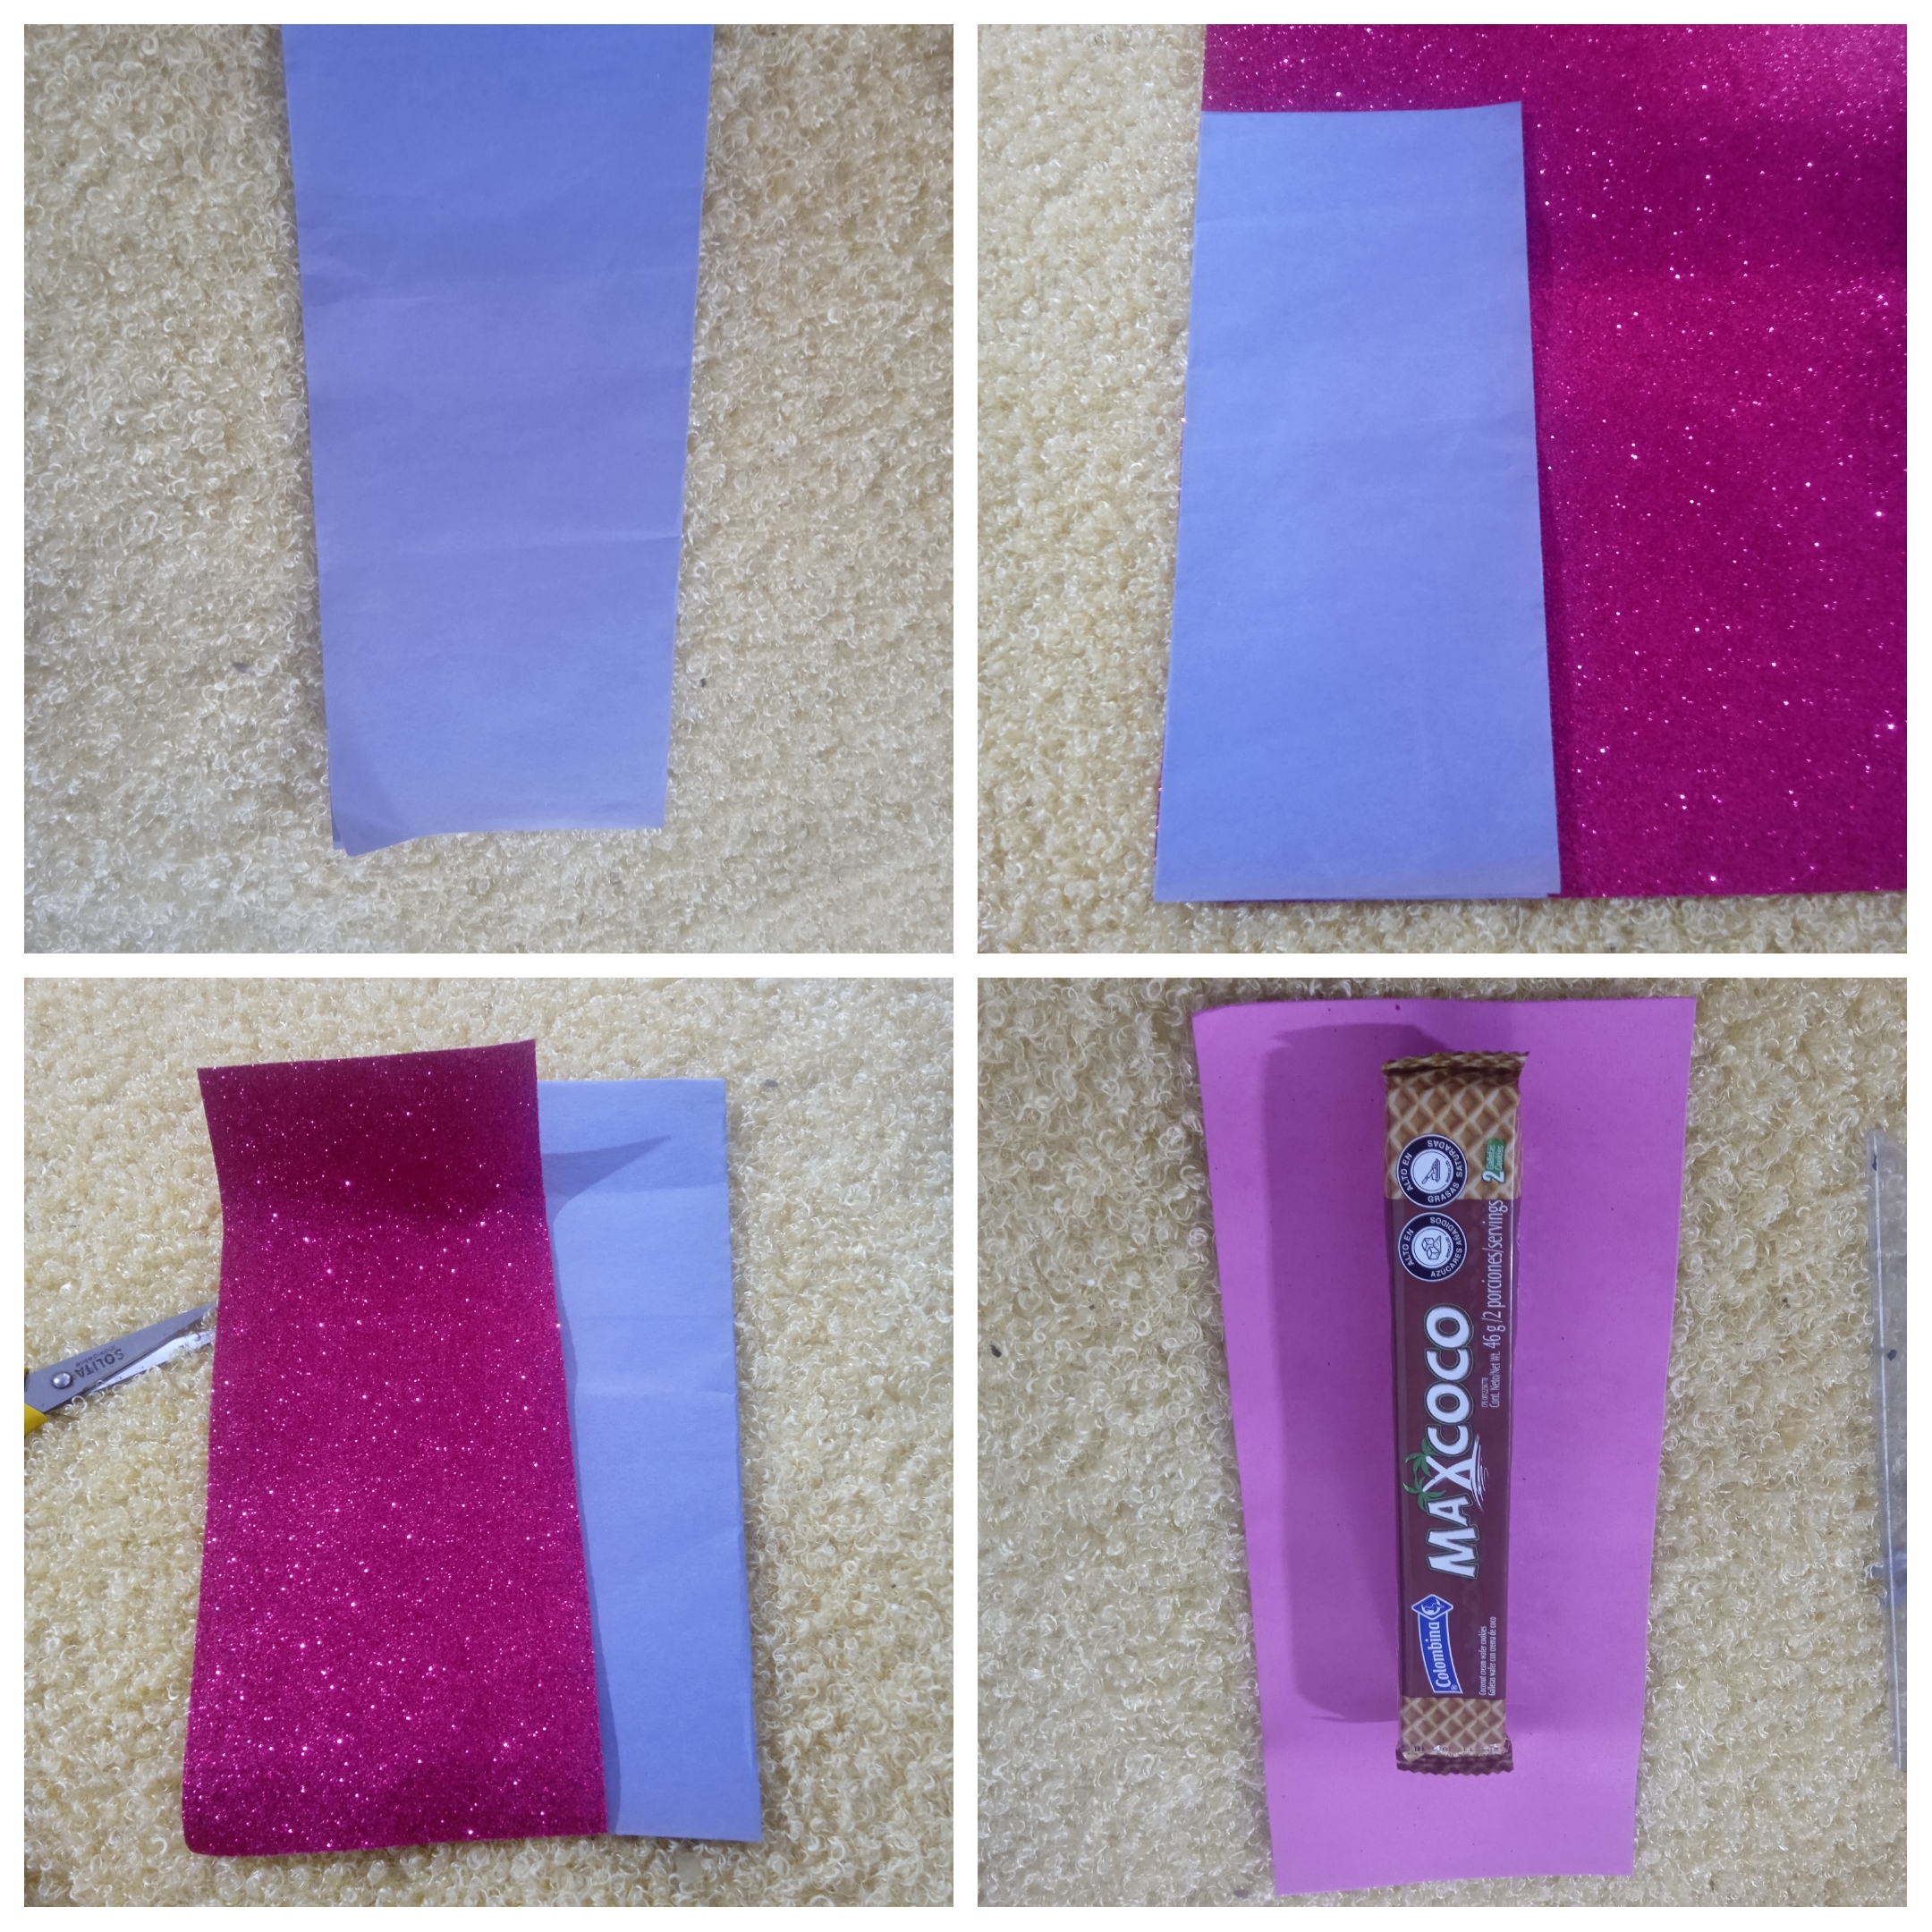
Amigos creativos para realizar este estuche para regalo inicie cortando la cartulina de forma rectangular con una medida de 12 cm de ancho por 26 cm de largo, luego realice el mismo procedimiento con el foami color fucsia y así obtuve dos formas rectangulares del mismo tamaño necesarias para este proyecto.
🎁English Version
Creative friends, to make this gift box, start by cutting the cardboard into a rectangular shape measuring 12 cm wide by 26 cm long, then carry out the same procedure with the fuchsia foam and thus obtain two rectangular shapes of the same size necessary for this project.
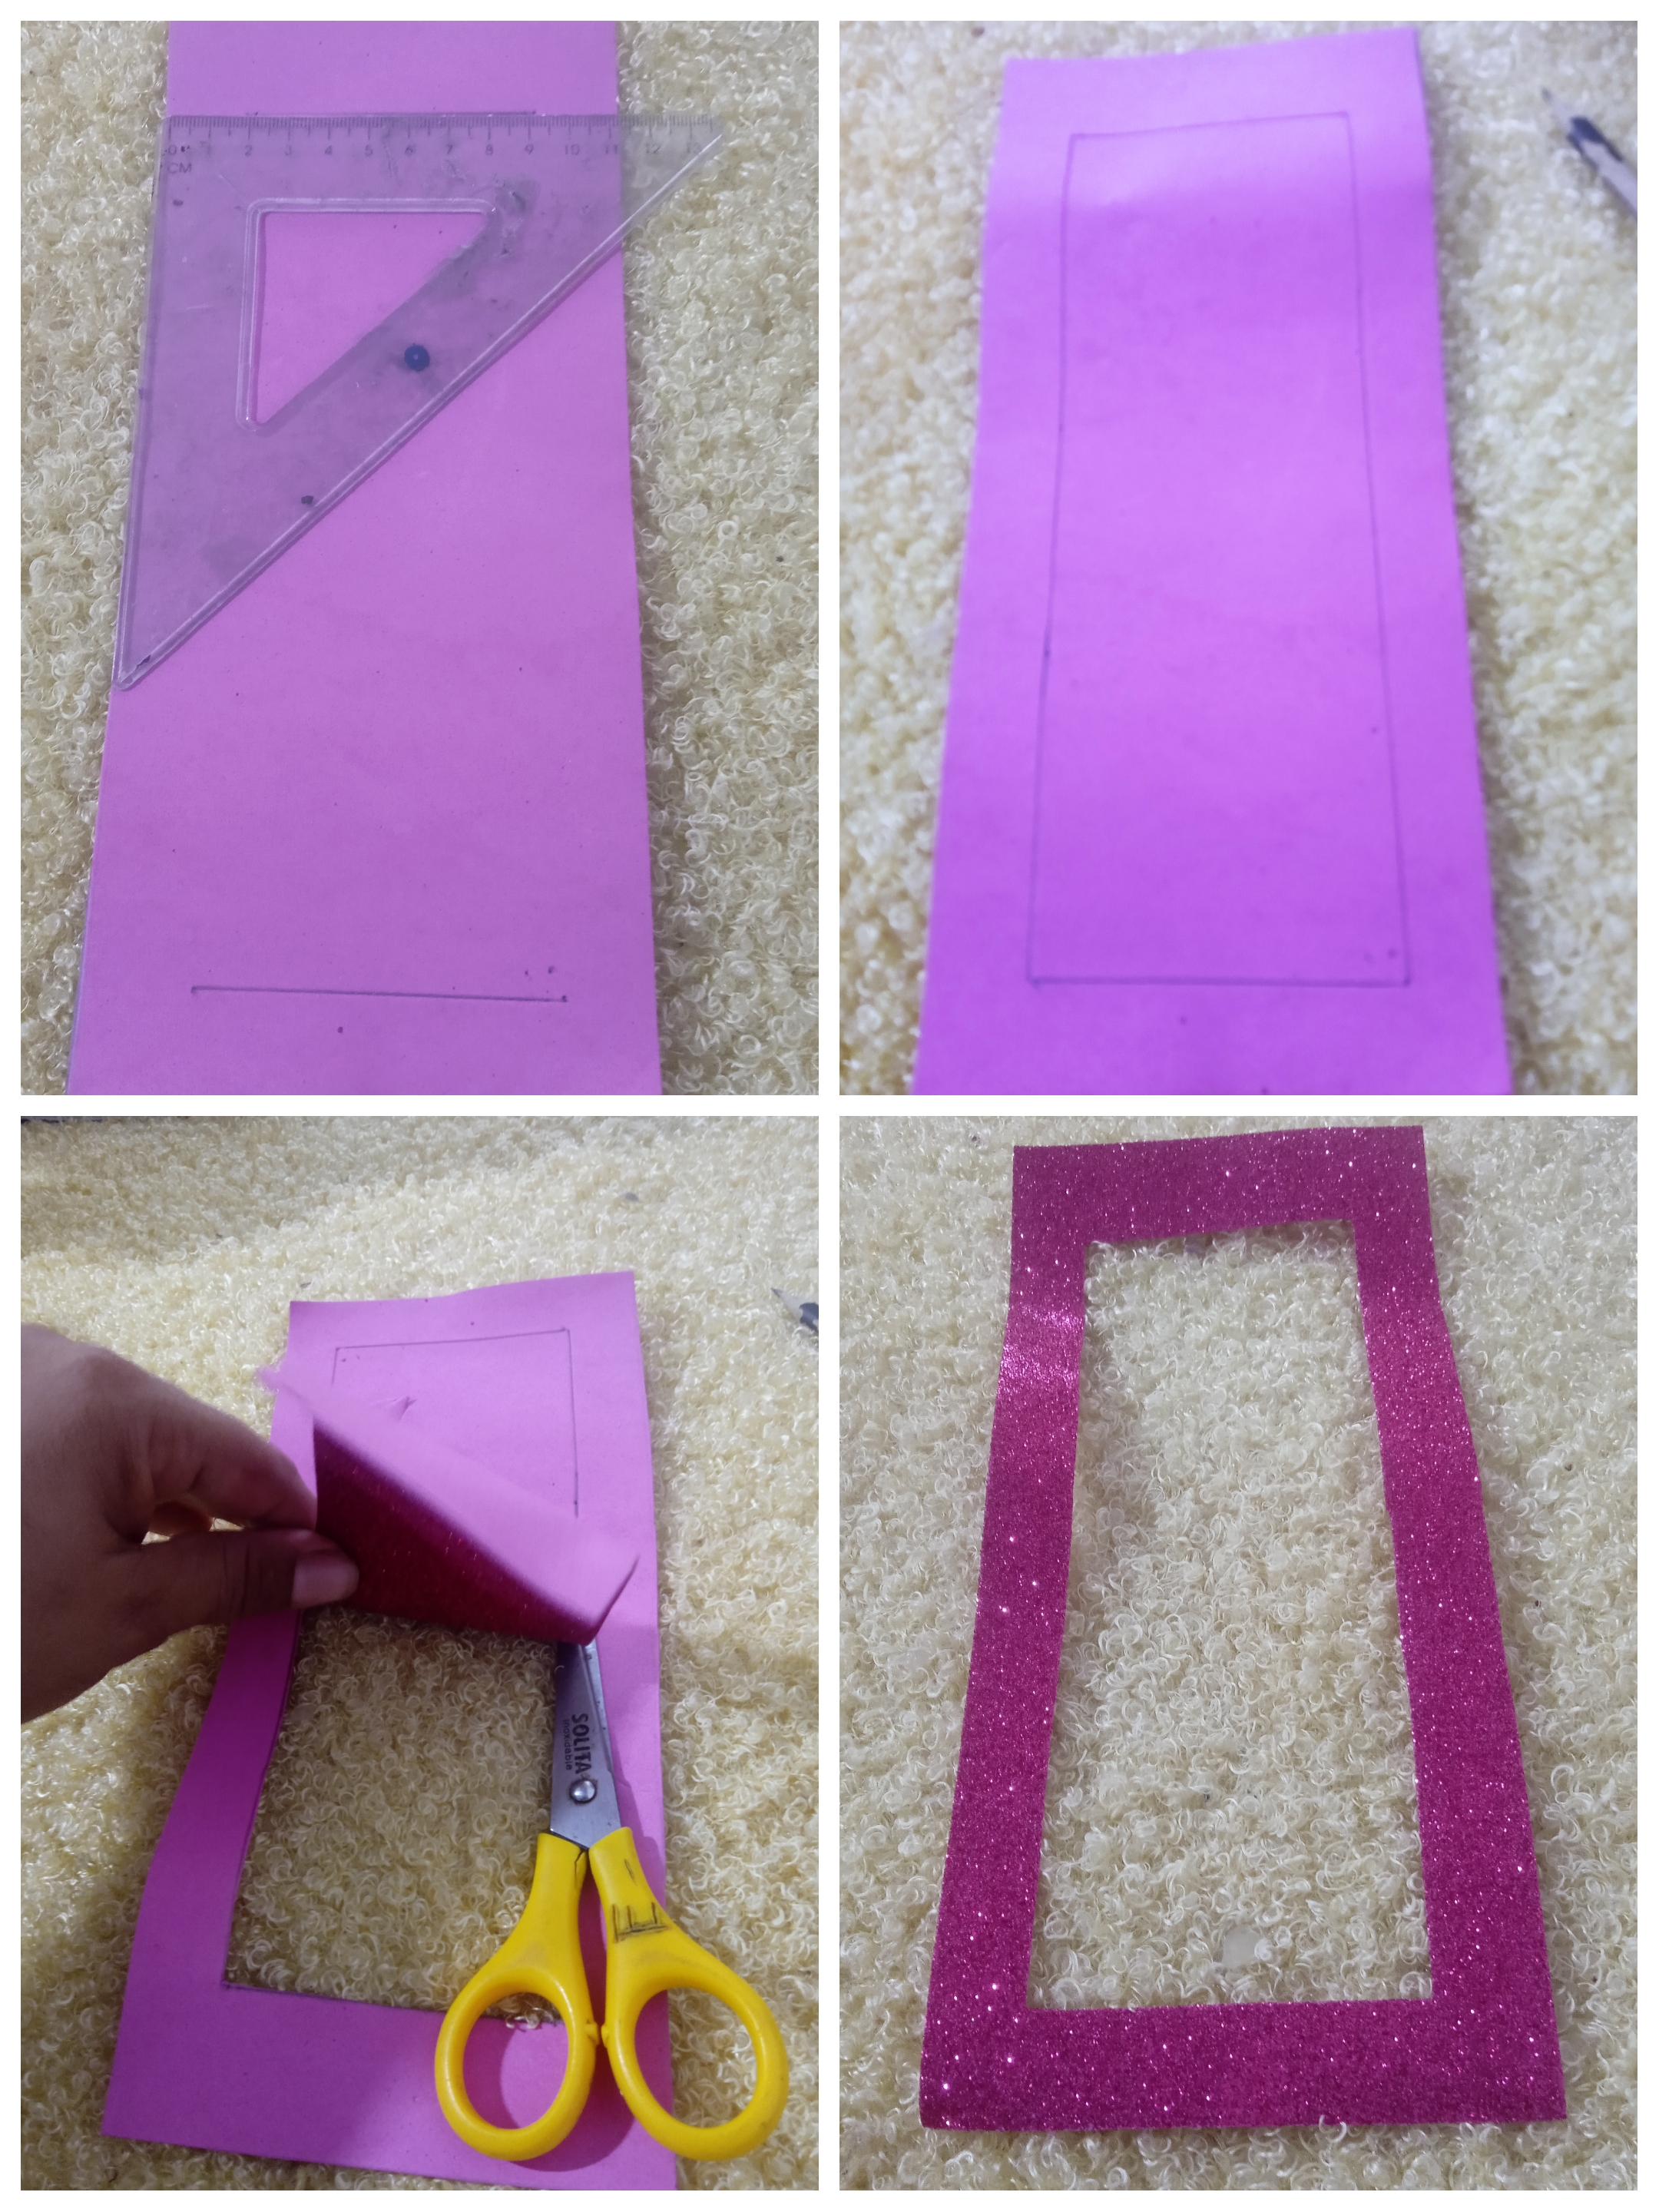
Segui realizando mi estuche está ves lo que hacemos es medir por la parte de atrás del foami color fucsia en la parte de arriba medimos dejando 3 cm en cada extremo y trazamos una linea y en la parte de abajo dejamos 2 cm de cada lado y unimos todas las líneas para luego proceder a cortar consiguiendo con esto una forma de marco.
🎁English Version
I continued making my case. You see, what we do is measure on the back of the fuchsia-colored foam. At the top, we measure, leaving 3 cm at each end and draw a line, and at the bottom, we leave 2 cm on each side and join. all the lines and then proceed to cut, obtaining a frame shape
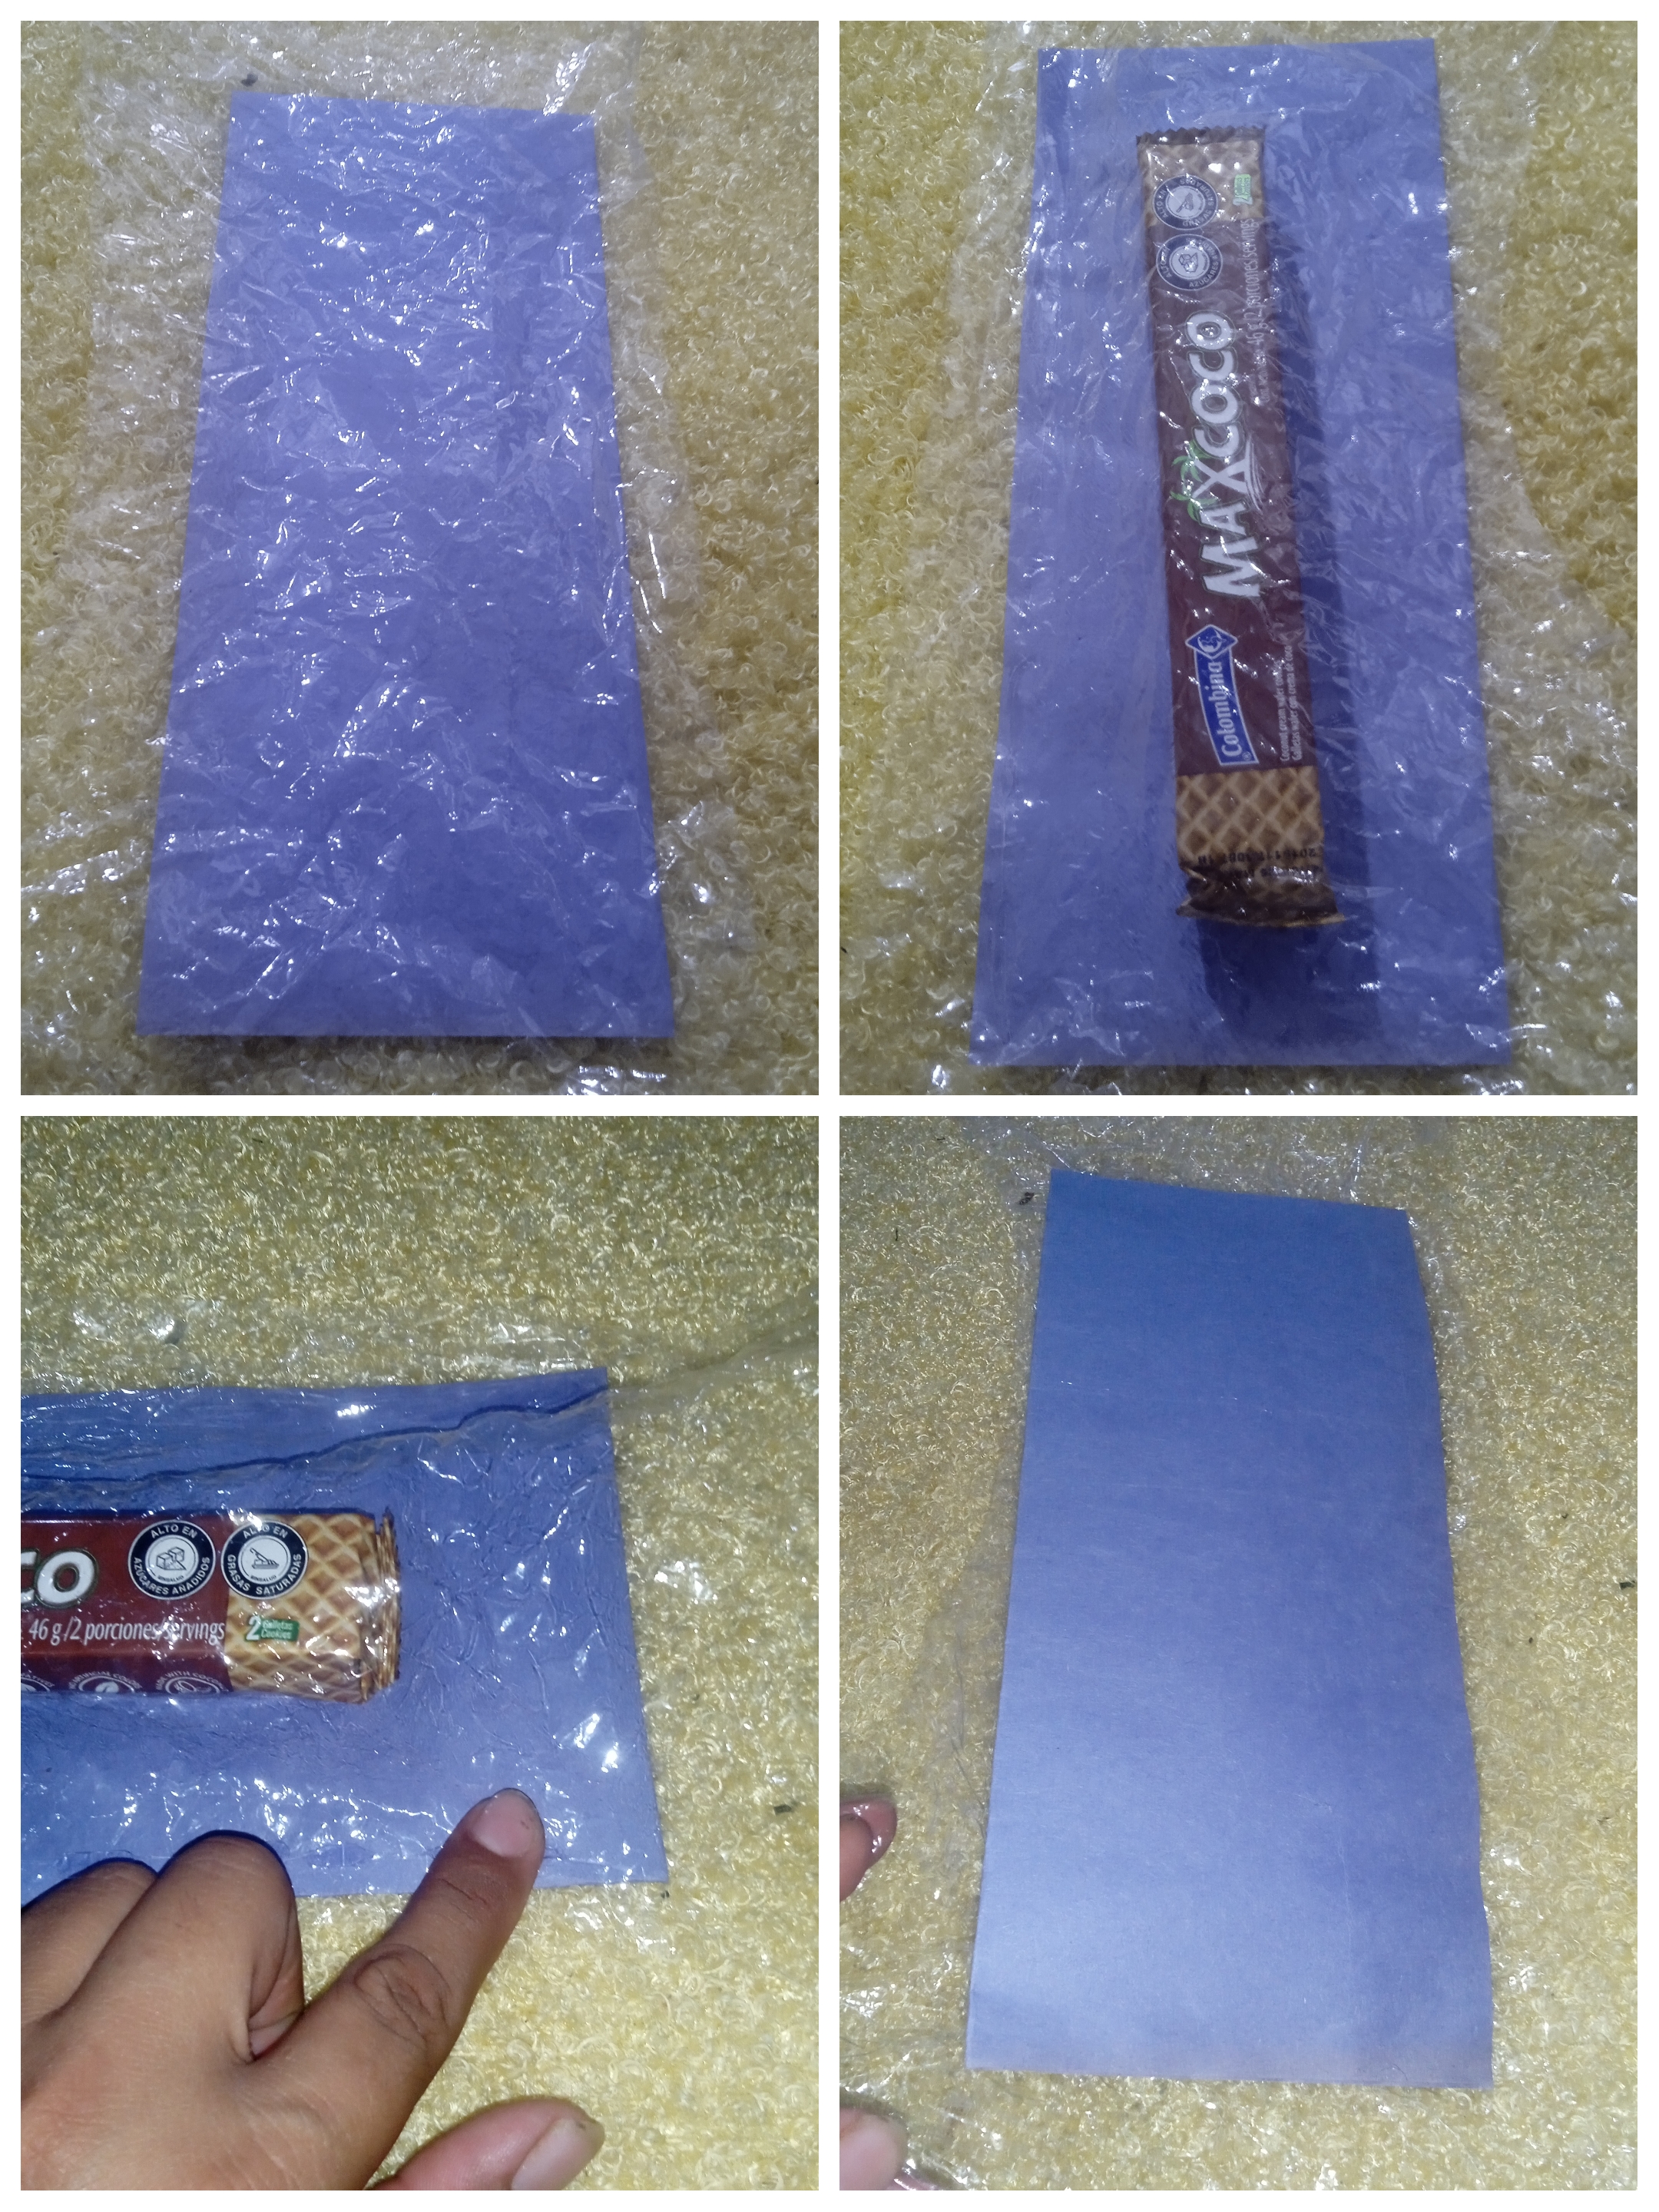
Continuamos y lo que hacemos ahora es pegar el papel transparente reciclado en la cartulina color azúl vamos pegando colocamos nuestro obsequio adentro vamos midiendo y colocando silicón por las orillas una vez cuidado este proceso lo que hacemos es cortar el exceso de papel transparente.
🎁English Version
We continue and what we do now is stick the recycled transparent paper on the blue cardboard, we stick, we place our gift inside, we measure and place silicone along the edges. Once this process has been taken care of, what we do is cut the excess transparent paper.
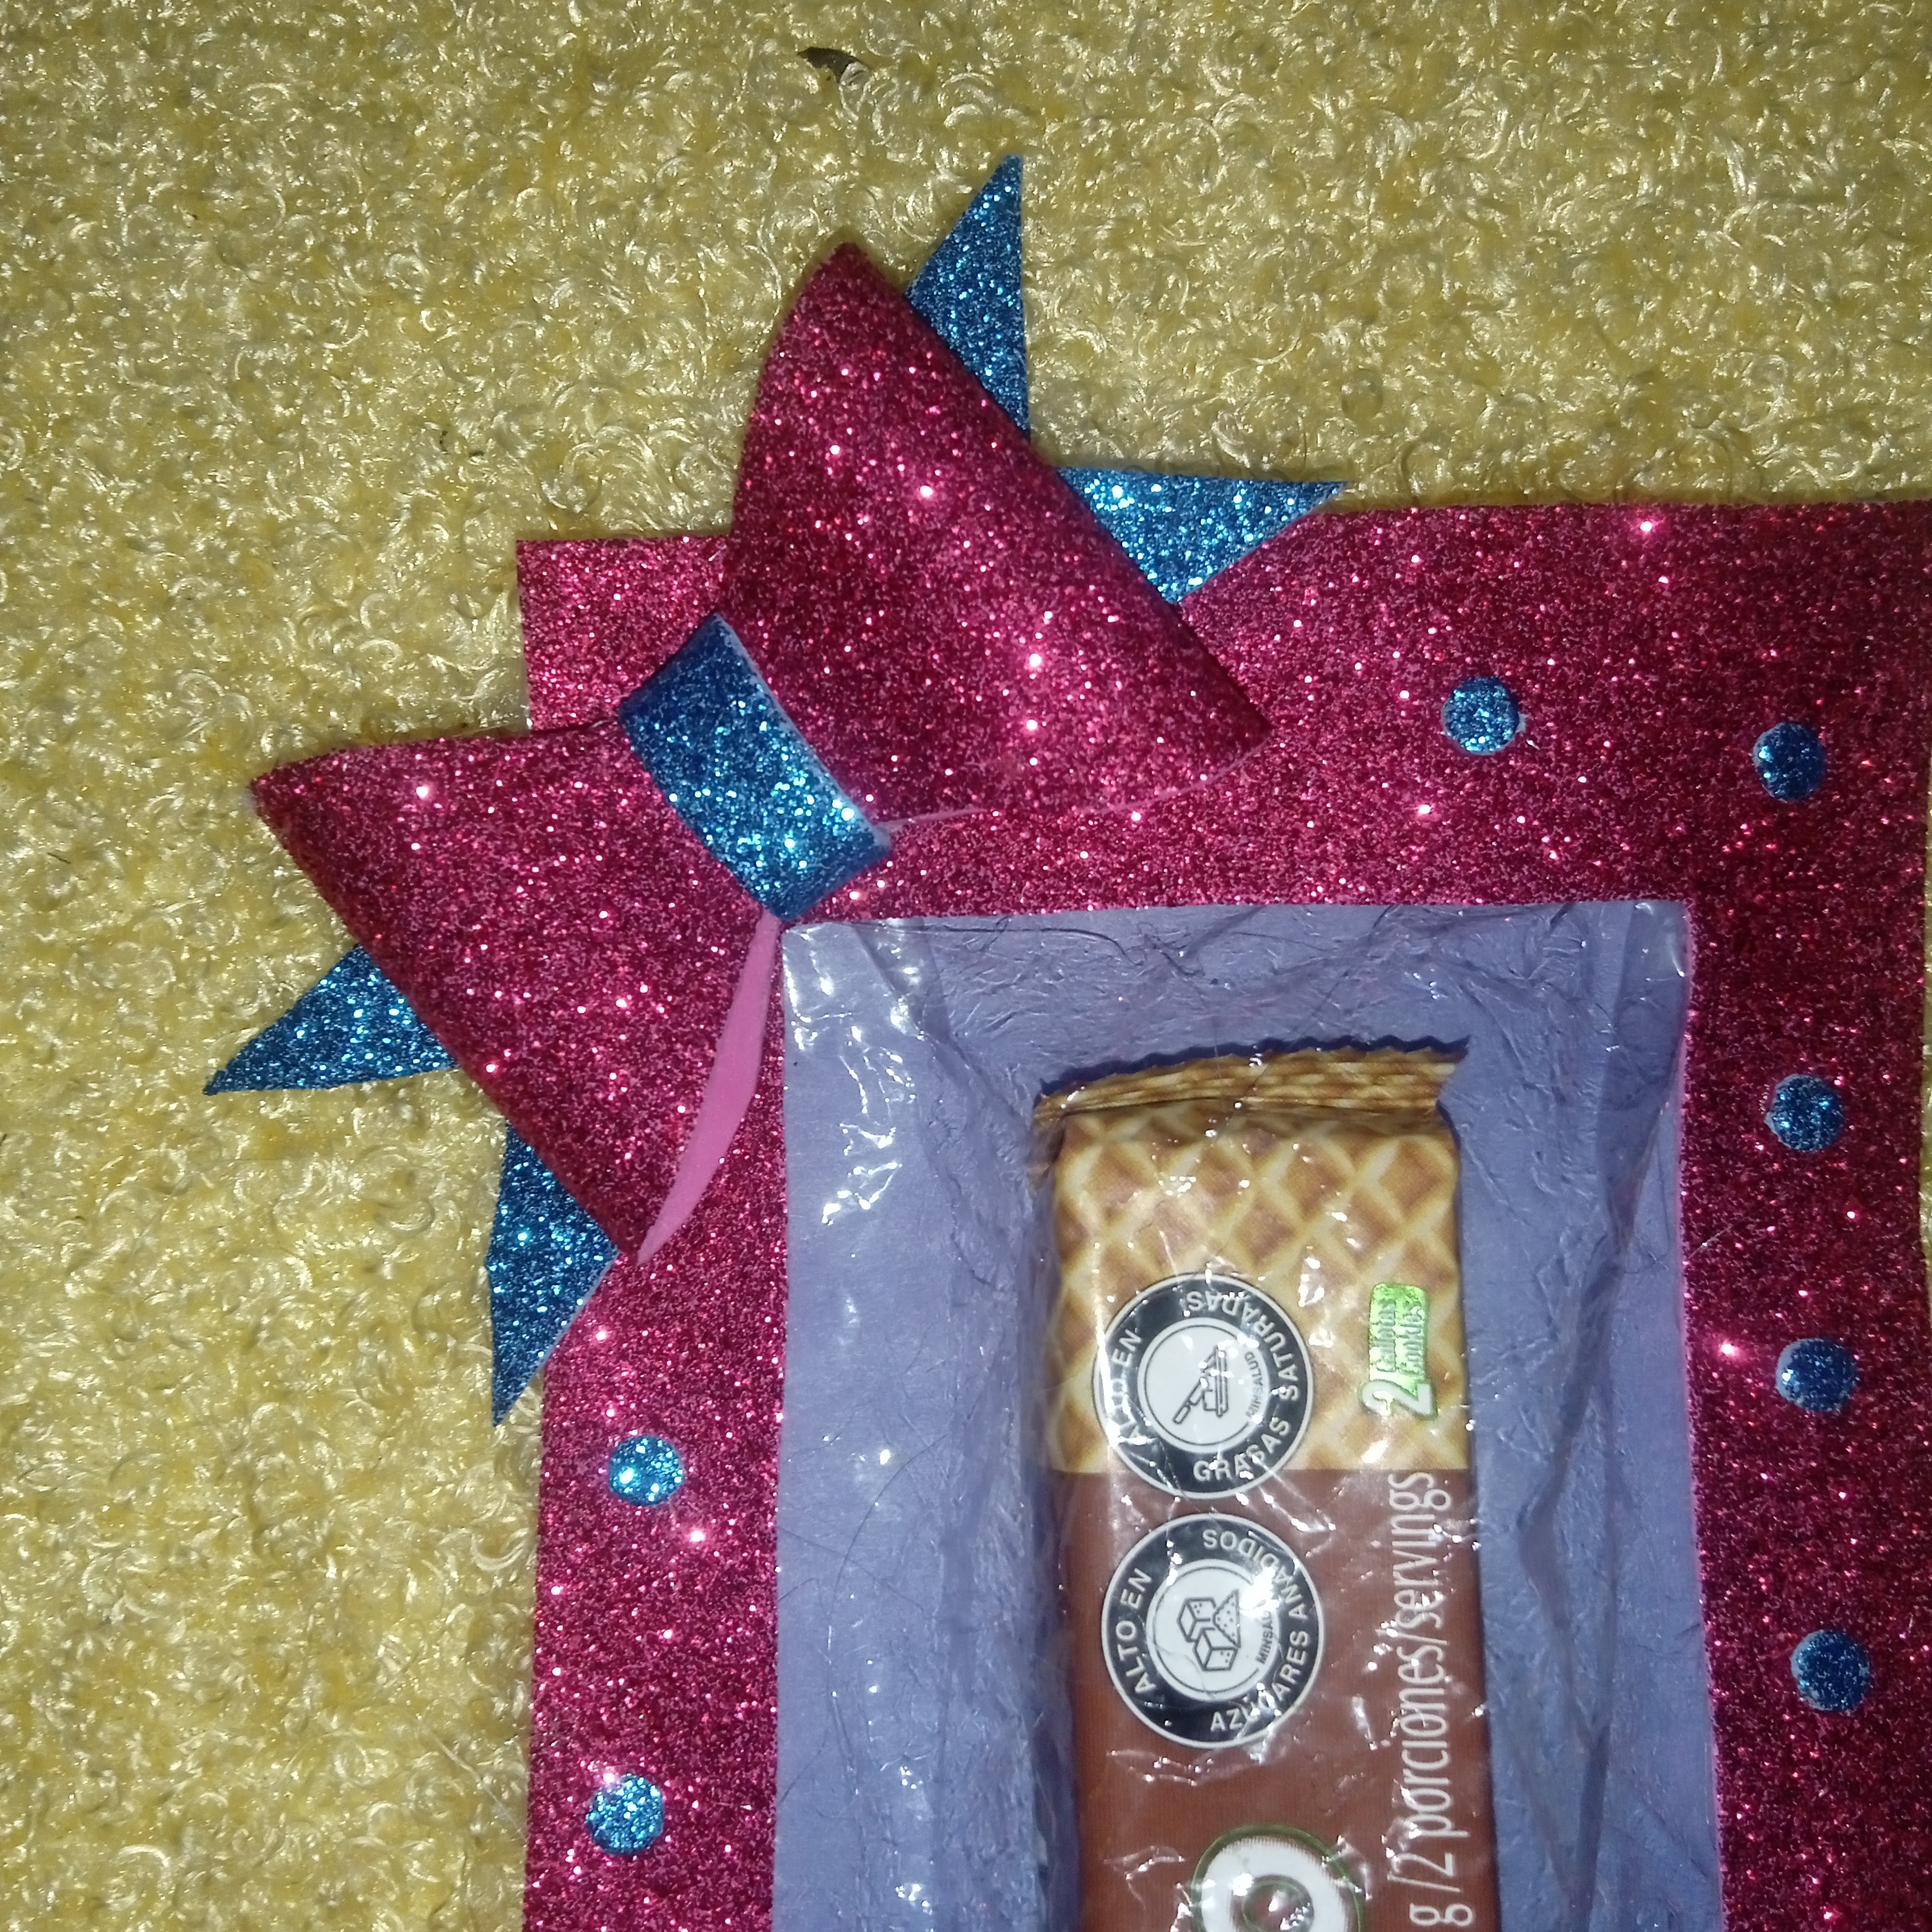
Seguimos con nuestro estuche está vez el marco que hemos sacado en foami lo vamos pegando encima y luego lo decoramos un poco alrededor colocando pelotitas de foami en color azúl realizadas con un abre huecos.
🎁English Version
We continue with our case, this time we glue the frame that we have made out of foam on top and then we decorate it a little around it by placing blue foam balls made with a hole opener.

Para finalizar le quise agregar otro detalle decorativo y realice un lazo en foami, me fui guiando con un patrón para sacar las formas de este lindo lazo, primero trace las formas luego las recorte con mucho cuidado, luego forme mi lazo uniendo las piezas cortadas.
🎁English Version
To finish I wanted to add another decorative detail and make a foam bow, I was guided with a pattern to get the shapes of this beautiful bow, first I traced the shapes then cut them out very carefully, then I formed my bow by joining the cut pieces
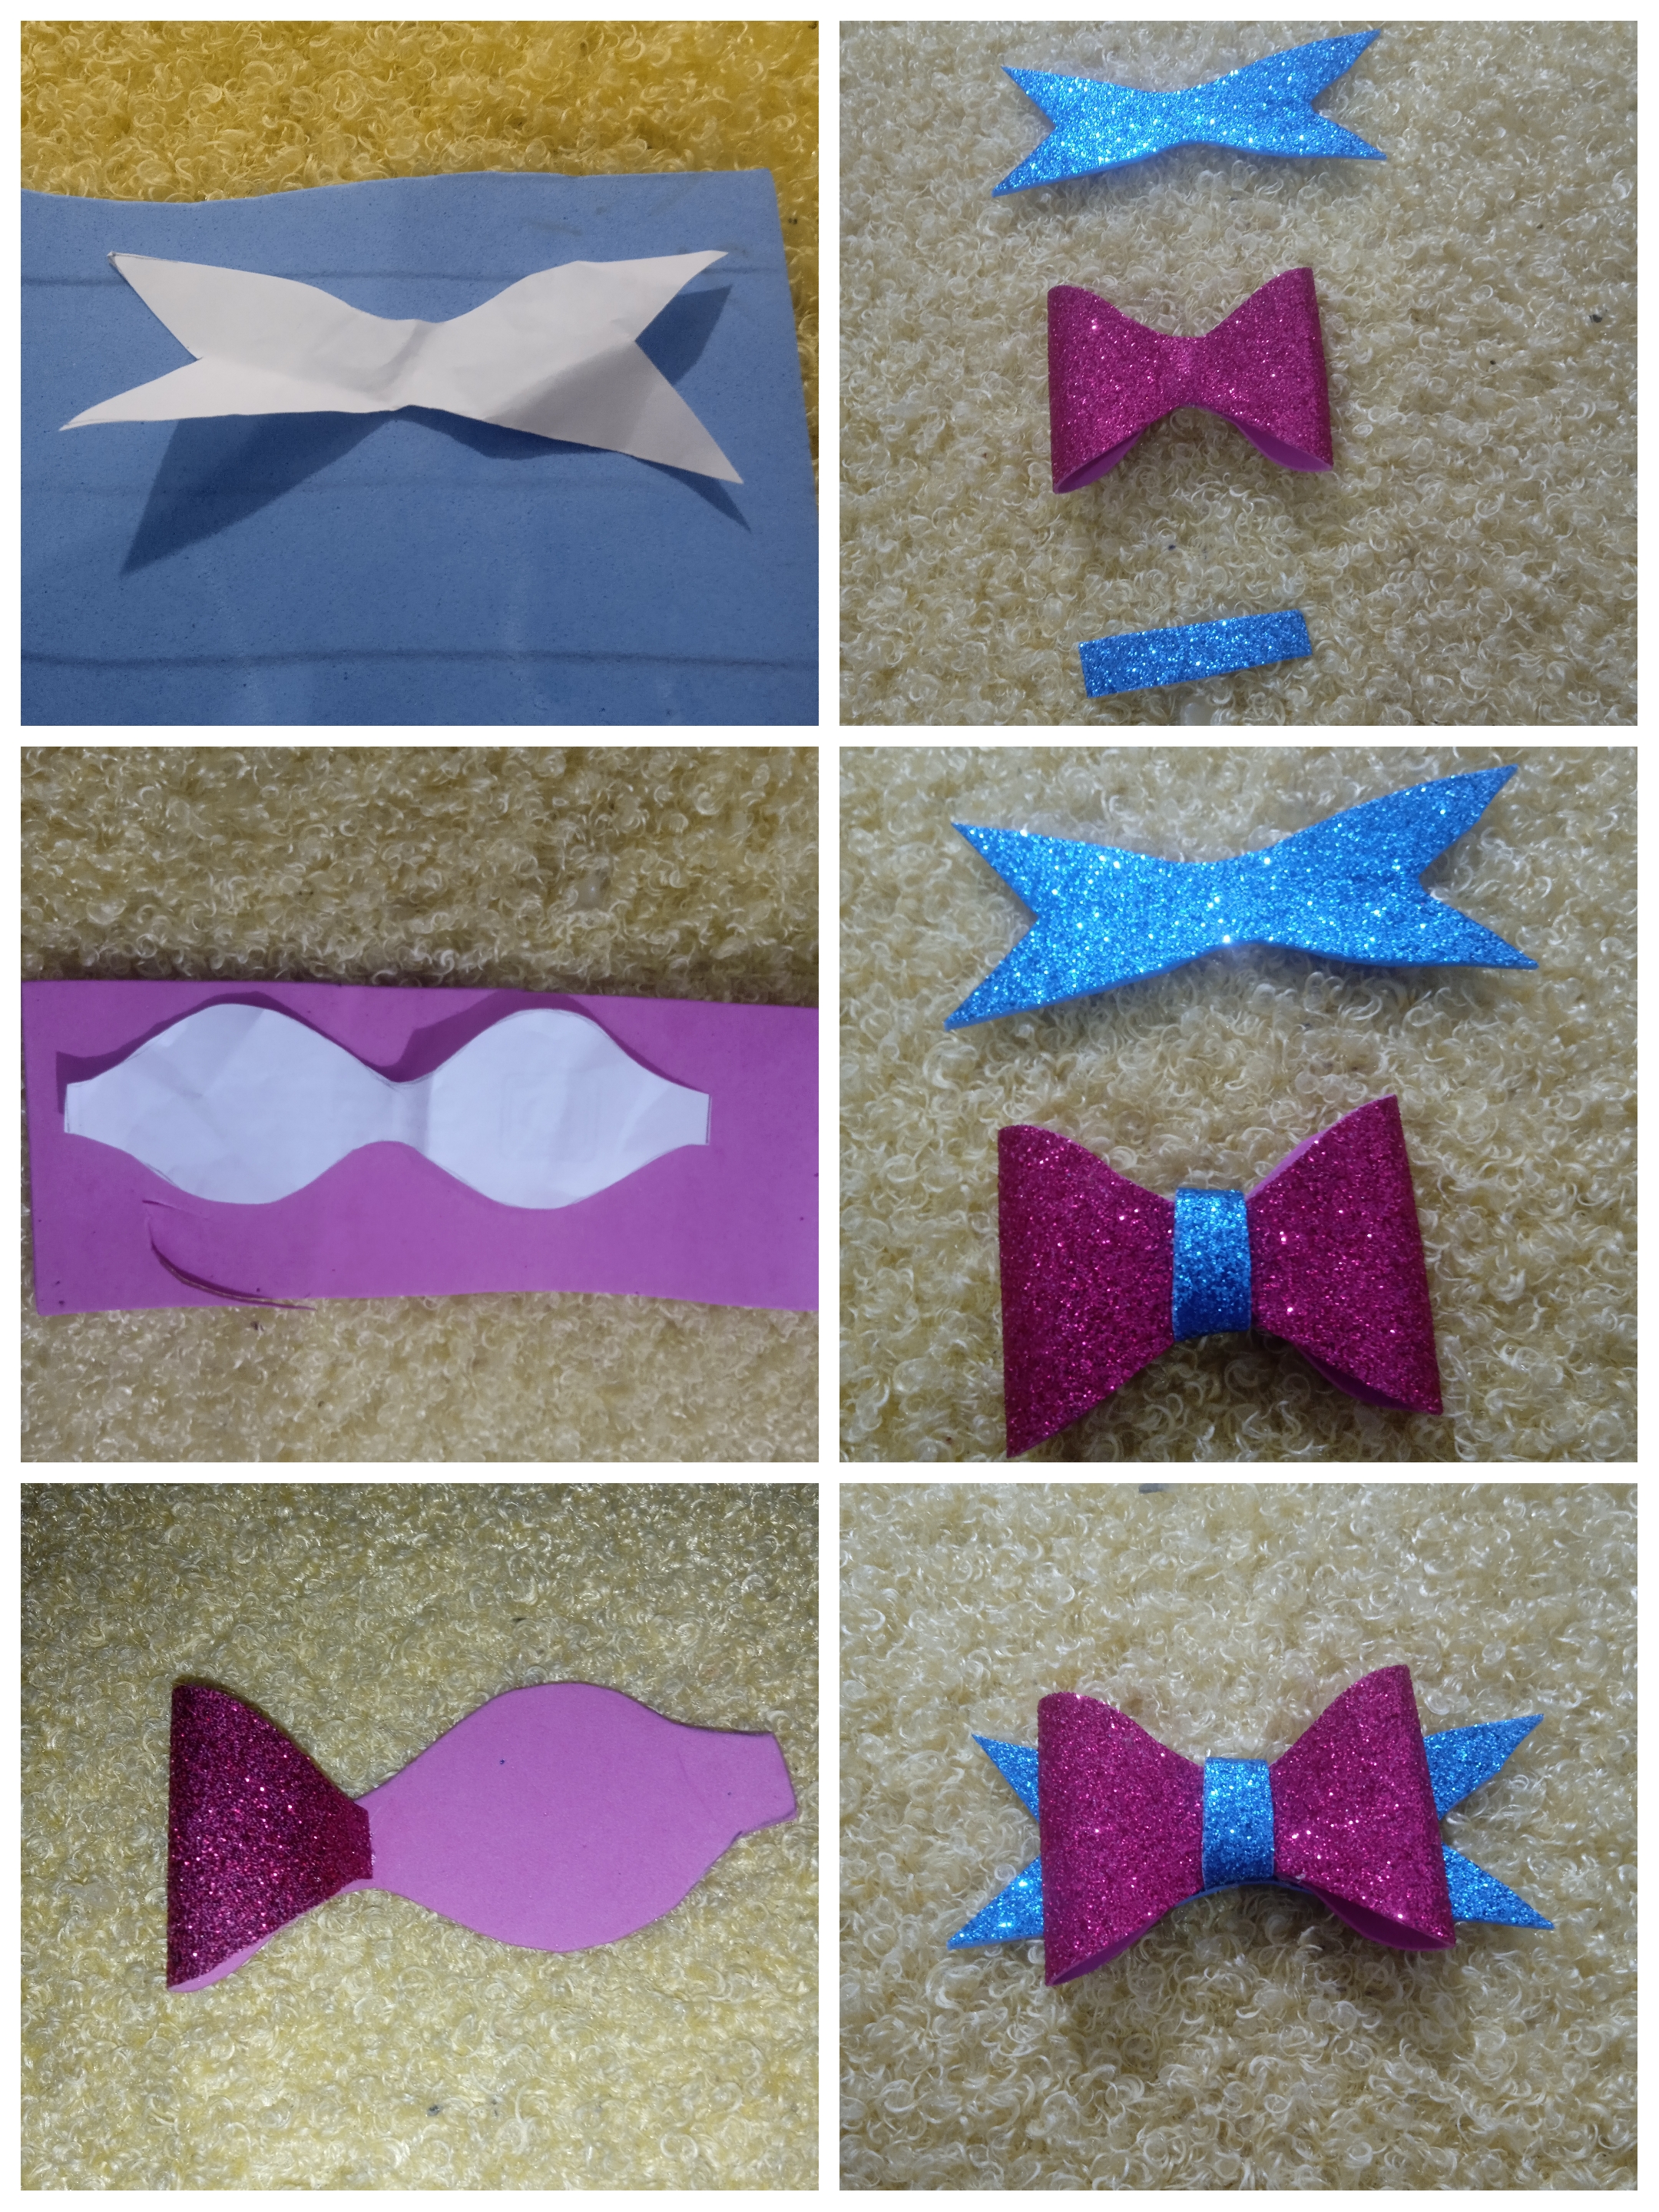
Detalle del lazo
Bow detail
Amigos creativos está es una forma súper sencilla de dar un detalle a una persona especial, es muy fácil económico y les aseguro que le sacará una sonrisa a la quien el obsequiamos este detalle.
🎁English Version
Creative friends, this is a super simple way to give a gift to a special person, it is very easy, economical and I assure you that it will bring a smile to the person we gave this gift to.
Todas las fotos fueron tomadas con mi teléfono Redmi 9
Espero sea de su agrado mi proyecto realizado con esmero para el disfrute de todos ustedes, deseando siempre que abunde en ustedes la creatividad
Los espero en una próxima oportunidad.
Se despide con cariño @ celeni
🎁English Version
All photos were taken with my Redmi 9 phone
I hope you like my project, made with care for the enjoyment of all of you, always wishing that creativity abounds in you.
I hope to see you next time.
Saying goodbye with love @ celeni
Hola amiga, muy linda manera para dar un pequeño detalle, gracias por compartirlo, bendiciones.
Si amiga los pequeños detalles marcan la diferencia.Saludos!