
Diseño Abstracto de un Camaleón en Inkscape:
Paso 1:
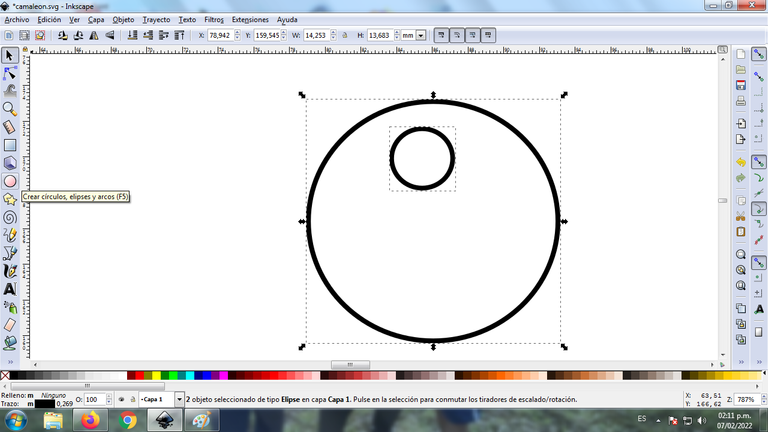
Abrimos el programa Inkscape, e insertamos dos círculos que serán los ojos del camaleón, utilizando la opción de crear círculos de la barra de herramientas.
Paso 2:
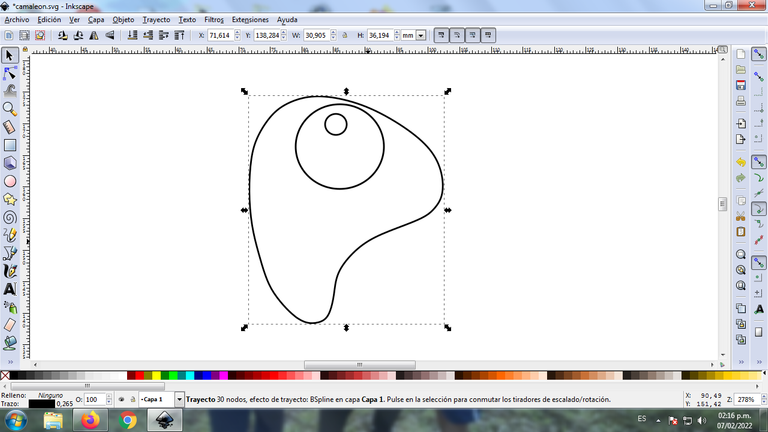
Se traza la siguiente figura que será la cabeza del camaleón, con la opción de curvas Bézier de la barra de herramientas.
Paso 3:
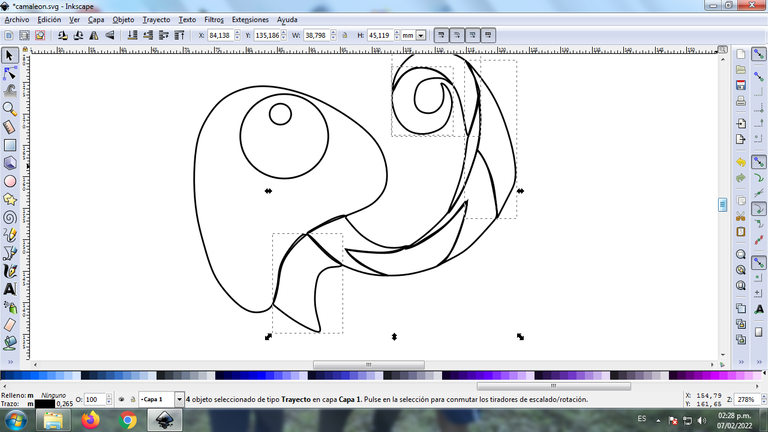
Comenzamos a trazar estas tres figuras con la misma herramienta, para ir creando la cola del camaleón. Son varias figuras porque están tendrán diferentes colores que va a dar el efecto ak camaleón.

Paso 4:
Continuamos trazando hasta completar la primera parte de la cola del camaleón.
Paso 5:
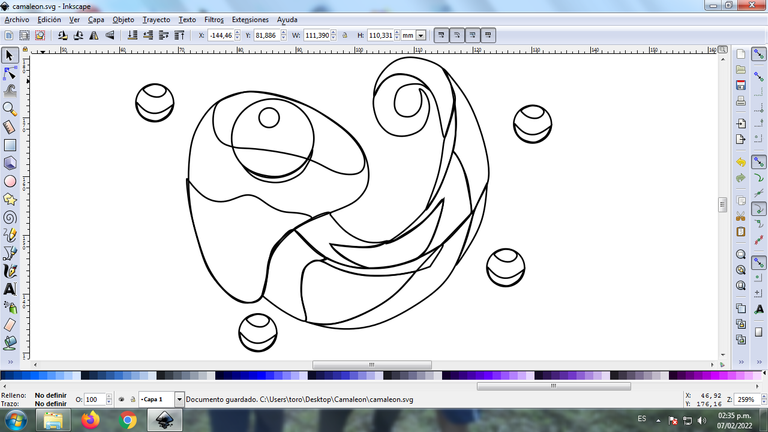
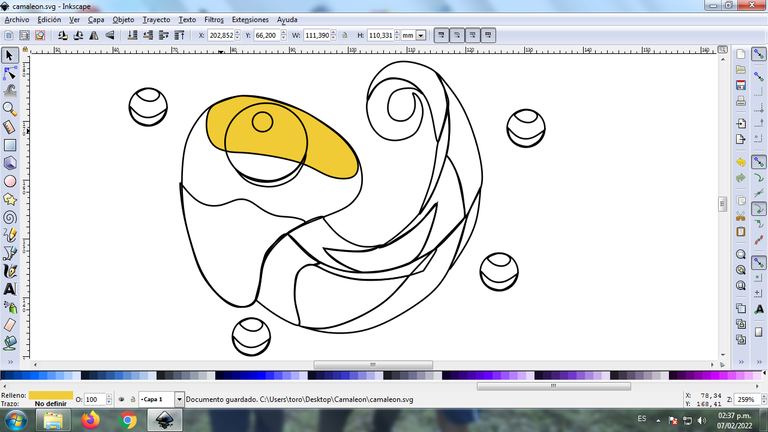
Se trazan en la parte de abajo tres figuras de la cola del camaleón, luego insertamos dos formas en la parte de la cabeza con la herramienta de curvas Bézier.
Paso 6:
Se aplica el color a cada una de las figuras, se selecciona y luego le damos clic en la paleta de colores que se encuentra en la parte inferior.
Paso 7:
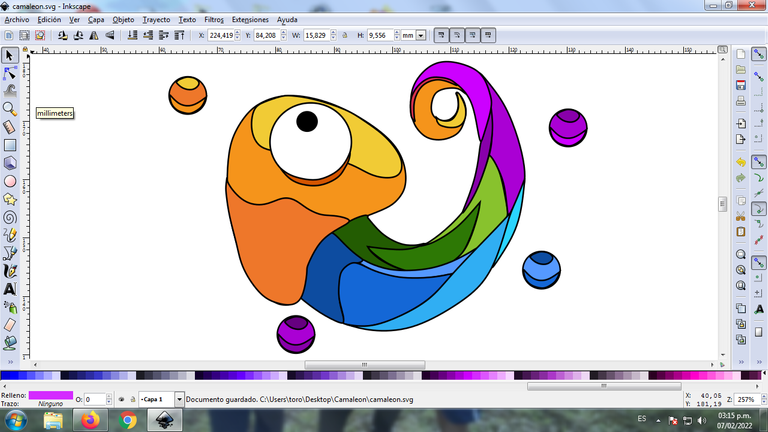
Realizamos el paso 6 en cada una de las partes del camaleón hasta completar el color en todo la figura.
Paso 8:
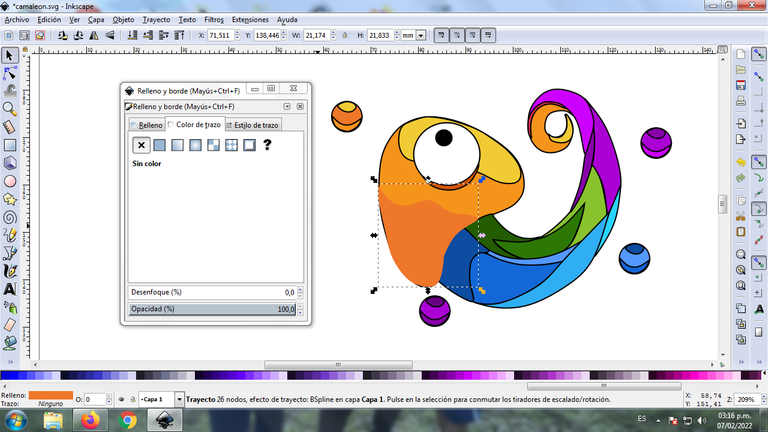
Se eliminan los bordes de cada figura, para esto le damos clic en la barra de menú Objeto – Rellenos y Bordes.

Se selecciona la pestaña color de trazo y luego en la X para borrar el borde de la figura.
Paso 9:
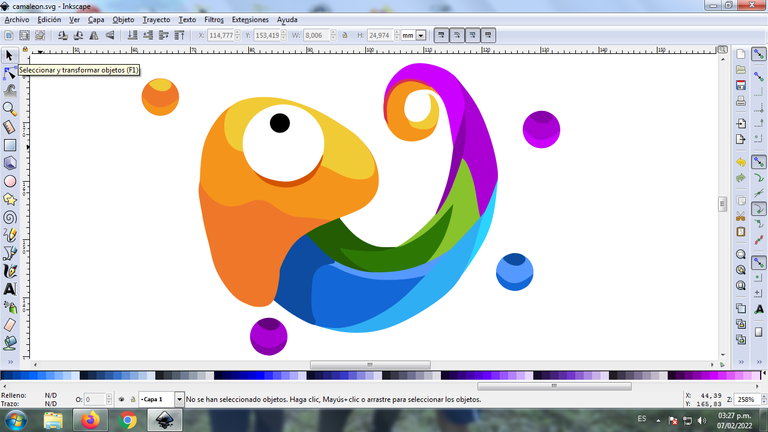
Se aplica el paso 8 para eliminar todos los bordes de cada figura y este sería el resultado final.
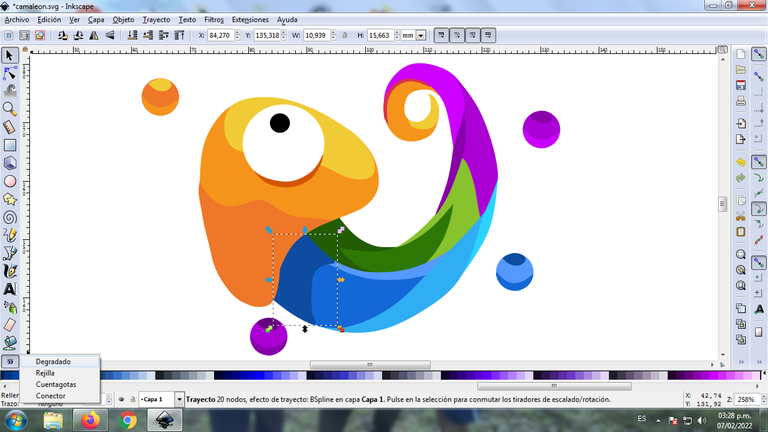
Paso 10:
Procedemos a darle un degradado para darle un efecto abstracto, le damos clic en degradado y luego se selecciona el color que tendrá en este punto.
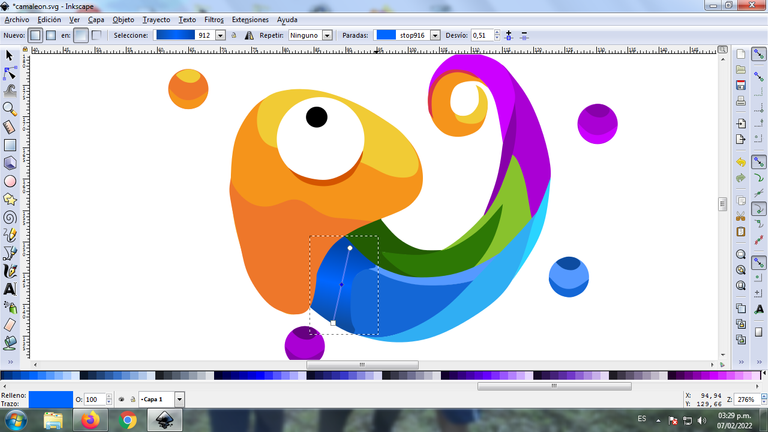
Luego continuamos presionando clic hasta que aparezca el punto y luego se selecciona el color. En esta parte tenemos tres colores en tres puntos.
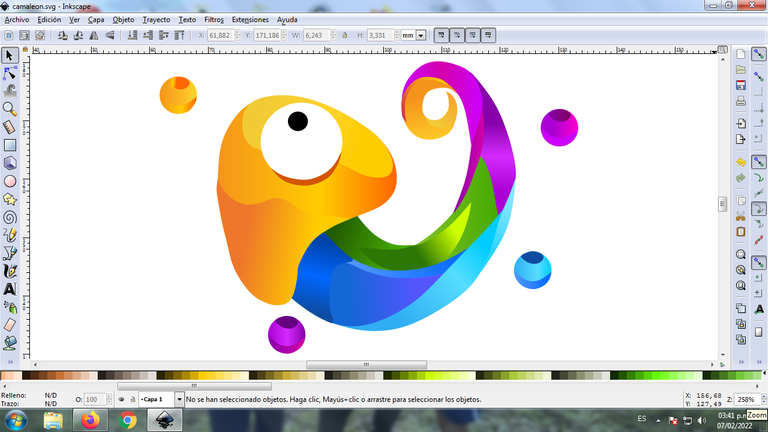
Paso 11:
Se aplica el paso 10 y este es el resultado con todos los degradados.
Paso 12:
Se duplica la figura del camaleón, luego se reduce, se coloca en la parte inferior y se le aplica un desenfoque al 10%, después insertamos un fondo color negro y tenemos listo nuestro diseño.
Imagen de Referencia Fuente
El programa Inkscape se puede descargar en esta dirección Fuente
Espero que les haya gustado mi diseño, nos vemos en el próximo.
English
Greetings Hive friends, today we present to you the abstract design of a chameleon, made in Inkscape. This design has various colors, because the chameleon changes its appearance a lot, I really liked how the design turned out at the end, here are the steps.
Abstract Design of a Chameleon in Inkscape:
Step 1:
We open the Inkscape program, and insert two circles that will be the eyes of the chameleon, using the option to create circles on the toolbar
Step 2:
The following figure is drawn, which will be the head of the chameleon, with the Bézier curves option on the toolbar.
Step 3:
We begin to trace these three figures with the same tool, to create the tail of the chameleon. There are several figures because they will have different colors that will give the effect of a chameleon.
Step 4:
We continue tracing until we complete the first part of the chameleon's tail.
Step 5:
Three shapes of the chameleon's tail are traced at the bottom, then we insert two shapes at the head part with the Bézier curve tool.
Step 6:
The color is applied to each of the figures, it is selected and then we click on the color palette at the bottom.
Step 7:
We carry out step 6 in each of the parts of the chameleon until we complete the color throughout the figure.
Step 8:
The borders of each figure are eliminated, for this we click on the menu bar Object – Fills and Borders.
The stroke color tab is selected and then the X to erase the border of the figure.
Step 9:
Step 8 is applied to remove all the edges of each figure and this would be the final result.
Step 10:
We proceed to give it a gradient to give it an abstract effect, we click on gradient and then the color it will have at this point is selected.
Then we continue clicking until the point appears and then the color is selected. In this part we have three colors in three points.
Step 11:
Step 10 is applied and this is the result with all the gradients.
Step 12:
The figure of the chameleon is duplicated, then it is reduced, it is placed in the lower part and a blur is applied to it at 10%, then we insert a black background and we have our design ready.
Reference Image Source
The Inkscape program can be downloaded at this address Source
I hope you liked my design, see you in the next one.

Muy colorido ese camaleón, te quedo muy lindo, gracias por compartir este tutorial paso a paso. Saludos @cetb2008
Hola @lisbethseijas muchas gracias, por visitar mi blog.
Me encanta ese camaleón, gracias por compartirlo.
Felicitaciones y mucho éxito!
Hola @valthy gracias por pasar por mi blog.
The rewards earned on this comment will go directly to the person sharing the post on Twitter as long as they are registered with @poshtoken. Sign up at https://hiveposh.com.
Que lindo te quedó amigo, me encantaría poder comunicarme contigo para que con tu creatividad me ayudaras a crear mi banner. Dios te bendiga.
Que bien te quedo amigo, toda una explosión de color, muy a tono con lo que trasmite un camaleón. Saludos