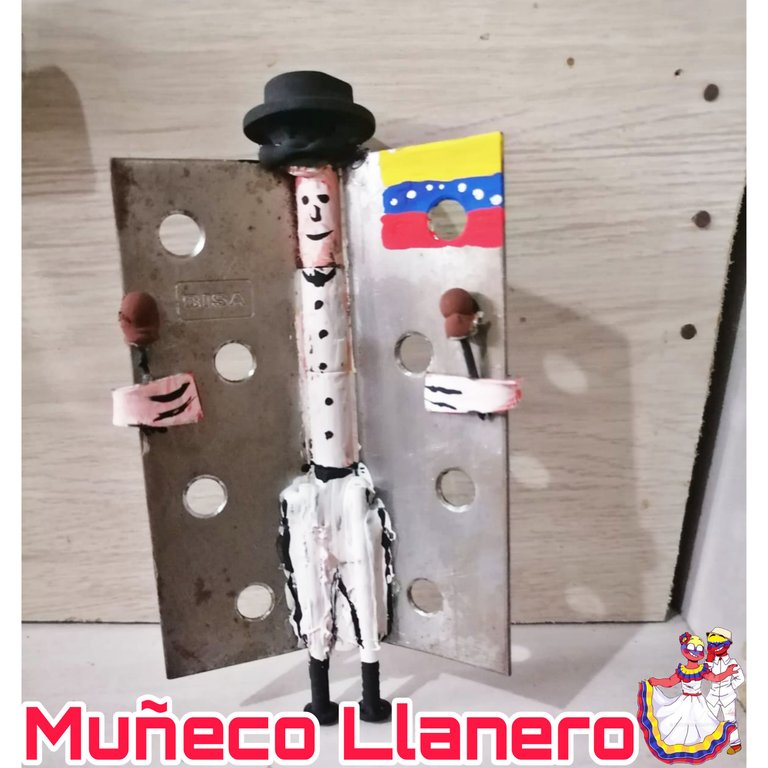
Saludos cordiales creativa familia de esta linda comunidad #hive-Diy, es un gustos saludarlos nuevamente y traerles un nuevo tutorial de ¿Cómo hacer un creativo muñeco llanero?
Warm greetings creative family of this nice community #hive-Diy, it's a pleasure to greet you again and bring you a new tutorial of How to make a creative llanero doll?
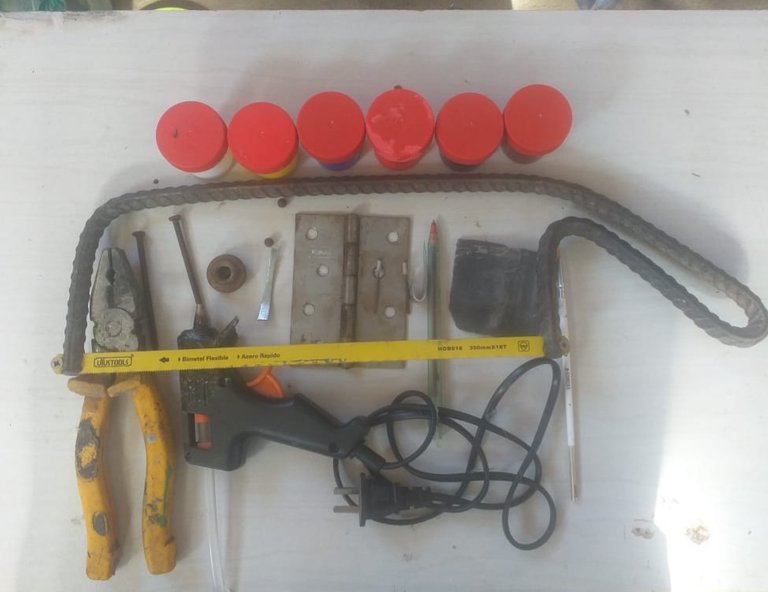
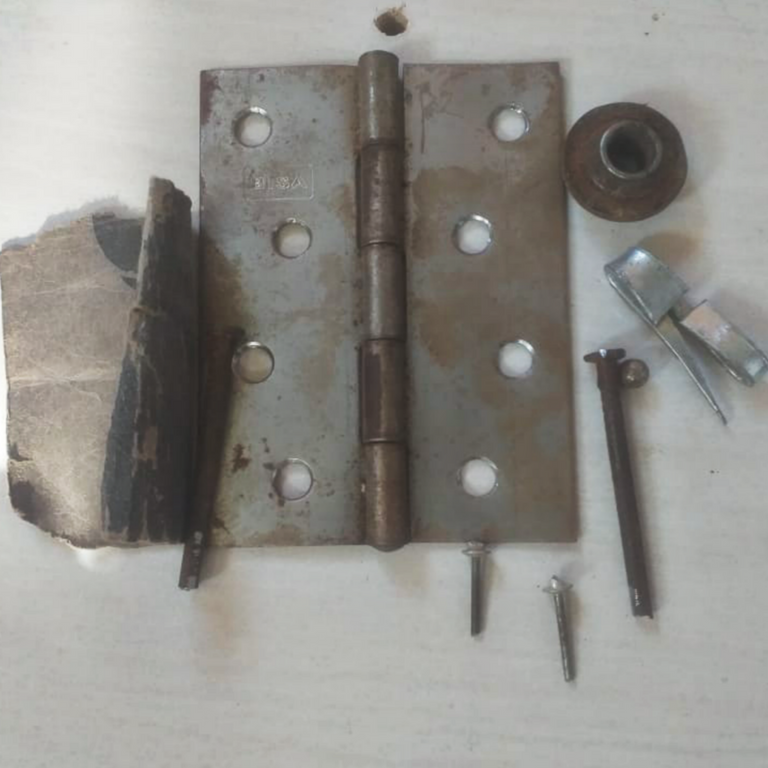
- Una bisagra.
- 2 clavos.
- 2 remaches.
- 2 trozos de latón
- 2 bolitas de rodamiento.
- Alicate.
- Sierra o segueta.
- 1 tuerca de eje central de bicicleta.
- Lija.
- Pinturas.
- Pincel.
- Pistola de silicón caliente.
- Lápiz.
- One hinge.
- 2 nails.
- 2 rivets.
- 2 pieces of brass.
- 2 bearing balls.
- Pliers.
- Saw or hacksaw.
- 1 bicycle central axle nut.
- Sandpaper.
- Paint.
- Paintbrush.
- Hot silicone gun.
- Pencil.
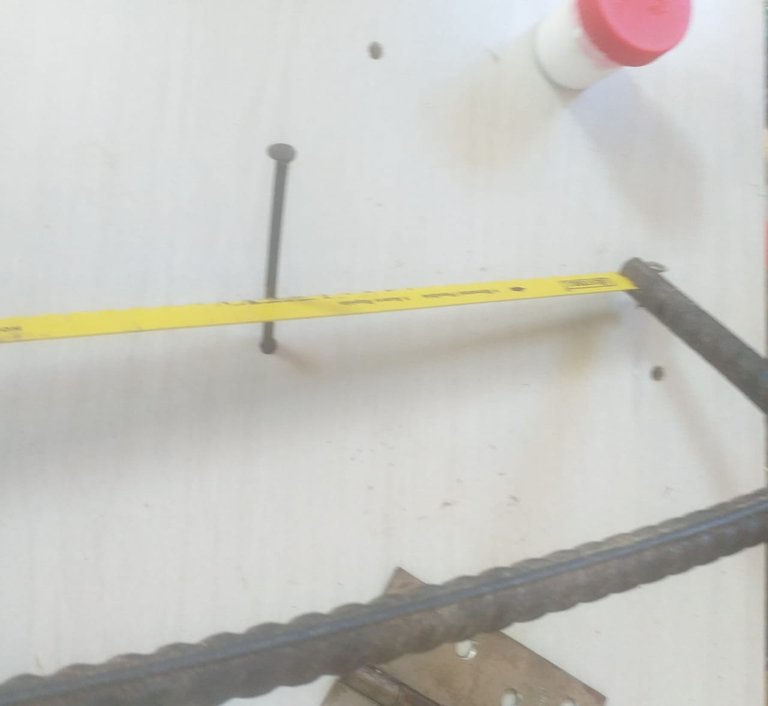
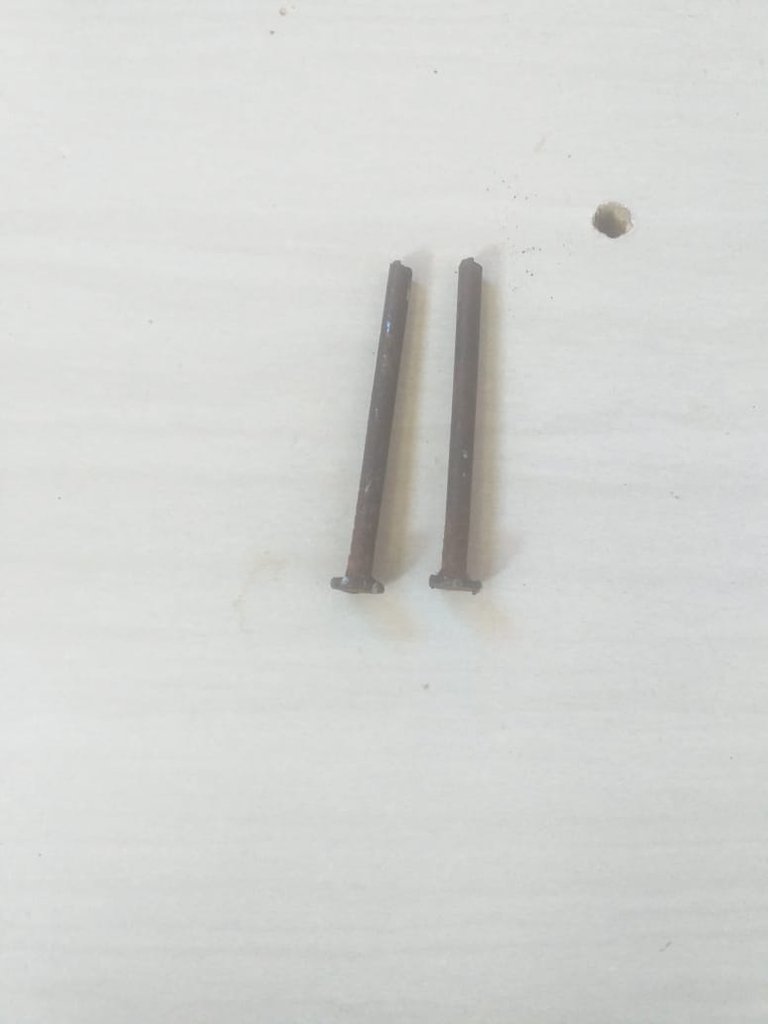
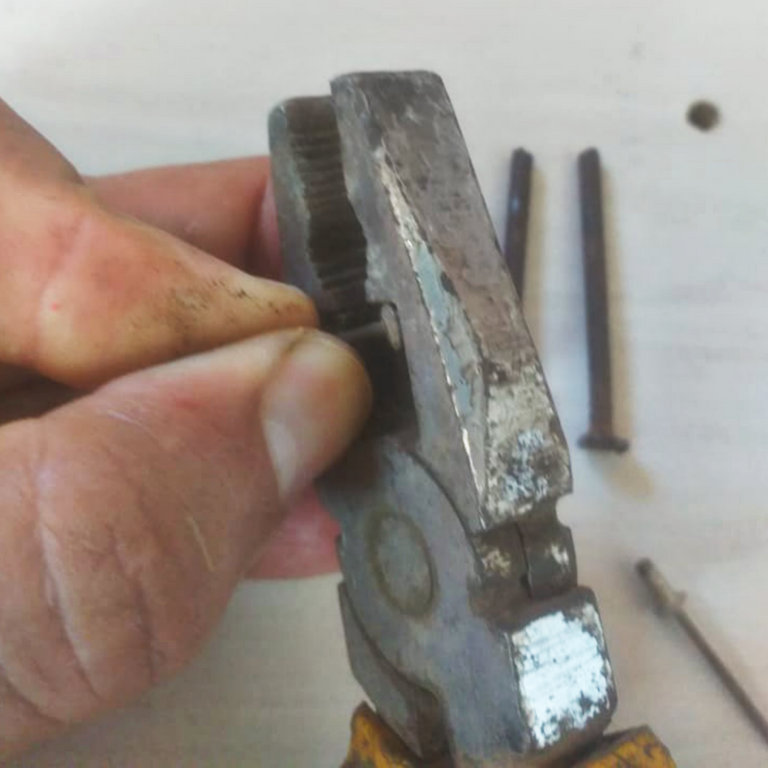
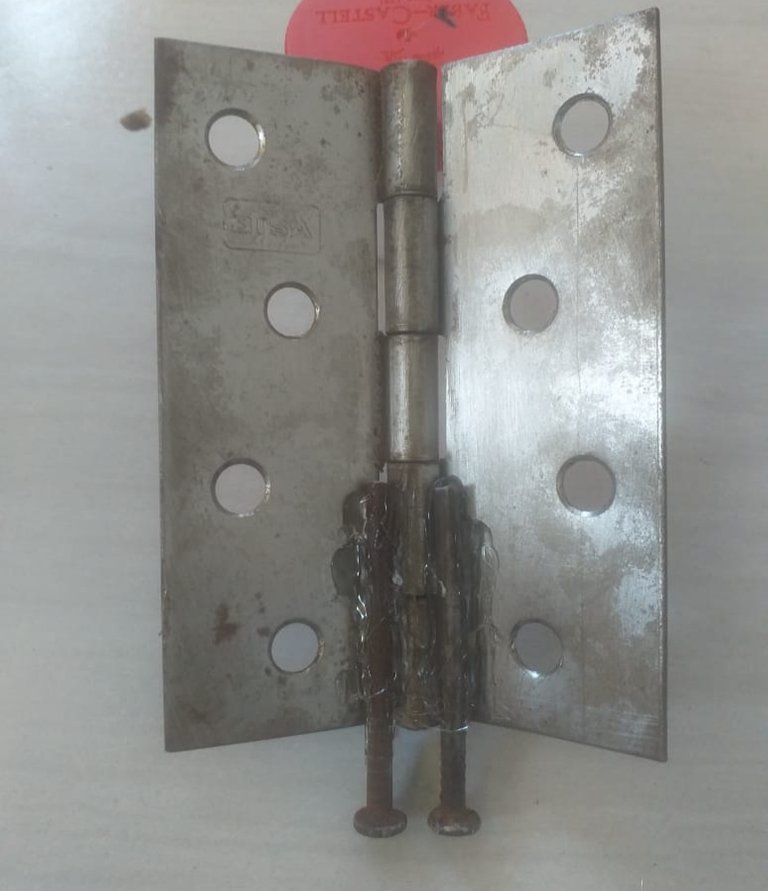
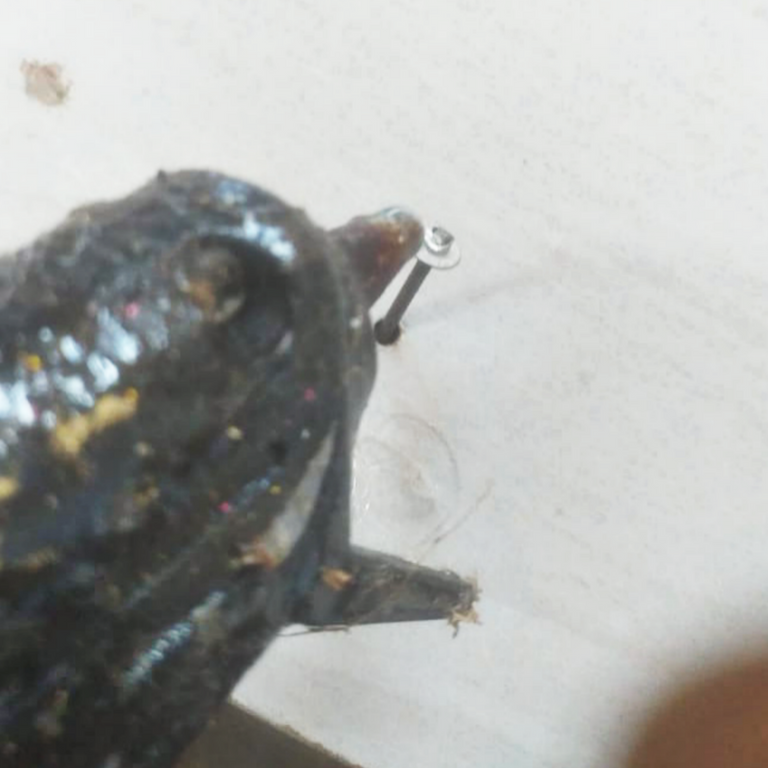
Primero le cortamos un cm a cada clavo del lado de la punta.
First we cut one cm from each nail on the side of the tip.
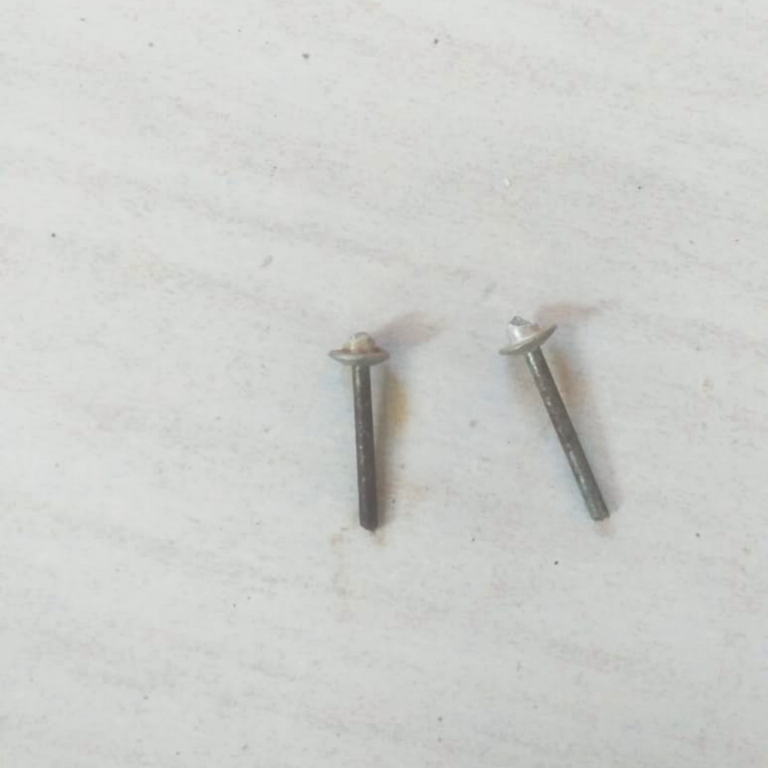
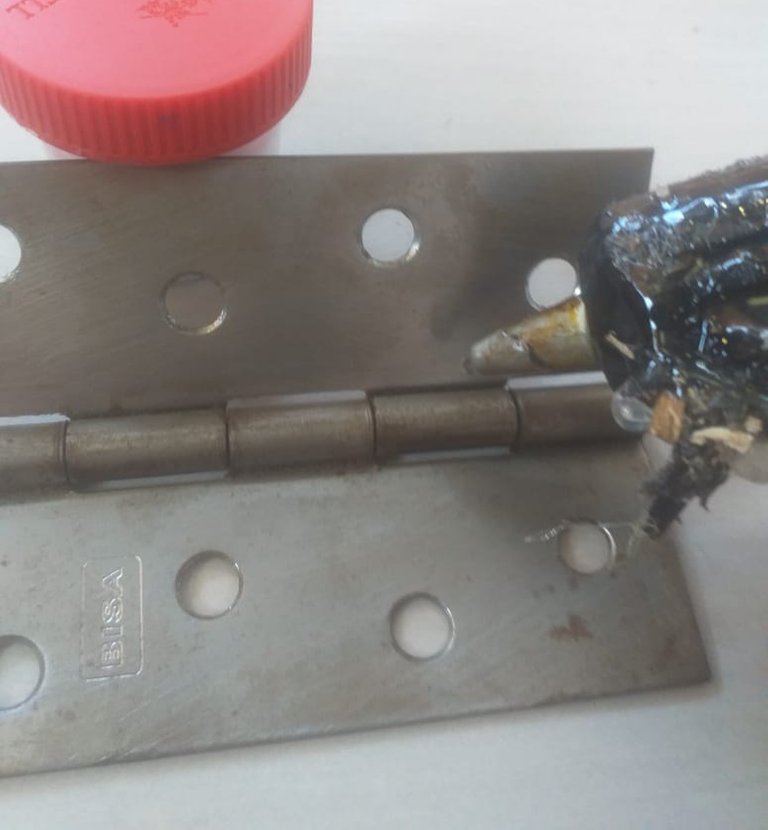
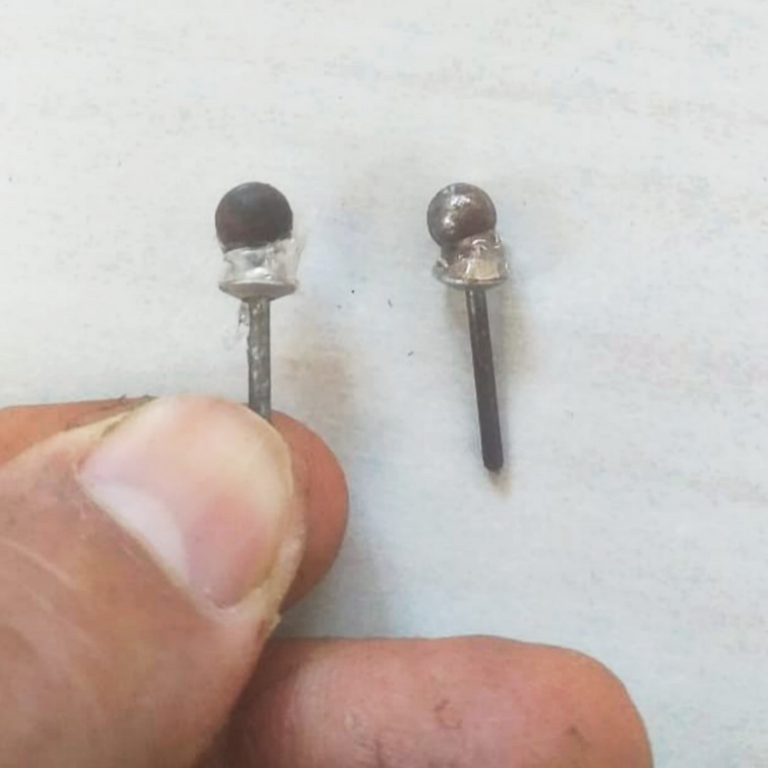
Después le quitamos las cabecitas a los remaches, más 1cm de la parte de abajo con la segueta.
Then we remove the little heads of the rivets, plus 1cm from the bottom with the saw.
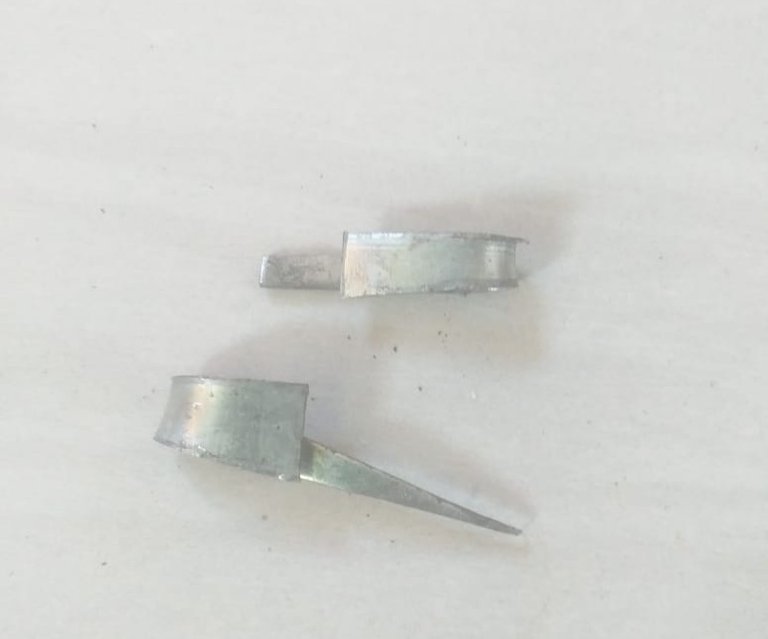
Luego doblamos con el alicate los dos trozos de latón.
Then we bend with the pliers the two pieces of brass.

Posteriormente lijamos todos los elementos que componen el muñeco.
Then we sand all the elements that make up the doll.
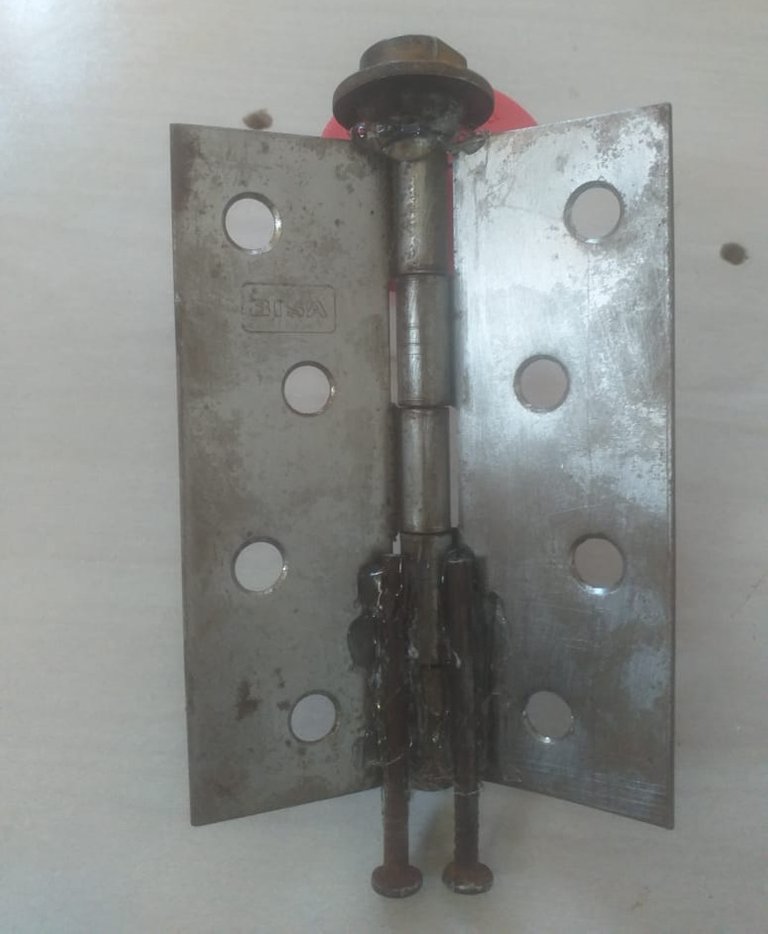
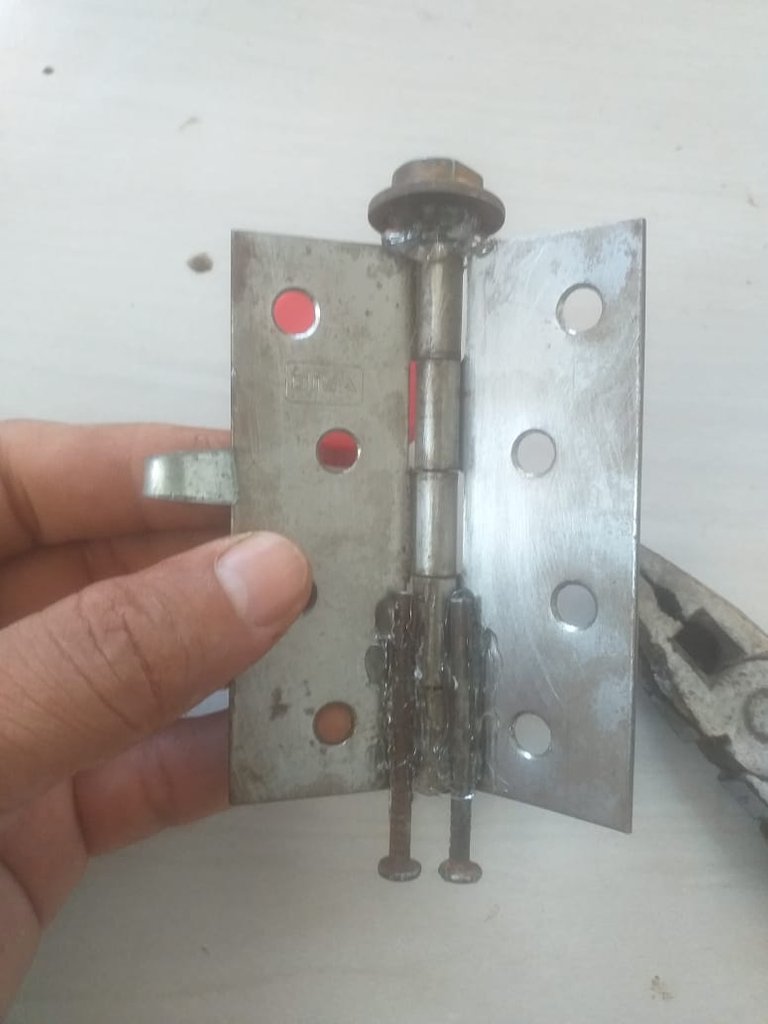
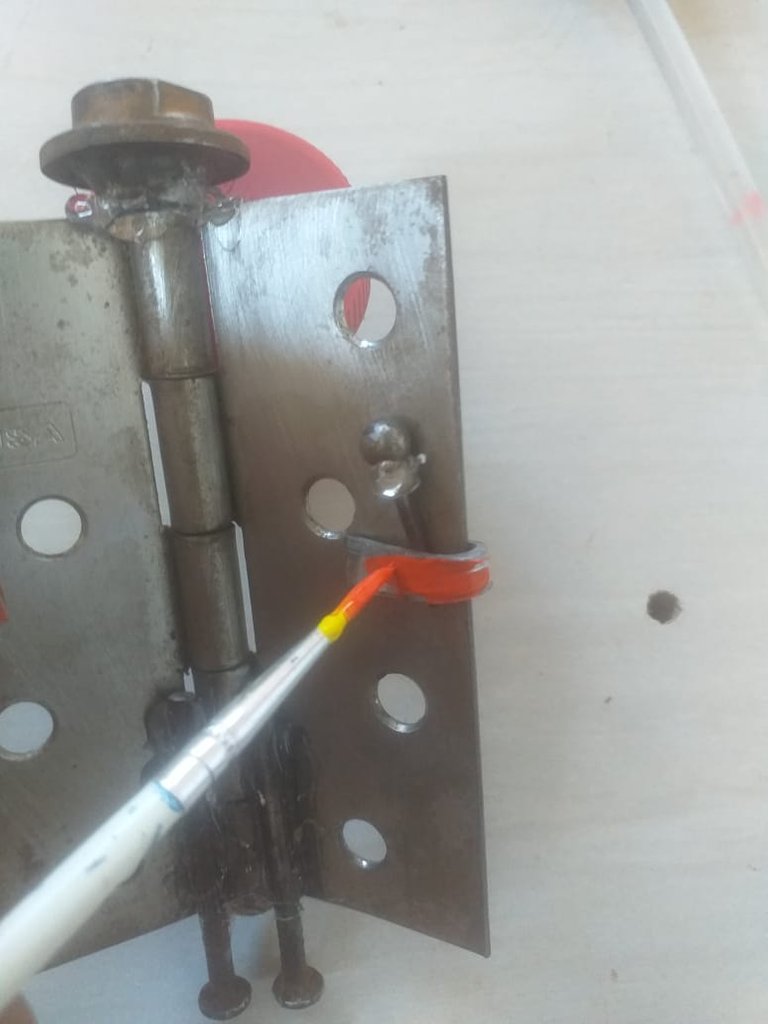
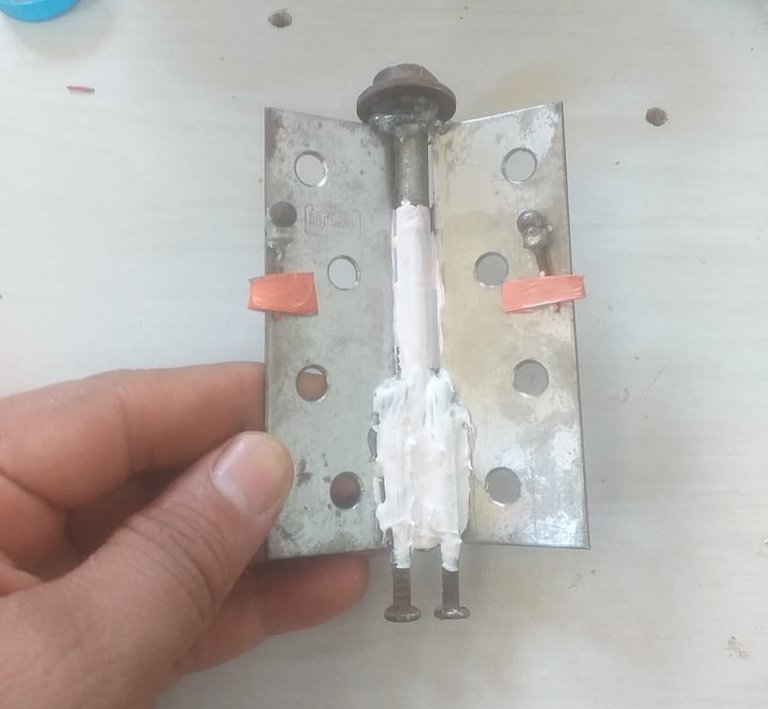
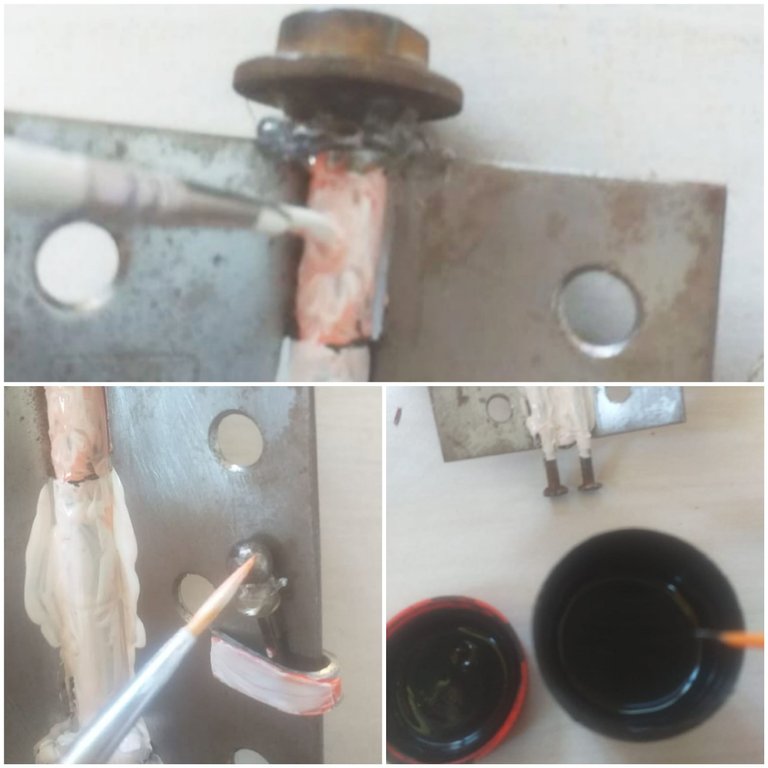
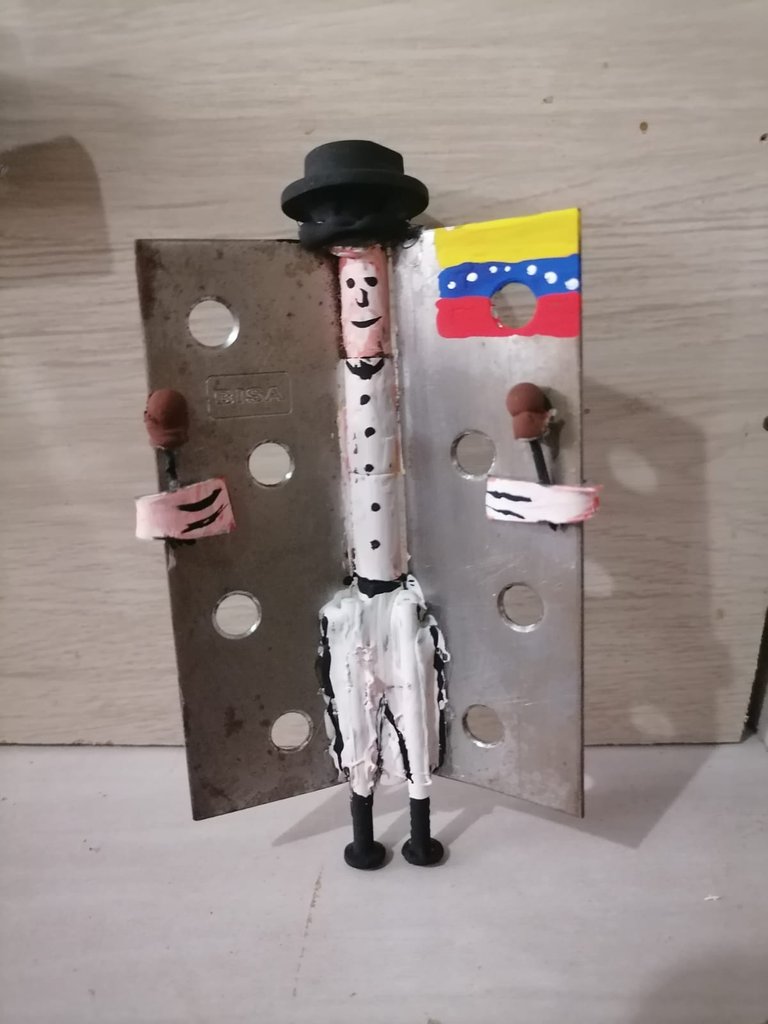
Ahora pegamos con silicón caliente los clavos en en el centro de la bisagra para hacer las piernas y arriba de la bisagra, pegaremos la tuerca de eje central para hacer el sombrero.
Now we glue with hot silicone the nails in the center of the hinge to make the legs and on top of it, we will glue the central axis nut to make the hat.
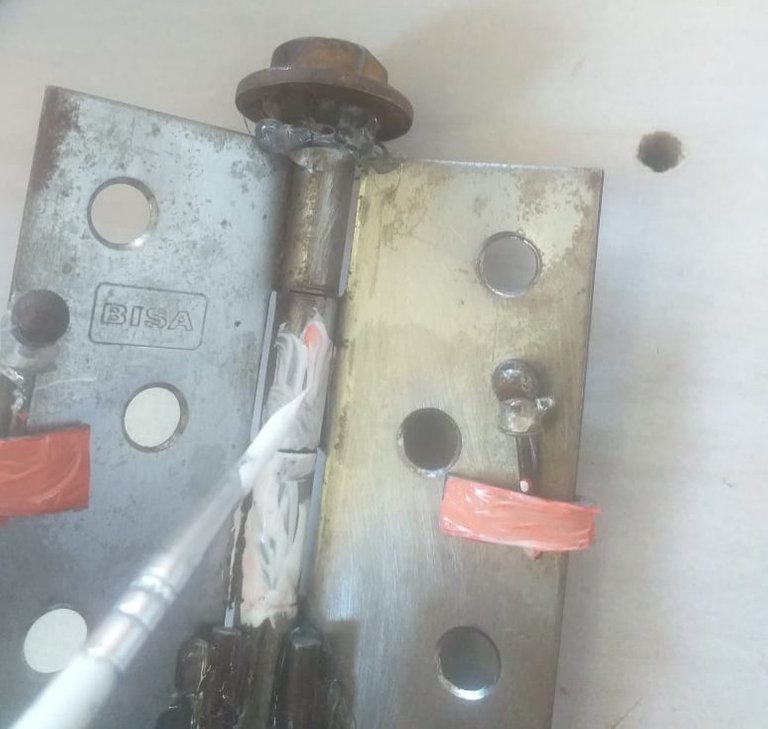
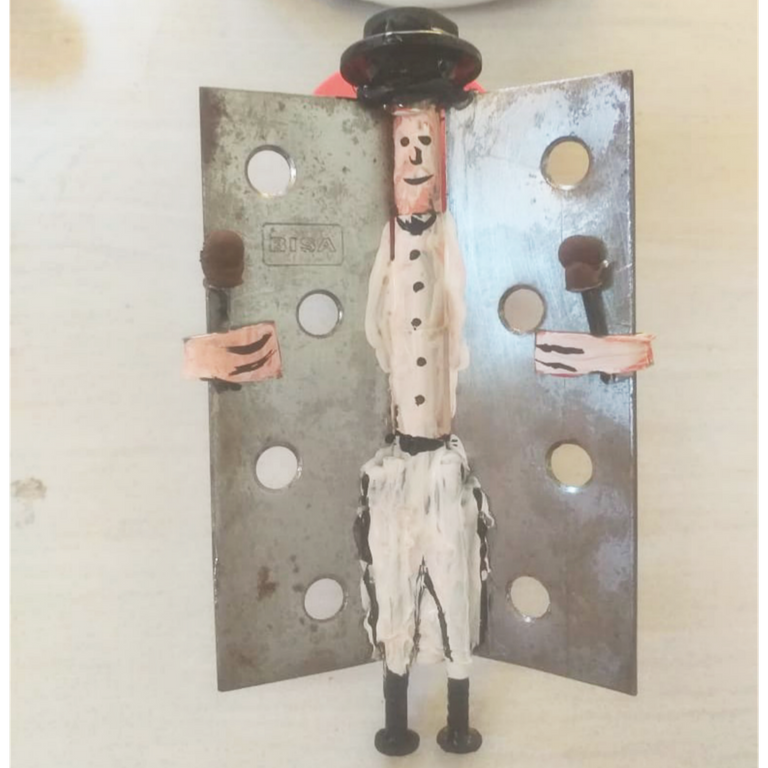
En cada lado de la bisagra introducimos los dos trozos de latón doblado para hacer las manos del muñeco.
On each side of the hinge we insert the two pieces of bent brass to make the doll's hands.
Pegamos con silicón caliente las bolitas en la punta de los remaches para hacer las maracas y estas las introducimos, una en cada manito que hicimos de latón doblado.
We glue with hot silicone the little balls on the tip of the rivets to make the maracas and these we introduce them, one in each little hand that we made of bent brass.

Ahora procederemos a darle color al muñeco pintando en primer lugar las manitos y el traje.
Now we will proceed to give color to the doll painting first the little hands and the suit.
Después pintamos la cara, las maracas y las botas.
Then we painted the face, maracas and boots.
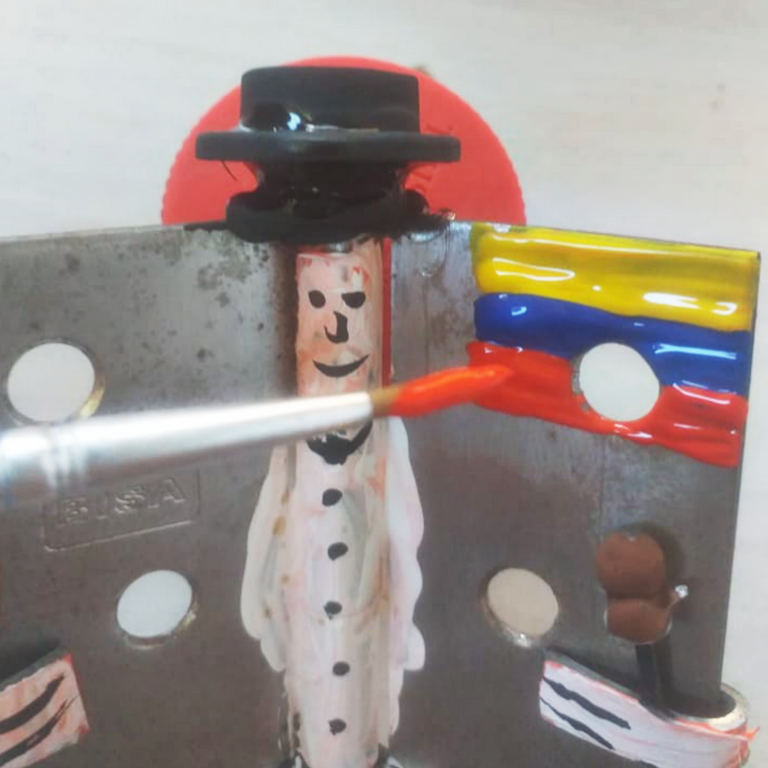
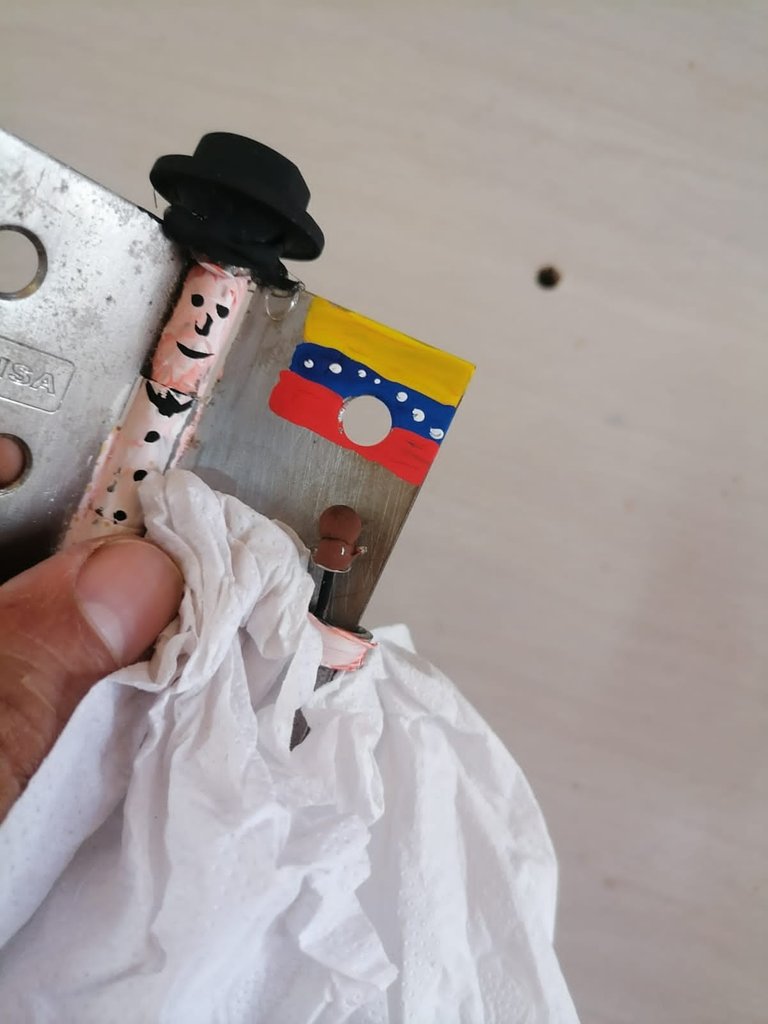
Luego pintamos el sombrero con pintura negra y con esta misma pintura hacemos los últimos detalles de la cara, el cuello del traje, los botones,el pantalón y las mano.
Then we paint the hat with black paint and with this same paint we make the last details of the face, the neck of the suit, the buttons, the pants and the hands.

Para finalizar pintaremos la bandera de Venezuela en una esquina de la bisagra y limpiamos los excesos de pintura.
To finish we will paint the Venezuelan flag in a corner of the hinge and clean the excess paint.
Gracias por leer y quedarte hasta el final de éste creativo tutorial, estimado amigo lector. Saludos y Bendiciones.
Thank you for reading and staying until the end of this creative tutorial, dear reader friend. Greetings and Blessings.