
El arte es uno de los principales recursos para impulsar el conocimiento de un niño, ser docente de educación inicial me ha llevado a experimentar diferentes situaciones y una de ellas es crear a través de diferentes elementos.
Por lo anterior quiero dedicar un espacio en mi blog para mostrarles diferentes técnicas que podemos usar para enseñar a niños y niñas, además que estás técnicas permiten desarrollar la plasticidad cerebral que el niño necesita para su desarrollo integral.
Art is one of the main resources to boost the knowledge of a child, being a teacher of early education has led me to experience different situations and one of them is to create through different elements.
For this reason I want to dedicate a space in my blog to show you different techniques that we can use to teach children, besides these techniques allow us to develop the brain plasticity that the child needs for its integral development.

The technique we are going to apply is called paper tearing, it is used to develop fine motor skills in children, to help the hand muscles to reach later skills such as: holding the pencil, cutting, coloring, taking elements by means of hand-eye coordination.
- Materials:
🌟 White sheet.
🌟 Glue
🌟 Colored paper
🌟 Pencil
🌟 Movable eyes
🌟 Black marker
La técnica que vamos aplicar se llama rasgado con papel, se utiliza para desarrollar la motricidad fina en los niños, para ayudar a los músculos de la mano a fin de que pueda alcanzar habilidades posteriores como: agarrar el lápiz, recortar, colorear, tomar elementos mediante la coordinación óculo manual.
- Materiales:
🌟 Hoja blanca
🌟 Pega
🌟 Peleles de colores
🌟 Lápiz
🌟 Ojitos móviles
🌟 Marcador negro
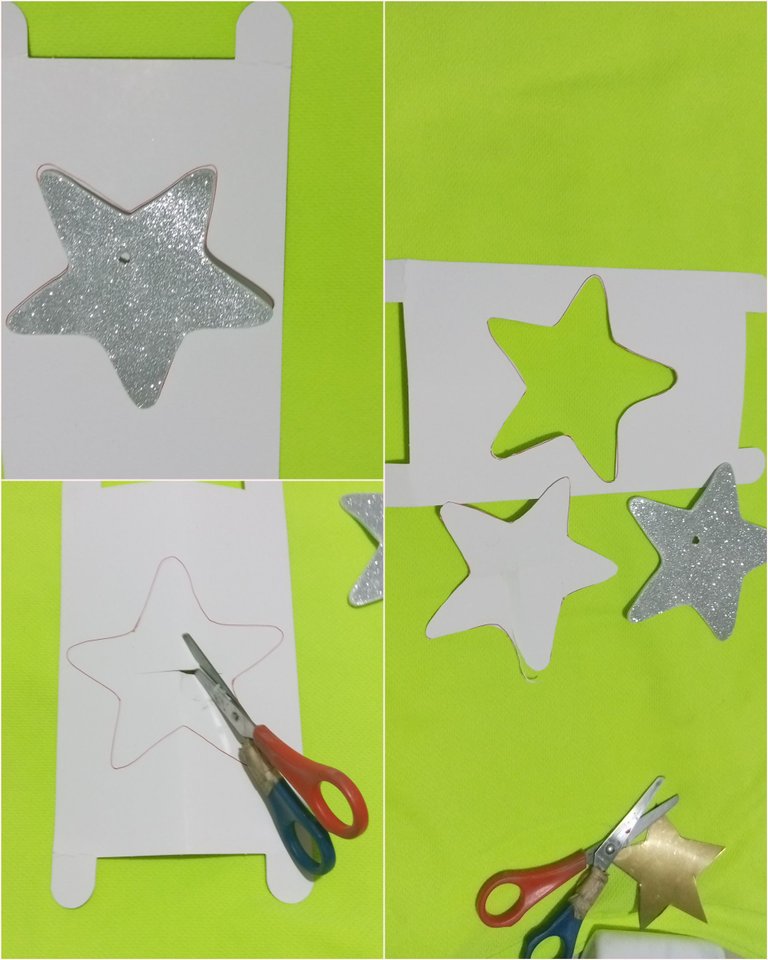
- Una vez que tenemos los materiales procedemos a recortar la silueta que vamos a utilizar.
1.Once we have the materials we proceed to cut out the silhouette that we are going to use.
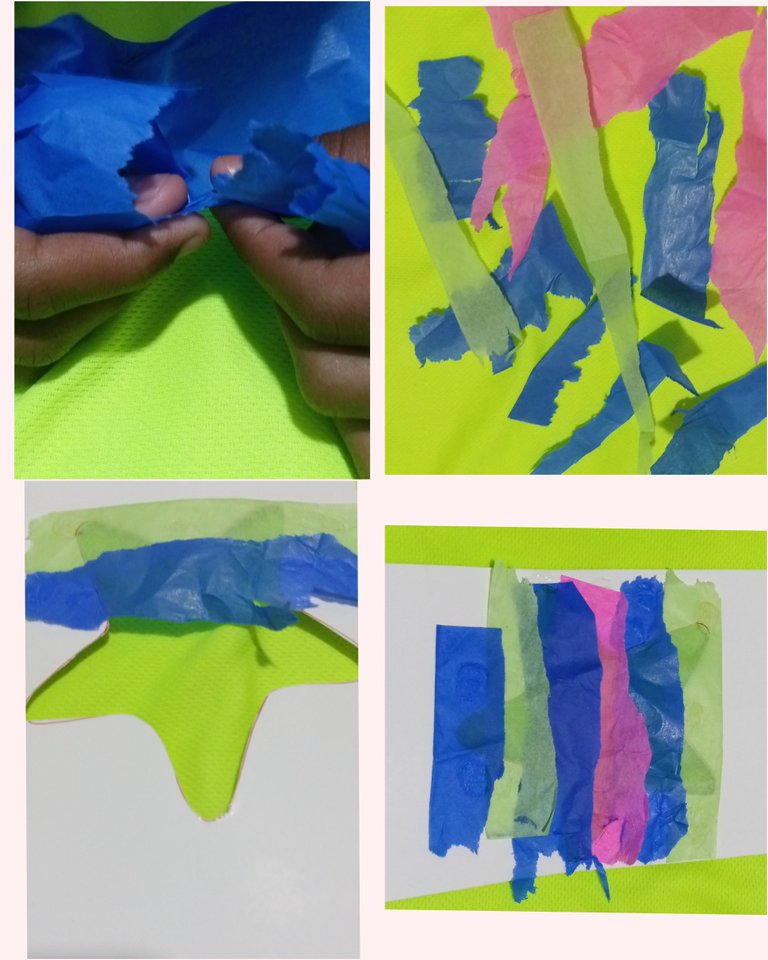
2.Luego debemos Rasgar el papel de colores, debe ser un poco más larga que la silueta.
2.Then we tear the colored paper, it should be a little longer than the silhouette.
3.Por la parte de atrás comenzamos a pegar nuestras tiras, lo más juntas posible y de forma intercalada.
3.On the back we begin to glue our strips, as close together as possible and in an interleaved manne
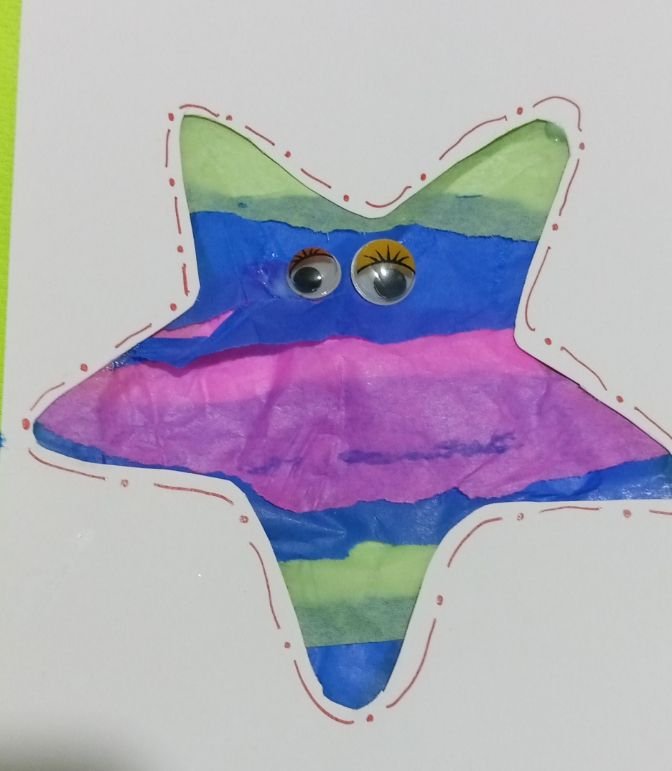
- Luego reforzamos atrás con el corte que reservamos, después delineamos la figura y por último agregamos los ojitos móviles.
- Then we reinforce the back with the cut we reserved, then we outline the figure and finally we add the movable eyes.
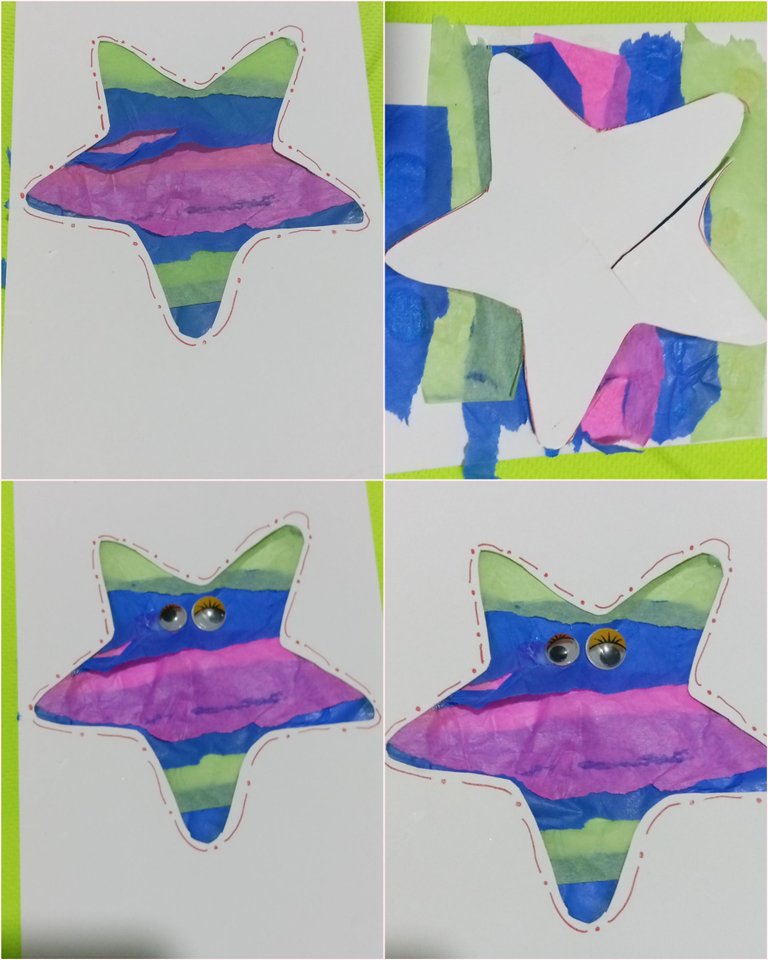
Así queda está técnica, es fácil, no necesita de muchos materiales y es versátil pues podemos elaborar cualquier figura y darle nuestro toque personal.


Fotografías son de mi propiedad editadas en picsart.
Texto traducido en deelp.
Separador
Nos vemos en mi próxima publicación.
Tengan un feliz día.