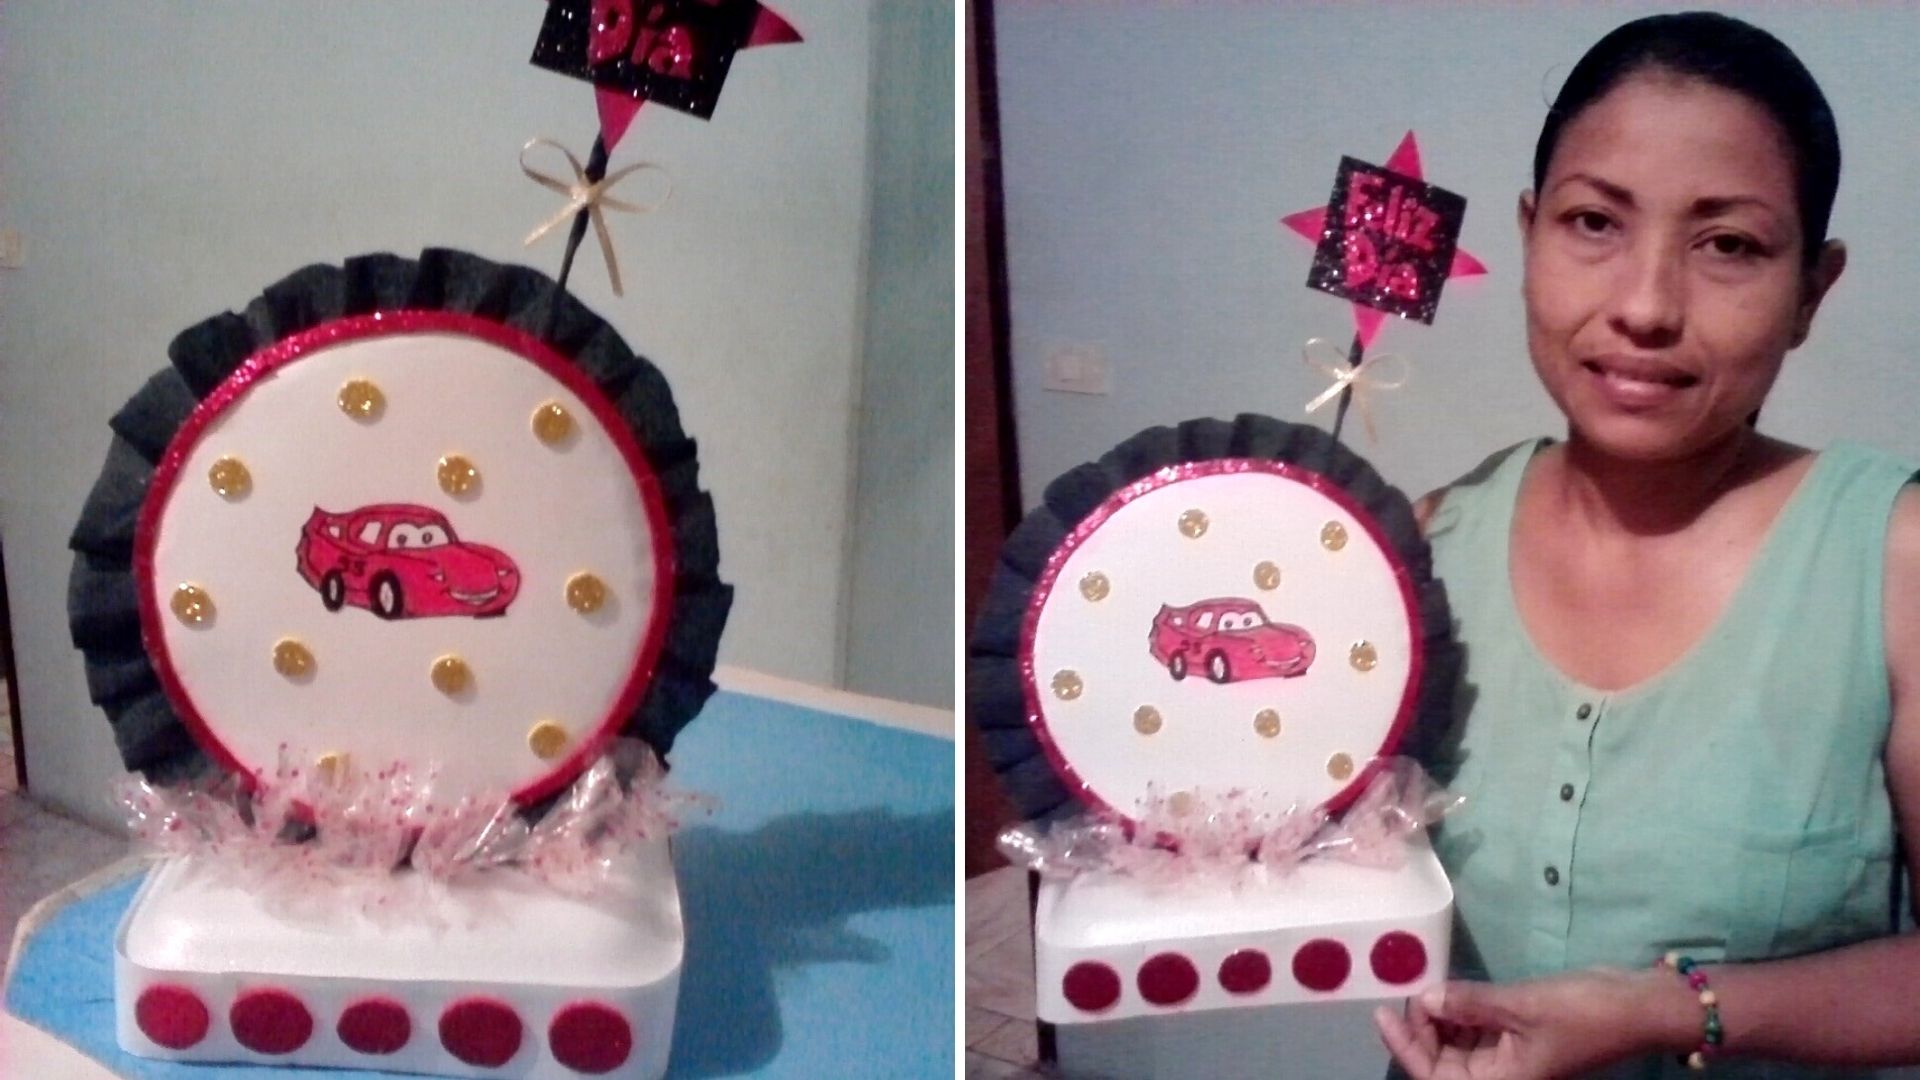
Hello my beautiful community, I am happy and pleased to participate in this wonderful contest called Party Kids, powered by Hive diy, where I will show you how to make a centerpiece with the Cars design for the little ones of the house on their special birthday. Made with useful materials. Now let's start with the step by step.
Español:
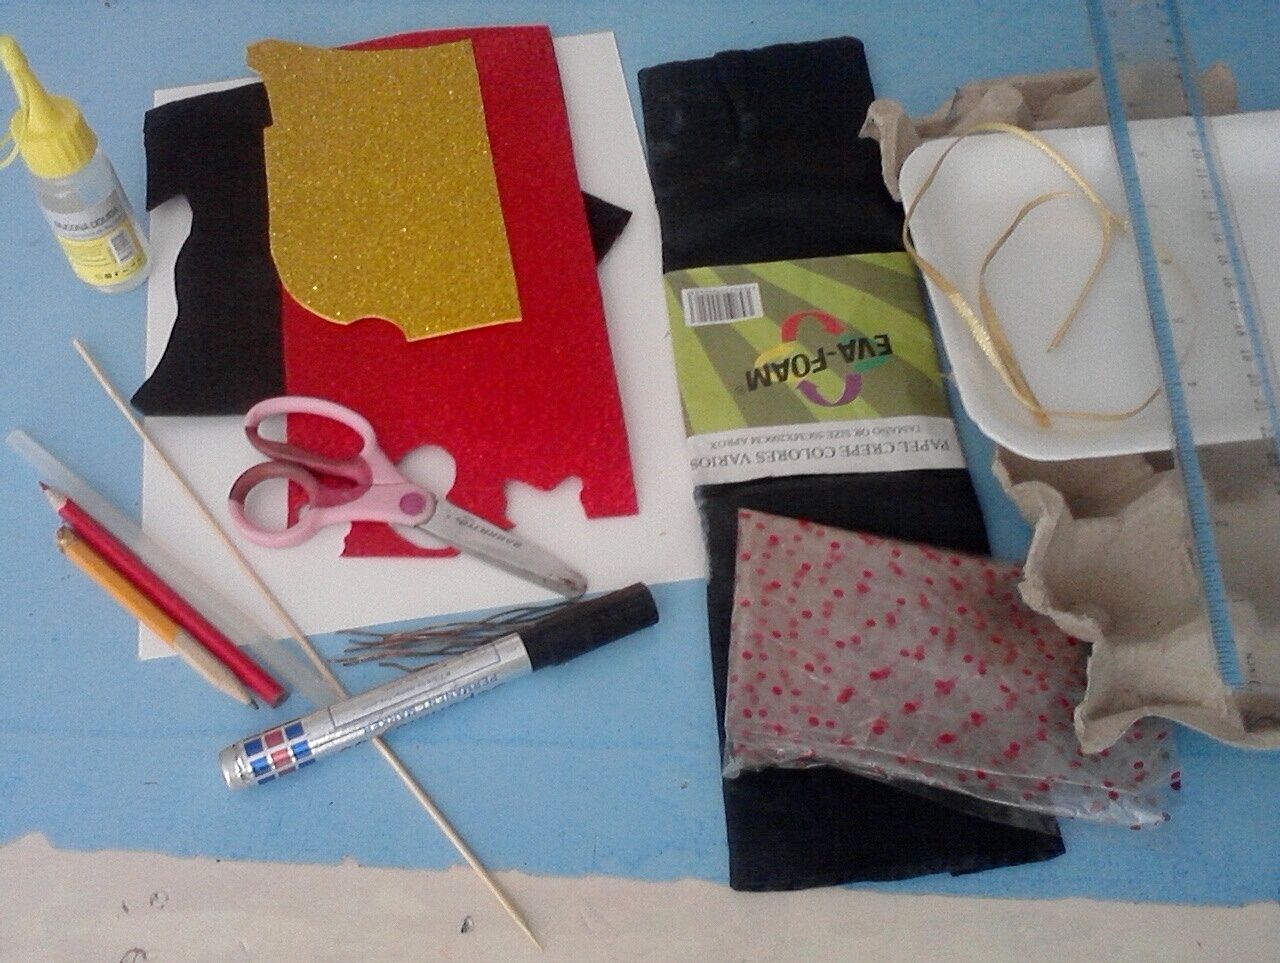
Materiales:
- Cartón de huevos.
- 1 bandeja de anime.
- Papel crepé negro.
- Cartulina blanca.
- Foami rojo, amarillo y negro escarchado.
- 1 Barra de silicon y líquido.
- Tijera.
- Marcador negro.
- Lápiz color rojo.
- Lápiz creyón.
- 1 palillo de altura.
- Varios trocitos de alambre de cobre.
- Regla.
- 1 cinta amarilla.
- Papel celofán transparente con diseños de colores.
English:
Materials:
- Egg carton.
- 1 anime tray.
- Black crepe paper.
- White cardboard.
- Red, yellow and black frosted Foami.
- 1 stick of silicone and liquid.
- Scissors.
- Black marker.
- Red pencil.
- Crayon pencil.
- 1 height stick.
- Several pieces of copper wire.
- Ruler.
- 1 yellow ribbon.
- Transparent cellophane paper with colored designs.

Español:
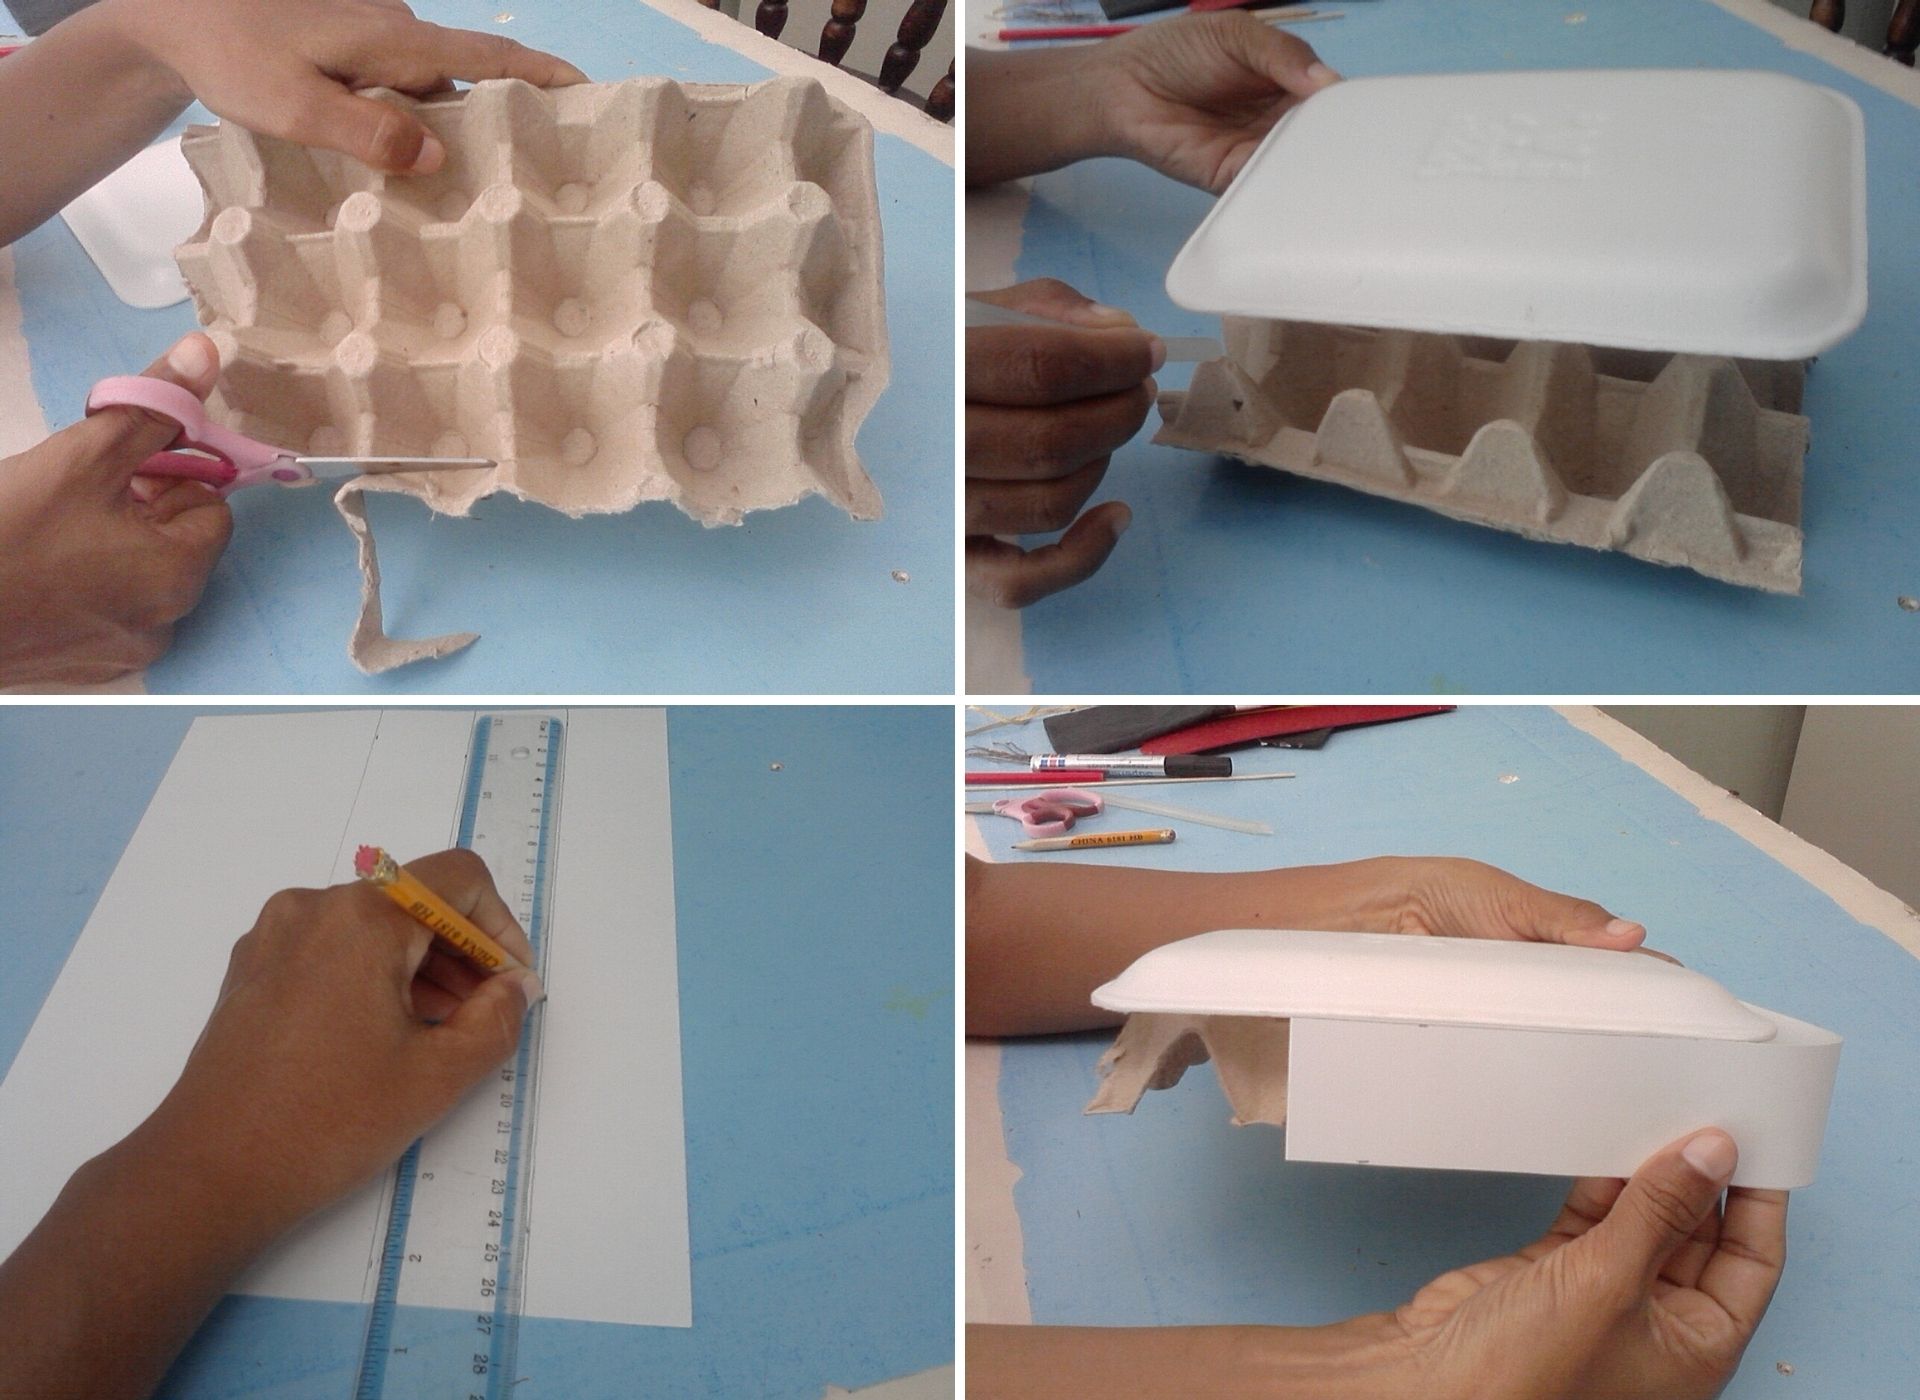
Paso: 1
- Comenzamos a elaborar la base de nuestro centro de mesa con el cartón de huevo, recortando al tamaño de la bandeja, luego pegamos con la barra de silicon el anime encima del cartón y procedemos a marcar y recortar unas tiras de cartulina de 4 cm de ancho, para pegarlas por todo el borde de nuestra base.
English:
Step: 1
- We begin to make the base of our centerpiece with the egg carton, cutting it to the size of the tray, then we glue the anime on top of the carton with the silicon stick and proceed to mark and cut some 4 cm wide strips of cardboard, to glue them all around the edge of our base.

Español:
Paso: 2
- Ya teniendo nuestra base lista, comienzo a dibujar el carro de Cars en un trozo de cartulina, delineamos con el marcador negro, rellenando los cauchos y los ojos. Después lo coloreamos con el color rojo y recortamos.
English:
Step: 2
- Once we have our base ready, I start drawing the Cars car on a piece of cardboard, outlining it with the black marker, filling in the tires and eyes. Then we color it with the red color and cut it out.
Español:
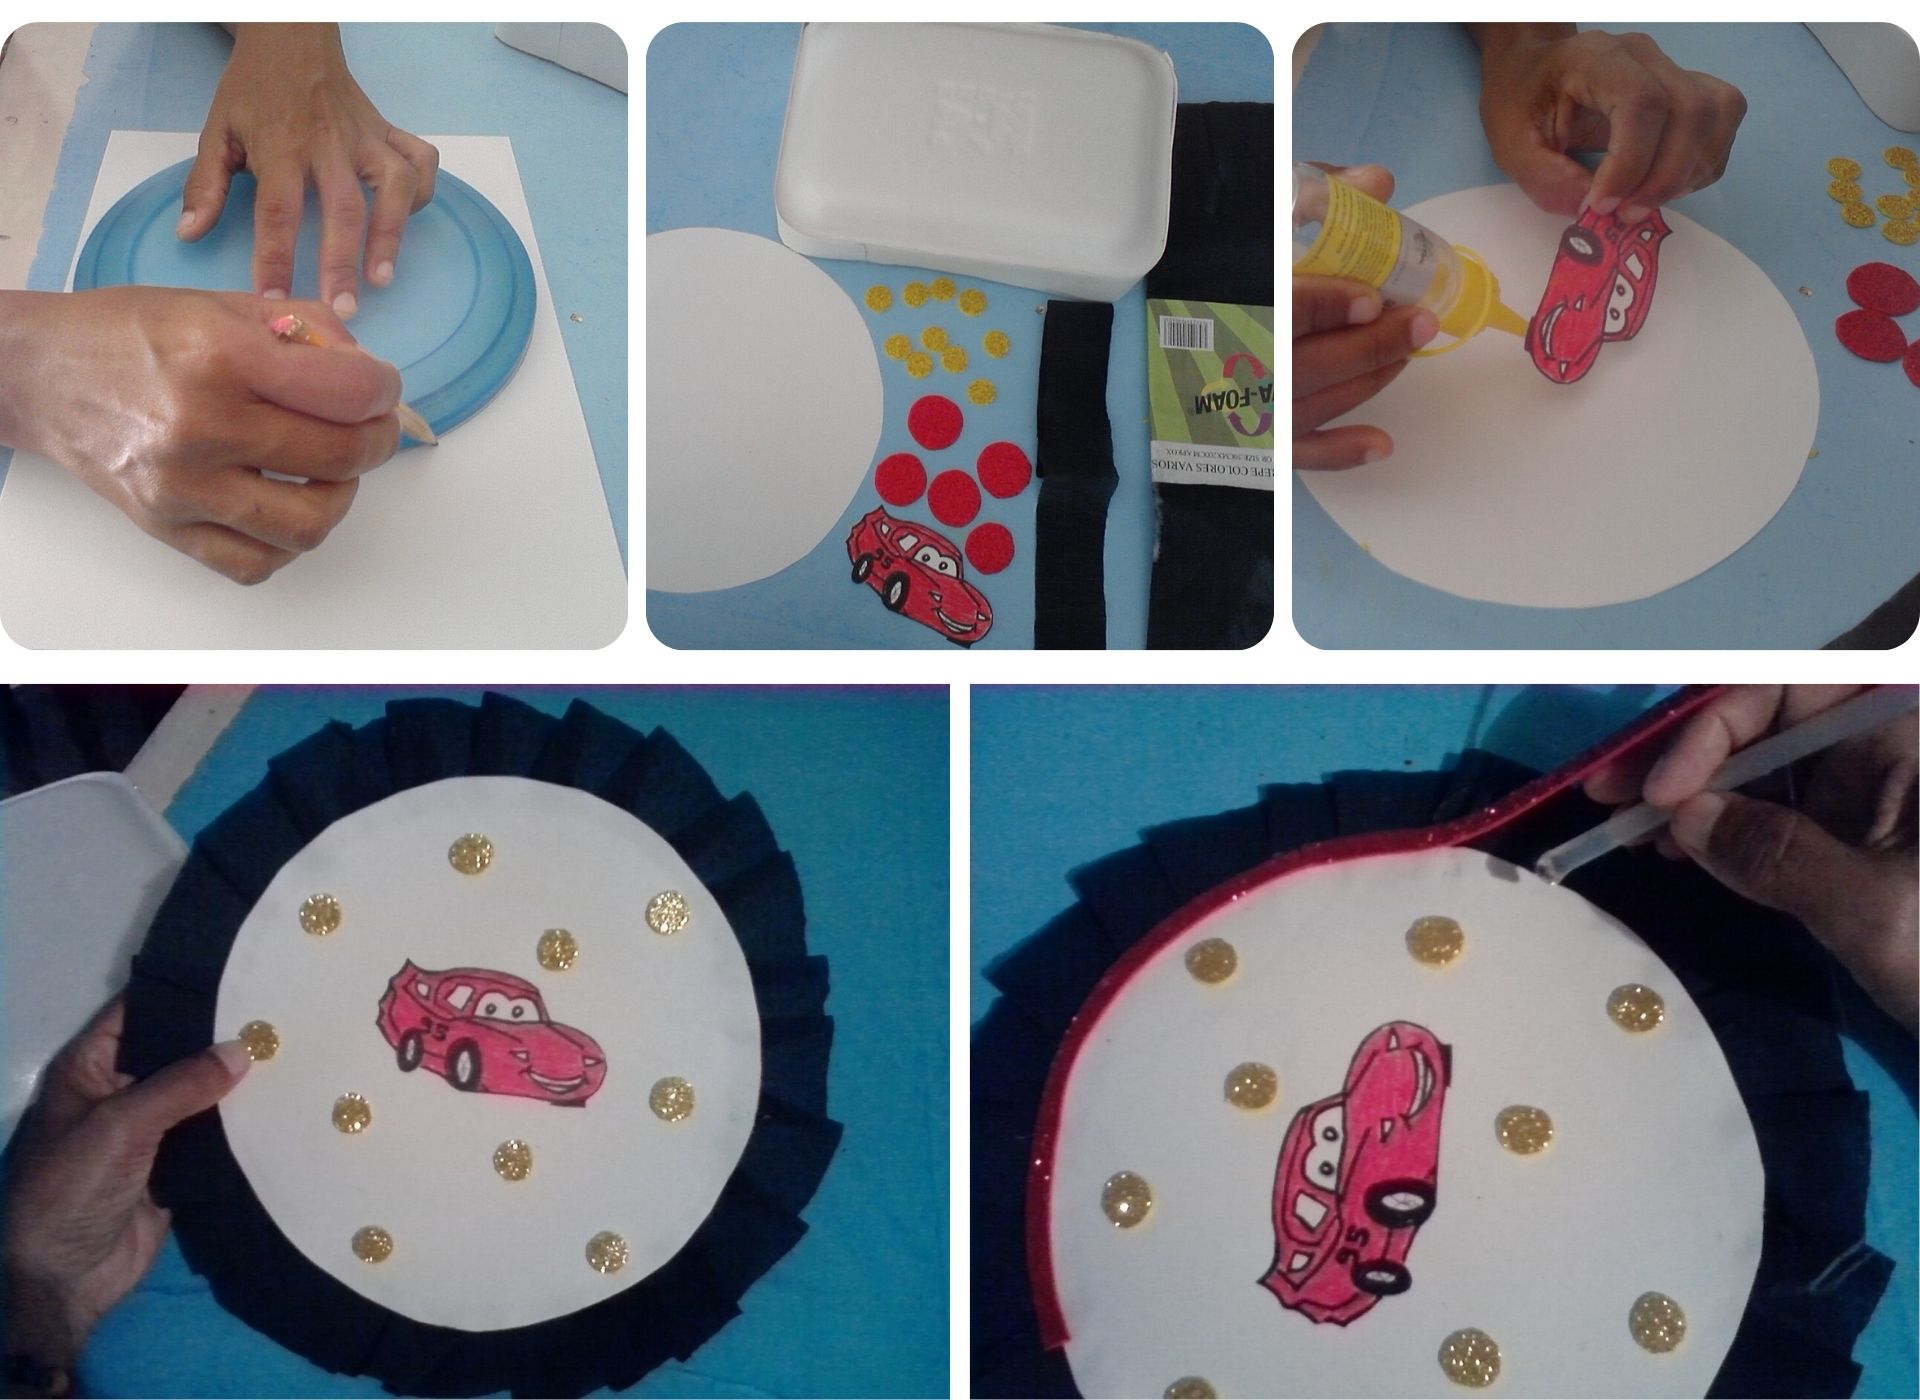
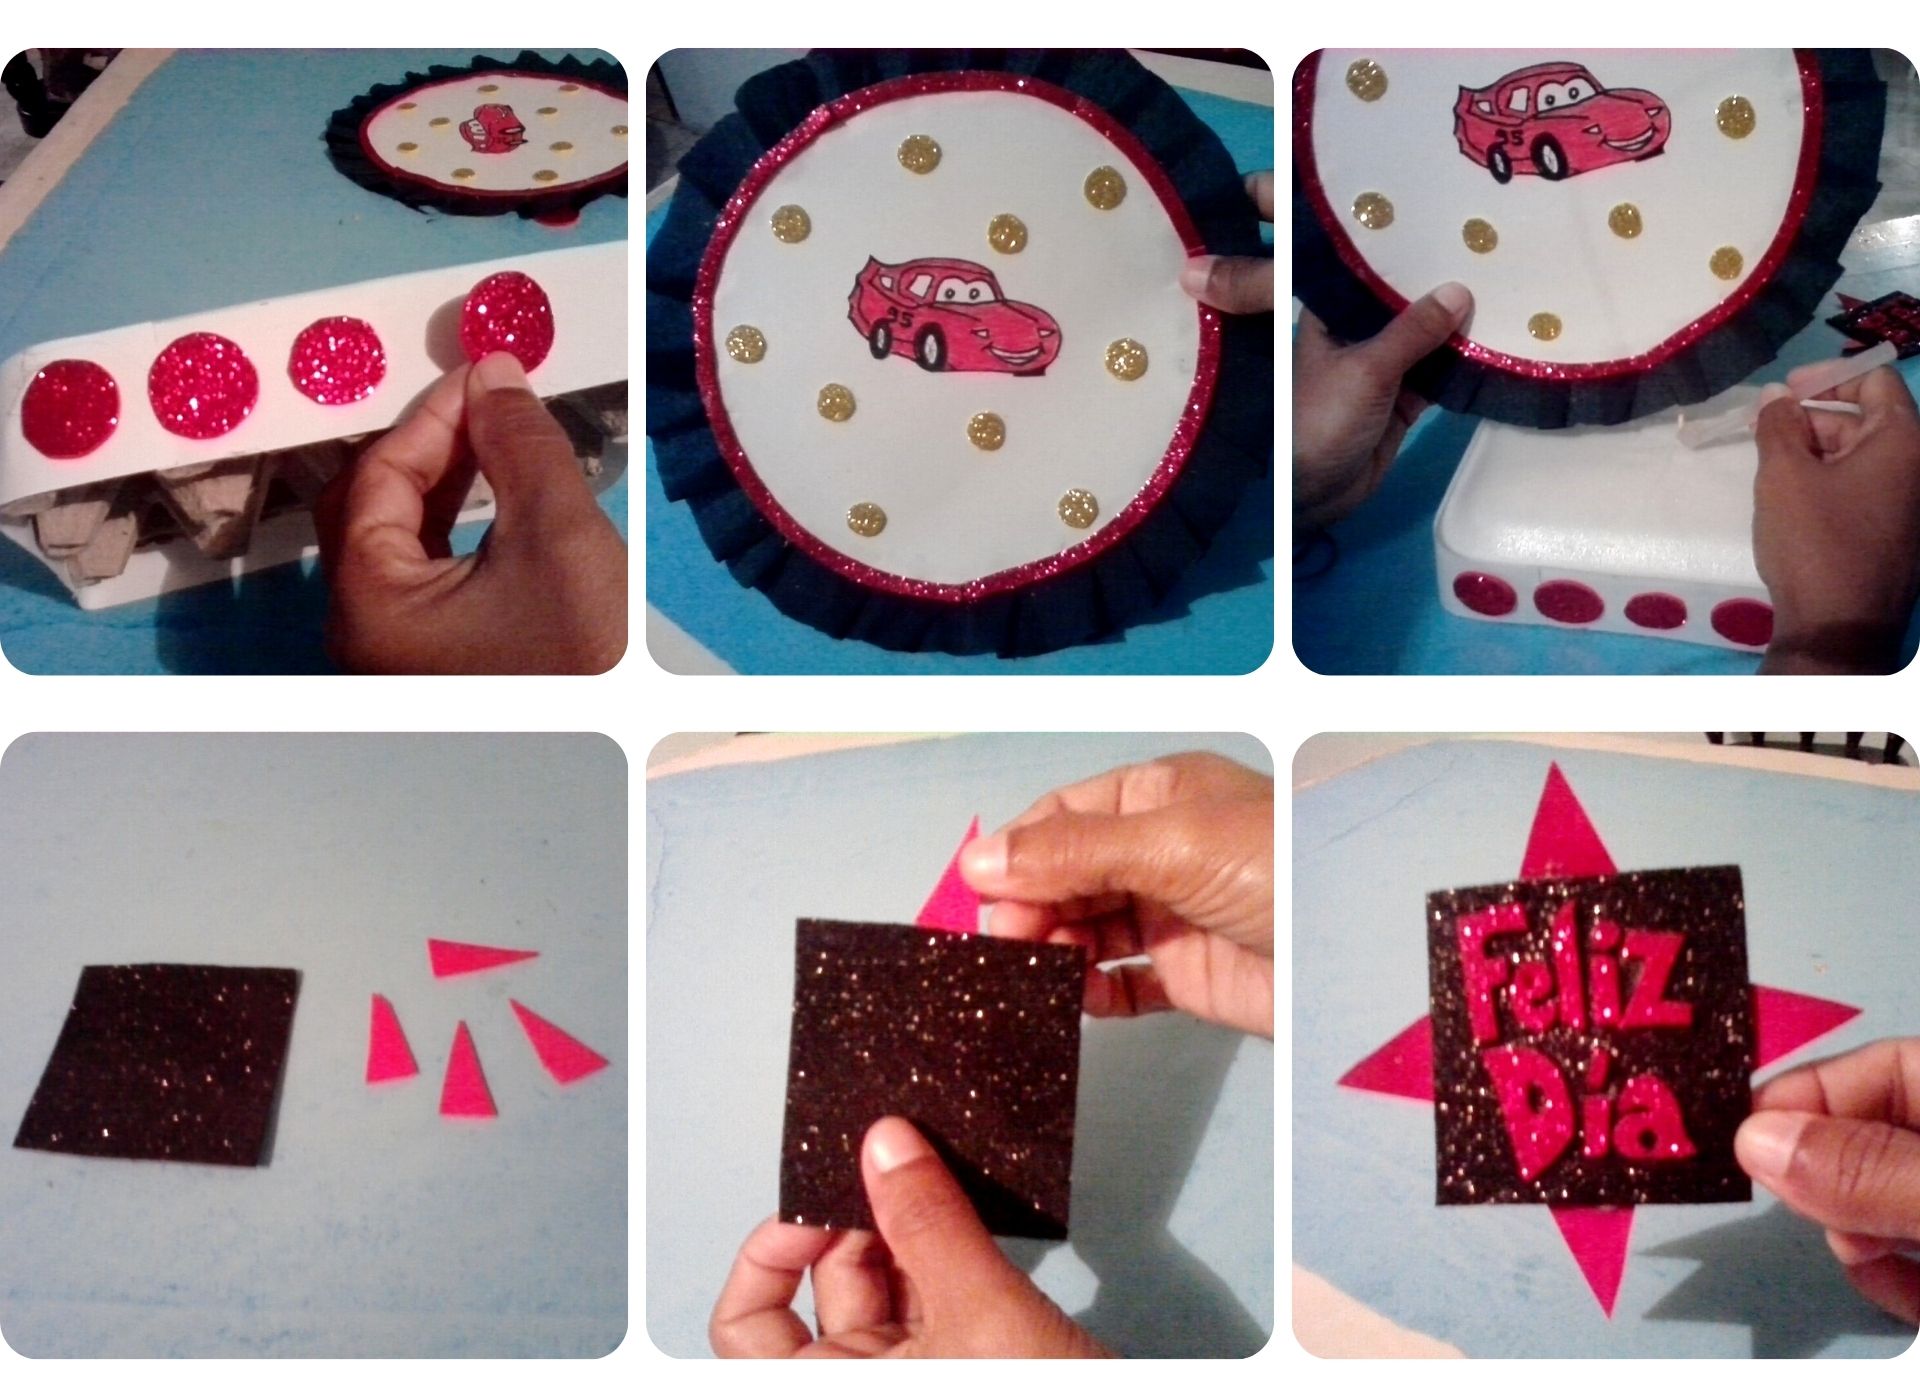
Paso: 3
- Ahora con la ayuda de una tapa dibujamos y recortamos un círculo del tamaño de su preferencia, también recortamos 10 círculos pequeños del foami amarillo y 5 un poco más grandes del foami rojo, recortamos una tira de papel crepé negro de 3 cm de ancho, y comenzamos a pegar para armar nuestro diseño, con el carro en el centro del círculo, luego por el borde del carro los círculos amarillos, después pegamos el papel crepé en forma de faralao, y unas tiras delgadas con el foami rojo en la unión del papel crepé con la cartulina blanca.
English:
Step: 3
- Now with the help of a lid we draw and cut out a circle of the size of your preference, we also cut out 10 small circles from the yellow foami and 5 a little bigger from the red foami, we cut out a strip of black crepe paper 3 cm wide, and start gluing to assemble our design, with the car in the center of the circle, then along the edge of the car the yellow circles, then glue the crepe paper in the form of faralao, and some thin strips with the red foami at the junction of the crepe paper with the white cardboard.
Español:
Paso: 4
- Los 5 círculos de foami rojo lo pegamos en la base, por la parte frontal del centro de mesa, luego tomamos nuestro diseño y lo pegamos en el centro de la base , ahora para darle un toque más especial recortamos un cuadrado con foami negro y 4 puntas triángular, la pegamos para que quede en forma de estrella y le colocamos la frase que decidas colocar.
English:
Step: 4
- We glue the 5 circles of red foami on the base, on the front of the centerpiece, then we take our design and glue it in the center of the base, now to give it a more special touch we cut a square with black foami and 4 triangular points, we glue it so that it is in the shape of a star and we place the phrase that you decide to place.
Español:
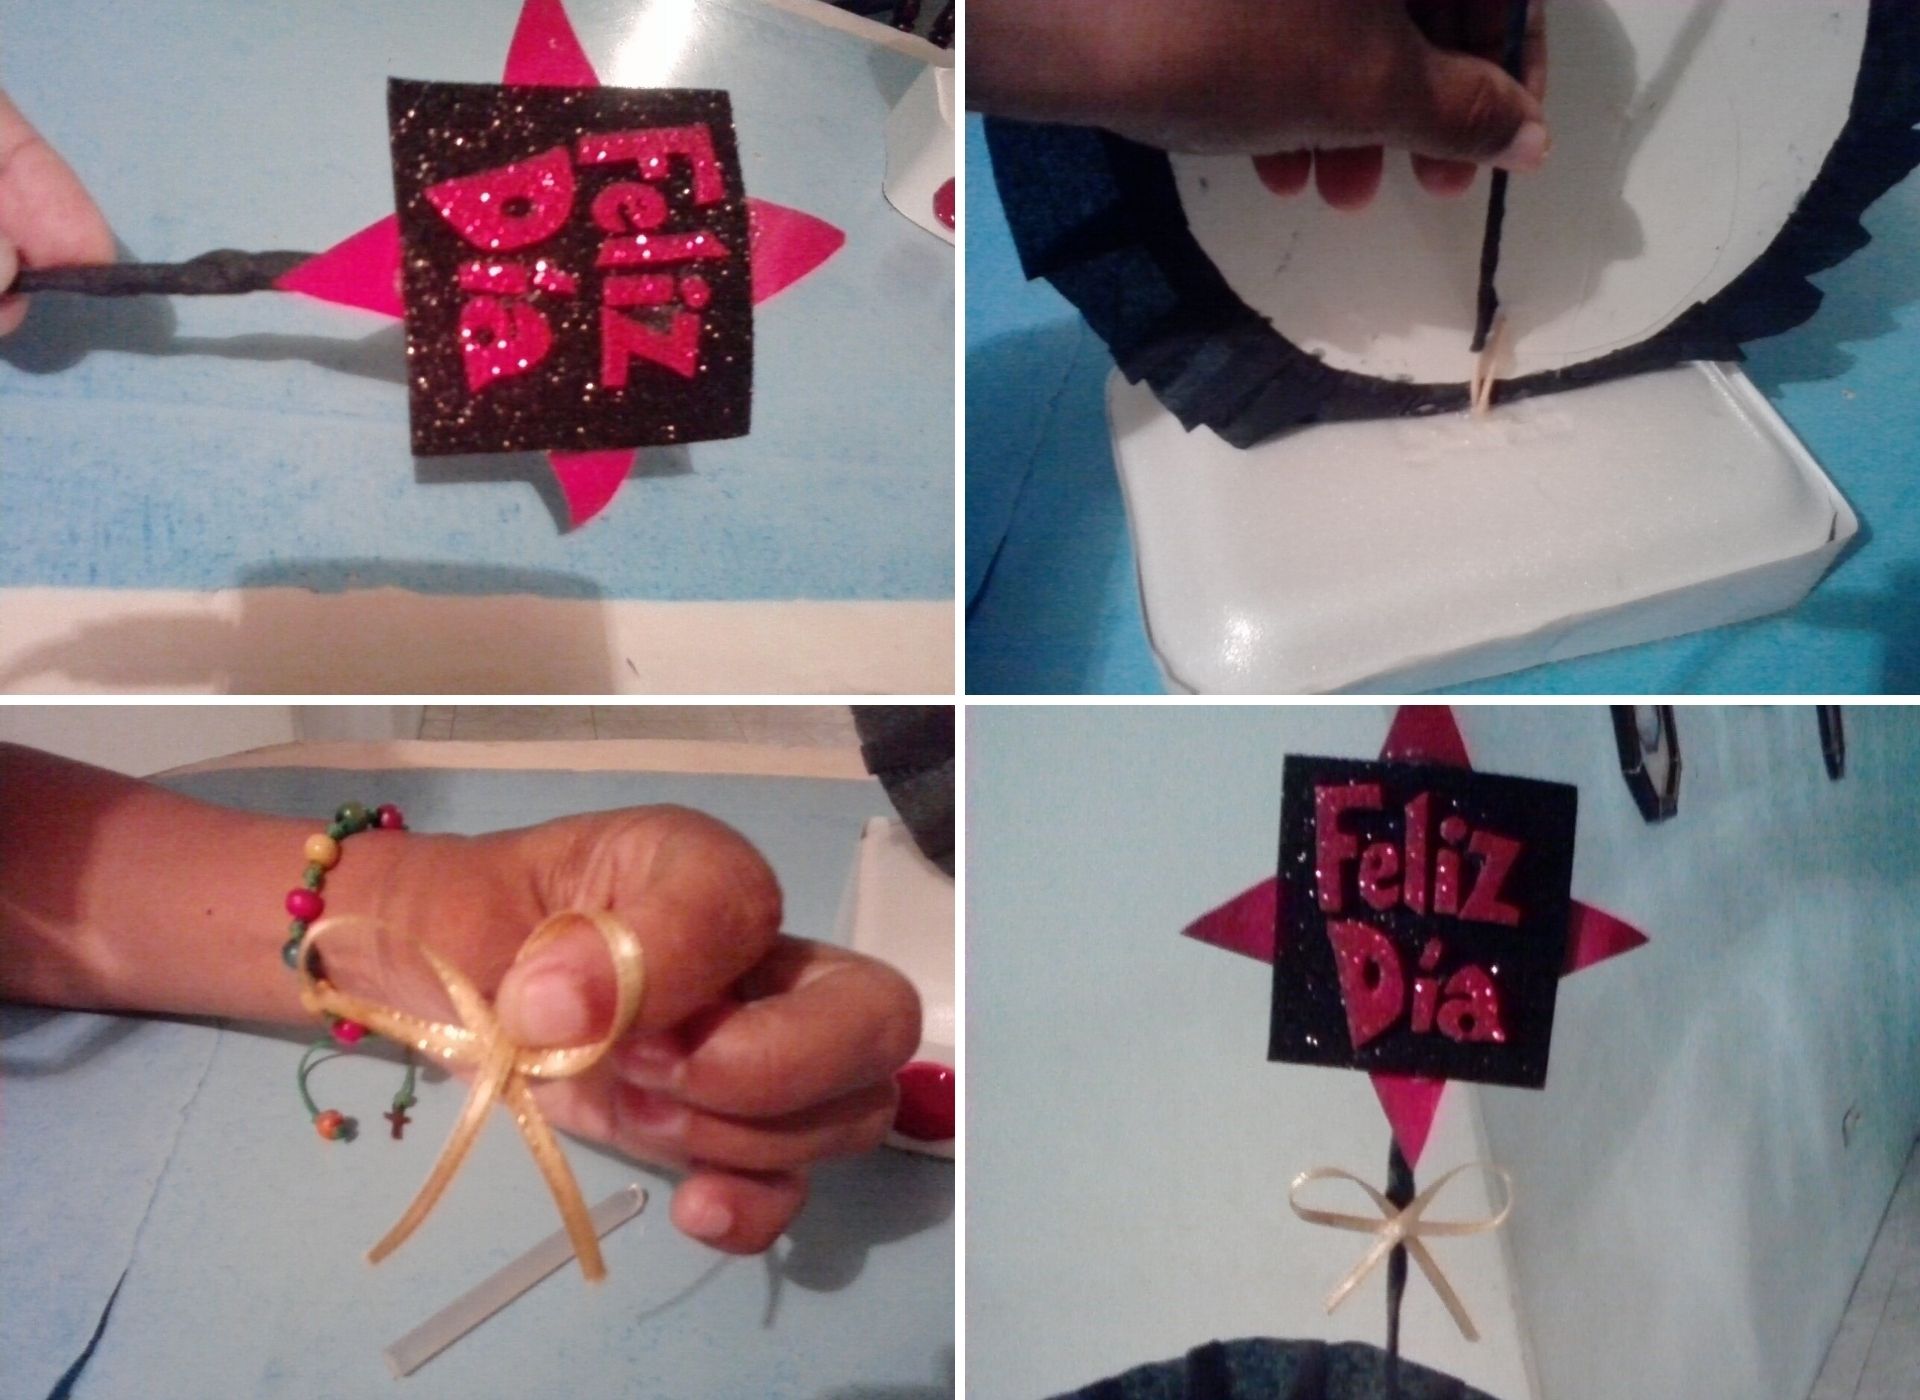
Paso: 5
- Teniendo ya nuestra estrella forramos el palo de altura con papel crepé y lo introducimos a la base en la parte trasera del diseño , luego con la cinta amarilla elaboramos un lazo y lo pegamos al palillo de altura.
English:
Step: 5
- Once we have our star, we line the star stick with crepe paper and we introduce it to the base at the back of the design, then with the yellow ribbon we make a bow and we glue it to the star stick.
Español:
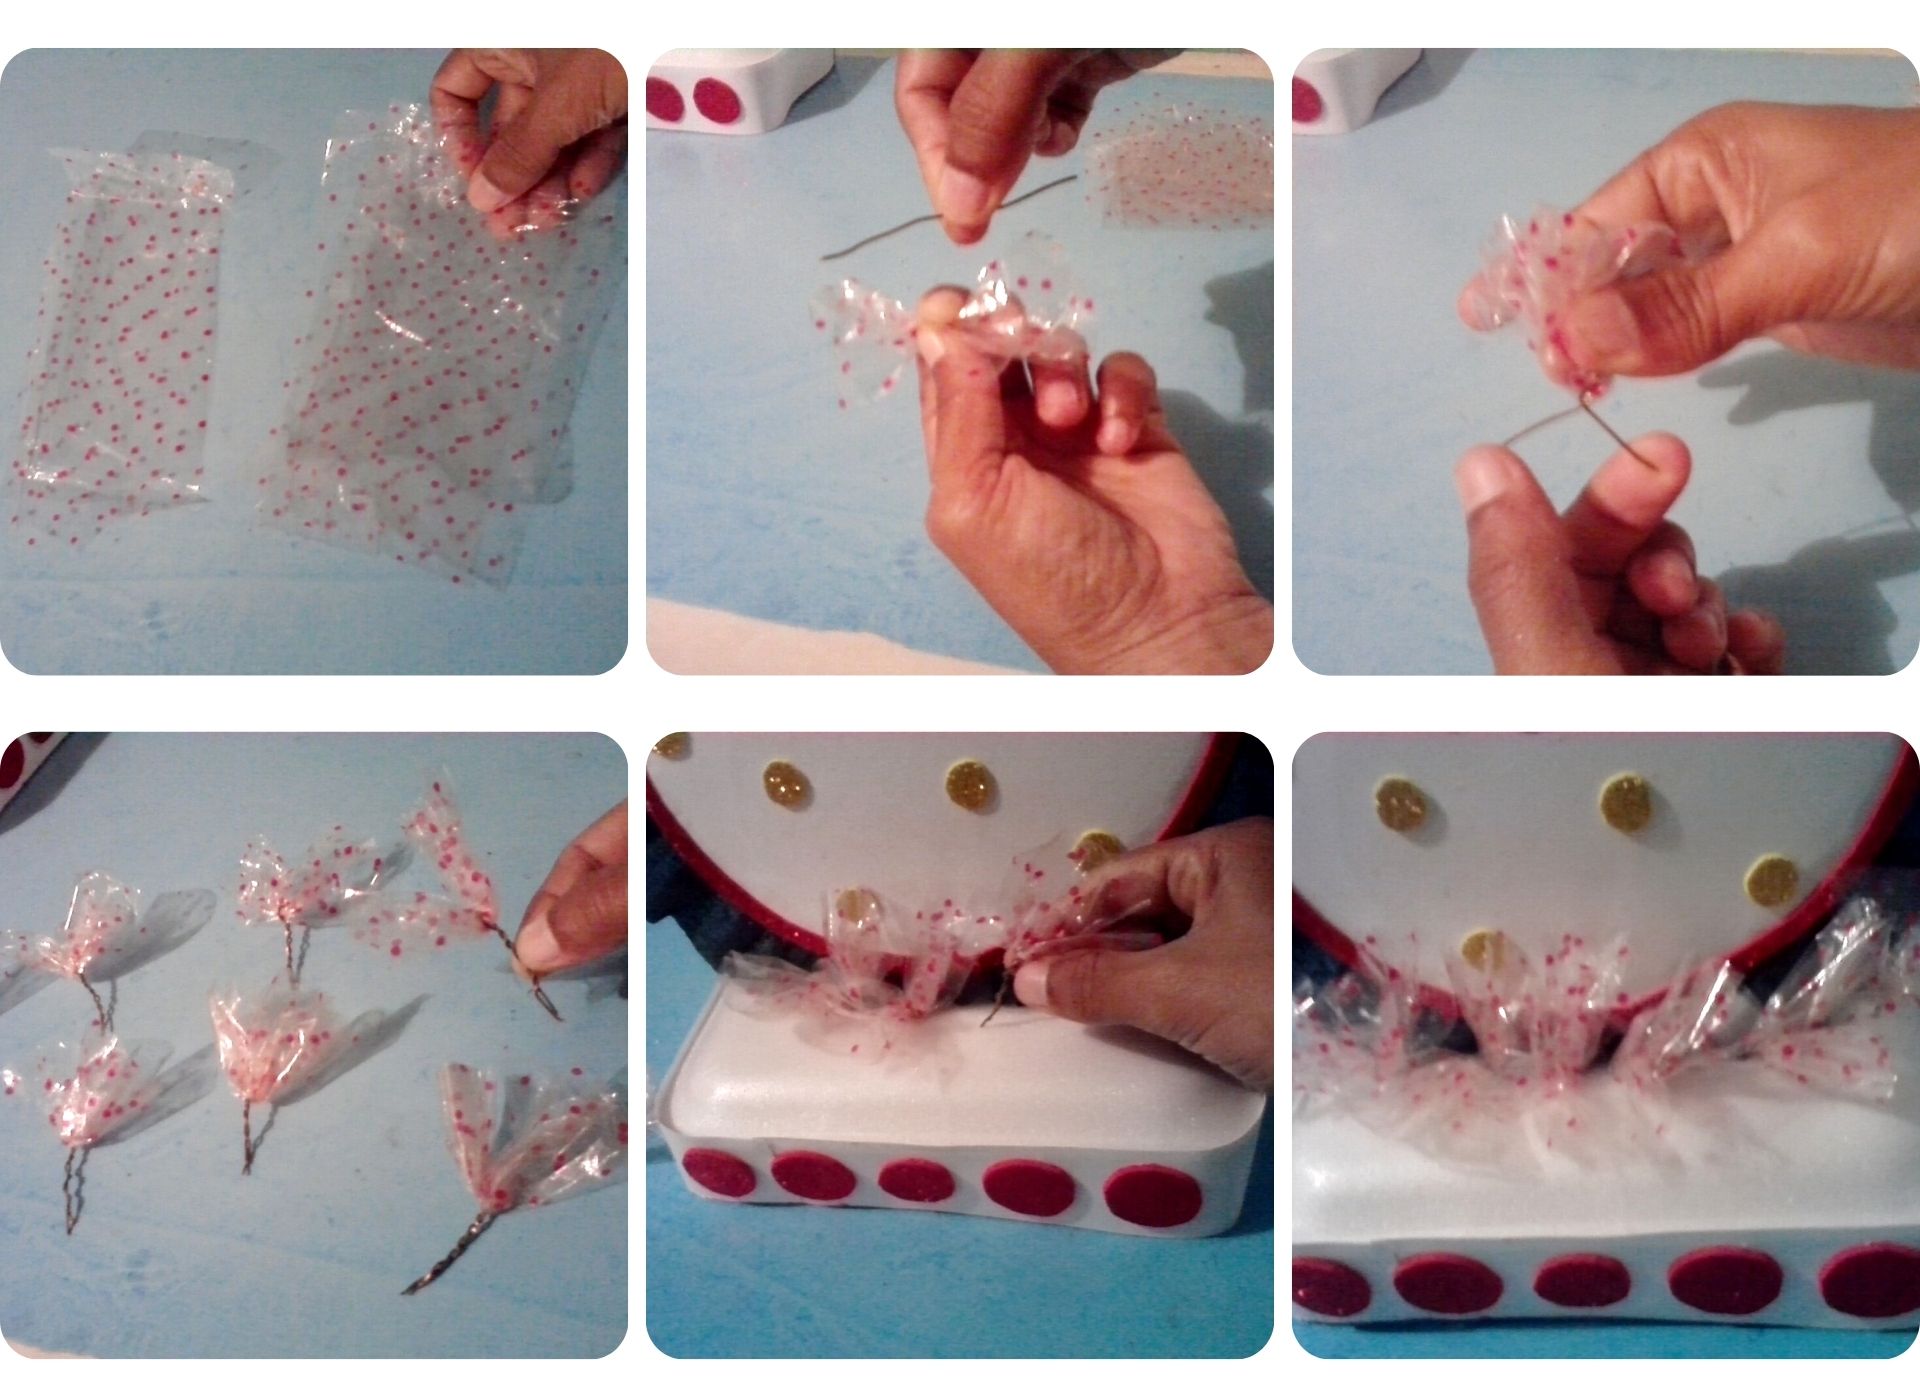
Paso: 6
- Recortamos varios trozos de papel celofán, lo tomamos a la mitad y lo amarramos con los pedacitos de alambre , enroscando ambas puntas y la introducimos por el borde del círculo en la base del anime.
English:
Step: 6
- Cut out several pieces of cellophane paper, cut it in half and tie it with the pieces of wire, twisting both ends and insert it through the edge of the circle at the base of the anime.
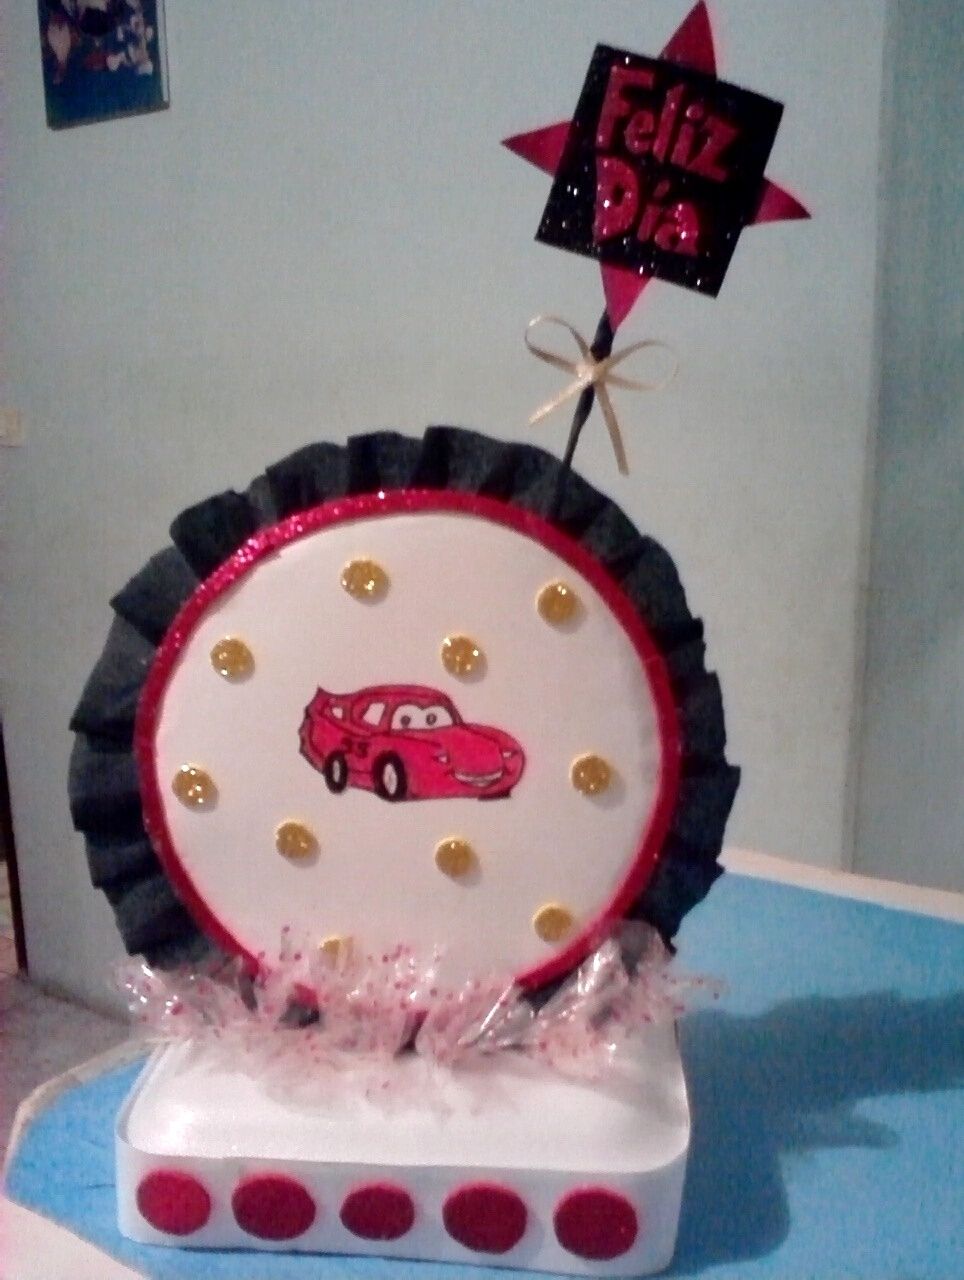
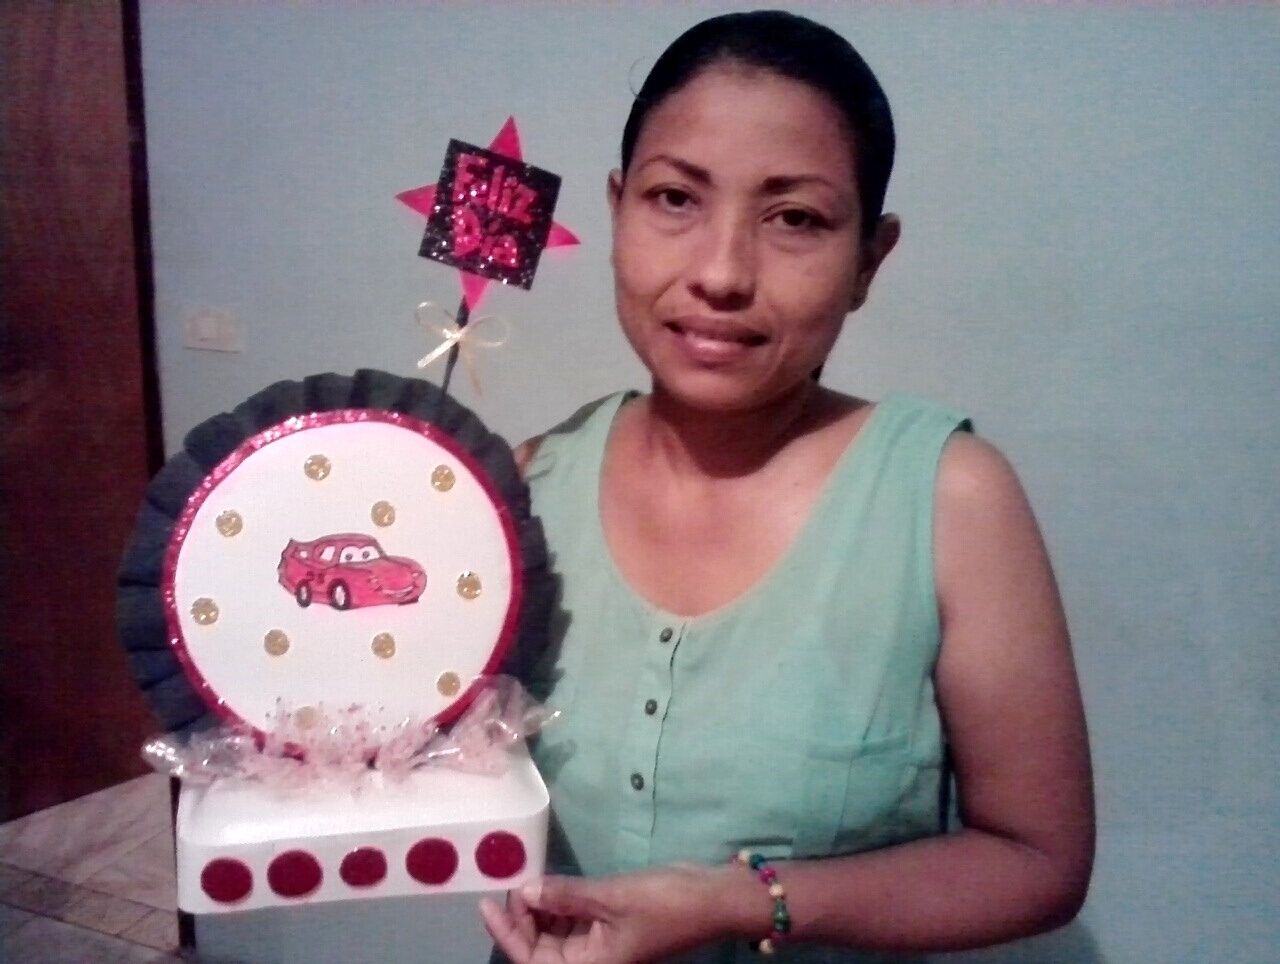
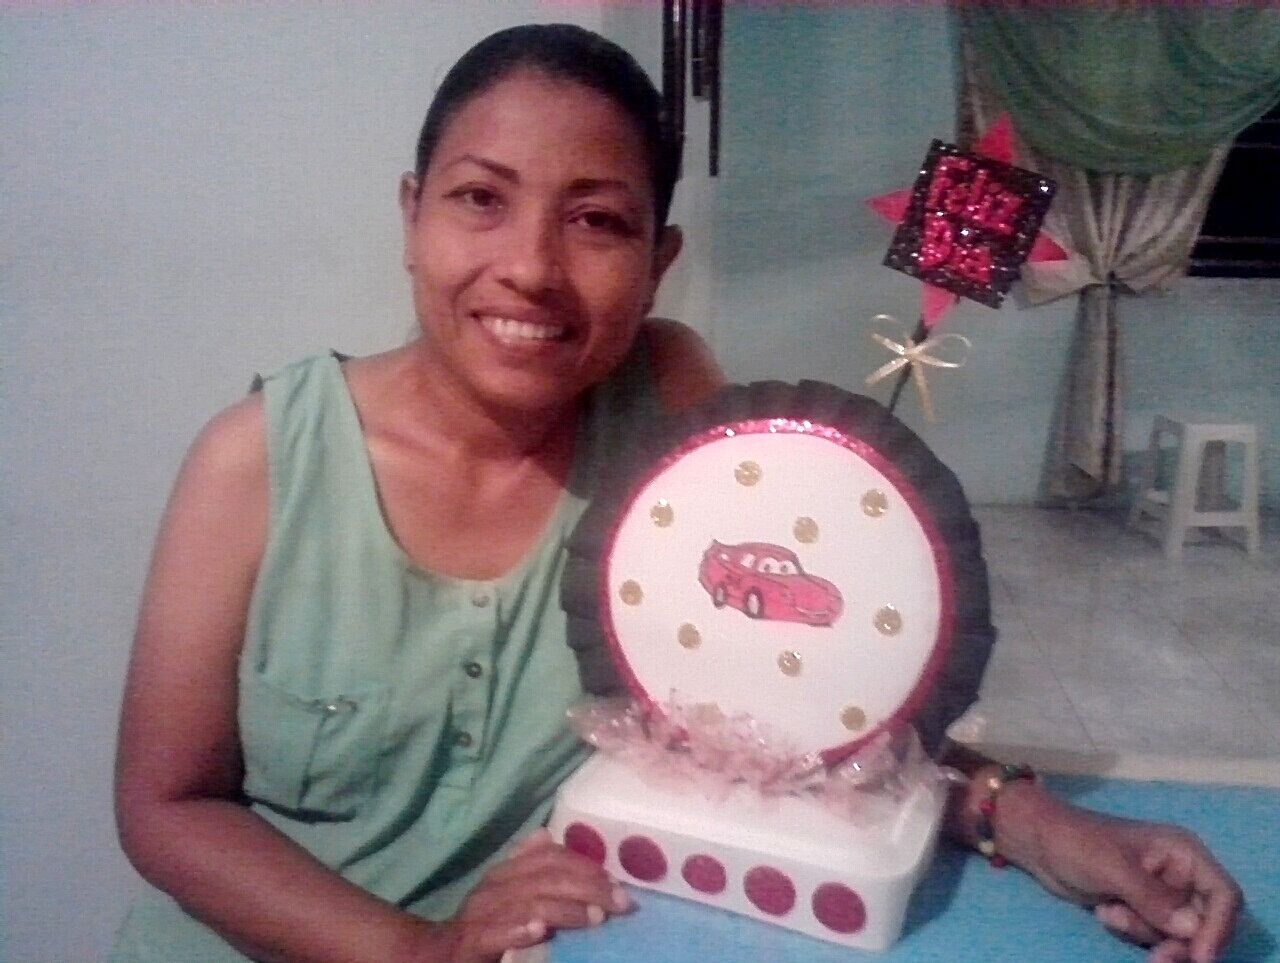
Este es mi resultado final. Espero les allá gustado.
This is my final result.I hope you liked it.
.jpg)
.jpg)
.jpg)
Todas las fotos son de mi autoria y editadas con Canva.
Invito a mi amiga @eribetzi que se anime a participar en el concurso.
All photos are my own and edited with Canva. I invite my friend @eribetzi to participate in the contest.
Invito a mi amiga @eribetzi que se anime a participar en el concurso.
All photos are my own and edited with Canva. I invite my friend @eribetzi to participate in the contest.
Congratulations @coromoto20! You have completed the following achievement on the Hive blockchain and have been rewarded with new badge(s) :
Your next target is to reach 200 upvotes.
You can view your badges on your board and compare yourself to others in the Ranking
If you no longer want to receive notifications, reply to this comment with the word
STOPEs una idea muy bonita, gracias por participar, mucha suerte en el concurso.
Gracias.