Comencemos.
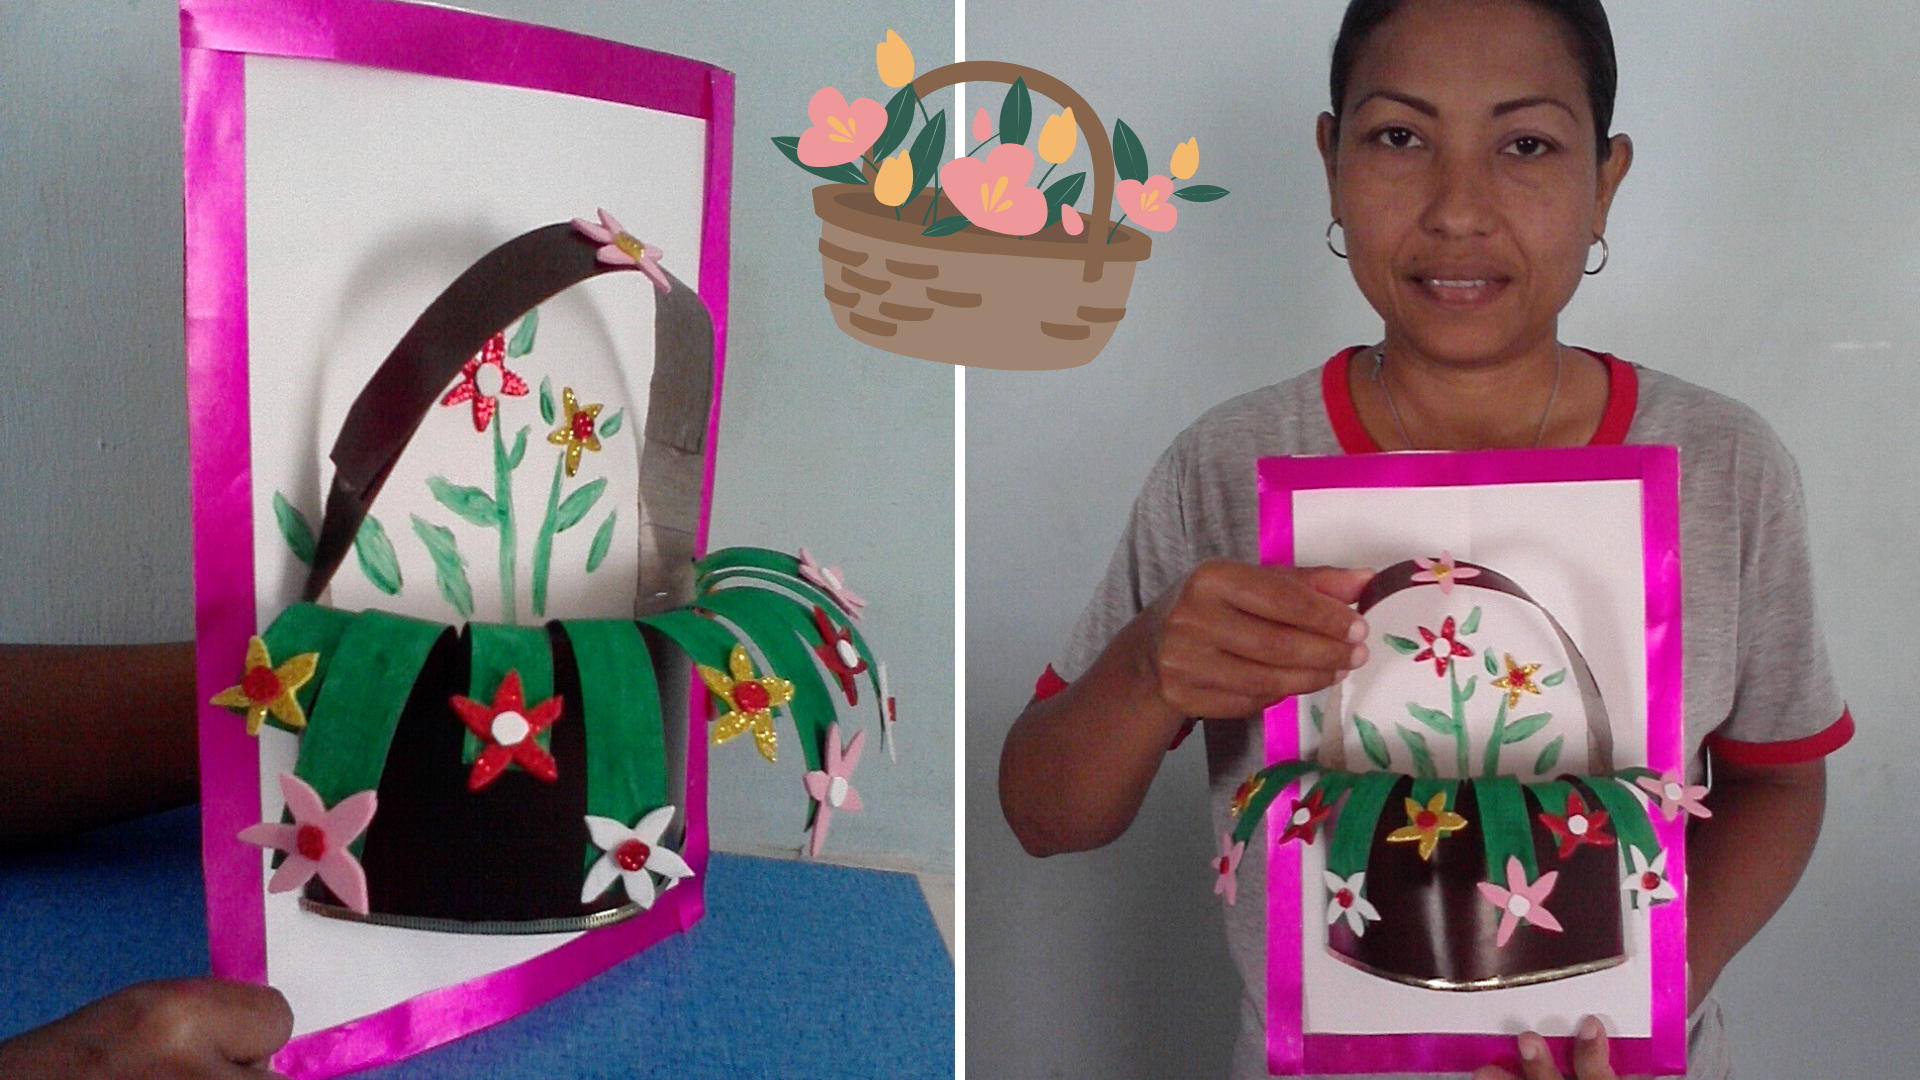
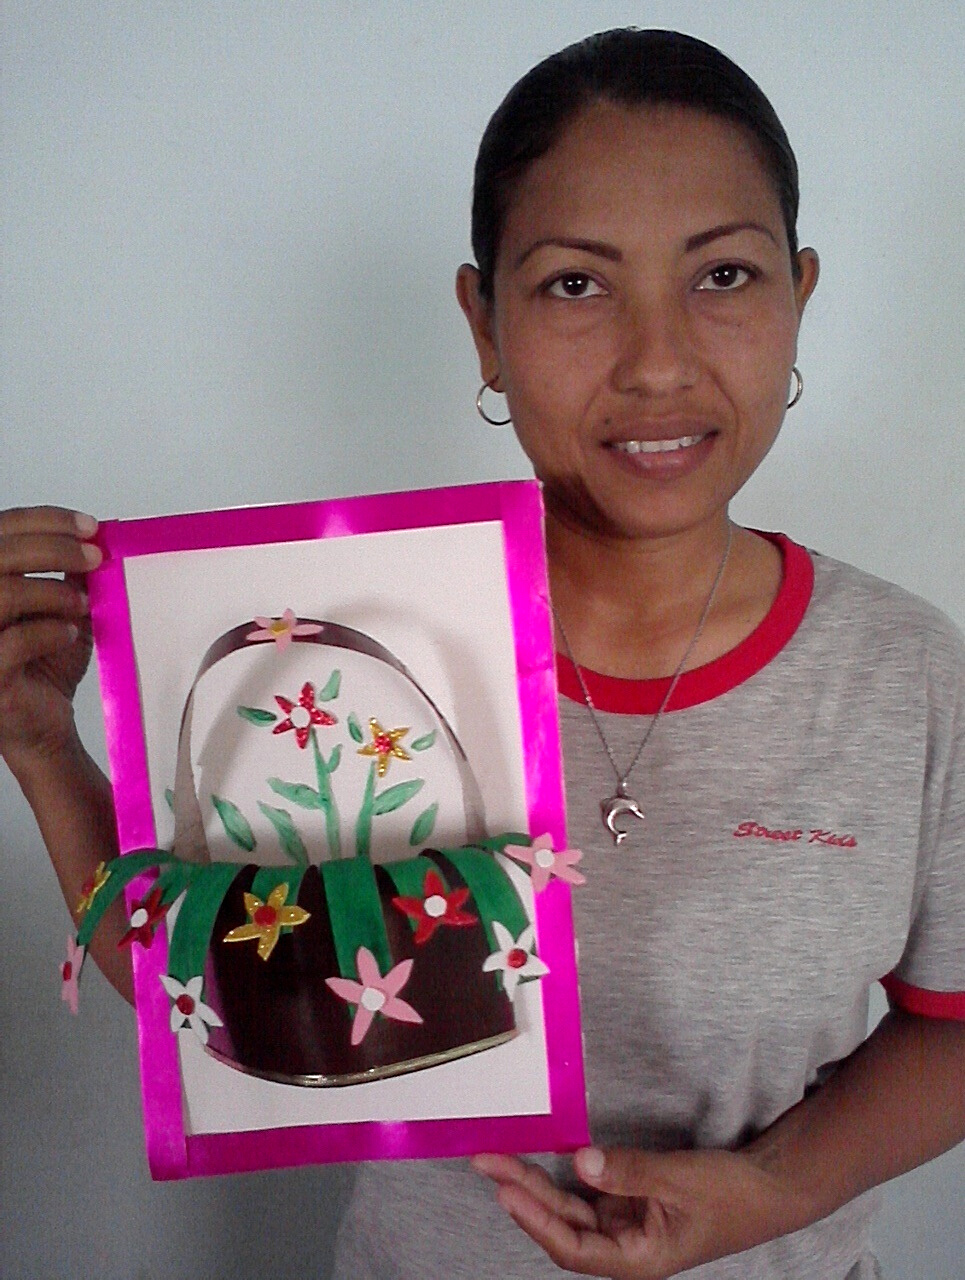
Greetings my friends of HIVE DIY, happy to participate in this new contest with the theme "Third Dimension", with the moderation of @equipodelta, it is very rewarding to demonstrate our creativity by putting a little bit of our imagination. This time I made a decorative painting inspired by a basket of flowers, I hope you like it.
Let's start.

Español:
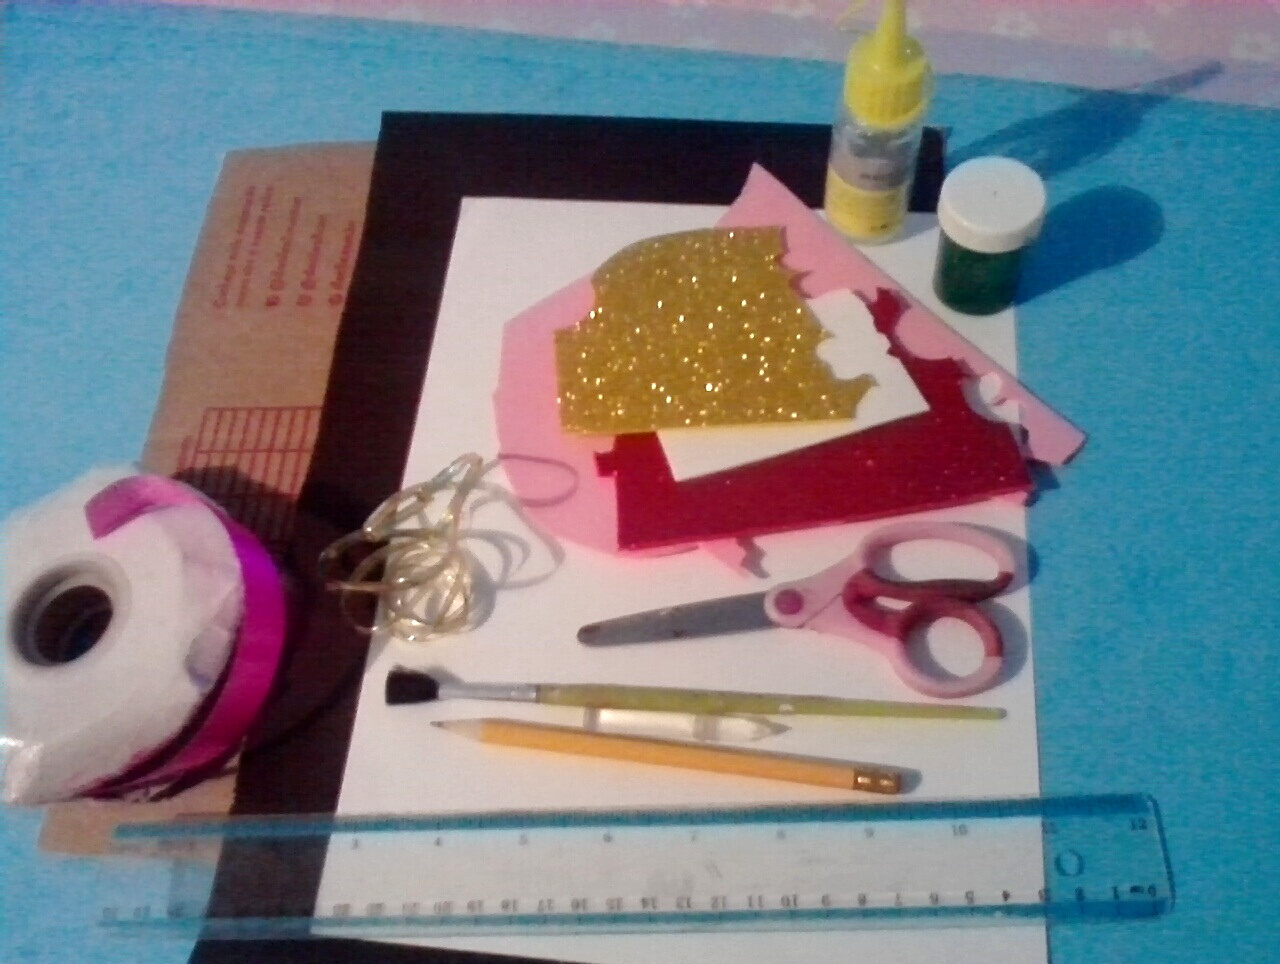
Materiales:
- (1) trozo de cartón, de (30 cm) x (20 cm).
- Cartulina doble faz marrón, de (20 cm) x (18 cm).
- (1) hoja blanca.
- Foami, rosado, blanco, amarillo y rojo.
- Cinta plástica color fucsia.
- Cinta decorativa dorada.
- Tijera.
- Lapiz.
- Regla.
- Silicon.
- Pincel.
- Tempera verde.
English:
Materials:
- (1) piece of cardboard, (30 cm) x (20 cm).
- Brown double-sided cardboard, (20 cm) x (18 cm).
- (1) white sheet.
- Foami, pink, white, yellow and red.
- Fuchsia color plastic tape.
- Gold decorative ribbon.
- Scissors.
- Pencil.
- Ruler.
- Silicon.
- Paintbrush.
- Green tempera.

Español:
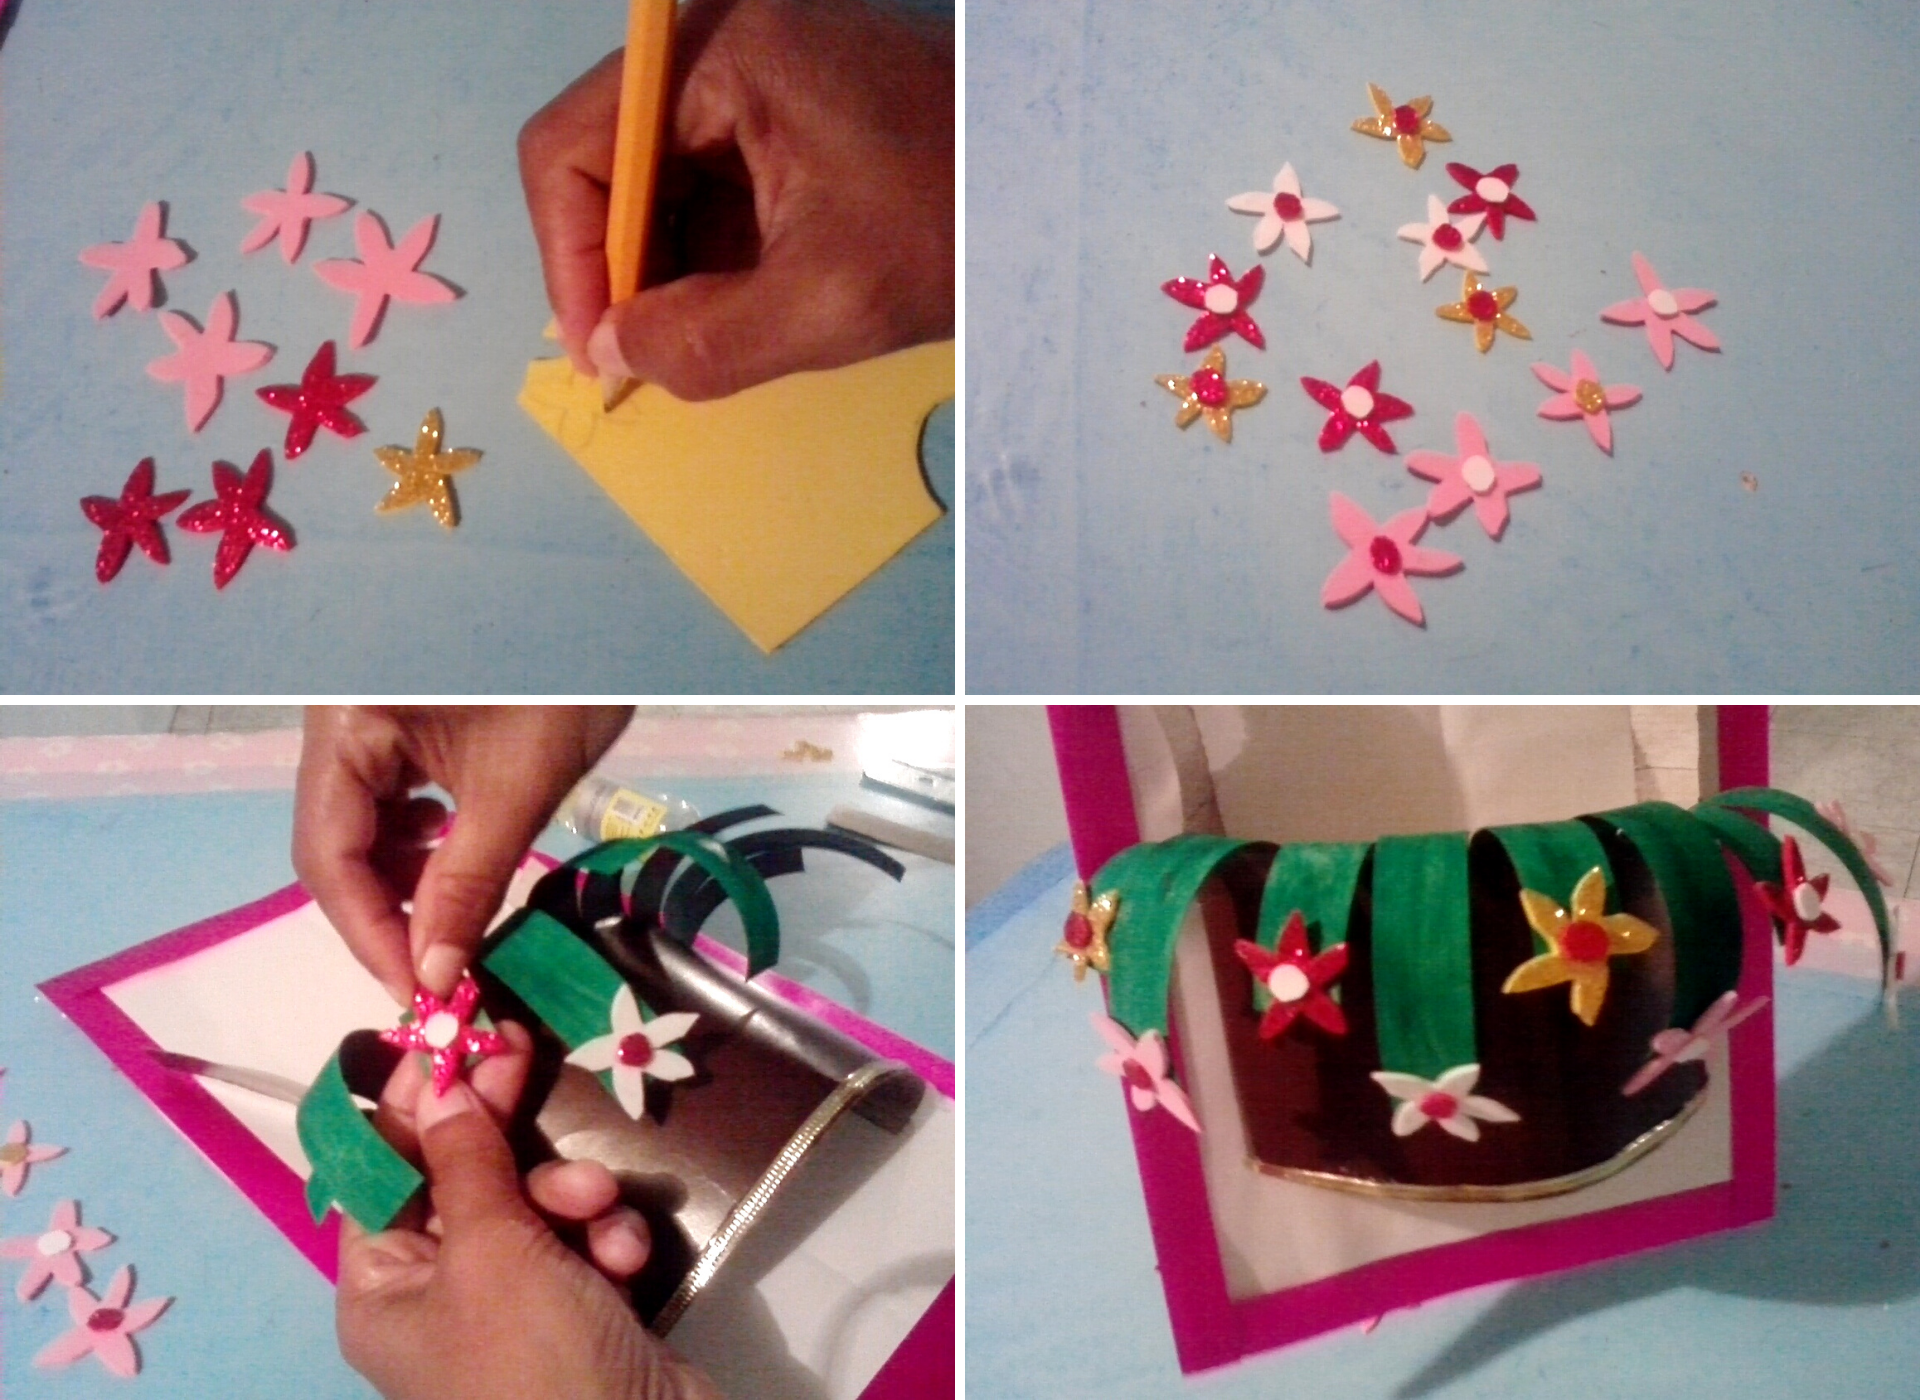
Paso: 1
- Agregamos silicon al cartón, para pegar la hoja blanca, luego pegamos la cinta fucsia por los (4) lados del cartón, y procedemos a marcar en la parte de atrás de la cartulina varias lineas a la altura de (8 cm).
English:
Step: 1
- We add silicone to the cardboard, to stick the white sheet, then we stick the fuchsia tape on the (4) sides of the cardboard, and we proceed to mark on the back of the cardboard several lines at the height of (8 cm).
Español:
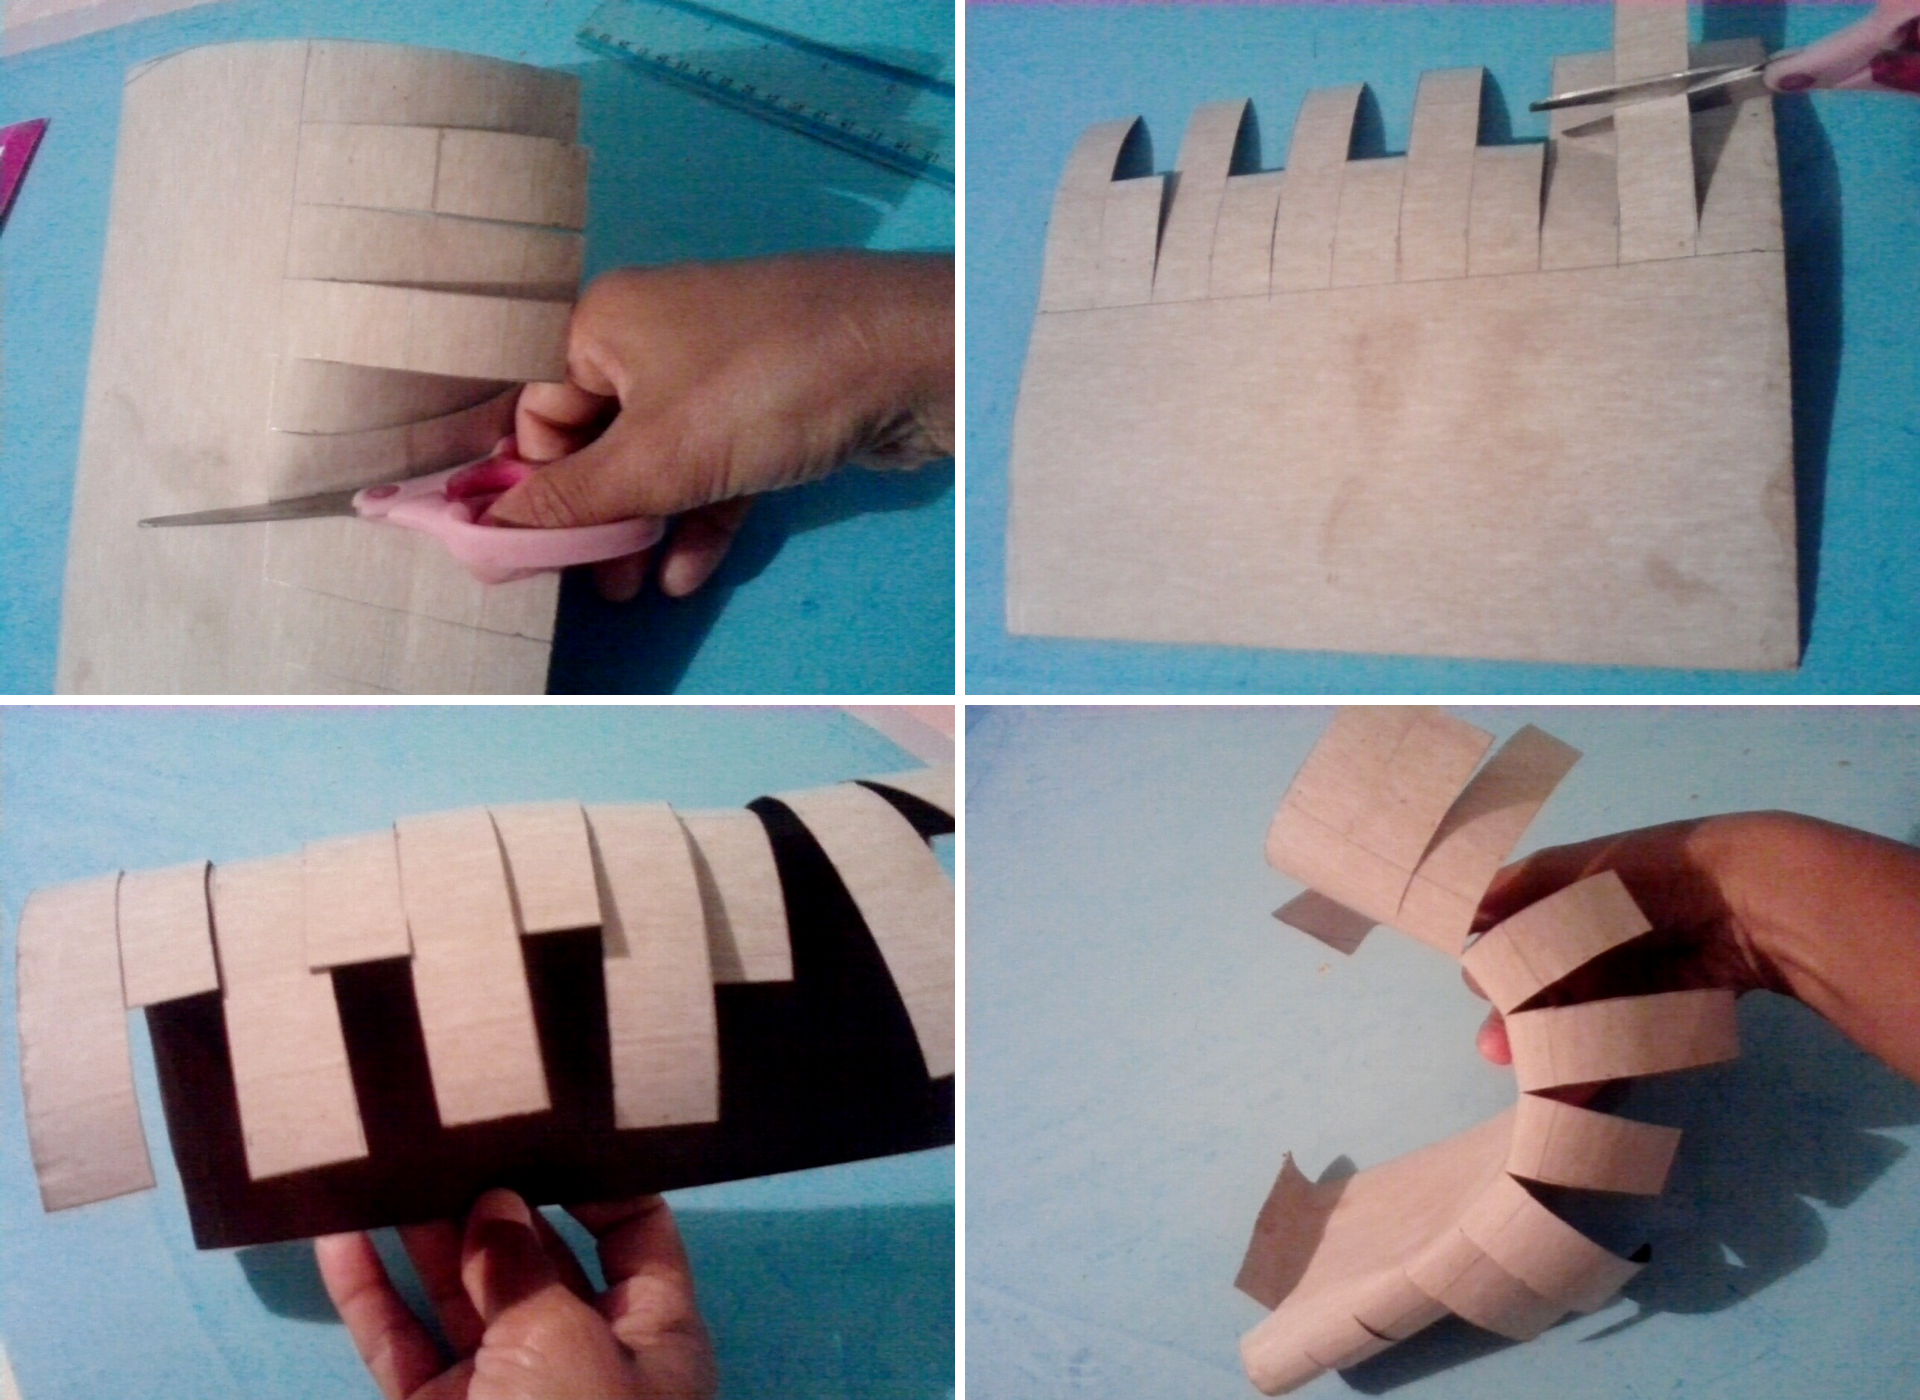
Paso: 2
- Marcar y recortar en tiras de (2 cm) de ancho, hasta la altura de (8 cm) en la cartulina marrón, luego recortamos las tiras intermedias hasta la mitad, para después realizar un dobles hacia fuera, haciendo un semicírculo.
English:
Step: 2
- Mark and cut in strips of (2 cm) wide, up to the height of (8 cm) on the brown cardboard, then cut the intermediate strips up to the middle, and then make a double outwards, making a semicircle.
Español:
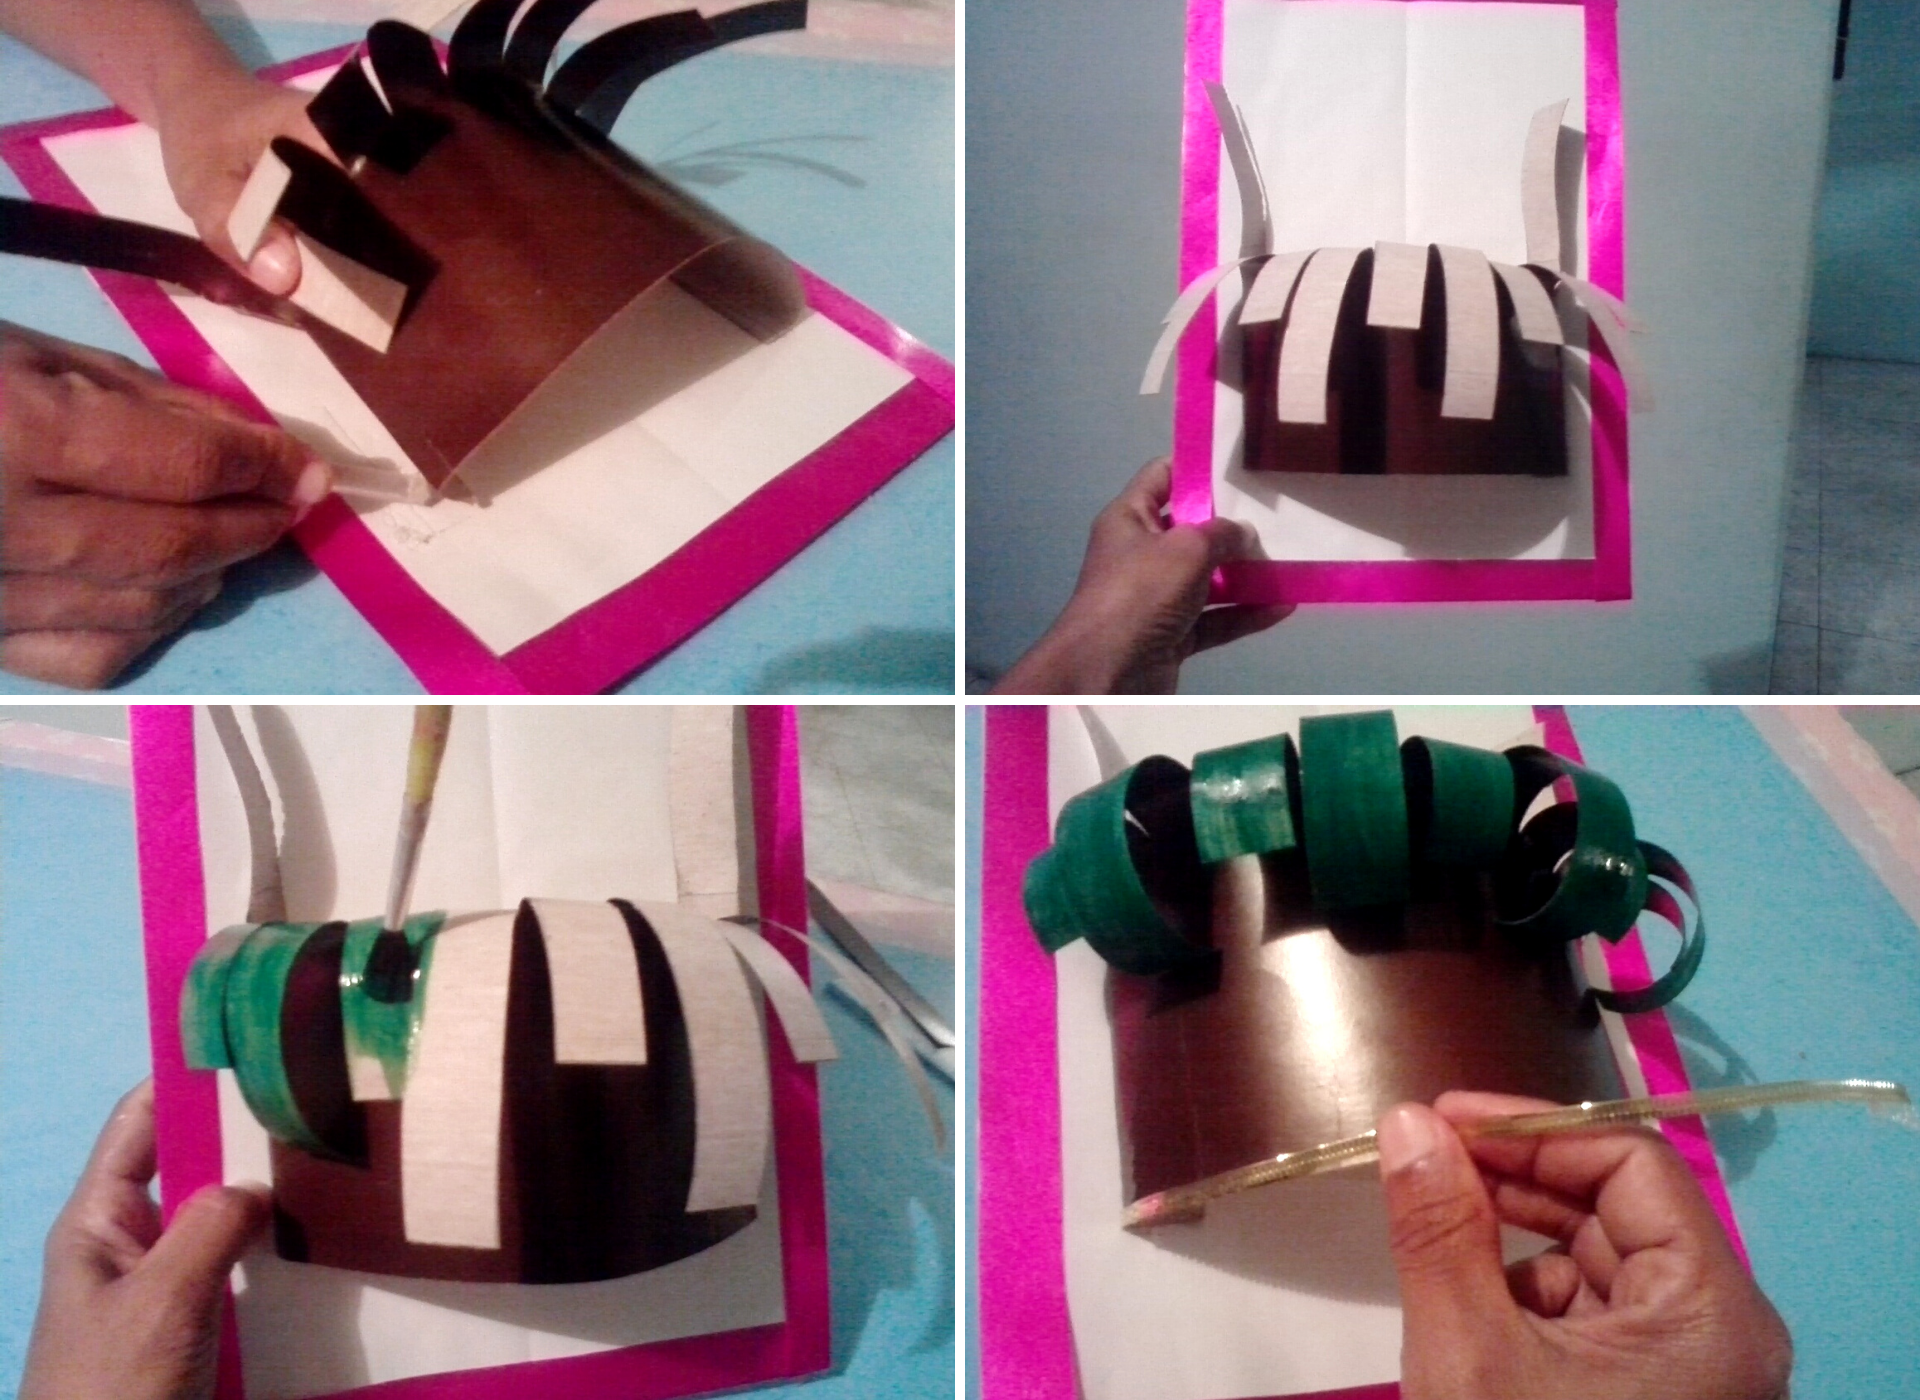
Paso: 3
- Procedemos a pegar la cartulina en el cuadro, dejando (2) tiras hacia arriba que vendría siendo el asa de la cesta, luego con la pintura verde coloreamos las tiras de la cartulina, y pegamos la cinta dorada en el fondo de la cesta.
English:
Step: 3
- We proceed to glue the cardboard on the frame, leaving (2) strips upwards which would be the handle of the basket, then with the green paint we color the strips of cardboard, and glue the gold ribbon on the bottom of the basket.
Español:
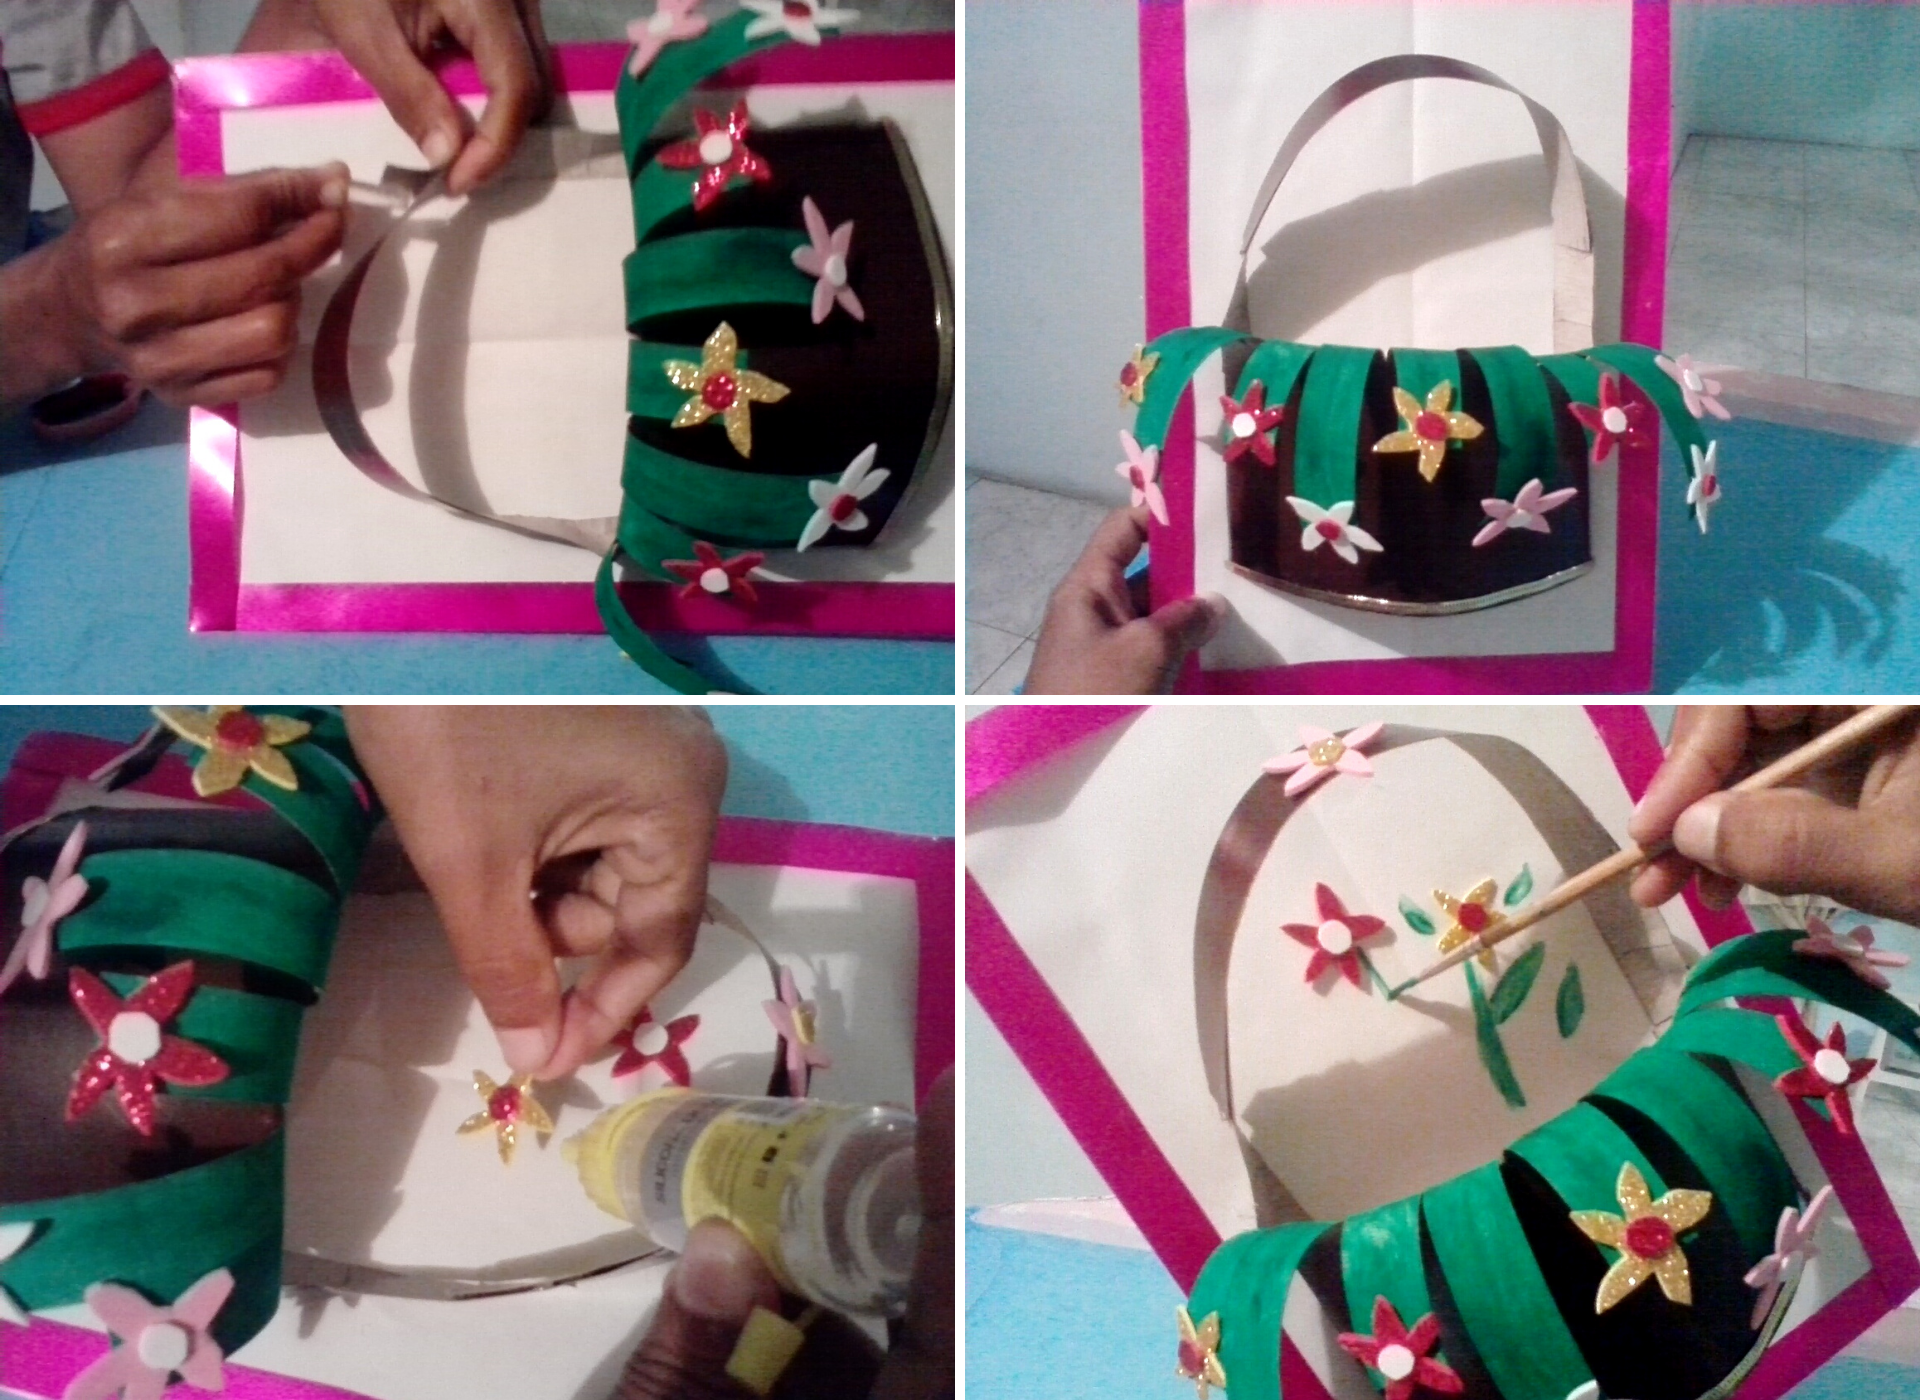
Paso: 4
- Dibujamos y recortamos (12) flores en el foami y la pegamos en cada punta de las tiras de la cesta.
English:
Step: 4
- We draw and cut out (12) flowers on the foami and glue them on each end of the strips of the basket.
Español:
Paso: 5
- Ahora pegamos el asa de la cesta, colocamos (1) flor en el asa y (2) en el cuadro quedando dentro de la cesta, le dibujamos varias hojas, para así terminar nuestro cuadro.
English:
Step: 5
- Now we glue the handle of the basket, we place (1) flower on the handle and (2) on the frame inside the basket, we draw several leaves, to finish our frame.
Aquí esta mi resultado final.
Here is my final result.
.png)
.png)
.png)
.png)
Todas las fotos son de mi autoria y editadas con Canva.
All the photos were taken by me and edited with Canva.

Hola Coromoto, Para que la entrada sea válida, recuerda que entre las reglas del concurso están invitar a un amigo y rebloggear el post del concurso. Me gustó la cestita, integraste varios materiales y texturas.:) Gracias por participar. Mucha suerte.
Hola @equipodelta, gracias por su comentario, de ahora en adelante lo tendré en cuenta, fue que se me olvido la invitación de un amigo, saludos y bendiciones.
Congratulations @coromoto20! You have completed the following achievement on the Hive blockchain and have been rewarded with new badge(s) :
Your next target is to reach 900 upvotes.
You can view your badges on your board and compare yourself to others in the Ranking
If you no longer want to receive notifications, reply to this comment with the word
STOPCheck out the last post from @hivebuzz: