
Hello my friends in the Hive DIY community!
Even though I joined some time ago, this is my second post in the community. This is due to the fact that I often remember to capture images of the results of the work done, forgetting about the initial steps.
I had a problem with the clothes dryer, which had a burning smell. I quickly removed it from the power supply and patiently waited until my next day off to start playing.
My assumption was that the resistance must have burned out, so I would disassemble and inspect it to check the feasibility of performing the replacement myself.
If access to the resistance was very difficult, I would send it to a specialized service. If I managed to reach the resistance, and could see the burn, I would order it online and make the exchange.
At the same time I intended to do an internal cleaning in order to extend the durability of my equipment, which was recommended on the internet and in the manual.
Necessary materials
To carry out this task at home, I needed the following tools:
Screwdrivers and Philiphs;
Screwdriver;
Vacuum Cleaner;
Tightening wrench, or fixed wrench.
Multimeter.
They are all my own, from my toolbox!
 |  |
|---|---|
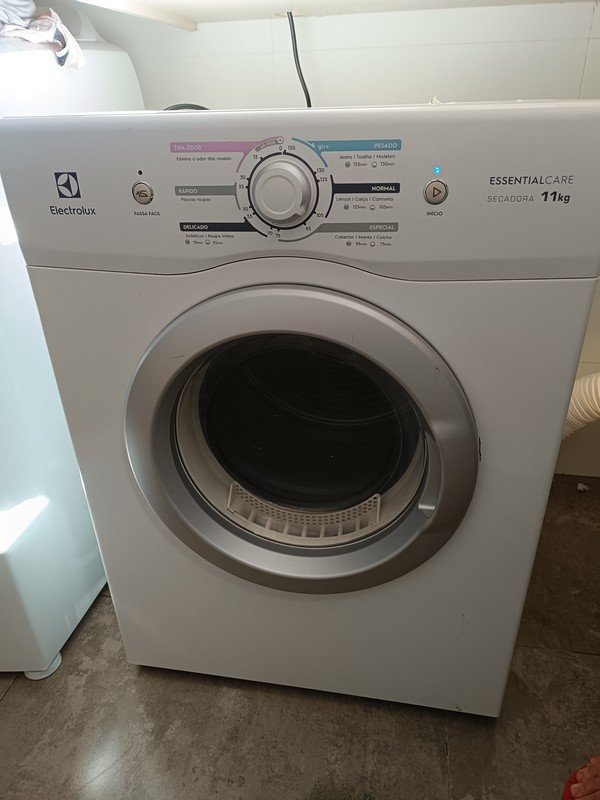
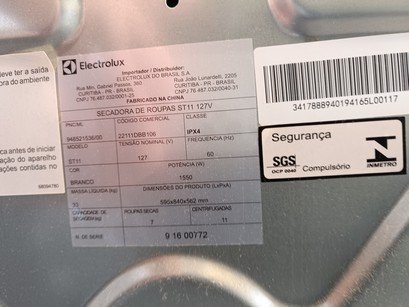
| Photo 1: Eletrolux clothes dryer | Photo 2: Identification label: 110 volts and 1000 watts of power |
Procedure
Photo 2 should have been of the entire top on the back of the machine, but I ended up wanting to focus on the label and thus lost the image of the side screws. In any case, removing the screws should not be a hindrance for anyone in this community!
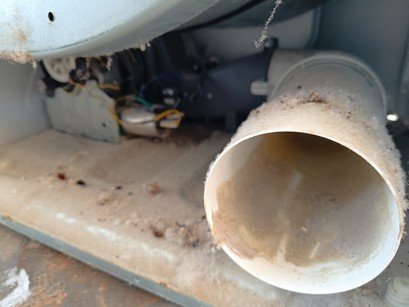
After removing the back cover, the signs of the need for cleaning were very clear!
 |  |  |
|---|---|---|
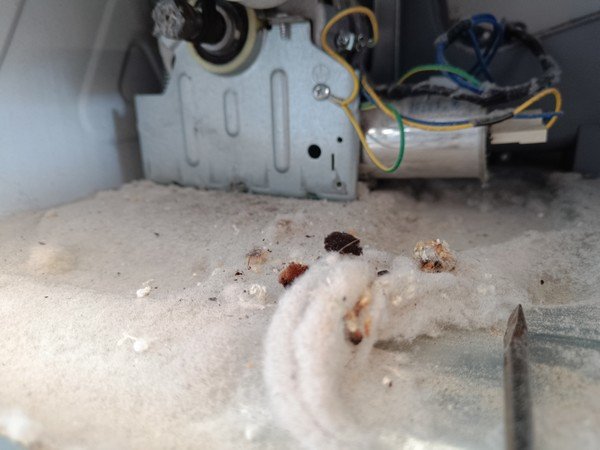
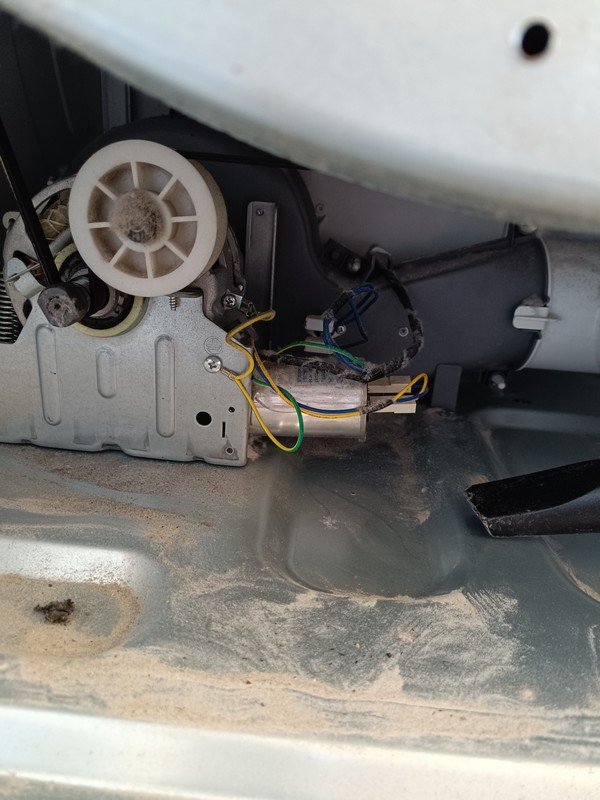
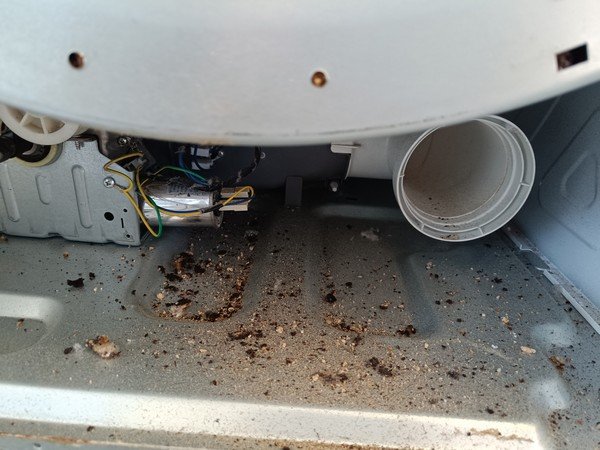
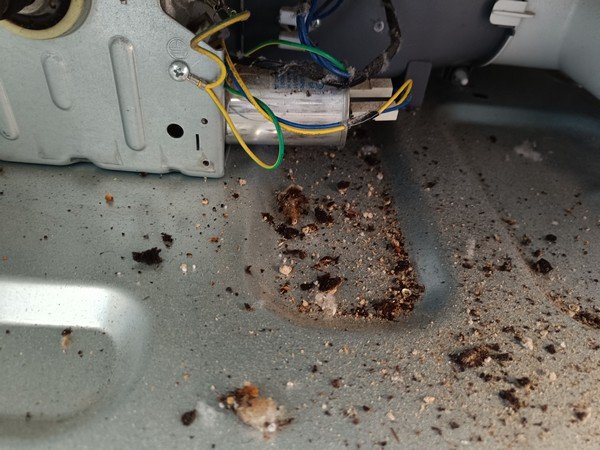
| Photo 3: Top section, electrical contacts | Photo 4: Lower section, exhaust pipe | Photo 5: Lower section, detail on the thickness of the accumulated residue |
To capture photo 5 I used my finger to gather the thick layer of residue deposited at the bottom of the machine. It has been in use for 4 years, according to my wife, without ever having been opened for maintenance or cleaning.
 |  |
|---|---|
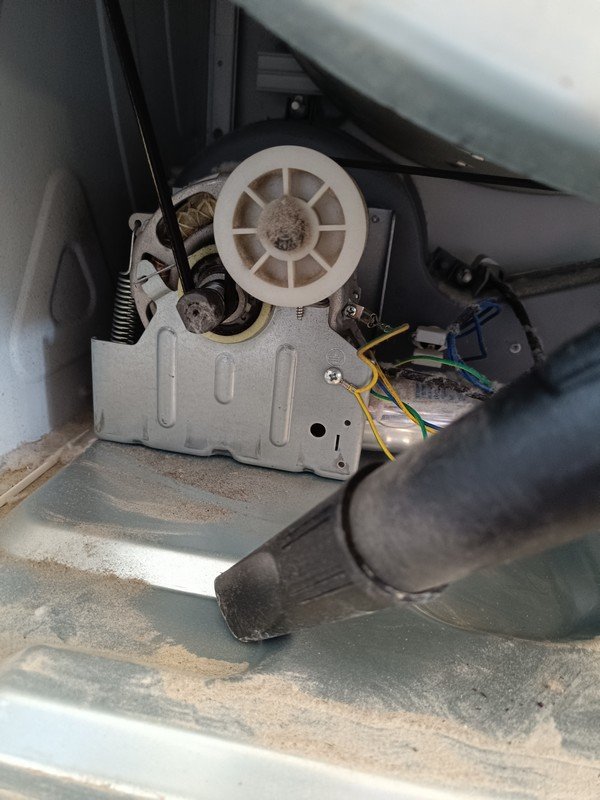
| Photo 6: Removing waste with your hands and a plastic bag | Photo 7: Vacuum cleaner finished cleaning. |
If you are observant, you will notice some dark spots in the residue from previous photos. Well, after finishing cleaning, I tested the machine with it open and noticed that more residue fell out. So, I lightly tapped the rotation drum and the result I got is as follows:
 |  |
|---|---|
| Photo 8: residue after testing with the machine still open | Photo 9: Residue after light knocks on the rotation drum |
This residue is nothing more than shredded and burned cotton. I immediately became optimistic thinking that the machine might not be burned out!
Using a wrench (in Brazil, "open-end wrench"), I loosened the screw on the central drum, gaining access to the resistance.
 |  |
|---|---|
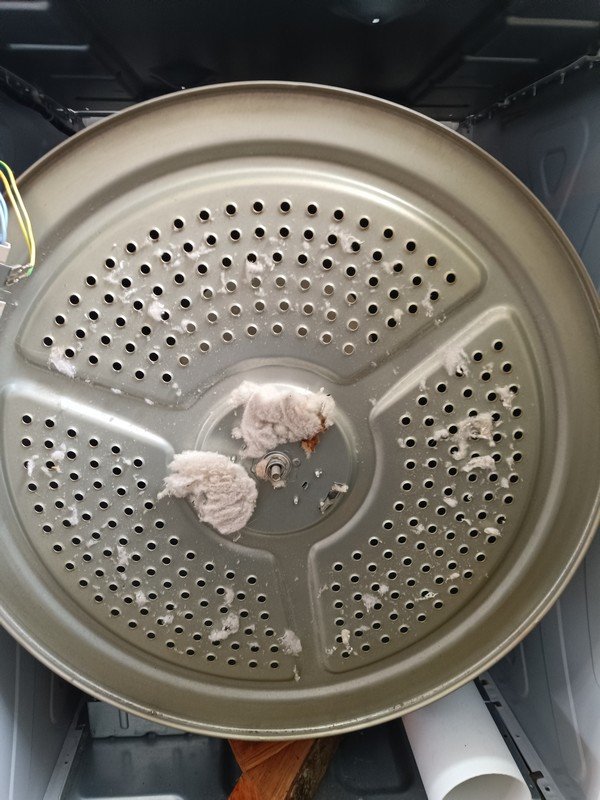
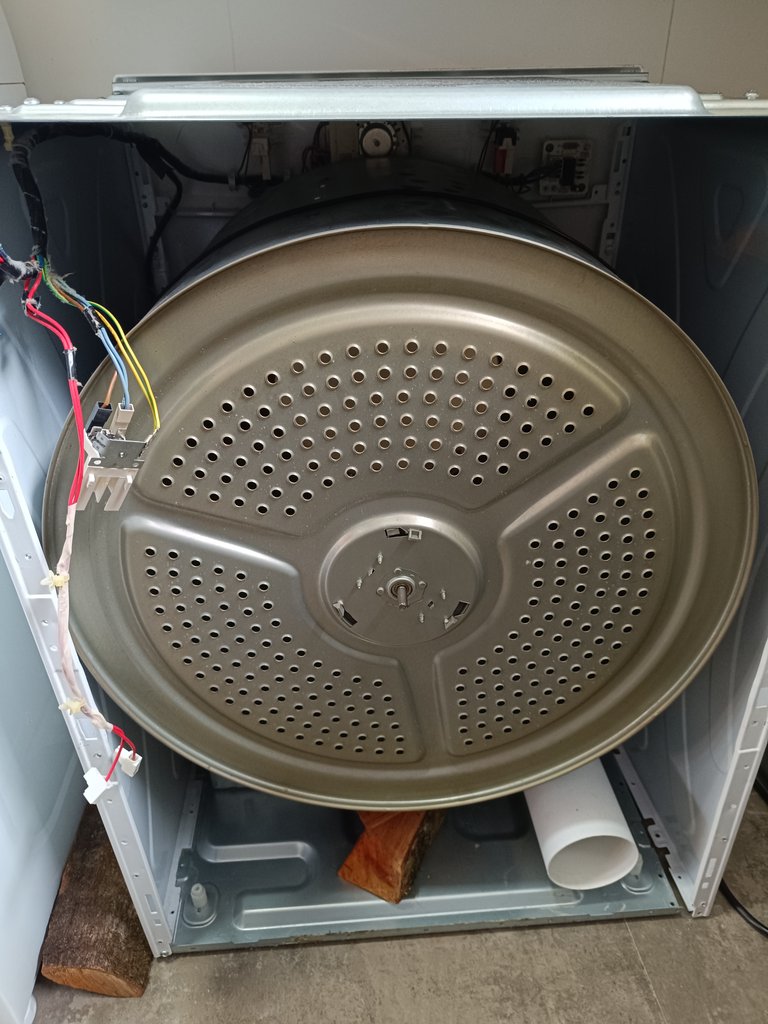
| Figure 10: Central drum: overview of the front | Figure 11: Central drum: back, electrical resistance in detail |
Great news! The resistance was in perfect condition! I removed the cotton stuck to it and I was sure that the cleaning procedure would be completed satisfactorily!
 |  |
|---|---|
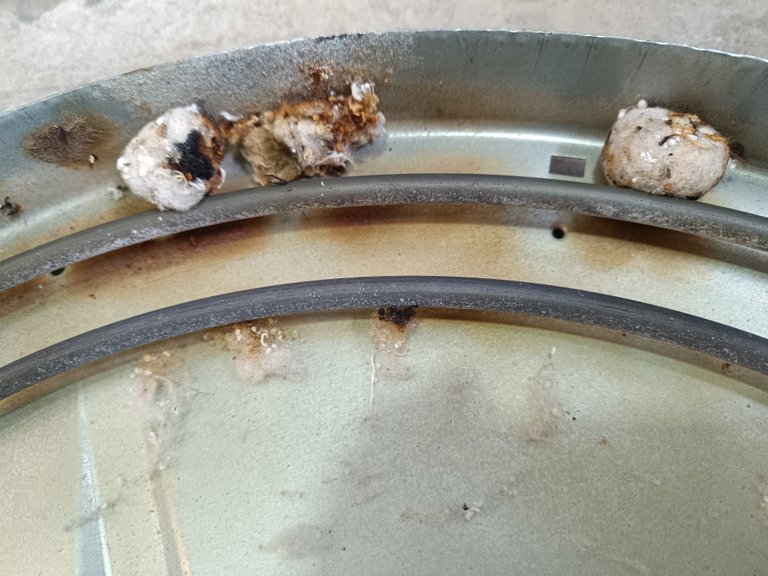
| Figure 12: front central drum, after cleaning | Figure 13: central drum back: clean resistance (the burn marks are from where the cotton residue was! |
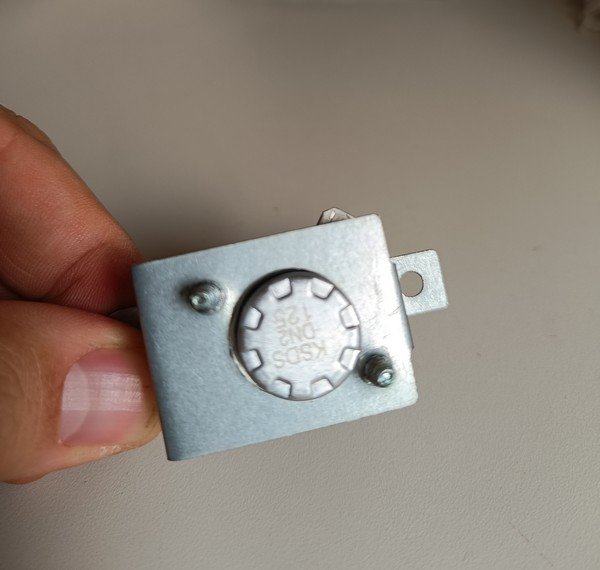
Before finishing, a test on the temperature sensor. This model has 2 temperature sensors, which openin the circuit, interrupting the heating of the resistance whenever the temperature deforms the internal plate of the sensor. In other words, it is a mechanical sensor.
 |  |
|---|---|
| Figure 14: Mechanical temperature sensor, with reset button | Figure 15: Temperature sensor specifications: KDS DN2 125, suggesting it is designed to trip at 125 degrees celsius |
I didn't take a photo of the test, but with the multimeter reading in continuity mode, it must be in continuity, that is, closed circuit. If it is open, the sensor is burned out and needs to be replaced.
Optional
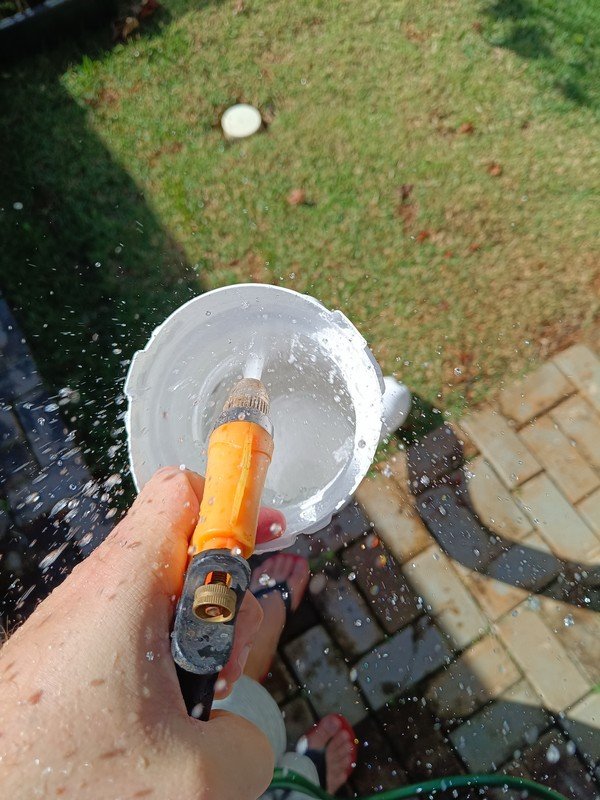
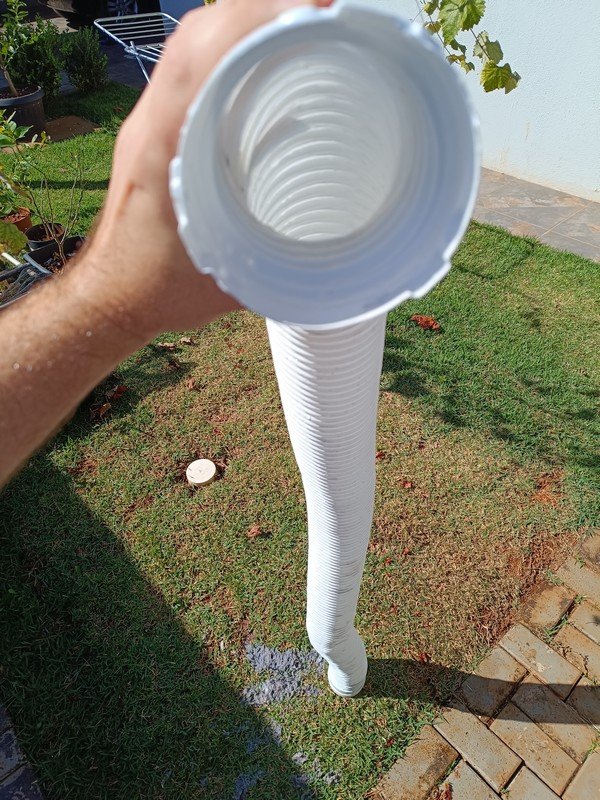
In order to keep everything practically new, I also cleaned the flexible exhaust pipe, using a water hose. It was more difficult than it seems as the residue accumulated in the corrugations of the tube. Look on the ground, in the grass, at the amount of material that came out of the tube!
 |  |
|---|---|
| Figure 16: Water jet cleans the exhaust pipe | Figure 17: Clean pipe, and ash residue on the grass |
Result
I was extremely pleased with the result. The cost of the service is estimated at R$250. I didn't have any expenses on materials! As a legacy of the pandemic, my wife even wiped it with 70% alcohol to “sanitize” the machine.
This type of task makes me very satisfied and makes us value the goods we have... it would be very easy to buy a new one! But what about the environment? Everything we discard as "garbage" ends up somewhere!
I hope you enjoyed and see you soon!

CrazyPhantomBR supports the PGM project
I invite you to learn about the PGM project.
The gaming community is looking for you!
The divider and logo/image above belong to the PGM project.

CrazyPhantomBR supports the FreeCompliments project
I invite you to get to know the FreeCompliments community.
The most welcoming community on Hive!
The logo belongs to CrazyPhantomBR.
The divider/image belongs to CrazyPhantomBR.

CrazyPhantomBR supports Brazilian curation @hive-br
Delegate your HP to the hive-br.voter account and earn HIVE and HBR daily!

Olá meus amigos da comunidade Hive DIY!
Apesar de ter entrado há algum tempo, este é meu segundo post na comunidade. Isso se deve ao fato de que geralmente me lembro de capturar imagens dos resultados do trabalho feito, esquecendo-me das etapas iniciais.
Tive um problema com a secadora de roupas, que apresentou cheiro de queimado. Rapidamente removi da energia elétrica e esperei pacientemente até meu próximo dia de folga para começar a brincadeira.
Minha suposição era que a resistência deveria ter queimado, então eu iria desmontar e inspecionar para verificar a viabilidade de eu mesmo realizar a troca.
Se o acesso à resistência fosse muito difícil, eu mandaria para um serviço especializado. Seu eu conseguisse alcançar a resistência, e pudesse constatar a queima, eu iria encomendar pela internet e fazer a troca.
Ao mesmo tempo eu pretendia fazer uma limpeza interna de forma a prolongar a durabilidade do meu equipamento, sendo que na internet e no manual da mesma era recomendado.
Materiais Necessários
Para realizar esta tarefa em casa, precisei das seguintes ferramentas:
Chaves de Fenda e Philiphs;
Parafusadeira;
Aspirador de pó;
Chave de aperto, ou chave fixa.
Multímetro.
Todas elas já são próprias, da minha caixa de ferramentas!
| |
|---|---|
| Foto 1: Secadora de roupas Eletrolux | Foto 2: Etiqueta de identificação: 110 volts e 1000 watts de potência |
Procedimento
A Foto 2 deveria ter sido de todo o tampo do verso da máquina, mas acabei querendo focar na etiqueta e assim perdi a imagem dos parafusos laterais. De qualquer forma, retirar os parafusos não deve ser um empecilho para ninguém que esteja nesta comunidade!
Após retirada a tampa traseira, os sinais de necessidade de limpeza estavam muito claros!
| | |
|---|---|---|
| Foto 3: Seção superior, contatos elétricos | Foto 4: Seção inferior, cano exaustor | Foto 5: Seção inferior, detalhe na espessura do resíduo acumulado |
Para capturar a foto 5 eu usei o dedo para juntar a camada espessa de resíduos depositados no fundo da máquina. São 4 anos de uso, segundo minha esposa, sem nunca ter sido aberta para manutenção nem limpeza.
| |
|---|---|
| Foto 6: Remoção dos resíduos com a mão e sacola plástica | Foto 7: Aspirador de pó finalizou a limpeza. |
Se você for observador, vai notar alguns pontos escuros nos resíduos das fotos anteriores. Pois bem, após finalizar a limpeza, efetuei um teste da máquina com ela aberta e pude notar que mais resíduos caíram. Então, dei leves batidas no tambor de rotação e o resultado que obtive está a seguir:
| |
|---|---|
| Foto 8: resíduos após teste com a máquina ainda aberta | Foto 9: Resíduos após leves batidas no tambor de rotação |
Esse resíduo nada mais é do que algodão desfiado e queimado. Imediatamente, fiquei otimista pensando que a máquina poderia não estar queimada!
Utilizando uma chave de aperto (no Brasil, "chave de boca"), soltei o parafuso do tambor central obtendo acesso à resistência.
| |
|---|---|
| Figura 10: Tambor central: visão geral da parte frontal | Figura 11: Tambor central: verso, resistência elétrica em detalhe |
Ótimas notícias! A resistência estava em perfeito estado! Removi o algodão preso à ela tive a certeza que o procedimento de limpeza estaria concluído de forma satisfatória!
| |
|---|---|
| Figura 12: tambor central frente, depois de limpo | Figura 13: tambor central verso: resistência limpa (as marcas de queimado são do local onde estava o resíduo de algodão! |
Antes de finalizar, um teste no sensor de temperatura. Este modelo conta com 2 sensores de temperatura, que abrem o circuito interrompendo o aquecimento da resistência sempre que a temperatura deformar a placa interna do sensor. Ou seja, é um sensor mecânico.
| |
|---|---|
| Figura 14: Sensor de temperatura mecânico, com botão para rearmar | Figura 15: Especificações do sensor de temperatura: KDS DN2 125, sugerindo que seja projetado para desarmar em 125 graus celsius |
Não fiz foto do teste, mas com o multímetro fazendo a leitura no modo continuidade é preciso estar com continuidade, ou seja, circuito fechado. Se estiver aberto o sensor está queimado e precisa ser substituído.
Opcional
De forma a deixar tudo praticamente novo, também limpei o cano exaustor flexível, utilizando uma mangueira de água. Foi mais difícil do que parece pois o resíduo se acumulava nas ondulações do tubo. Veja no chão, na grama, a quantidade de material que saiu do tubo!
| |
|---|---|
| Figura 16: Jato de água limpa a tubulação exaustora | Figura 17: Tubo limpo, e resíduo em cinza na grama |
Resultado
Fiquei extremamente satisfeito com o resultado. O custo do serviço é estimado em R$ 250. Não tive nenhum gasto com material! Como uma herança da pandemia, minha esposa ainda passou um pano com álcool 70º para "sanitizar" a máquina.
Esse tipo de tarefa me deixa muito satisfeito e faz com que a gente valorize os bens que possui... seria muito fácil comprar uma nova! Mas e o meio ambiente? Tudo que descartamos como "lixo" vai parar em algum lugar!
Espero que tenham gostado, e até a próxima!
CrazyPhantomBR apoia o projeto PGM
Te convido a conhecer o projeto PGM.
A comunidade gammer procura por você!
O divisor e logotipo / imagem acima pertencem ao projeto PGM.
CrazyPhantomBR apoia o projeto FreeCompliments
Te convido a conhecer a comunidade FreeCompliments.
A comunidade mais acolhedora da Hive!
O logotipo pertence à CrazyPhantomBR.
O divisor / imagem pertence à CrazyPhantomBR.
CrazyPhantomBR apoia a curadoria brasileira @hive-br
Delegate your HP to the hive-br.voter account and earn HIVE and HBR daily!
Obrigado por promover a comunidade Hive-BR em suas postagens.
Vamos seguir fortalecendo a Hive
View or trade
BEER.Hey @crazyphantombr, here is a little bit of
BEERfrom @pixresteemer for you. Enjoy it!Did you know that <a href='https://dcity.io/cityyou can use BEER at dCity game to buy cards to rule the world.
Congratulations @crazyphantombr! You have completed the following achievement on the Hive blockchain And have been rewarded with New badge(s)
Your next target is to reach 11000 upvotes.
You can view your badges on your board and compare yourself to others in the Ranking
If you no longer want to receive notifications, reply to this comment with the word
STOPTo support your work, I also upvoted your post!
Your post was manually curated by @KaibaGT.
Delegate your HP to the hive-br.voter account and earn Hive daily!
🔹 Follow our Curation Trail and don't miss voting! 🔹
Yay! 🤗
Your content has been boosted with Ecency Points, by @crazyphantombr.
Use Ecency daily to boost your growth on platform!
Support Ecency
Vote for new Proposal
Delegate HP and earn more
thank you!
!LUV
@crazyphantombr sent you LUV 🙂 (1/5)
Made with LUV by crrdlx
!HBITS
!DHEDGE
This post has been selected for upvote from our token accounts by @crazyphantombr! Based on your tags you received upvotes from the following account(s):
- @dhedge.bonus
- @dhedge.bee
- @dhedge.pob
- @dhedge.alive
@crazyphantombr has 1 vote calls left today.
Hold 10 or more DHEDGE to unlock daily dividends. Hold 100 or more DHEDGE to unlock thread votes. Calling in our curation accounts currently has a minimum holding requirement of 100 DHEDGE. The more DHEDGE you hold, the higher upvote you can call in. Buy DHEDGE on Tribaldex or earn some daily by joining one of our many delegation pools at app.dhedge.cc.