Buen día, amigos creativos que formamos esta apreciada comunidad Hivediy, espero estén muy bien que es lo más importante, reciban un fuerte abrazo y Dios los bendigan a todos.
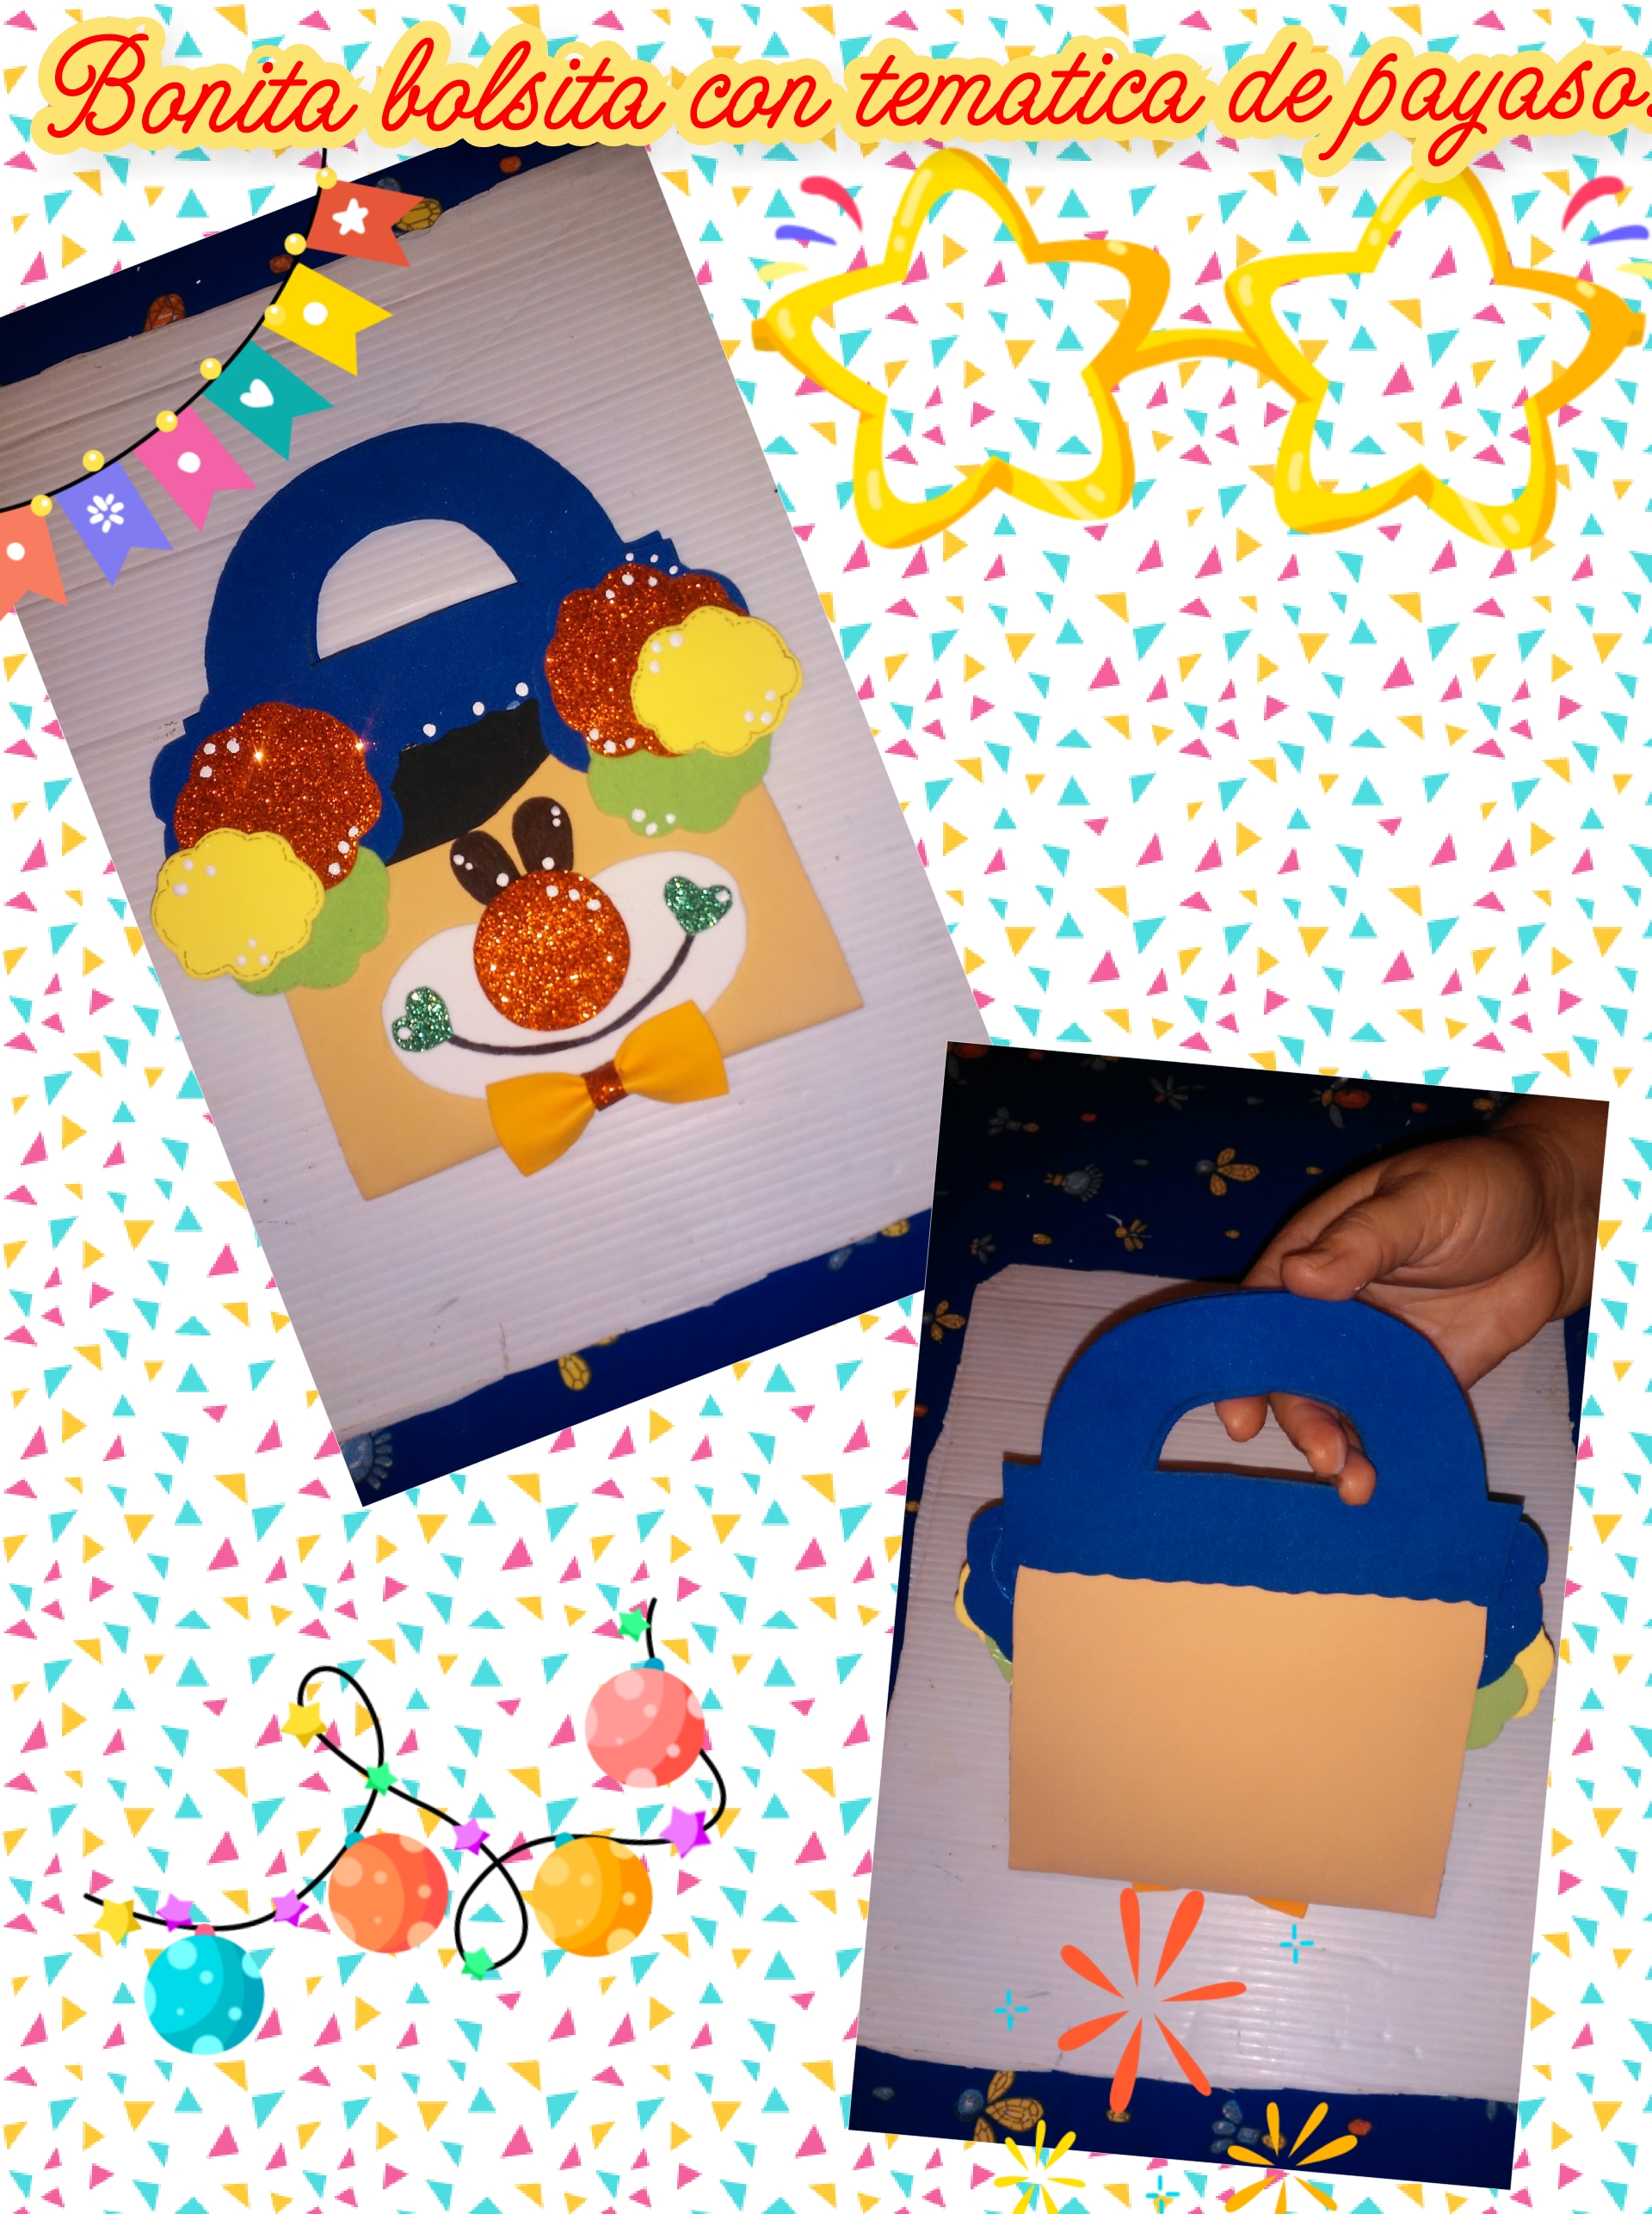
Como siempre hoy les traigo un divertido tutorial, hoy se trata de mostrarle como hacer una bolsita de foami con temática de payaso, ideal para guardar lo que ustedes deseen y también lo pueden utilizar como dulcero para regalar en las fiestas infantiles, además que está elaborada con materiales fáciles de conseguir y muy económicos, esta bolsita está muy bien diseñada más que todos para los pequeños de la casa, para que ellos puedan guardar lo que ellos deseen. Y ahora manos a la obra, vamos a comenzar con el paso a paso seguro, se van a divertir tanto como yo.
Good morning, creative friends who make up this appreciated Hivediy community, I hope you are very well, which is the most important thing, receive a big hug and God bless you all.
As always today I bring you a fun tutorial, today I am going to show you how to make a clown-themed foami bag, ideal to store what you want and you can also use it as a candy box to give away at children's parties, besides it is elaborate With materials that are easy to get and very cheap, this bag is very well designed more than anything else for the little ones in the house, so that they can store whatever they want. And now let's get to work, we are going to start with the safe step by step, you are going to have as much fun as me.
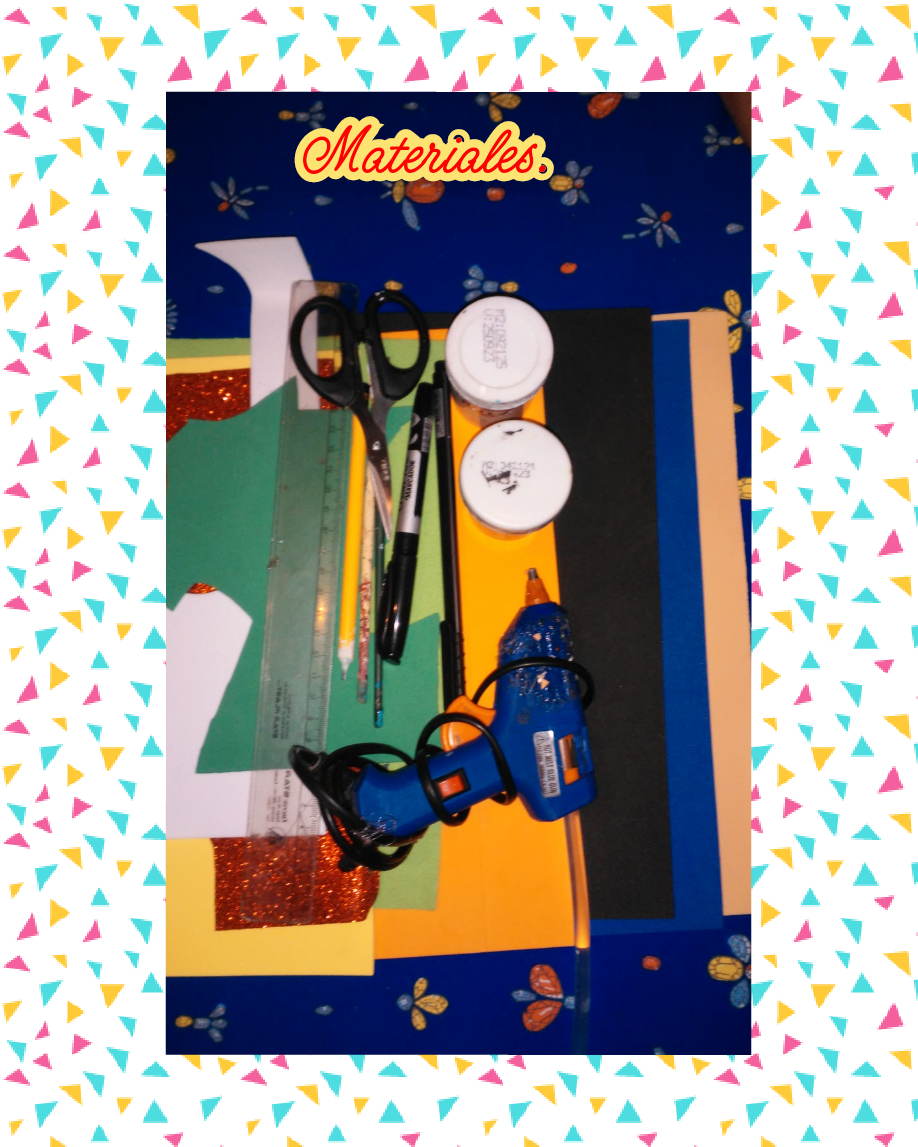
Para elaborar esta bonita bolsita con temática de payaso, vamos a utilizar los siguientes materiales.
*Foamis de varios colores y diferentes texturas.
*1 regla métrica.
*Marcadores punta fina y gruesa.
*1 tijera.
*Pinturas al frío.
*Pistola de silicona caliente.
To make this beautiful clown-themed bag, we are going to use the following materials.
*Foams of various colors and different textures.
*1 metric ruler.
*Fine and thick tip pens.
*1 scissors.
*Cold paints.
*Hot glue gun.
Let's start with the step by step to make this cute clown themed bag.
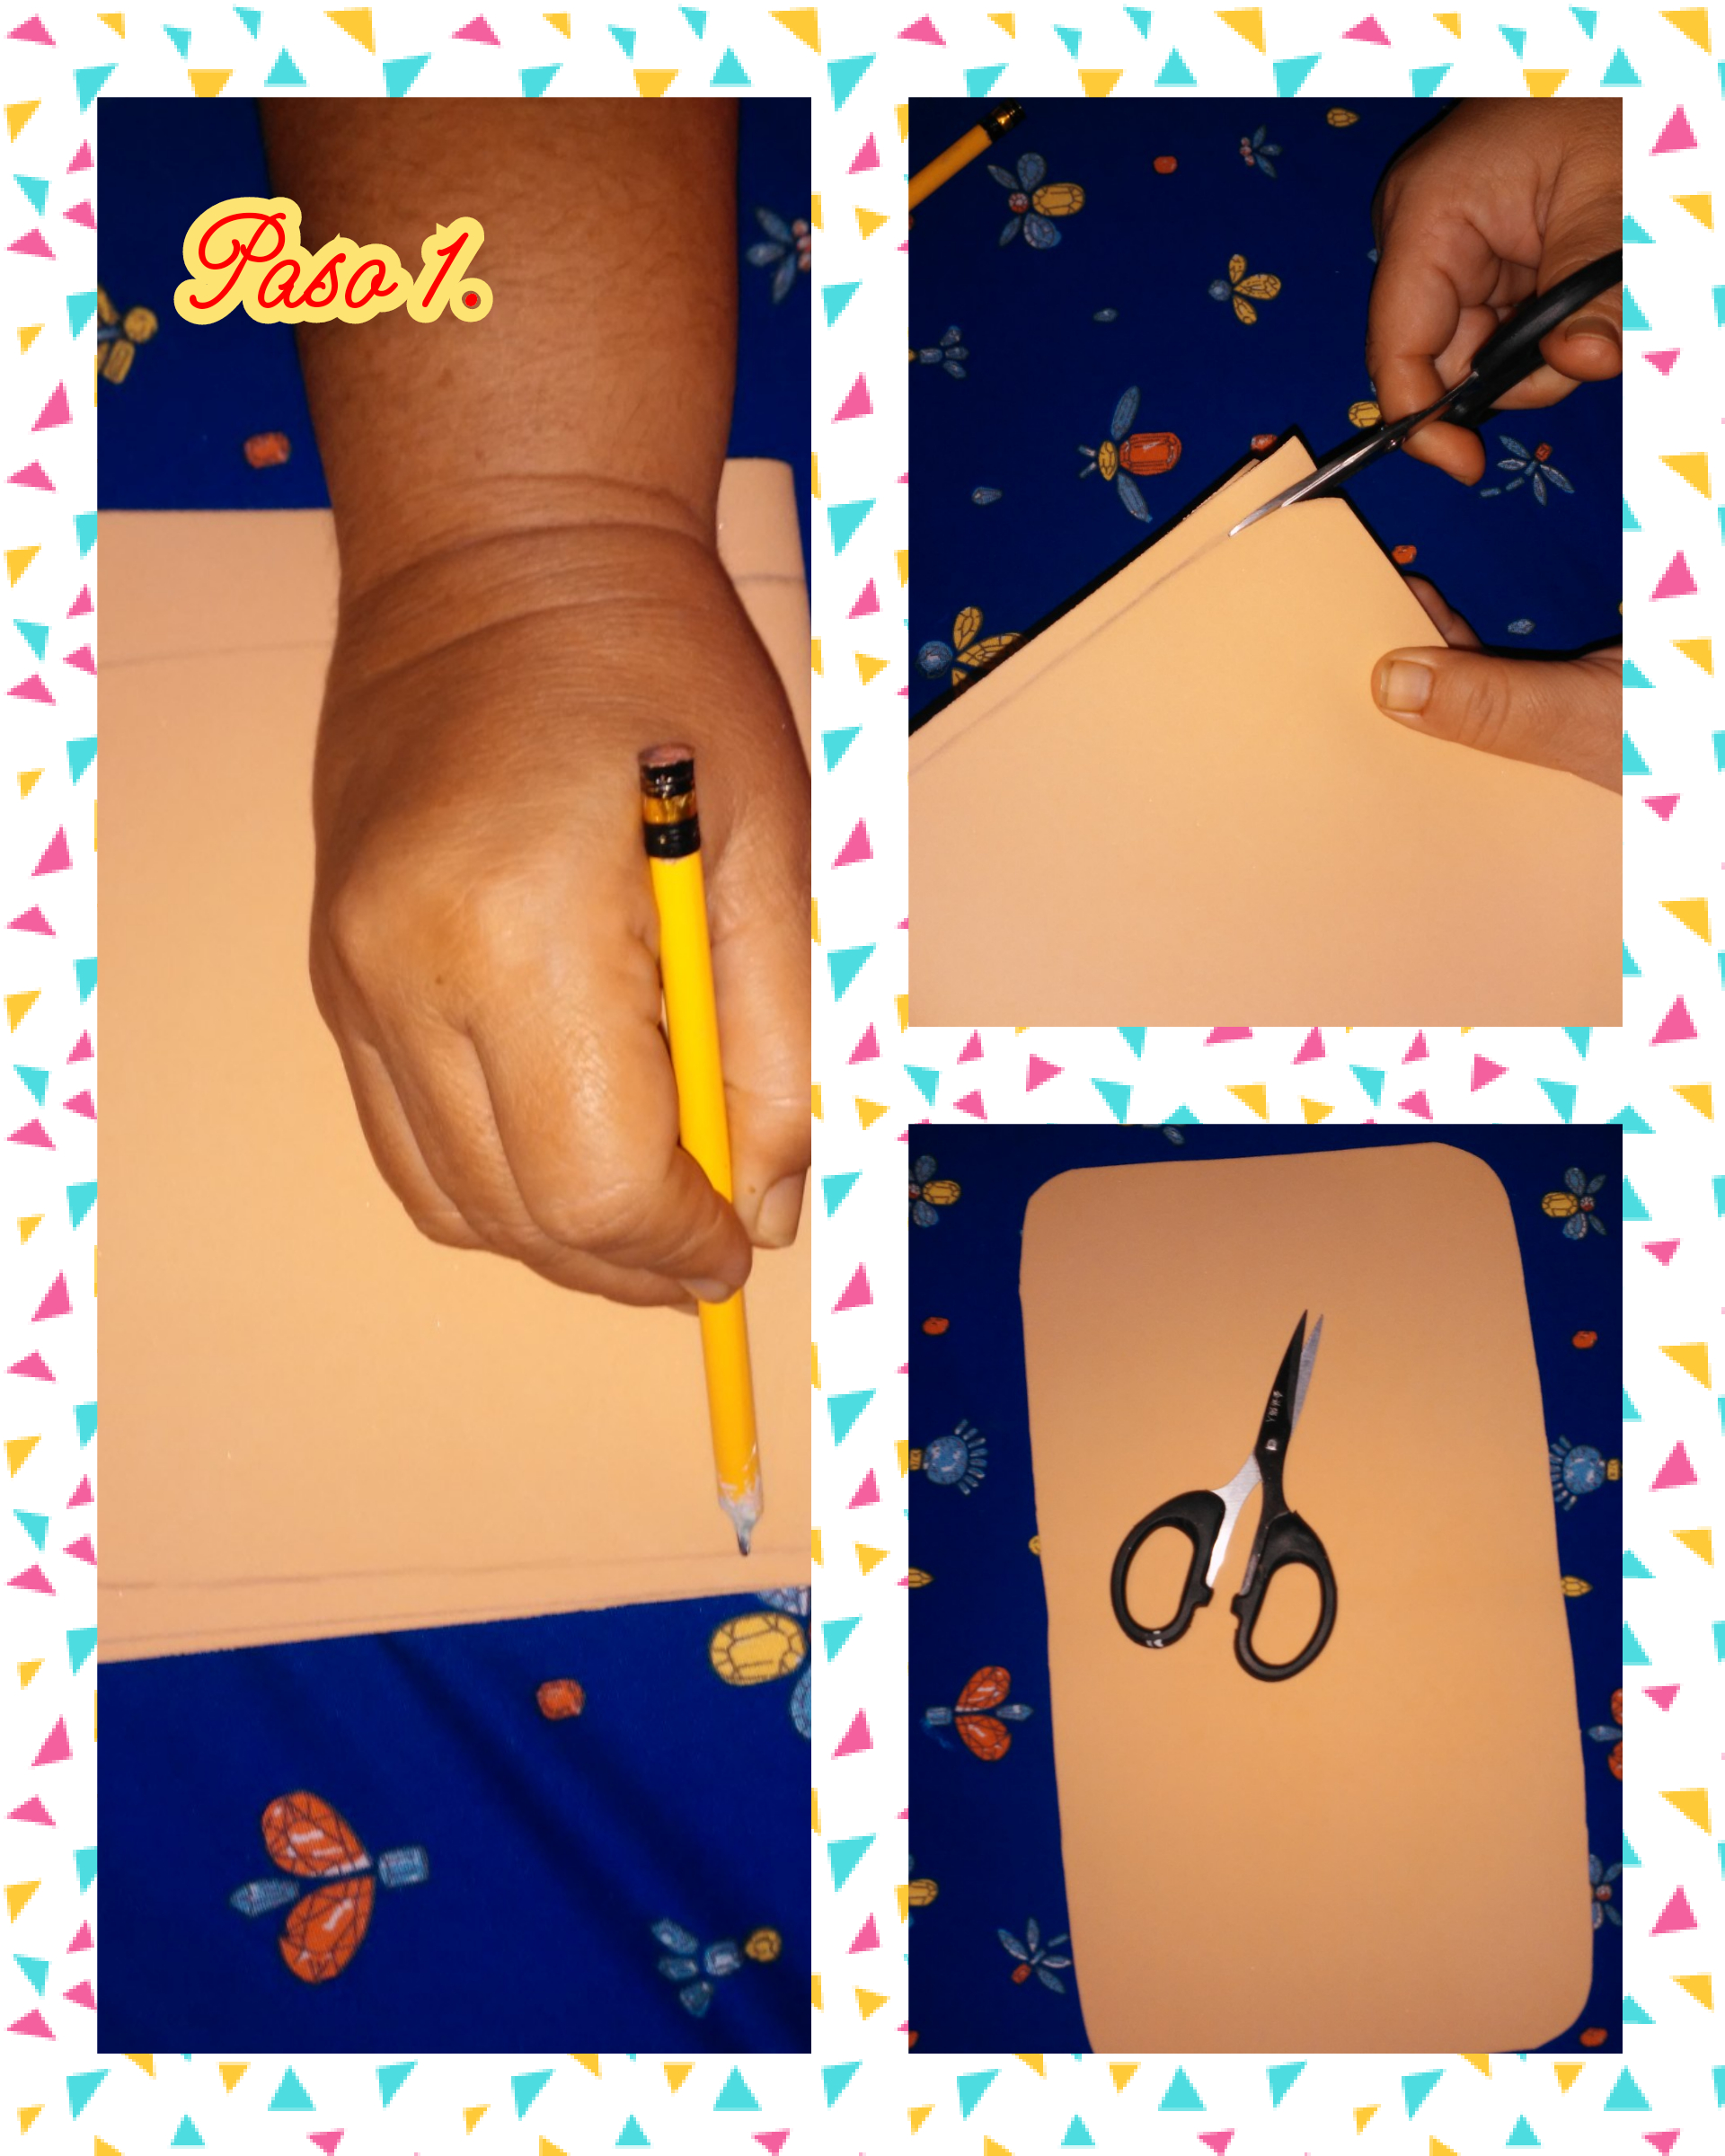
Step 1. To start making this bag, the first thing we are going to do is take a skin-colored foami with a soft texture, we mark the measurements of 17 cm wide by 30 cm long and then, with the help of scissors, we cut it and at the ends we cut it round, see the images.
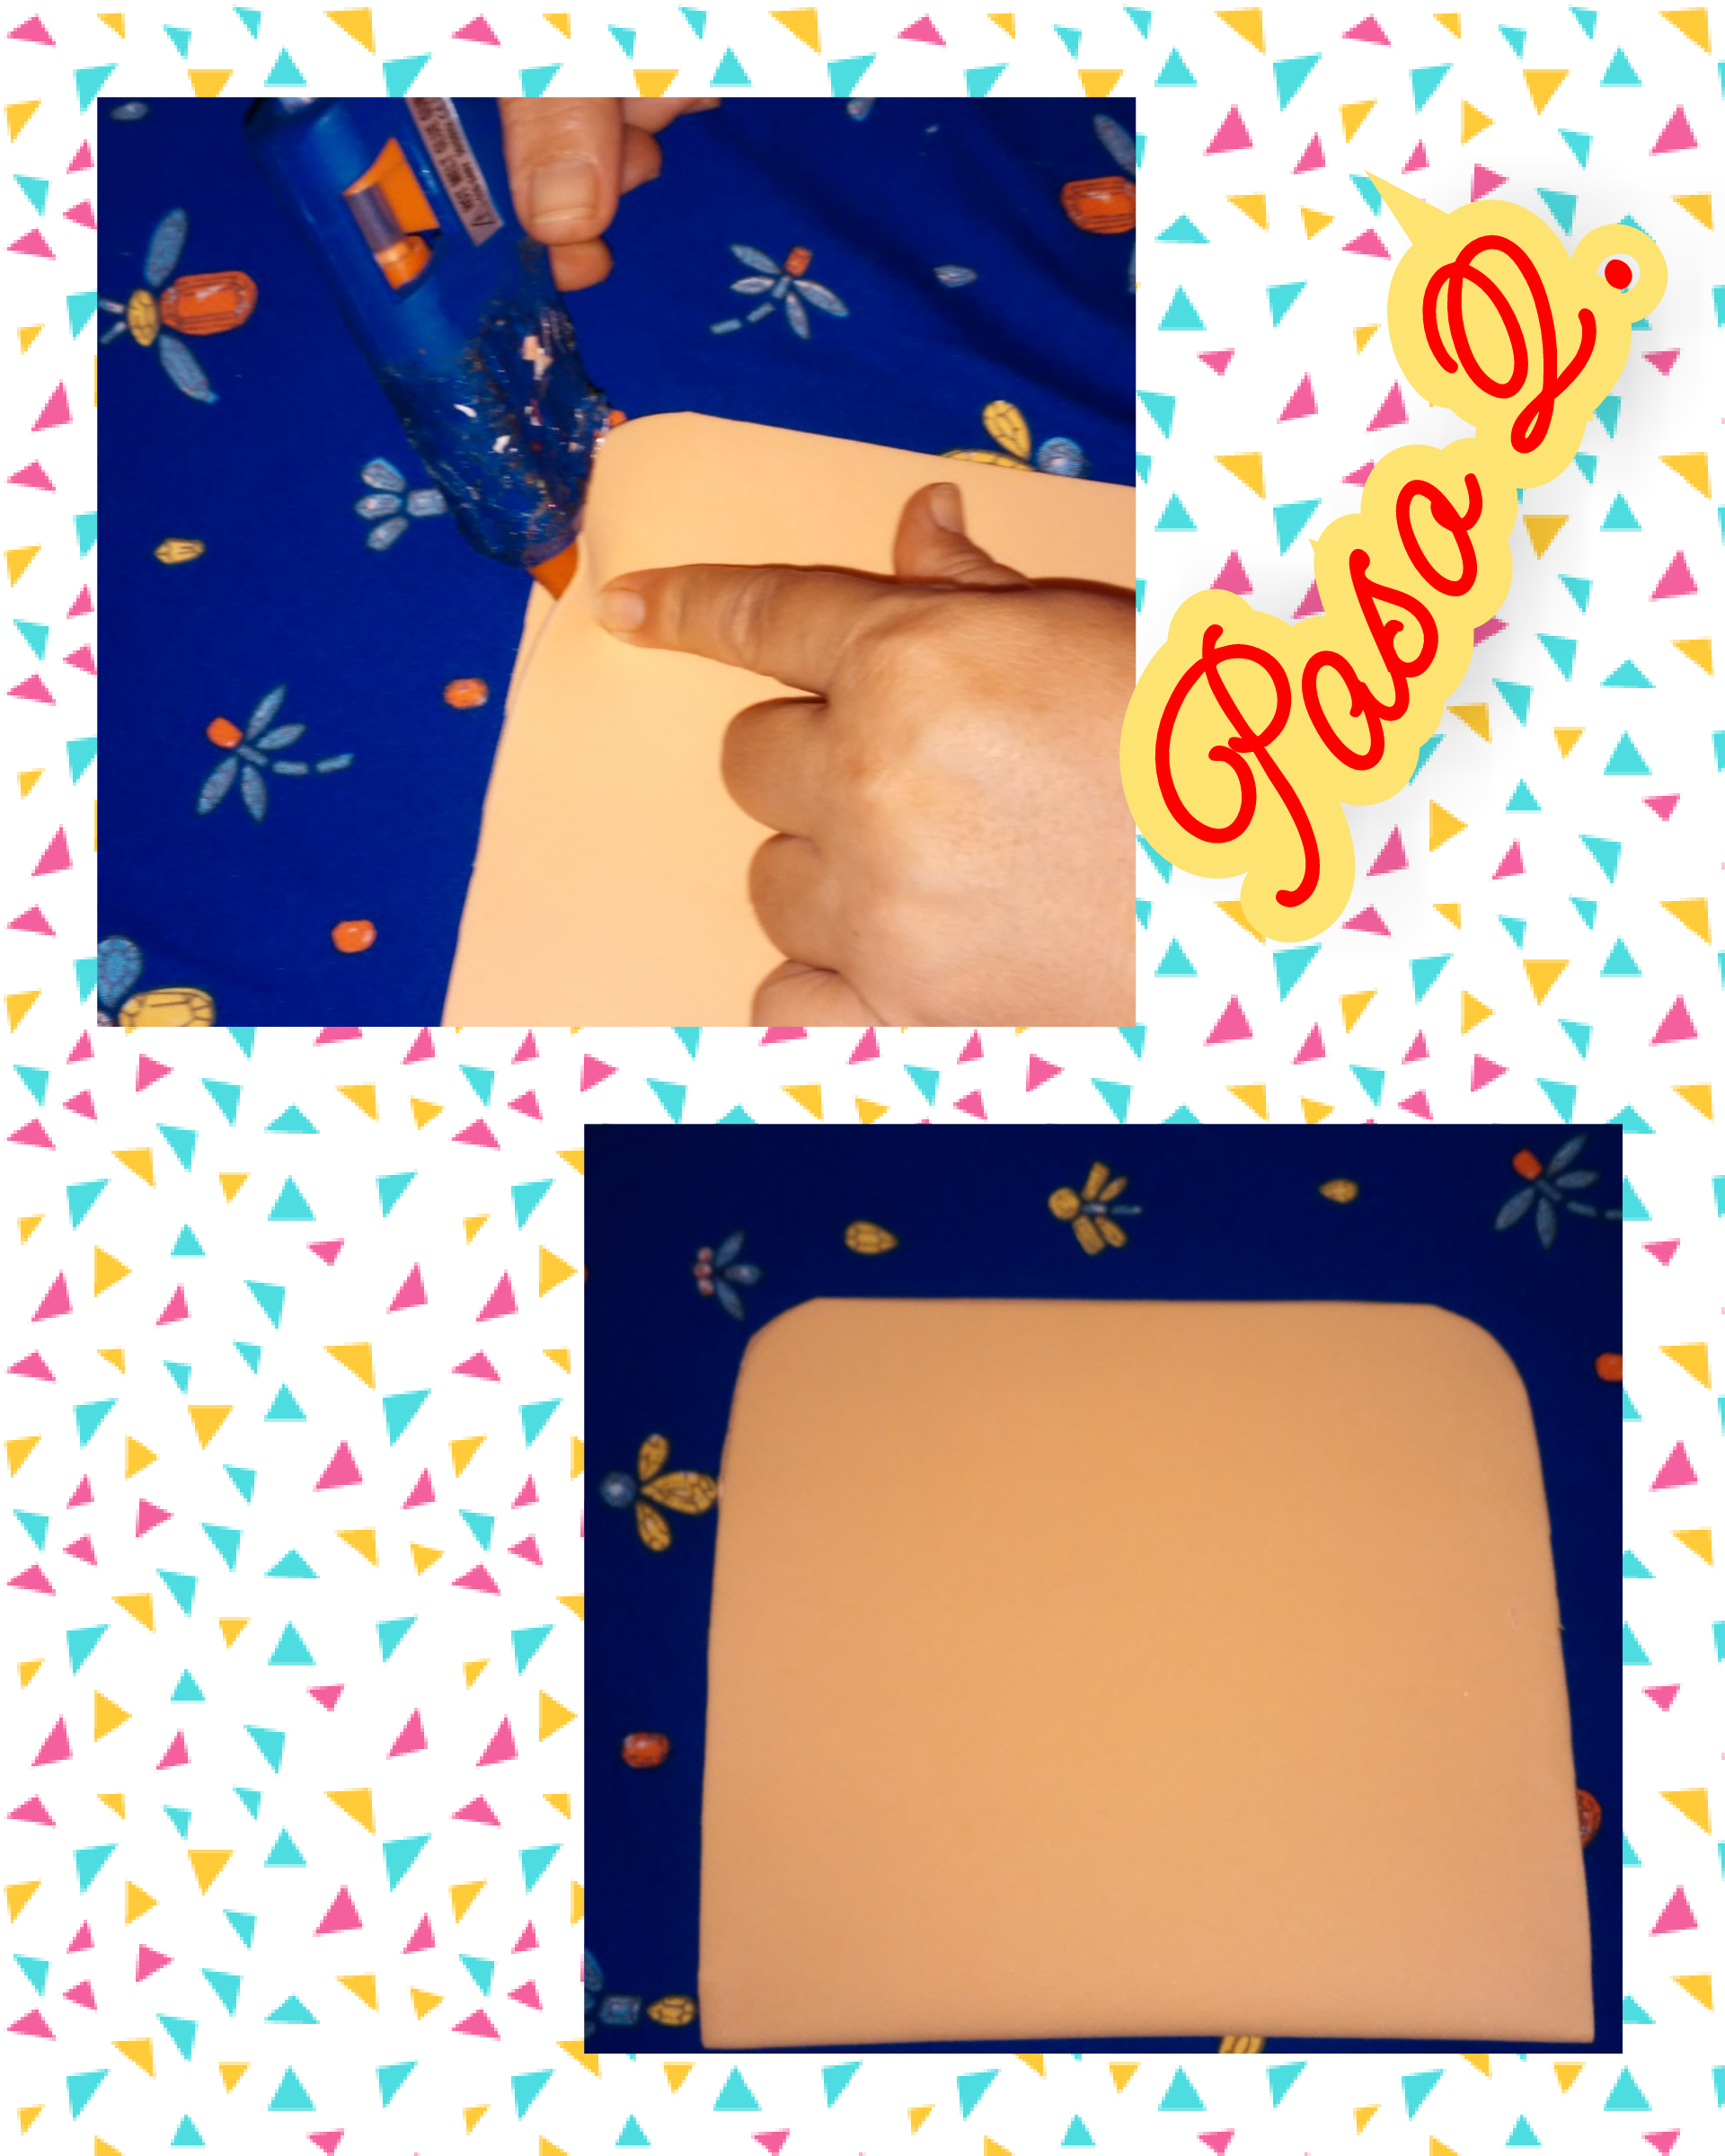
Step 2. After cutting out the skin-colored piece, we are going to take the hot glue gun and start gluing in this way, we fold the already cut foam in half and glue the sides, leaving it in the shape of a square, this piece would be the face of the clown.
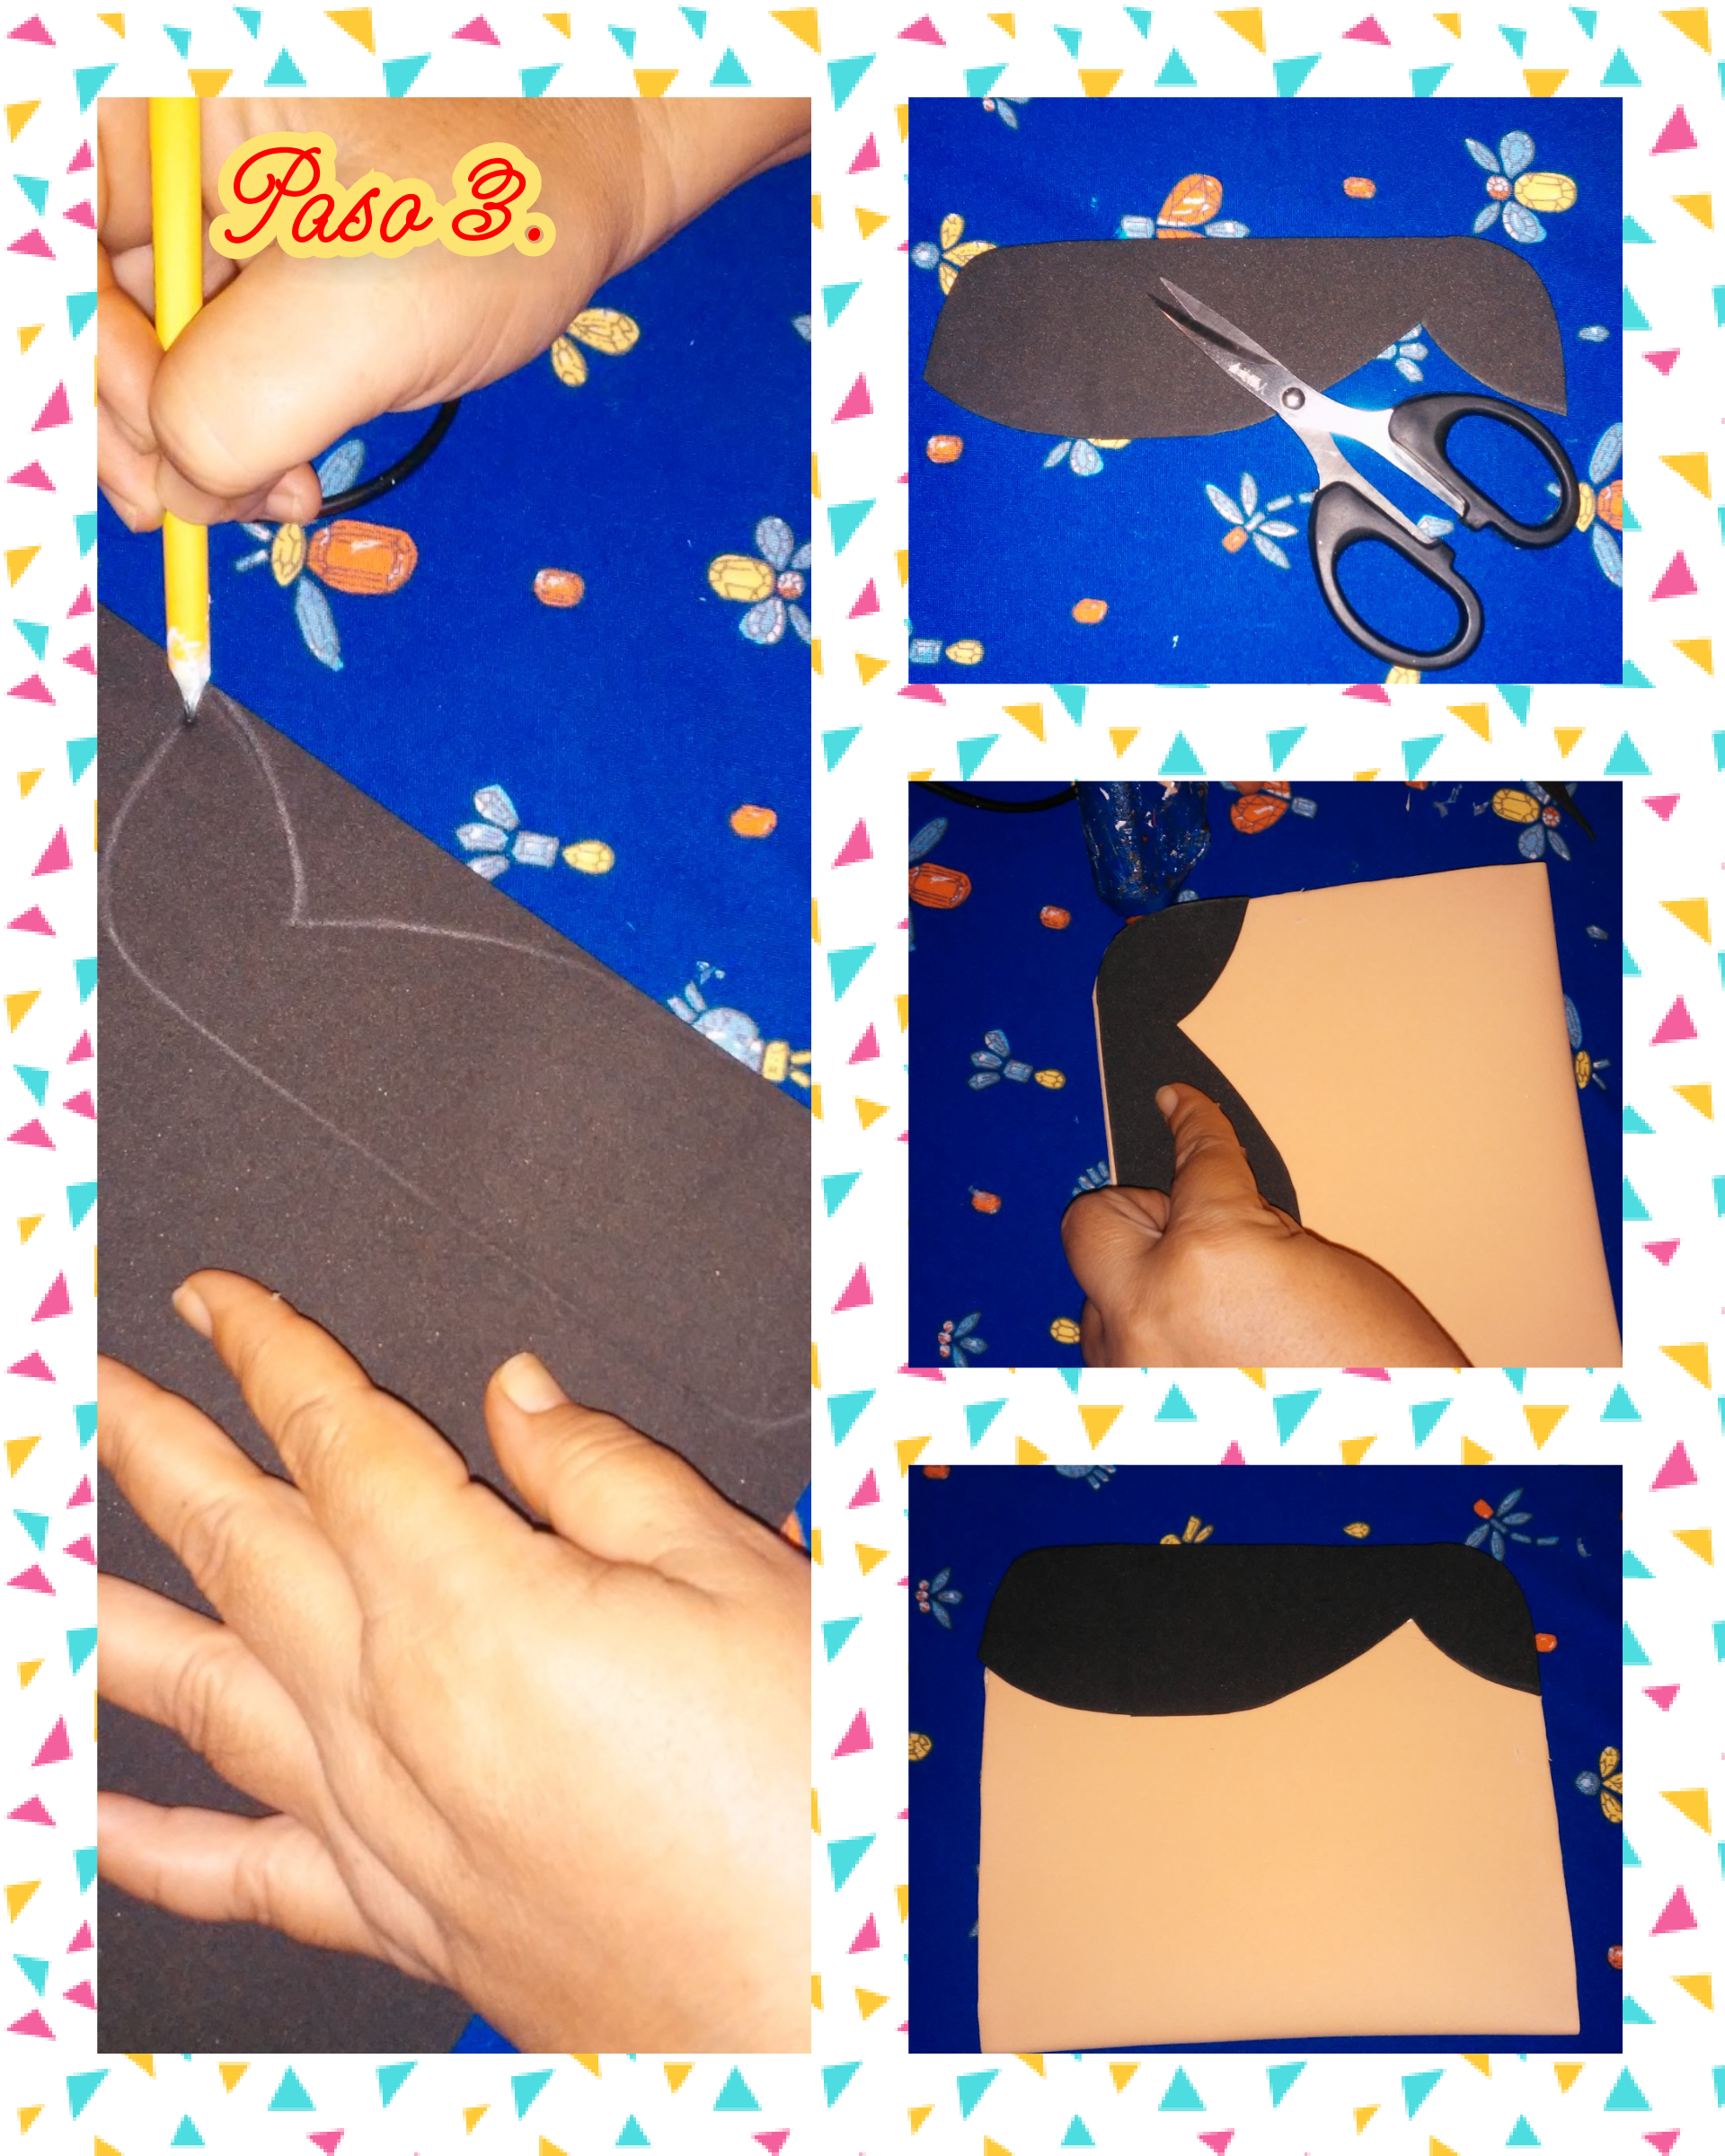
Step 3. After we have the piece that would be the face of the clown now, we take black foami and mark to get the shape of the hair, like the front part, cut it out and then glue it onto the piece that would be the face of the clown. clown, see the images.
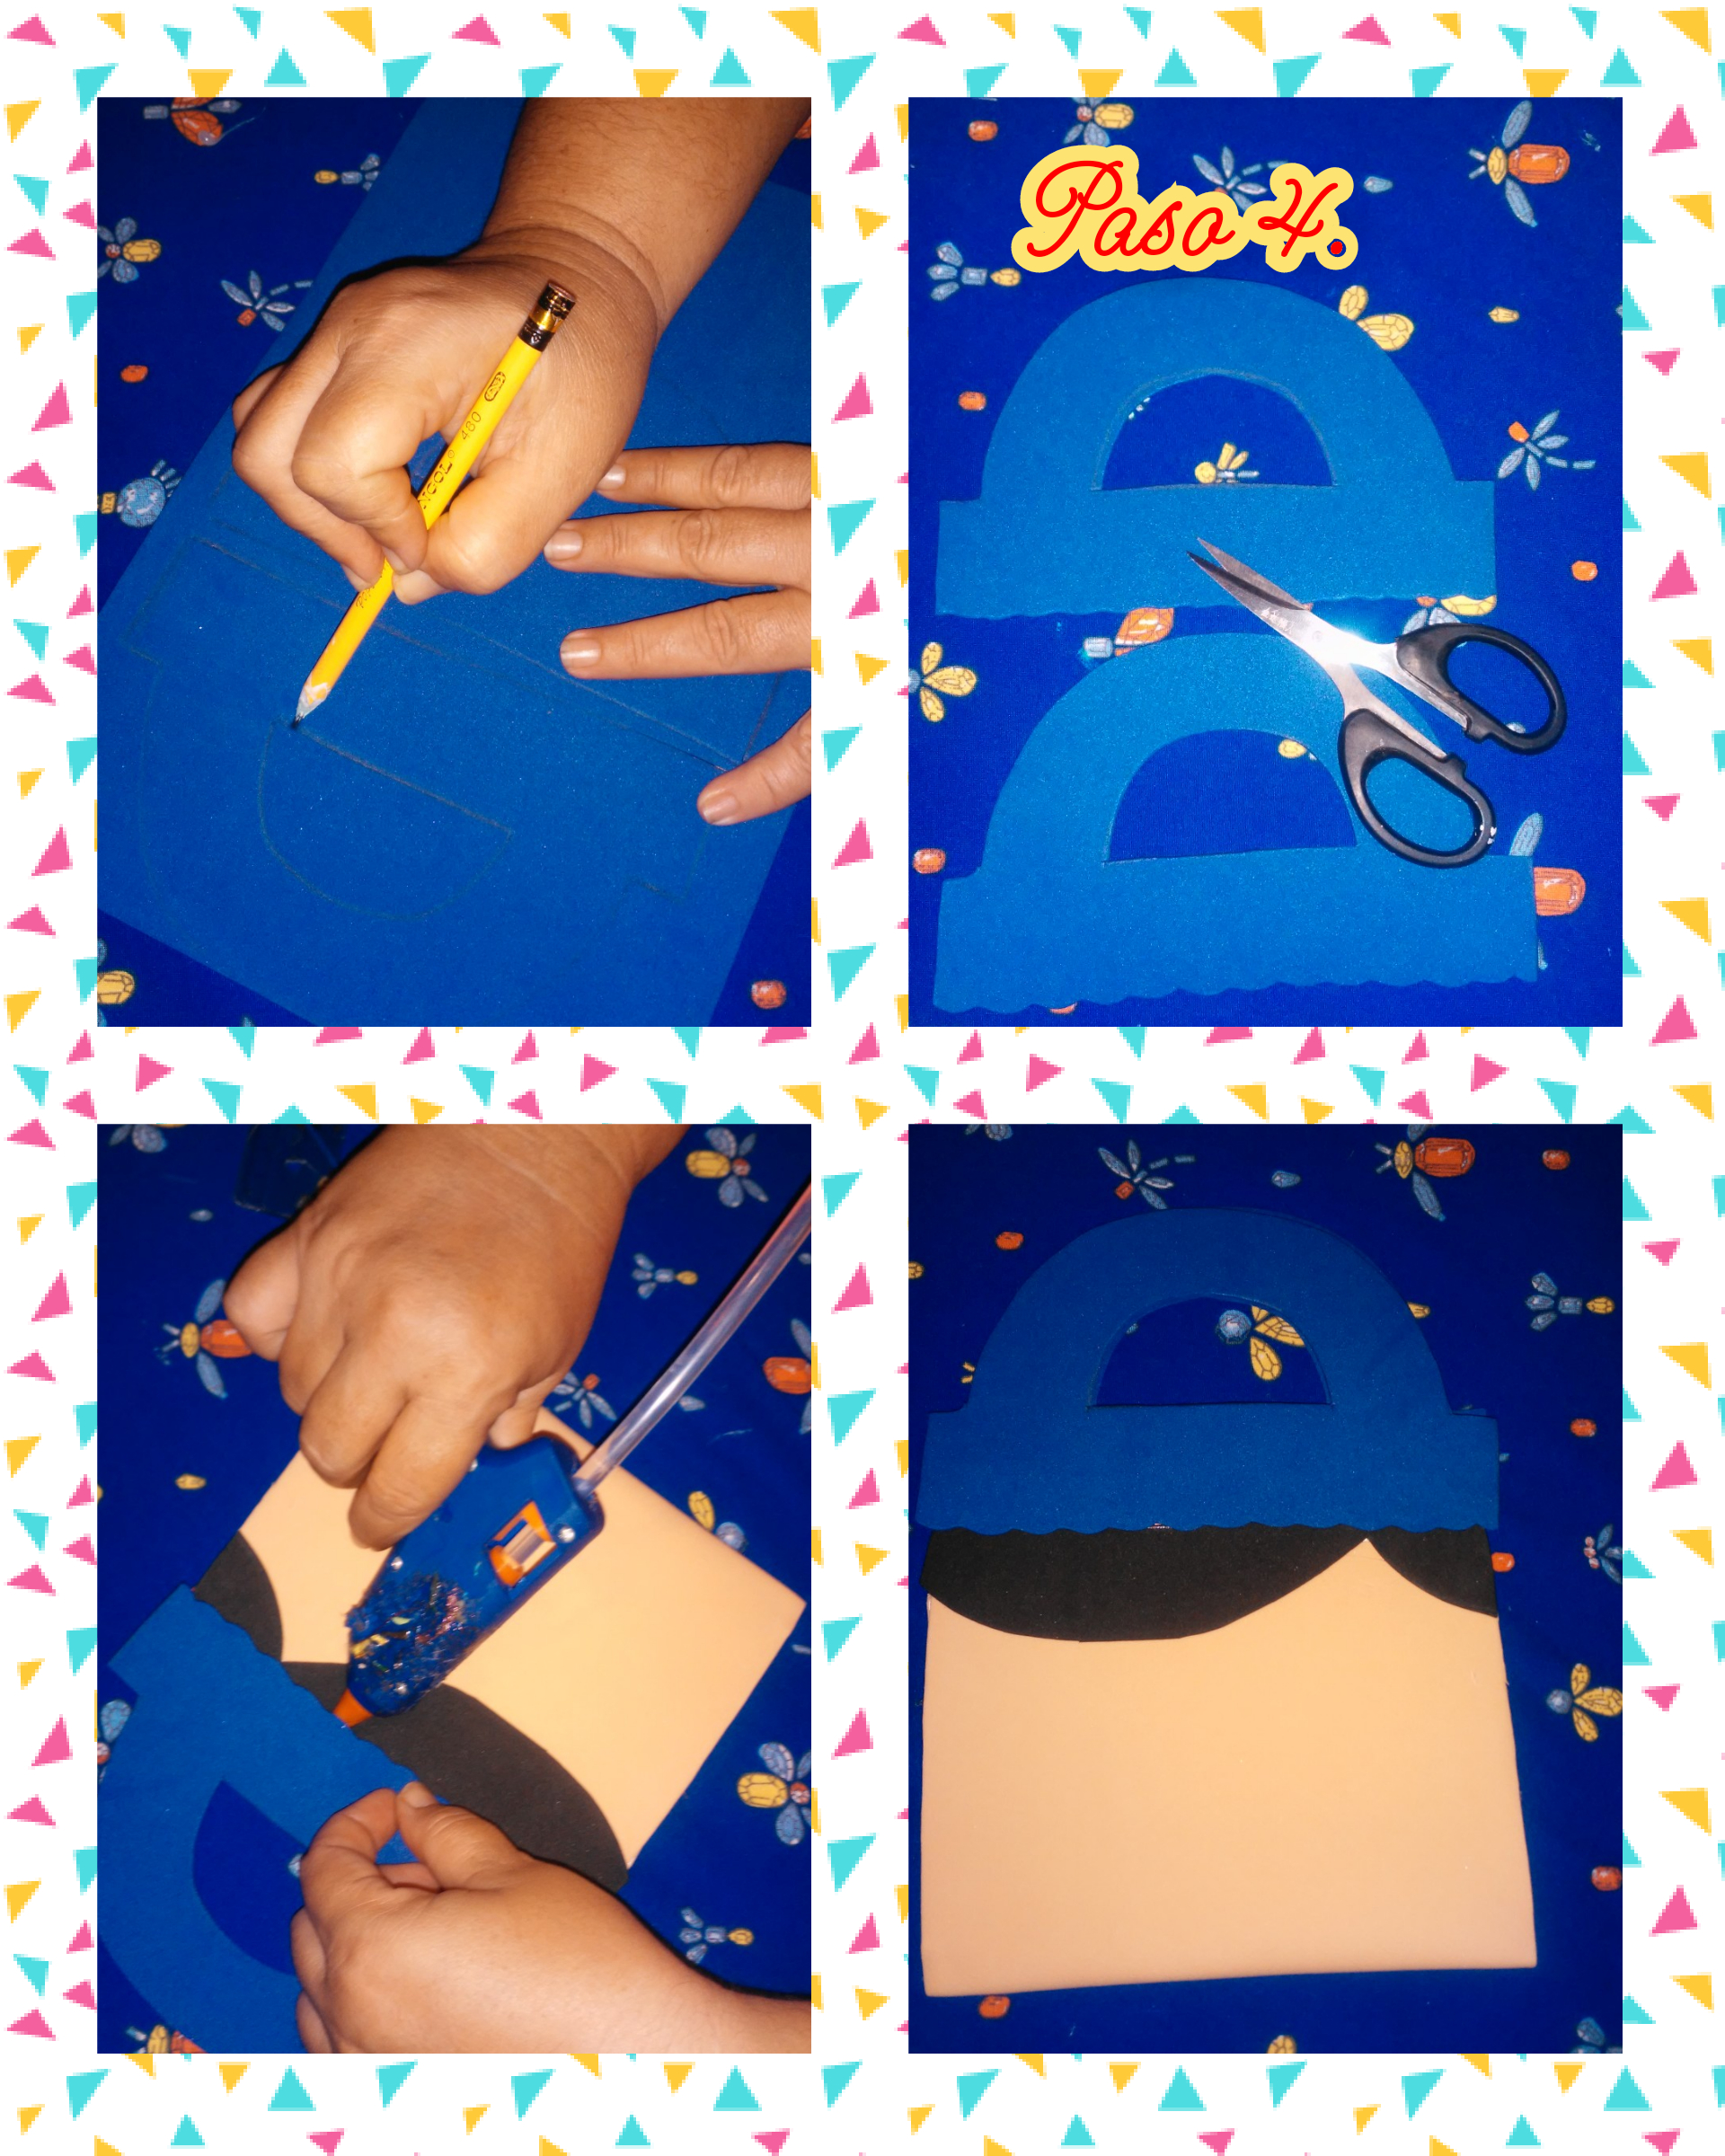
Step 4. Now in this step we are going to take blue foam with a smooth texture, we mark the handles and then we cut them out and with the hot glue gun we glue it on top of the piece that would be the clown's face and it looks like this, look at the pictures.
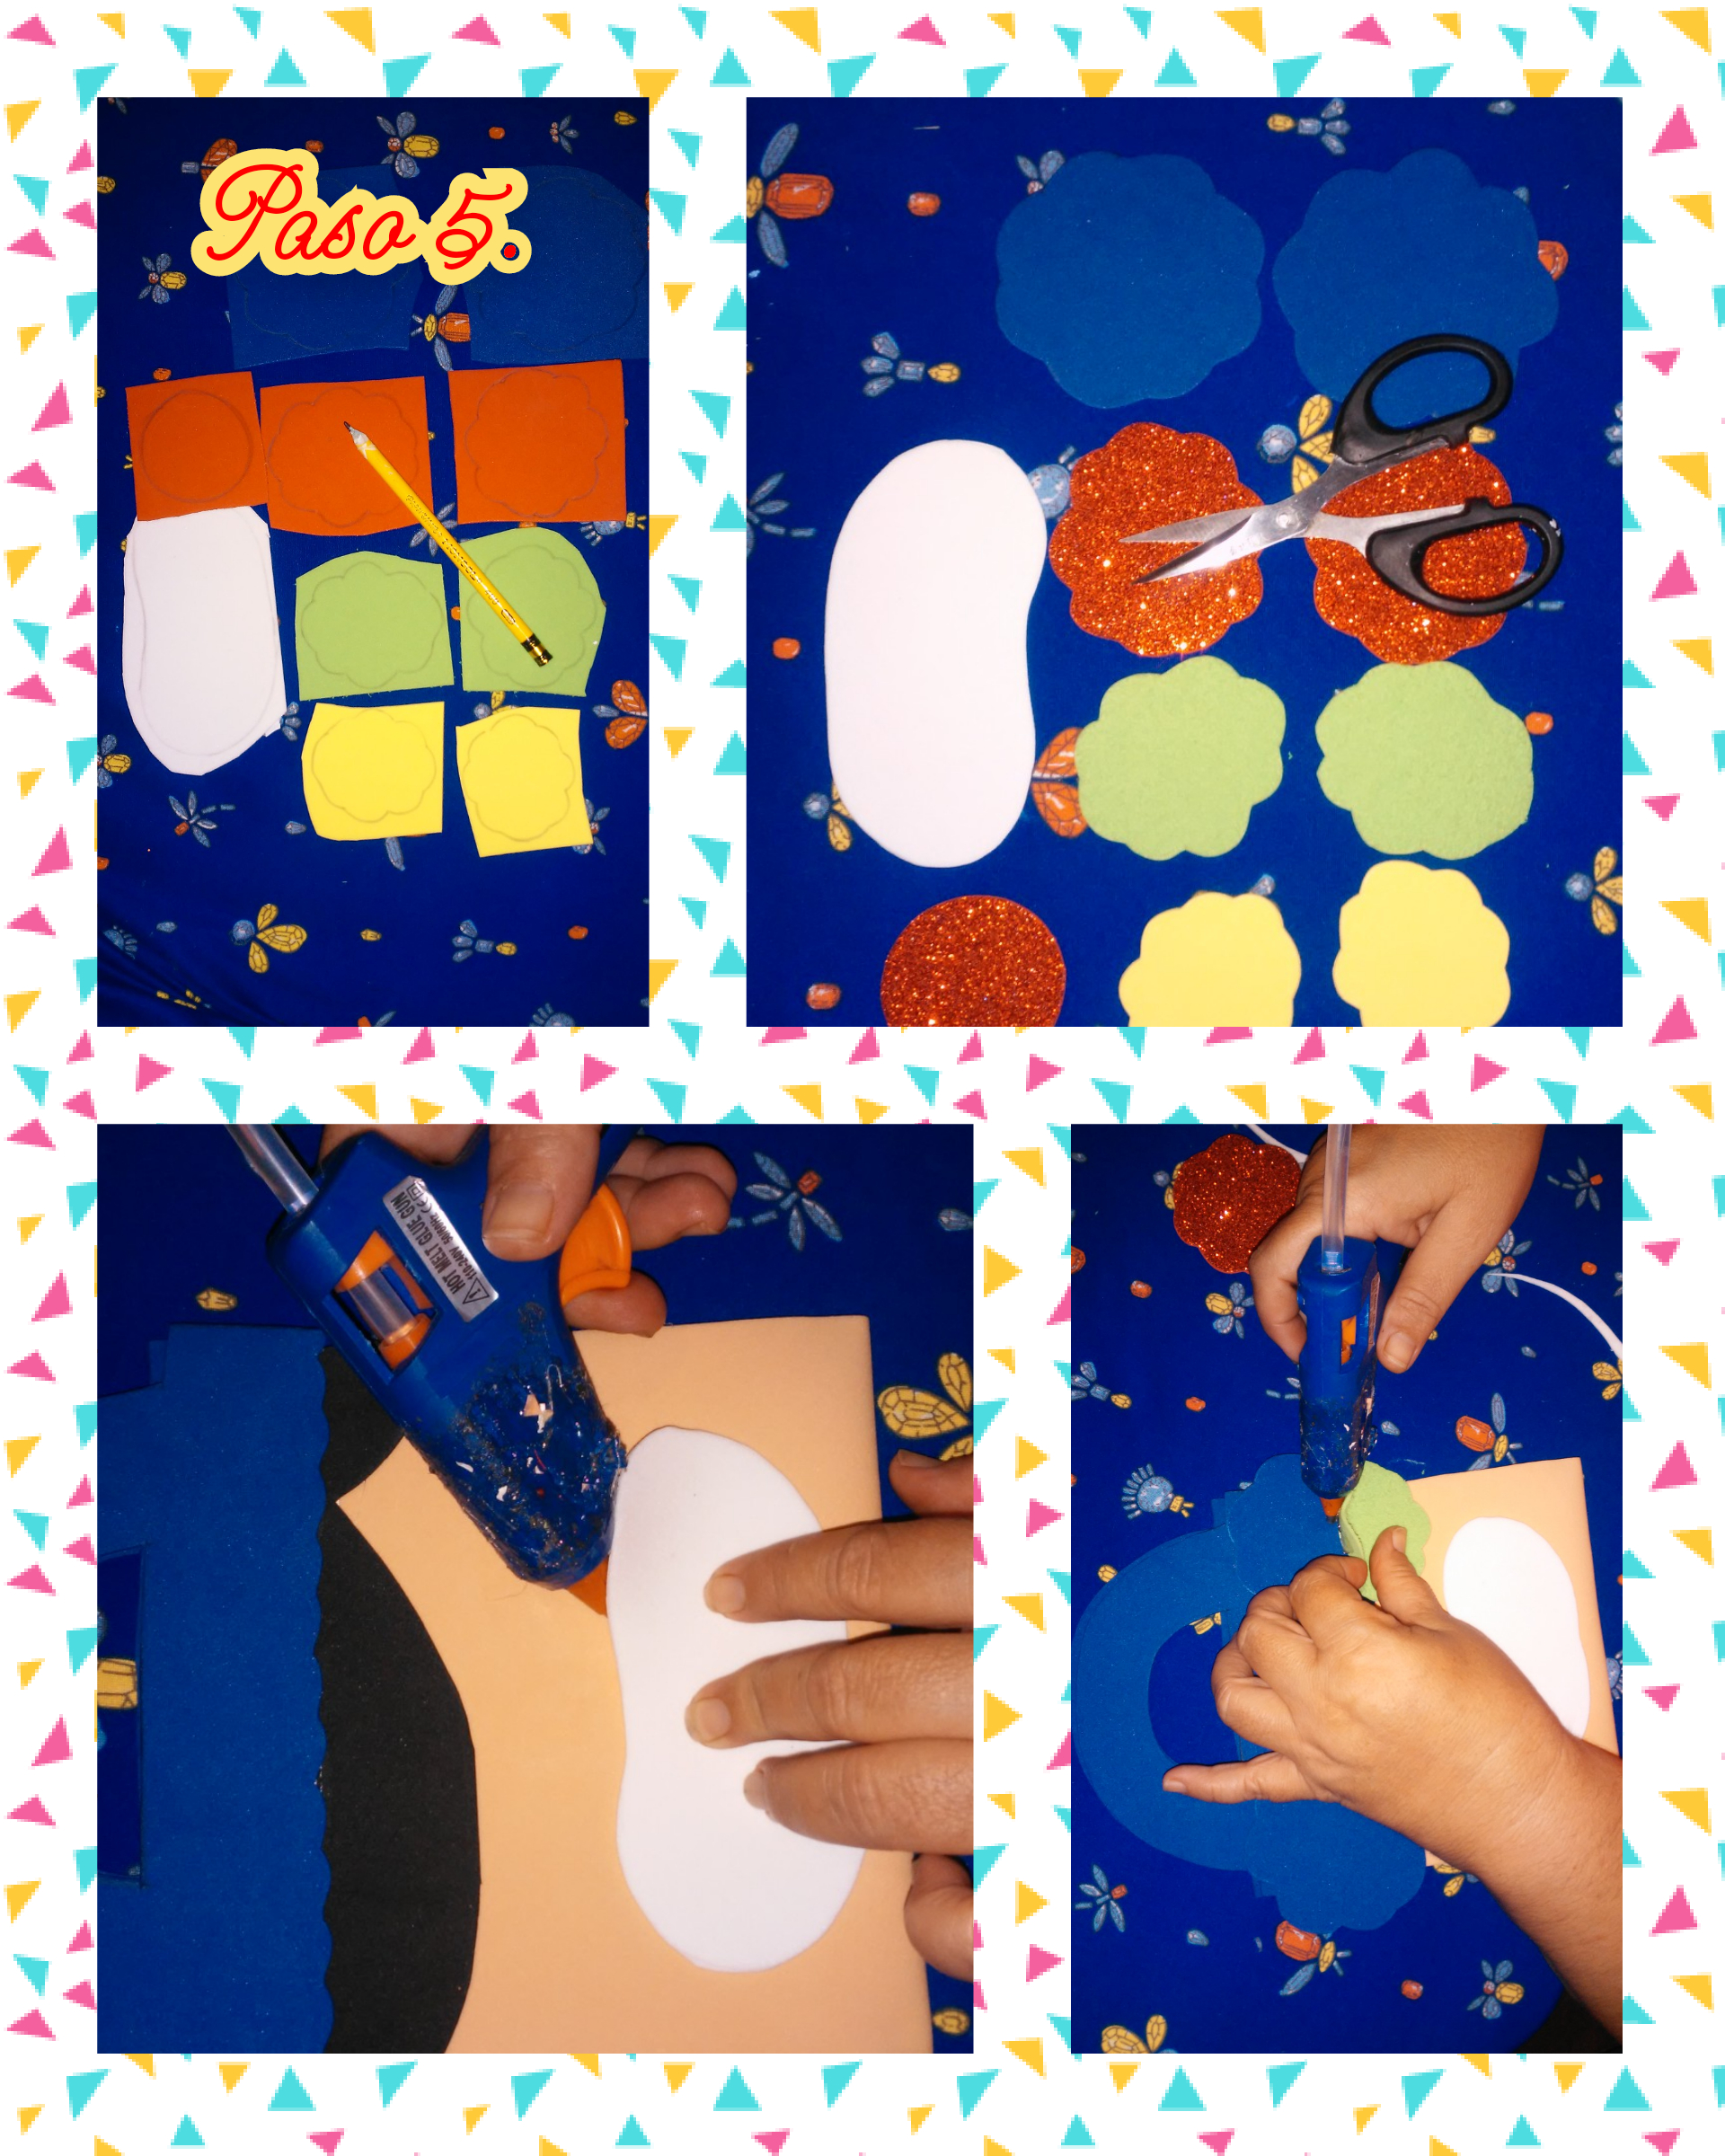
Step 5. In this step we are going to use foamis of various colors and different textures, we mark all the pieces with which we are going to form the face of the clown and wavy cuts to simulate the colored hair and then we cut it with the help of the scissors and finally with the hot glue gun we start to glue all the pieces to form the face of the clown.
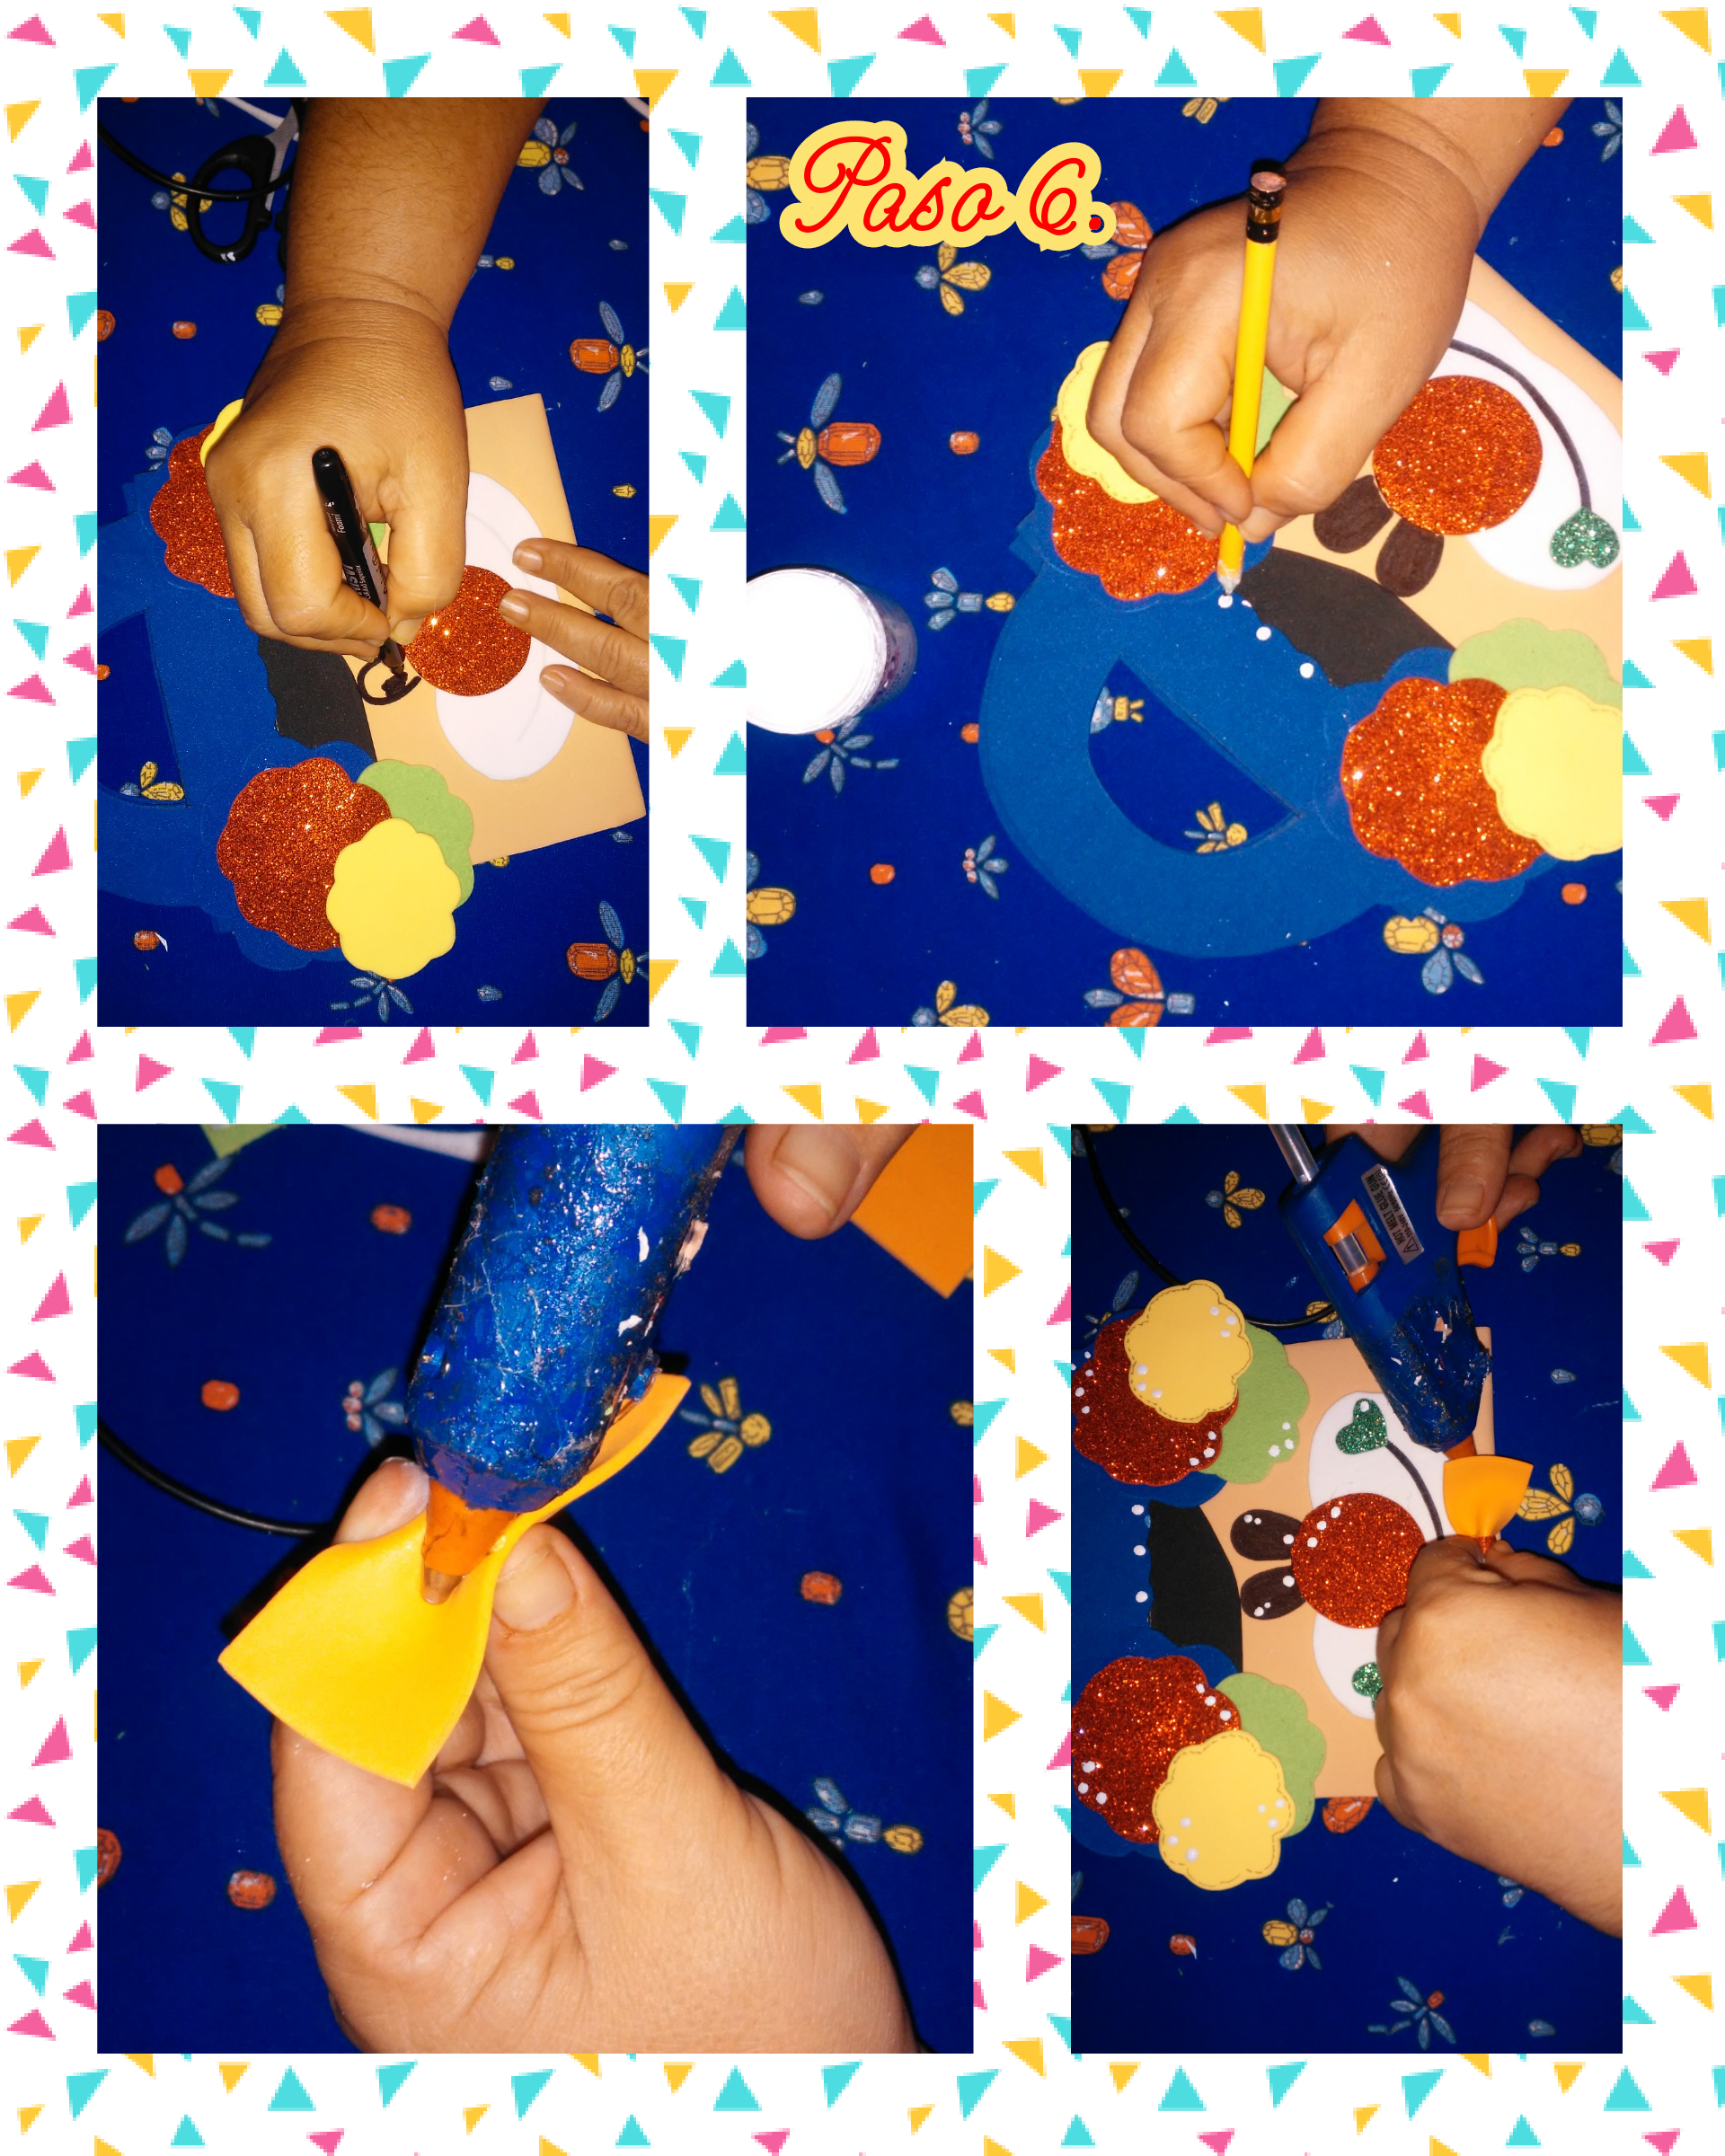
Step 6. After having glued all the pieces of the clown's face we are going to mark and paint the eyes with a marker, then with white cold paint, we put dots on all the pieces to decorate the bag, with a clown theme , see images.
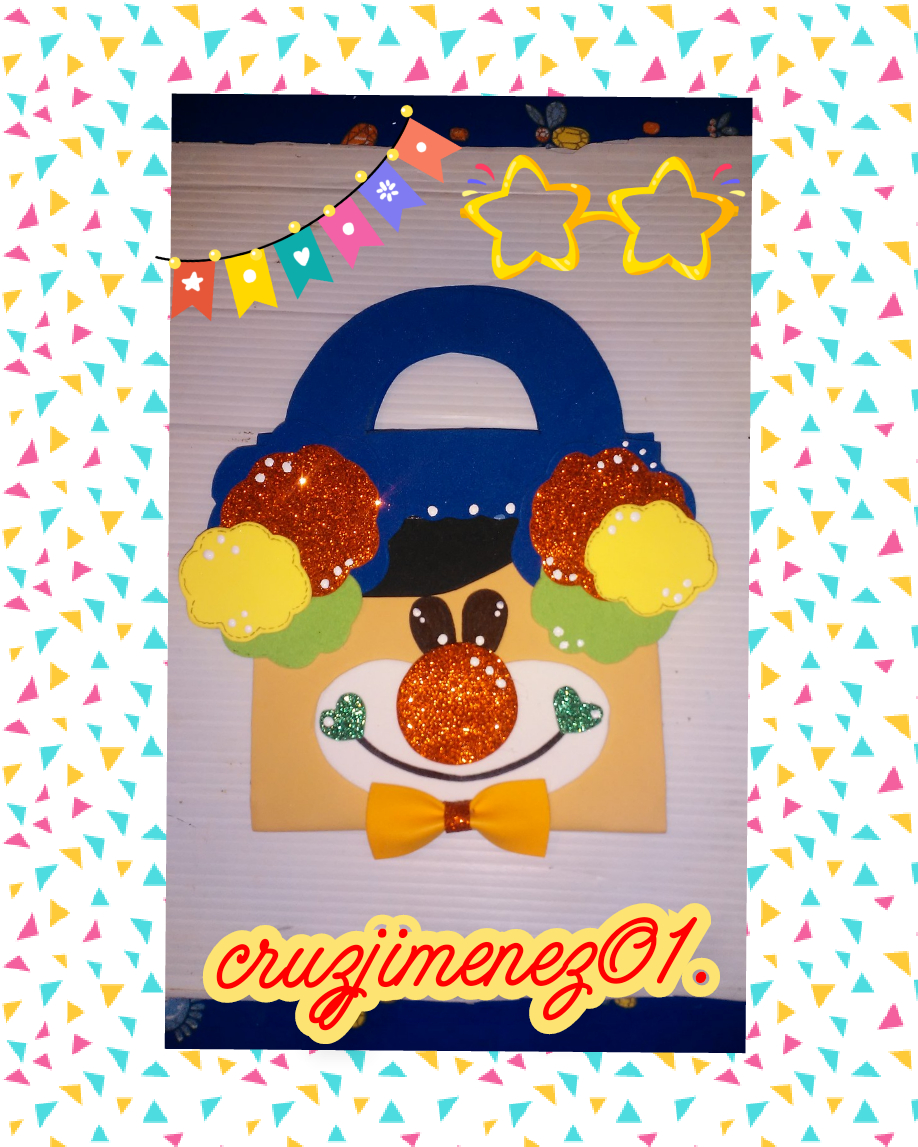
This is the final result, a cute clown-themed bag, ideal for the little ones in the house and that can also be used as a candy box to give away at children's parties, thanks for visiting my blog, see you soon with another creative idea, good day and many blessings to all.
Las fotos son de mi propiedad y editadas con la aplicación Collage Maker.
Photos are owned by me and edited with Collage Maker app.
Es muy hermoso, como para un cumpleaños, bonitos colores, se ve limpio el trabajo. Me gustan los brillos que tiene
Hola corazón, muchas gracias, saludos.
Thank you for sharing this amazing post on HIVE!
Your content got selected by our fellow curator @rezoanulvibes & you just received a little thank you via an upvote from our non-profit curation initiative!
You will be featured in one of our recurring curation compilations and on our pinterest boards! Both are aiming to offer you a stage to widen your audience within and outside of the DIY scene of hive.
Join the official DIYHub community on HIVE and show us more of your amazing work and feel free to connect with us and other DIYers via our discord server: https://discord.gg/mY5uCfQ !
If you want to support our goal to motivate other DIY/art/music/homesteading/... creators just delegate to us and earn 100% of your curation rewards!
Stay creative & hive on!