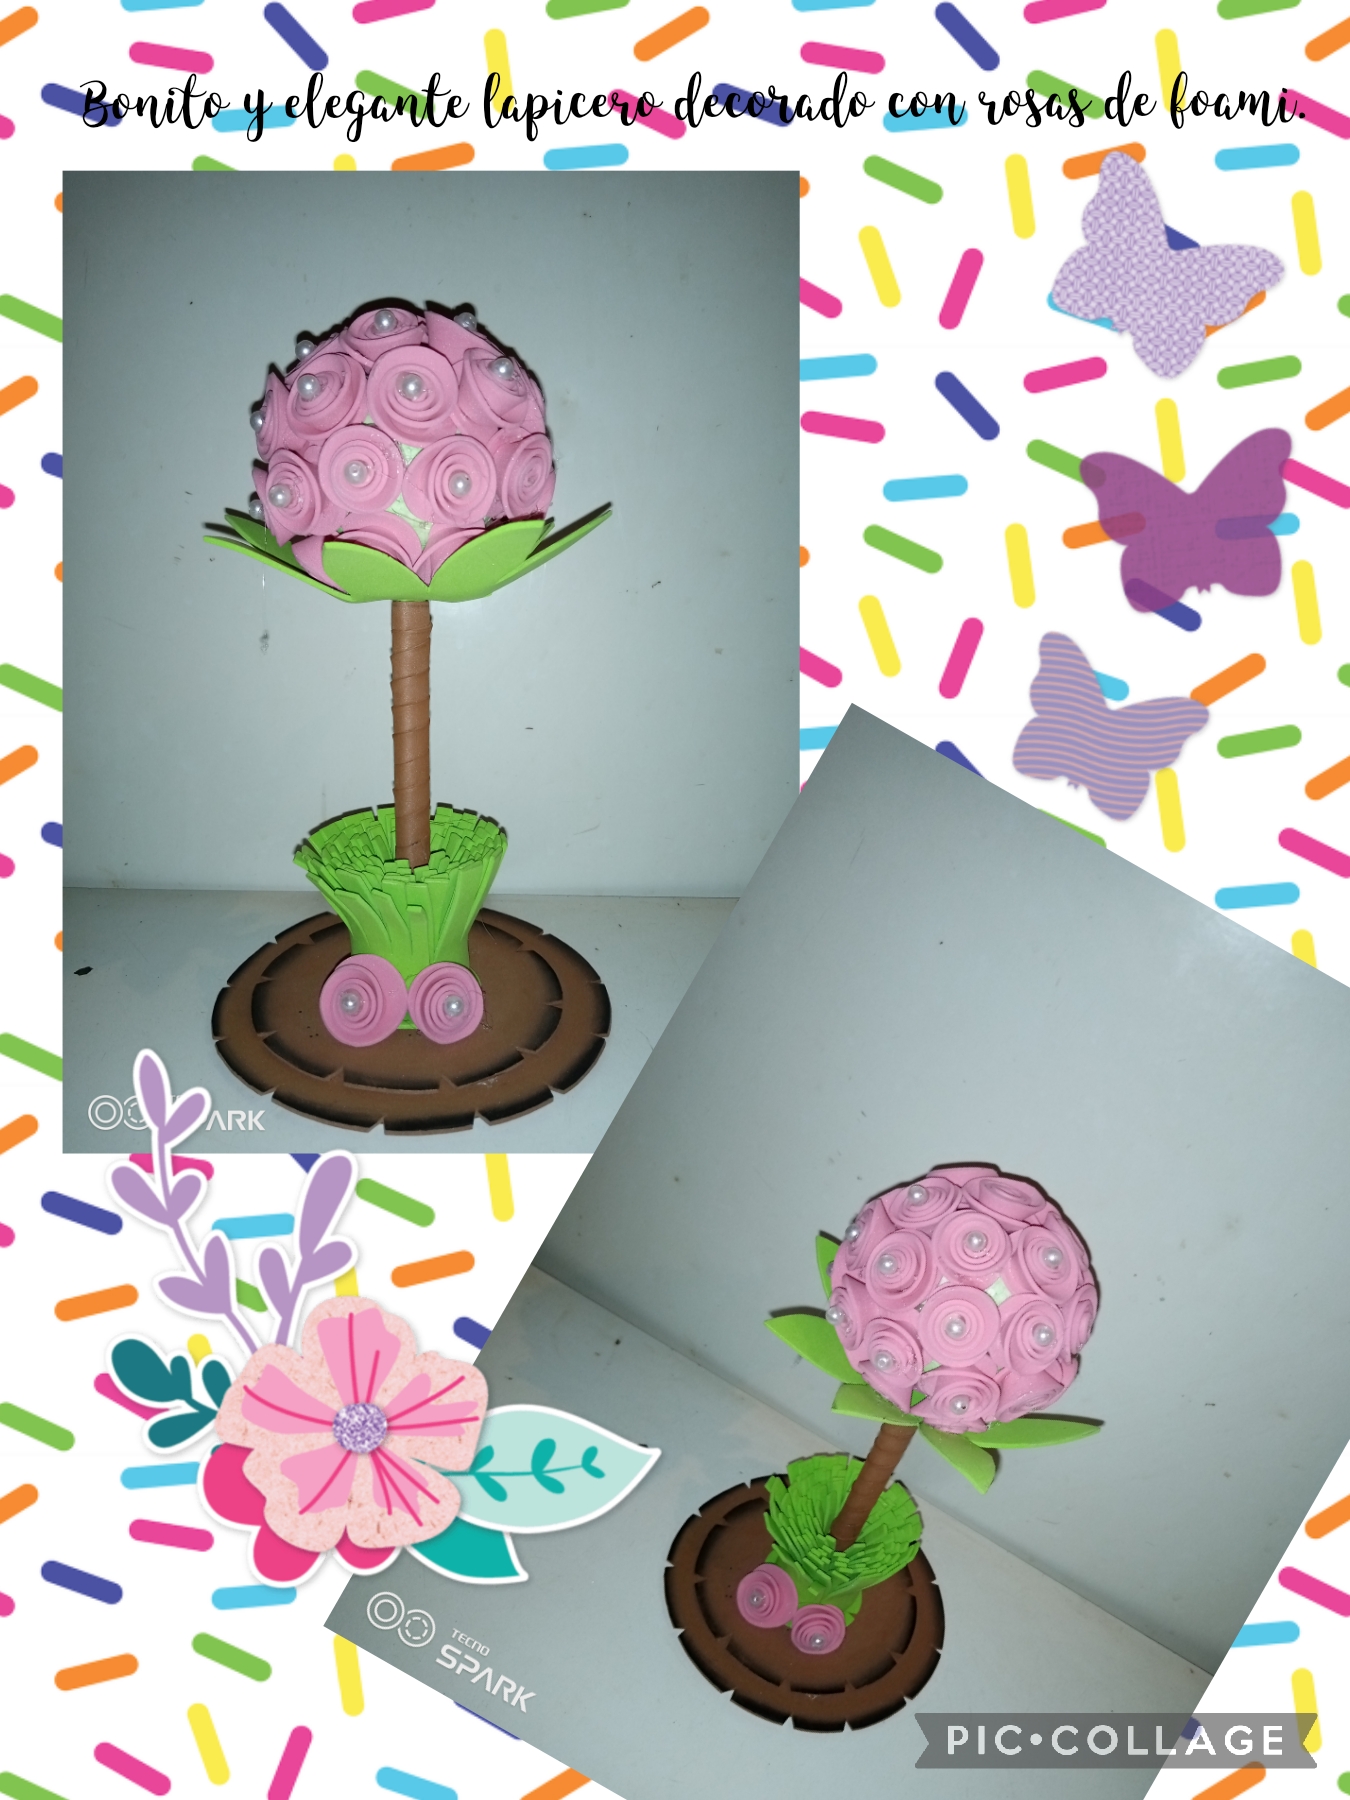
Buen día, para todos mis amigos creativos que formamos esta hermosa comunidad Hivediy, reciban de mi parte un saludo virtual deseándoles que se encuentren muy bien, que es lo más importante Dios los bendiga a todos. El día de hoy les traigo un divertido paso a paso, se trata de como decorar un bonito y elegante lapicero, con rosas hechas con foami, este proyecto es ideal para obsequios en fechas muy especiales para nuestras amigas o aquella persona muy importante y que obsequio más bonito que un lapicero, decorado con rosas de foami, es muy bonito detalle, y además está elaborado con materiales de provecho y otros materiales que son muy económicos y fácil de conseguir, sin más nada que decir manos a la obra que ya comenzaremos con su paso a paso, seguro les va a encantar tanto como a mí, y les aseguro que les será de mucha utilidad.
Good morning, for all my creative friends who make up this beautiful Hivediy community, receive a virtual greeting from me wishing you are very well, which is the most important thing God bless you all. Today I bring you a fun step by step, it is about how to decorate a beautiful and elegant pen, with roses made with foami, this project is ideal for gifts on very special dates for our friends or that very important person and what a gift prettier than a pen, decorated with foami roses, it is a very nice detail, and it is also made with useful materials and other materials that are very cheap and easy to get, with nothing more to say to the work that we will start with your step by step, surely you will love it as much as I do, and I assure you that it will be very useful.
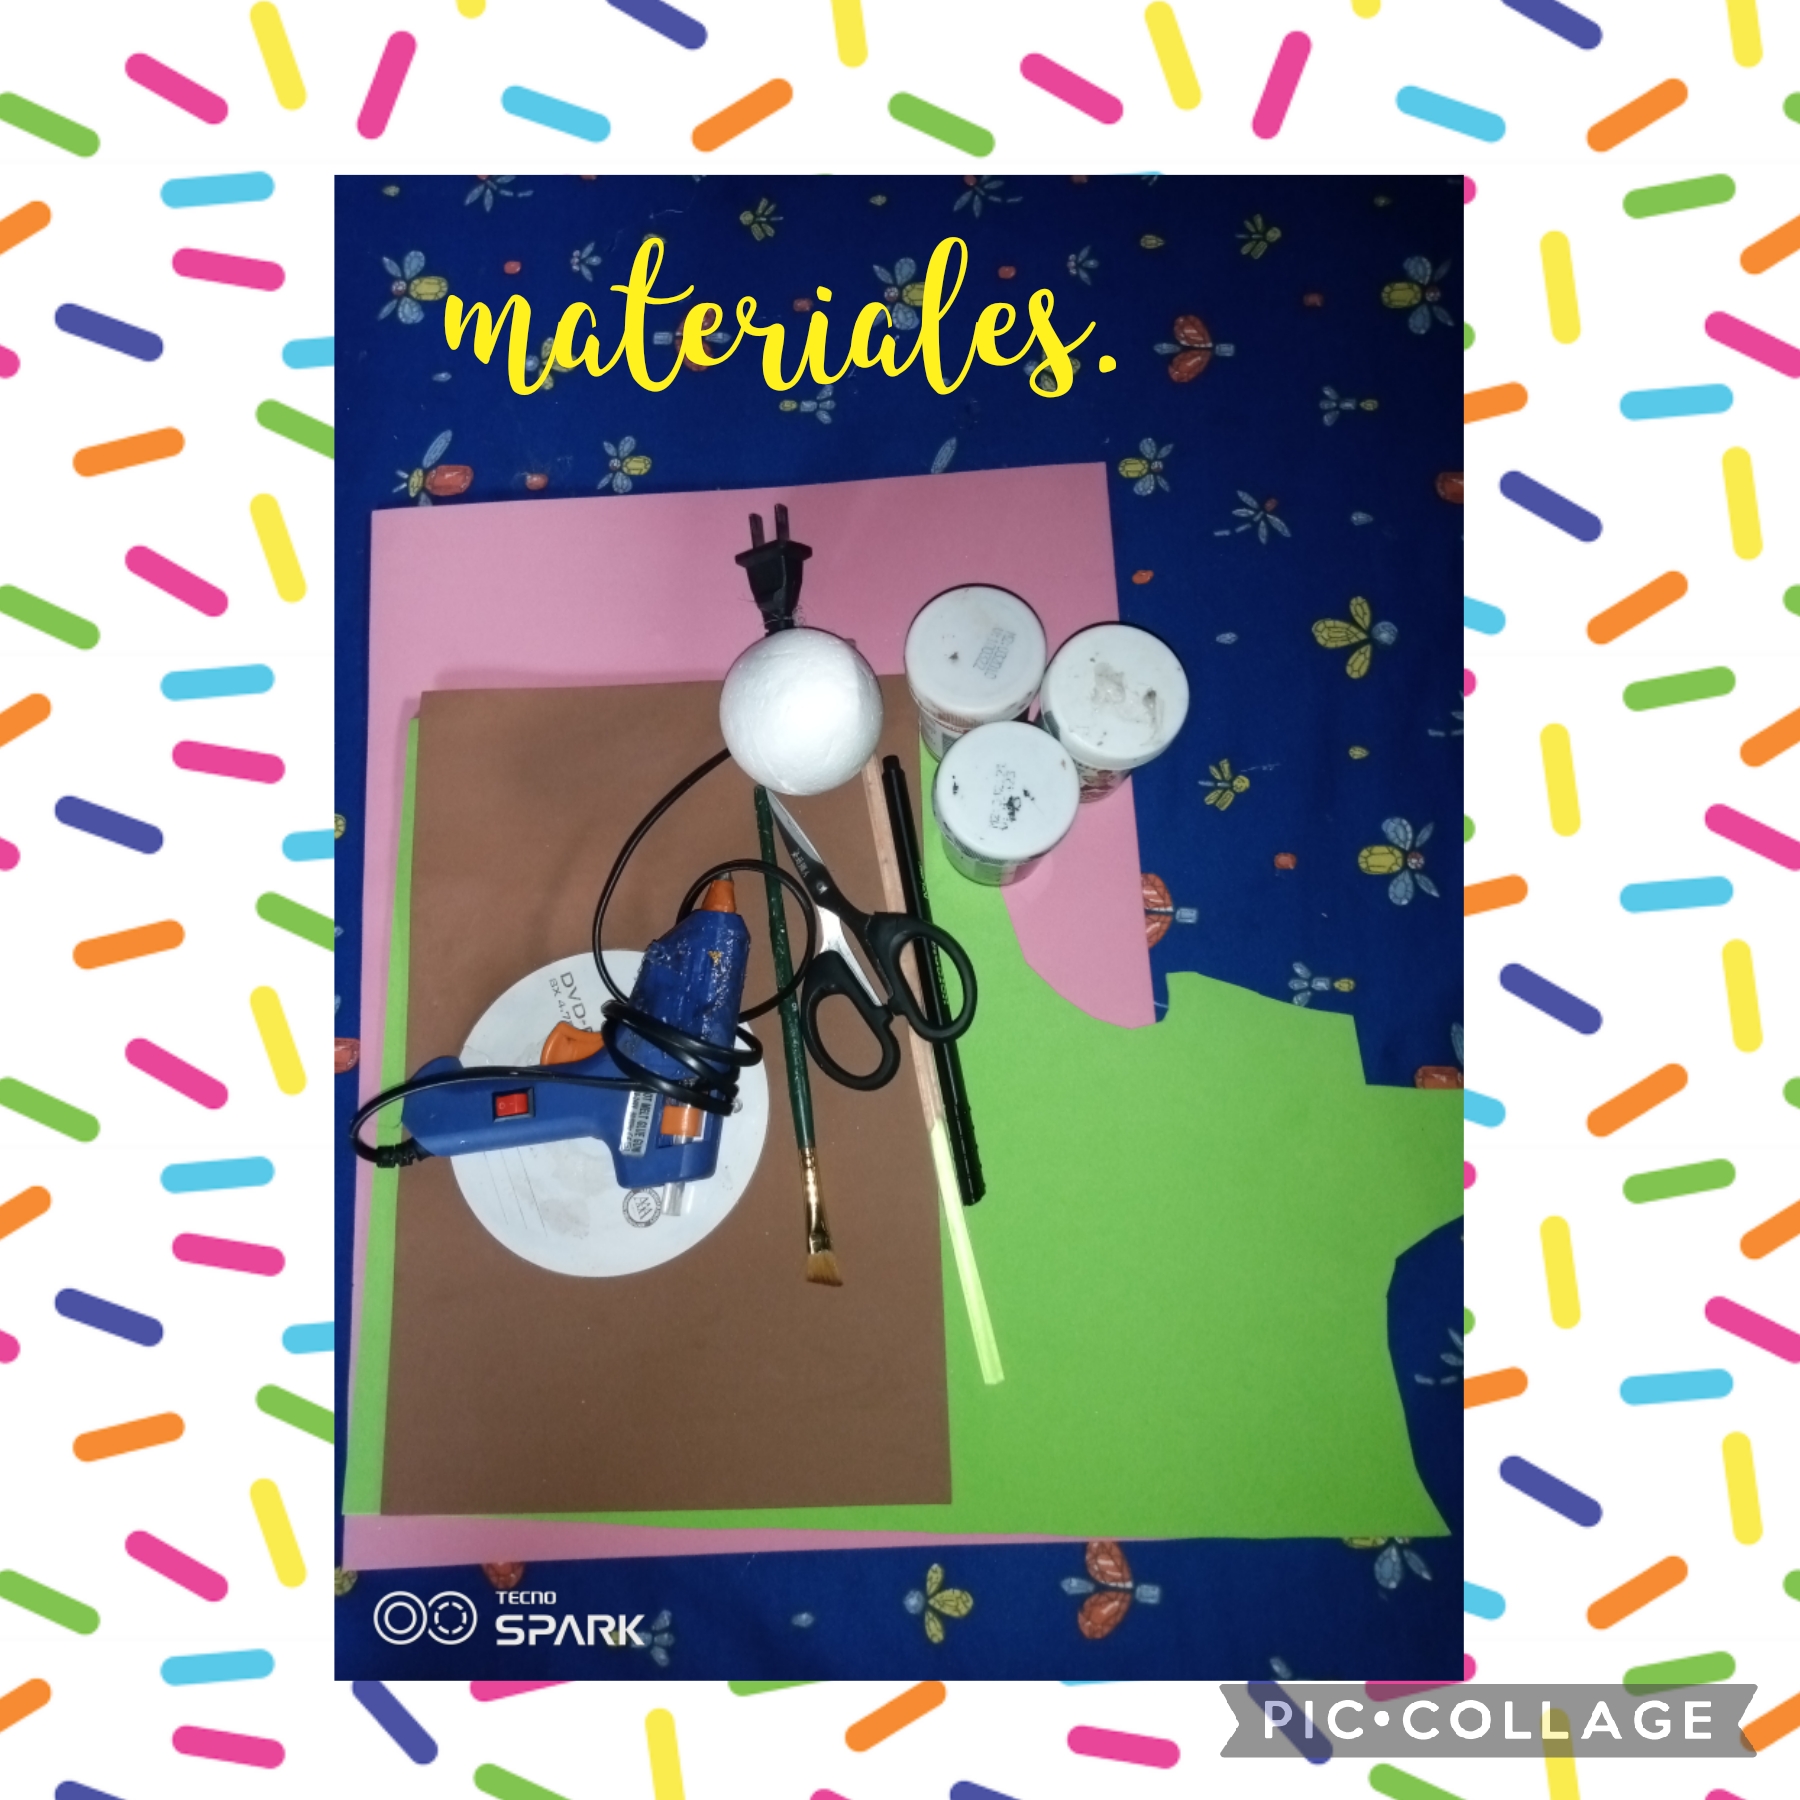
Para decorar este bonito y elegante lapicero vamos a necesitar los siguientes materiales.
*1 CD de uso reciclable.
*Foamis de varios colores de textura lisa.
*Pinturas al frío y pincel angular.
*1 tijera.
*1 barra de silicona.
1 pistola de silicona caliente.
1 lapicero.
1 bola de anime número #6.
To decorate this beautiful and elegant pencil holder we will need the following materials.
*1 recyclable use CD.
*Foams of various colors with a soft texture.
*Cold paints and angular brush.
*1 scissors.
*1 silicone bar.
*1hot glue gun
*1pen
*1anime ball number #6
We start with the step by step.
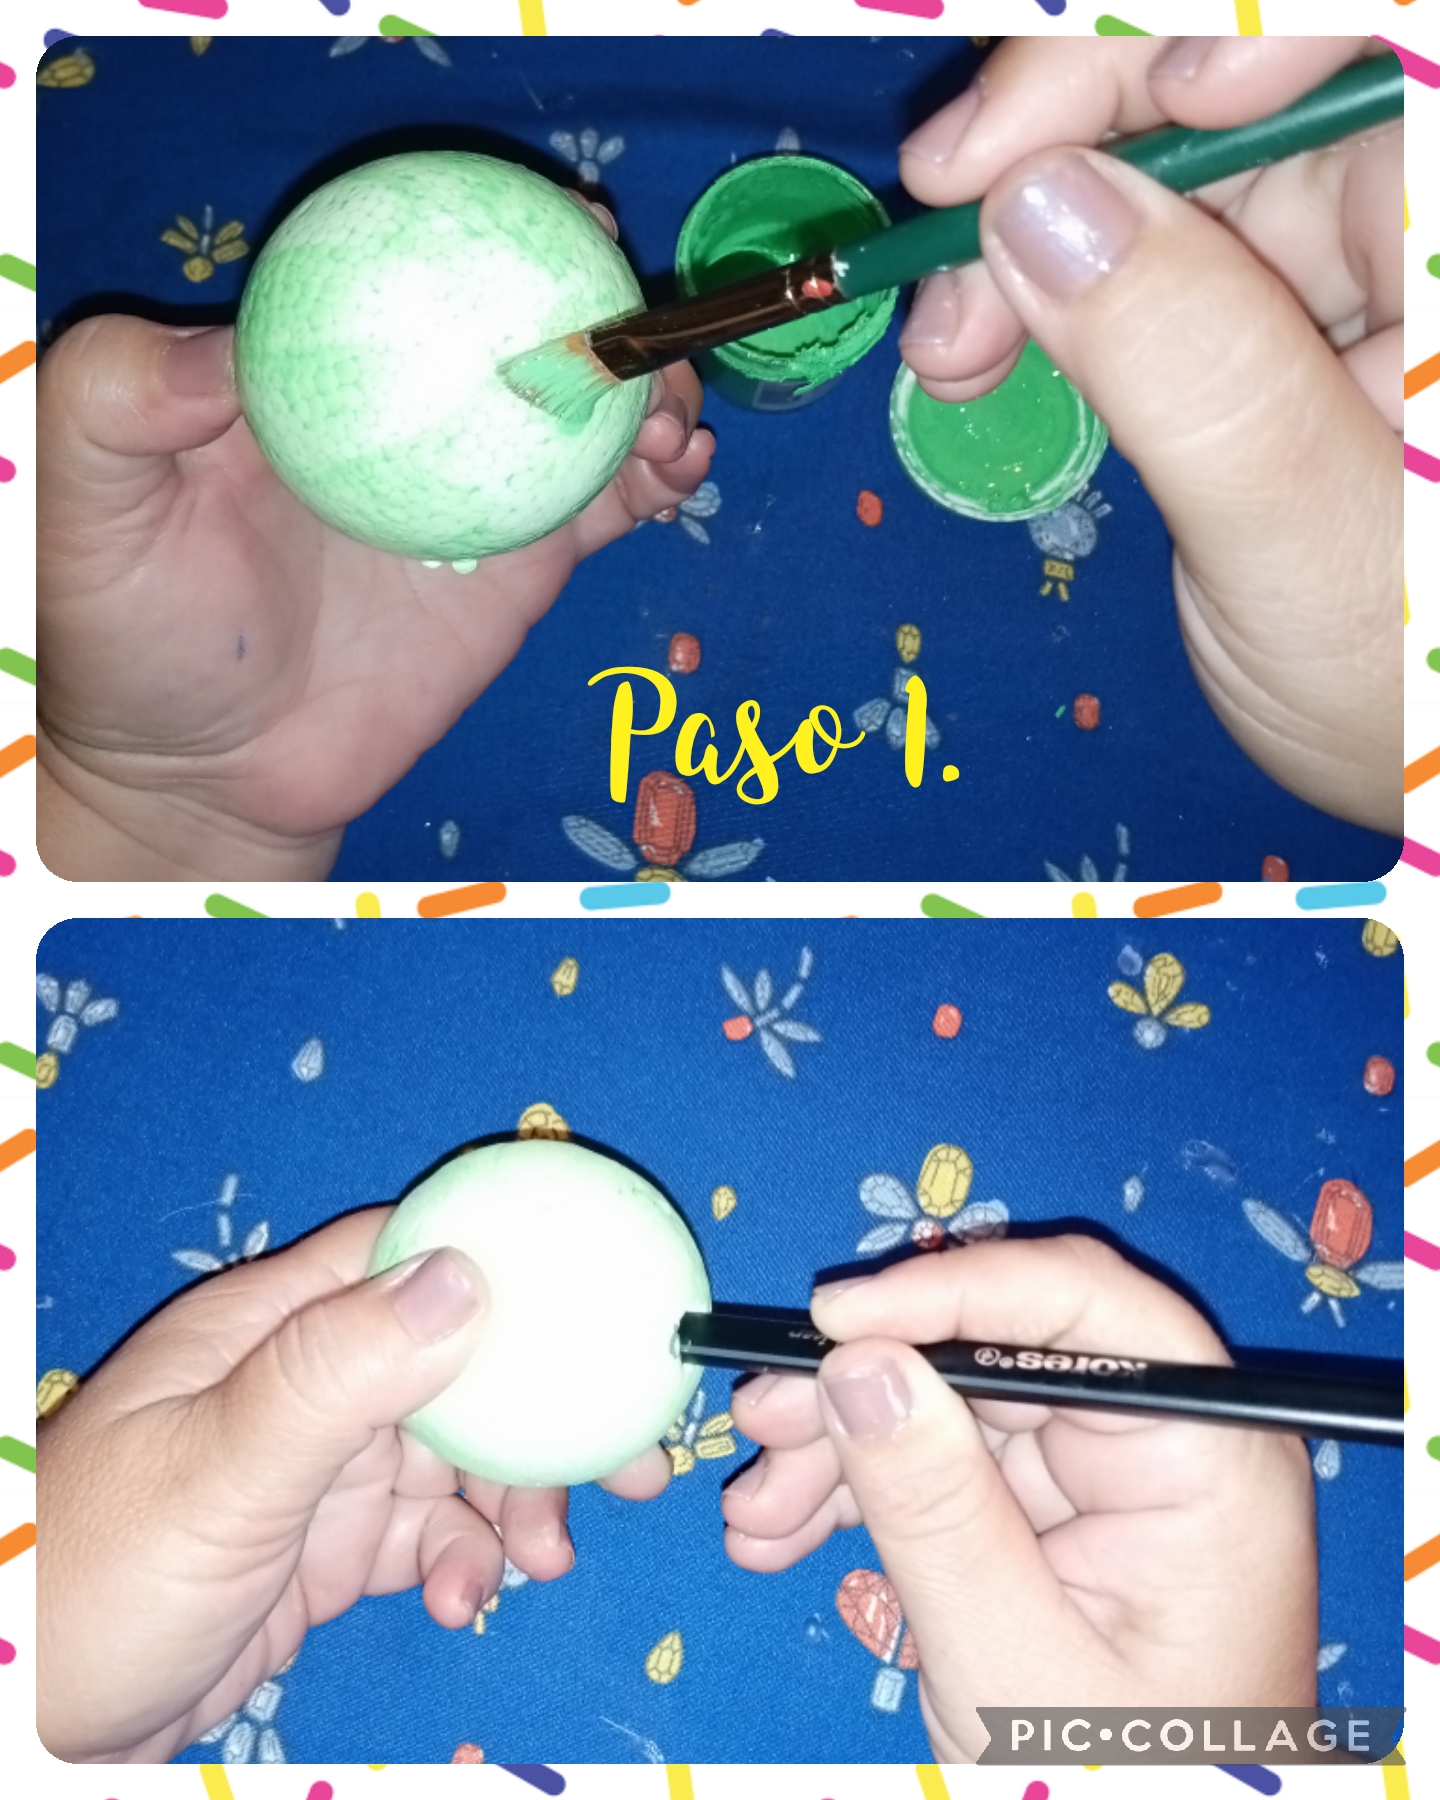
Step 1. To start decorating this pen, the first thing we are going to do is, with cold green paint and a brush, we start painting the anime ball, let it dry for a few minutes, after the anime ball is dry at the bottom we open a hole with the same pen, that's where the pen is inserted, see the images.
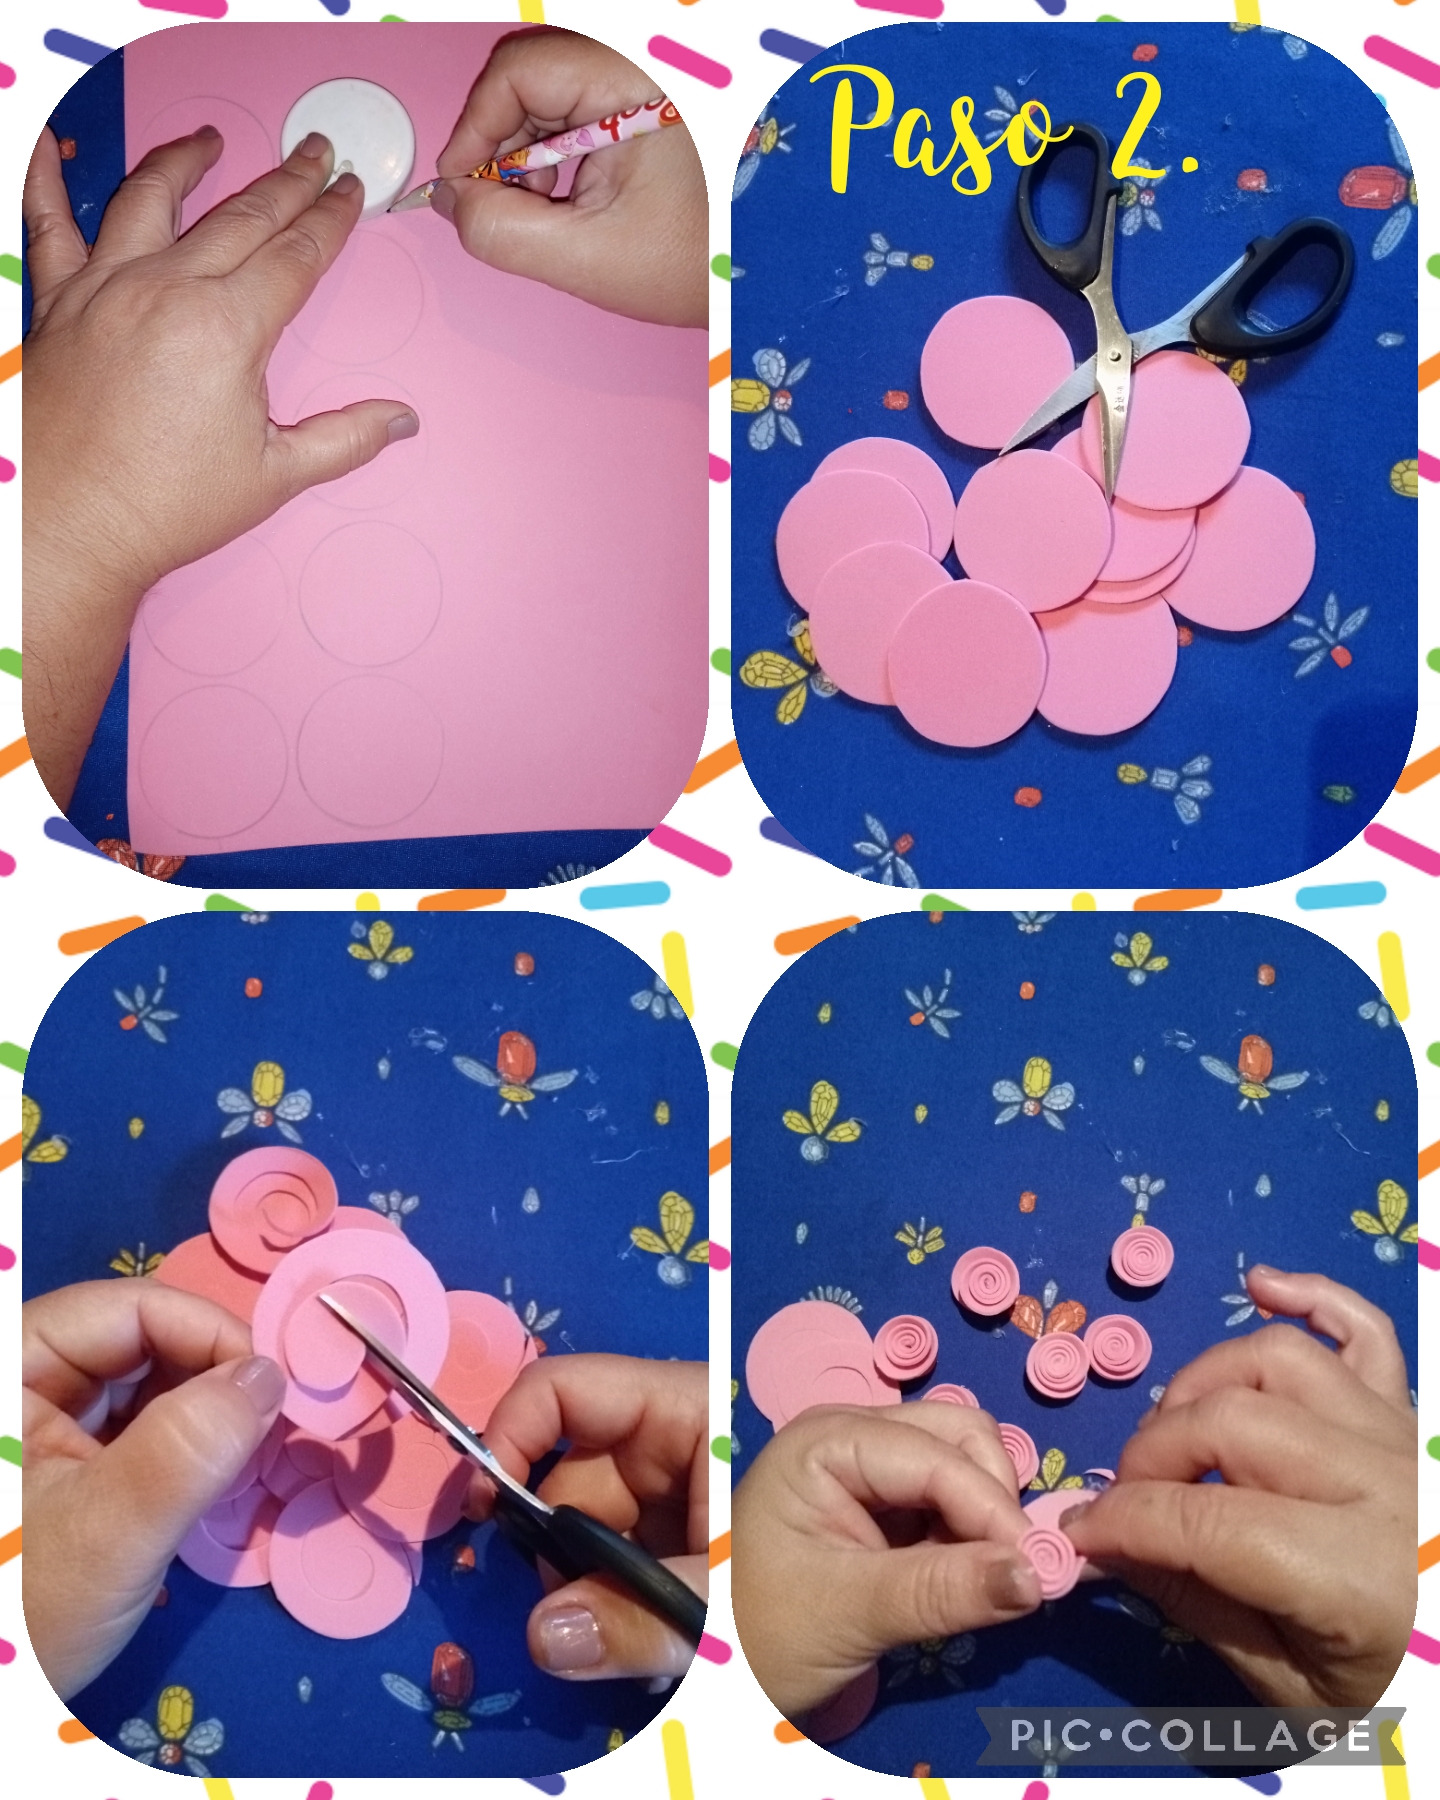
Step 2. In this step we take a foami with a soft texture, pink color and we begin to mark medium circles, then with the help of the scissors we cut them and then we make a cut in the shape of a spiral and to finish we begin to roll them from the outside inwards forming the roses, see the images.
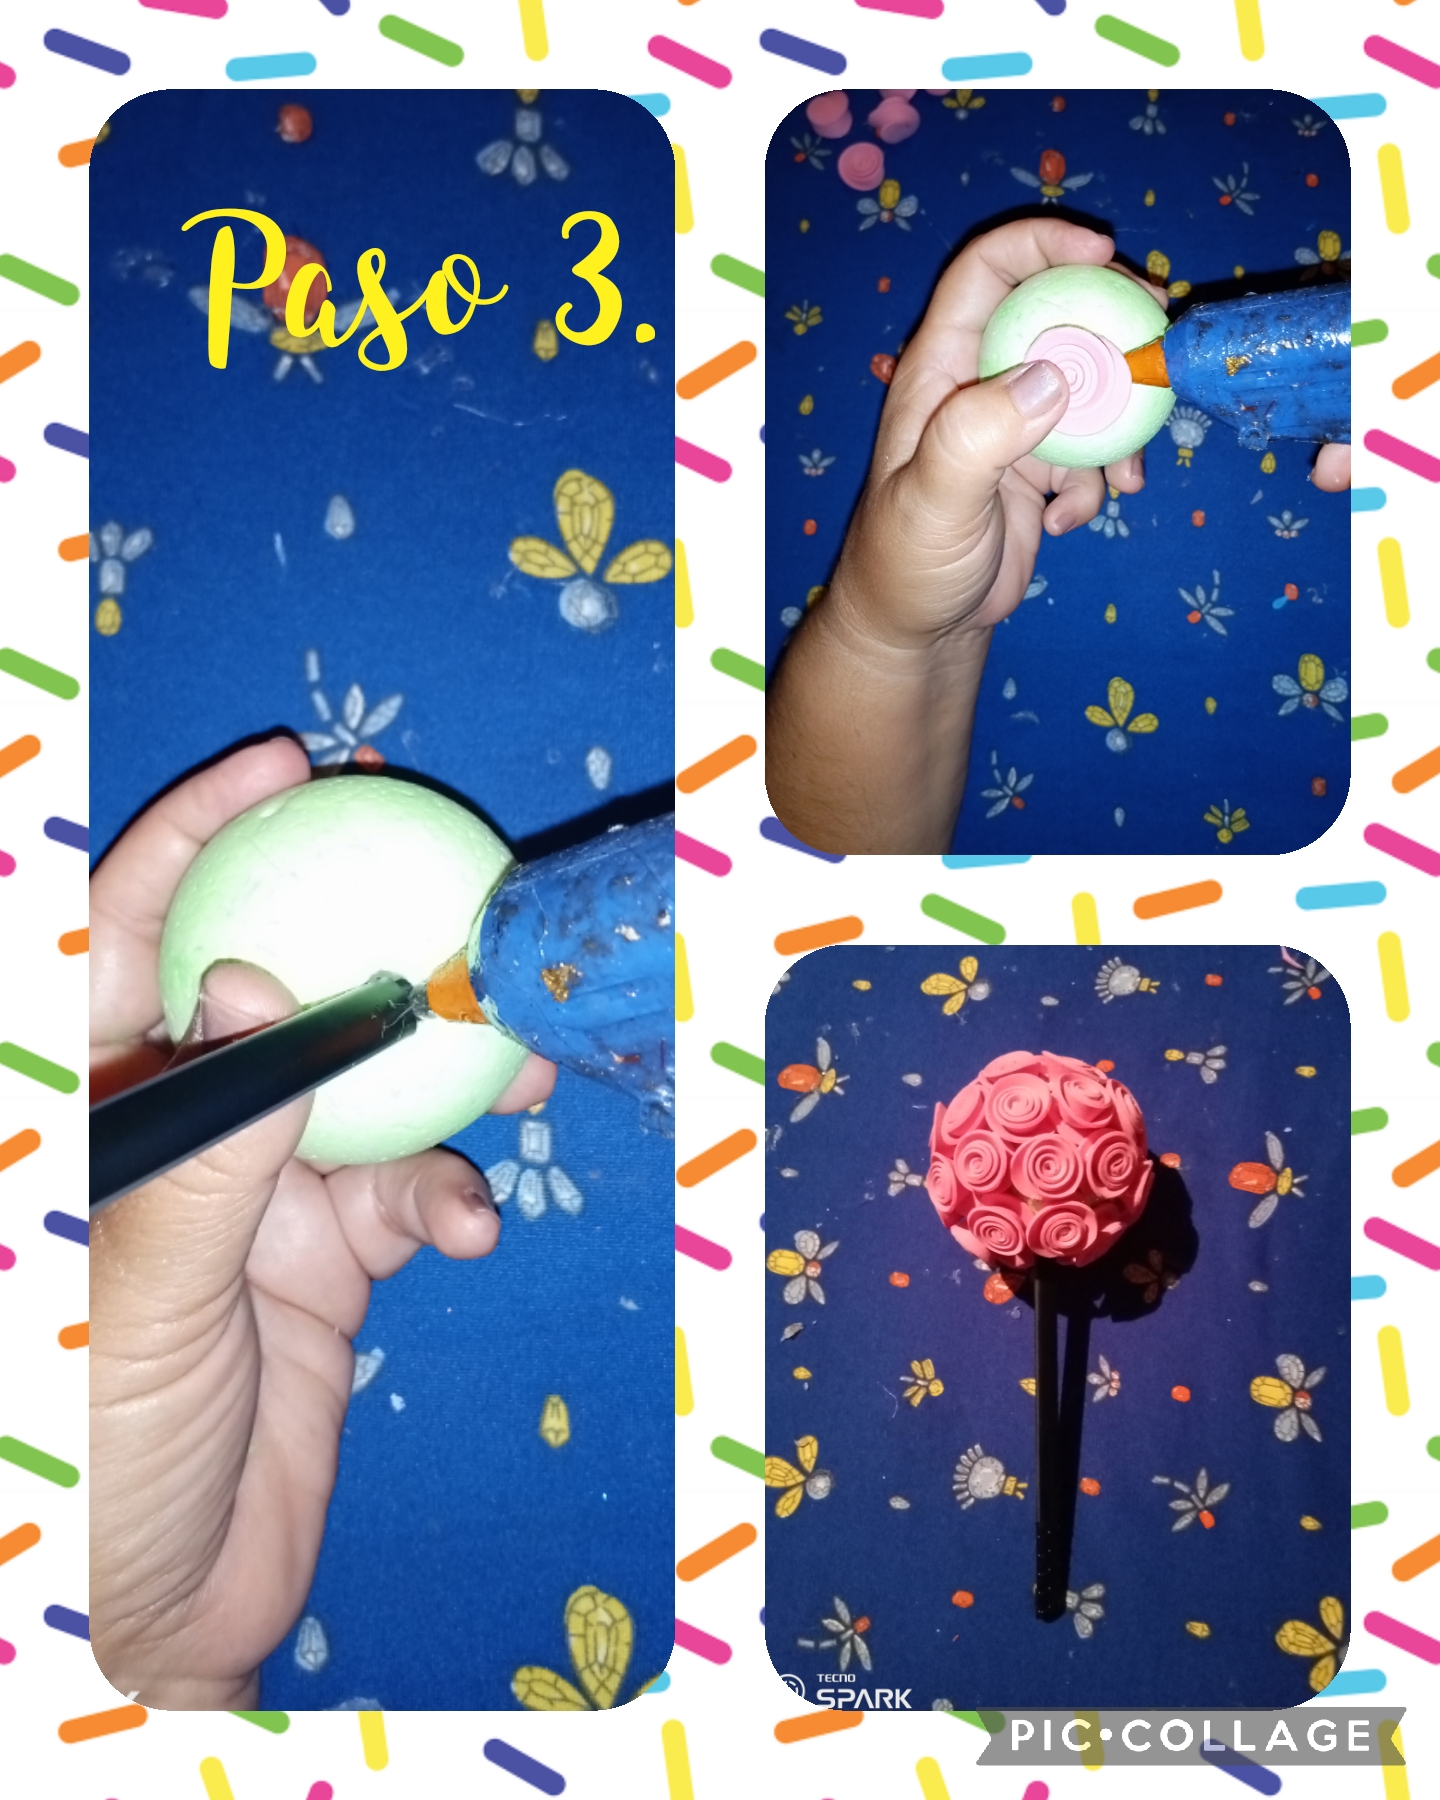
Step 3. Now in this step we are going to introduce the pen in the hole of the anime ball using hot silicone so that it is well glued and then with the same hot silicone we are going to stick the foami roses, starting from the top in the center and so on until the entire anime ball is covered.
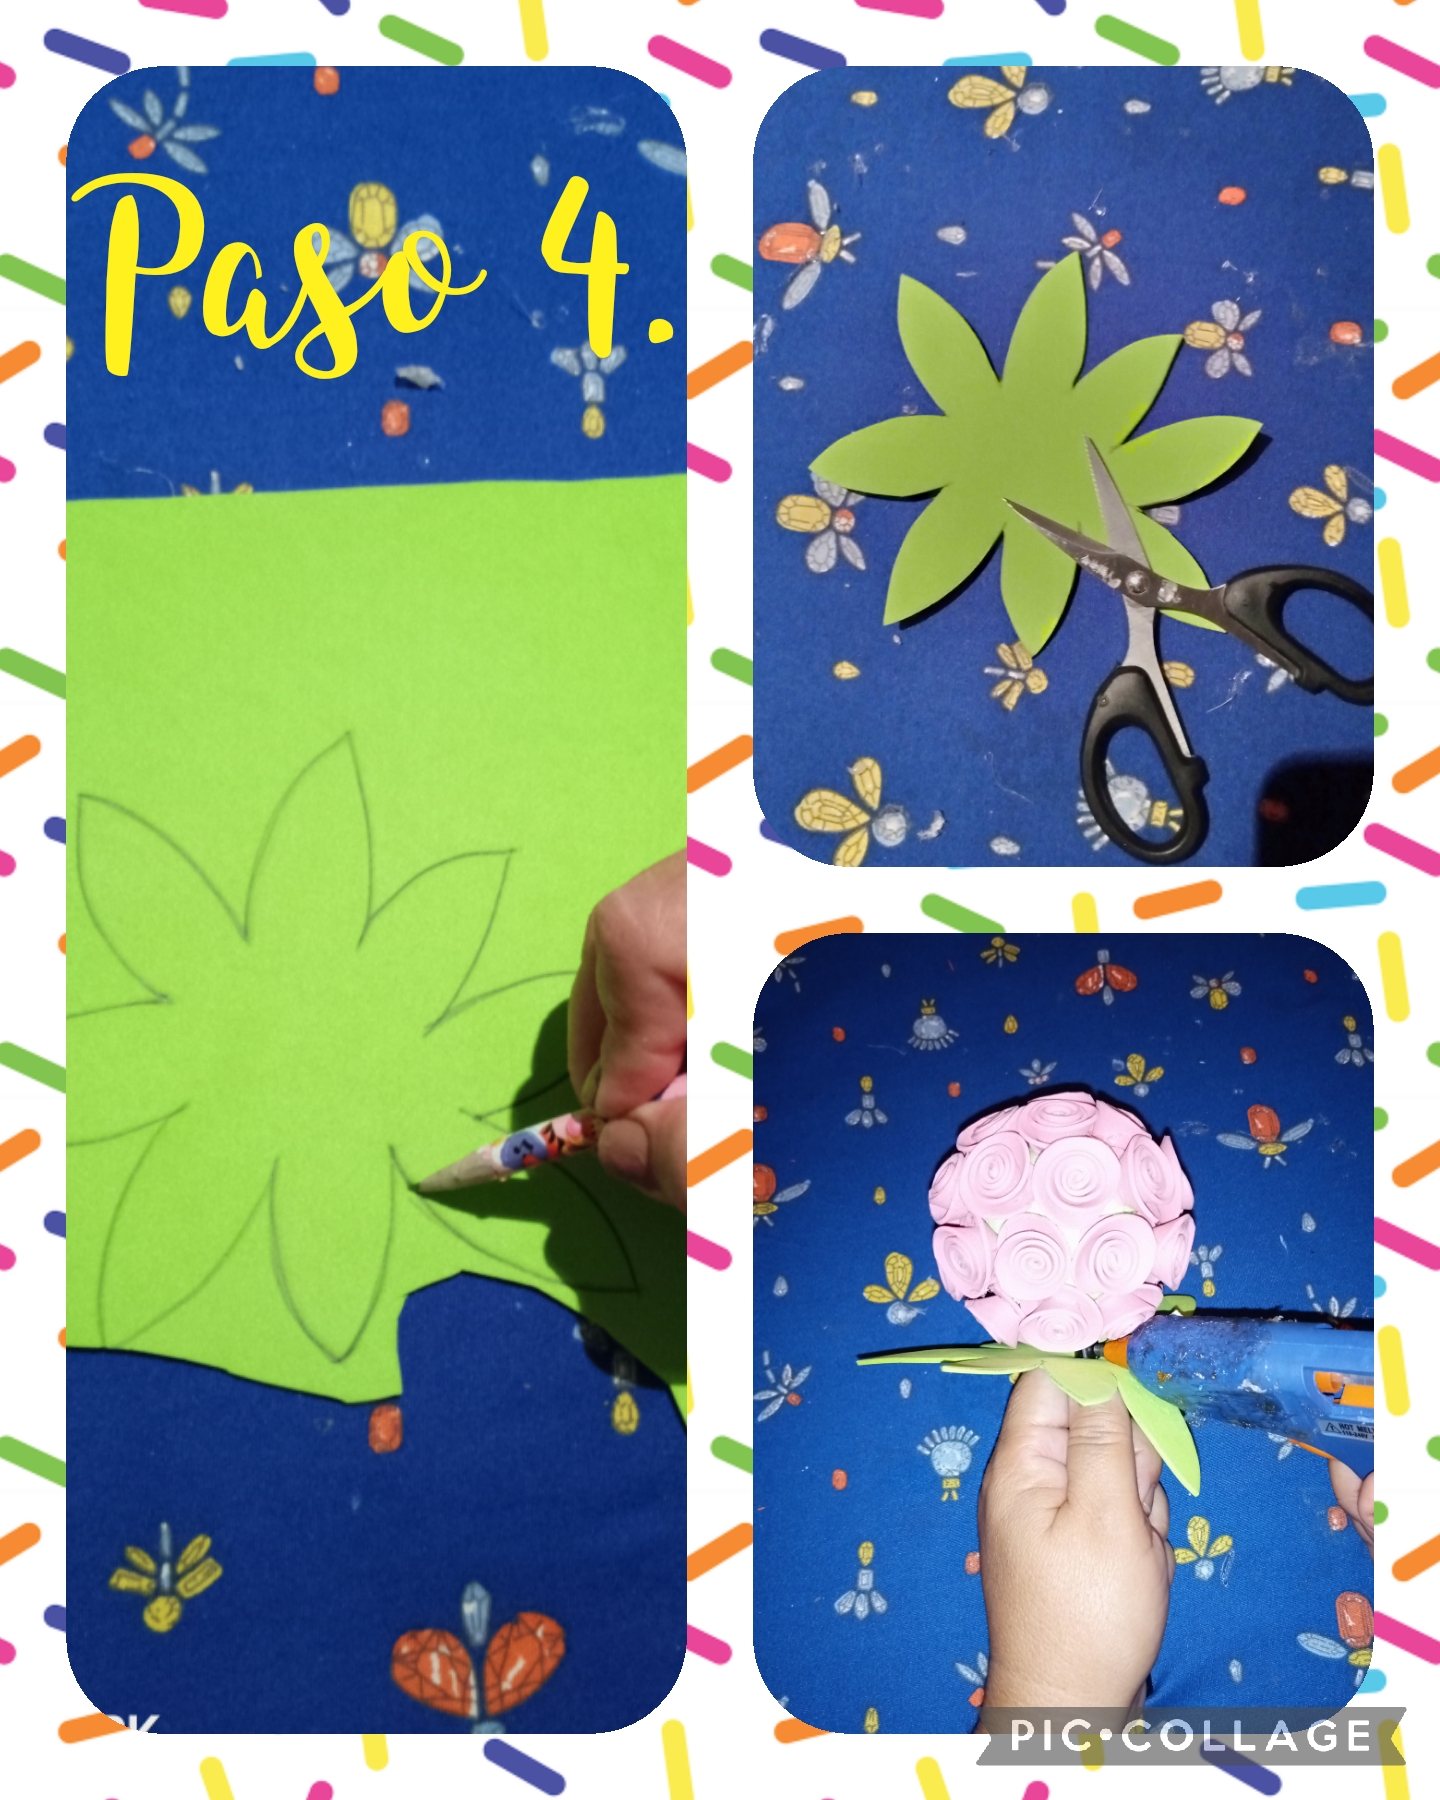
Step 4. Then we take a foami with a soft texture, green color and we mark some leaves, with the help of scissors we cut it and with hot silicone we join it with the upper part of the pen to decorate it, see the images.

Step 5. We cut strips of foami with a soft texture, brown, one centimeter wide and as long as you want, then we begin to cover the pen simulating the stem of the rose.

Step 6. In this step, with hot silicone, we paste a cd, in a foami with a soft texture, we gild and cut it, then we mark two circles, one large and one small, we cut it and also with the tip of the scissors we remove fringes around the edge of the circles, we continue with cold paint and an angular brush, we blur the circles on the edges and finally we join them by gluing them with hot silicone, see the images.
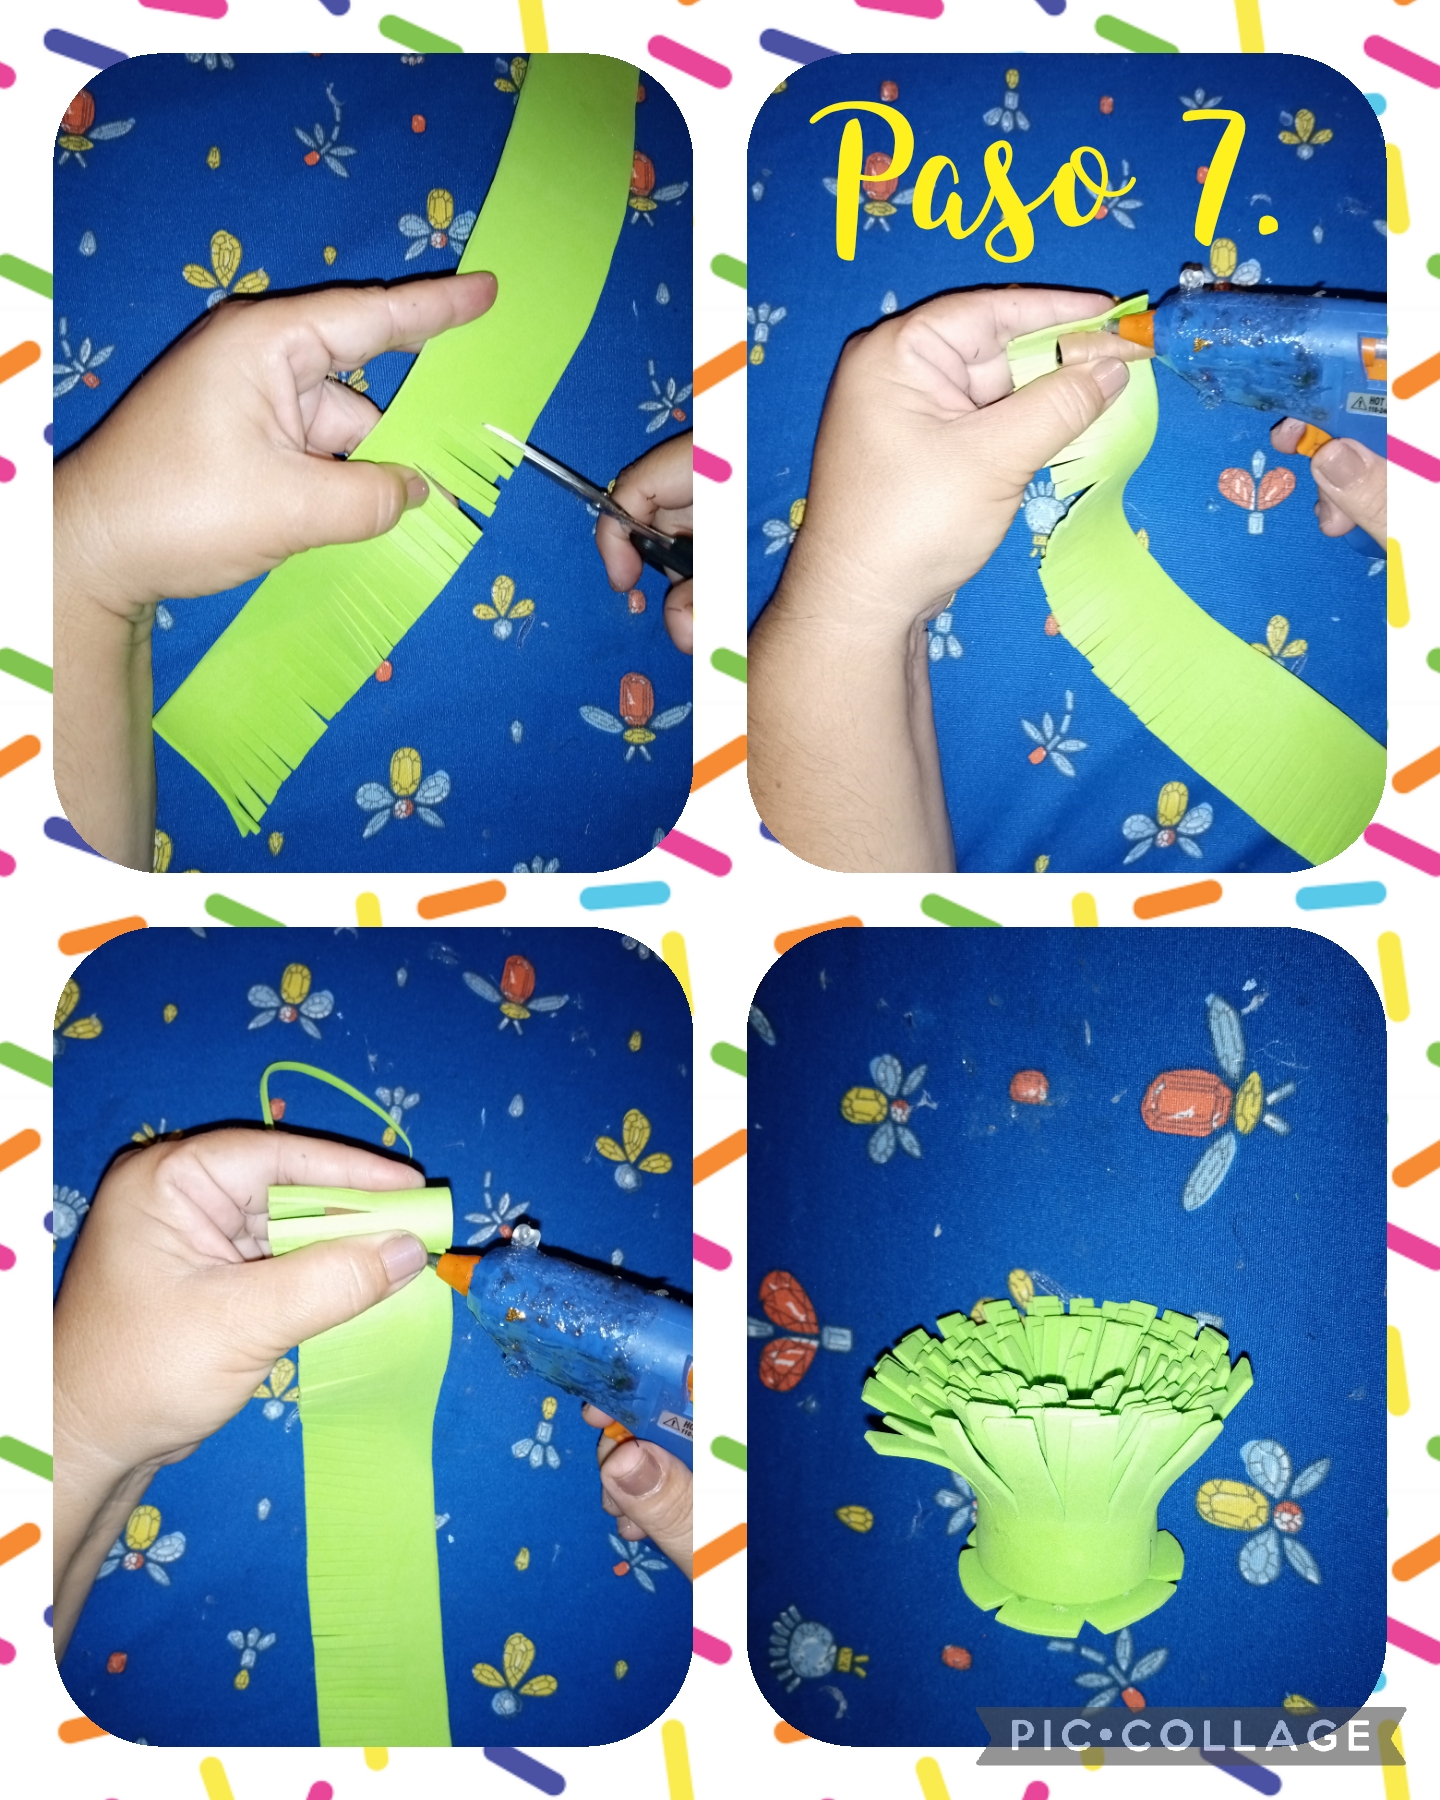
Step 7. In this step we are going to make a grass and we are going to do it in the following way, we mark and cut thick strips with foami with a smooth texture, green color, then with the scissors we make cuts around the edge to finish it by rolling it on the lid of the pen, see the images.

Step 8. In this step we are going to join the two pieces that form the pen and the base by gluing them with hot silicone.
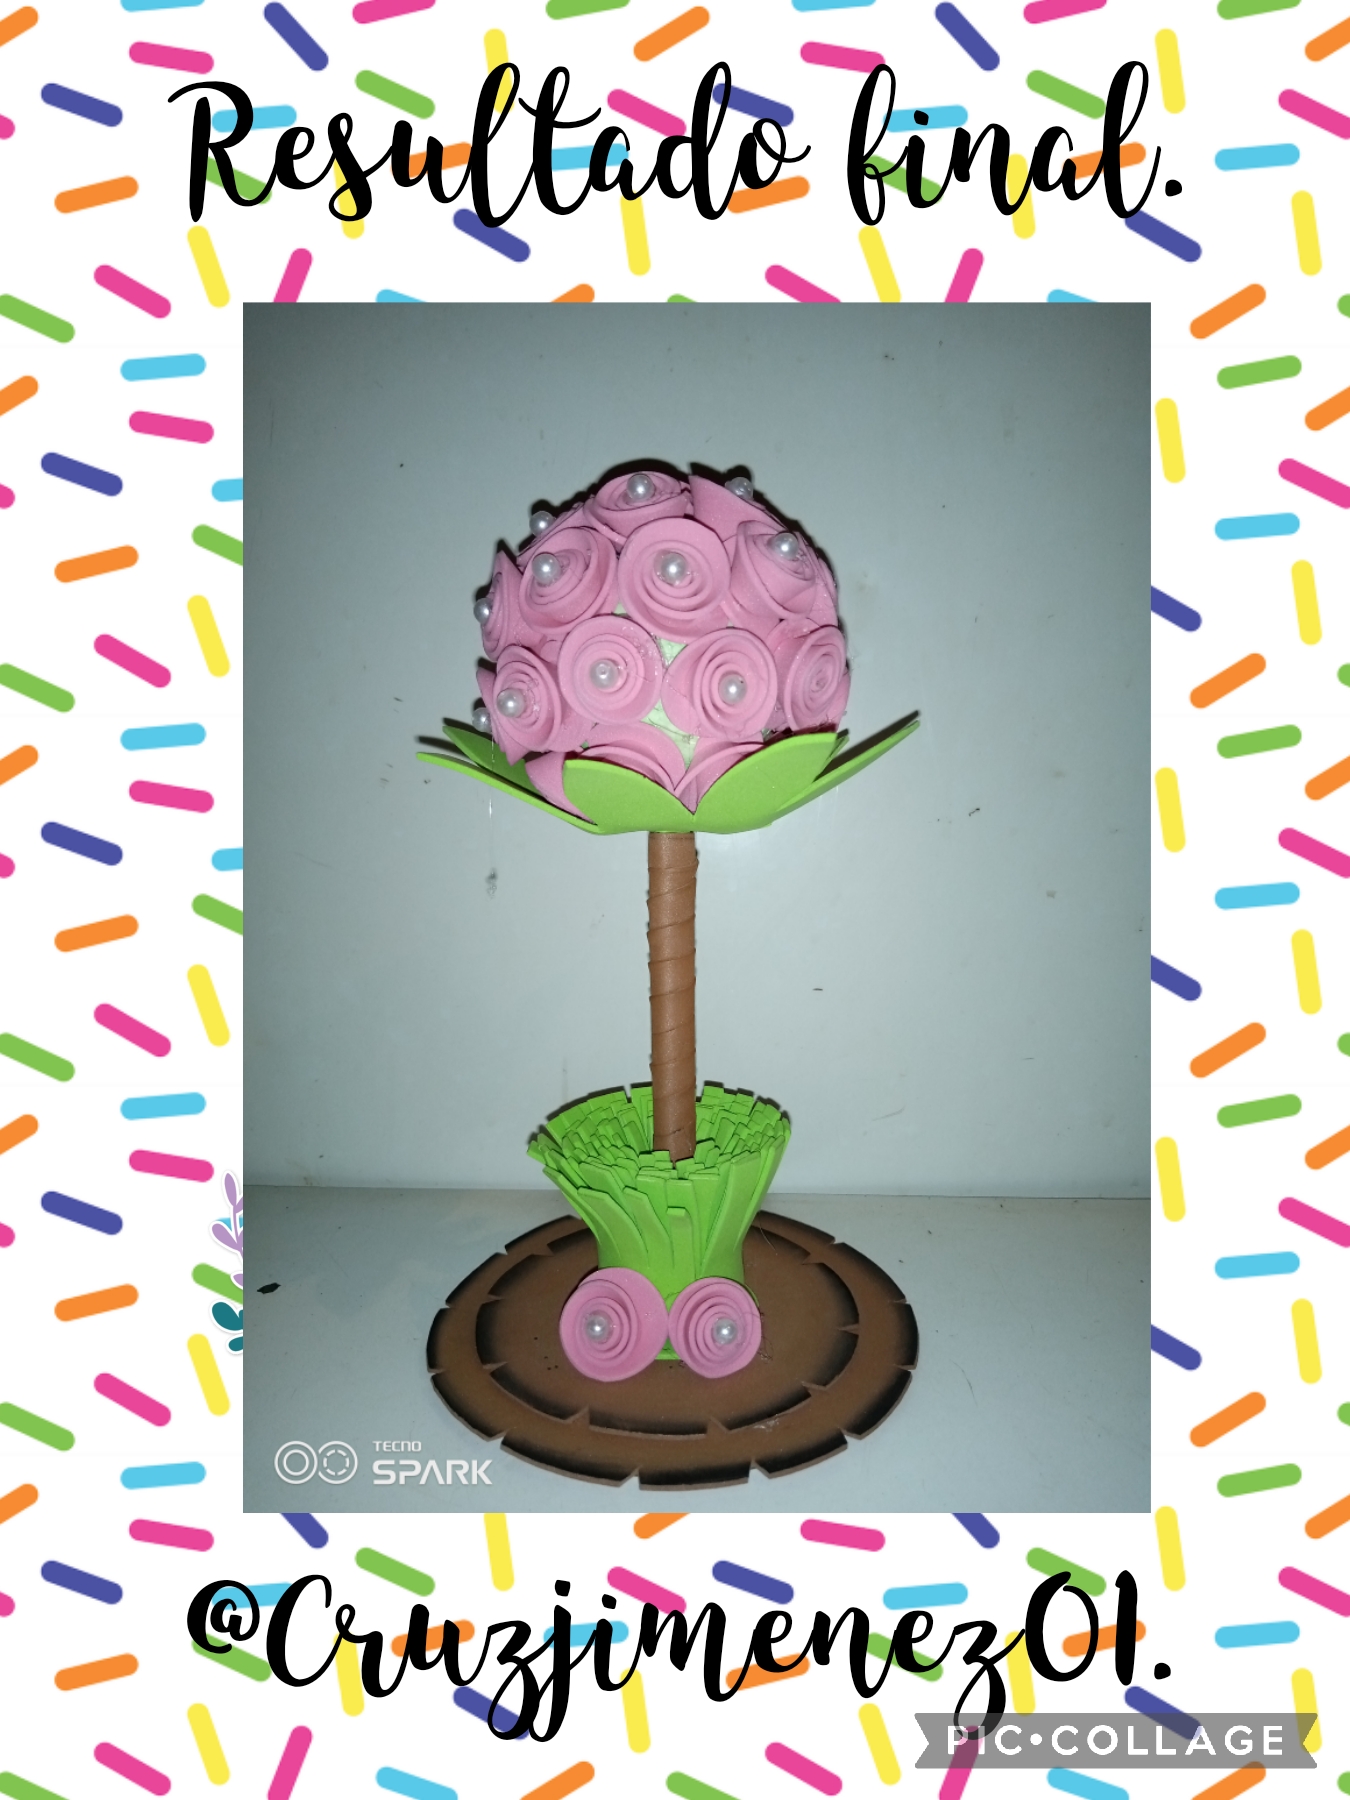
This is the final result of all the steps, a beautiful and elegant pen, decorated with roses made with foami, ideal to give to the most important people and we can also place it as an ornament on our desk or wherever you want, Thanks for visiting my blog, see you very soon with another creative idea. God bless you all, see you very soon.
Las fotos fueron tomadas con mi teléfono androide TECNO SPARK 6GO, y editadas con la aplicación PIC-COLLAGE.
The photos were taken with my TECNO SPARK 6GO Android phone and edited with the PIC-COLLAGE app.
Muy bello!!!💕
hola, muchas gracias y me alegra mucho que les gusto mi proyecto.
Hola amiga ! ✨💕 Que trabajo más lindo, me encanta , se ve muy delicado, me gustó la técnica con la que pintaste la base.
Gracias por compartir amiga, Saludos ✨💕👋🏻
Hola, me alegro mucho muchas gracias saludos y bendiciones.
¡Felicidades! Esta publicación obtuvo upvote y fue compartido por @la-colmena, un proyecto de Curación Manual para la comunidad hispana de Hive que cuenta con el respaldo de @curie.
Si te gusta el trabajo que hacemos, te invitamos a darle tu voto a este comentario y a votar como testigo por Curie.
Si quieres saber más sobre nuestro proyecto, acompáñanos en Discord: La Colmena.
Your content has been voted as a part of Encouragement program. Keep up the good work!
Use Ecency daily to boost your growth on platform!
Support Ecency
Vote for new Proposal
Delegate HP and earn more
Bello trabajo, me encantó.
Muy lindo y creativo, sin duda con foami se puede crear grandes cosas, gracias por compartirlo, saludos