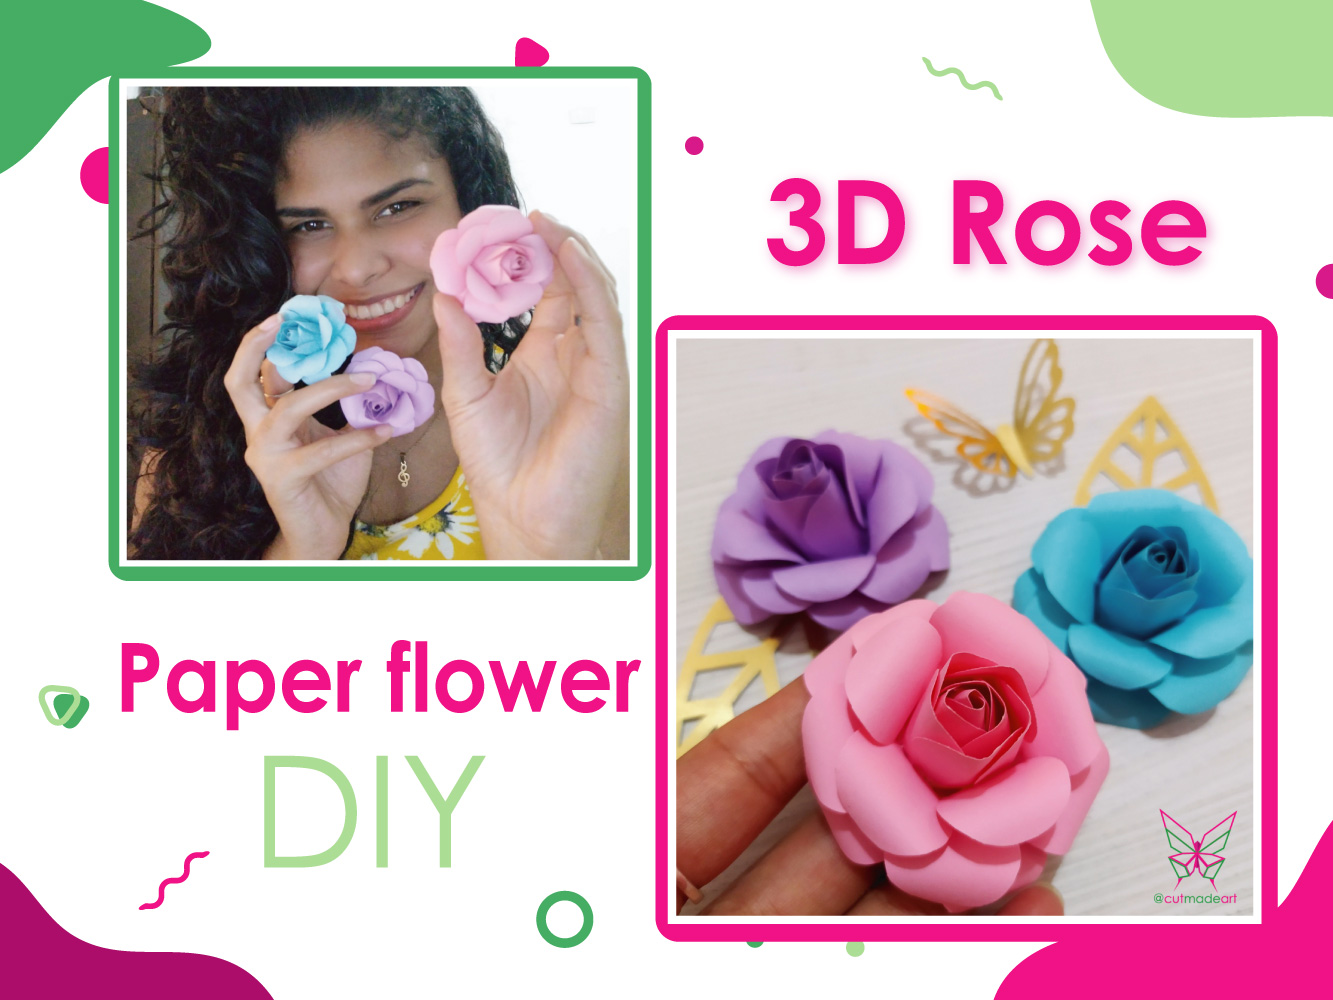
Hola amigos de Hive ¿Cómo están? Espero estén super bien. Hoy quiero compartir con ustedes como hacer rosas de papel 3D muy lindas, ideales para usarlas como topper para tortas. De verdad quedan muy bellas, femeninas y lo mejor es que son muy fáciles de elaborar. Sigue leyendo para enterarte de como hacerlas.
Hi Hive friends, how are you? I hope they are super good. Today I want to share with you how to make very cute 3D paper roses, ideal to use as a cake topper. They really look very beautiful, feminine and the best thing is that they are very easy to make. Read on to find out how to do them.
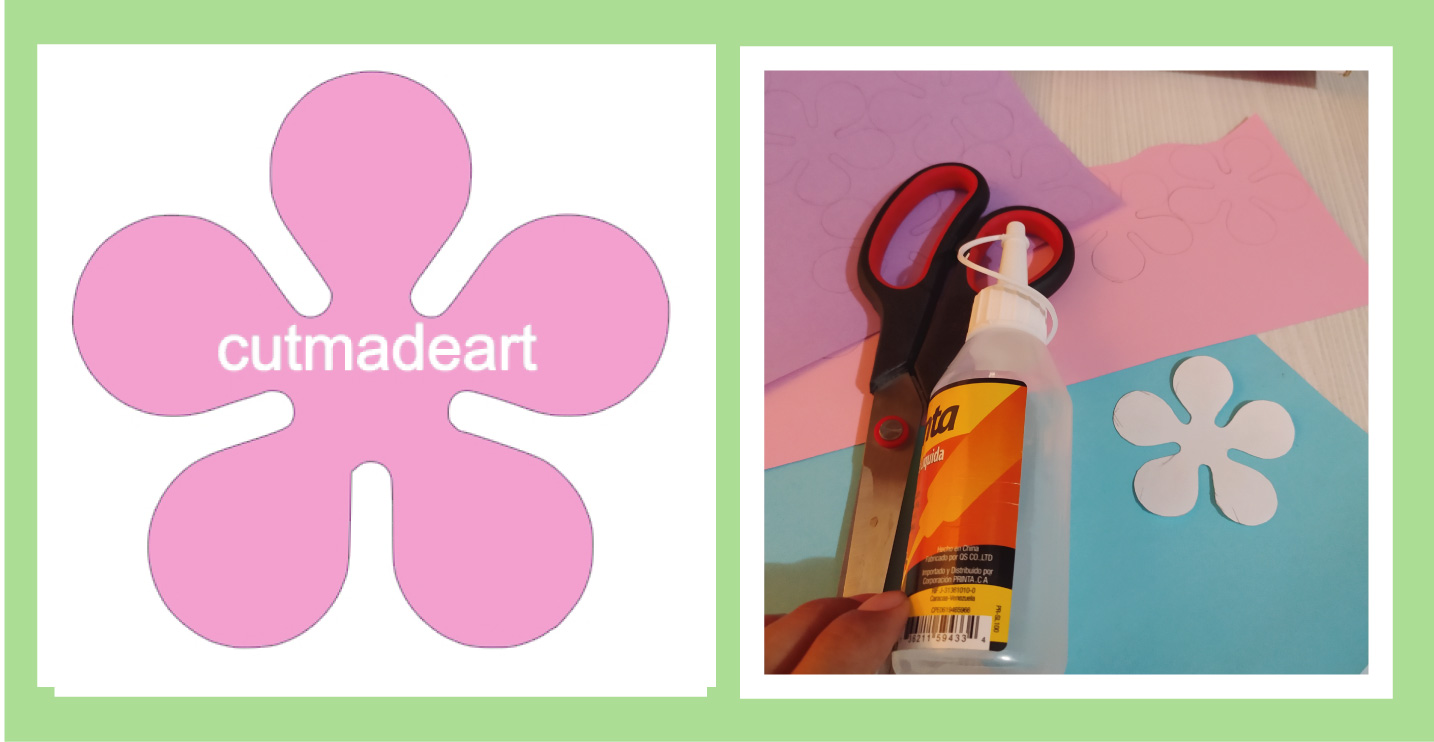
Para empezar les compartiré el molde que deberán utilizar para hacer realizar estas flores. Pueden calquearla directamente de la pantalla o hacerla de forma manual (la medida que yo utilice fue de aproximadamente 6 cm). Ahora veamos que materiales necesitaremos.
To begin, I will share with you the mold that you will have to use to make these flowers. They can trace it directly from the screen or do it manually (the measurement that I used was approximately 6 cm). Now let's see what materials we will need.
Materiales/Materials
- Molde para flor
- Cartulinas de colores
- Tijera
- Silicón liquido o caliente.
- Palillo
- Flower mold
- Colored cards
- Scissor
- Liquid or hot silicone.
- Toothpick
Bien, comencemos!
Para hacer 1 rosita tendremos que calquear y cortar 5 veces el molde anteriormente dado.
OK lets start!
To make 1 rosita we will have to trace and cut the previously given mold 5 times.

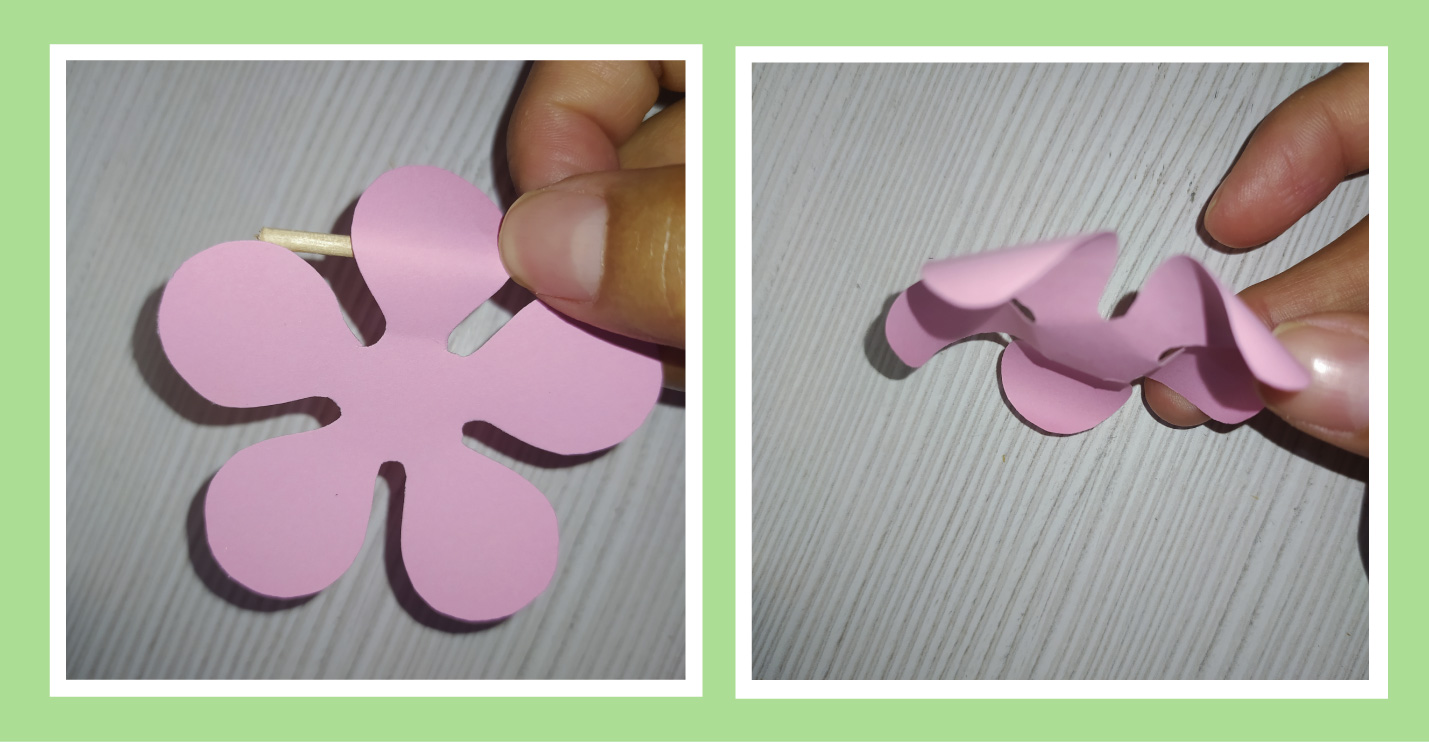
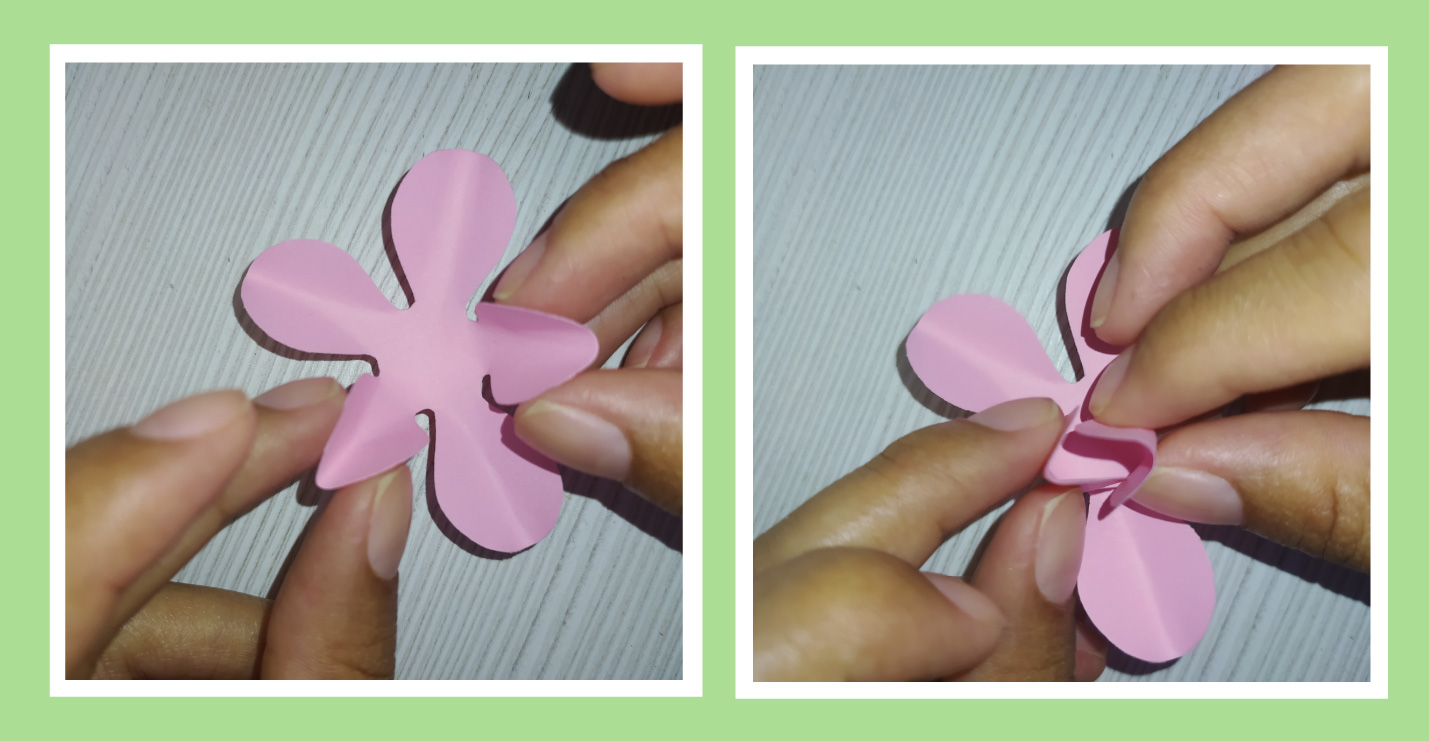
Luego vamos a tomar 2 de los 5 cortes realizados y con ayuda del palillo doblaremos por la mitad cada pétalo.
Then we are going to take 2 of the 5 cuts made and with the help of the toothpick we will fold each petal in half.

Y a los otros tres moldes vamos a rizar sus pétalos hacia afuera con la ayuda del palillo también.
And to the other three molds we are going to curl their petals out with the help of the toothpick as well.
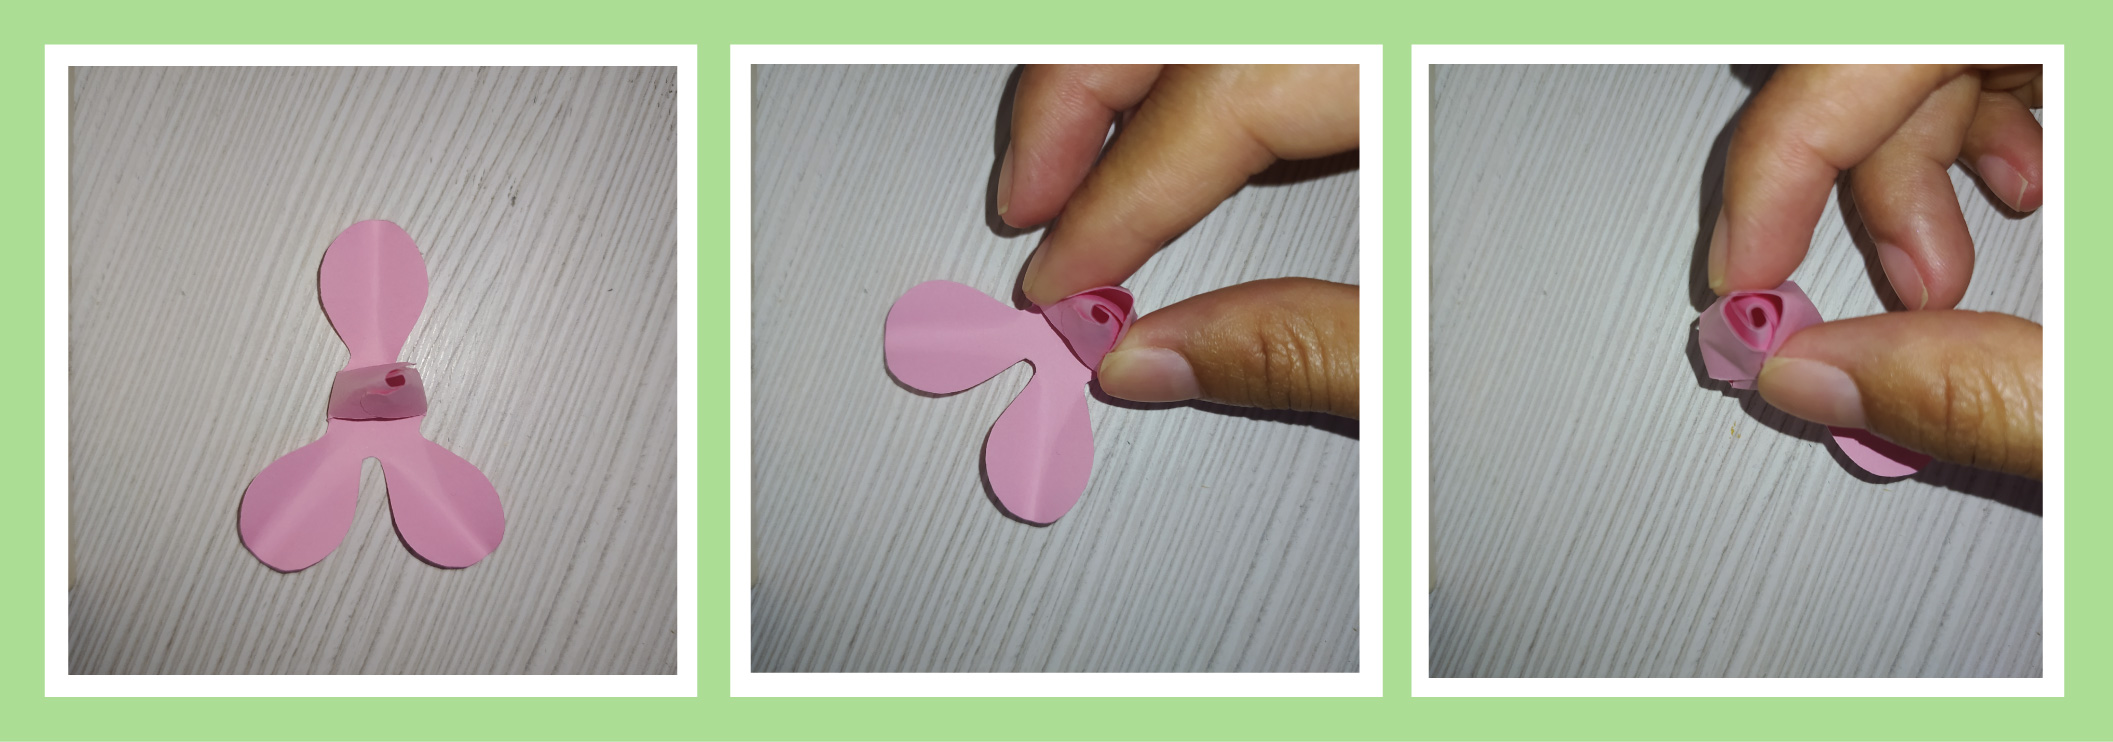
Ahora comenzaremos a armar el centro de la flor. Para esto vamos a utilizar los 2 moldes a los que doblamos sus pétalos a la mitad. Primero pegaremos dos pétalos que se encuentren en lados opuestos para crear la base, y luego los otros 3 restantes los pegamos alrededor de lo hecho anteriormente. (Siempre dejando una apertura dentro de cada pétalo).
Now we will begin to assemble the center of the flower. For this we are going to use the 2 molds to which we fold the petals in half. First we will glue two petals that are on opposite sides to create the base, and then the other 3 remaining we will glue them around what was done previously. (Always leaving an opening inside each petal).
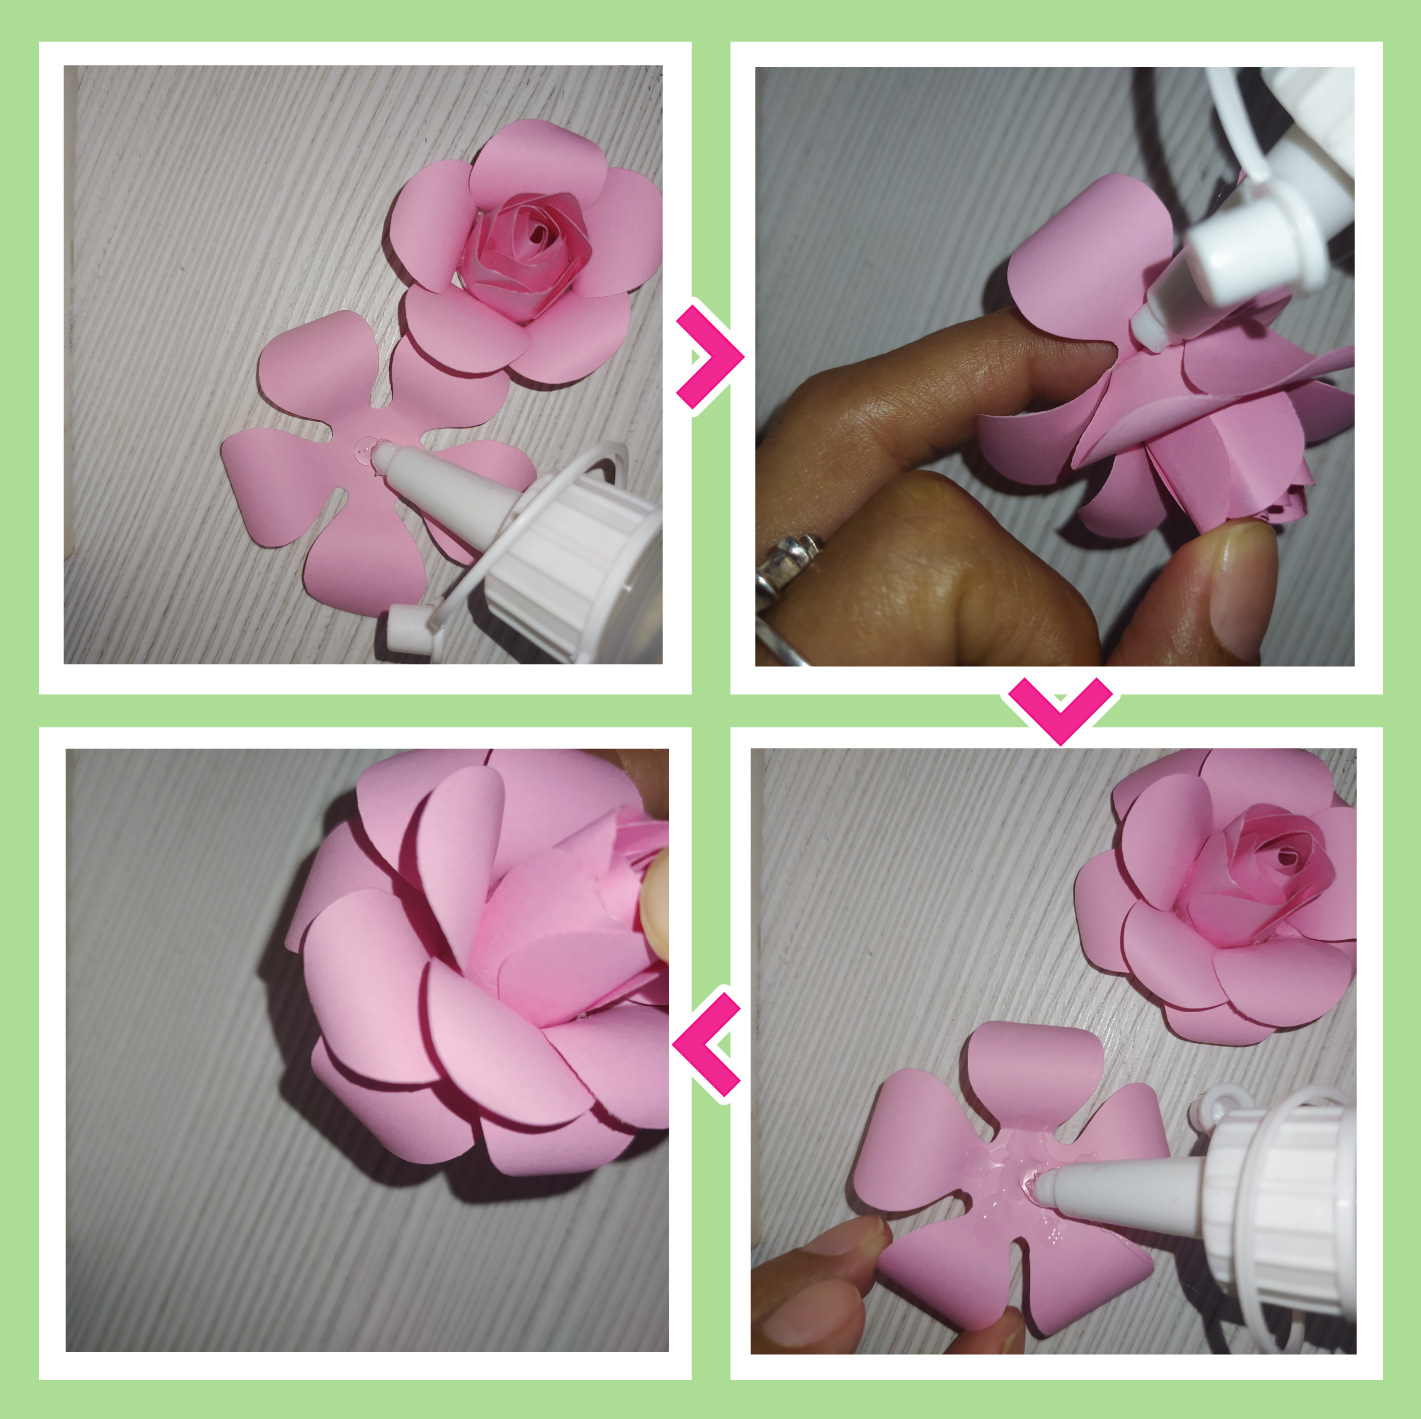
Luego vamos a pegar la base del capullo que realizamos al centro de la otra capa del molde , para luego ir pegando al rededor sus pétalos (esto yo lo realizo recogiendo de uno en uno cada petalo y dando la forma desee).
Then we are going to glue the base of the cocoon that we made to the center of the other layer of the mold, and then go around gluing its petals (I do this by collecting each petal one by one and giving the desired shape).
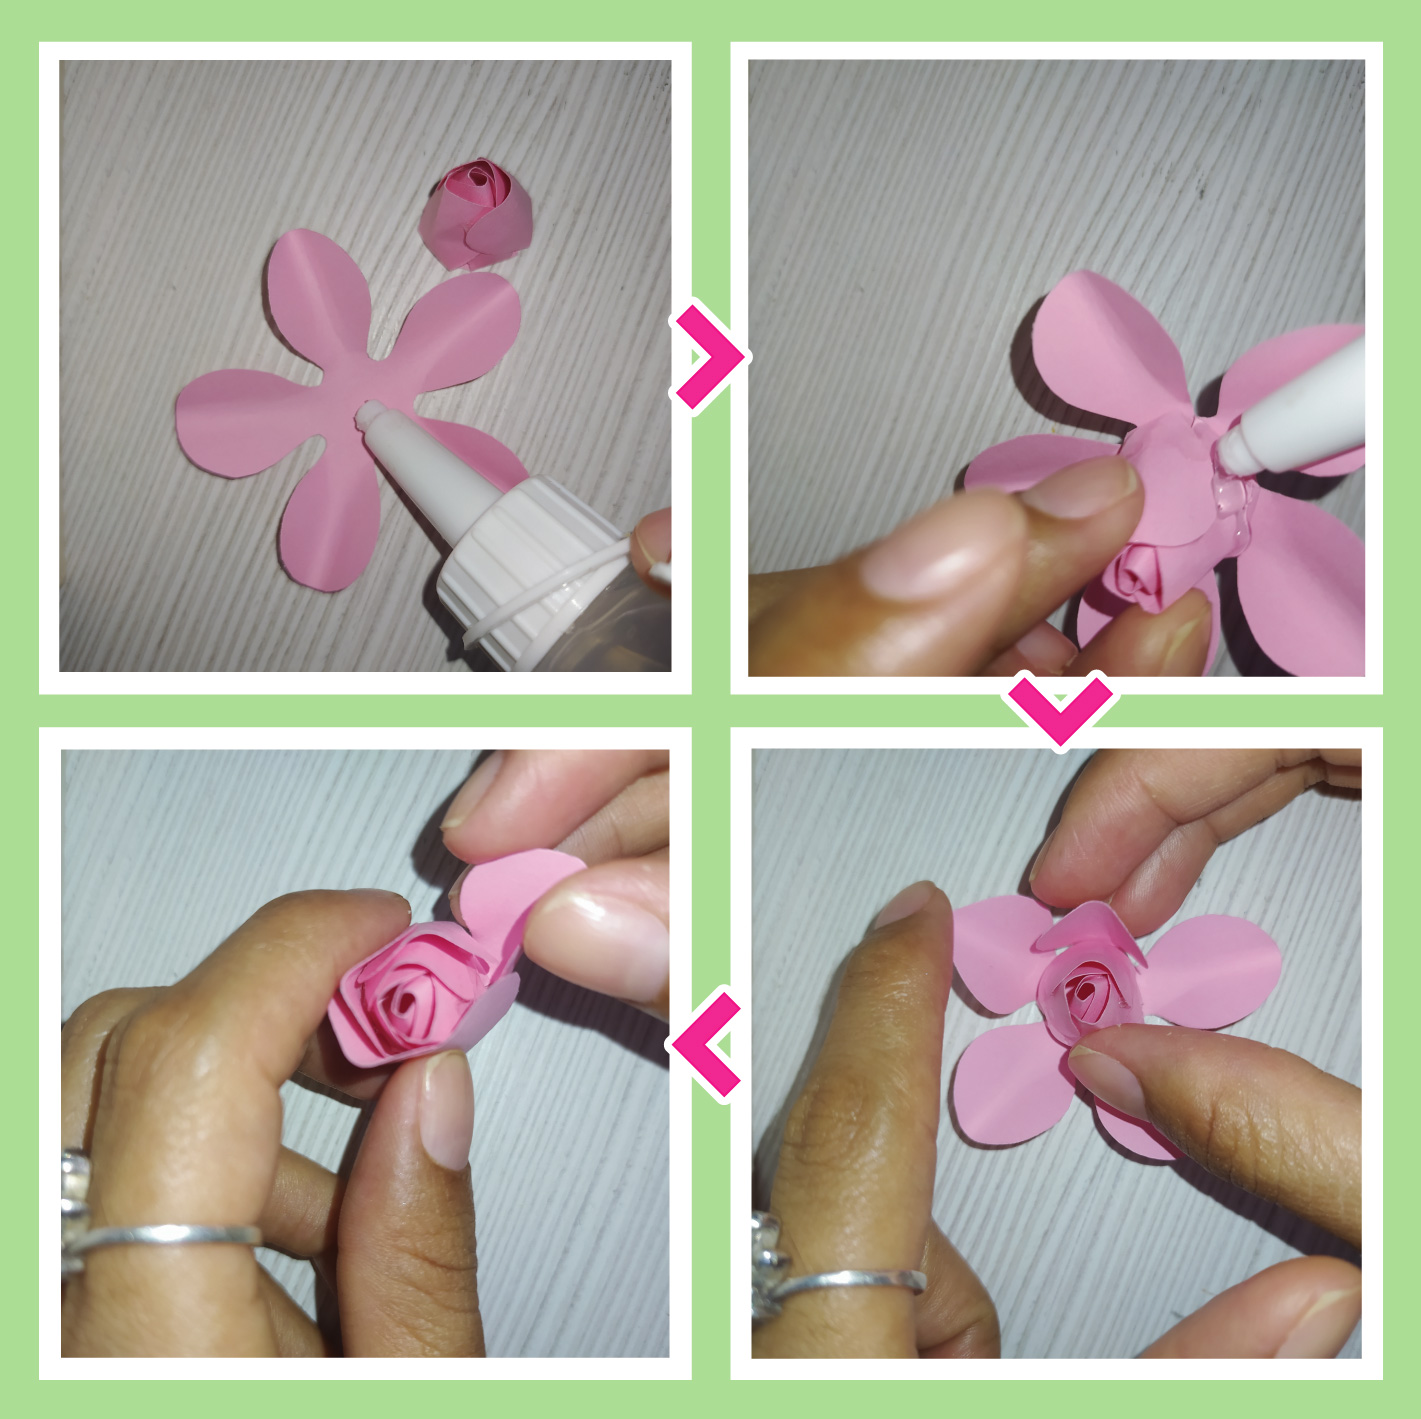
Seguimos con la parte mas sencilla de la flor que es pegar las ultimas 3 capas (las que están rizadas hacia afuera). Lo que haremos será pegar el centro y los pétalos al capullo. Para esto colocamos pega en el centro y y alrededor del capullo lo mas al borde que puedan, esto es para que los pétalos queden sujetos debajo pero mantengan su forma arriba y de apertura a la flor.
We continue with the simplest part of the flower, which is to glue the last 3 layers (those that are curled outwards). What we will do is glue the center and the petals to the bud. For this we place glue in the center and around the bud as close to the edge as possible, this is so that the petals are held underneath but maintain their shape above and opening to the flower.
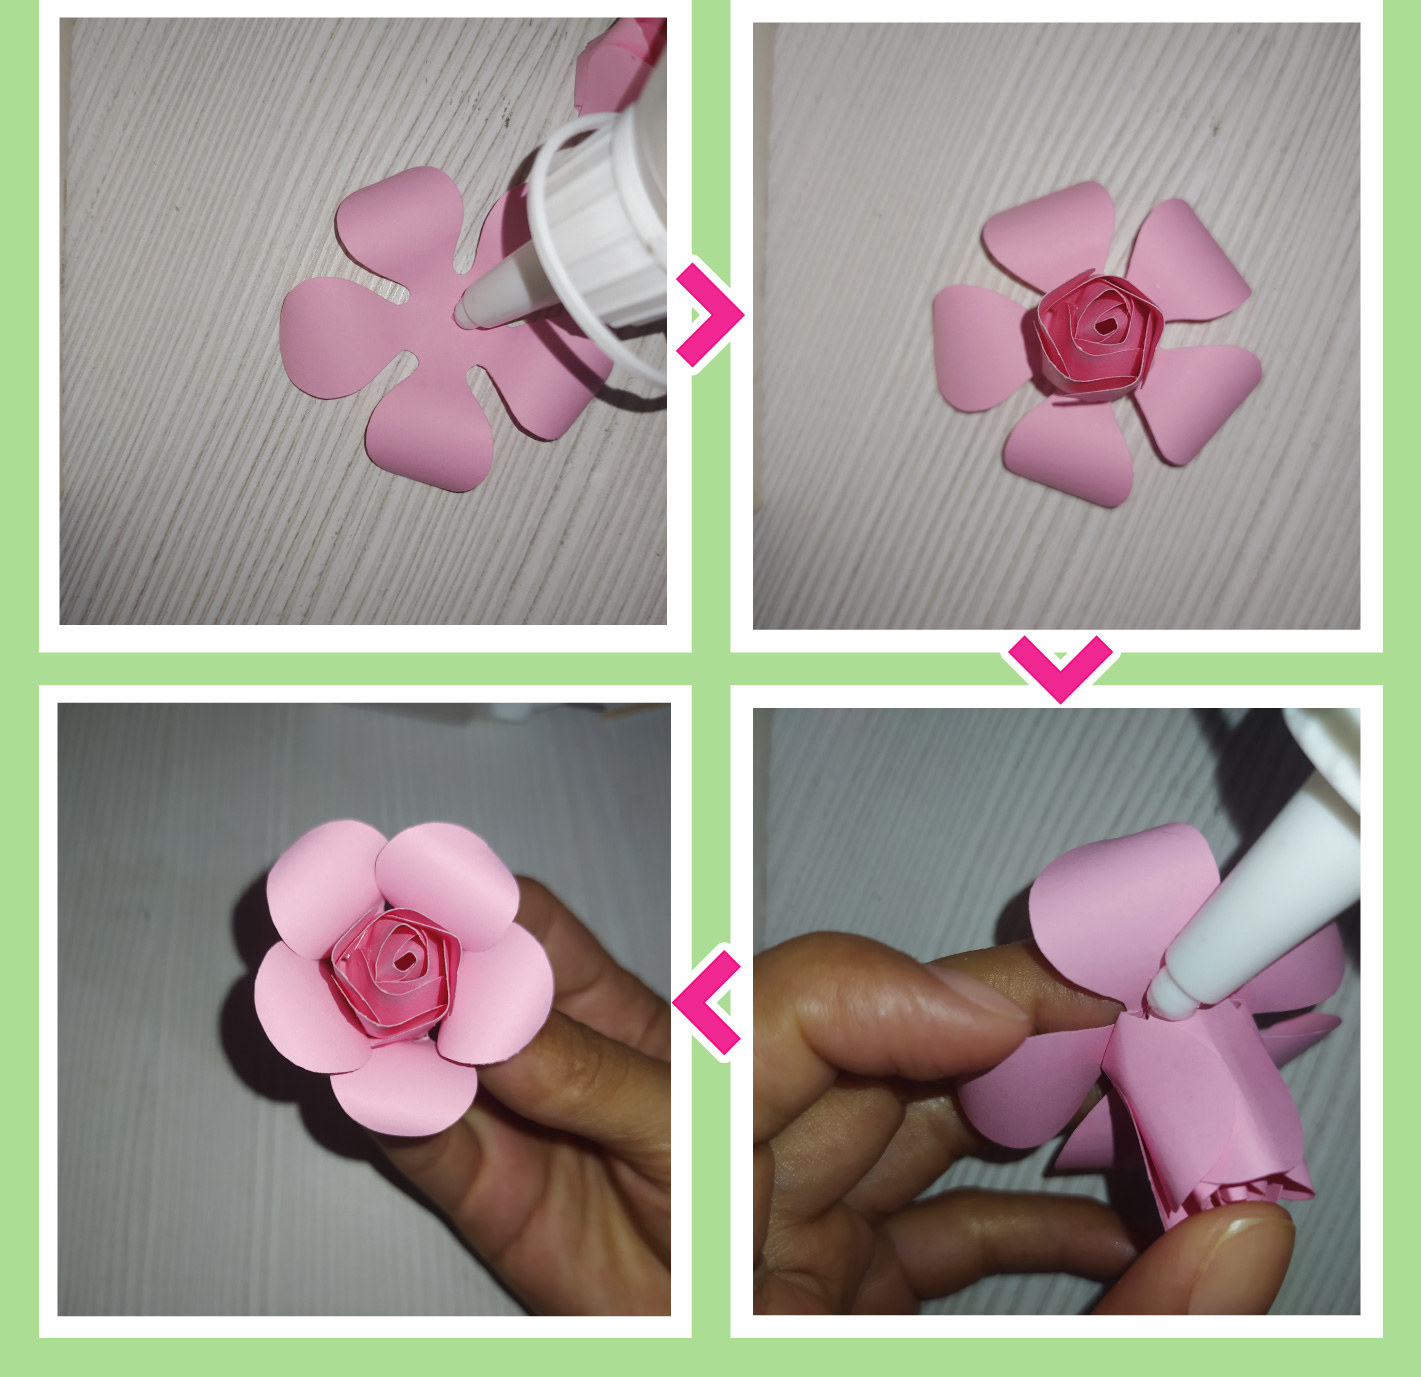
Para culminar repetimos el mismo procedimiento anterior con las dos capas restantes, tratando siempre que los pétalos queden sujetos pero no demasiado pegados.
To finish, we repeat the same previous procedure with the two remaining layers, always trying to keep the petals attached but not too close together.
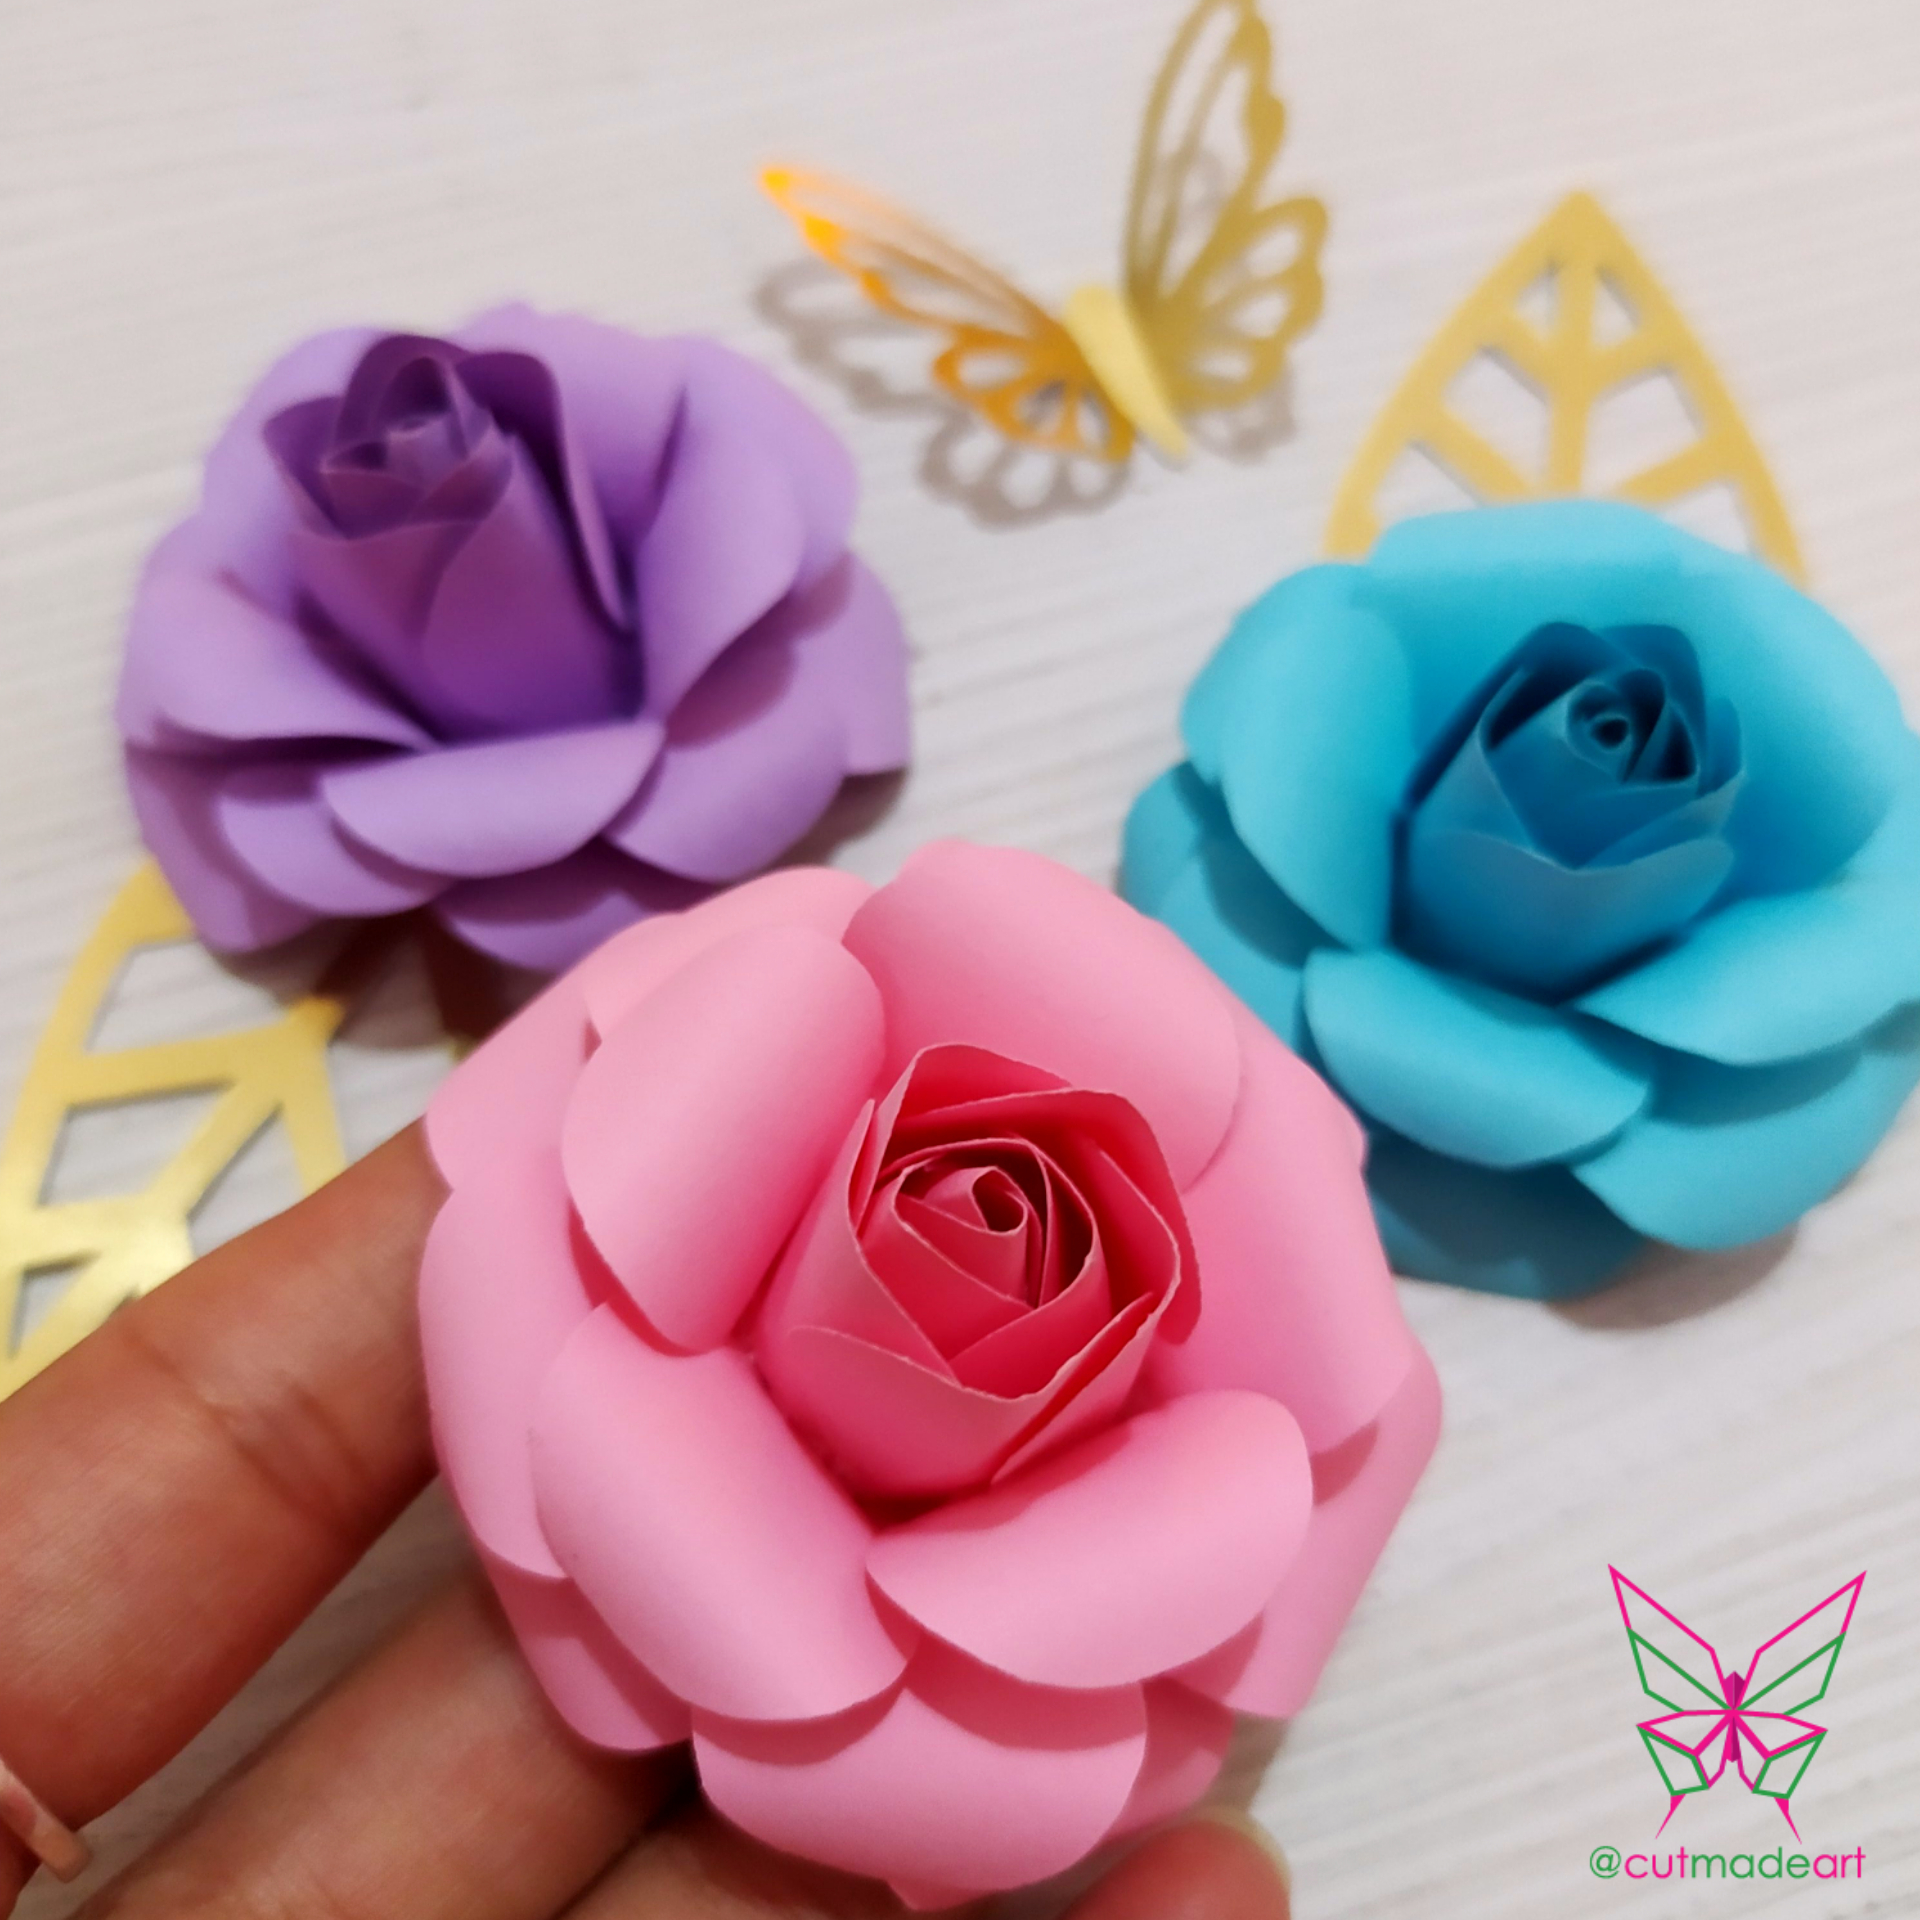
Y así es como tendremos lista nuestra rosa FACIL y RAPIDO. La pueden utilizar para decorar cualquier cosa que se les ocurra. Yo las he utilizado hasta como adorno para el cabello jaja 😆
And this is how we will have our rose EASY and FAST ready. They can use it to decorate anything they can think of. I've even used them as a hair ornament haha 😆
Espero les sea de gran utilidad este tutorial y le saquen mucho provecho. Nos vemos en un próximo post. Besos!
I hope this tutorial will be of great use to you and that you will get a lot out of it. See you in a next post. Kisses!
SALUDOS / REGARDS 👋
Todas las Fotos son de mi propiedad. Tomadas desde Xiaomi Redmi Note 8.
Contenido original de @cutmadeart (fotos y texto) - Todos los derechos reservados Publicado en HIVE así como en mi instagram : http://instagram.com/cutmadeart?r=nametag
All Photos are my property. Taken from Xiaomi Redmi Note 8.
** Original content from @cutmadeart (photos and text) ** - All rights reserved Posted on HIVE as well as on my instagram: http://instagram.com/cutmadeart?r=nametag