Hola hola qué tal amigos; yo estoy súper emocionada por todo el amor y el apoyo que le han brindado a mis recientes post, y quiero agradecerles de todo corazón, no saben cuan feliz me han hecho.💕💕💕
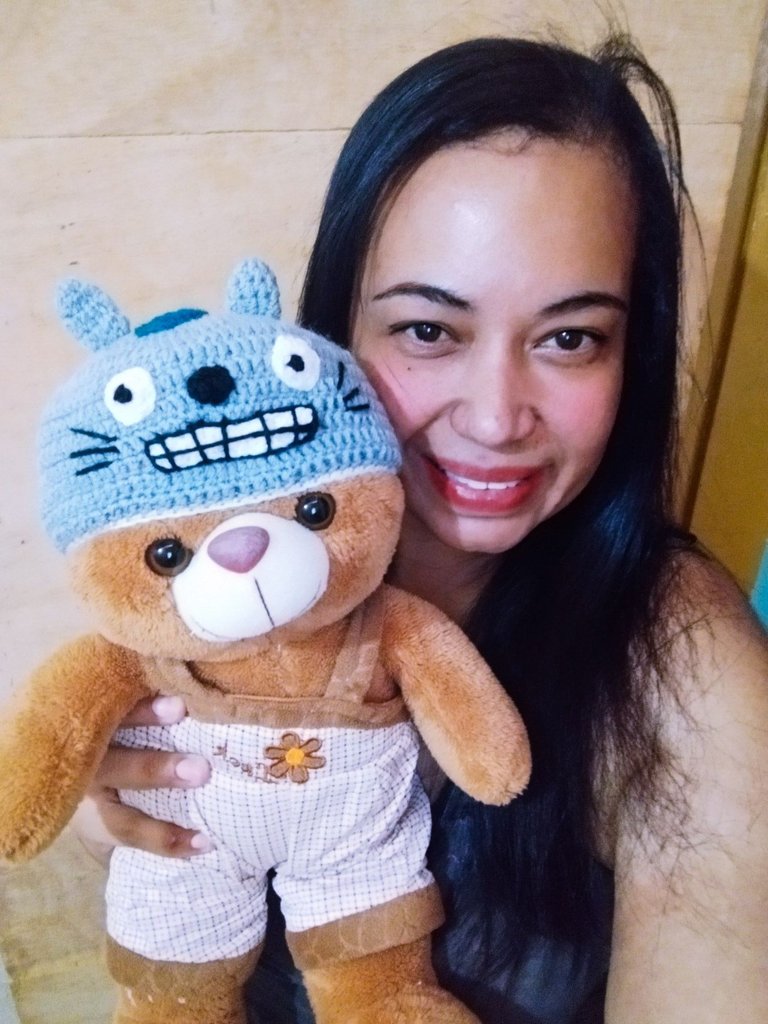
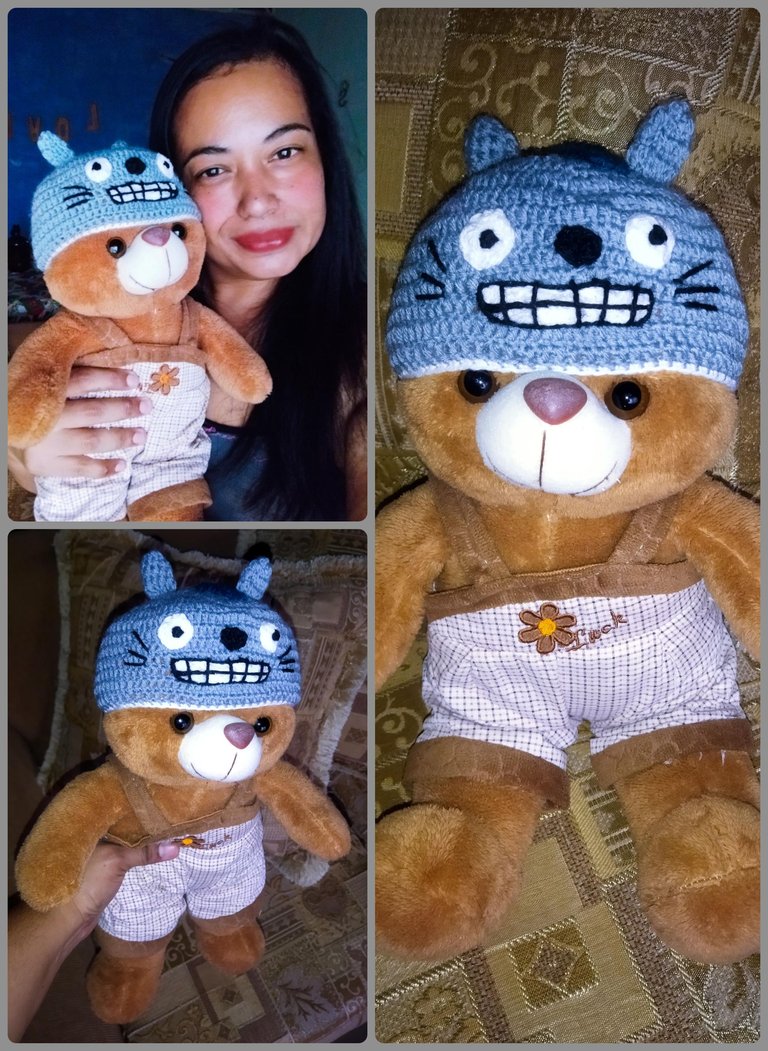
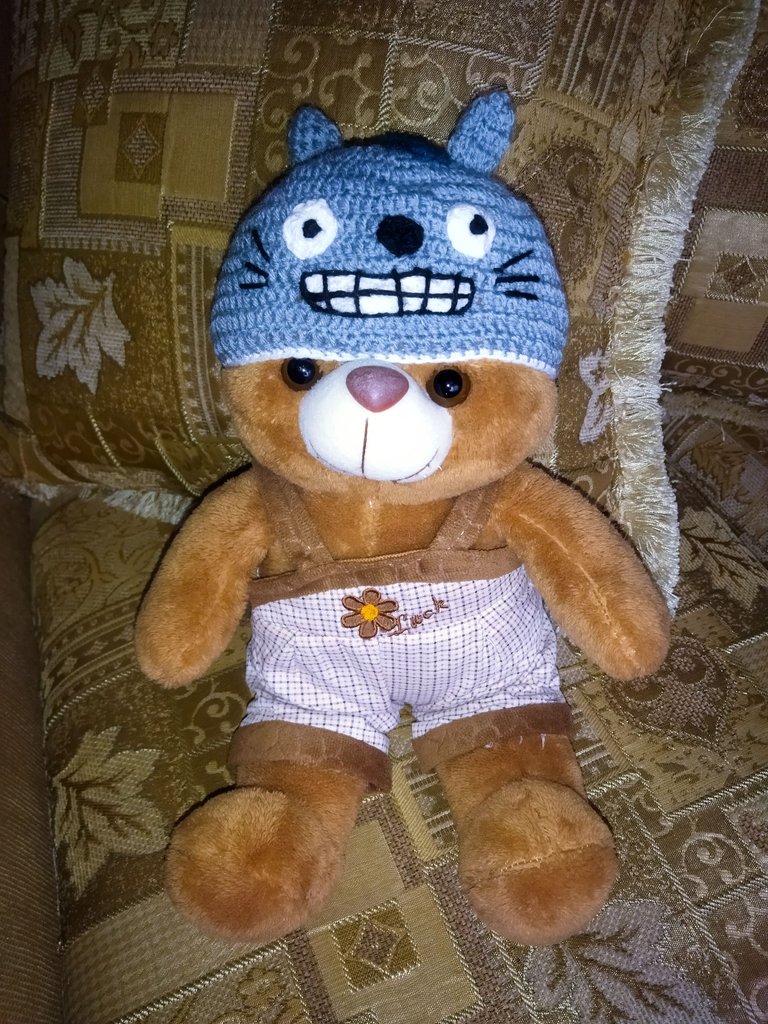
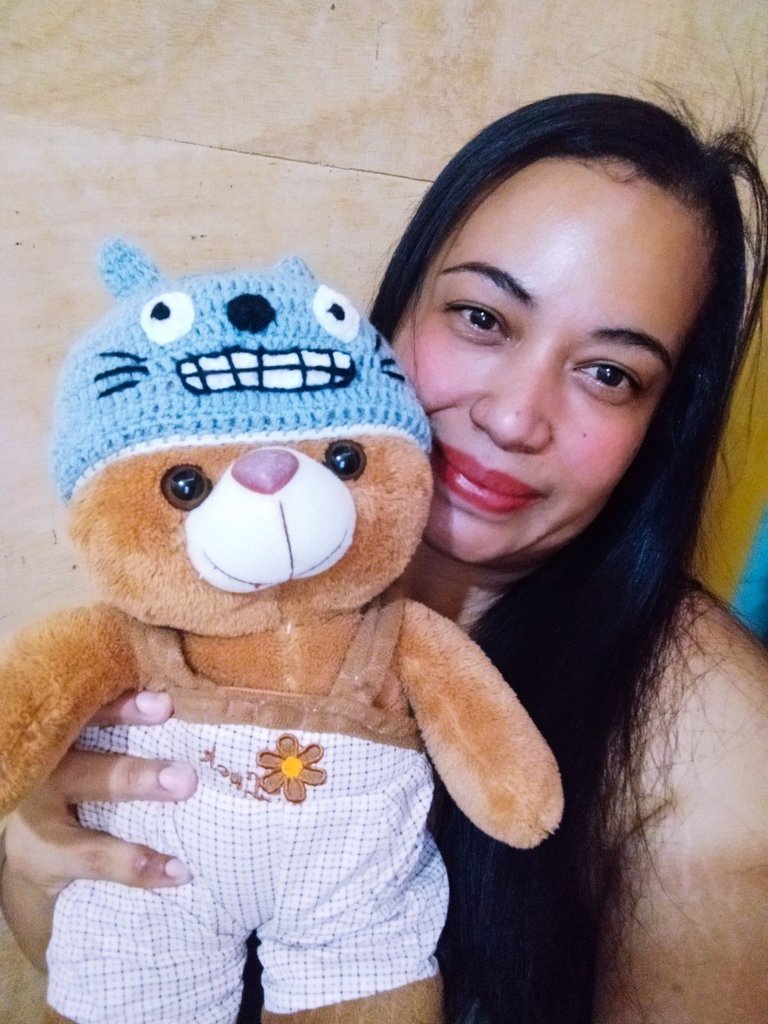
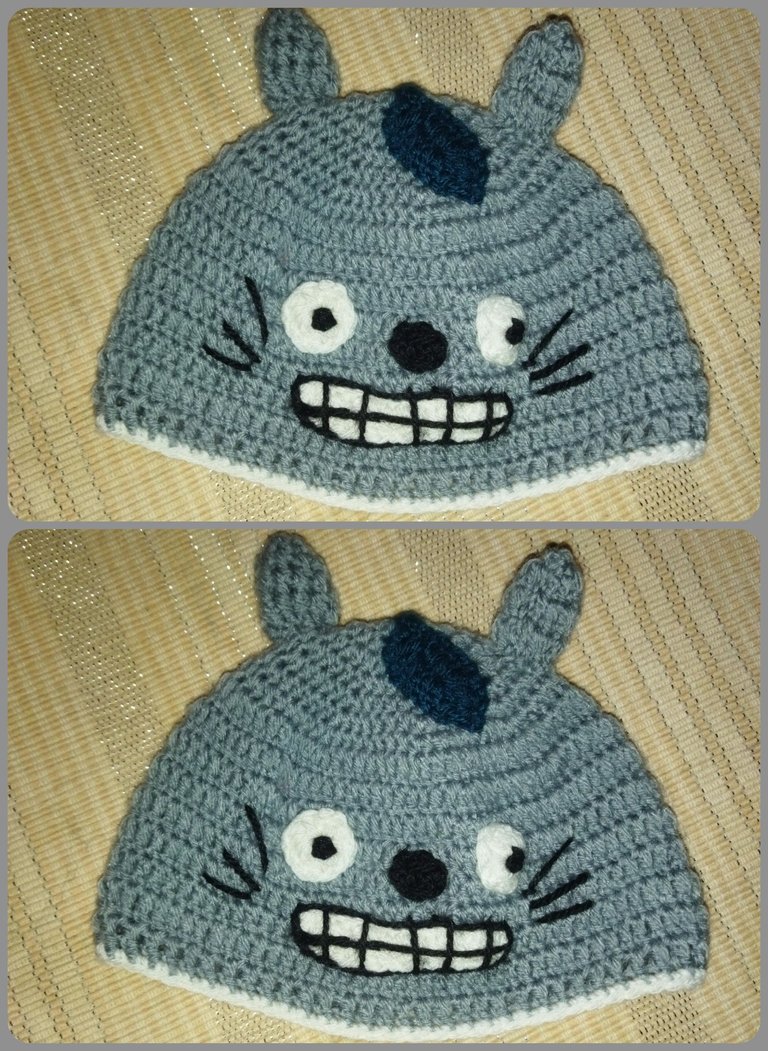
Hoy seguimos con uno de los tutoriales que tanto me gustan, porque está dedicado a seguir preparándonos para la llegada del bebé mi sobrina, el cual esperamos con mucha ilusión y amor , en esta ocasión le voy a tejer un gorrito para bebe a crochet de una talla de 0 a 3 meses,pero con una característica muy particular ya que está decorado con un simpático y tierno Totoro Bebé,el emblemático personaje de manga, de los estudios Gibli. Ya que fué una petición especial de mi hijo quien es fanático de esos personajes.
Today I bring you this model, but you can customize the base hat with the design or pattern you prefer.
Esta prenda de vestir es de suma importancia para los bebés recién nacidos ya que abrigar su cabecita es tan importante como abrigar el resto de su cuerpo, por eso la importancia de los gorros. Hoy te traigo este modelo pero, pero el gorro base lo puedes personalizar con el diseño o perosonaje que prefieras.
Como estamos tejiendo para bebés debemos tener especial atención y cuidado con lo materiales que elijamos, lo principal es que busquemos un estambre hipoalergenico para cuidar a piel del recién nacido.
Hypoallergenic cotton yarn two millimeters thick in gray, black, green and white.
Number two crochet hook
Wool needle
Scissors
Los materiales utilizados en esta ocasión fueron: Hilo de algodón hipoalergenico de dos milimetros de grosor en color gris,negro, verde y en color blanco. Ganchillo del número dos Aguja lanera Tijeras

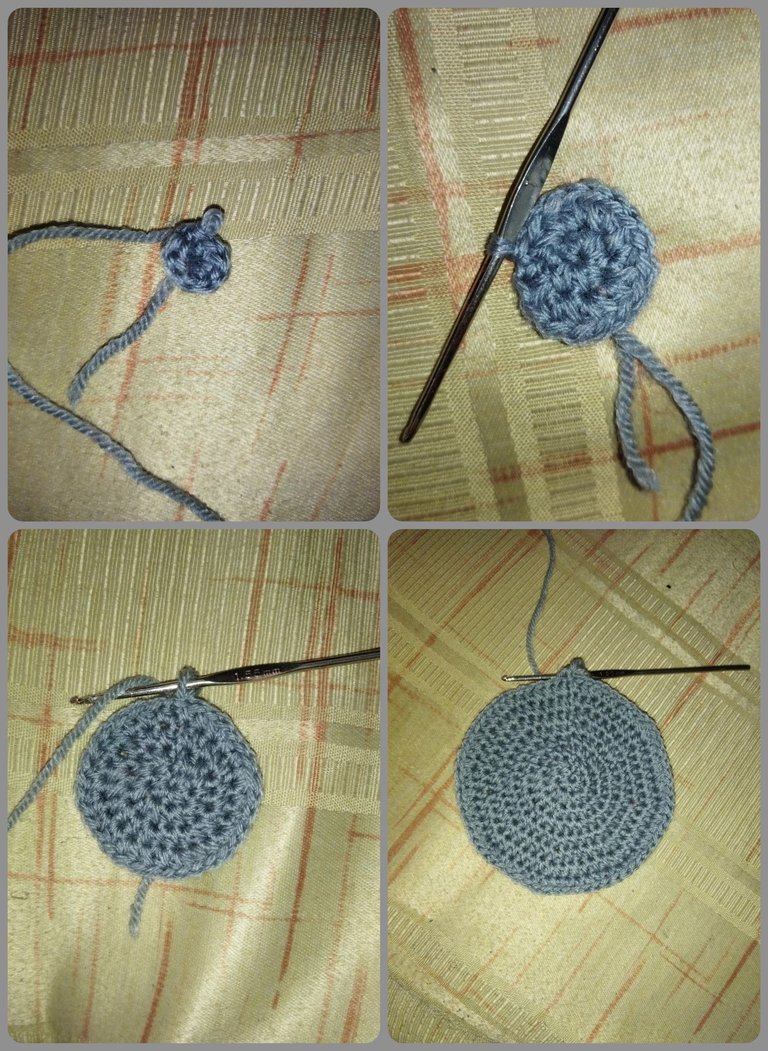
Para comenzar vamos a tejer un anillo mágico con 3 cadenas, con el estambre gris, para sustituir el primer punto alto, Dentro del anillo vamos a tejer otros nueve puntos altos, para tener 10 puntos altos en todo el anillo. Cerramos el anillo por completo.
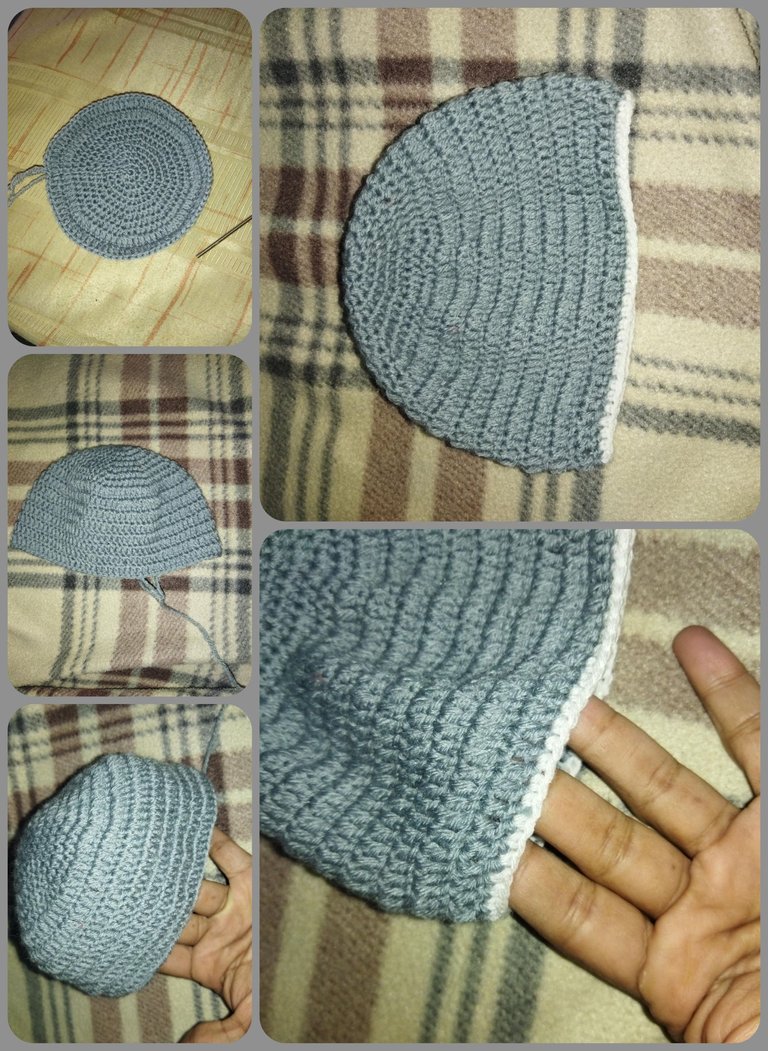
In row 3 we will work 3 chains and then knit the following sequence: two double crochet over the previous stitches and an increase, so that at the end of the row we will have 30 double crochet stitches. In the next row we will knit 3 chains and the following sequence: one increase, one single crochet, to end the row with 40 double crochet stitches.
En la segunda vuelta empezaremos tejiendo 3 cadenas para ganar altura, luego tejemos 6 aumentos, esto se hace tejiendo dos puntos altos en cada punto de la vuelta anterior y cerramos con un punto bajo, al final de la vuelta debemos tener 20 puntos altos. En la vuelta 3 trabajaremos 3 cadenas y luego tejemos la siguiente secuencia: dos puntos altos sobre los puntos anteriores y un aumento, para que al final de la vuelta tengamos 30 puntos altos. En la siguiente vuelta tejeremos 3 cadenas y la siguiente secuencia: un aumento, un punto solo, para terminar con 40 puntos altos.
En la vuelta número 5 trabajaremos 3 cadenas que sustituyen al primer punto alto, luego tejemos la siguiente secuencia: hasta terminar la vuelta, aumento y tres puntos altos sobre los puntos anteriores. Al finalizar debemos tener 50 puntos altos, este mismo patrón lo vamos a continuar hasta lograr el ancho deseado y luego hacemos cuatro vueltas de un punto sobre cada punto, hacemos un punto deslizado, una cadena y cortamos hilo. Para los bordes cambiamos a hilo color blanco y hacemos medios puntos bajos por toda la vuelta. Y ya tenemos listo nuestro gorro base.
Para las orejitas tomamos hilo color gris, montamos un anillo mágico de tres puntos altos, la segunda vuelta hacemos un aumento en cada punto, y realizamos dos vueltas de un punto alto sobre cada punto. Realizamos dos piezas iguales.
Para los ojos hacemos un anillo mágico y montamos doce puntos altos, punto deslizado, cadena y cortamos, dejando suficiente hilo para coser.
For the leaf, we take green yarn and making a chain of 16 stitches, slip stitch in the penultimate chain, two chains and slip stitch, then we make high stitches until we reach the extreme, slip stitch and repeat high stitches.
La parte de la boca la realizamos montando una cadena de 17 puntos, dejamos una cadena y a partir de la cadena número 16 hacemos puntos altos por todo el alrededor. Para la hoja, tomamos hilo verde y haciendo una cadena de 16 puntos, punto deslizado en la penúltima cadena, dos cadenas y punto deslizado, luego hacemos puntos altos hasta llegar al extrema, punto deslizado y repetimos puntos altos.
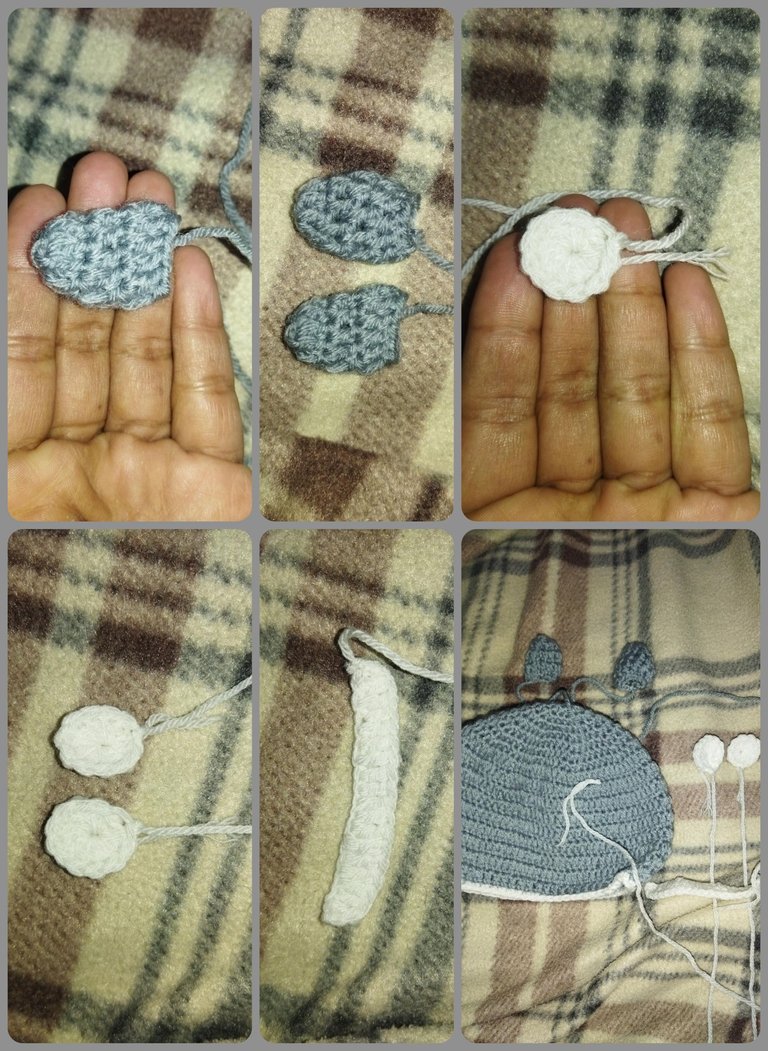
De esta manera ya tenemos todas las piezas y solo nos faltaría ensamblar en el gorro base. Comenzamos colocando las orejitas en ambos extremos, los ojos y dentro de ellos le vamos a bordar en hilo negro el círculo del medio, la parte de la sonrisa la bordeamos con hilo negro y hacemos cuadramos en el centro, para formar la figura de los dientes. Y la hoja la colocamos en el centro entre las dos orejas.
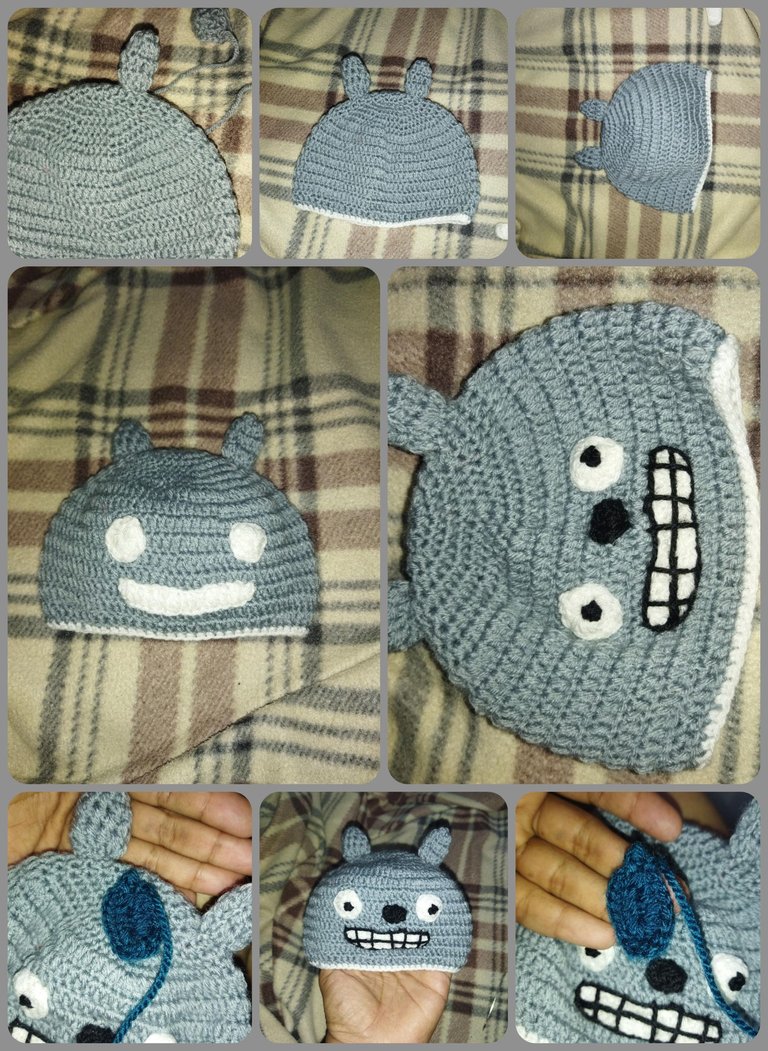
And in this way we have finished this beautiful crochet knitted hat of a beautiful Totoro Baby.
Así terminas este gorrito, si deseas darle una personalización, trata que no sean muy exageradas para no incomodar mucho al bebé. Y de esta manera ya tenemos culminado a este bello gorro tejido a crochet de un bello Totoro Bebé.
Por mi parte me despido hasta una nueva oportunidad, agradezco mucho tu atención y les deseo éxitos y bendiciones.
Todas las imágenes son de mi propiedad tomadas con redmi 9t y editadas con la aplicación Photoshop Express para Android.
Has sido curado por @visualblock / You've been curated by @visualblock
Bienvenidas delegaciones / Delegations welcome
Trail de Curación / Curation Trail
Vota por nuestro Testigo aliado - @hispapro / Vote for our allied Witness - @hispapro
Más información sobre el testigo aquí / More information about the witness here
Gracias @visualblock ☺️☺️ por el apoyo brindado!!
Tu manualidad es muy linda. Buen trabajo. 🤗
Amo a Totoro, tengo un par de peluches de este personaje tan carismatico y querido jeje por eso apenas vi que tu gorro era de él, entre a husmear sin dudar jaja ❤️
Te quedo muy bonito, tejes relamente muy bien y con muy lindos y prolijos acabados 😍
Graciasss, me alegra que le haya gustado😍
Congratulations, your post has been upvoted by @dsc-r2cornell, which is the curating account for @R2cornell's Discord Community.
Enhorabuena, su "post" ha sido "up-voted" por @dsc-r2cornell, que es la "cuenta curating" de la Comunidad de la Discordia de @R2cornell.
Gracias @dsc-r2cornell ☺️☺️
Aww que ternura!