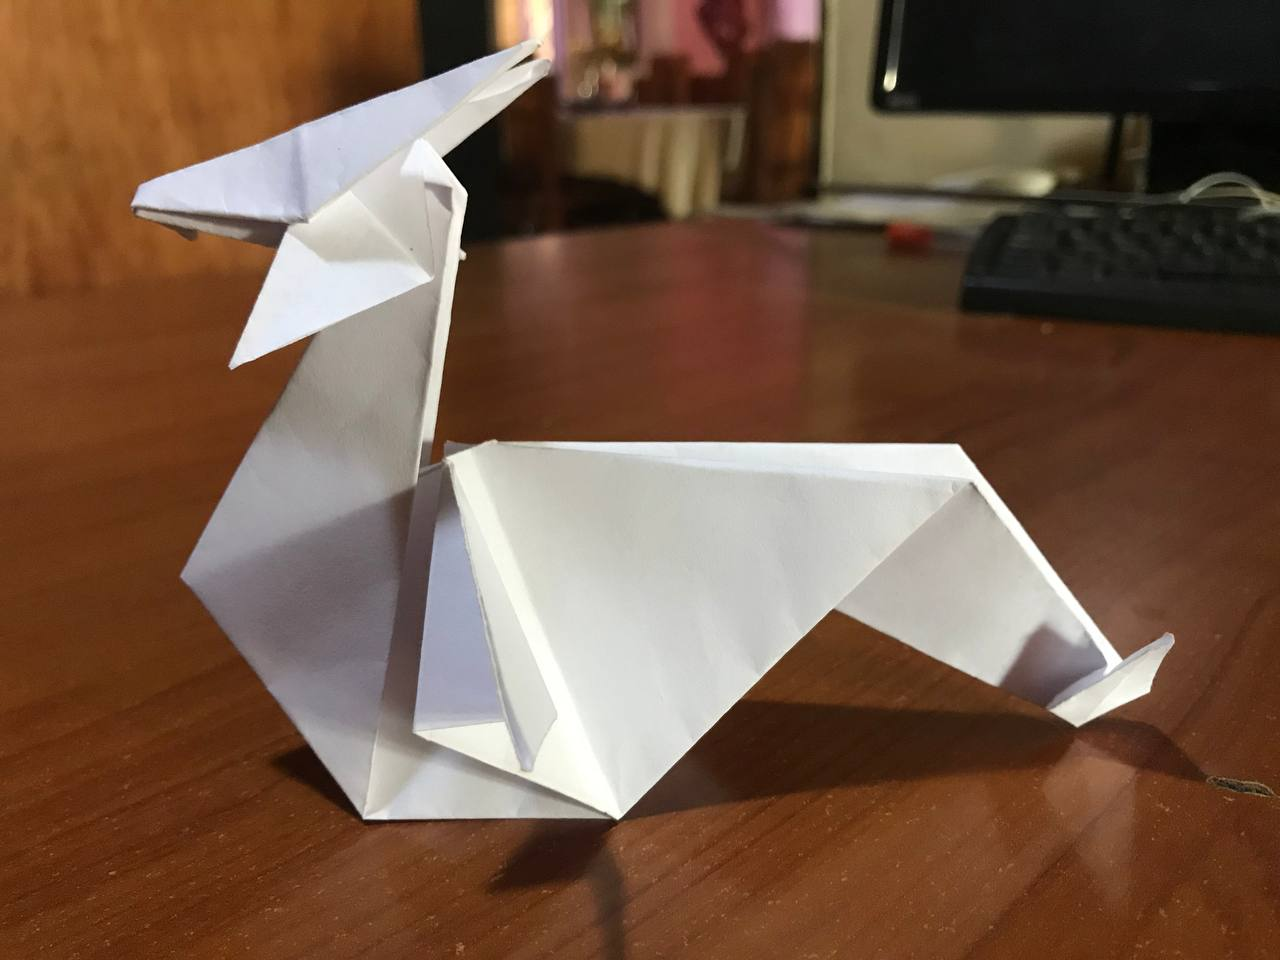
Greetings friends, after looking for some new ideas to assemble and get great pieces of paper using the origami technique. Today I managed to make one that had me a little confused, I ruined a sheet by wrong folding and after practicing, I was very happy with the result of this paper origami. The figure is a dragon, which is a great animal that existed many years ago and only the memory and the name of these animals remains, therefore, I took a piece of paper and began to fold and look for the paper to take the most similar shape. So I share with you the step by step of this great paper dragon.
Saludos amigos, luego de buscar algunas ideas nuevas para armar y conseguir grandes piezas de papel mediante la técnica del origami. Hoy logre hacer uno que me tenía un poco confuso, arruine una hoja por doblar mal y luego de practicar, quede muy contento con el resultado de este origami de papel. La figura se trata de un dragón, la cual es un gran animal que existió hace muchos años y solo queda el recuerdo y el nombre de estos animales, por lo tanto, tome un papel y comencé a doblar y buscar que el papel fuera tomando la forma más parecida. Así que les comparto el paso a paso de este gran dragón de papel.
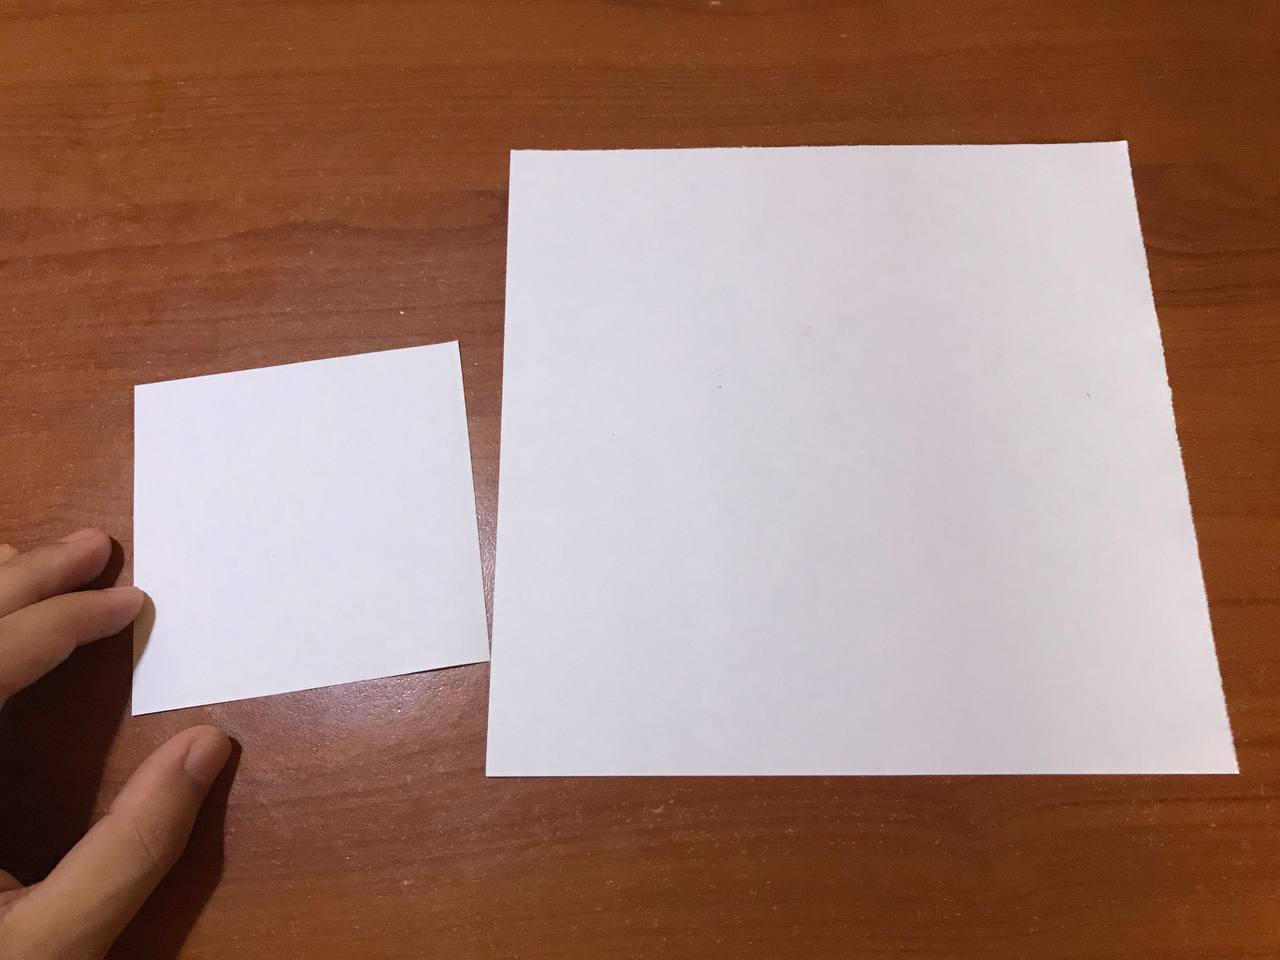
The first thing we will need to assemble our dragon will be two white sheets or any color of your choice to assemble this origami. The first sheet will have to have a measure of 20 * 20 cm and the second sheet will be a little smaller with the measures of 10 * 10 cm, so we can work and achieve each of the steps that require this great dragon and above all you have to be careful.
Lo primero que vamos a necesitar para armar nuestro dragón serán dos hojas blancas o de cualquier color de su preferencia para así armar este origami. La primera hoja tendrá que tener una medida de 20 * 20 cm y la segunda hoja será un poco más pequeña con las medidas de 10 * 10 cm, para así poder trabajar y lograr cada uno de los pasos que requieren este gran dragón y sobre todo se tiene que tener cuidado.
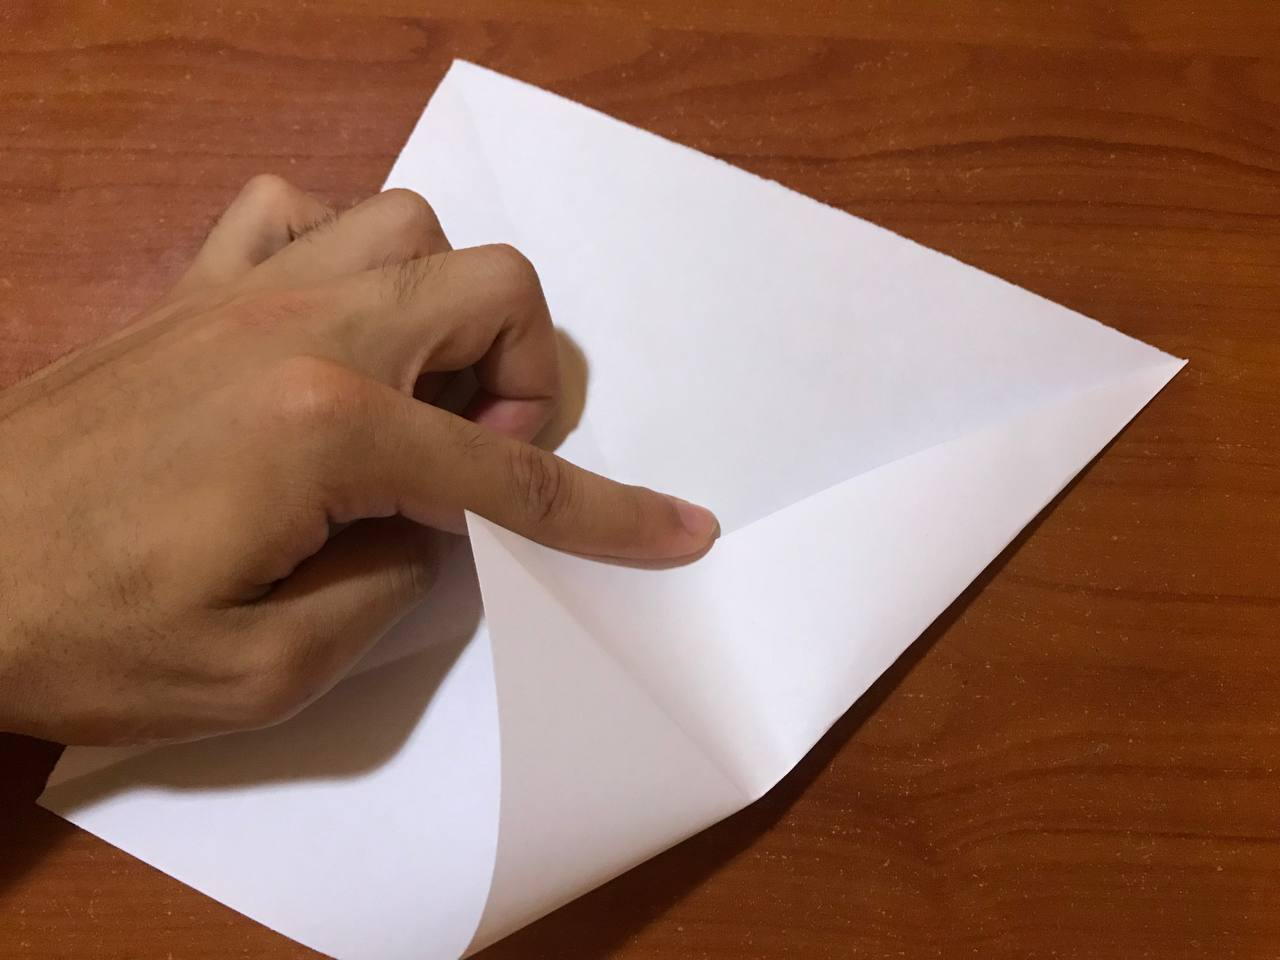
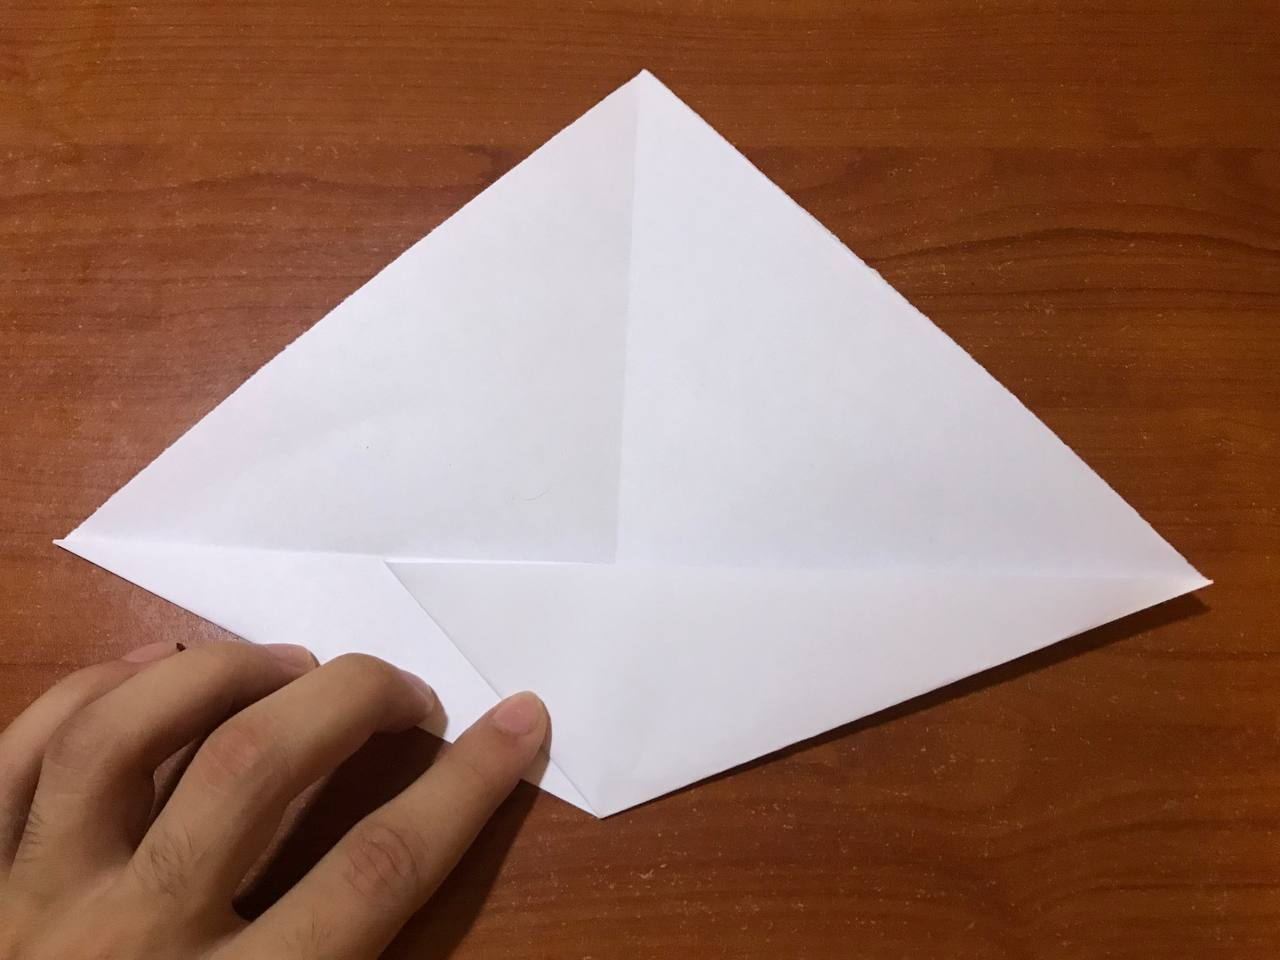
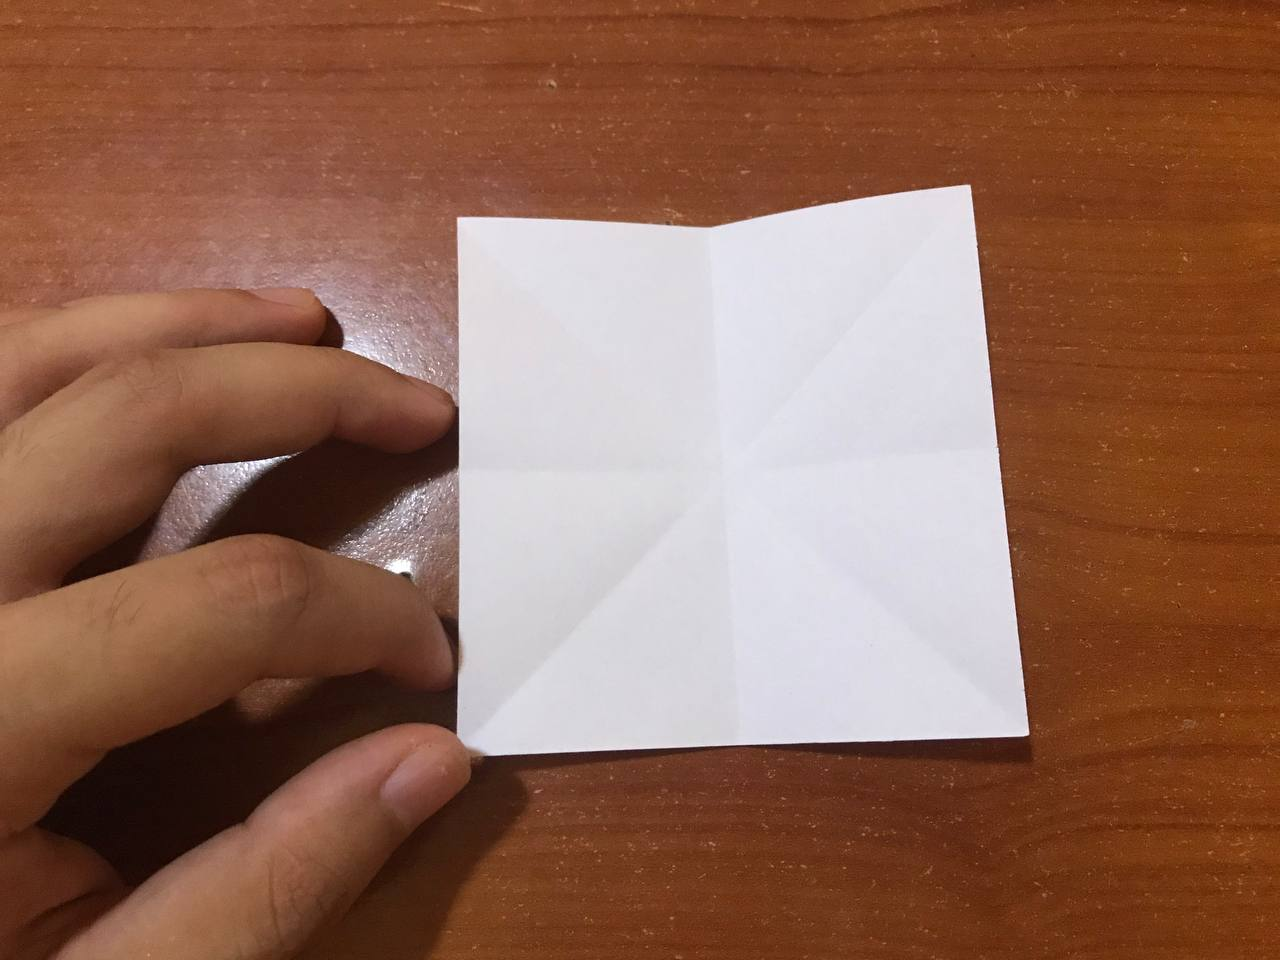
We take the largest sheet to begin to make the body of this dragon, where we will mark the two diagonals with great force so that they are very well marked on the sheet. We open the sheet and we will take one of the ends of the sheet and very carefully we will take to the center along the line that we marked in the previous fold and flatten, where we will take the fold that comes out to one side. The same thing we are going to repeat on the other side of the sheet, and at the end of these two steps we will have a kind of rhombus.
Tomamos la hoja más grande para así comenzar a realizar el cuerpo de este dragón, donde vamos a marcar las dos diagonales con mucha fuerza para que así queden muy bien marcadas en la hoja. Abrimos la hoja y vamos a tomar uno de los extremos de la hoja y con mucho cuidado vamos a llevar hacia el centro por la línea que marcarnos en el doblez anterior y aplastamos, donde vamos a llevar el pliegue que nos sale hacia un lado. Eso mismo la vamos a repetir por el otro lado de la hoja, y al final de hacer estos dos pasos nos quedará especie de un rombo.

|
 |
|
 |
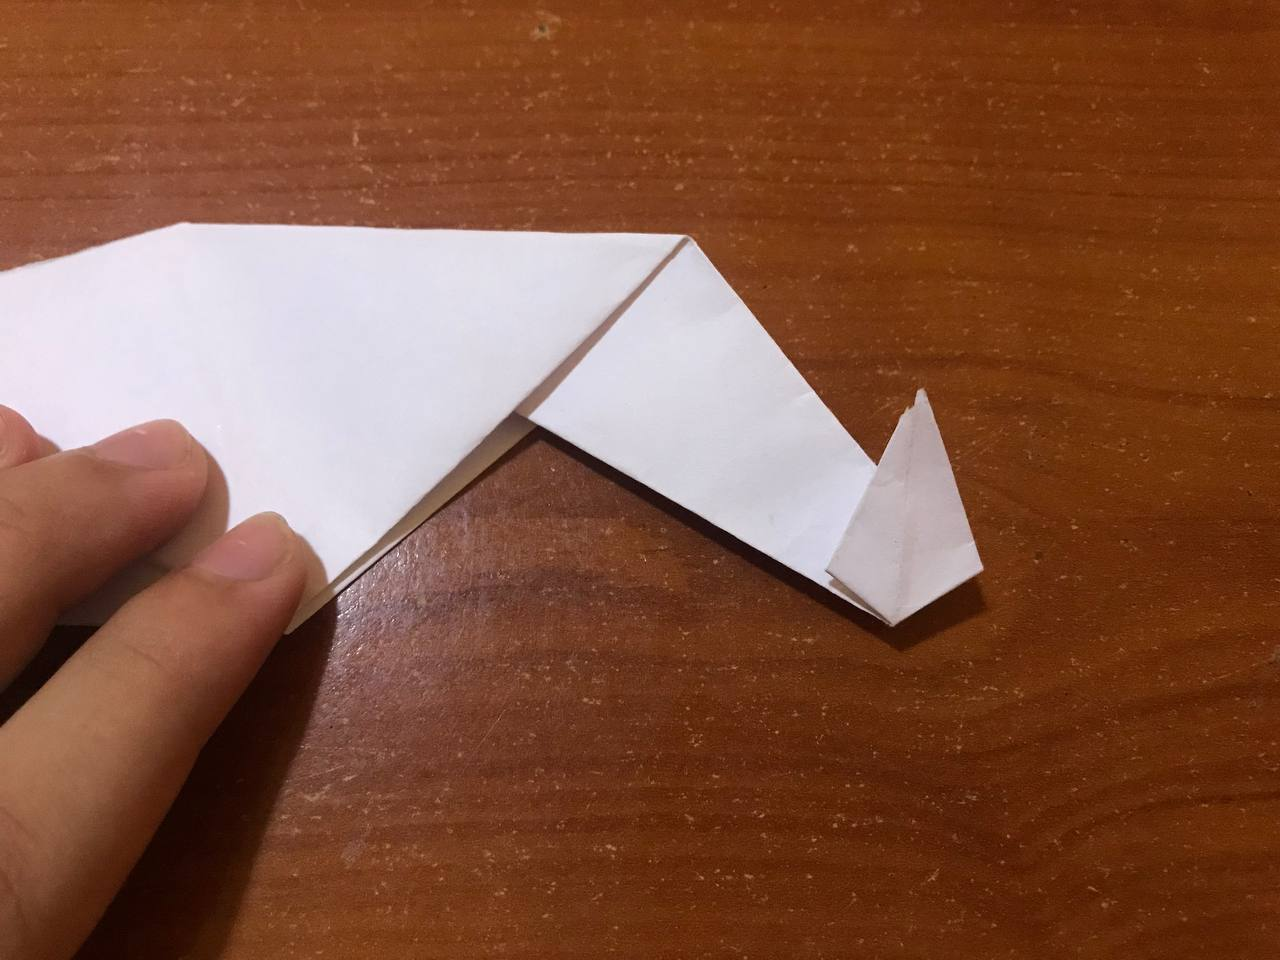
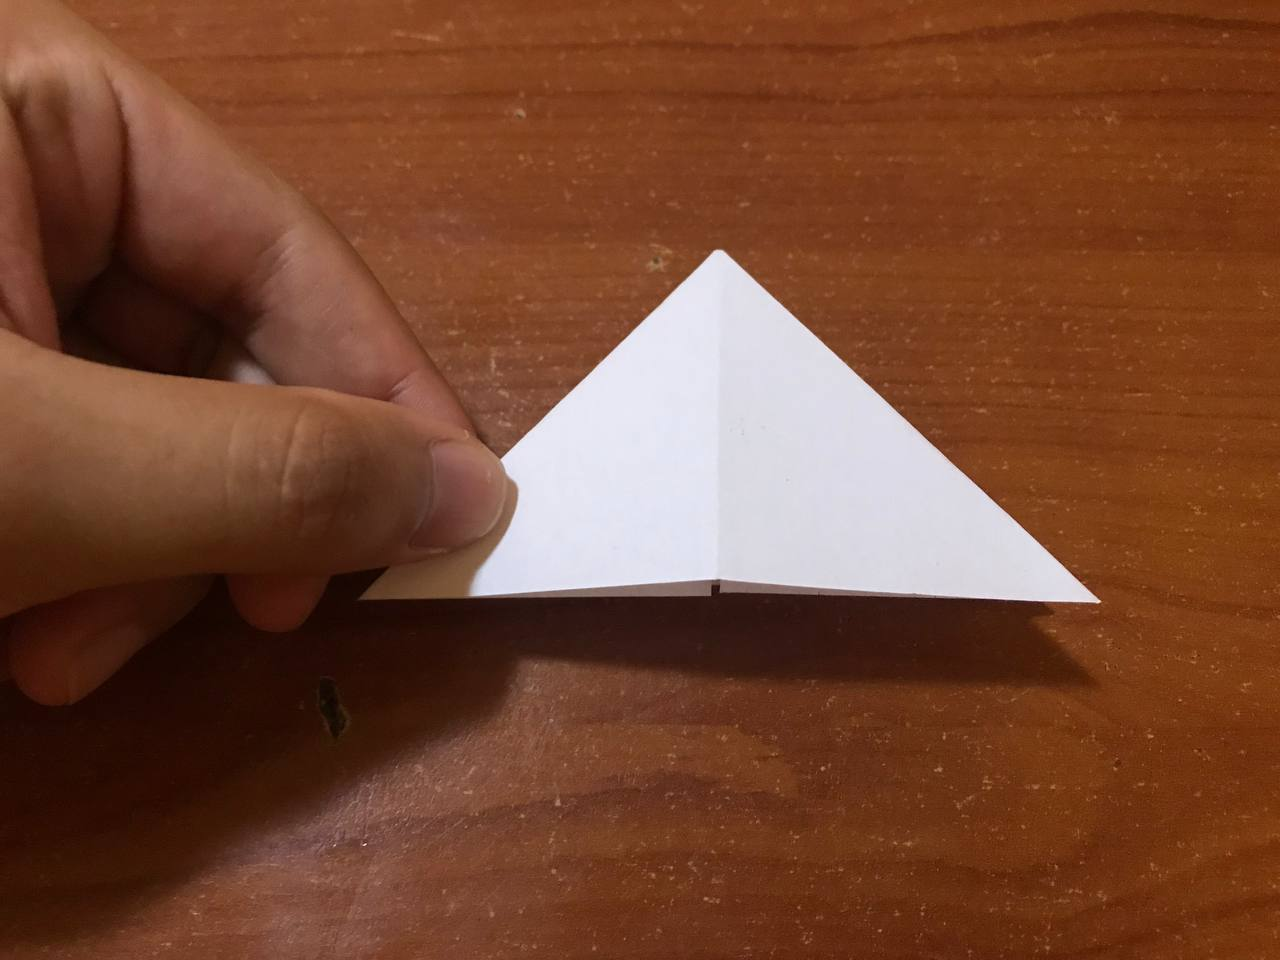
Next, we are going to fold our sheet in half and take the back of the sheet to fold it down to match the intersection of the previous fold and of course that it is parallel to the line that is marked on the sheet, once that is ready we flatten it very well. The idea of making these folds is to then proceed to make a big fold, as shown in the photos. Right there on the tip of the leaf we will make the tail of this dragon folding to one side and then upwards and we will have that part ready.
Seguidamente, vamos a doblar nuestra hoja por la mitad y tomamos la parte de atrás de la hoja para doblarla hacia abajo que coincidan con la intersección del doblez anterior y por supuesto que esté paralela con la línea que está marcada sobre la hoja, una vez listo eso aplastamos muy bien. La idea de hacer estos dobles es para luego proceder a realizar un gran pliegue, como se nota en las fotos. Allí mismo en la punta de la hoja haremos la cola de este dragón doblando hacia un lado y luego hacia arriba y tendremos esa parte lista.
|
 |
|
 |
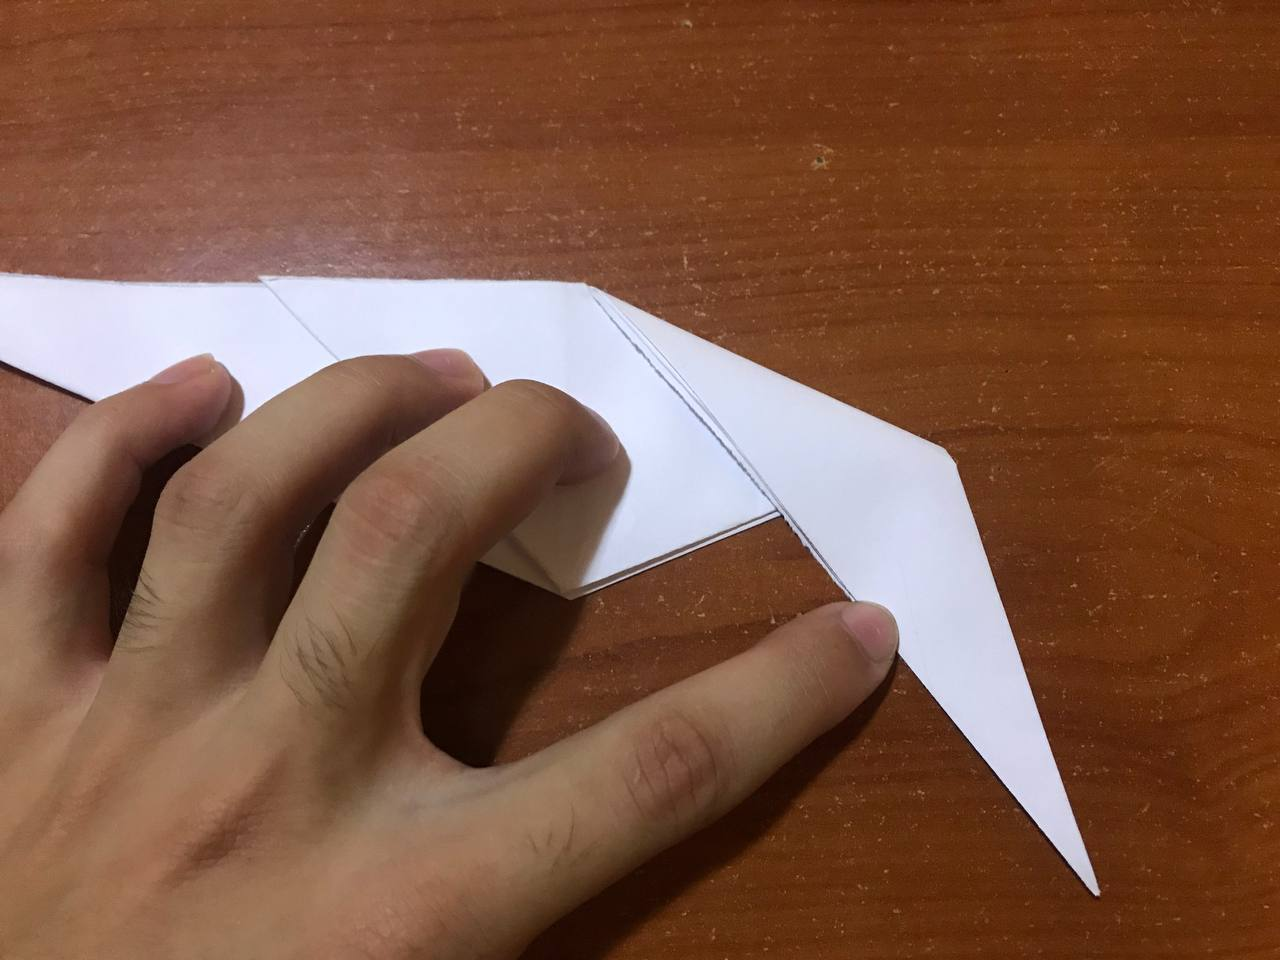
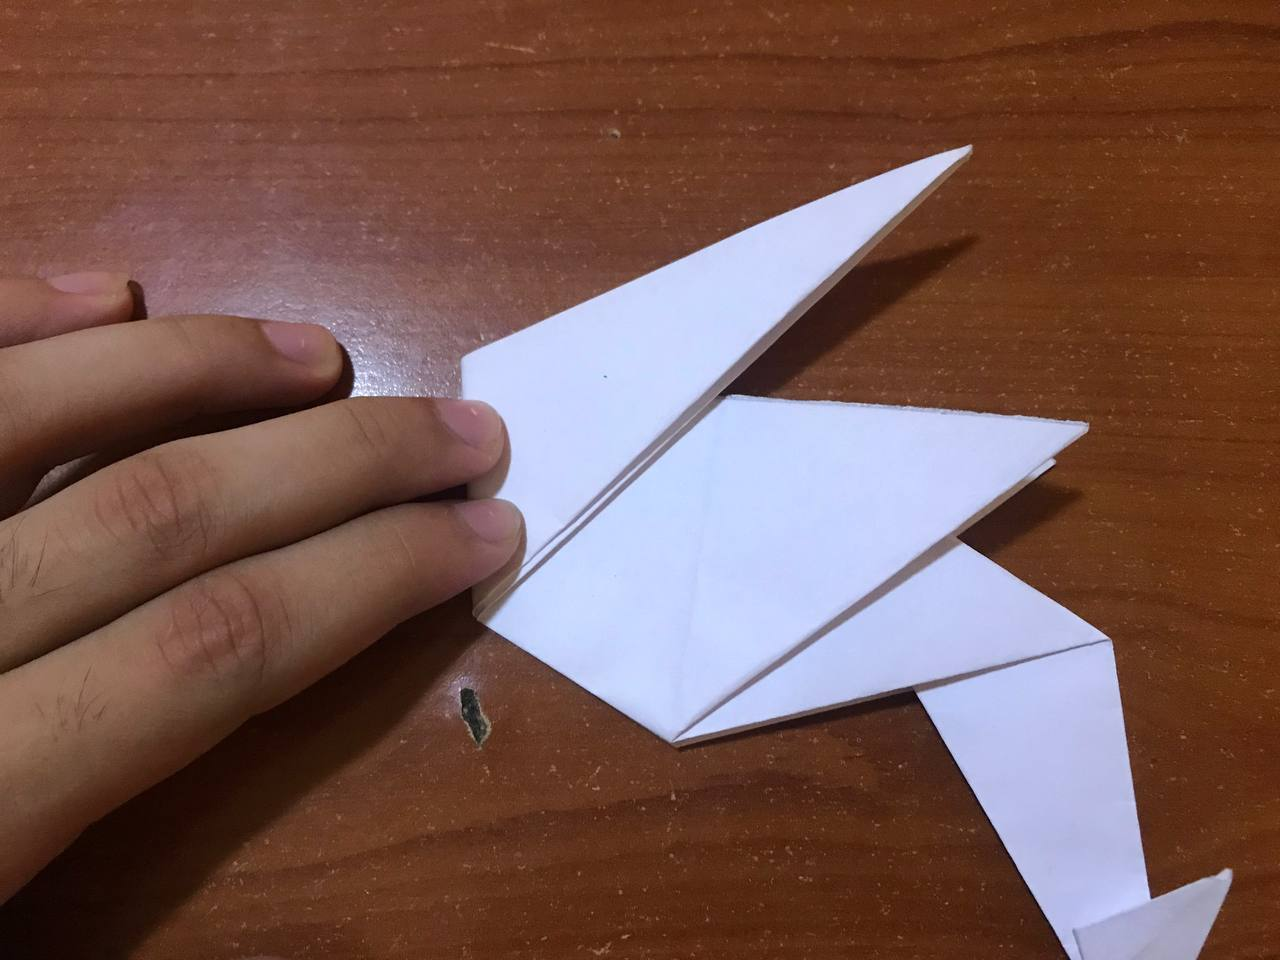
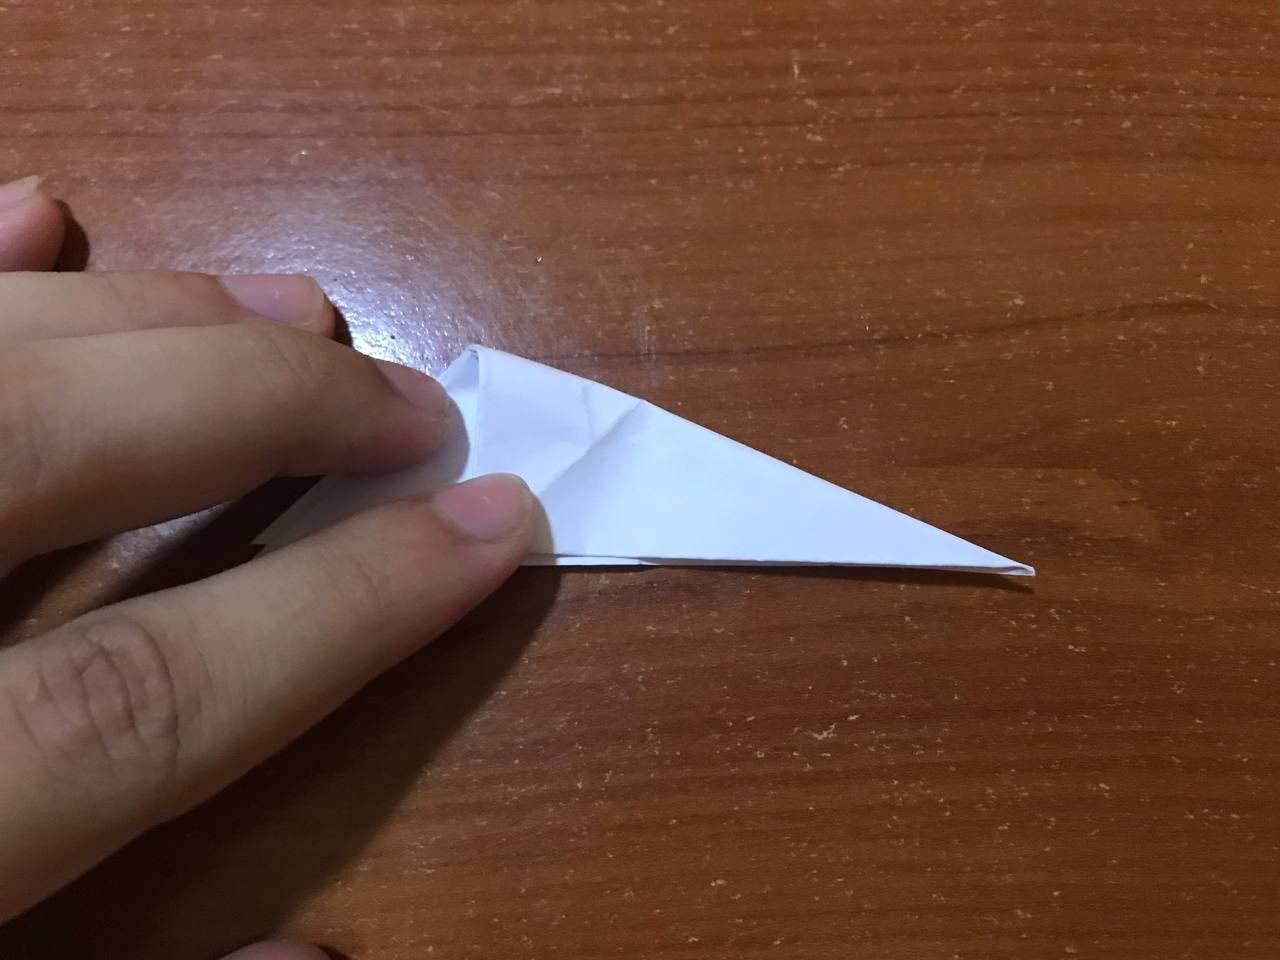
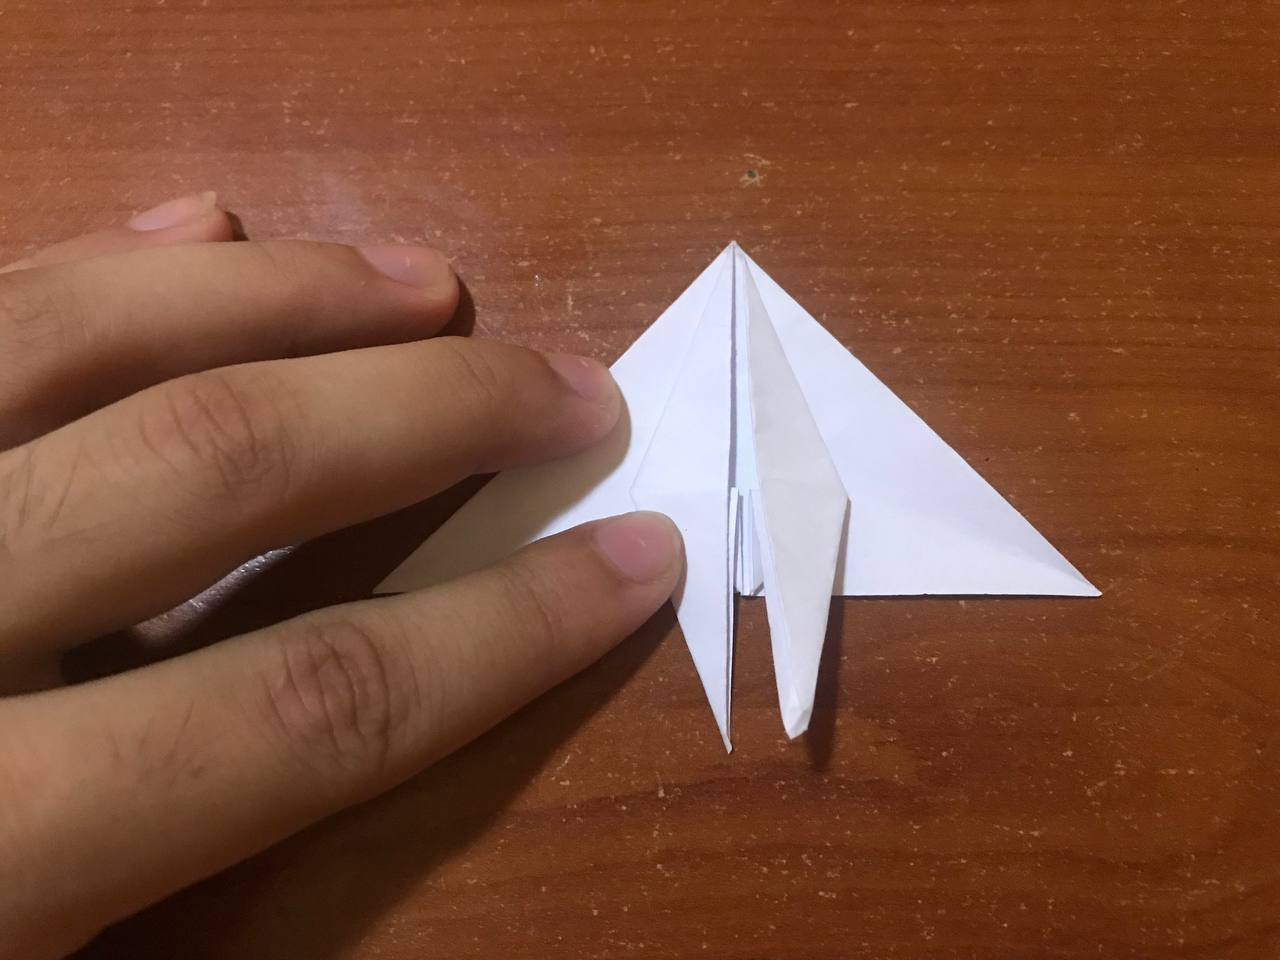
Then we have to make the head of this dragon, where from here the things will begin to get a little complicated and the folds will be more extensive, certainly everything can be achieved. We take the other side of our sheet and we take it to the back to match the fold that is there on the sheet, and then proceed to make a fold and carefully open it a little to make it easier to fold and flatten, the tip of the sheet has to be up.
Luego nos toca hacer la cabeza de este dragón, donde a partir de aquí las coas comenzaran a complicarse un poco y los pliegues serán más extensos, sin duda todo se puede lograr. Tomamos el otro lado de nuestra hoja y lo llevamos hacia la parte de atrás que coincidan con el pliegue que está allí en la hoja, para luego proceder a realizar un pliegue y con mucho cuidado lo abrimos un poco para que sea más fácil de doblar y aplastamos, esa punta de la hoja tiene que quedar hacia arriba.
|
 |
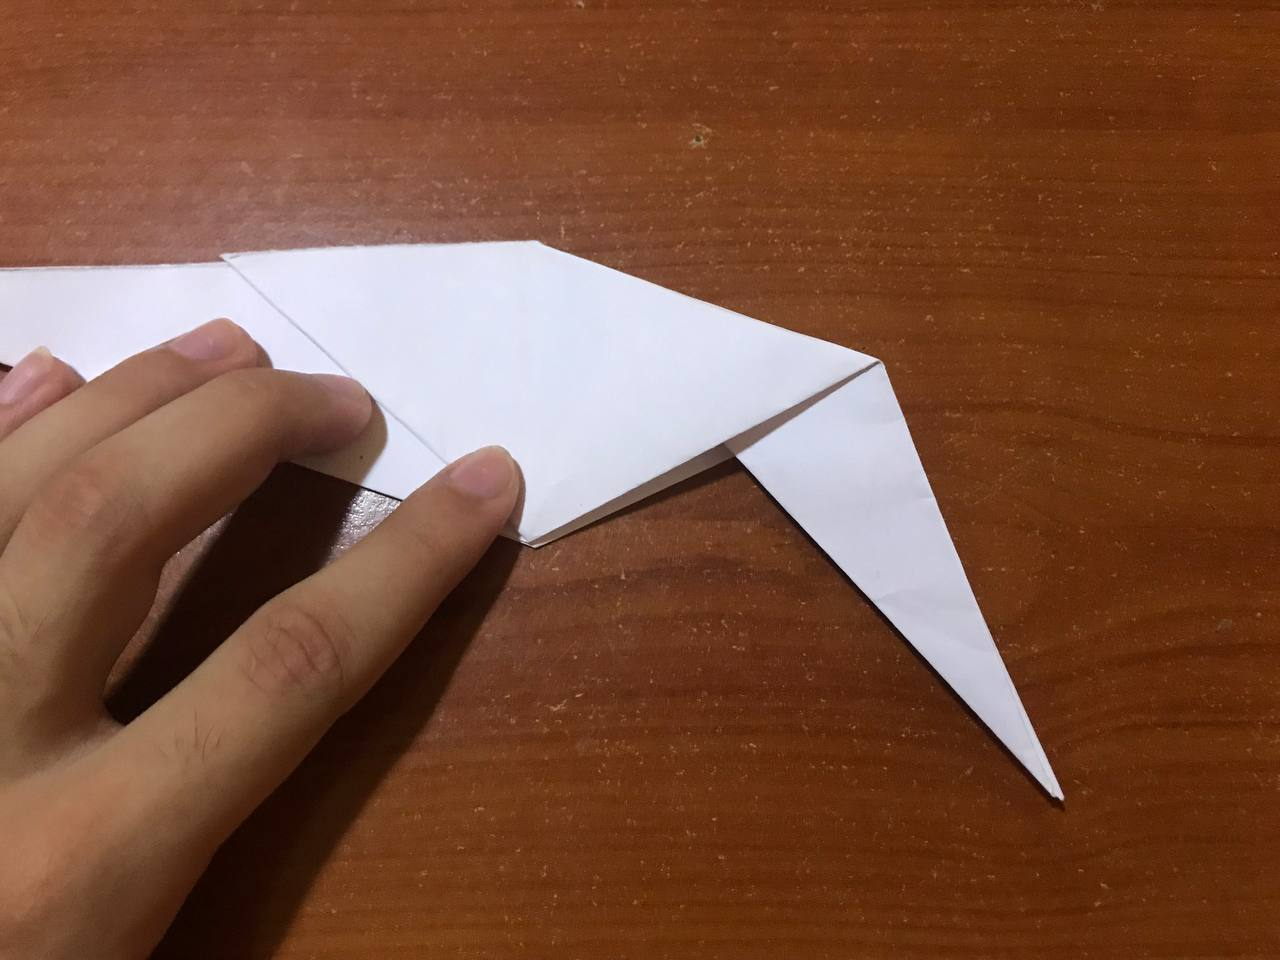
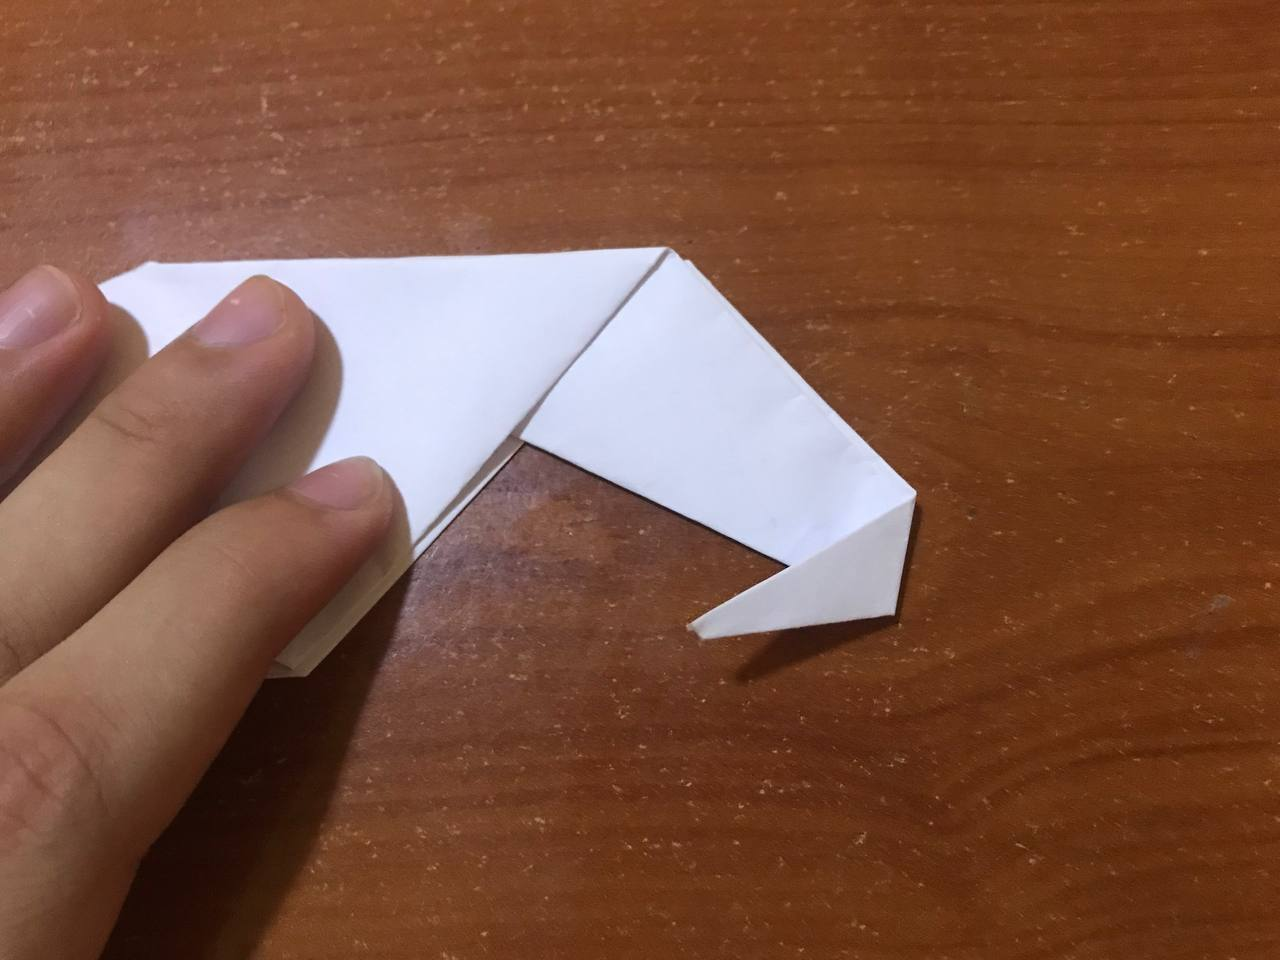
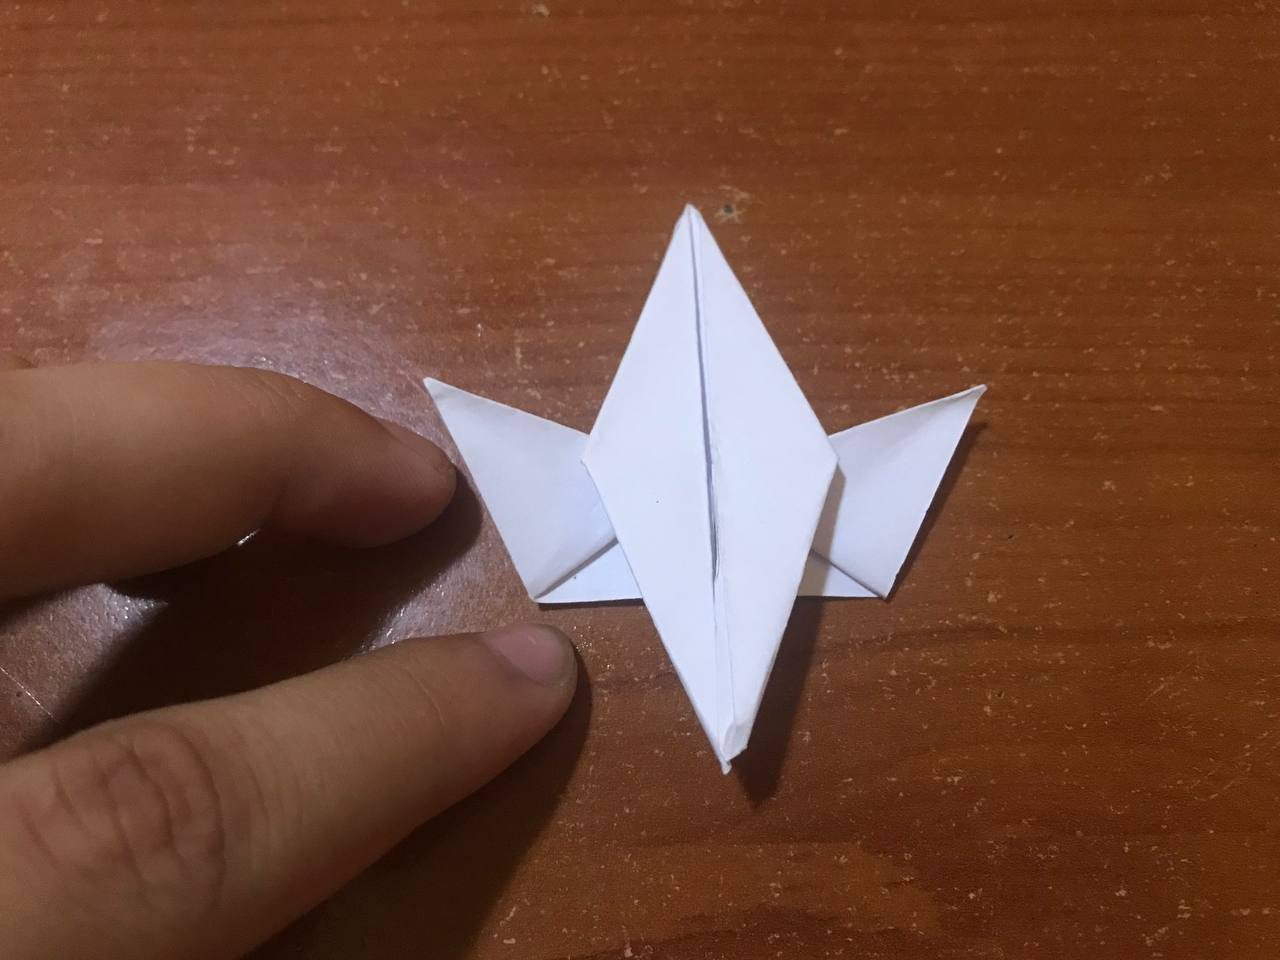
Then at the tip of the leaf, we will make a small double to one side and thus achieve the head of this dragon. Right there we proceed to make the wings, folding the leaf down and then backwards very carefully, then we take the same double back over the line, marking very well so that the wing is not disassembled. We are going to repeat the same thing on the other side of the sheet and in this way we will have the two wings of this paper dragon.
Seguidamente en la punta de la hoja, haremos un pequeño dobles hacia un lado y de esa manera lograr la cabeza de este dragón. Allí mismo procedemos a realizar las alas, doblando la hoja hacia abajo y luego hacia atrás con mucho cuidado, lujo volvemos a llevar ese mismo dobles sobre la línea, marcando muy bien para que no se desarme el ala. Eso mismo lo vamos a repetir del otro lado de la hoja y de esa manera vamos a tener las dos alas de este dragón de papel.
|
|
|
Once that is ready, we are going to take the other smaller sheet, and immediately start marking the two diagonals and at the same time in the middle so that the sheet is completely marked. Then we open the leaf, we will take the two ends of the leaf towards the center and push down and we will have a kind of triangle on the leaf.
Una vez listo eso, vamos a tomar la otra hoja más pequeña, y de inmediato comenzamos marcado por las dos diagonales y a la vez por la mitad para que la hoja quede totalmente marcada. Luego abrimos la hoja, vamos a llevar los dos extremos de la hoja hacia el centro y empujamos hacia abajo y nos quedara como especie de un triángulo en dicha hoja.
|
 |
Now we take the ends of the triangle and very carefully we will bring it to the edge of the sheet to mark a slight line, we do this on both sides. Once ready we open the sheet and we will do the same procedure of the step, one of this moment in each of the parts of the sheet, so we can take out the head of this great dragon. When all the respective doubles are finished and we proceed to fold the sheet in half.
Ahora tomamos los extremos de ese triángulo y con mucho cuidado lo vamos a llevar hasta el borde de la hoja para marcar una ligera línea, esto lo hacemos en ambos lados. Una vez listo abrimos la hoja y haremos el mismo procedimiento del paso, uno de este momento en cada una de las partes de la hoja, para así poder sacar la cabeza de este gran dragón. Cuando se terminen todos los dobles respectivos y procedemos a doblar la hoja por la mitad.
|
 |
|
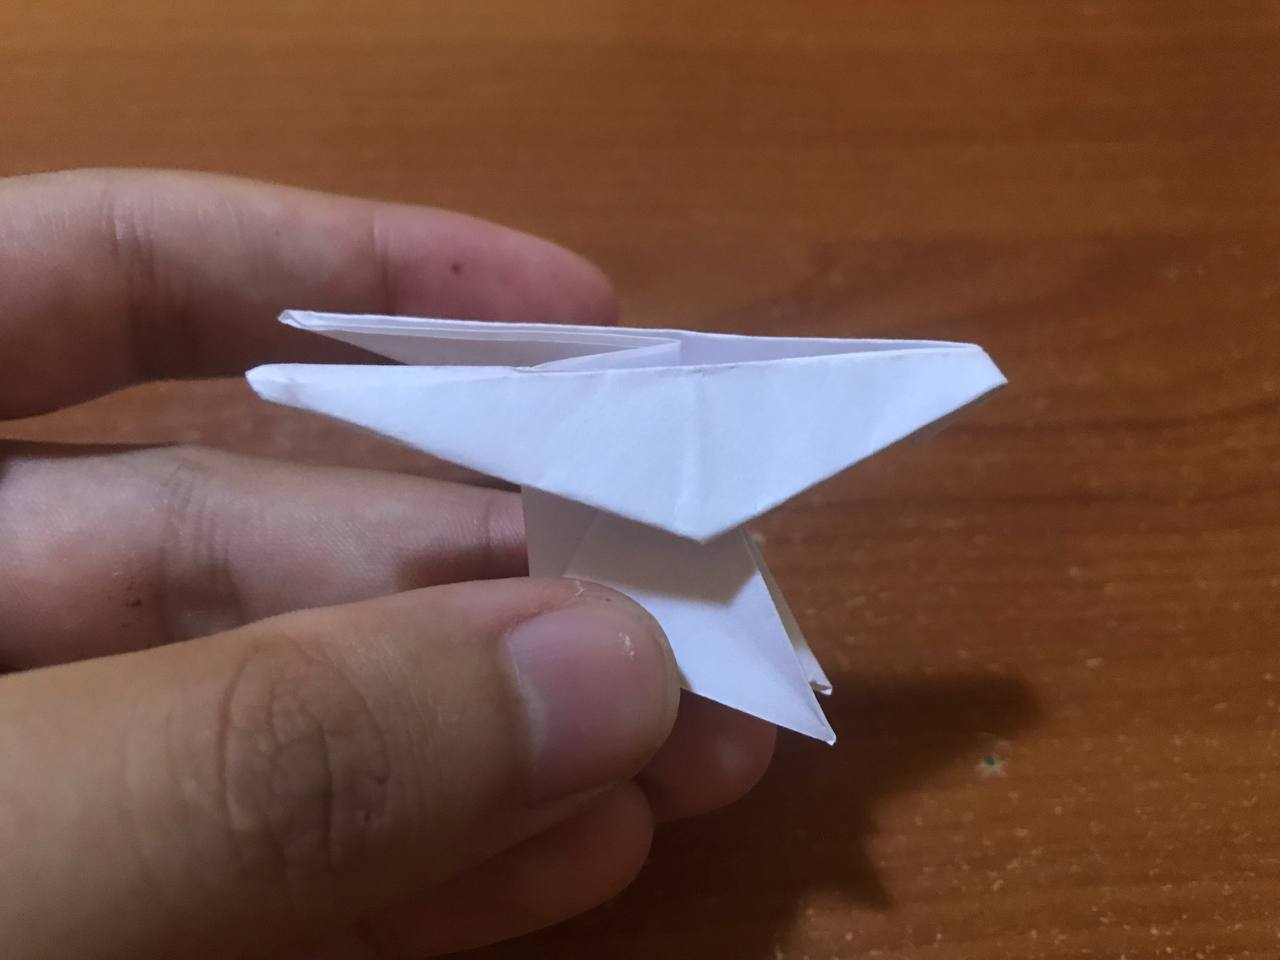 |
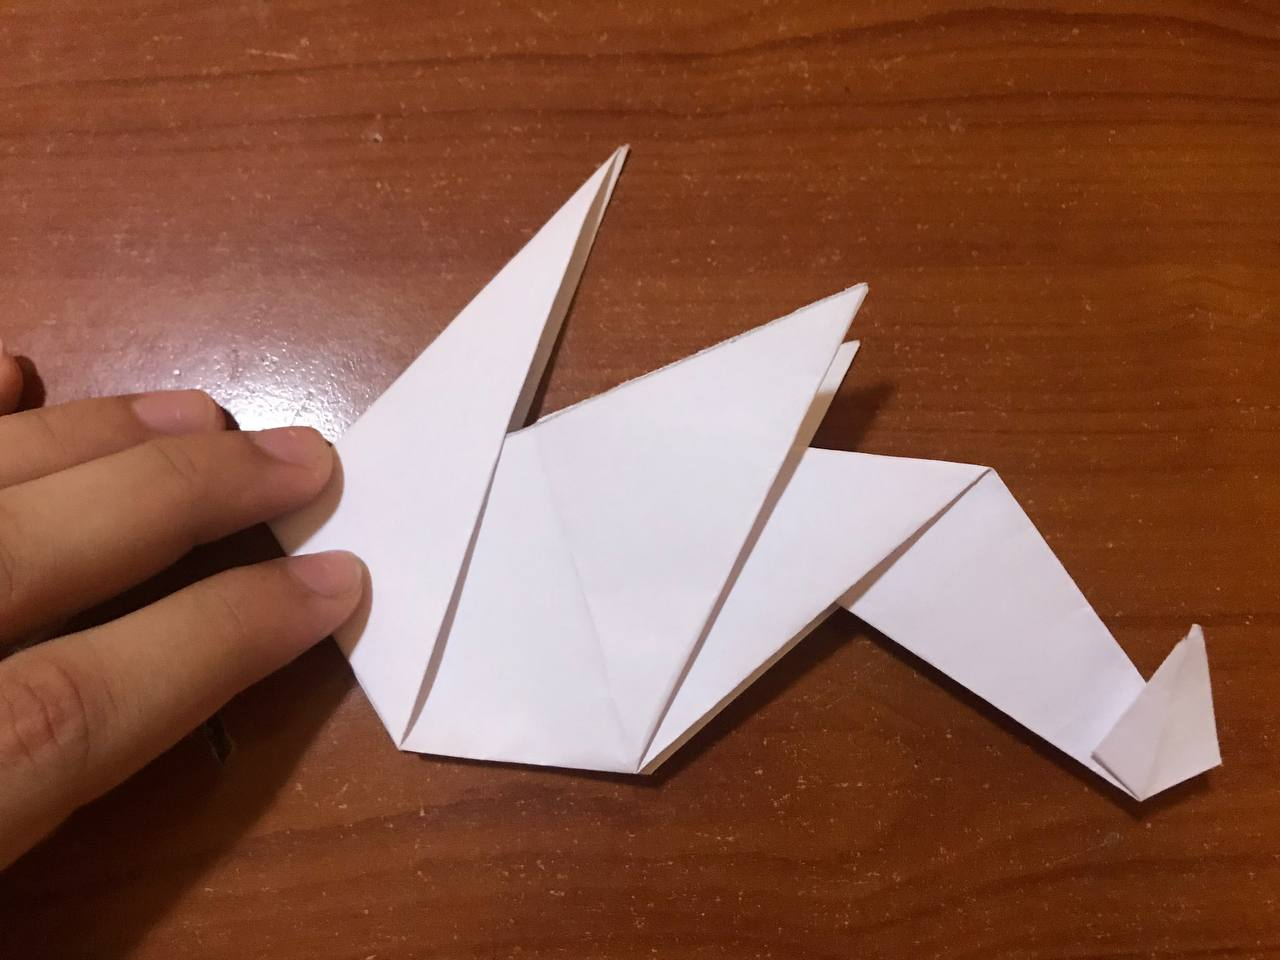
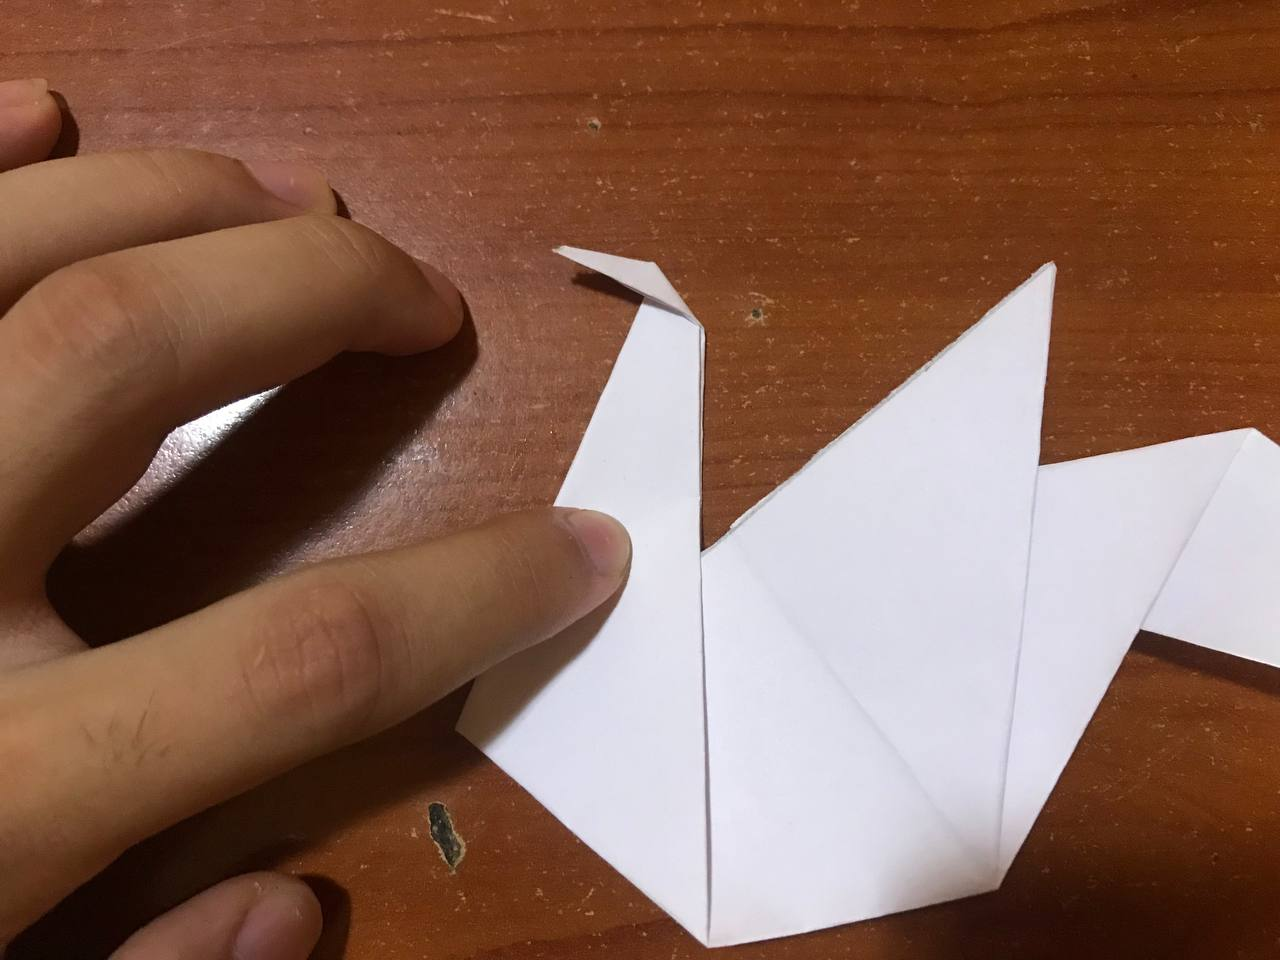
When the head and body of the dragon are ready, the final moment comes to join both parts of this origami, where carefully open a little the top of the sheet and put the other part of the paper and that way it will be fixed. You have to be very careful with this step not to damage anything.
Cuando se tenga lista la cabeza y el cuerpo del dragón, llega el momento final de unir ambas parte de este origami, donde con mucho cuidado se abre un poco la parte de arriba de la hoja y metemos la otra parte el papel y de esa manera quedará fija. Se tiene que tener mucho cuidado con este paso de no dañar nada.
|
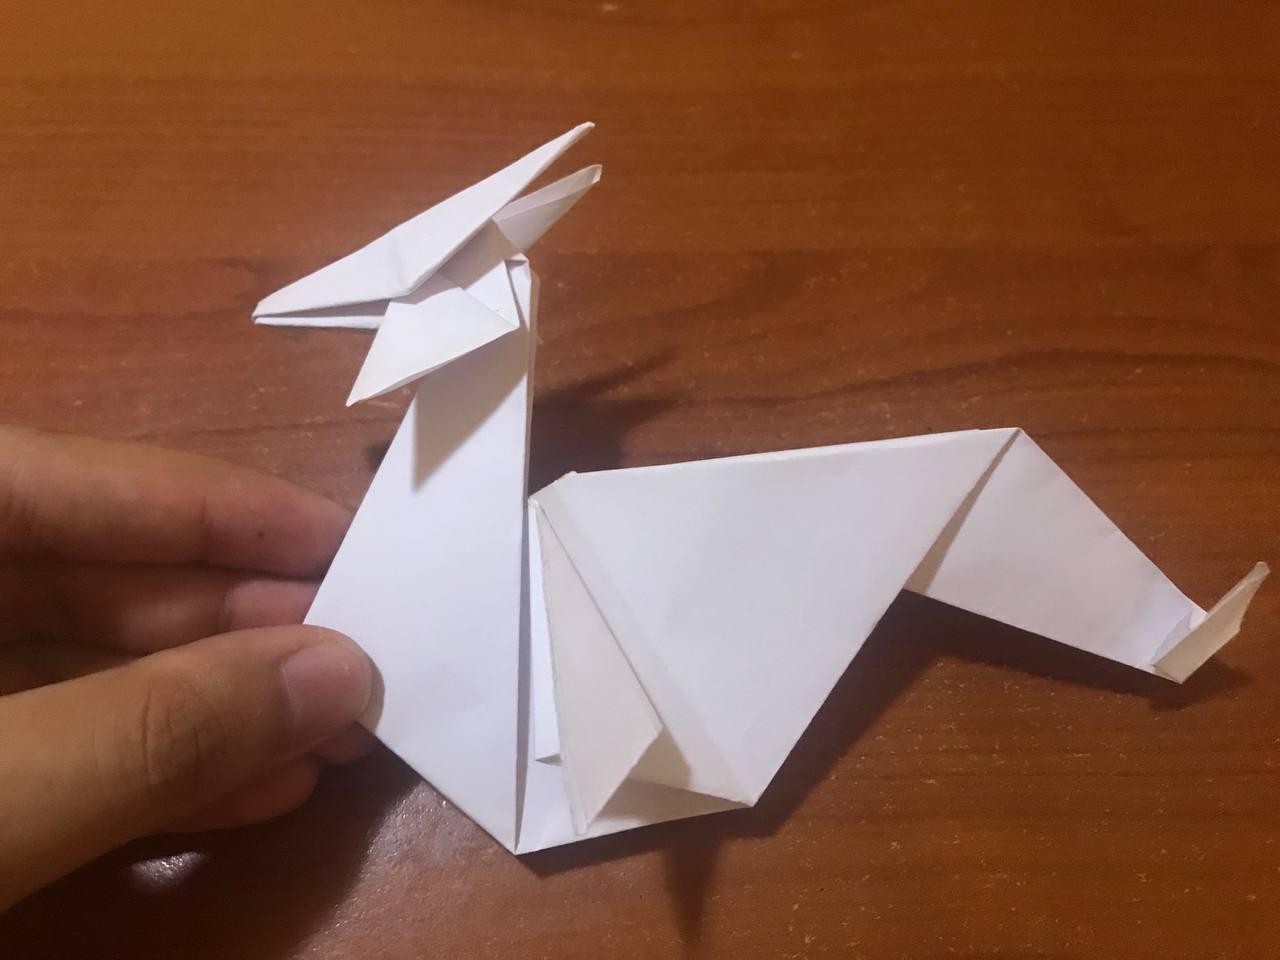 |
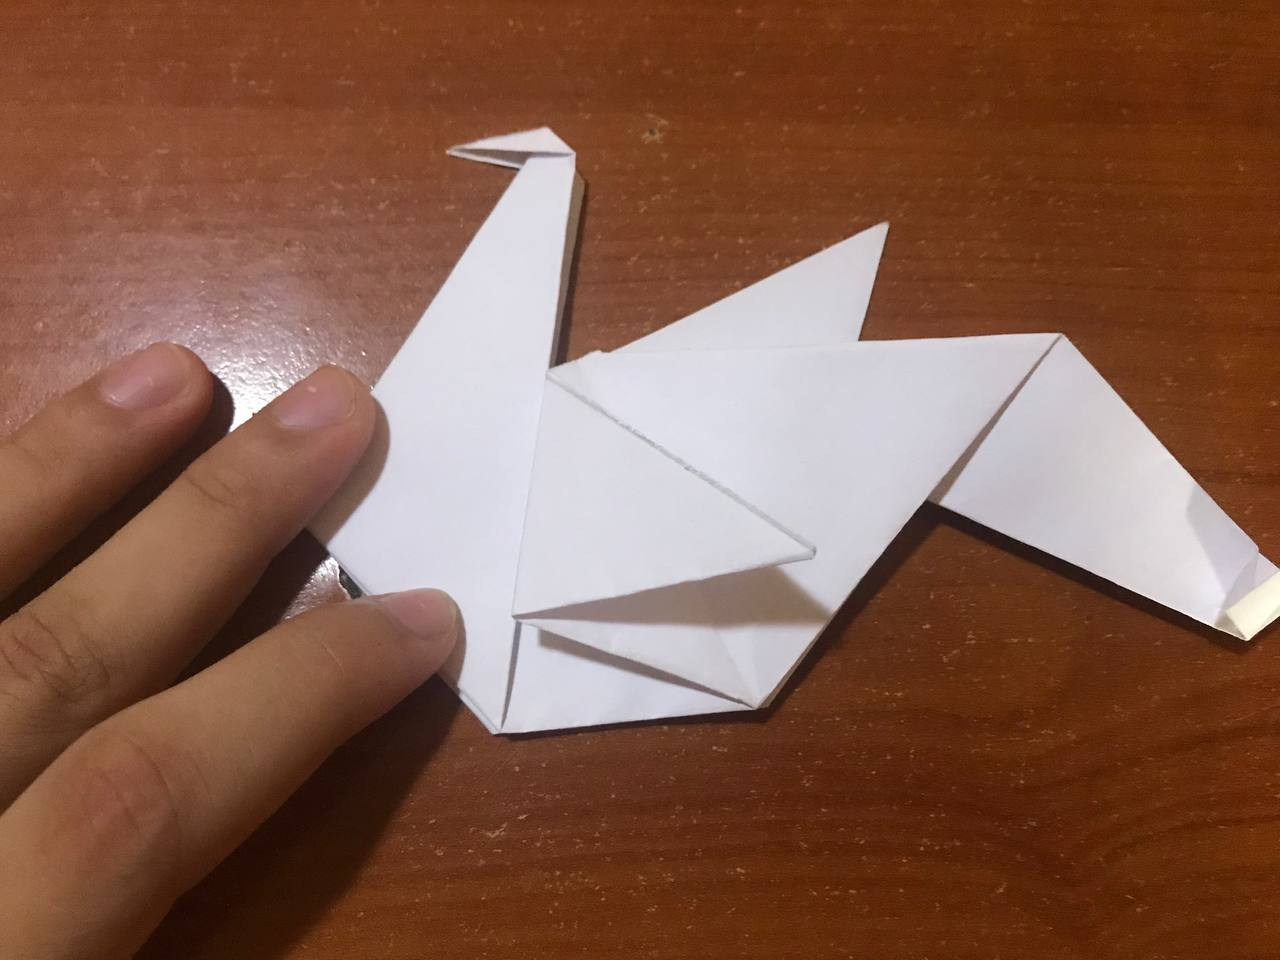
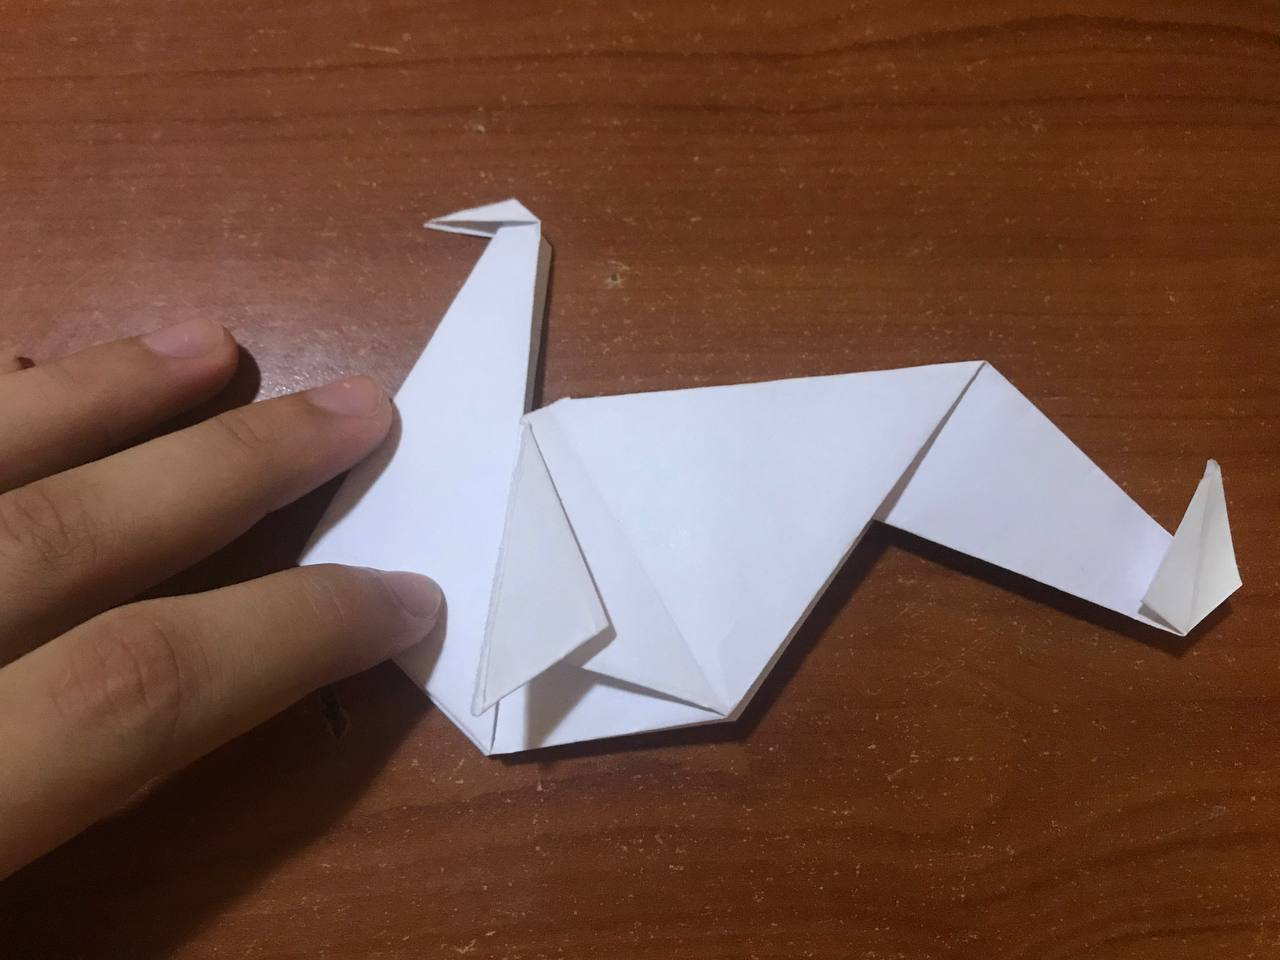
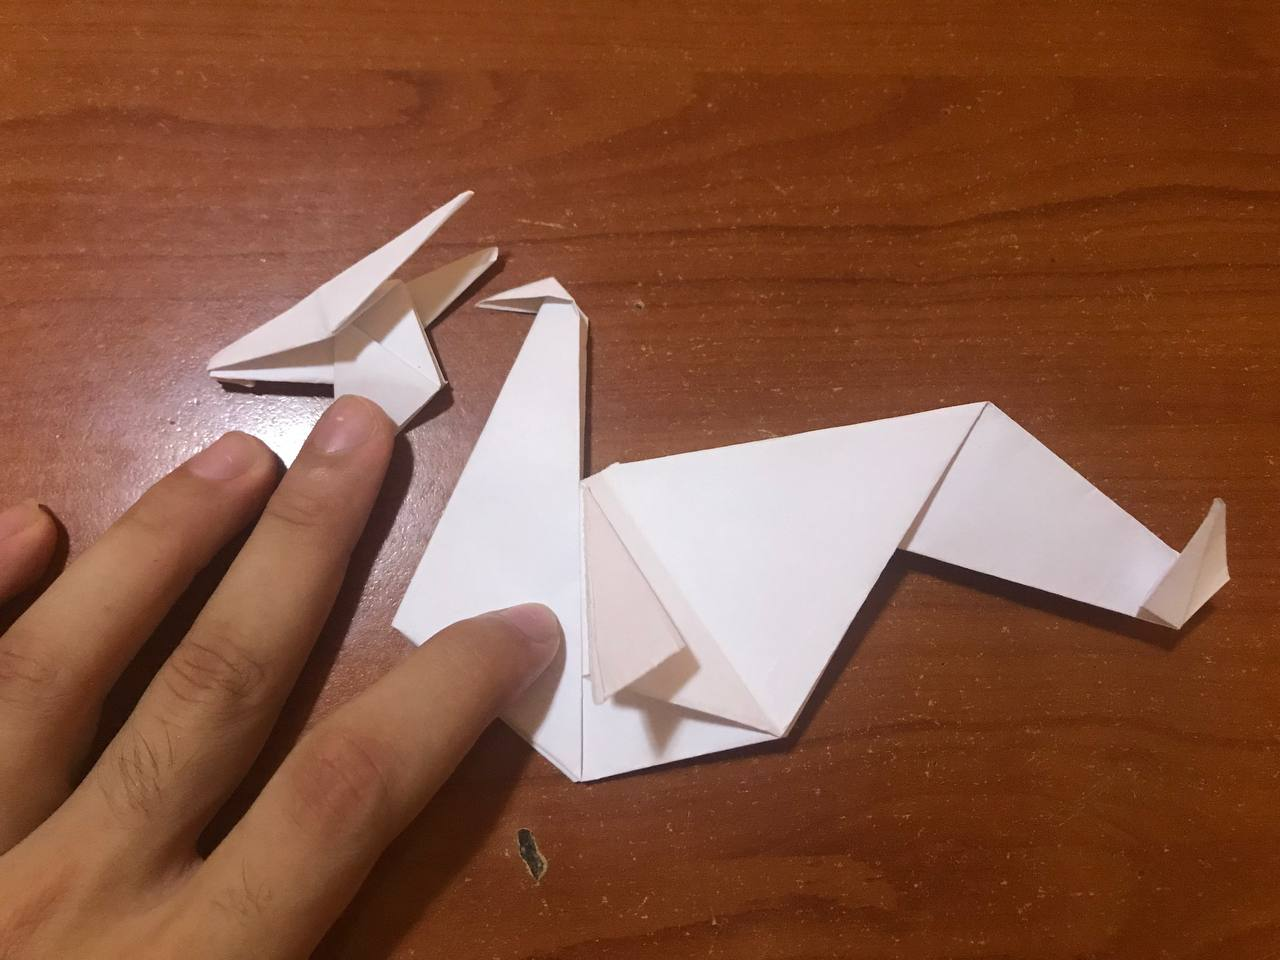
Resultado // Result
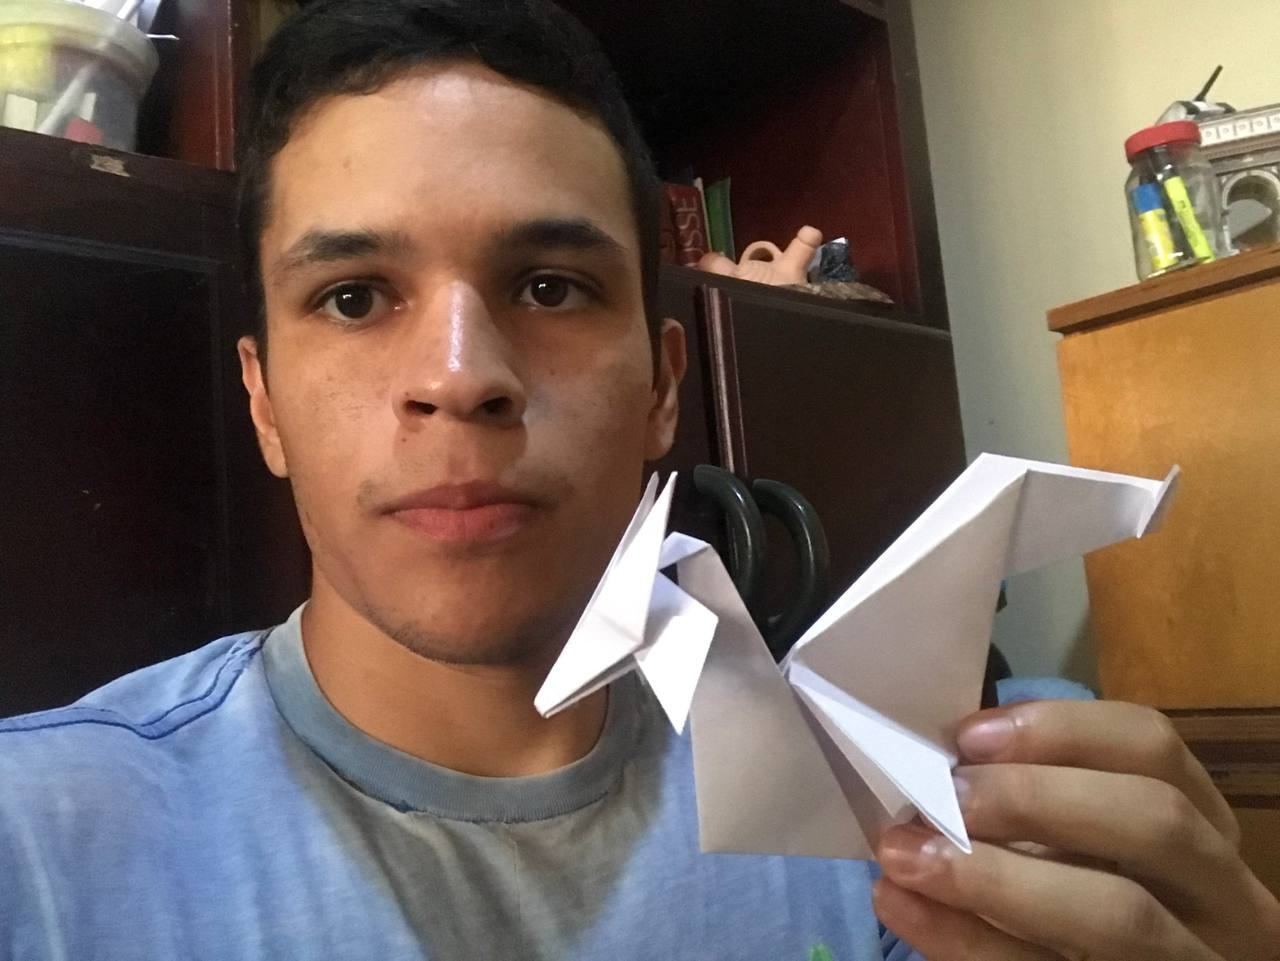
An origami a little complex for having to assemble two separate parts, certainly with some practice and concentration you can get, although it has to fold many times and repeat steps. So this paper origami will serve you for many things, you can vary the size, either smaller or larger and thus achieve a large collection of dragons, where it is perfect for playing, gifts and many other things. So see you next time with another origami.
Un origami un poco complejo por tener que armar dos partes por separadas, sin duda con algo de práctica y concentración puedes conseguir, a pesar de que tiene que doblar muchas veces y repetir pasos. Así que este origami de papel te servirá para muchas cosas, puedes variar el tamaño, ya sea más pequeño o grande y de esa manera lograr una gran colección de dragones, donde es perfecto para jugar, regalarlo y muchas otras cosas. Así que nos vemos en la próxima con otro origami.

Fotos tomadas con un Iphone 7 // Photos prises avec un iPhone 7.
Muchas felicidades hijo, por este gran trabajo que nos compartes, donde es fascinante la capacidad y la concentración que tiene para recrear las dos piezas de papel y al final lograr un gran resultado. Todo de maravilla.
Muchas gracias, seguimos mejorando y dando lo mejor con este gran arte.
Davicito pero es que tú te has ido perfeccionando en esto, cada vez estás haciendo cosas más complejas. Yo soy medio fatal para seguir esos pasos y lejos de relajarme siento que me estresa jaja. Aquí en casa hay un libro con muchas figuras, pero nada más de ver las instrucciones con todos los dobleces hiperventilo jaja
Muchas gracias amiga, esta es un arte muy bonito y siempre me ha gustado, donde es fascinante cada una de las cosas que se pueden lograr. Tienes que animarte a practicarlo.
El arte de hacer origami requiere de mucha paciencia te felicito por tu excelente trabajo amigo
Gracias amiga, saludos.
Wow. This is a very impressive paper craft. Nice origami
Thank you, it was a few hours of work
Buena explicación, el resultado es muy bueno 💪🤘
Gracias amigo, saludos.
Este tipo de actividad es de detalle y de paciencia, me encantó el resultado que lograste. Espero que u colección sea un éxito en poco tiempo.
Gracias por compartir.
Saludos David
Gracias amiga, ya tengo muchas figuras de papel que he logrado ir haciendo.
Wow amigo, la verdad que hacer esta figura debe ser bastante complicado, no llego a ese nivel de hacer un dragón así, es complejo, te comprendo que bueno que finalmente lo pudiste lograr. Felicidades.
Gracias amiga, todo con practica y dedicación se puede lograr. Tienes que ponerte a intentarlo.
Así es mi querido amigo, si se puede, voy a sacar un poco de tiempo para hacer mis prácticas.
No recuerdo haber visto uno de esos que sea conformados por dos piezas. Los veo más sencillos. Buen trabajo. Saludos @davidpena21
Es un gran trabajo que requiere de mucha mas concentración.
Excelente trabajo pana David, me gusto mucho la forma del dragón, tiene un estilo muy llamativo
Gracias amigo, es toda una obra de arte.
Muchas gracias por el apoyo, saludos.
Congratulations @davidpena21! You have completed the following achievement on the Hive blockchain And have been rewarded with New badge(s)
Your next payout target is 17000 HP.
The unit is Hive Power equivalent because post and comment rewards can be split into HP and HBD
You can view your badges on your board and compare yourself to others in the Ranking
If you no longer want to receive notifications, reply to this comment with the word
STOPMuchas gracias por el apoyo, saludos.