
Hello everyone... ✨
Hello to my dear Hivers and the dear community of artists #HiveDIY, as always very pleased and excited to be here again, showing you my work made with love and especially for you.
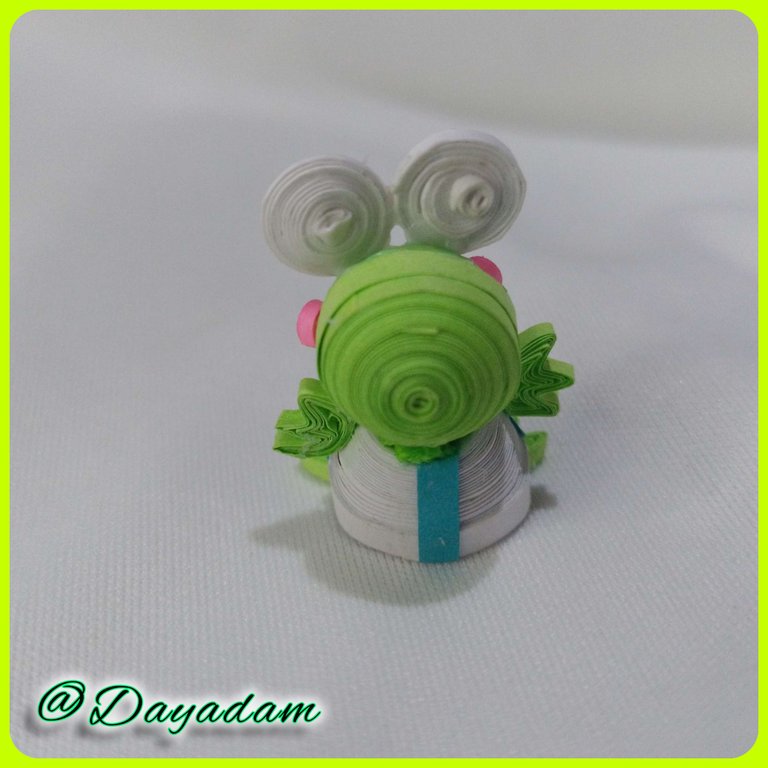
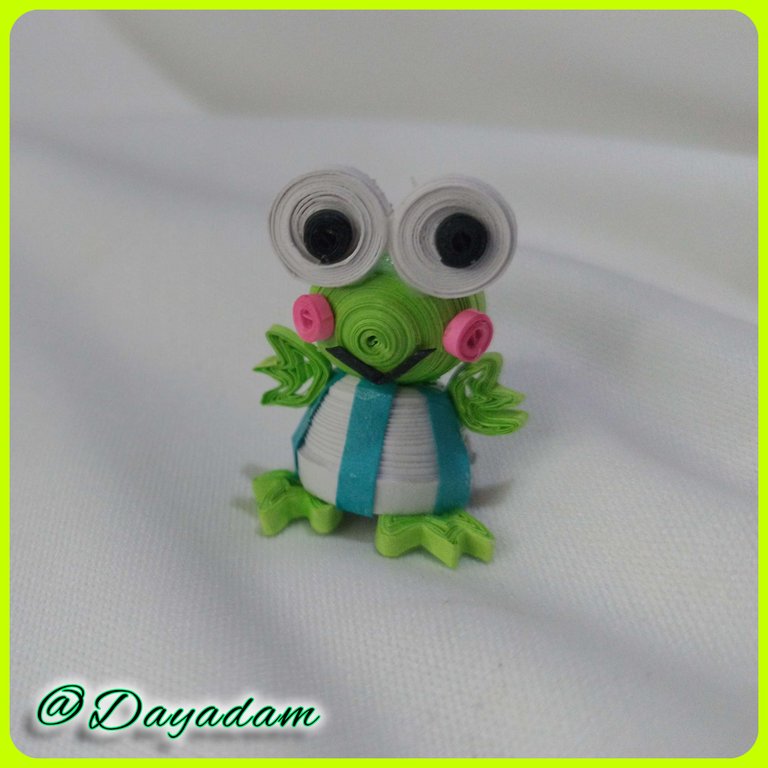
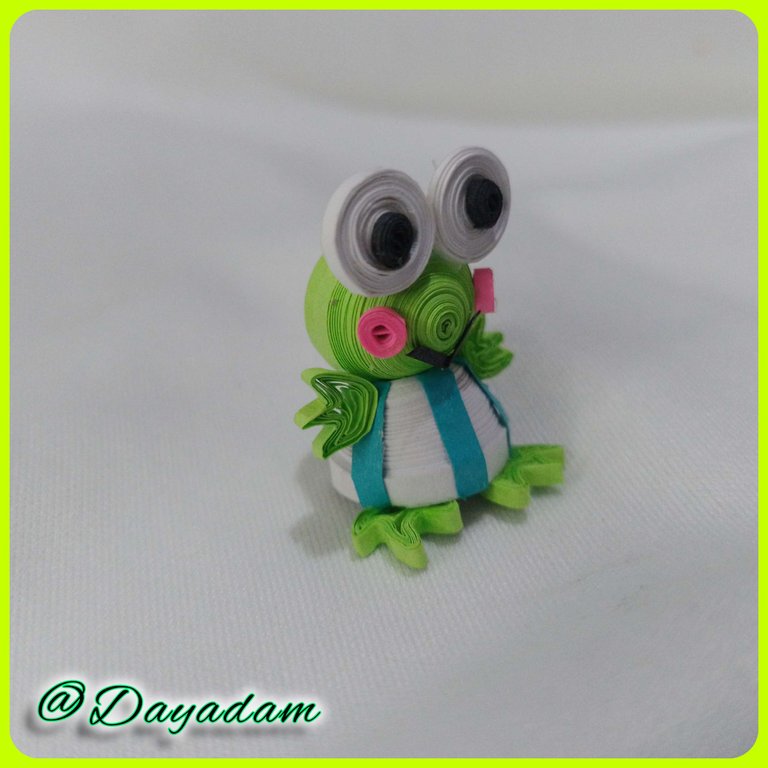
Since I was a child I liked Hello Kitty, currently with the age that I have I keep some stuffed animals in my room, as well as I have some headphones allusive to the character, so I thought about making a collection of her and her friends for some time but for some reasons I decided not to start with her but with another of the characters that accompany her, so today I bring you and I start with the cute little frog called Keroppi in 3D in the quilling technique, which you can give multiple uses depending on the size you want to do it, in my case I wanted to make it very small to place it as a decoration.
Hoping that you like it, and are encouraged to carry it out, without further ado I leave here my creative process.
Let's get started:😃

Hola a Todos... ✨
Hola a mis queridos Hivers y a la querida comunidad de artistas #HiveDIY, como siempre muy complacida y emocionada de encontrarme por acá nuevamente, mostrándole mi trabajo hecho con mucho amor y especialmente para ustedes.
Desde niña me a gustado Hello Kitty, actualmente con la edad que tengo conservo algunos peluches en mi habitación, así como también tengo unos auriculares alusivos al personaje, pues por ello pensé en hacer una colección de ella y sus amigos desde hace algún tiempo pero por algunas razones decidí no comenzar con ella si no con otro de los personajes que la acompañan, pues para hoy les traigo y empiezo con la simpática ranita llamada Keroppi en 3D en la técnica de quilling, la cual puedes darle múltiples usos dependiendo del tamaño que quieras realizarlo, en mi caso quise hacerlo muy pequeñito para colocarlo como decoración.
Esperando que sea de su agrado, y se animen a llevarlo a cabo, sin más preámbulos les dejo por acá mi proceso creativo.
Comencemos:😃

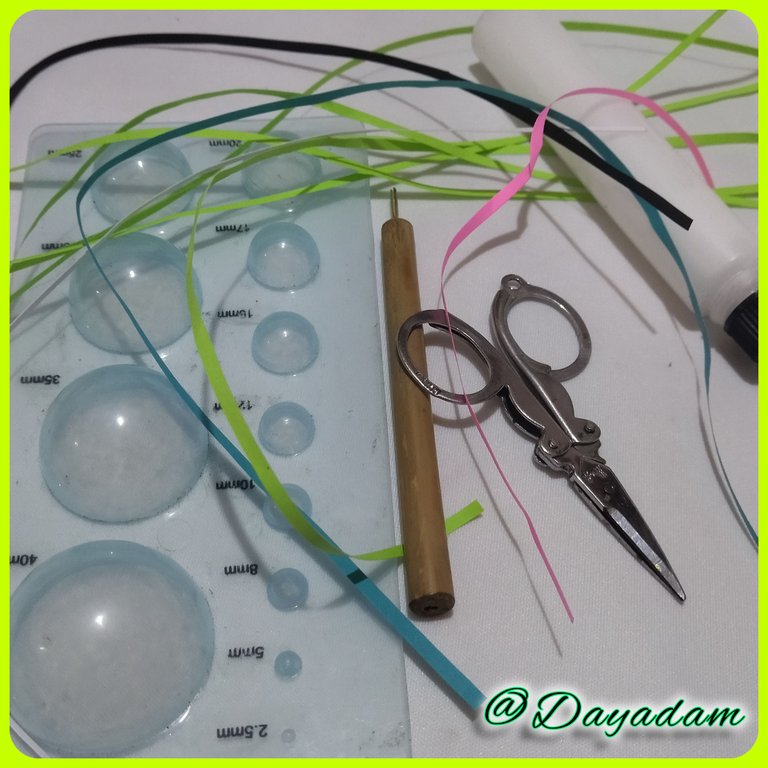
• Cintas de quilling de diversas medidas y colores .
• Aguja para quilling.
• Plantilla para moldear círculos.
• Pega blanca extra fuerte (de carpintería).
• Tijera.
- Quilling ribbons of different sizes and colors.
- Needle for quilling.
- Template to mold circles.
- Extra strong white glue (carpentry glue).
- Scissors.

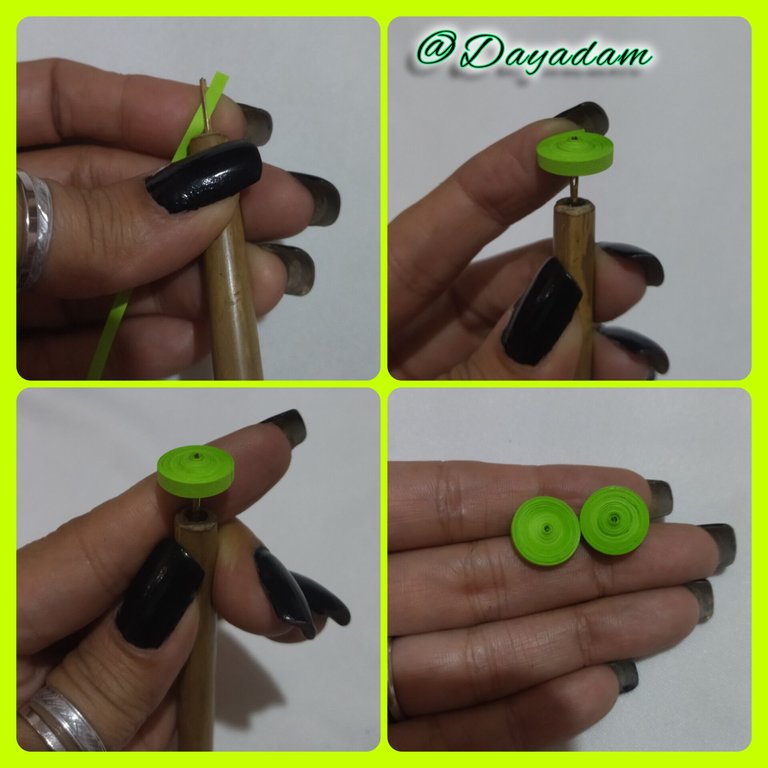
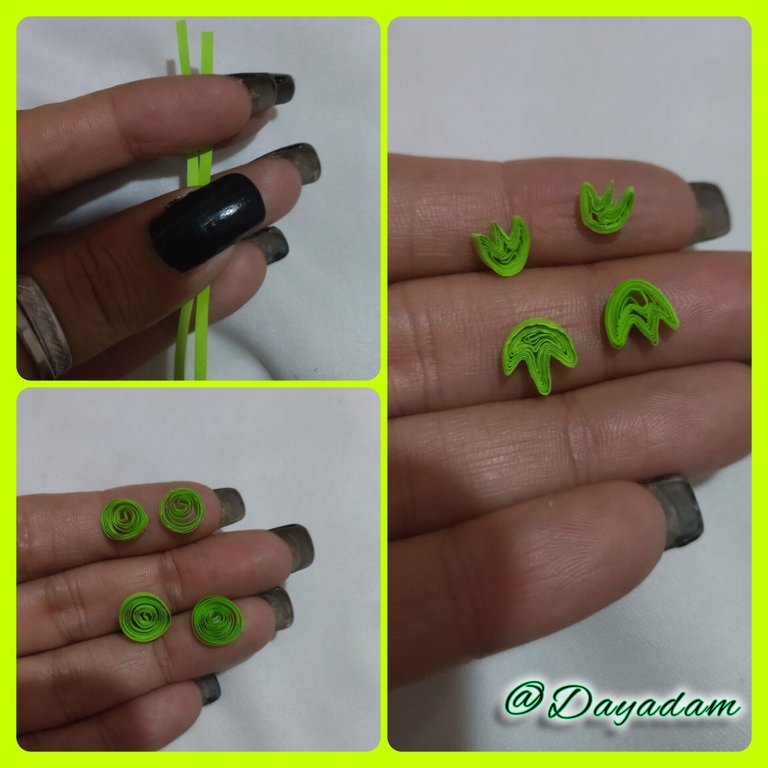
- We take light green quilling tape 3mm wide, we roll with the quilling needle until we reach the end of the tape, we seal with extra strong white glue, we take it out of the needle, we will obtain a closed circle. We will make 2 circles of the same color.
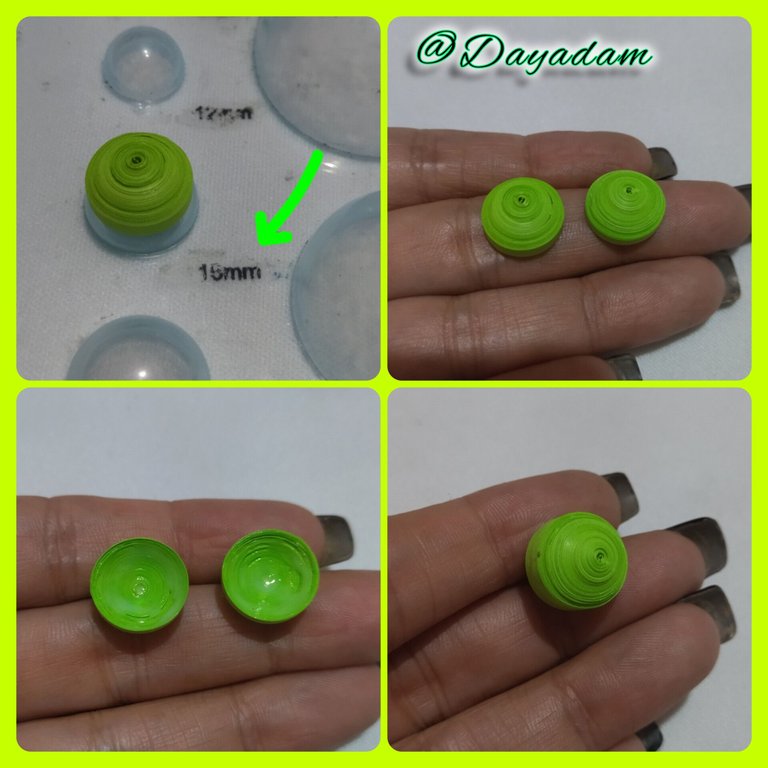
- We are going to mold the circles, place them in the circle template in the 15mm size, once molded we take them out of the template and add a little glue on the inside, let them dry to prevent the pieces from moving.
- We will take the pieces and join them with a small piece of 3mm wide quilling tape, we join both pieces passing the tape through the middle with extra strong white glue.
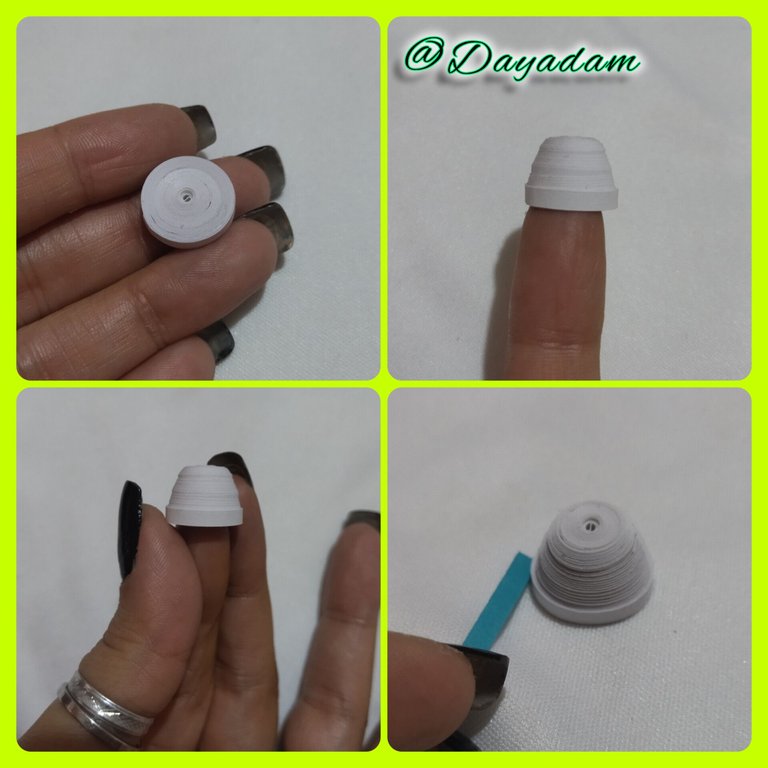
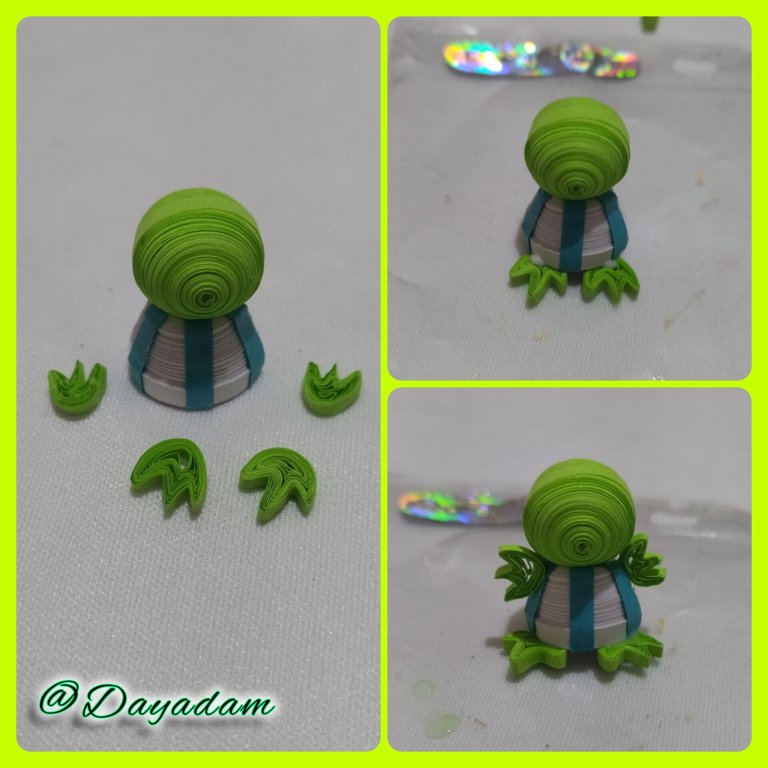
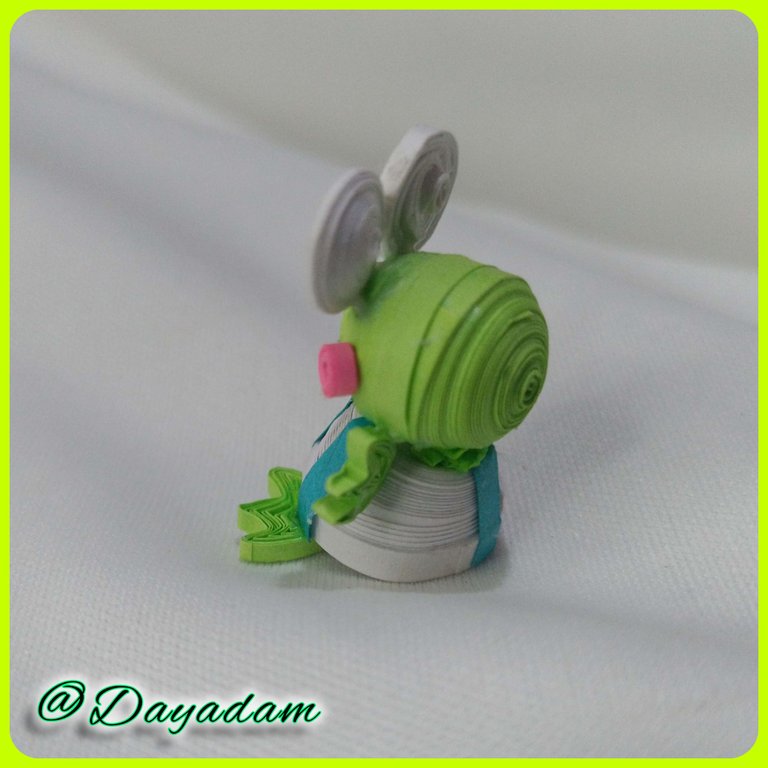
- For the body or suit, we take a 3mm wide white quilling tape, with the quilling needle we roll it in its entirety, seal it with extra white glue and take it out of the needle, to form it, we take a pencil, pen or simply with the finger very carefully push it out forming a kind of cone, we add a little glue on the inside to prevent it from moving, we flatten the piece a little with our fingers.
- To decorate the suit I took blue quilling tape and glued small strips vertically on the cone. Once the costume was ready, I proceeded to glue the head with extra strong white glue.

• Comenzamos tomando cinta para quilling de color verde claro 3mm de ancho, enrollamos con la aguja para quilling hasta llegar al final de la cinta, sellamos con pega blanca extra fuerte, sacamos de la aguja, obtendremos un círculo cerrado. Realizaremos 2 círculos del mismo color.
• Vamos a moldear los círculos, los coloque en la plantilla de círculos en la medida 15mm, una vez moldeados sacamos de la plantilla y en la parte de adentro agregamos un poco de pega, dejamos secar para evitar que se muevan las piezas.
• Tomaremos las piezas y uniremos con un pequeño trozo de cinta de quilling de 3mm de ancho, acoplamos ambas pasando la cinta por el medio con pega blanca extra fuerte.
• Para el cuerpo o traje, tomamos una cinta para quilling de 3mm de ancho color blanca, con la aguja para quilling enrollamos en su totalidad, sellamos con pega extra blanca y sacamos de la aguja, para formar el mismo, tomamos un lápiz, bolígrafo o simplemente con el dedo con mucho cuidado empujamos hacia afuera formando una especie de cono, agregamos un poco de pega en la parte interna para evitar que se mueva, aplanamos un poco con los dedos la pieza.
• Para decorar el traje tome cinta para quilling colo azul y pegue pequeñas tiras de manera vertical en el cono. Listo el traje procedí a pegar la cabeza con pega blanca extra fuerte.

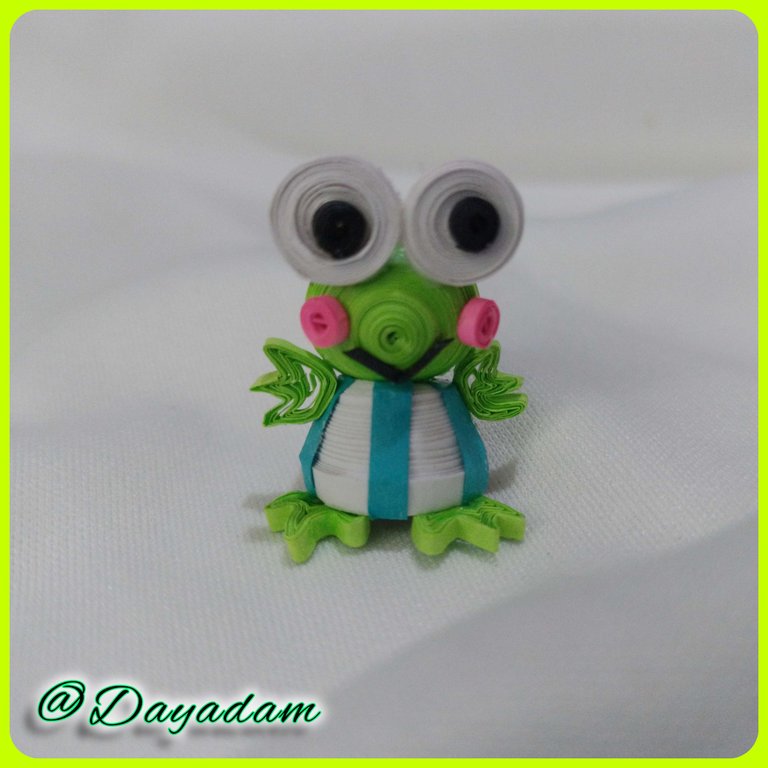
- To make the hands and feet of the character, take 1mm wide quilling tape of the same color as the head, make 4 open circles 2 a little larger, which molded as shown in the image, once ready I proceeded to paste the 2 largest at the bottom for the feet and the 2 smaller ones on the sides of the suit that will be the arms.
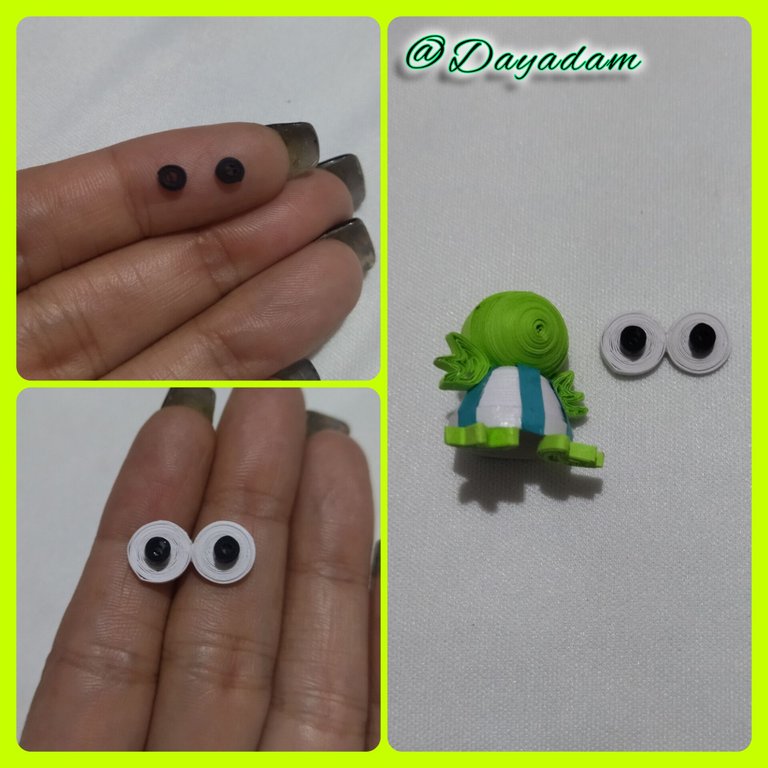
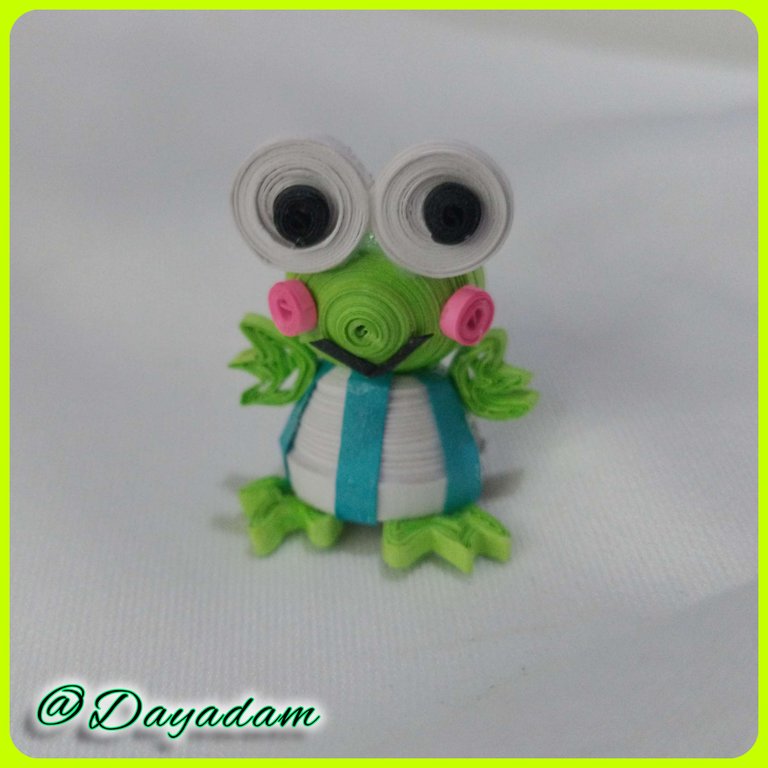
- For the eyes I made with white tape 1mm wide 2 closed circles, which I joined with glue, for the inner part of the eyes I made 2 small black circles which I placed on the ones I made previously, once ready I glued them on the top of the head.
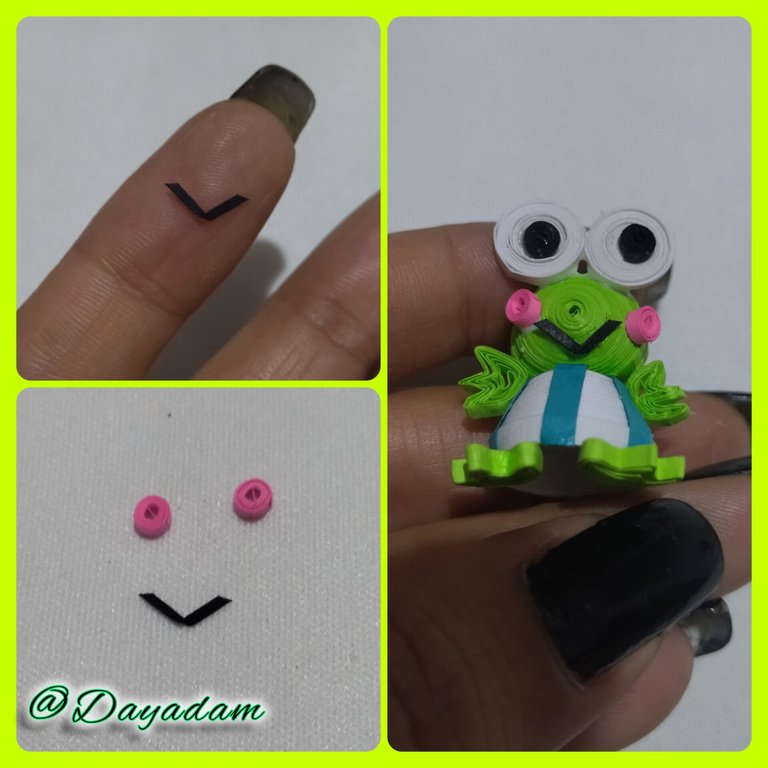
- To make the mouth take a small piece of 1mm black ribbon and glue it in a V shape, for the cheeks make 2 small circles closed with 1mm wide pink ribbon and glue them on the Keroppi's face.
In this way we have ready this small decorative Keroppi in 3D.
• Para realizar las manos y pies del personaje, tome cinta para quilling de 1mm de ancho del mismo color que la cabeza, realice 4 círculos abiertos 2 un poco mas grandes, los cuales moldee tal como muestra la imagen, una vez listos procedí a pegar los 2 mas grandes en la parte de abajo para los pies y los 2 mas pequeños a los lados del traje que serán los brazos.
• Para los ojos realice con cinta de color blanca de 1mm de ancho 2 círculos cerrados, los cuales uní con pega, para la parte interna de los ojos elabore 2 pequeños círculos de color negro los cuales coloque en los que elabore previamente, una vez listos pegue de la parte de arriba de la cabeza.
• Para realizar la boca tome un pequeño trozo de cinta de color negra de 1mm el cual pegue en forma de V, para las mejillas elabore 2 diminutos círculos cerrados con cinta de color rosada de 1mm de ancho y pegue de la carita del Keroppi.
De esta manera tenemos listo este pequeño Keroppi decorativo en 3D.


What did you think, did you like it?
I hope you did, I hope you liked my explanation, procedure and photos, I made them with love for you.
"Let out that muse that inspires you, and let your imagination fly".
Thank you all, see you next time.
¿Qué les pareció, les gustó?
Espero que sí, que les haya gustado mi explicación, procedimiento y fotos, los hice con mucho cariño por y para ustedes.
"Deja salir esa musa que te inspira, y deja volar tu imaginación".
Gracias a todos, nos vemos en la próxima.

Ooh, I've never seen this technique before, but I like it instantly and I'll do some search to learn more about this.
This is so cute:)
Hello. Since I started at Hive more than 2 years ago I have been working on the quilling technique and thanks to it I have become known. I hope to learn more every day and be able to share my knowledge with everyone. You are invited whenever you want to visit my blog, you are welcome. If you have any questions, I am at your service. I'm very glad you liked this little work. Thank you for stopping by and for your words. Blessings @millycf1976 ✨
All good wishes in learning more and developing your skill 🤗
Thanks for the support @untilwelearn ✨
Excelente trabajo amiga, esta técnica se te da muy bien, gracias por compartir.
Saludos!
Muchísimas gracias a ti por pasar por valorar mi trabajo y por tus palabras. Saludos @virgilio07 ✨
Amiga te quedo muy coqueta, tiene mucha expresión facial, qué ternura sobre todo por el diminuto tamaño, debe ser un trabajo de mucho cuidado y dedicación, excelente para los niños que necesitan mantener la concentración. Gracias por compartir.🤗
Gracias mi linda por tus palabras me alegra que te haya gustado. Me gusta trabajar mucho piezas pequeñas que muchos creen que es fácil pero todo lo contrario es más difícil debido al material y la técnica que uso, como tú dices cuidado y sobre todo concentración. Y si pudiera ser adecuada para trabajar la parte motriz de los niños.
Abrazos @lauracraft ✨
Congratulations, your post has been curated by @dsc-r2cornell. You can use the tag #R2cornell. Also, find us on Discord
Felicitaciones, su publicación ha sido votada por @ dsc-r2cornell. Puedes usar el tag #R2cornell. También, nos puedes encontrar en Discord
He visto otras publicaciones en las que usas esa técnica y no deja de sorprenderme lo que se puede hacer. Hermoso trabajo.
Bien hermoso quedó al final , otra vez demostrando ser una artista en los detalles más pequeños 😍😍
Que ternurita, me encantó! Gracias amiga por compartir tan lindo trabajo.