Hola, hola amigos @Hivediy reciban un cordial saludo 🤗
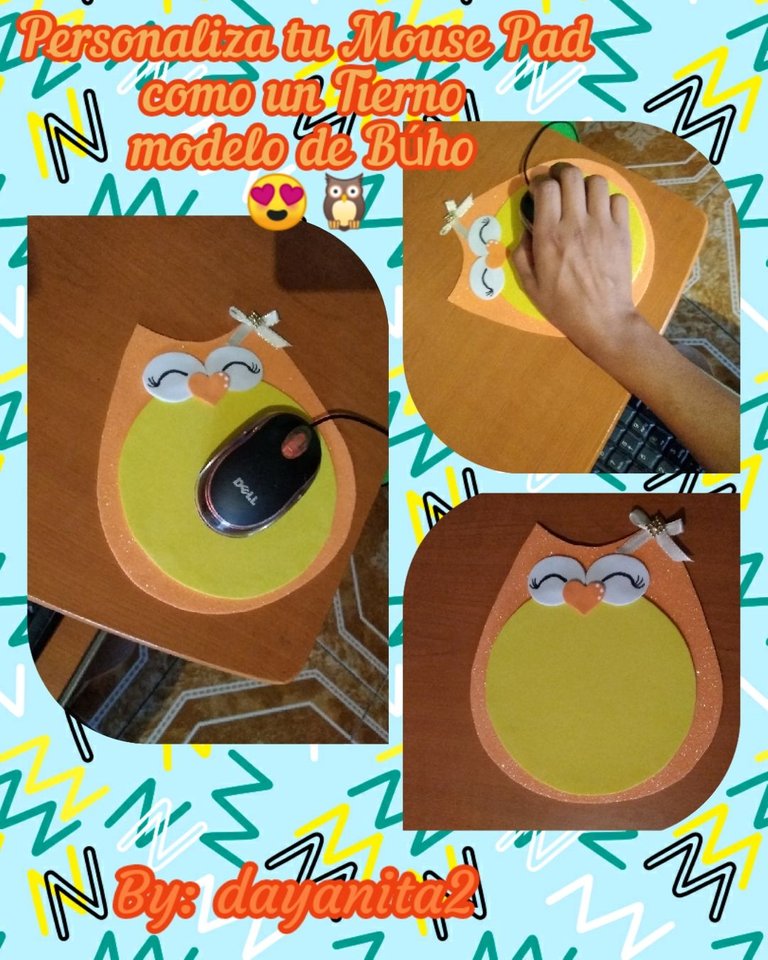
Hoy les traigo un sencillo pero lindo y tierno proyecto, que realice para mi pues tenia un mouse pad deteriorado y un tanto aburrido en realidad no me gustaba, y decidí cambiarlo y realizar un búho, creo que a la mayoría de nosotros los maestros nos gusta esta figura ya que representa la sabiduría e inteligencia que proyecta cada ser humano. Y por ello los invito a que me acompañen a este paso a paso, tomen nota de los materiales a usar:
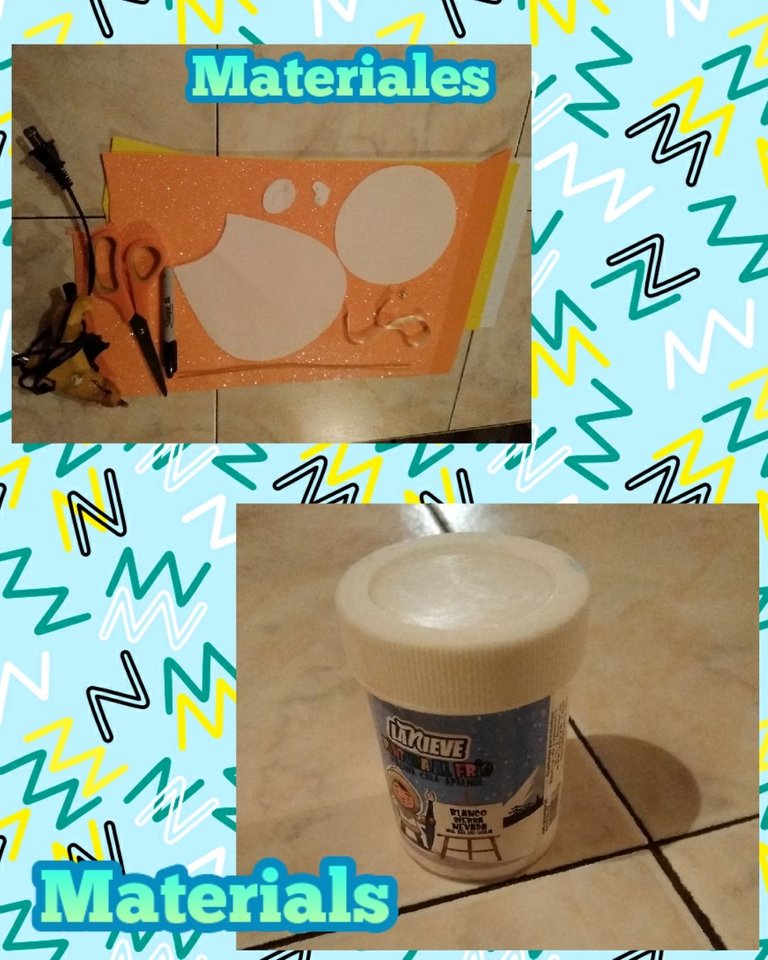
🦉 Foami (goma eva) naranja escarchado, amarillo, naranja y blanco.
🦉 Tijera, palito de altura, marcador fino negro y pistola de silicón.
🦉 Cinta de raso delgada blanca con borde dorado y pintura al frío blanca.
🦉 Patrones.
Hello, hello friends @Hivediy receive a warm greeting 🤗
Today I bring you a simple but cute and tender project that I did for myself because I had a deteriorated and somewhat boring mouse pad, I really didn't like it, and I decided to change it and make an owl, I think most of us teachers like it this figure since it represents the wisdom and intelligence that every human being projects. And for this reason I invite you to accompany me on this step by step, take note of the materials to use:
🦉 Foami (eva rubber) frosty orange, yellow, orange and white.
🦉 Scissors, height stick, black fine marker and silicone gun.
🦉 Thin white satin ribbon with gold edge and white cold paint.
🦉 Patterns.
Comenzaremos pasando al foami (goma eva) los patrones usaremos el palito de altura, la silueta del búho se sacara en el naranja escarchado, el circulo en amarillo, el pico en naranja y los dos ojos en blanco.
We will start by going to the foami (eva rubber) the patterns we will use the height stick, the silhouette of the owl will be drawn in frosty orange, the circle in yellow, the beak in orange and the two eyes in white.
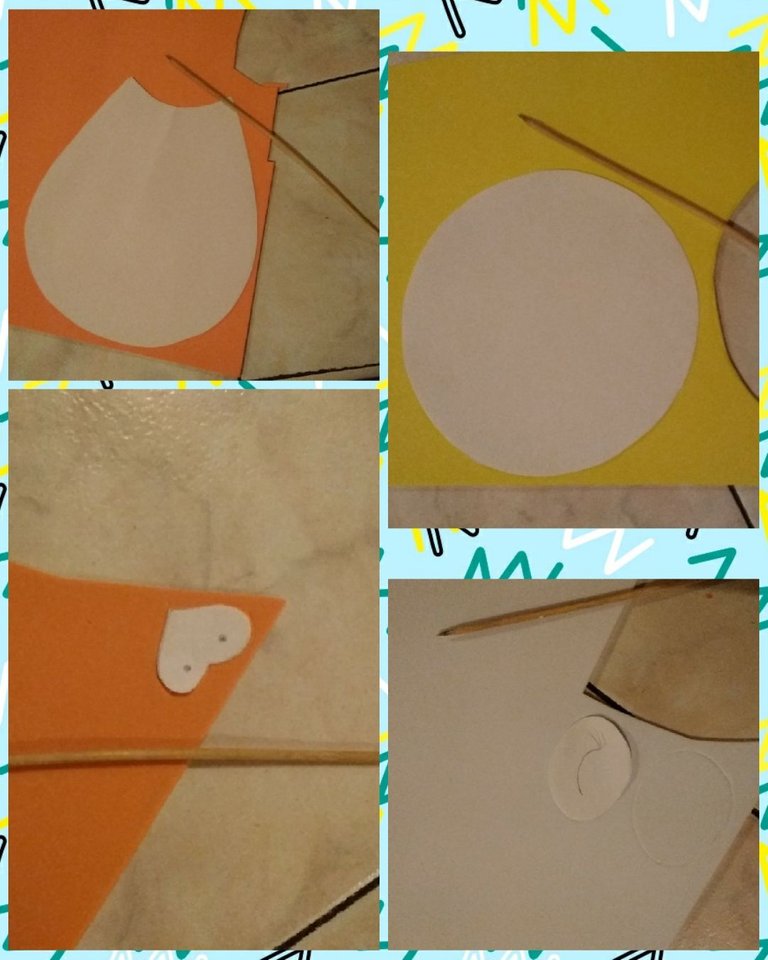
✂️ Hora de recortar los patrones que pasamos al foami (goma eva) al hacerlo recortar tratando de evitar picotear el mismo, ya que de un buen recortado depende que nuestro trabajo quede impecable.
✂️ Time to cut the patterns that we pass to the foami (eva rubber) when making it cut trying to avoid pecking it, since a good cut depends on our work being impeccable.

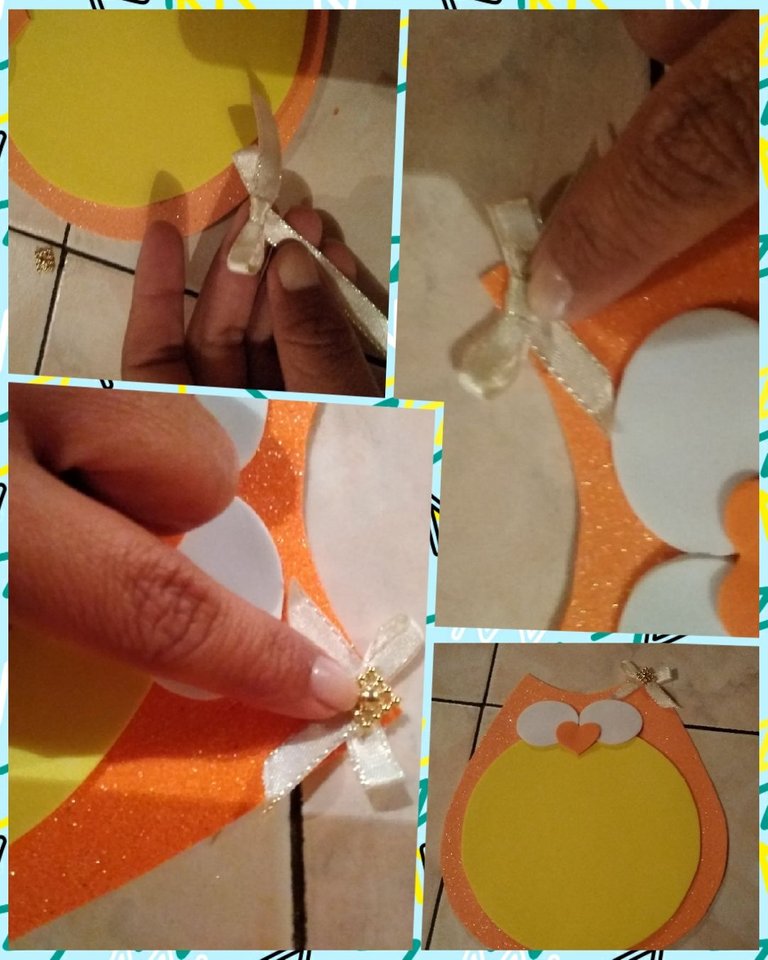
⏰ Hora de armar y dar forma a nuestro búho, primero tomaremos la silueta del mismo y el círculo amarillo lo pegaremos encima de la silueta, tratando que nos quede lo más centrado posible para ello usaremos la pistola de silicón, los círculos que son los ojos, los pegaremos juntos en la parte de arriba y el pico se pegara en el centro de los dos ojos.
⏰ Time to assemble and shape our owl, first we will take its silhouette and we will paste the yellow circle on top of the silhouette, trying to make it as centered as possible for this we will use the silicone gun, the circles that are the eyes , we will glue them together at the top and the beak will be glued in the center of the two eyes.
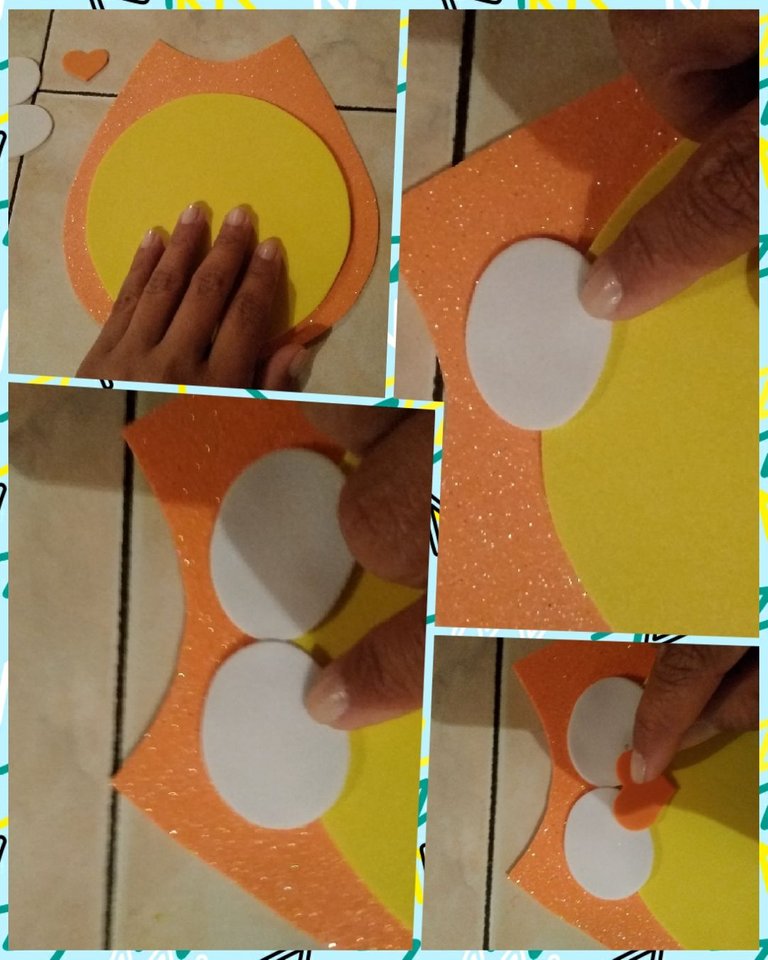
Para que nuestra buhita luzca aún más coqueta, con la cinta de raso haremos un lazito pequeño y se pegara con silicón en uno de los cuernos del búho y encima del lazito se le pegara el botón dorado.
To make our little owl look even more flirtatious, with the satin ribbon we will make a small bow and glue it with silicone on one of the owl's horns and on top of the bow we will glue the golden button.
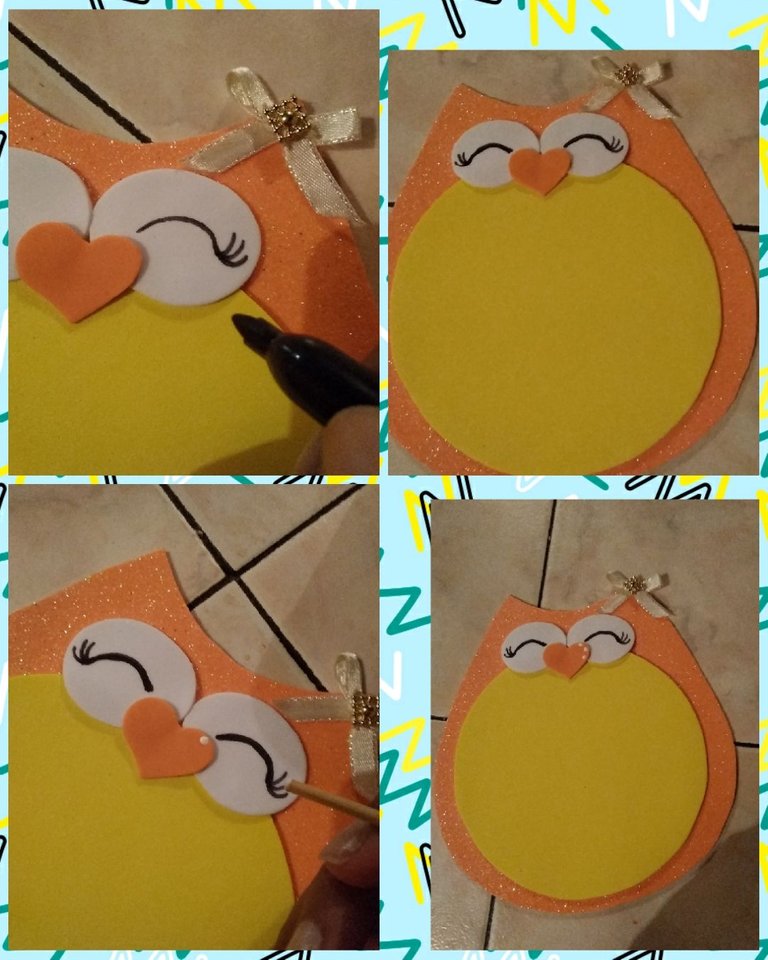
Ahora con el marcador negro fino dibujaremos los ojos, para ello haremos una semicurva y al final de esta sacaremos tres pestañas, este paso se repetirá en el otro ojo.
Luego con la pintura al frío blanca y el palito de altura haremos tres puntos en el pico para dar luz al mismo.
Now with the fine black marker we will draw the eyes, for this we will make a semi-curve and at the end of this we will remove three eyelashes, this step will be repeated in the other eye.
Then with the white cold paint and the height stick we will make three points on the beak to give light to it.
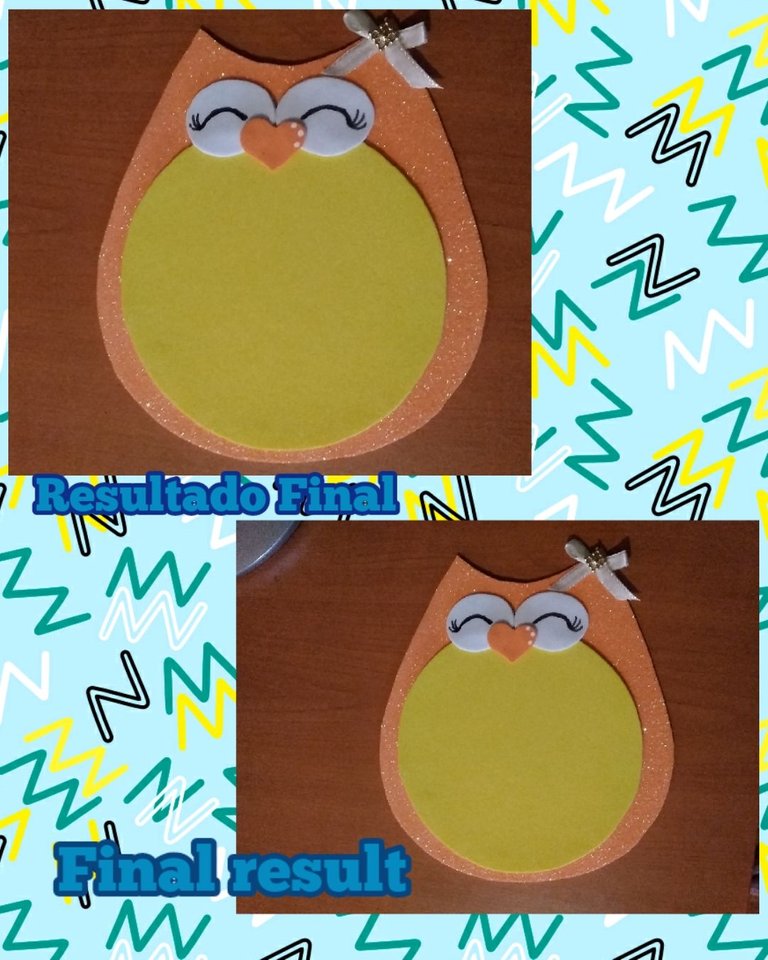
Y bueno amigos con estos sencillos pasos, obtendrás un tierno, hermoso y funcional mouse pad de búho a mi me encanto.
Me gustaría conocer Que opinas tú?
Y bien amigos aquí les dejare mi resultado final 🤗.
And well friends with these simple steps, you will get a cute, beautiful and functional owl mouse pad that I loved.
I would like to know What do you think?
And well friends here I will leave my final result 🤗.
Gracias a ti que te detienes a leer cada una de mis publicaciones recibe un caluroso abrazo y que tengas un lindo día cargado de energías positivas ✨.
Las fotos fueron tomadas y editadas con mi celular
use la aplicación "Foto Collage"
La traducción la realice con el traductor de google
Hasta un Próximo Encuentro!!!
🤗😘
Thanks to you who stop to read each of my posts, receive a warm hug and have a nice day full of positive energy ✨.
The photos were taken and edited with my cell phone.
use the "Photo Collage" app
The translation is done with google translator
Until a Next Meeting!!!
🤗😘
This post has been manually curated by @steemflow from Indiaunited community. Join us on our Discord Server.
Do you know that you can earn a passive income by delegating to @indiaunited. We share more than 100 % of the curation rewards with the delegators in the form of IUC tokens. HP delegators and IUC token holders also get upto 20% additional vote weight.
Here are some handy links for delegations: 100HP, 250HP, 500HP, 1000HP.
100% of the rewards from this comment goes to the curator for their manual curation efforts. Please encourage the curator @steemflow by upvoting this comment and support the community by voting the posts made by @indiaunited.
Esto esta muy lindo @dayanita2, sencillo pero bien delicado para poner nuestro mouse en una base bien coqueta.
Gracias por compartir...
!DIY
Hola @dayadam muchísimas gracias, me alegra saber que te gusto mi trabajo
Saludos un abrazo 🤗
Nice work. A delicate detail to accompany our workplace. // Lindo trabajo. Un detalle delicado para acompañar nuestro sitio de trabajo.
Muchas gracias @diyhub por el apoyo 🙏
Mori de amor, con lo que me gustan los buhos 😍 yo tengo uno gris liso pero sin duda cuando quiera cambiarlo me voy a ahacer este que esta super tierno y los materiales y creacion son muy sencillos, gracias por la idea! ❤️
Hola @elbuhito a mi también me encantan los búhos me parecen tan cuchis 😍
Gracias por visitarme un abrazo 🤗
que bonito buena idea!
Gracias amiga @lismarcarolina2
También quiero un mouse pad de búho, ay pero que ternura ajajja también es fácilisimo de hacer, este tutorial lo guardaré.
Si amiga @jennyzer es super fácil de realizar, gracias por visitarme 🤗