Hola, hola espero se encuentren bien 🤗 amigos de @Hivediy!!!
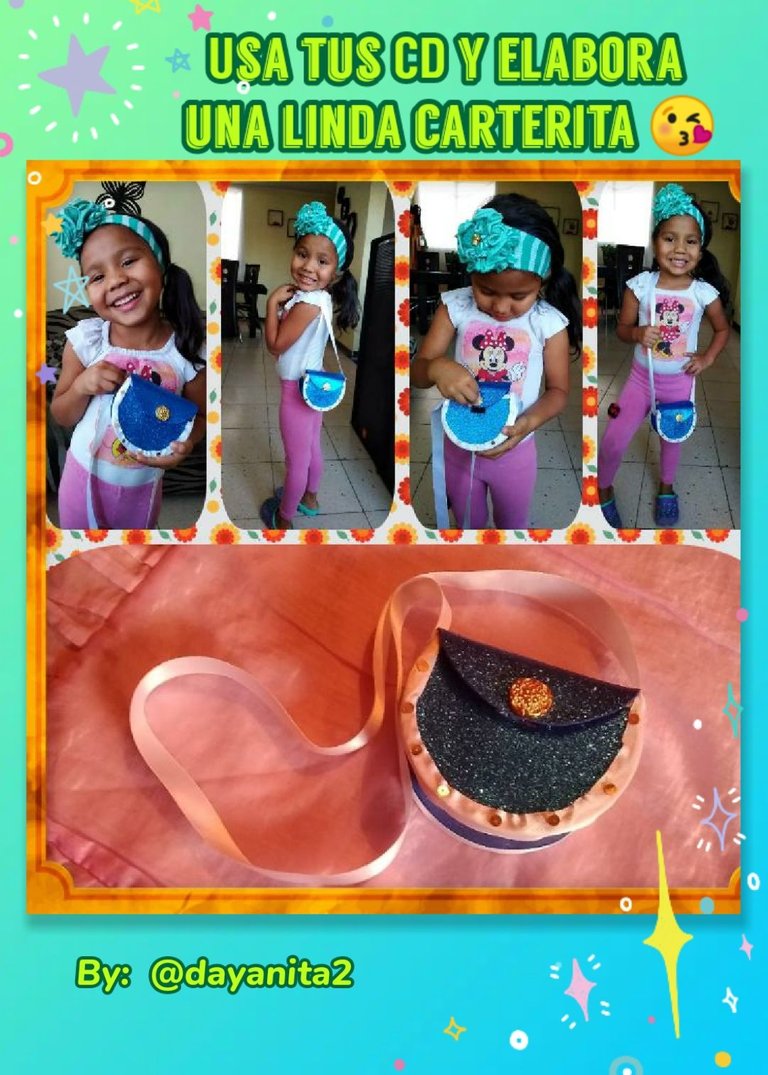
Hoy les traigo un lindo proyecto que hará muy feliz a las nenas de la casa, es una sencilla pero linda carterita 😍 .
Como les he comentado en anteriores post mi sobrina Gerimar es mi inspiración para la realización de estos lindos detallitos, ya que para mi es la hija que no he podido tener 😔 y como ella es súper coqueta siempre me pregunta tiaaa bella!! cuando me vas hacer algo nuevo para llevarlo para mi escuela 😁 y por supuesto esta tía consentidora la complace 🤗, para ella realice esta carterita que lleva poco material y además trabaje siempre apuntando al reciclaje. Por eso los invito a seguirme este paso a paso para que vean mi bello resultado.
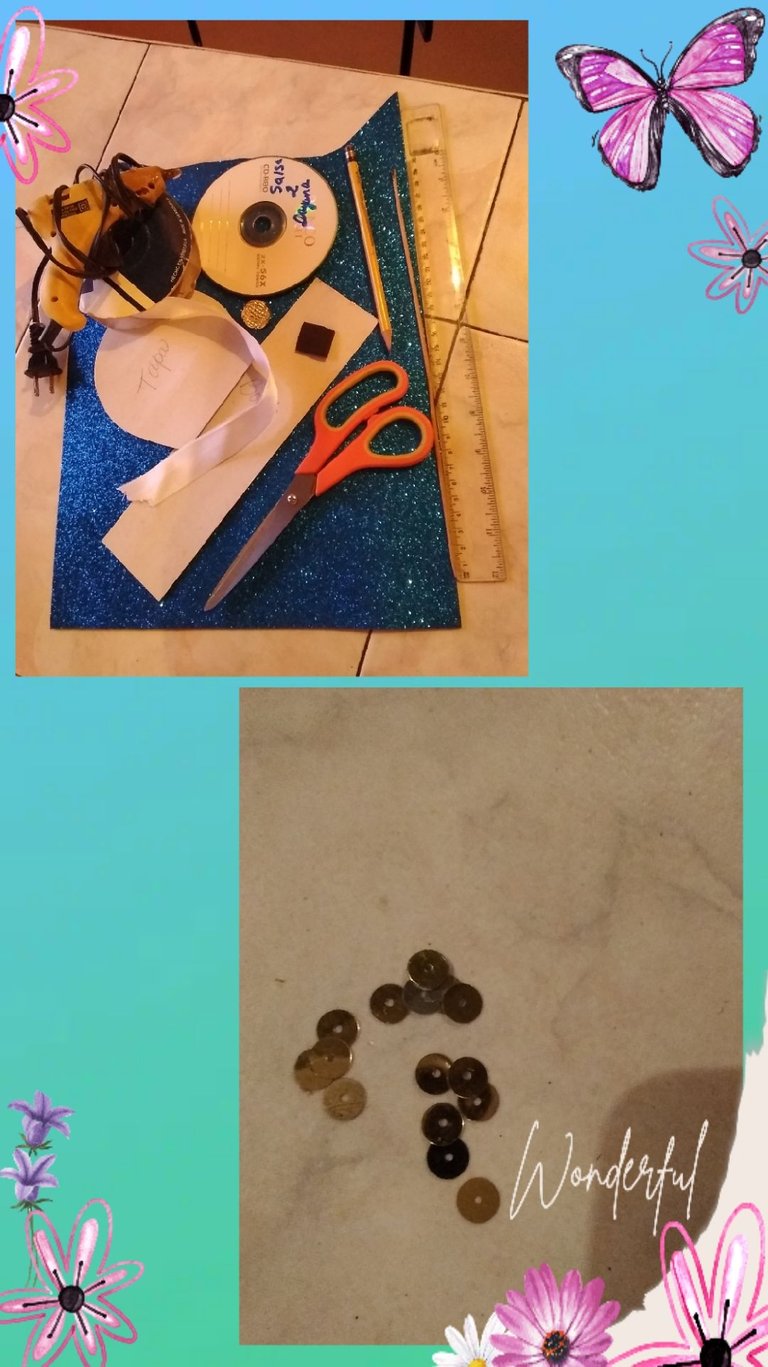
Para ello utilizaremos los siguientes materiales tomen nota 📝:
👝 4 Cd que ya no utilices
👝 Foami (goma eva) azul rey escarchado
👝 Cinta de raso blanca de dos dedos de ancho
👝 1 botón dorado
👝 Pistola de silicón, lápiz, regla, palito de altura, tijera y regla
👝 Cierre mágico, lentejuelas doradas y los patrones
Hello, hello I hope you are well 🤗 friends of @Hivediy!!!
Today I bring you a nice project that will make the girls of the house very happy, it is a simple but cute little bag 😍 .
As I have told you in previous posts, my niece Gerimar is my inspiration for the realization of these beautiful little details, since for me she is the daughter that I could not have 😔 and since she is super flirtatious, she always asks me aunty beautiful! ! when you are going to make me something new to take it to my school 😁 and of course this spoiled aunt pleases her 🤗, for her I made this little bag that carries little material and also always works aiming at recycling. That's why I invite you to follow me this step by step so you can see my beautiful result.
For this we will use the following materials, take note 📝:
👝 4 CDs that you no longer use
👝 Foami (eva rubber) royal blue frosted
👝 White satin ribbon two fingers wide
👝 1 golden button
👝 Glue gun, pencil, ruler, height stick, scissors and ruler
👝 Magic zipper, gold sequins and patterns
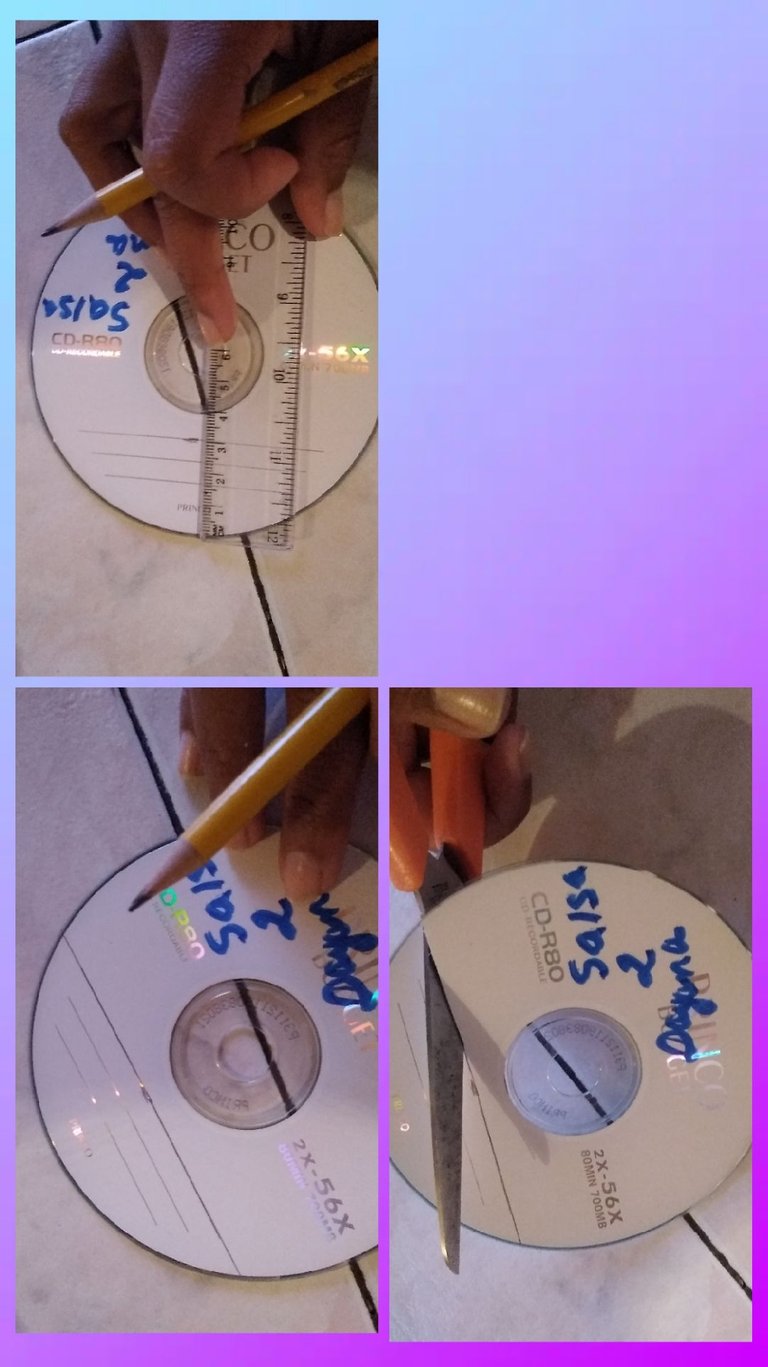
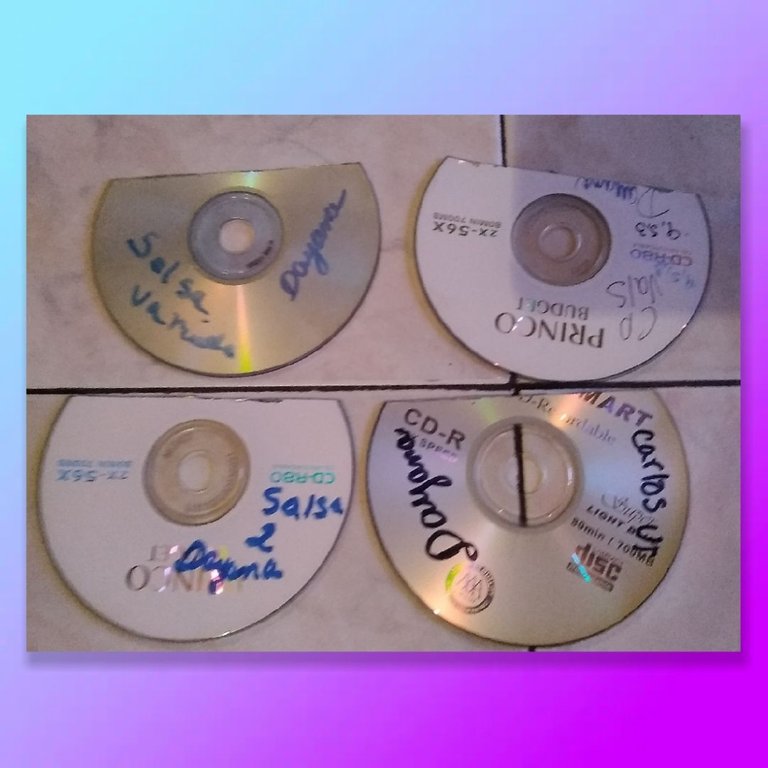
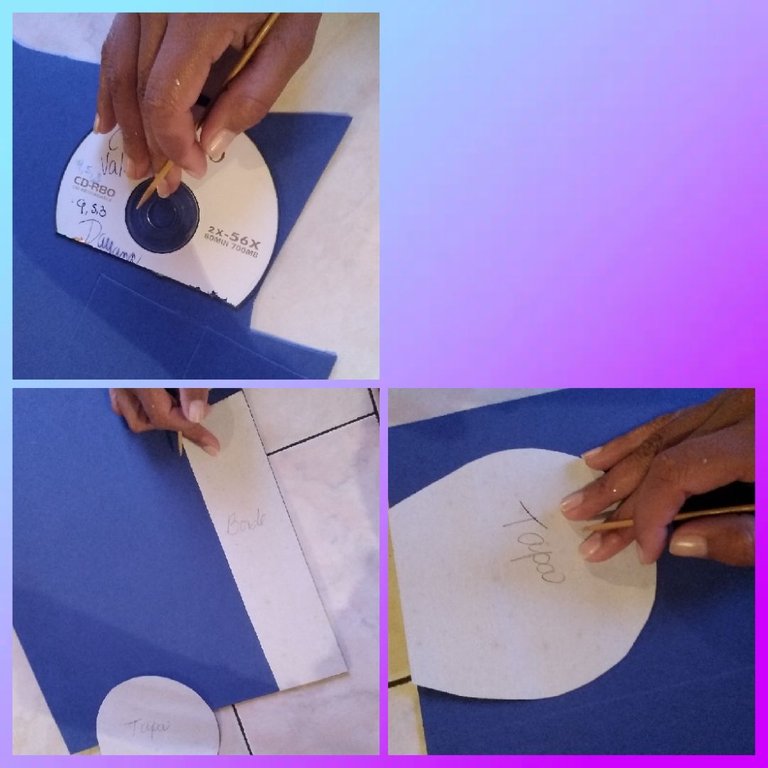
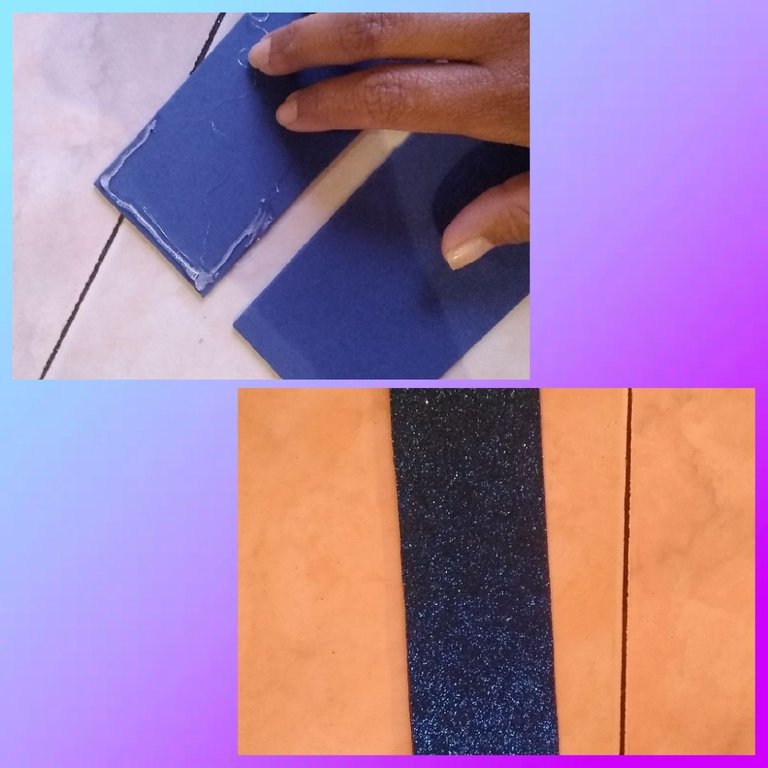
Como primer paso tomaremos los cd y con la regla en uno de sus extremos le quitaremos 3cm luego pasaremos una línea para luego recortarlo siguiendo la misma de esta manera ya el cd dejara de ser circular este paso se repetirá en cada uno.
Observa la imagen como nos quedaran 👇
As a first step we will take the cd and with the ruler at one of its ends we will remove 3cm then we will pass a line and then cut it following the same in this way and the cd will stop being circular this step will be repeated in each one.
Observe the image how they will fit us 👇
Now we will take the cd and the foami (eva rubber) in which we will mark 2 pieces, then each of the patterns, from the rectangular piece we will mark (2).
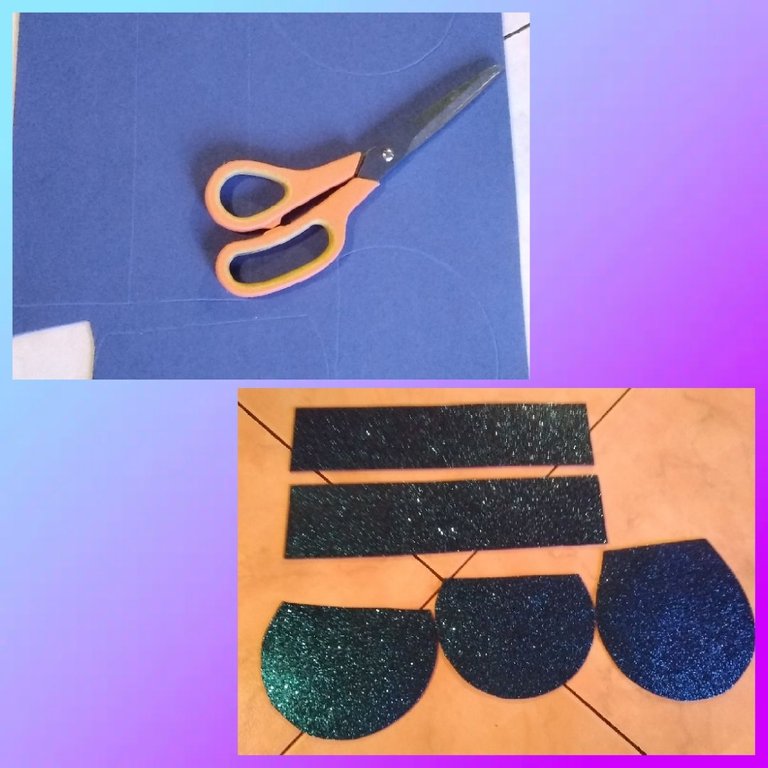
Hora de recortar ✂️ las piezas que pasamos al foami (goma eva), hacerlo con precisión evitando picotear el foami (goma eva) ya que de un buen recortado depende que nuestro trabajo quede bello e impecable.
Time to cut ✂️ the pieces that we pass to the foami (eva rubber), do it with precision avoiding pecking the foami (eva rubber) since a good cut depends on our work being beautiful and impeccable.
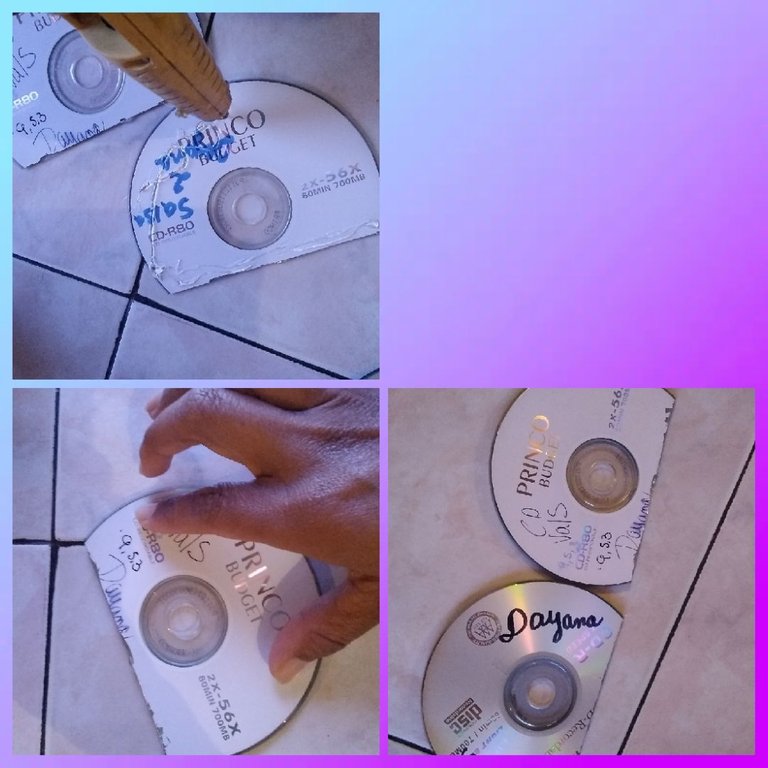
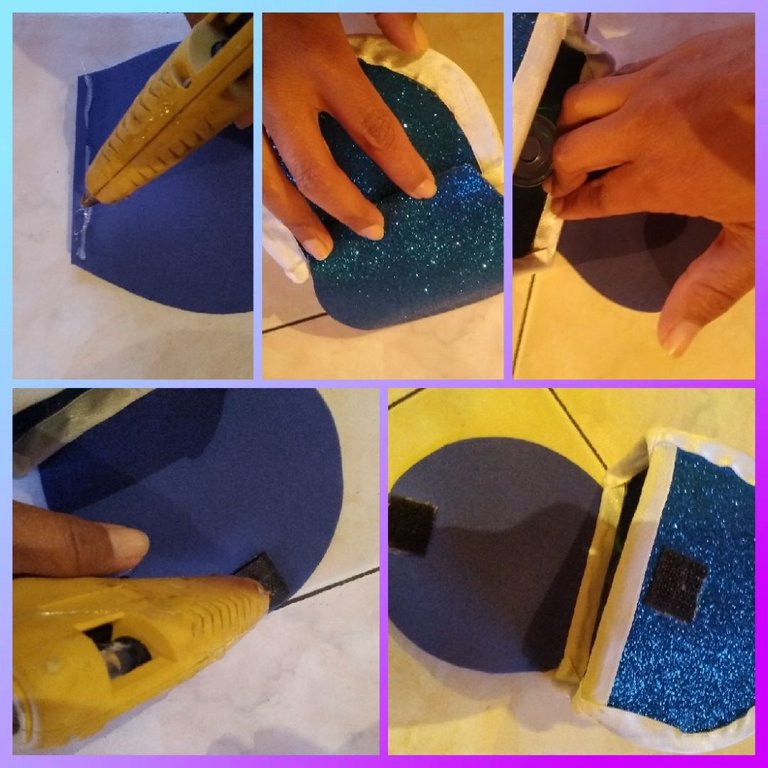
Ahora tomaremos 1 cd se le colocara silicón por todo el borde y encima de este se le pegara el otro, presionamos unos segundos para que selle muy bien, este paso se repetirá en el siguiente de esta manera nos quedarán 2 piezas.
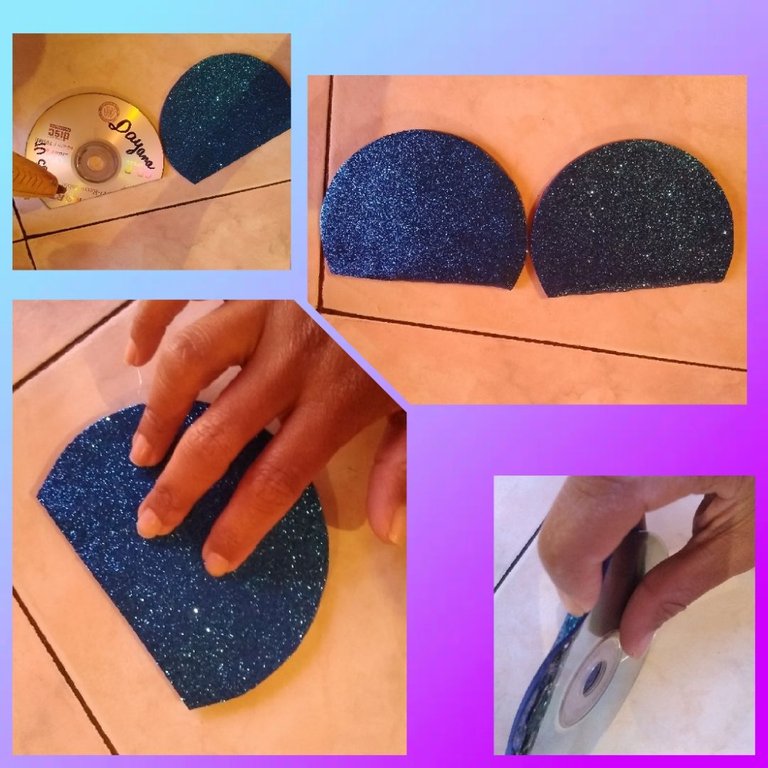
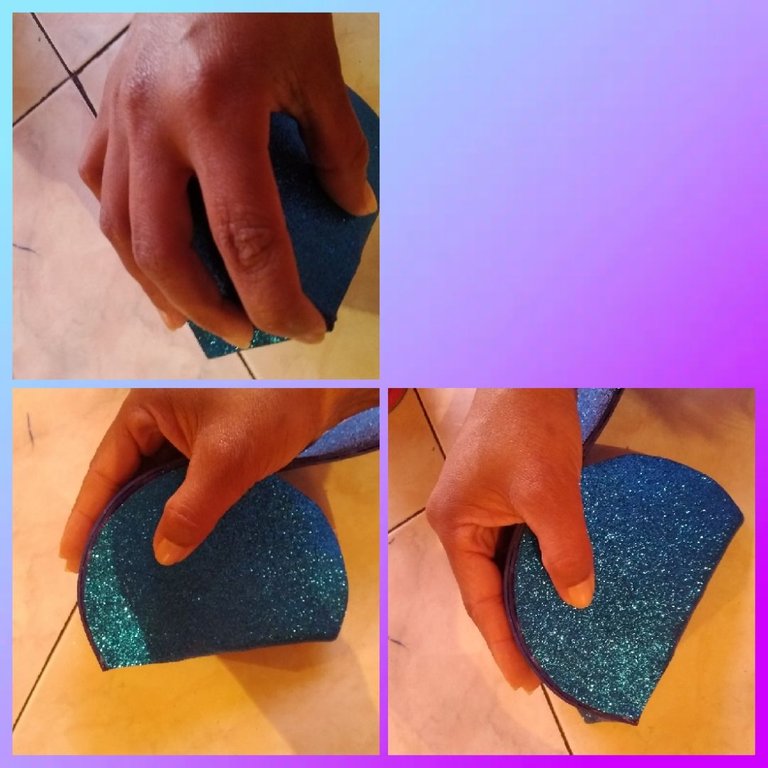
👝 Ahora forraremos las 2 piezas que formamos con los cd se le coloca silicón al cd todo alrededor y encima el patrón que recortamos en foami (goma eva), presionamos unos segundos luego alrededor del mismo se va pegando utilizando silicón, observa la imágen 👇.
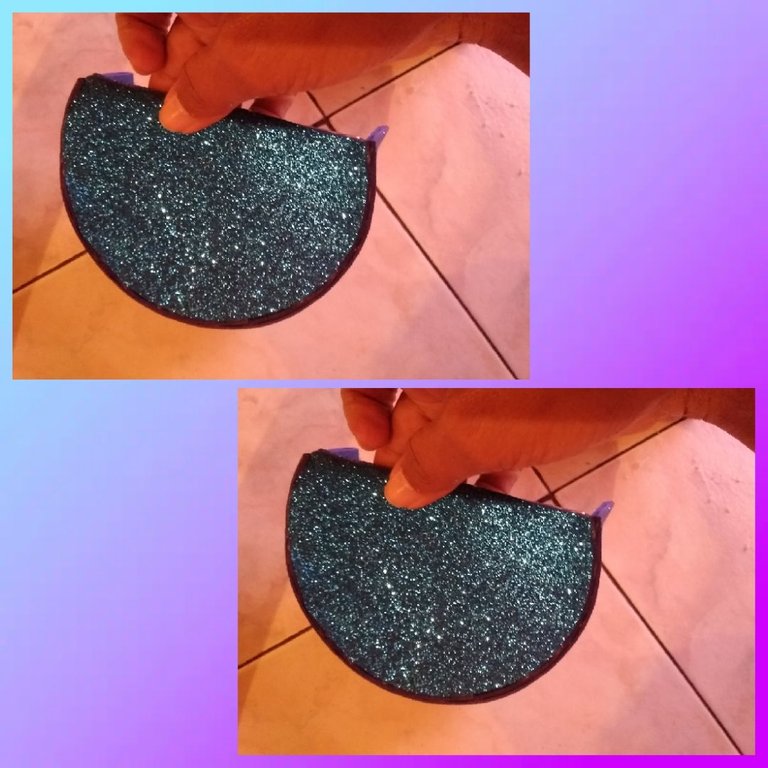
👝 Los dos rectángulos los unimos usando silicón cuidando que quede bien sellado.
👝 Now we will cover the 2 pieces that we form with the cds, silicone is placed on the cd all around and on top of the pattern that we cut out in foami (eva rubber), we press for a few seconds then around it it sticks using silicone, see the image 👇.
👝 We put the two rectangles together using silicone, taking care that it is well sealed.
We will begin to assemble our little bag, for this we will take the rectangle of foami (eva rubber) and we will glue it with silicone to our piece of (cd), starting at one end, this will be done little by little by pressing so that it is well glued, at the end we take the other piece of (cd) and the above process will be repeated.
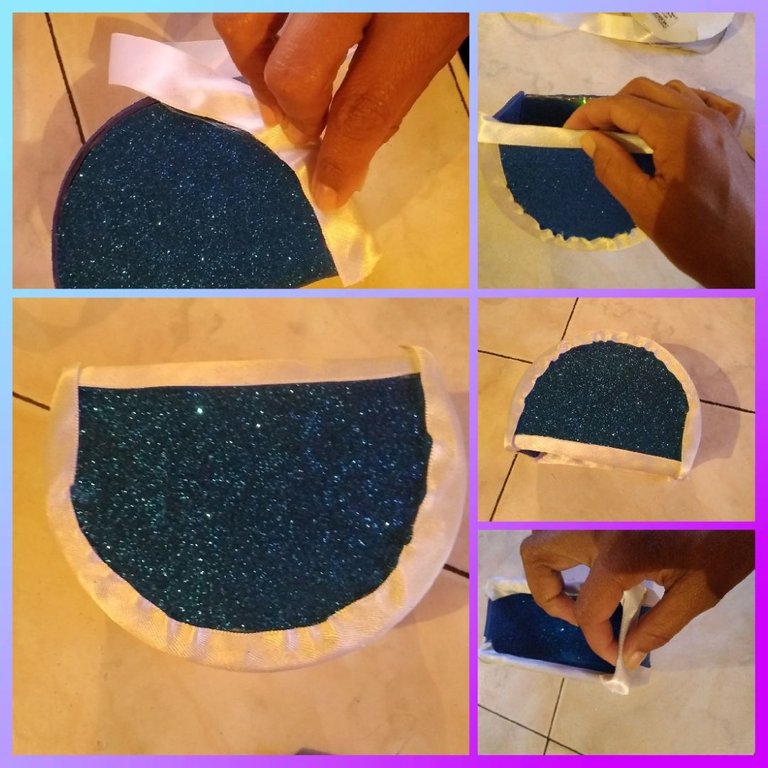
👝 El patrón de la tapa de la carterita se le coloca silicón y se pegará en uno de los extremos de la misma doblamos hacia adelante para que tome el dobles.
👝 Seguidamente pegaremos el cierre mágico para abrir y cerrar la carterita, para ello se despegara el mismo uno se pega en la tapa y se medira para pegar el otro en la carterita se presiona para evitar que se despegue.
👝 The pattern of the cover of the bag is placed on silicone and it will be glued to one of the ends of it, we fold forward so that it takes the doubles.
👝 Next we will paste the magic closure to open and close the bag, for this the same one will be detached, stick on the lid and measure to stick the other on the bag, press it to prevent it from coming off.
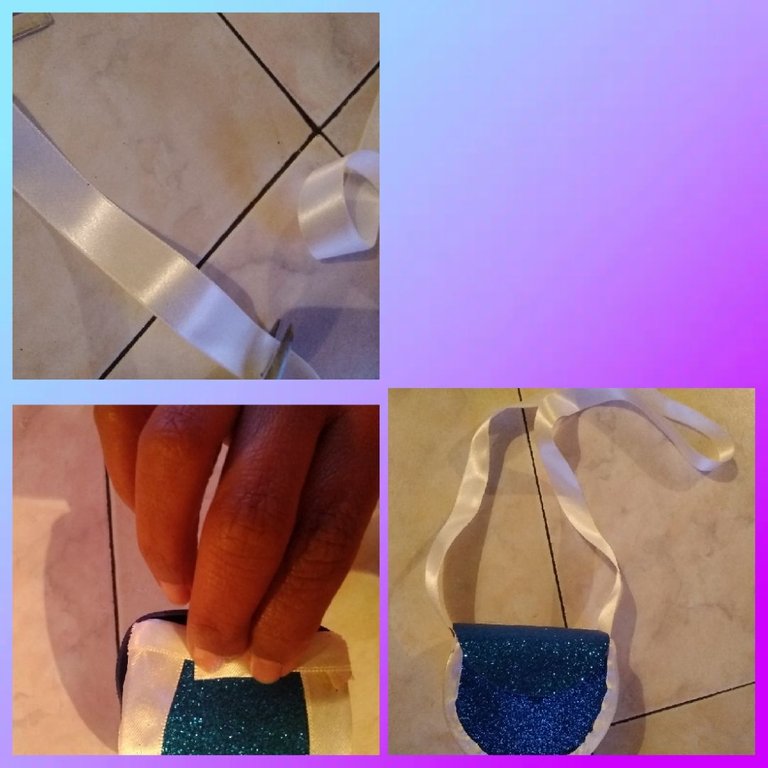
Para el asa de la carterita cortaremos una tira de la cinta de raso de 98cm, esta la pegaremos con silicón en un extremo como se indica en la imágen y luego del otro.
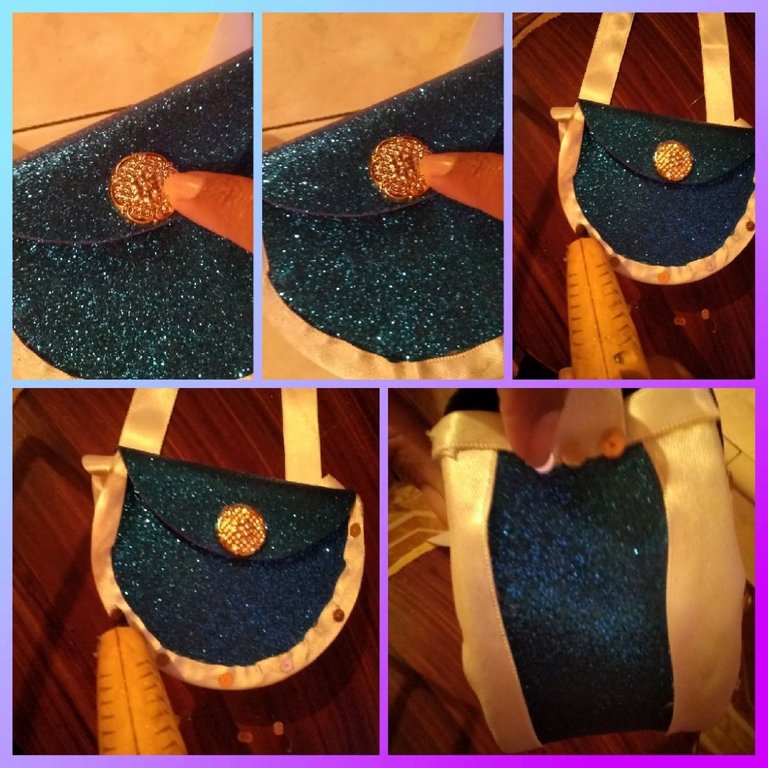
Ya casi lista nuestra carterita, ahora vamos a concluirla decorandola:
👝 Con silicón se pegará el botón dorado en la tapa y las lentejuelas las pegaremos por todo el borde de la parte delantera de la carterita dejando una pequeña distancia de la otra.
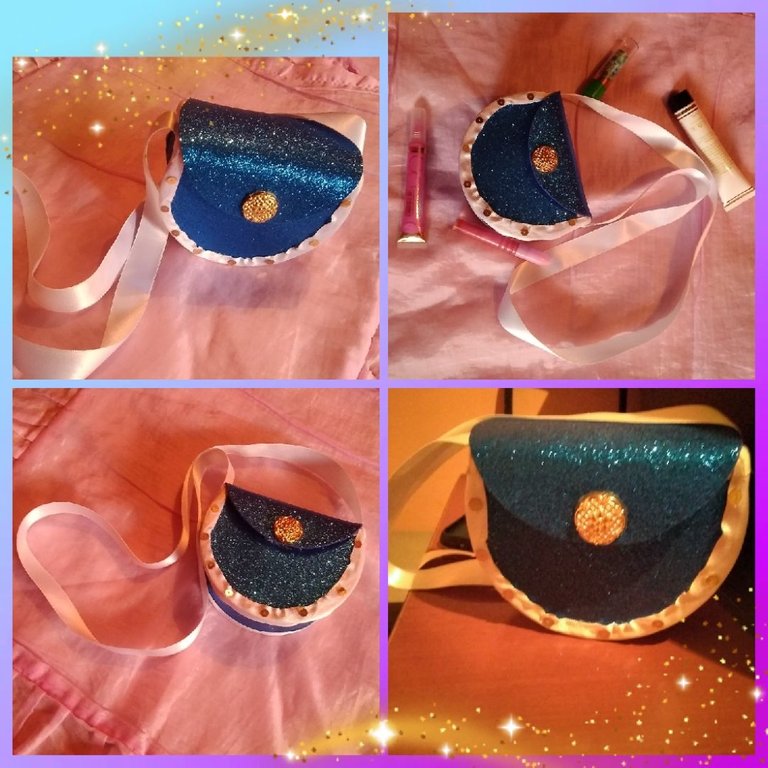
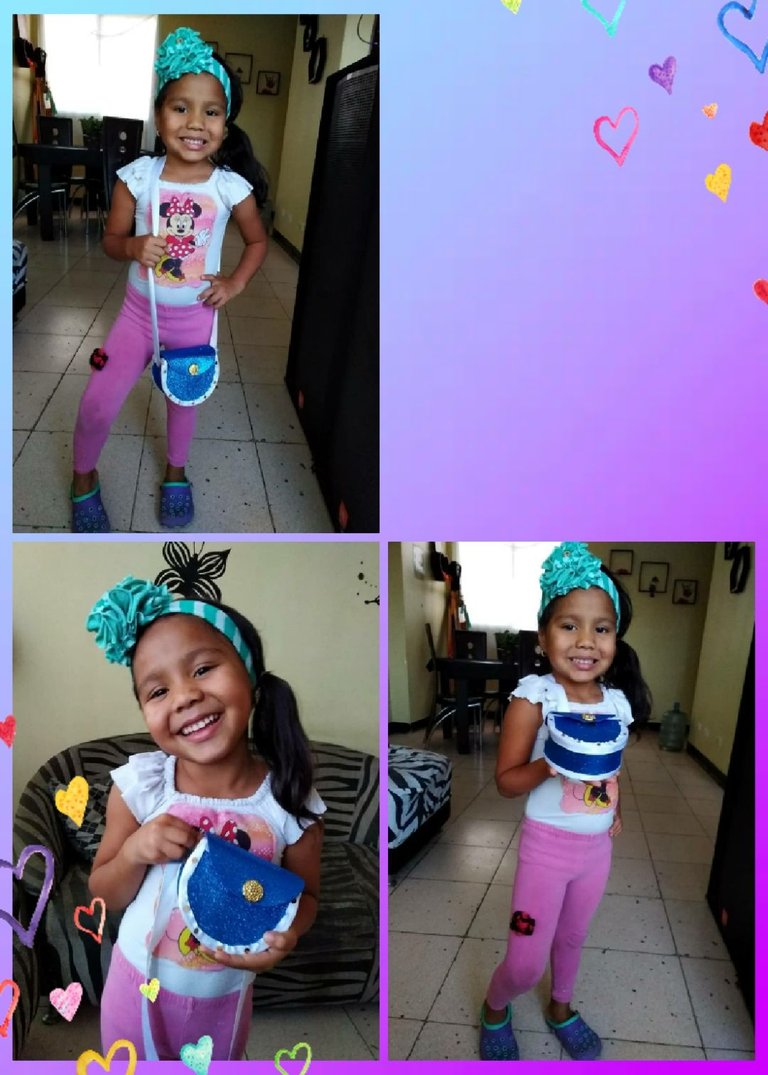
Y así concluyo este proyecto del día hoy, con unos cd que ya no tenían utilidad los reuse y los transforme en una bella carterita, mi invitación es animense a realizarla para las nenas de la casa para que luzcan esta coqueta carterita, a mi sobrina Gerimar le encanto y la esta disfrutando mucho, además de mostrarla a sus amiguitas del colegio 🤗.
Our bag is almost ready, now we are going to conclude it by decorating it:
👝 With silicone, the golden button will be glued on the lid and the sequins will be glued all over the edge of the front part of the bag, leaving a small distance from the other.
And so I conclude this project of the day today, with some cds that were no longer useful, I reused them and transformed them into a beautiful little bag, my invitation is to encourage you to do it for the girls of the house so that they can show off this flirty little bag, to my niece Gerimar loved it and is enjoying it a lot, as well as showing it to her school friends 🤗.
MI RESULTADO FINAL 😍
Gracias a ustedes que se detienen a leer cada una de mis publicaciones reciban un abrazo cariñoso.
Las fotos fueron tomadas y editadas con mi celular
use la aplicación "Foto Collage y Mirror Collage"
La traducción la realice con el traductor de google
Hasta un Próximo Encuentro!!!
🤗😘
Thanks to you who stop to read each of my publications receive a loving hug.
The photos were taken and edited with my cell phone.
use the “Photo Collage and Mirror Collage” app
The translation is done with google translator
Until a Next Meeting!!!
🤗😘
The rewards earned on this comment will go directly to the people( @dayanita2 ) sharing the post on Twitter as long as they are registered with @poshtoken. Sign up at https://hiveposh.com.
Congratulations, your post has been upvoted by @dsc-r2cornell, which is a curating account for @R2cornell's Discord Community. We can also be found on our hive community & peakd as well as on my Discord Server
Felicitaciones, su publication ha sido votado por @dsc-r2cornell. También puedo ser encontrado en nuestra comunidad de colmena y Peakd así como en mi servidor de discordia
Muchisimas gracias por el apoyo🤗
Thank you for sharing this post on HIVE!
Your content got selected by our fellow curator ashikstd & you just received a little thank you upvote from us for your great work! Your post will be featured in one of our recurring compilations which are aiming to offer you a stage to widen your audience within the DIY scene of Hive. Stay creative & HIVE ON!
Please vote for our hive witness <3
Gracias por el apoyo🙏
Congratulations @dayanita2! You have completed the following achievement on the Hive blockchain And have been rewarded with New badge(s)
Your next target is to reach 6000 upvotes.
You can view your badges on your board and compare yourself to others in the Ranking
If you no longer want to receive notifications, reply to this comment with the word
STOPCheck out our last posts:
Support the HiveBuzz project. Vote for our proposal!
Thanks for the support🙏
You're welcome @dayanita2.
BTW, we need your help. May we ask you to support our proposal so our team can continue its work?
You can do it on Peakd, ecency,
https://peakd.com/me/proposals/248
Thank you.