Hello dear readers I hope you are healthy and happy, I have been a little absent feet I have been a little delicate in health and I can do some work as I feel better, however I could not stop sharing with you a very creative and beautiful idea What has occurred to me is that I cannot believe that we can perform so many wonders with articles that we are going to discard, useful articles, it is all a matter of letting your imagination fly and boalaaa hahaha, well if you do not believe, come with me to see this simple and the time creative tutorial.
Hola queridos lectores espero se encuentren sanos y felices, he estado un poco ausente pies he estado un poco delicada de salud y puedo hacer algún trabajo a medida que me sienta mejor, sin embargo no podría dejar de compartir con usted una idea muy creativa y hermosa que se me ha ocurrido y es que no puedo creer que podamos realizar tantas maravillas con artículos que vamos a desechar, artículos de provecho, todo es cuestión de pones tu imaginación aa volar y boalaaa jajaja pues si no crees acompáñame a ver este sencillo y a las vez creativo tutorial.
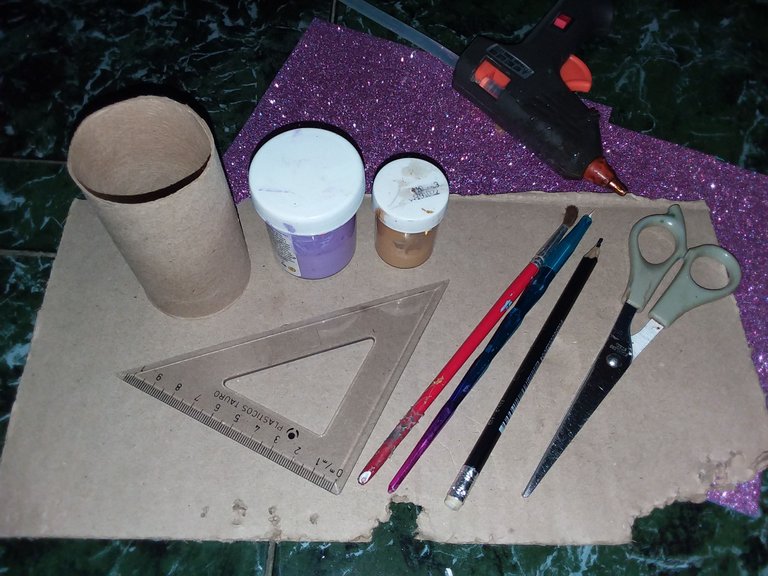
The materials to use:
- Toilet paper roll
*Foami (Eva rubber)
*Scissor
*Pencil
*Paperboard
*hot silicone
*Painting
*Brush
Materiales a utilizar:
*Rollo de papel sanitario
*Foami(goma Eva)
*Tijera
*Lápiz
*Cartón
*Silicón caliente
*Pintura
*Pincel
Elaboration process:
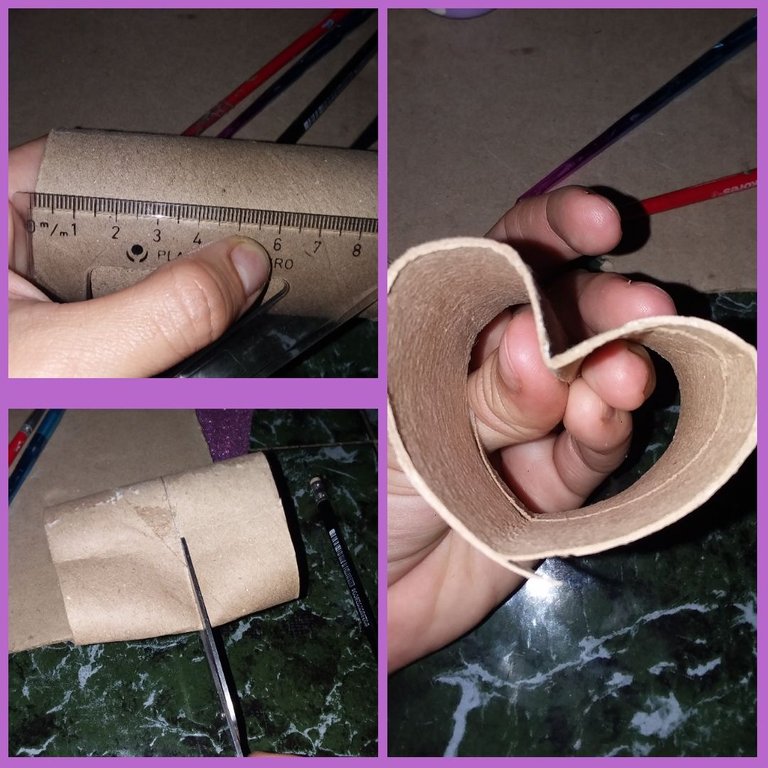
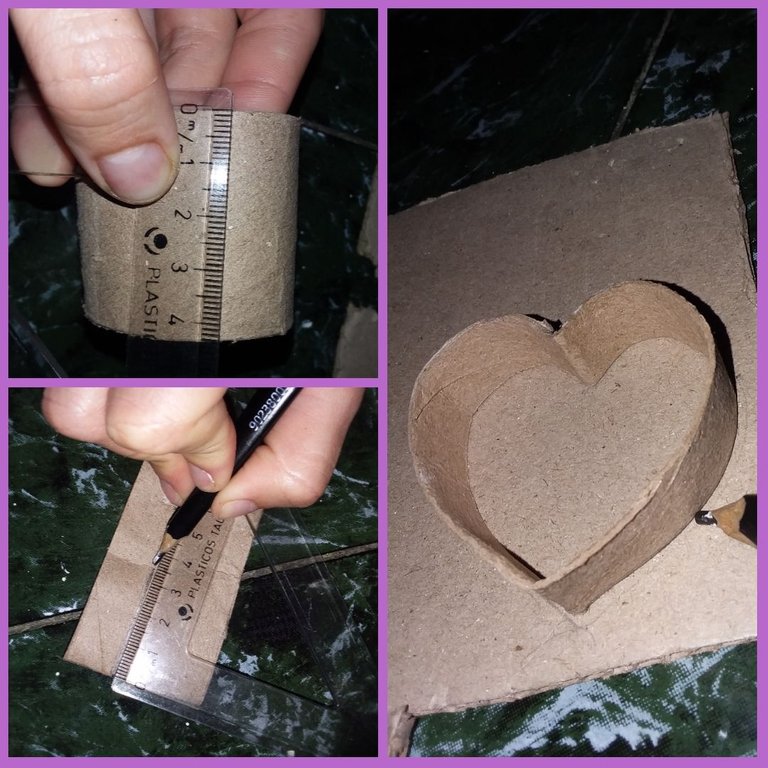
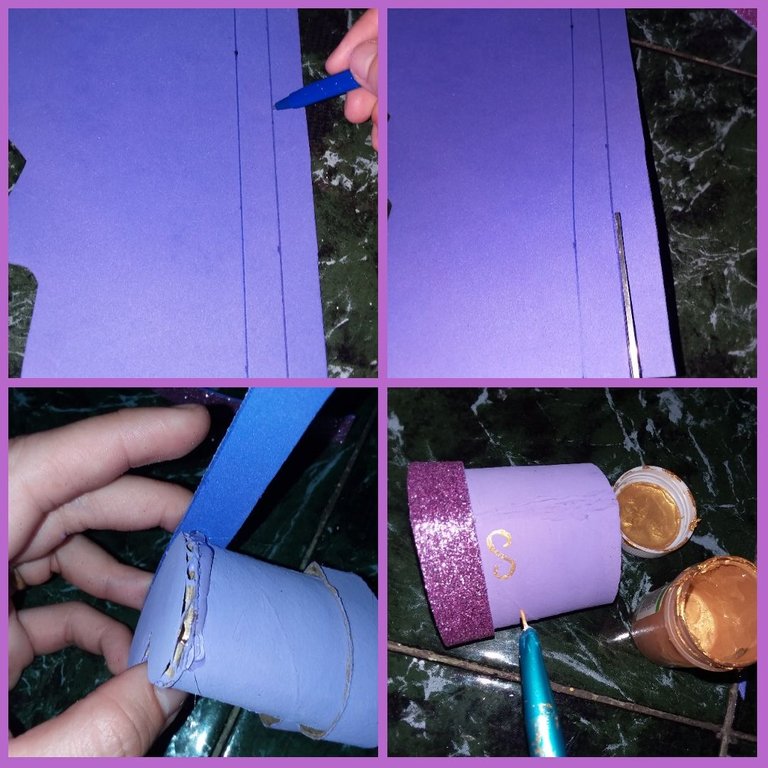
The first thing we must do is take our roll of toilet paper and measure a lake with 6cm scissors, cut and shape it into a heart!
Proceso de elaboración:
Lo primero que debemos hacer es tomar nuestro rollo de papel sanitario y medir un lago con la tijera de 6cm, cortamos y damos forma de corazón!
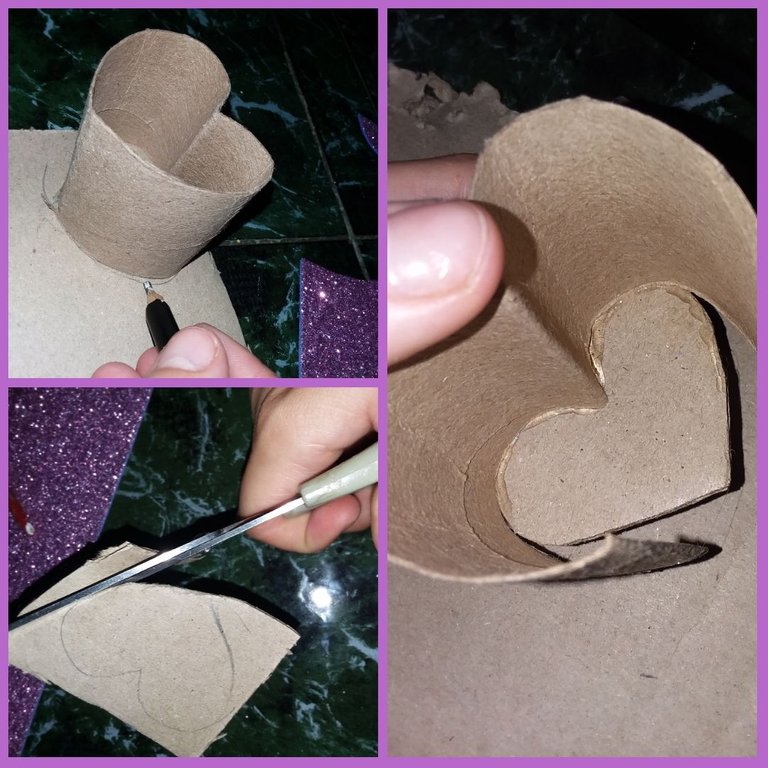
Then we must take the base that is the heart that we have just assembled and place it on top of a piece of cardboard, mark it and cut out its shape, followed by this we proceed to cut out our heart from the bottom so that we can easily stick it to our base, as we see in the images.
Luego debemos tomar la base que es el corazón que acabamos de armar y lo colocamos encima de un cartón, lo marcamos y recortamos su forma, seguido de esto procedemos a recortar nuestro corazón por la parte de abajo para que podamos pegarlo con las facilidad a nuestra base, como lo vemos en las imágenes.
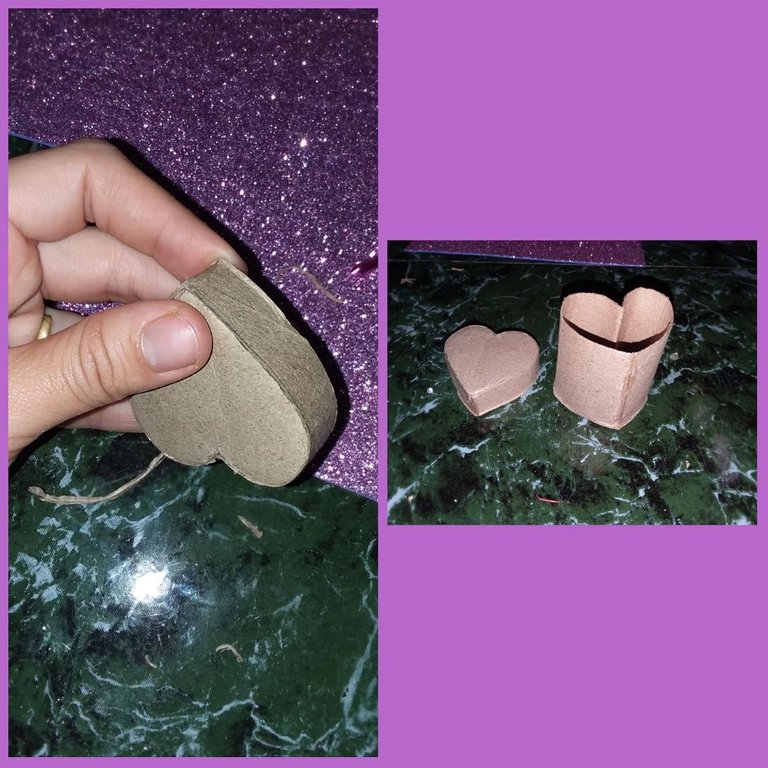
For the lid of our box, in the rest of the toilet paper roll we measure 1.5cm. We assemble and cut our lid and repeat the previous process.
It should be noted EYE: that for the base the cardboard of the paper roll must be glued on the inside and for the lid on the outside (edge).
Para la tapa de nuestra cajita, en el resto de el rollo de papel sanitario medimos 1,5cm Armamos y recortamos nuestra tapa y repetimos el proceso anterior.
Cabe resaltar OJO: que para la base el cartón de el rollo de papel debe ir pegado por dentro y para la tapa por fuera(borde).
Once everything is glued, we will obtain both the base and the box, as follows.
Una vez todo pegados obtendremos tanto la base como la caja, de la siguiente manera.
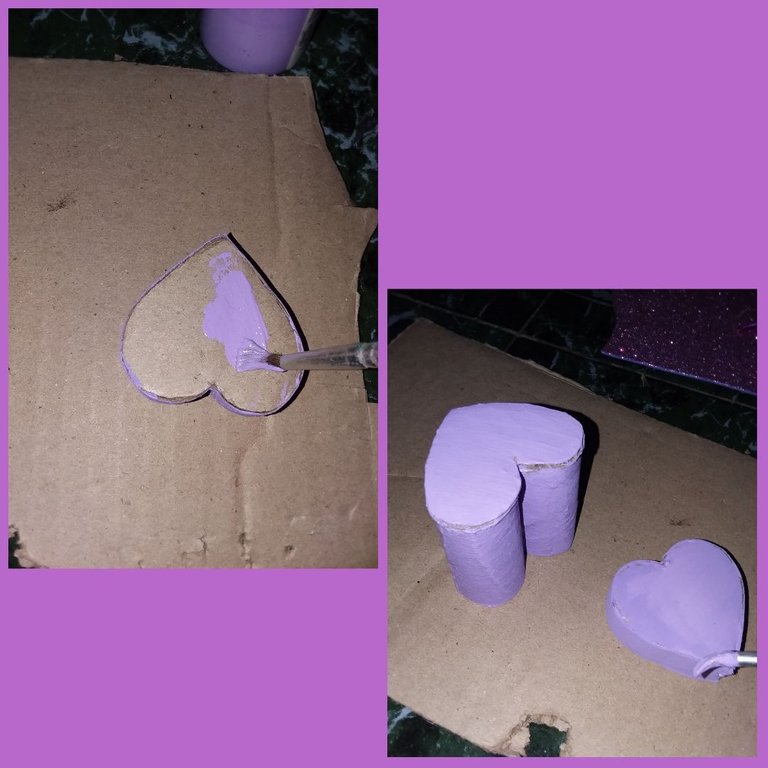
I took my lilac paint and painted my whole box, you can paint it inside and out.
Tomé mi pintura color lila y pinte toda mi caja, la puedes pintar por dentro y por fuera.
We glue the lid on the opposite side to the foami (rubber Eva) frosted and cut the edge or excess.
Pegamos la tapa de el lado contrario al foami(goma Eva)escarchado y recortamos el borde o excedente.
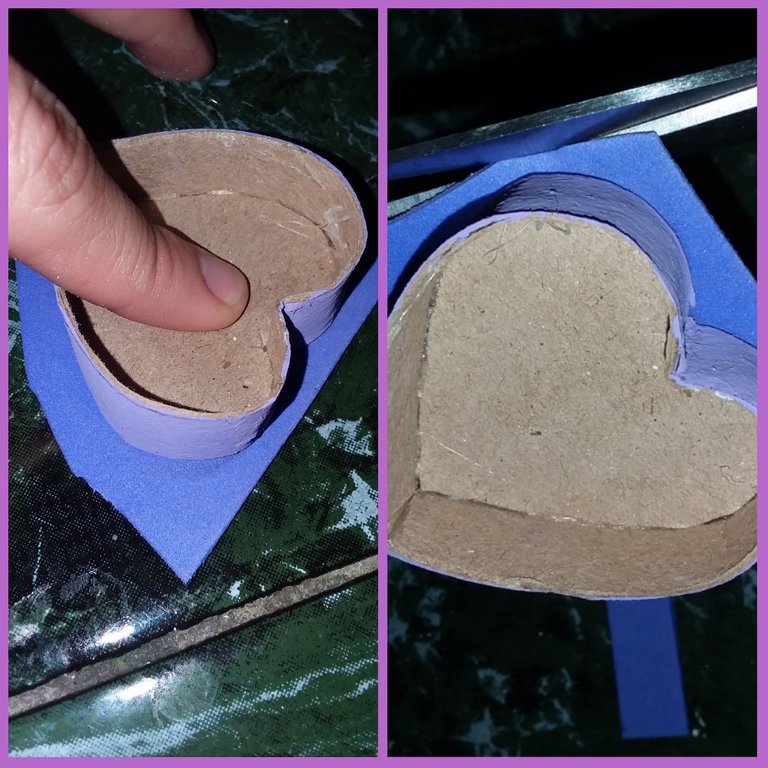
In our foami we mark 1.5cm wide strips to stick both to our lid and to the bottom of our box or edge, and finally we take a gold paint and make details so that it stands out.
En nuestro foami marcamos tiras de 1.5cm de ancho para pegarle tanto a nuestra tapa como a la parte de abajo de nuestra caja o borde, y ya por último tomamos una pintura dorada y hacemos detalles para que resalte.
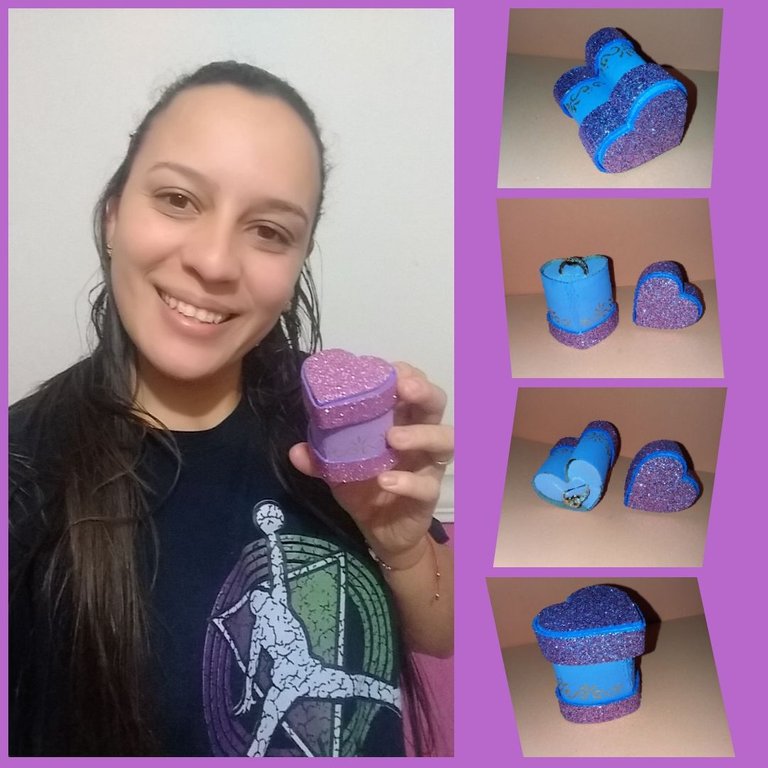
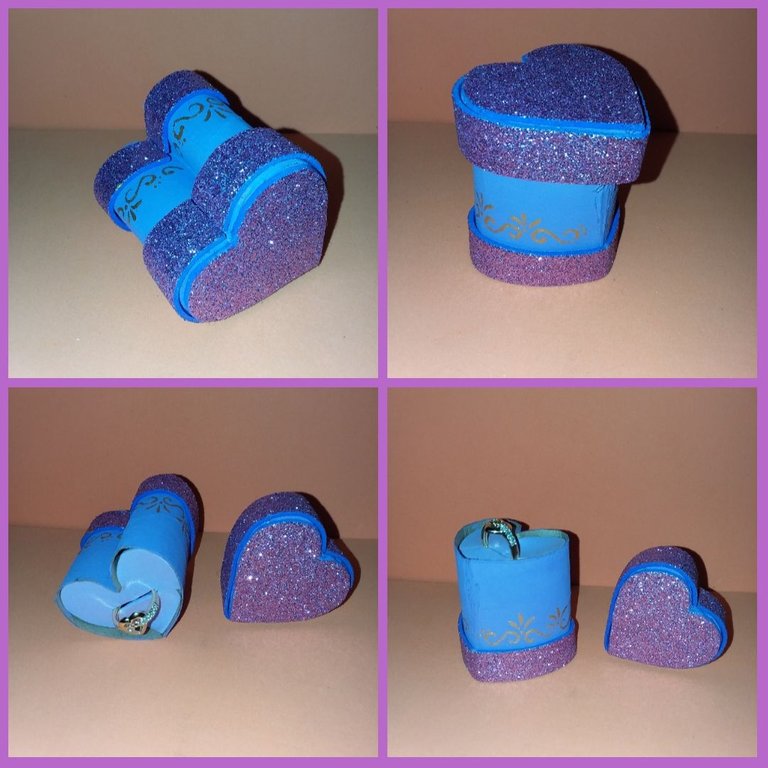
This is how we culminate, we always have to put our imagination to run wild, we can give any small thing that we want, it is very practical and easy to do, the best of all is that you can decorate it as you want!
Thank you very much for reaching the end, as soon as I recover I'll come with more! Blessings.
Es así como culminamos, siempre tenemos que poner nuestra imaginación a volar, podemos obsequiar cualquier cosa pequeña que queramos es muy práctico y sencillo de hacer, lo mejor de todo es que puedes decorarlo como quieras!
Muchas gracias por llegar hasta el final, en lo que me recupere vengo con más! Bendiciones.
Thank you for sharing this amazing post on HIVE!
Your content got selected by our fellow curator @stevenson7 & you just received a little thank you via an upvote from our non-profit curation initiative!
You will be featured in one of our recurring curation compilations and on our pinterest boards! Both are aiming to offer you a stage to widen your audience within and outside of the DIY scene of hive.
Join the official DIYHub community on HIVE and show us more of your amazing work and feel free to connect with us and other DIYers via our discord server: https://discord.gg/mY5uCfQ !
If you want to support our goal to motivate other DIY/art/music/homesteading/... creators just delegate to us and earn 100% of your curation rewards!
Stay creative & hive on!