Un saludo, tenga todos mis amigos creativos. El día de hoy les traigo un tutorial en el cual les mostraré como confeccionar un bello adorno floral con fomi. Este adorno tiene una divertida historia detrás. Resulta ser que la amiga @arqyanedesings estaba algo molesta porque veía constantemente como yo regalaba los adornos que creaba durante los tutoriales. Pero lo más divertido llego al momento de mostrarle el que era para ella, pues al verlo exclamó: “Uuyyy, me tocó”. Inmediatamente, me echo a reír porque sin darme cuenta se me ha hecho fila de amistades que esperan que haga una publicación para ver a quien le regalo el resultado.
English Version Here
Greetings to all my creative friends. Today I bring you a tutorial in which I will show you how to make a beautiful floral ornament with fomi. This ornament has a funny story behind it. It turns out that my friend @arqyanedesings was a little annoyed because she was constantly seeing how I was giving away the ornaments I created during the tutorials. But the funniest part came when I showed her the one that was for her, because when she saw it she exclaimed: "Oops, it was my turn". Immediately, I burst out laughing because without realizing it, I had a line of friends waiting for me to make a publication to see to whom I would give the result as a gift.
 |
 |
 |
 |
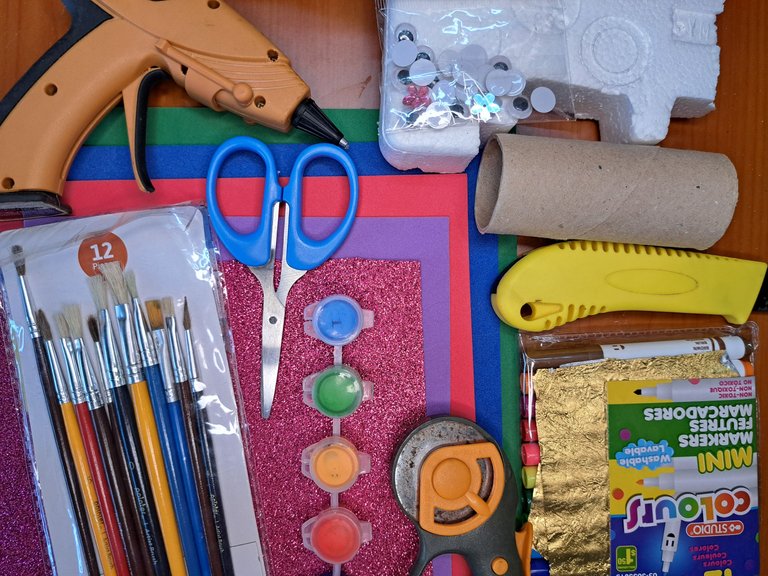
♦️ Materiales // Materials ♦️
✅ Fomi verde, azul, rojo, lila y rosado
✅ Tubo de cartón
✅ Trozo de poliespán
✅ Silicona caliente
✅ Tijeras, cúter recto y cúter circular
✅ Centro ornamental plástico
✅ Pintura y pinceles
✅ Regla y marcadores
✅ Cinta floral
English Version Here
✅ Green, blue, red, purple and pink fomi.
✅ Cardboard tube
✅ Piece of poliespan
✅ Hot glue
✅ Scissors, straight cutter and circular cutter.
✅ Plastic ornamental center
✅ Paint and paintbrushes
✅ Ruler and markers
✅ Floral tape
📝 Paso a paso // Step by step 📝
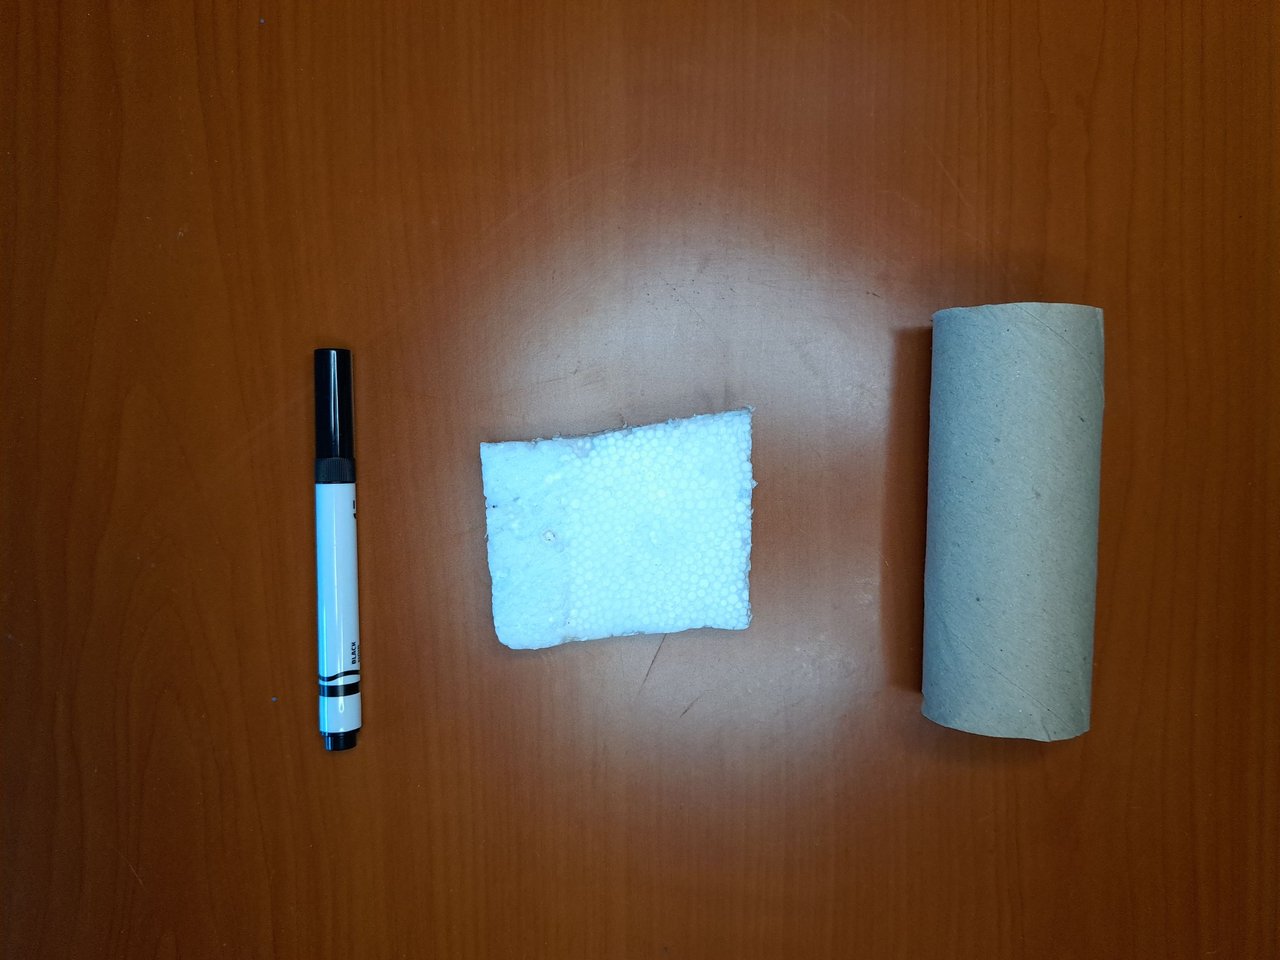
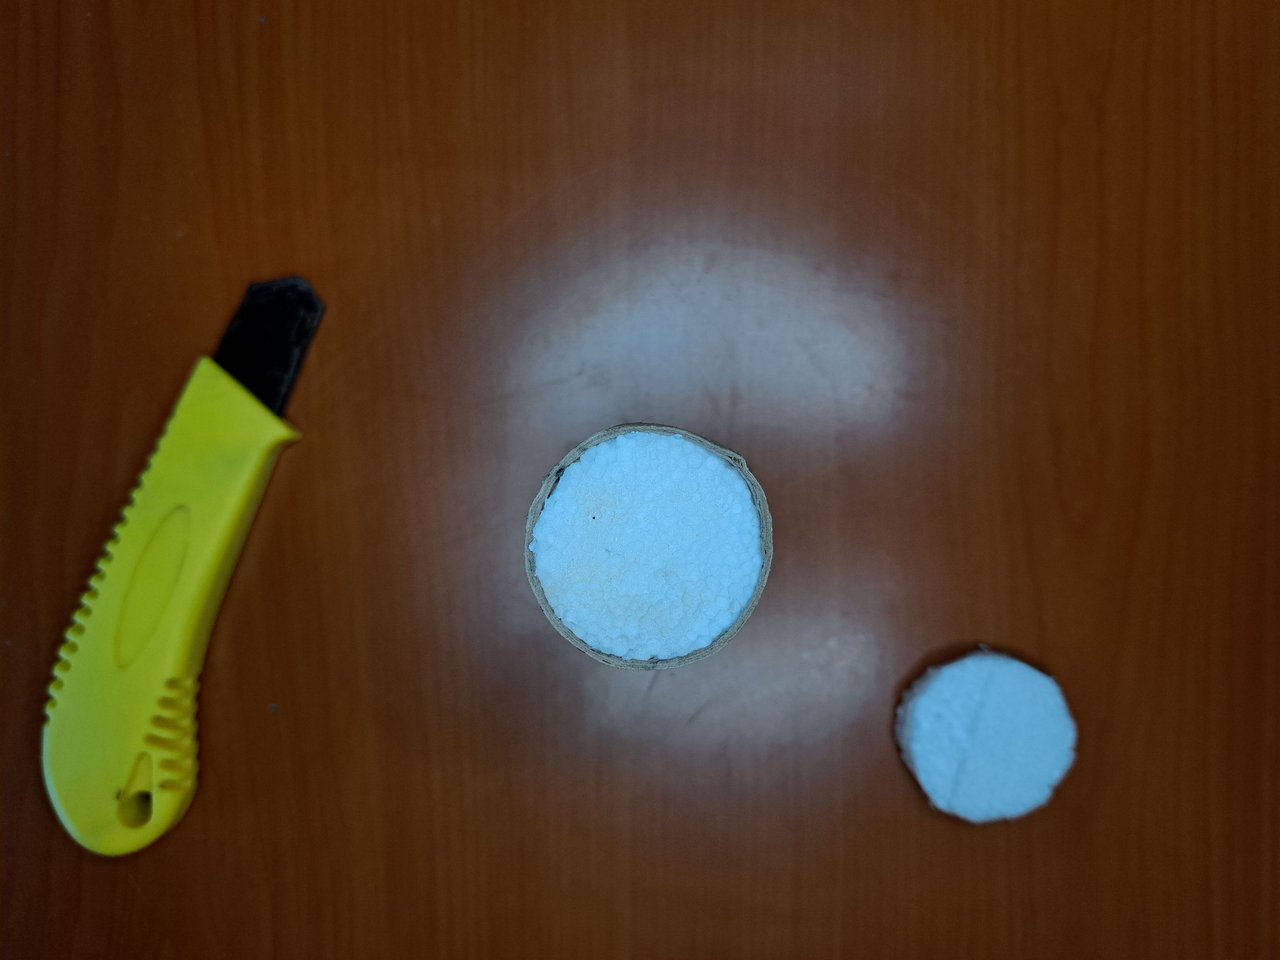
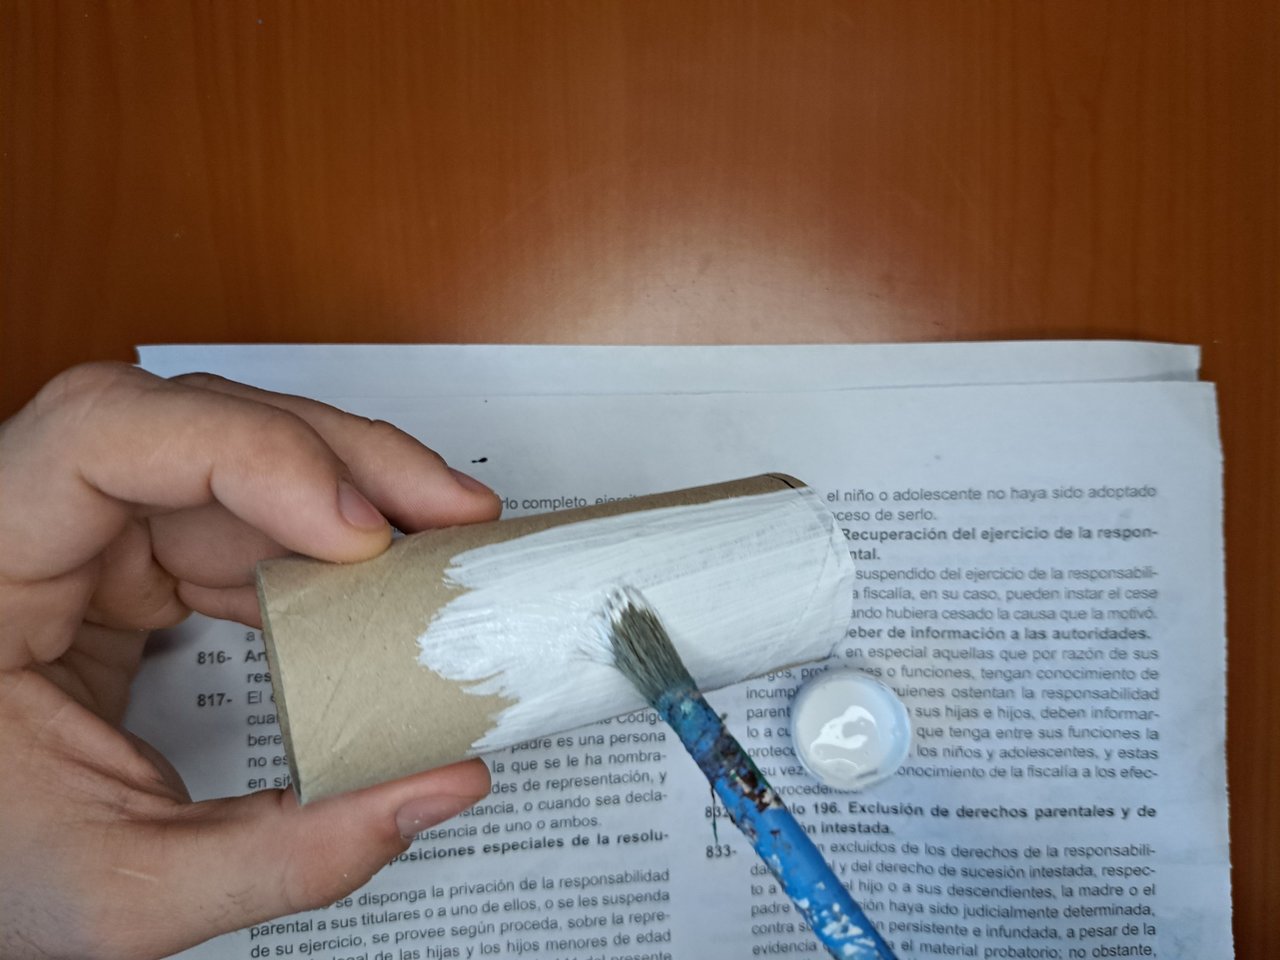
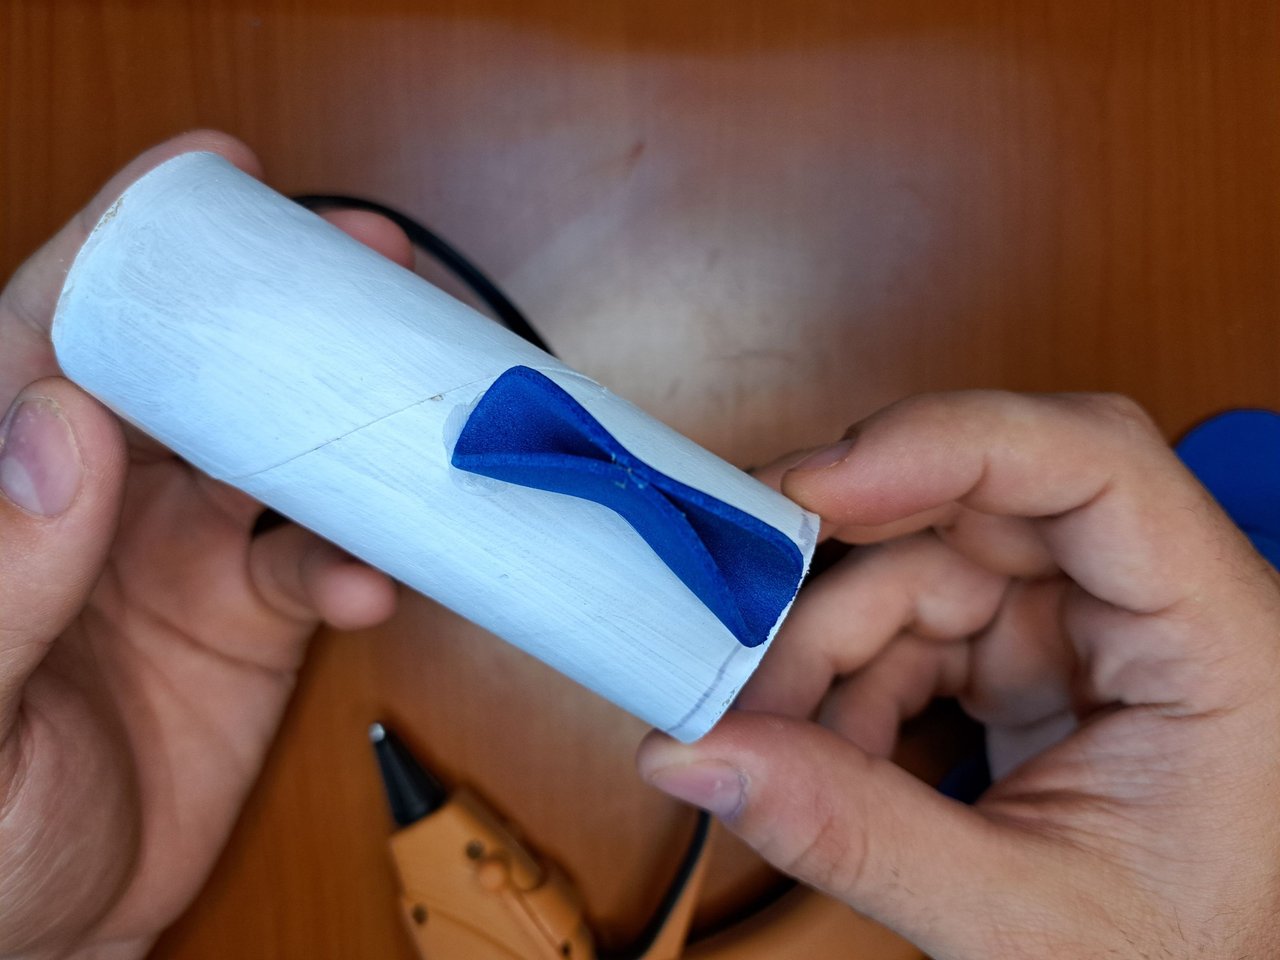
1️⃣ Para empezar, se marca el borde del tubo de cartón en un pedazo de poliespán. Luego se recorta y se introduce en uno de los extremos del tubo para luego pintar todo el exterior del tubo. El exterior puede ser pintado o cubierto con fomi, eso queda a elección de cada cual.
English Version Here
1️⃣ To begin, mark the edge of the cardboard tube on a piece of polystyrene. Then cut it out and insert it into one end of the tube and then paint the entire outside of the tube. The outside can be painted or covered with fomi, it is up to each person to choose.
 |
 |
 |
 |
 |
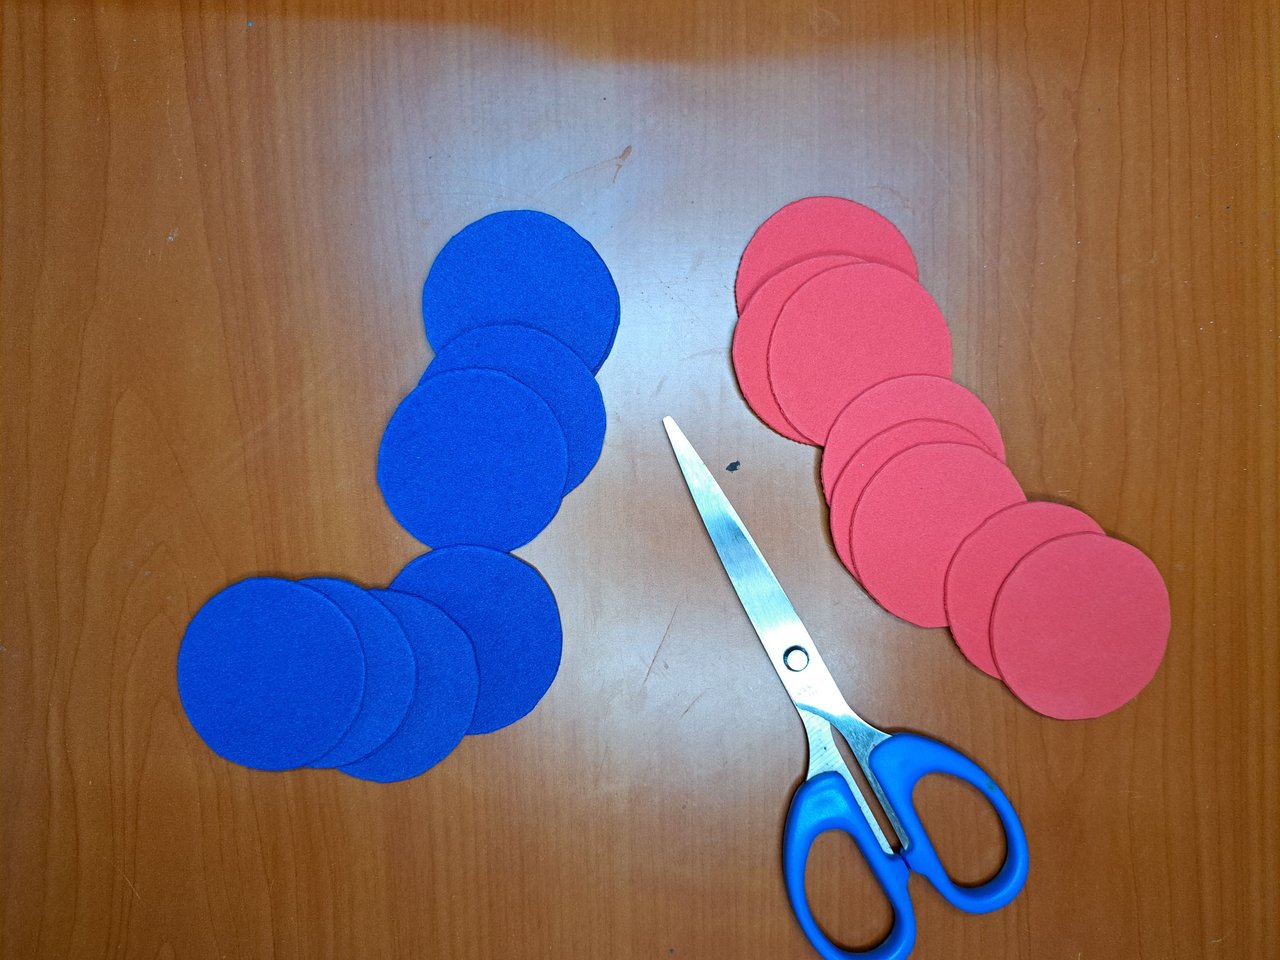
2️⃣ Cuando el tubo este seco se selecciona una medida circular cuyo diámetro sea exactamente la mitad de la longitud del tubo. Utilizando esta medida ser marcan y recortan 14 círculos rojos y 14 círculos azules.
English Version Here
2️⃣ When the tube is dry, select a circular measure whose diameter is exactly half the length of the tube. Using this measurement, mark and cut out 14 red circles and 14 blue circles.
 |
 |
 |
 |
 |
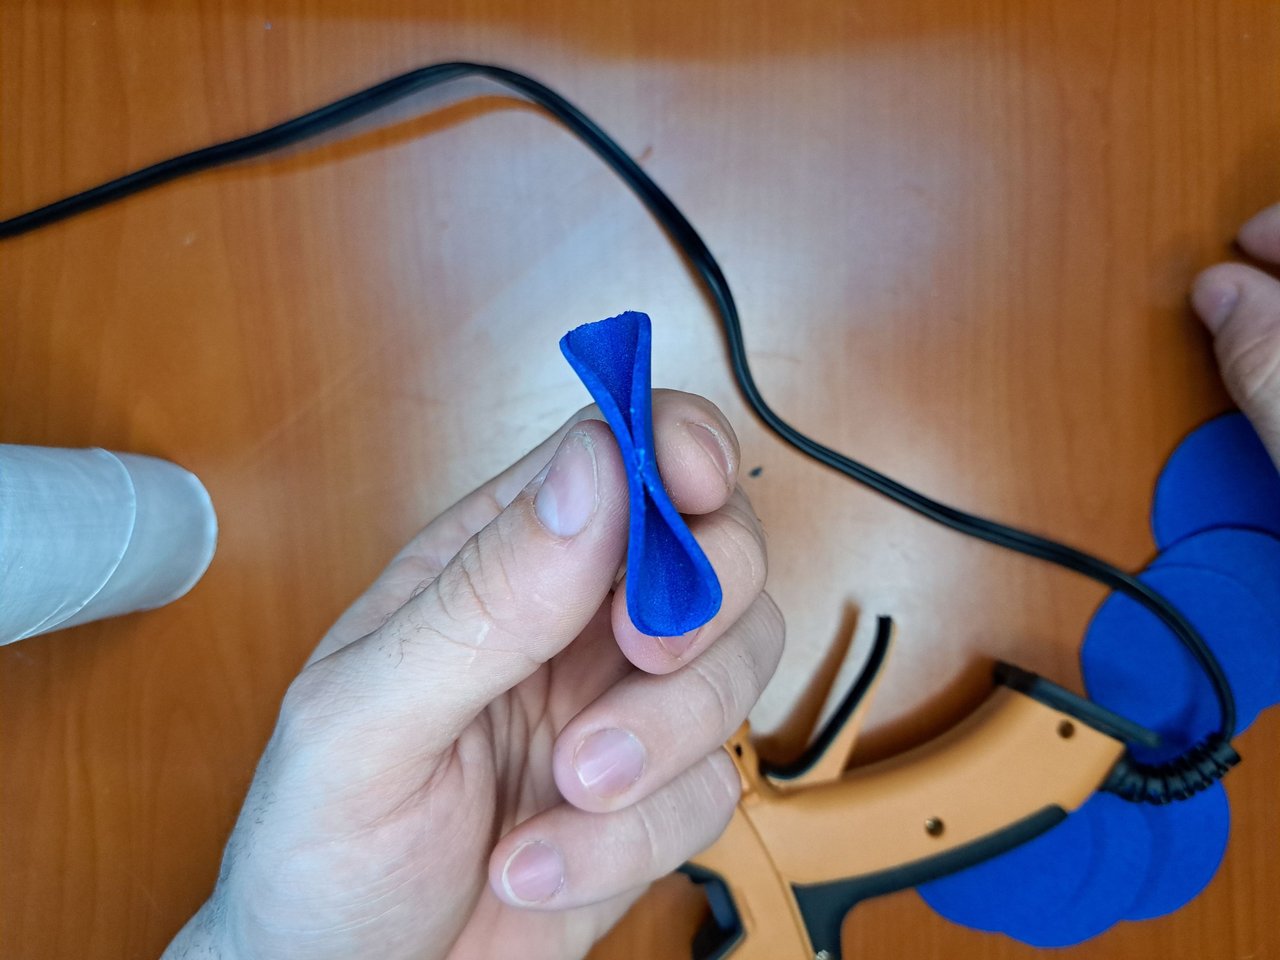
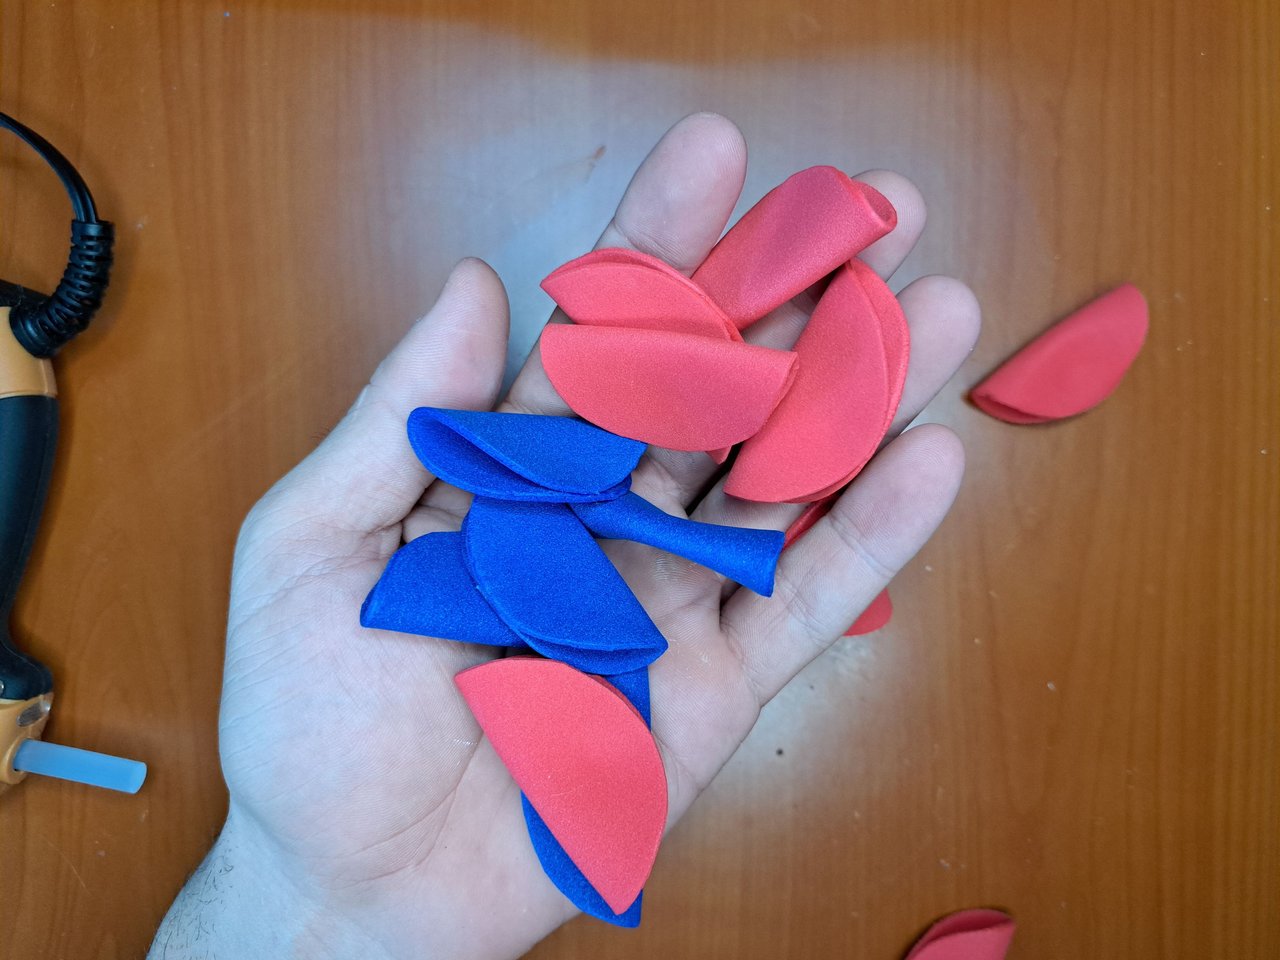
3️⃣ Cada uno de los círculos anteriores se dobla por la mitad y se pegan el interior de sus caras. Luego estos se pegan por el reverso al tubo de cartón intercambiando los colores y haciendo dos filas.
English Version Here
3️⃣ Each of the above circles is folded in half and glued on the inside of its faces. Then these are glued on the back of the cardboard tube, exchanging the colors and making two rows.
 |
 |
 |
 |
 |
 |
 |
 |
 |
 |
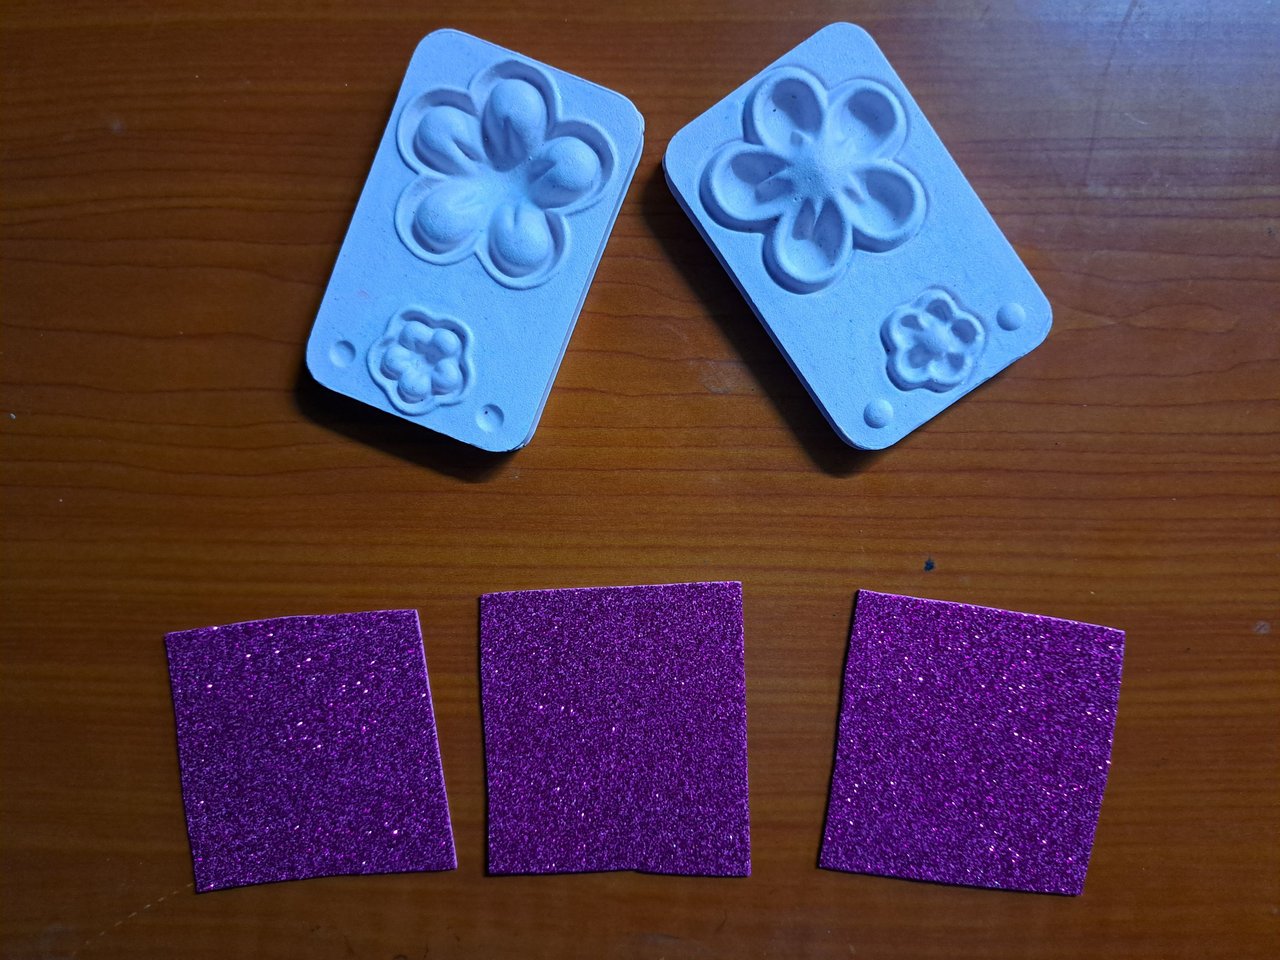
4️⃣ Para las flores se recortan 3 cuadrados de fomi azul y tres cuadrados de fomi rosado. Estas piezas se calientan con alguna fuente de calor externa y se colocan dentro del molde. Luego de presionar un rato se retiran los moldes y se recorta el fomi excedente.
English Version Here
4️⃣ For the flowers, cut out 3 squares of blue fomi and 3 squares of pink fomi. These pieces are heated with an external heat source and placed inside the mold. After pressing for a while, the molds are removed and the excess fomi is trimmed.
 |
 |
 |
 |
 |
5️⃣ Haciendo uso de un palillo largo se atraviesa el centro del molde de las flores, se coloca un centro plástico en la punta del palillo, se une todo y se envuelve el resto del palillo con cinta floral.
English Version Here
5️⃣ Using a long toothpick, pierce the center of the flower mold, place a plastic center on the tip of the toothpick, attach everything together and wrap the rest of the toothpick with floral tape.
 |
 |
 |
 |
 |
 |
 |
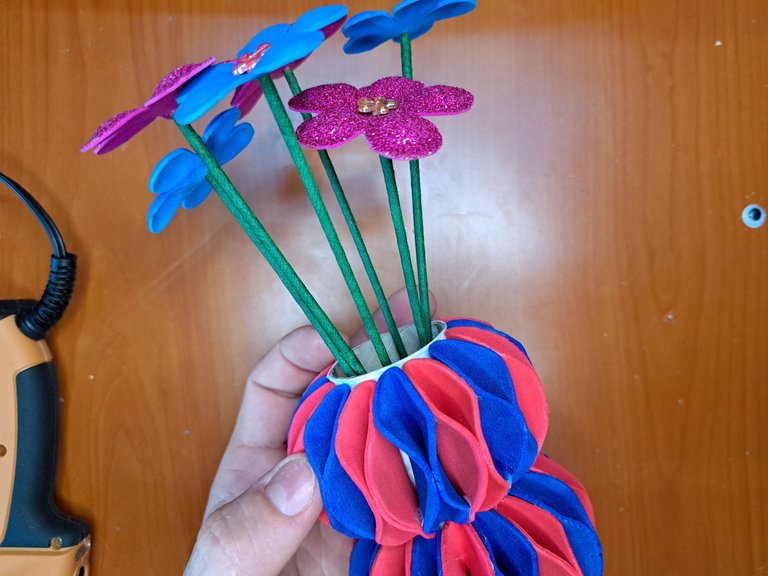
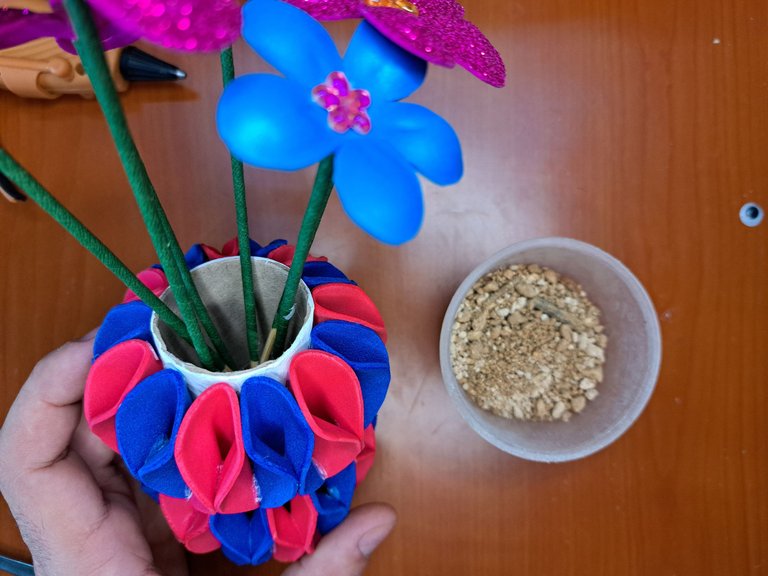
6️⃣ Cuando las flores listas se procede a insertarlas en la base y encajándolas en el círculo de poliespán que está dentro de la base. Una vez están bien ubicadas se pegan los tallos al borde de la base y se rellena con arena para agregar peso y estabilidad.
English Version Here
6️⃣ When the flowers are ready, insert them into the base and fit them into the polystyrene circle inside the base. Once they are well placed, the stems are glued to the edge of the base and filled with sand to add weight and stability.
 |
 |
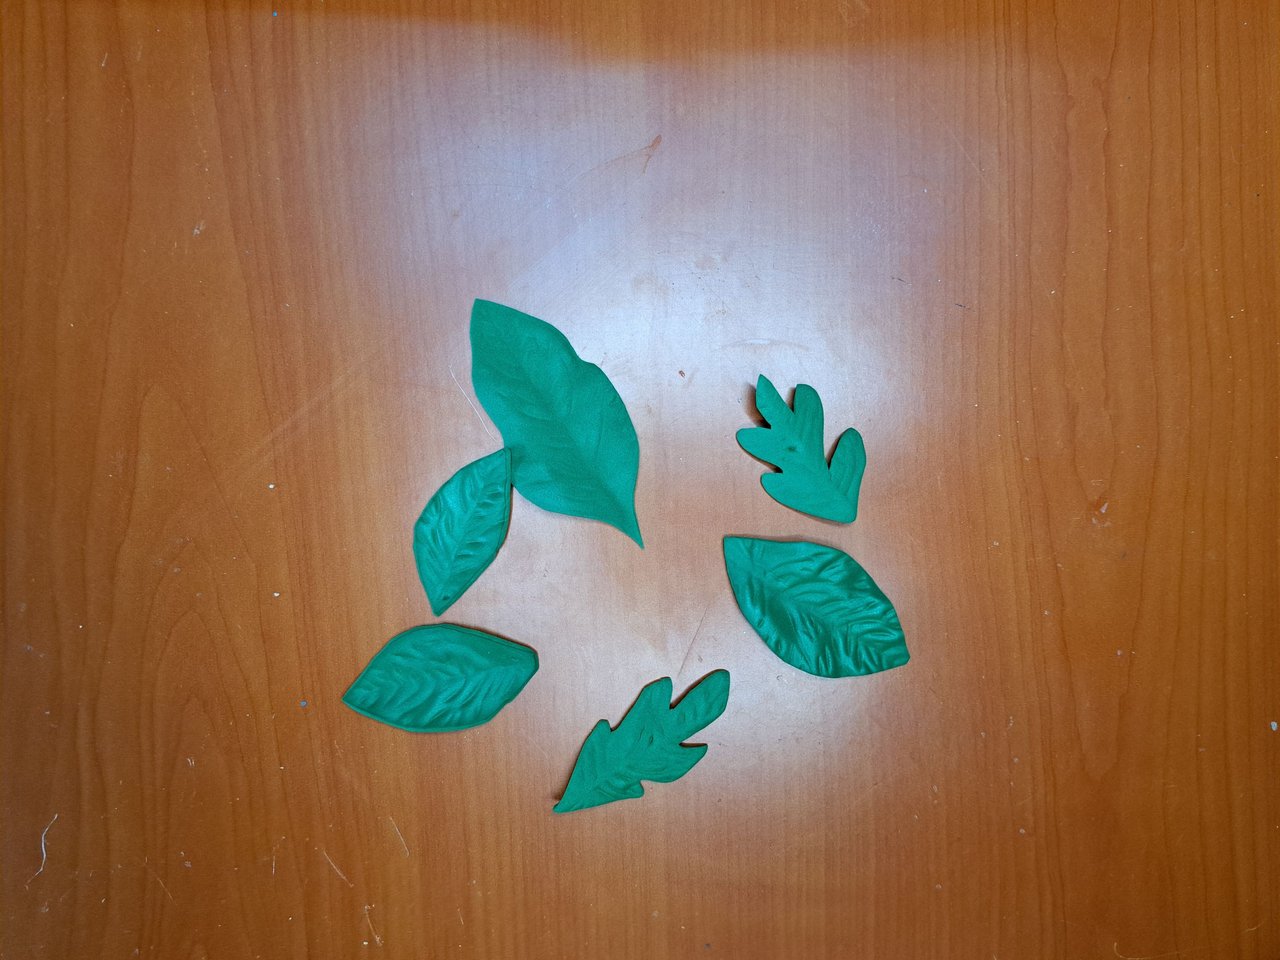
7️⃣ Con una lámina de fomi verde se hacen las hojas y se pegan a los tallos. Estas hojas se confeccionan haciendo uso de la misma técnica empleada para las flores, pero con un molde distinto. Adicionalmente, con los restos de fomi verde recortado se elabora un falso pasto y un centro en espiral, los cuales se pegan en la parte superior de la base.
English Version Here
7️⃣ The leaves are made with a sheet of green fomi and glued to the stems. These leaves are made using the same technique used for the flowers, but with a different mold. In addition, a fake grass and a spiral center are made with the remains of the cut green fomi, which are glued to the top of the base.
 |
 |
 |
 |
 |
 |
 |
 |
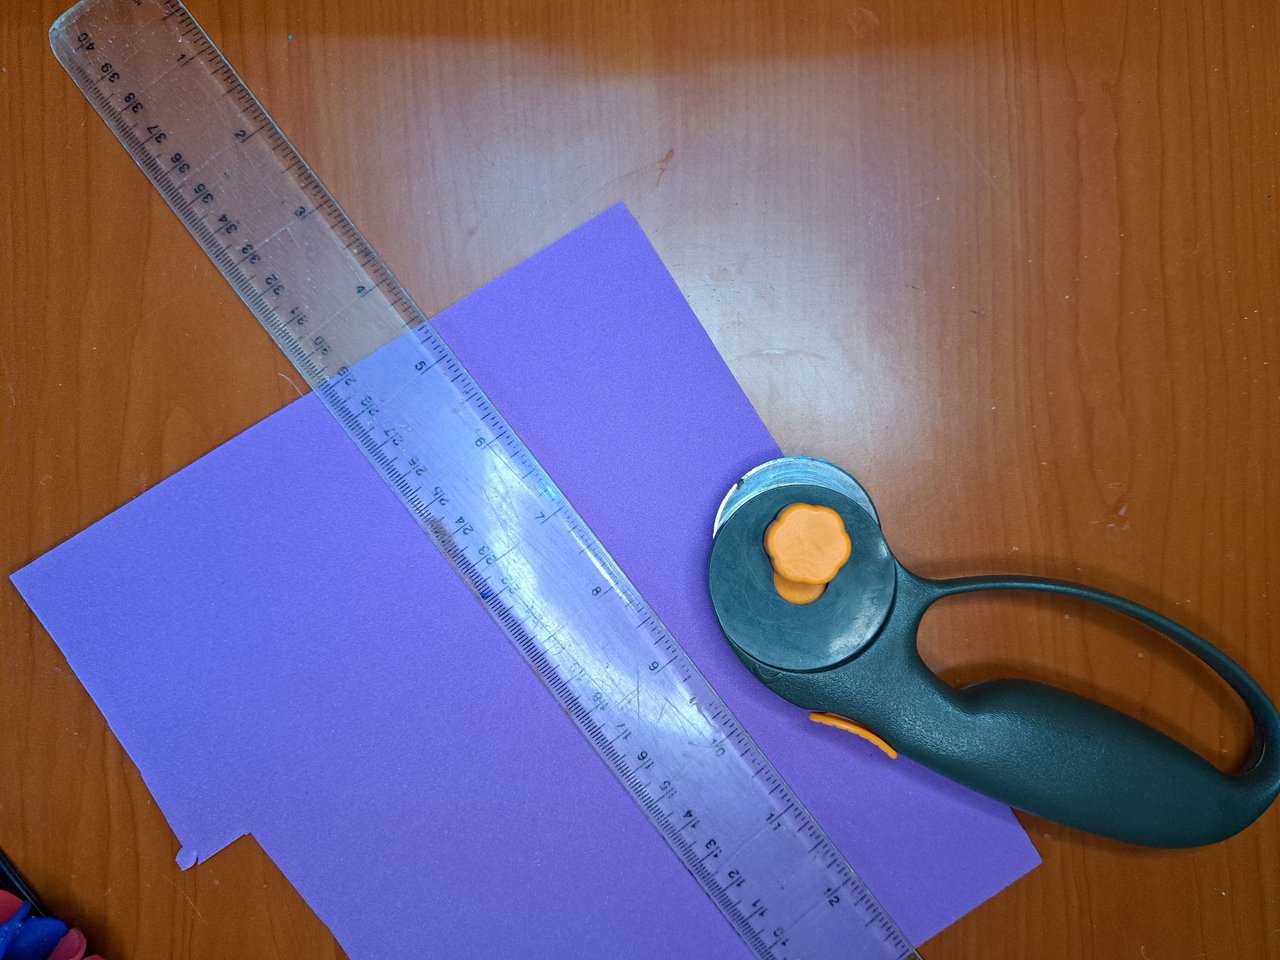
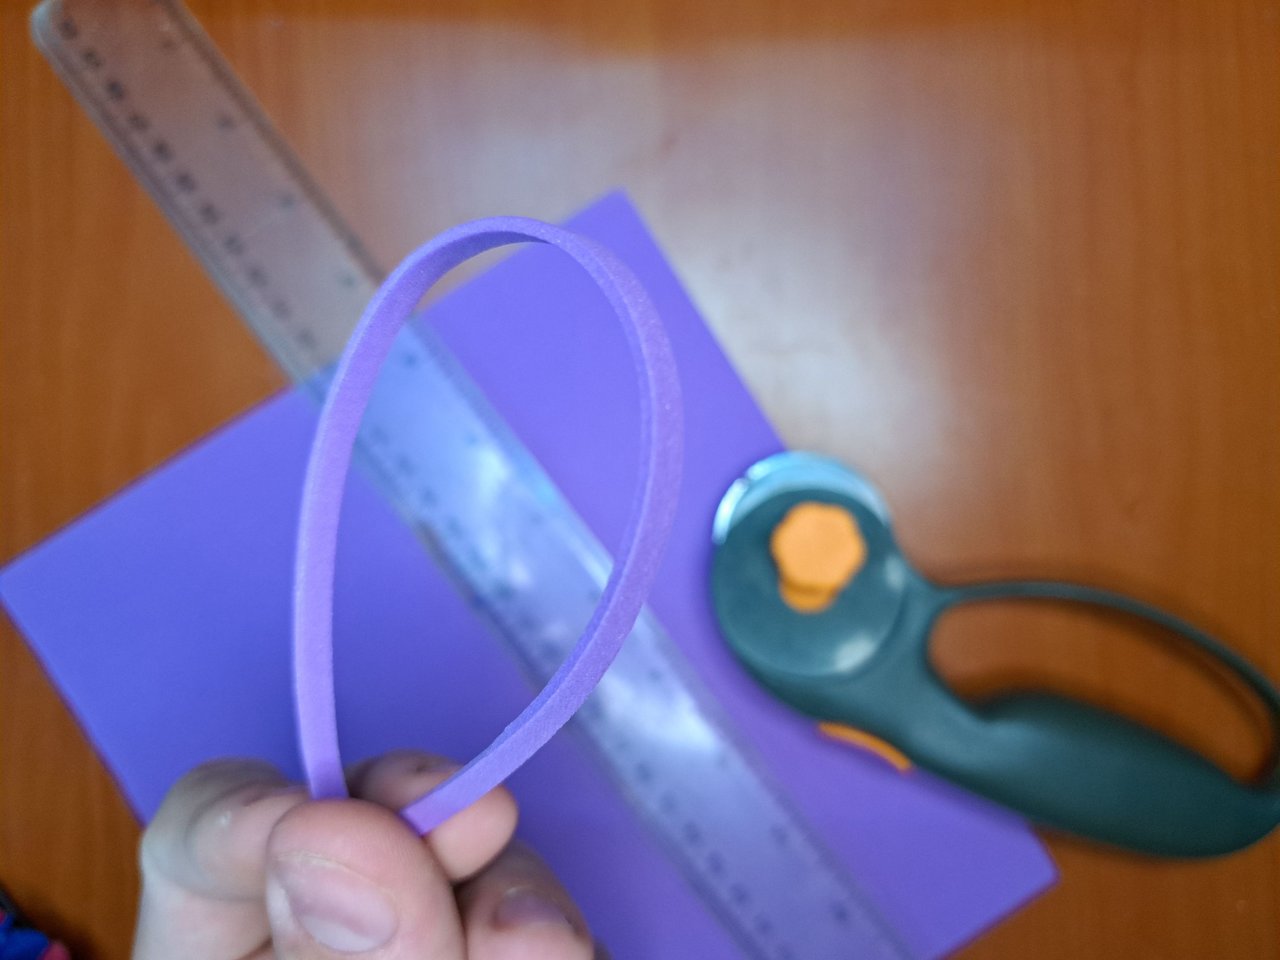
8️⃣ Para finalizar se corta una tira fina de fomi lila para crear un lazo que irá atada a la mitad de la base para ocultar el punto en el que se unen las dos filas que componen la estructura exterior de estas.
English Version Here
8️⃣ Finally, a thin strip of lilac fomi is cut to create a loop that will be tied in the middle of the base to hide the point where the two rows that make up the outer structure of the base meet.
 |
 |
 |
⚜️Resultado Final // Final Result⚜️
 |
 |
Y ya estaría terminado. Como siempre espero que hayan disfrutado del proceso al igual que yo. Y no quiero despedirme sin antes invitárteles a que dejen un comentario con su opinión sobre esta manualidad, pues yo estaré encantado de leerlos y responder.
English Version Here
And it would be finished. As always I hope you enjoyed the process as much as I did. And I don't want to say goodbye without first inviting you to leave a comment with your opinion about this craft, because I will be happy to read them and respond.

Muchas gracias por leer mi post. Si te gustó, por favor deja un comentario y considera seguirme para no perderte mis próximas publicaciones. Me encantaría saber tu opinión y tus ideas sobre el tema que traté en este post. ¡Nos vemos en el próximo!
Thank you very much for reading my post. If you liked it, please leave a comment and consider following me so you don't miss my next posts. I'd love to know your opinion and your thoughts about the topic I discussed in this post, see you in the next one!
Cover page created in Canva Pro
Translated by DeepL


Saludos amigo lo felicito por su creatividad el arreglo floral le quedó muy hermoso, esos moldes para hacer las flores son muy práctico, yo en vez de usar cinta floral uso papel crepé es más económico
Que Dios bendiga tus manos creativas
Muchas gracias por tus palabras.
Quedo muy bien amigo! Felicidades.👌😎
Gracias por tus palabras y apoyo 🫂.
te quedo muy linda esta manualidad amigo 😘🤗
Muchas gracias 🫂, me alegra saber que te gustó.
Te quedo bonito Asere felicidades 😉👏 buen trabajo
Gracias 🫂
Te quedó bello, te has vuelto famoso jjjj. Muchas gracias, al fin me tocó jjjjj.
Si he. Vamos a ver cuándo te lo puedo llevar.
Que bonito, otro hermoso y perfecto adorno floral (que no es para Buhito, voy a reclamar el mio yo tambien jajajajajaja ok no 😂)
Estan hermosos los colores que elegiste y quedan muy elegantes como adorno en el jardin 😍
Pues vamos a ver si podemos adelantar el turno de Buhito.
Queda preciosa!
🤗🤗
Me encantó el diseño y la combinación de colores, creo que se vería muy bonito en un jardín🌼
Gracias 🫂 por tus palabras, me alegra saber que te gustó.
!giphy amazing
@sagarkothari88 vote 20%
Via Tenor
Thank you very much for all your support.
wow amazing work, you did a great job. well explained post. thanks for that keep up the good work ,
It is a pleasure for me to share with everyone the things I like to do.
Woww que hermoso trabajo🥰
Gracias 🫂
Que bien me encantaron esos moldes para hacer las flores y la maceta también está bonita
Hola @edeyglezsosa, que lindas flores, los colores están hermosos y vibrantes, me encantó la de color azul se ve espectacular, un lindo detalle para decorar la sala u oficina.
Saludos!
Así mismo. A mí amiga le encantaron. Lo que no sé es si las dejará en su casa o las pondrá en la oficina.
Me encantó la combinación de los colores 😃, es una decoración muy llamativa y estoy segura que embellecera cualquier espacio que tú amiga escoja para ese hermoso florero.
Saludos
Muchas gracias por tus palabras.