Greetings friends who love art and crafts. A few days ago I embarked on an odyssey that consists of saturating my mom with ornaments for her house. With that goal in mind, I created the piece that I show you. Today I bring you a video tutorial where I will show you step by step how to make a circular ornament to decorate a wall.
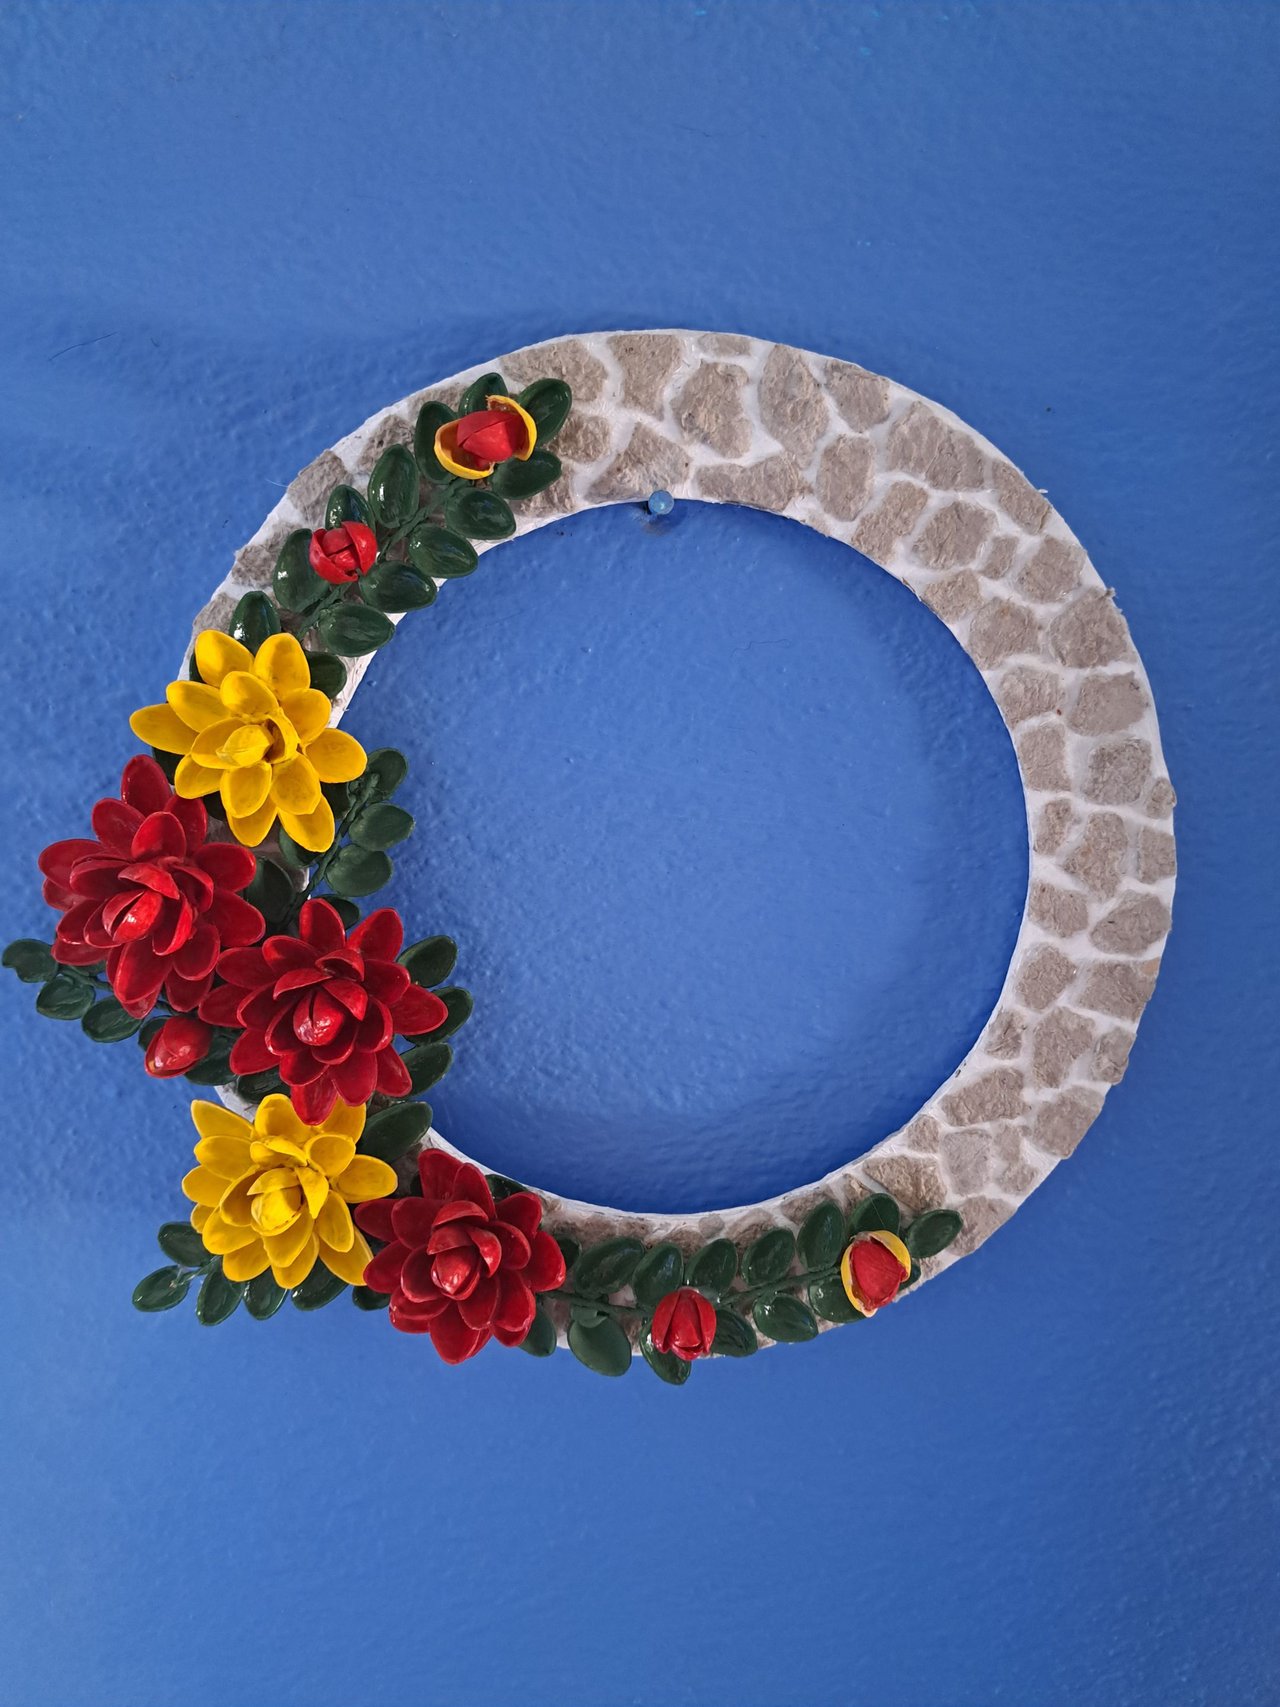
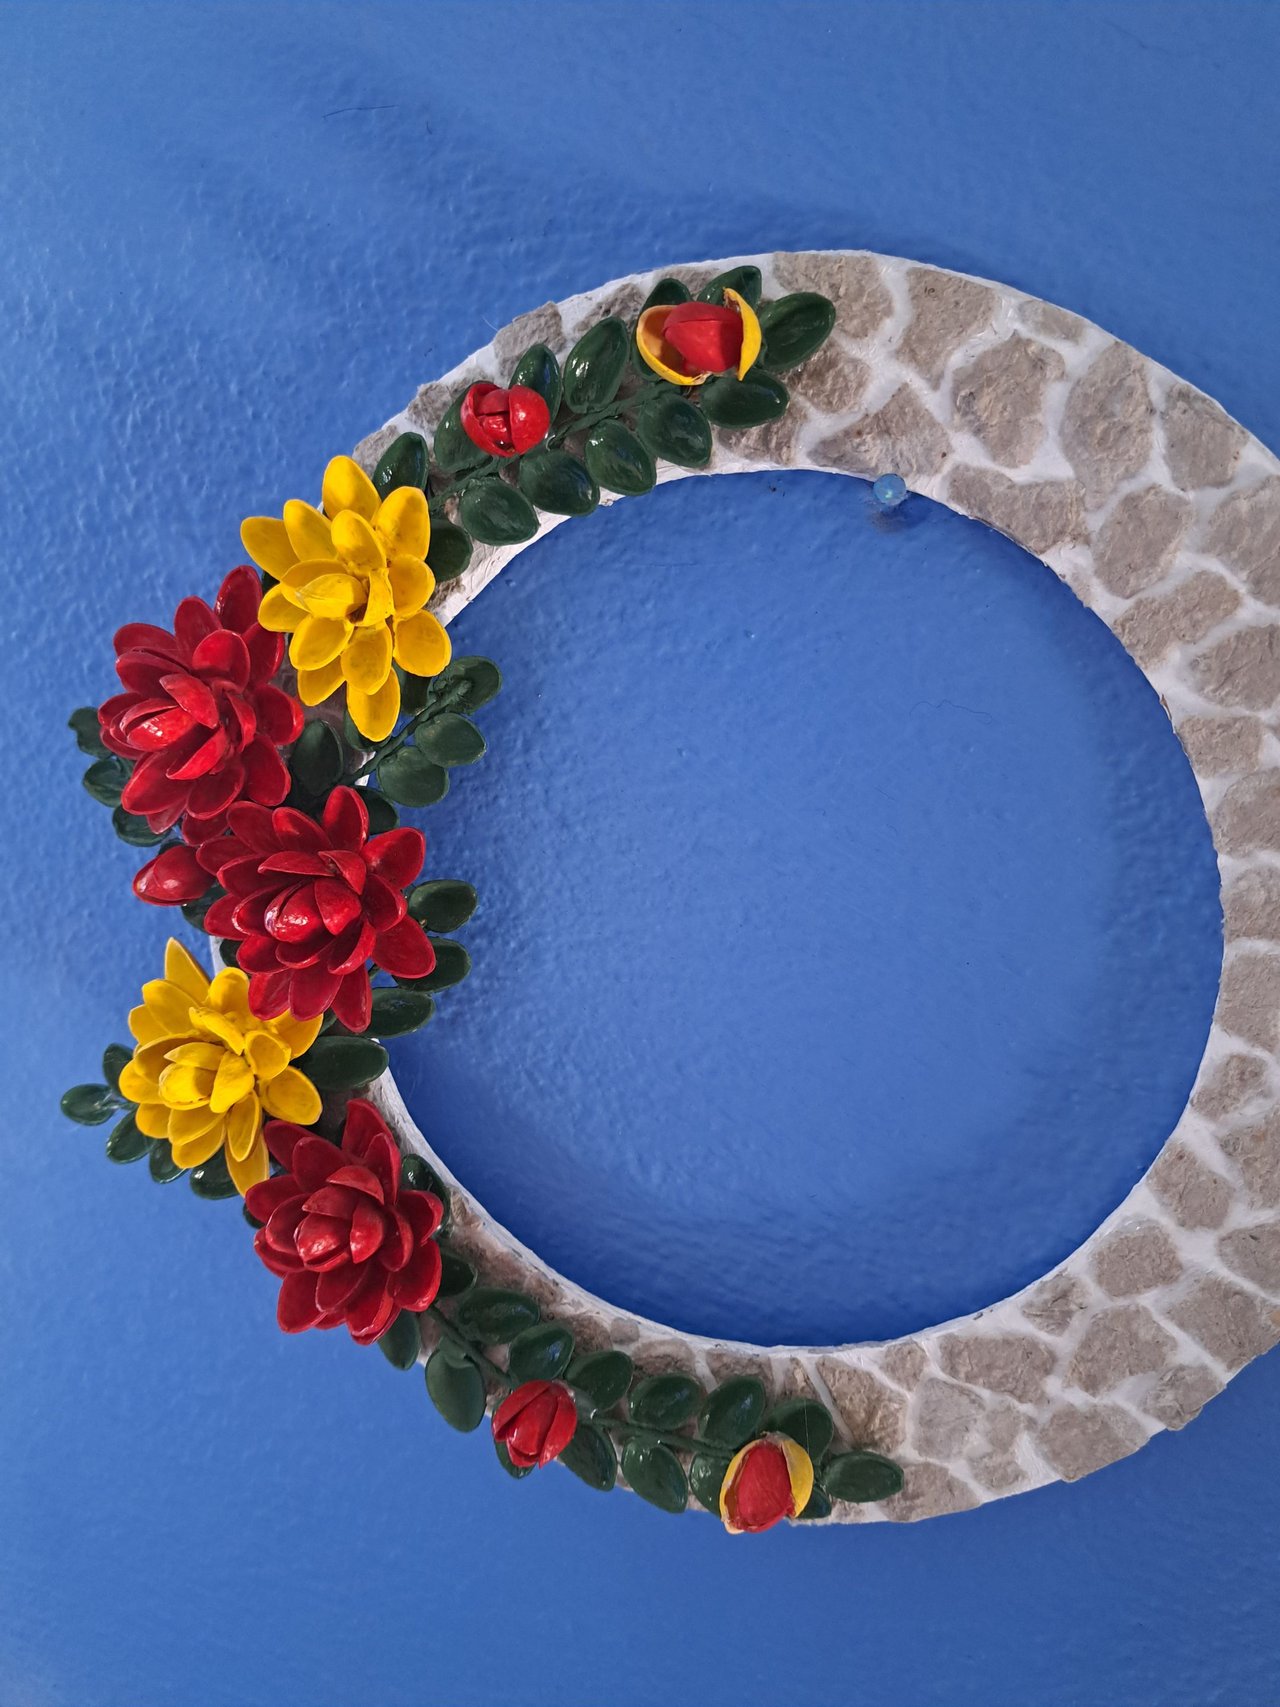
The ornament in question consists of a cardboard ring decorated in such a way that it resembles a concrete circle with embedded stones. A floral arrangement made from pistachio shells was placed on top and positioned in such a way that it looks like a crescent moon.
Spanish Version Here
Saludos amigos amantes del arte y las manualidades. Desde hace unos días me embarqué en una odisea que consiste en saturar a mi mamá con adornos para su casa. Con ese objetivo en mente, creé la pieza que les muestro. Hoy les traigo un video tutorial donde les mostraré el paso a paso de cómo confeccionar un adorno de forma circular para decorar una pared.
El adorno en cuestión está formado por un anillo de cartón adornado de forma tal que se asemeja a un círculo de concreto con piedras incrustadas. Encima se colocó un arreglo floral elaborado a partir de cáscaras de pistacho y ubicado de forma tal que parezca una media luna.
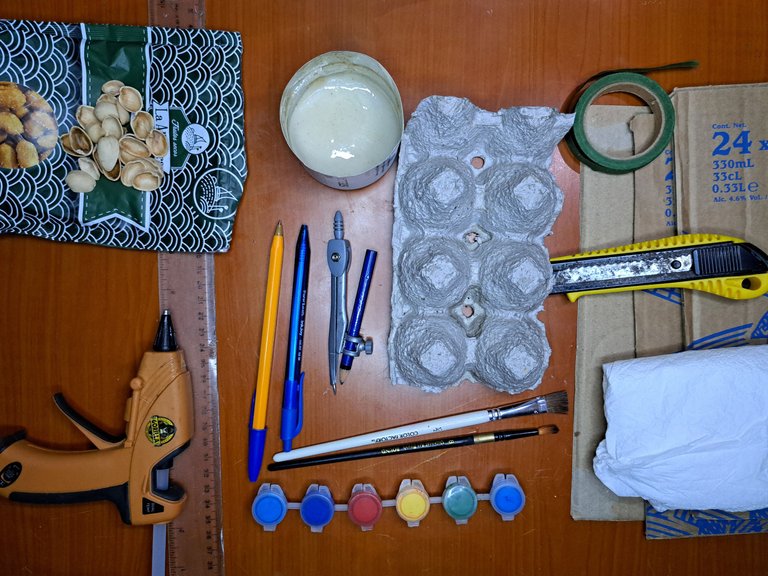
Materials // Materiales
| ✔️ Recycled cardboard | ✔️ Cartón reciclado |
| ✔️ Pistachio shells | ✔️ Cáscaras de pistacho |
| ✔️ Egg carton | ✔️ Cartón de huevos |
| ✔️ Adhesive with flour base | ✔️ Pegamento con base de harina |
| ✔️ Kitchen paper | ✔️ Papel de cocina |
| ✔️ Silicone gun | ✔️ Pistola de silicona |
| ✔️ Floral ribbon | ✔️ Cinta floral |
| ✔️ Cutter | ✔️ Cortador y compás |
| ✔️ Wire | ✔️ Alambre |
| ✔️ Ruler and markers | ✔️ Regla y marcadores |
| ✔️ White, red, and yellow paint | ✔️ Pintura blanca, roja y amarilla |
| ✔️ Brushes | ✔️ Pinceles |
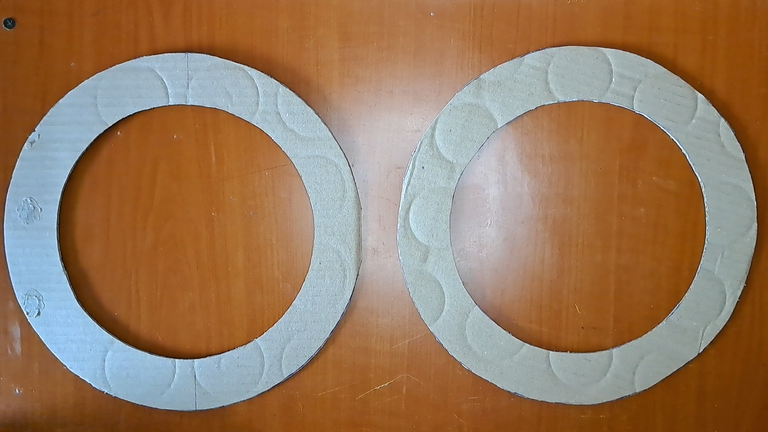
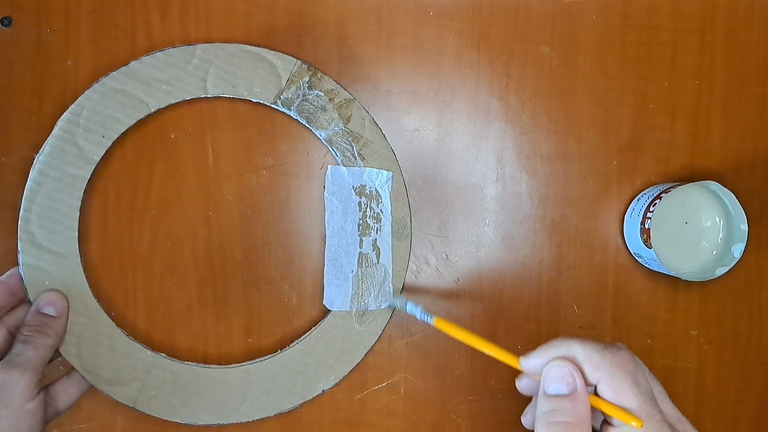
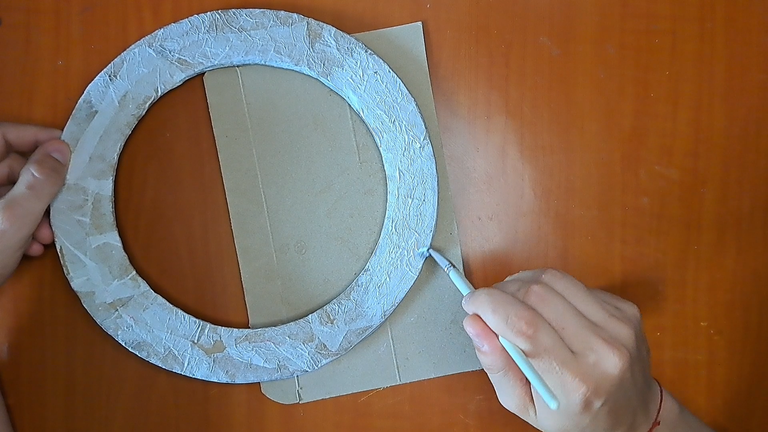
To begin, mark and cut two cardboard circles with a diameter of 25 cm and a width of 4 cm between the outer and inner edge. These circles should be glued one on top of the other and then completely covered using kitchen paper and flour-based glue.
Spanish Version Here
Para empezar, se deben marcar y cortar dos círculos de cartón con un diámetro de 25 cm y un ancho de 4 cm entre el borde exterior e interior. Dichos círculos se deben pegar uno encima del otro y luego se cubrirán completamente utilizando papel de cocina y pegamento con base de harina.
|
|
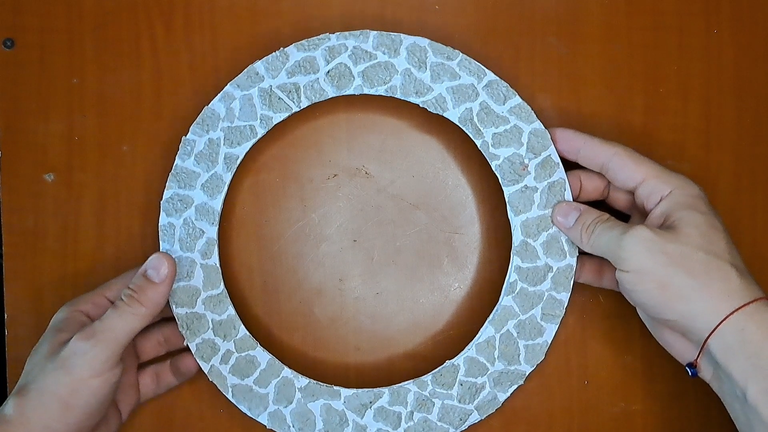
Once dry, apply a uniform coat of white paint covering both sides of the ring and the edges. Let it dry and then glue small fragments of egg carton on one side to simulate stones embedded in the concrete.
Spanish Version Here
Una vez seco, se aplicará una capa uniforme de pintura blanca cubriendo ambas caras del anillo y los bordes. Se deja secar y a continuación se pega en una de las caras pequeños fragmentos de cartón de huevo que simularán ser piedras incrustadas en el concreto.
|
|
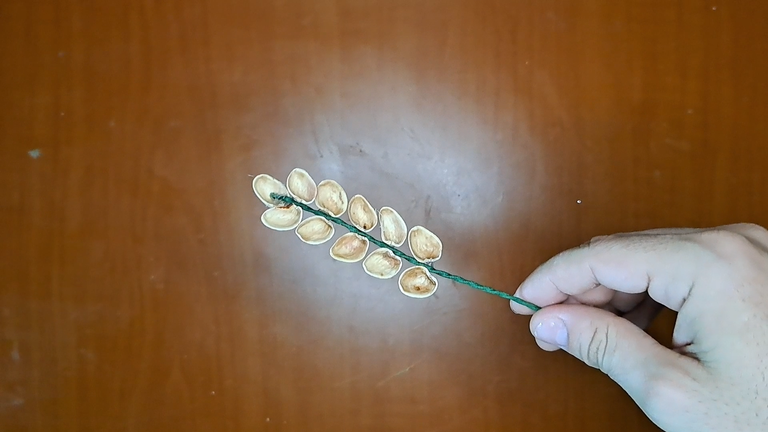
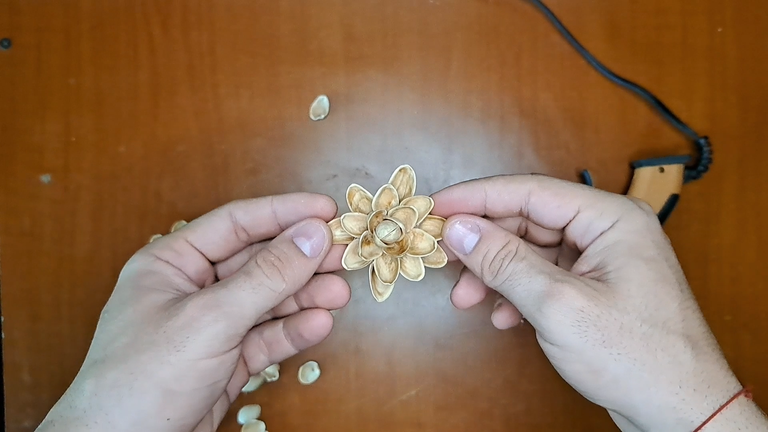
For the leaves, it will be necessary to wrap floral tape around a wire and glue some pistachio shells on each side. In the case of the flowers, we will join two pistachio nuts in the shape of a button and around these we will glue layer after layer of pistachio shells.
Spanish Version Here
Para las hojas, será necesario envolver cinta floral alrededor de un alambre e ir pegando por cada lado algunas cáscaras de pistachos. En el caso de las flores, uniremos dos pistachos en forma de botón y alrededor de estos iremos pegando capa tras capa de cáscaras de pistacho.
|
|
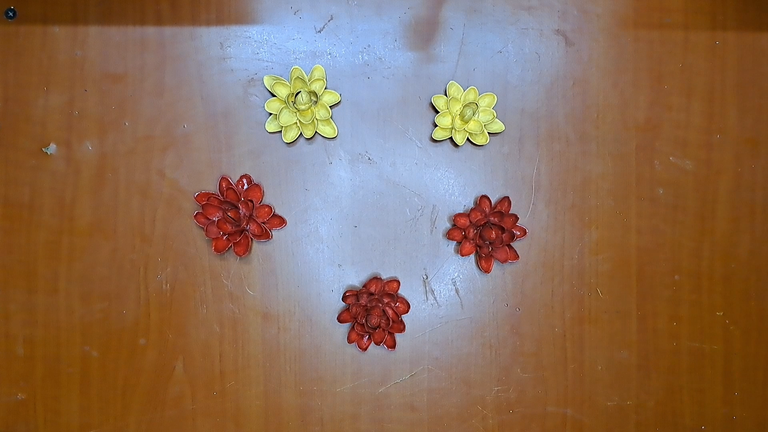
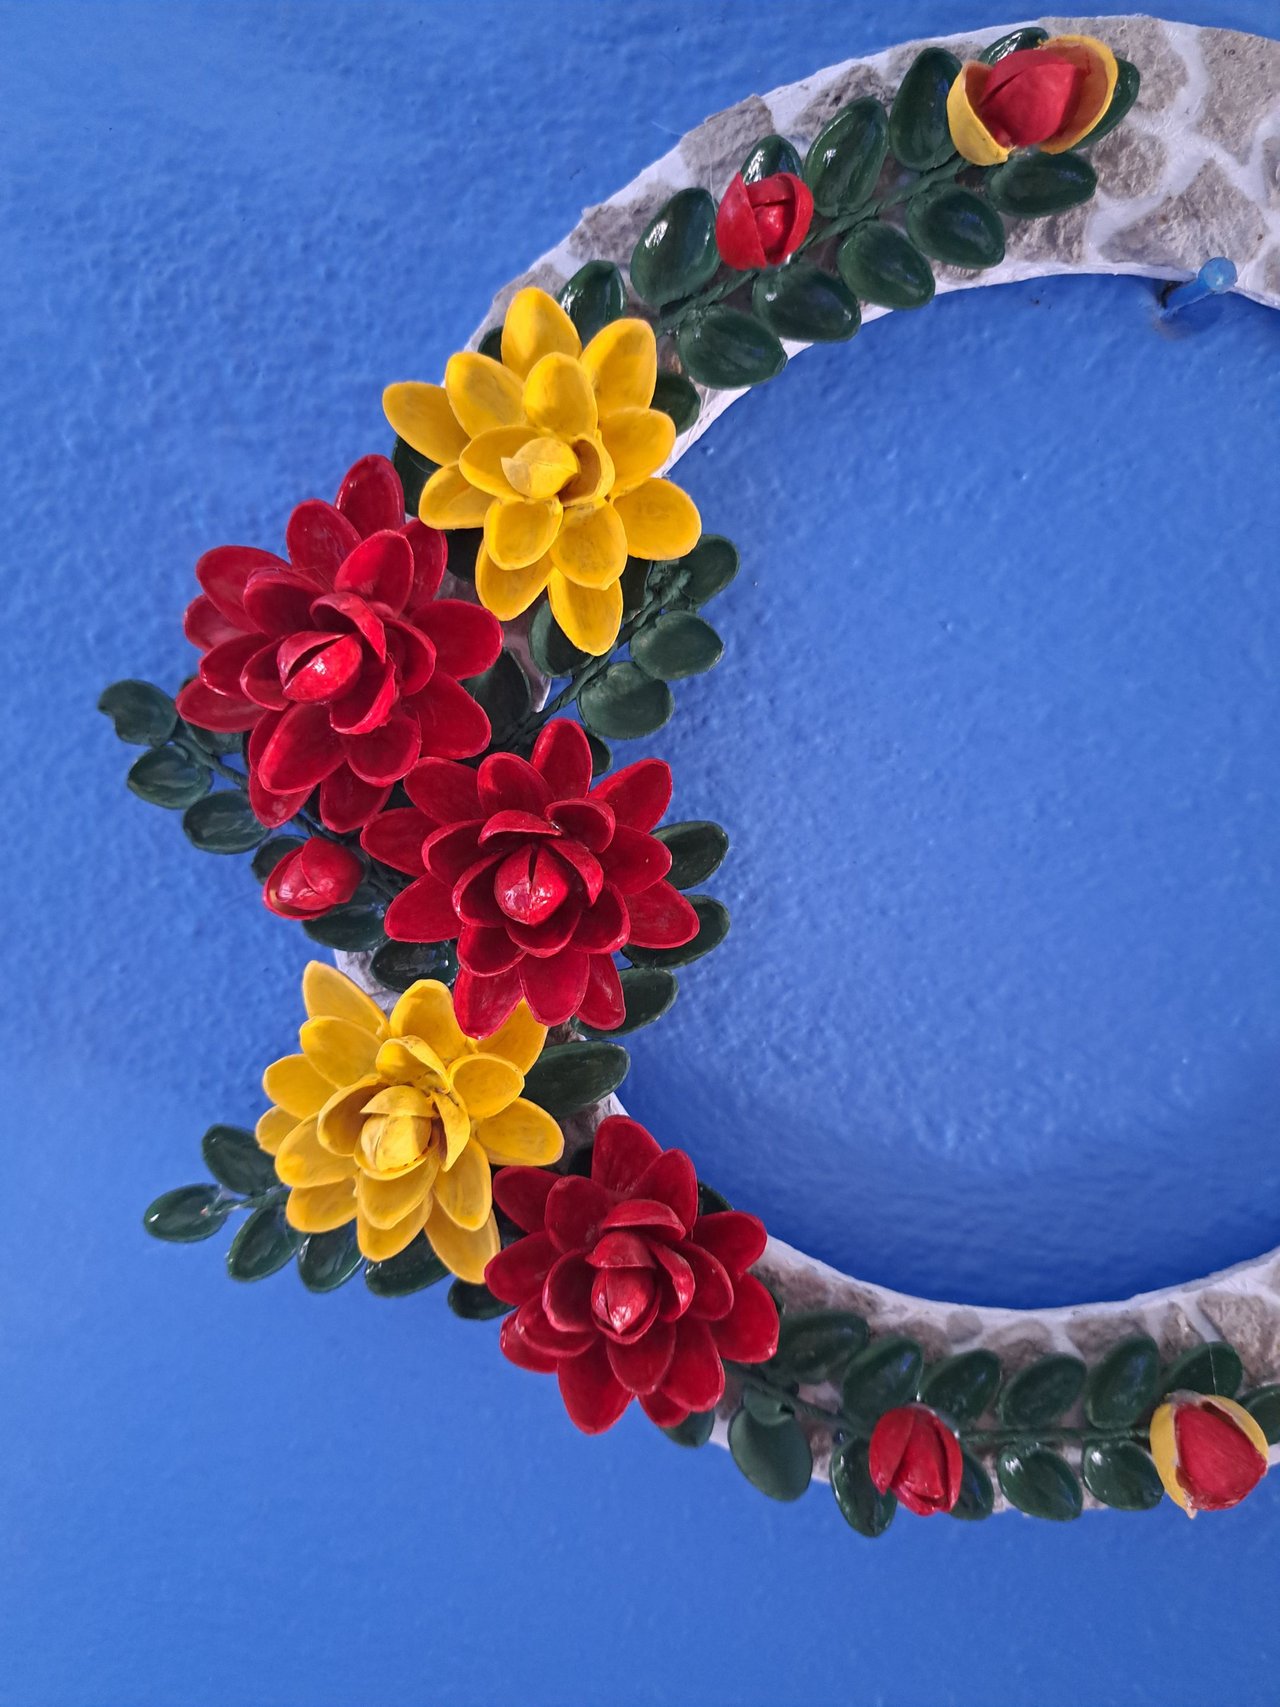
Once the 5 leaves are ready, they should be painted green on both sides. In the case of the flowers, 5 should be made and 2 should be painted yellow and 3 red. In addition, 5 flower buds will also be created, which will be 3 red and 2 yellow and red.
Spanish Version Here
Una vez estén listas las 5 hojas, se deben pintar de verde por ambos lados. En el caso de las flores, se deben confeccionar 5 y se pintarán 2 de color amarillo y 3 de color rojo. Adicionalmente, se crearán también 5 botones de flores, lo cuales serán 3 rojos y 2 amarillos y rojo.

|
|

|
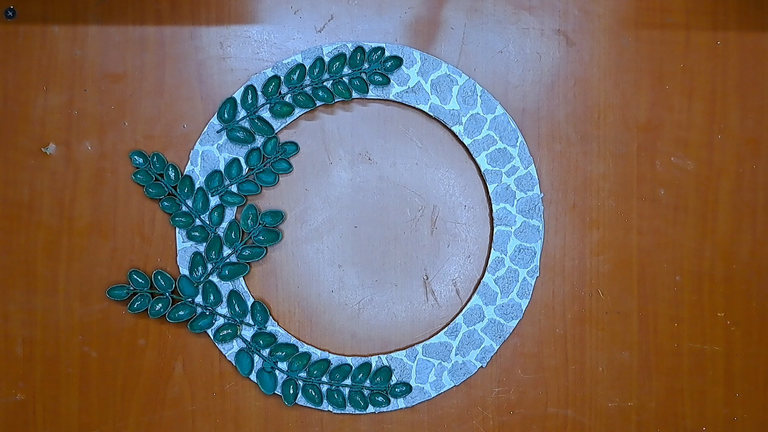
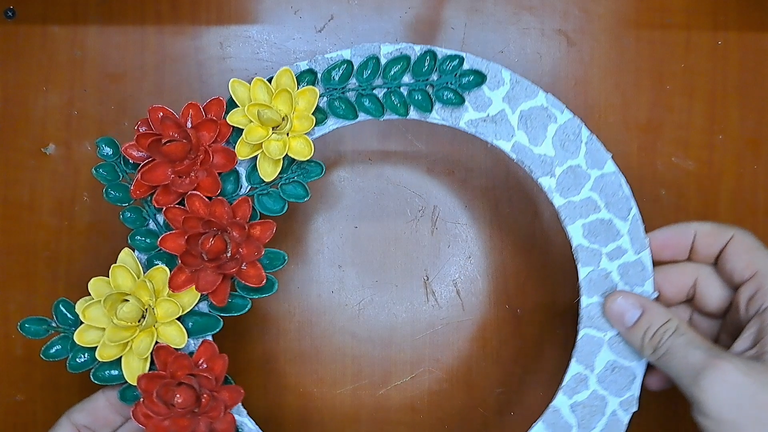
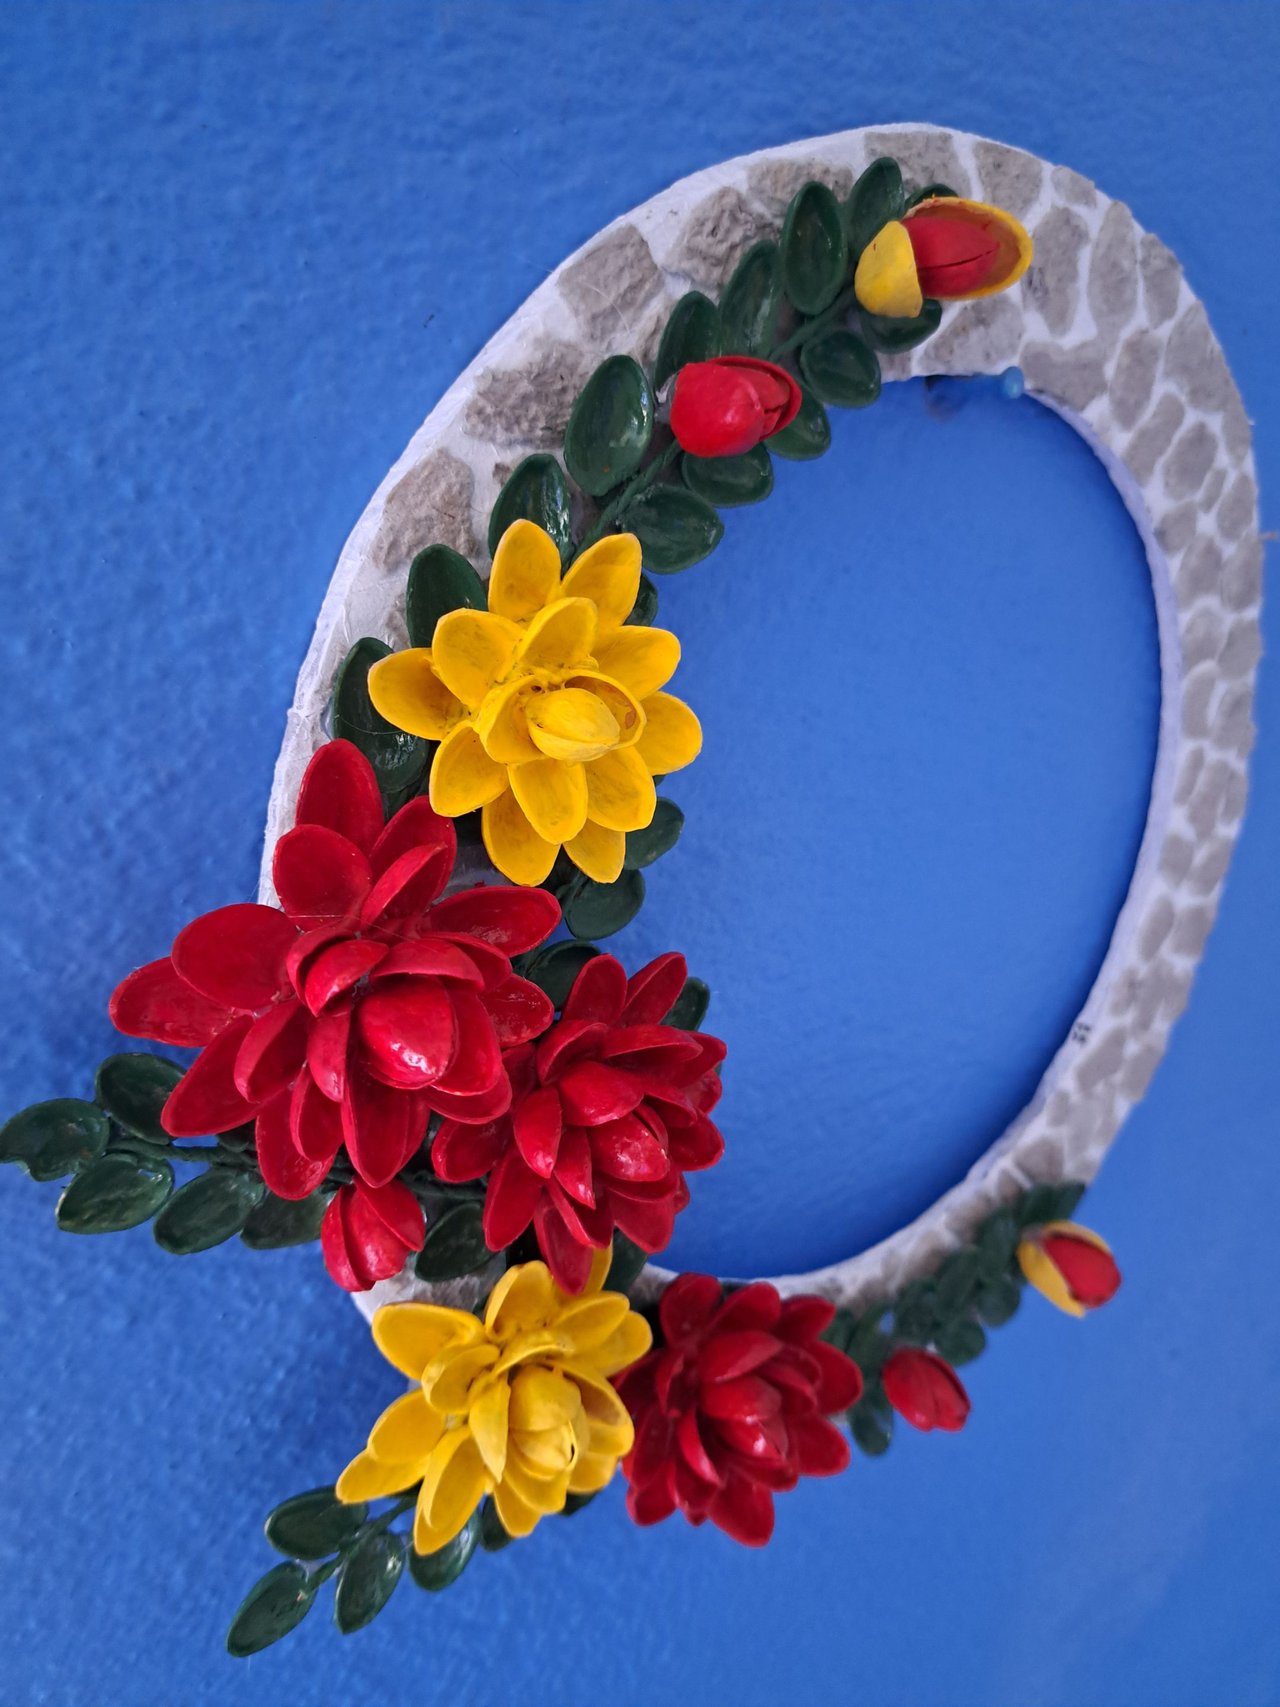
Now all that remains is to place the different parts on the stone ring. First will be the leaves, which will be placed in a crescent shape. Next, the flowers should be placed interspersed with their colors and placed in such a way that they cover the joints of the lower parts of the leaves. Finally, the buds are placed, of which the larger ones will be at the ends of the long leaves and the smaller ones between the other flowers.
Spanish Version Here
Ya solo queda colocar las distintas partes sobre el anillo de piedra. Primero serán las hojas, las cuales irán colocadas en forma de media luna. Seguidamente se deben colocar las flores intercalando sus colores y ubicadas de tal forma que cubran las uniones de las partes inferiores de las hojas. Al final se colocan los botones, de los cuales los más grandes irán en los extremos de las hojas largas y los más pequeños entre las demás flores.
|
|
|
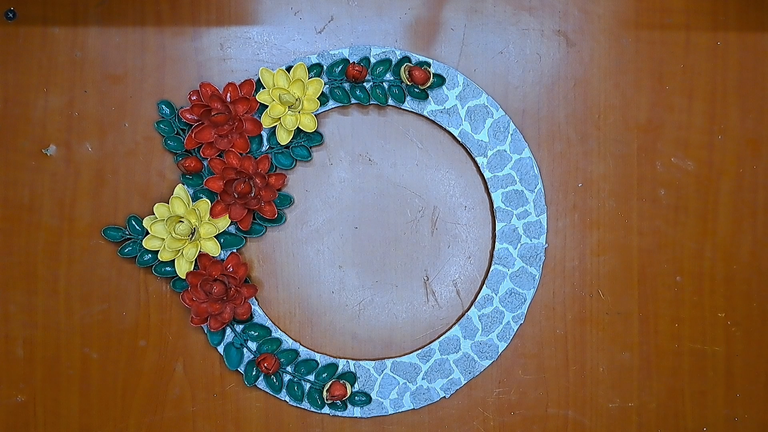
⚜️ Finished Work // Trabajo Terminado ⚜️
 |
 |
 |
 |

Thank you very much for reading my post. If you liked it, please leave a comment and consider following me so you don't miss my next posts. I'd love to know your opinion and your thoughts about the topic I discussed in this post, see you in the next one!
Credits and Resources // Créditos y Recursos
Cover page created in Canva Pro
Translated by DeepL
Video and images captured with my Samsung Galaxy A53
Edited in Wondershare Filmora 13
Music by Yurii Semchyshyn from Pixabay


▶️ 3Speak
This post has been shared on Reddit by @edeyglezsosa through the HivePosh initiative.
Hermoso detalle para su mamá. Saludos ☺️
Muchísimas gracias. Ya le he hecho unos cuantos y pienso hacerle muchos más.
Que bonito 😍🪄🙌🙌🙌
Valoro mucho estos trabajos, sé el tiempo que lleva hacer cada cosa con sumo cuidado y paciencia 🙏
Te quedó precioso amigo ❤🪄
Tienes toda la razón amiga. Hay algunas manualidades que llevan bastante tiempo y dedicación hacerlas.
wow that looks so beautiful you are amazing keep up the good work.
Thank you very much, I appreciate all the support
Qué belleza! Lo amé y todas esas texturas, excelente trabajo, te felicito
El texturizado de las superficie es algo que incorporé hace poco a mis manualidades y me ha encantado.
Que lindo, me encanto la combinacion de colores, delicado y decorativo 🌼
Muchísimas gracias, me alegro de saber que te gustó.
Congratulations @edeyglezsosa! You have completed the following achievement on the Hive blockchain And have been rewarded with New badge(s)
Your next target is to reach 8000 upvotes.
You can view your badges on your board and compare yourself to others in the Ranking
If you no longer want to receive notifications, reply to this comment with the word
STOPUna manualidad dónde hay que ser detallista y preciso para que quede bien bonita. Saludos y bendiciones
Muchísimas gracias por tus palabras. Saludos y bendiciones para ti también.
You have done an impressive job, not only the art, but the striking nature of your post and the editing of the video, this is a work of great quality in general, congratulations...
Thank you very much, your words give me encouragement to continue creating.
Excelente todo el proceso, el producto final, tu contenido audiovisual, etc.
Posdata: Yo viendo tu trabajo sin dejar de pensar que mi pistola de silicón me dice: Estoy cansado Jefe 🤣🤣🤣 No podía dejar de ver tu pistola de silicón pequeña, que hermosa. Ahora tengo que comprar una.
Jajaj, esa pistola no es tan nueva como parece. Se ve así porque la trató con mucho cuidado y siempre la limpio.
Quedó muy lindo! Gracias por compartirlo.