
Saludos comunidad creativa, es un gusto saludarles, espero se encuentren muy bien, alegres y contentos.
Hace unos días tuve una petición especial, una de mis ahijadas cumplía años y quería su cumpleaños de Frozen, ella eligió el modelo de su preferencia y madrina le iba a colocar ese toque a su deseo.
Así que me puse manos a la obra y les muestro el paso a paso del dibujo para su día especial.
Los materiales que utilice para el dibujo:
❄️Papel bond.
❄️Lápiz, borrador, regla.
❄️Pintura al frio
❄️Marcador
❄️Tiza de colores.
Y como siempre, le agrego el ingrediente principal a cualquier creación que mis manos tenga la oportunidad de hacer: ❤️ Amor ❤️, esencial para todo.
Paso a Paso dibujo ❄️Frozen❄️
1- Para iniciar con la regla realice un borde para centrar el dibujo, de 4cm aproximadamente en cada lado.

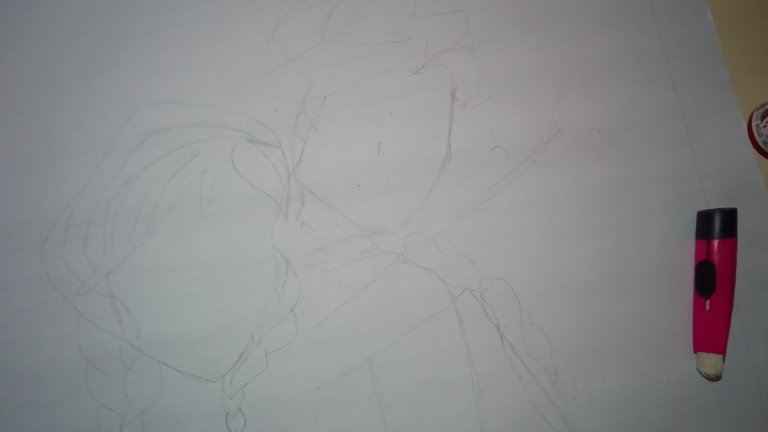
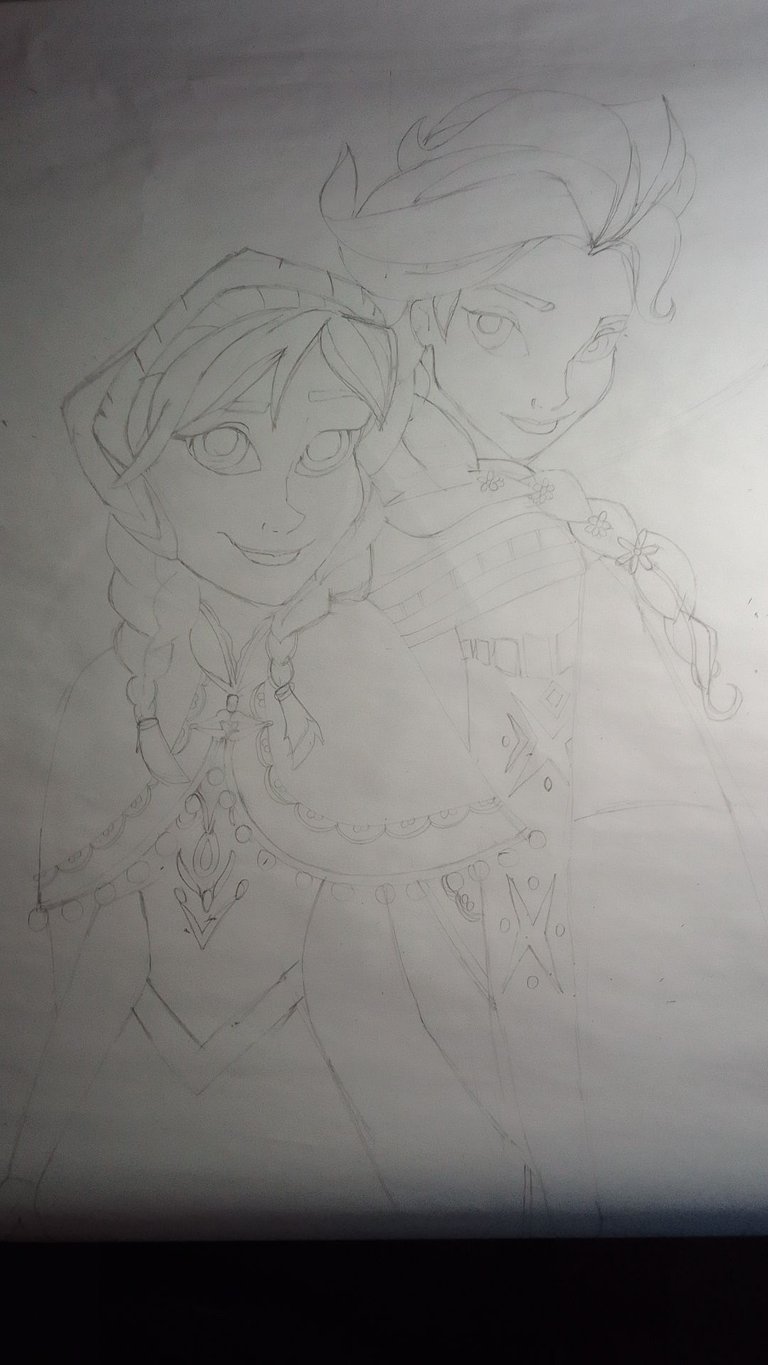
2- Realice un bosquejo de las figuras y comencé a darles forma poco a poco iniciando por la cabeza, luego seguí con el cabello, me enfoque en detallar primero la figura de ANNA🍁
 |  |
|---|
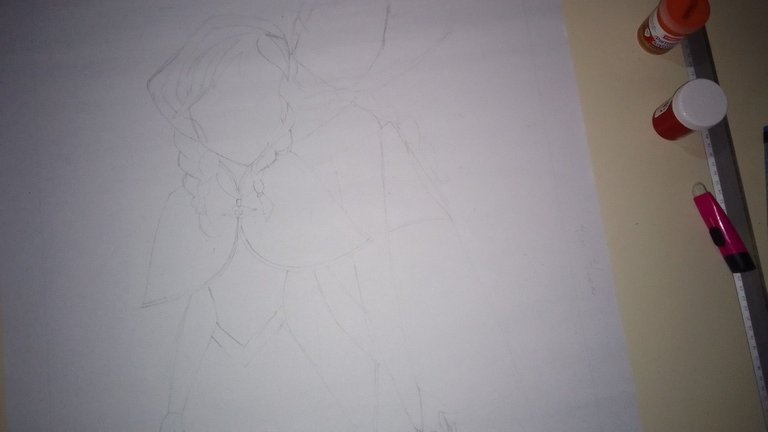
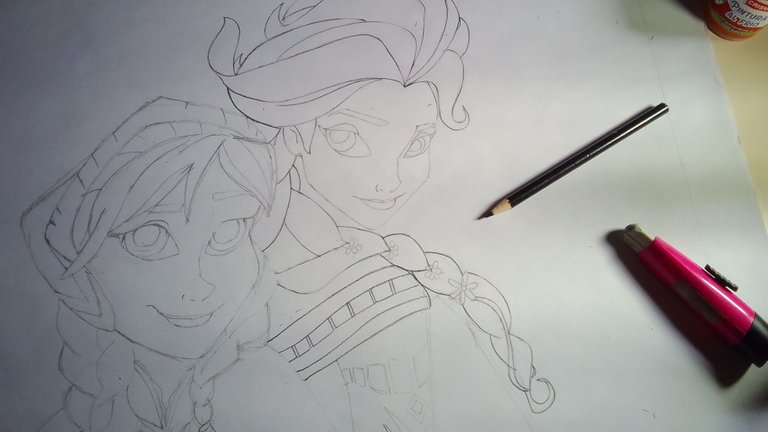
3- Continúe con el vestido, que tenía varios detalles en la parte de arriba, la capa es muy bonita y la parte delantera del vestido tiene un detalle de flores, que intente hacer lo más parecido posible, pero yo siempre digo que hago mi versión parecida 😅

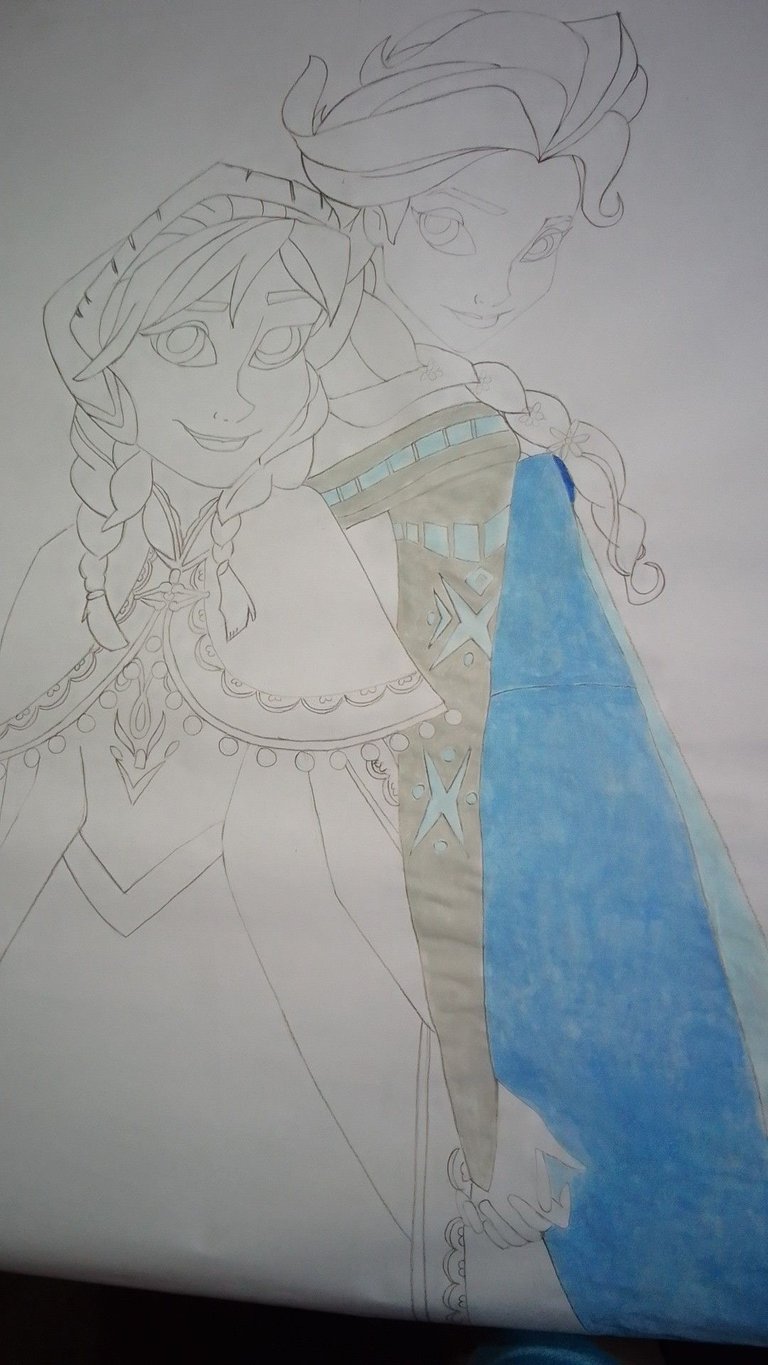
4- A la par inicie el vestido de ElSA❄️ que los detalles más destacables estaban en el hombro y brazo fue más fácil de realizar, también por la posición de la figura...
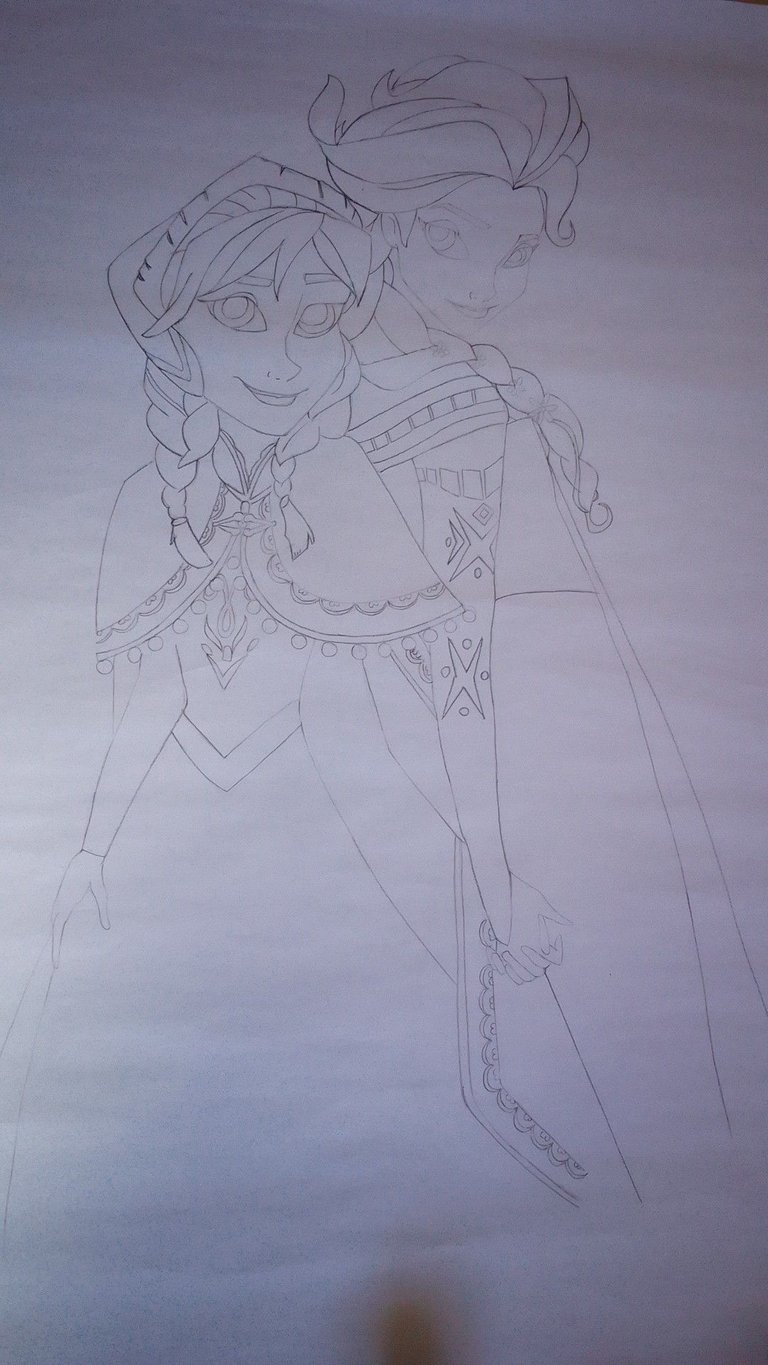
5- Luego dibuje las manos, que en la imagen las hermanas están tomadas de la mano, fue una parte en la que borré varias veces, pero logre el objetivo.
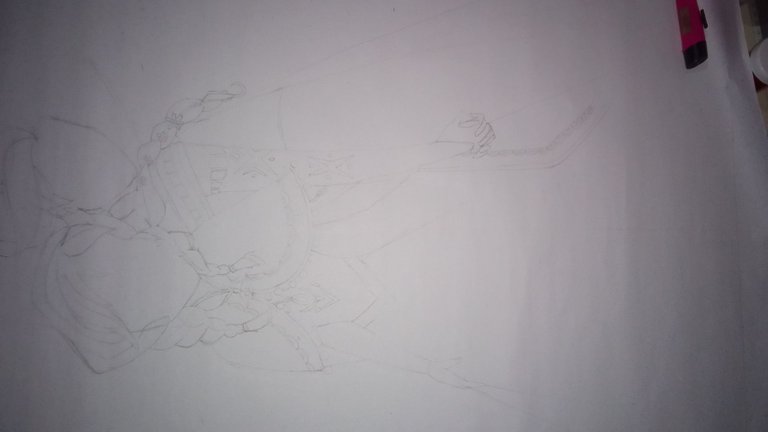
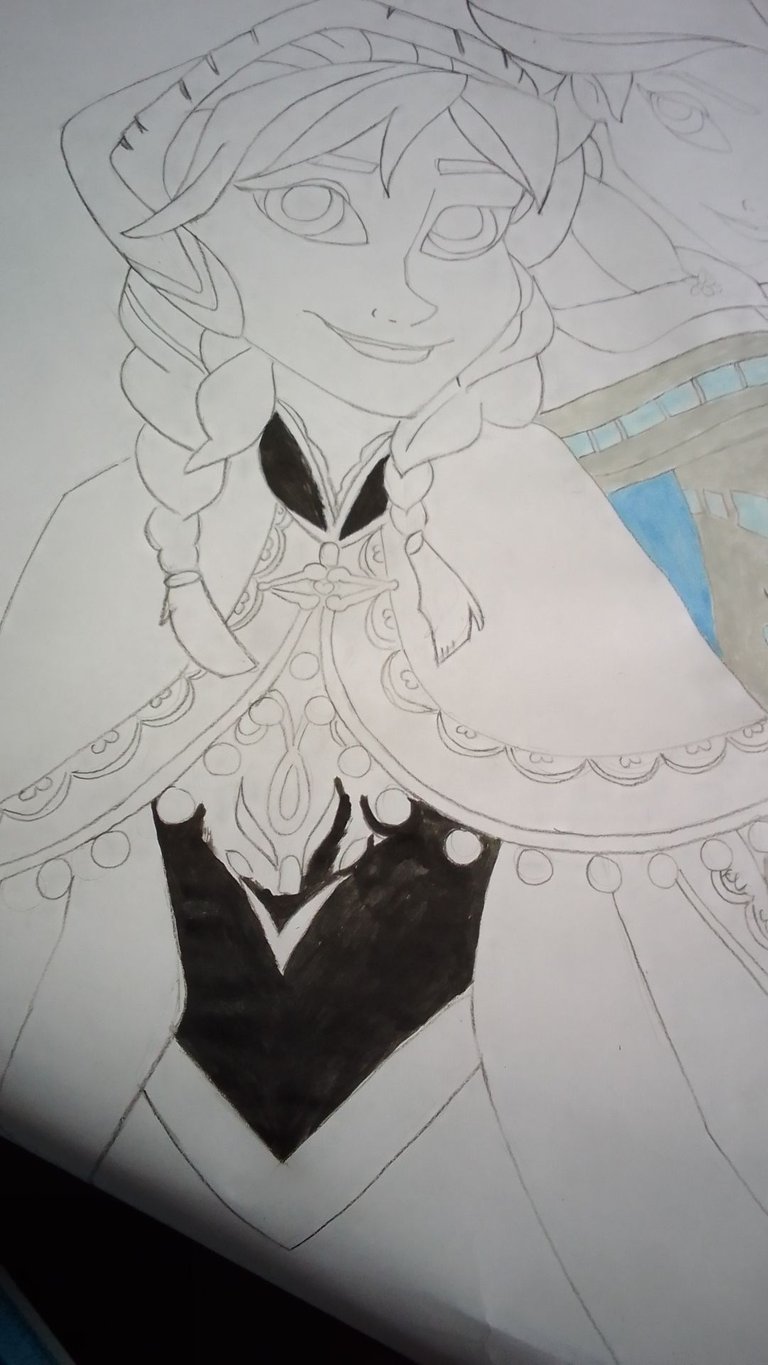
6- Seguí con el rostro que es la parte un poco más complicada para mí, comencé con los ojos, seguí con la nariz y la boca que me dio un poco de trabajo.
7- Y continúe mejorando la parte del cabello y los detalles de ANNA🍁 en el cabello. Me gustó mucho el resultado.
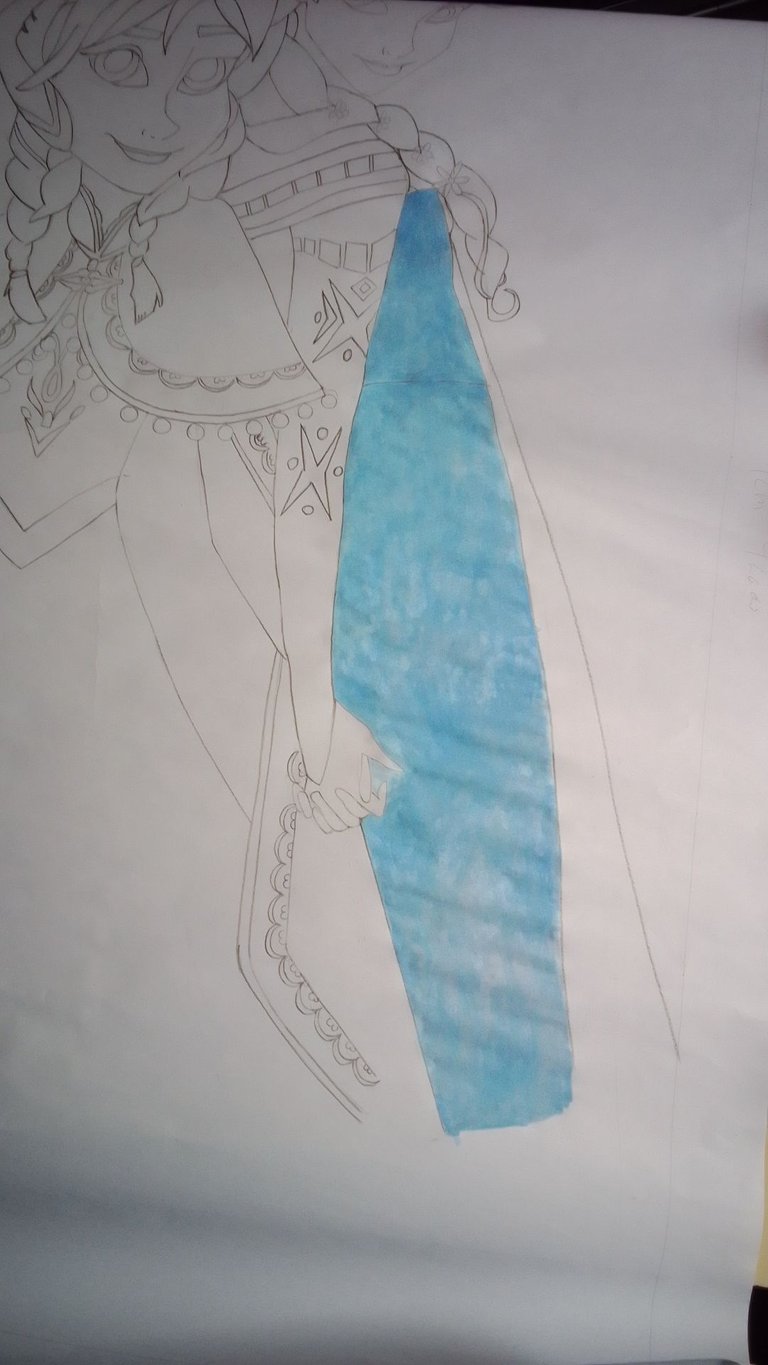
8- Antes de aplicar color con la pintura al frio, le pase un lápiz de color negro y borre las líneas de lápiz.
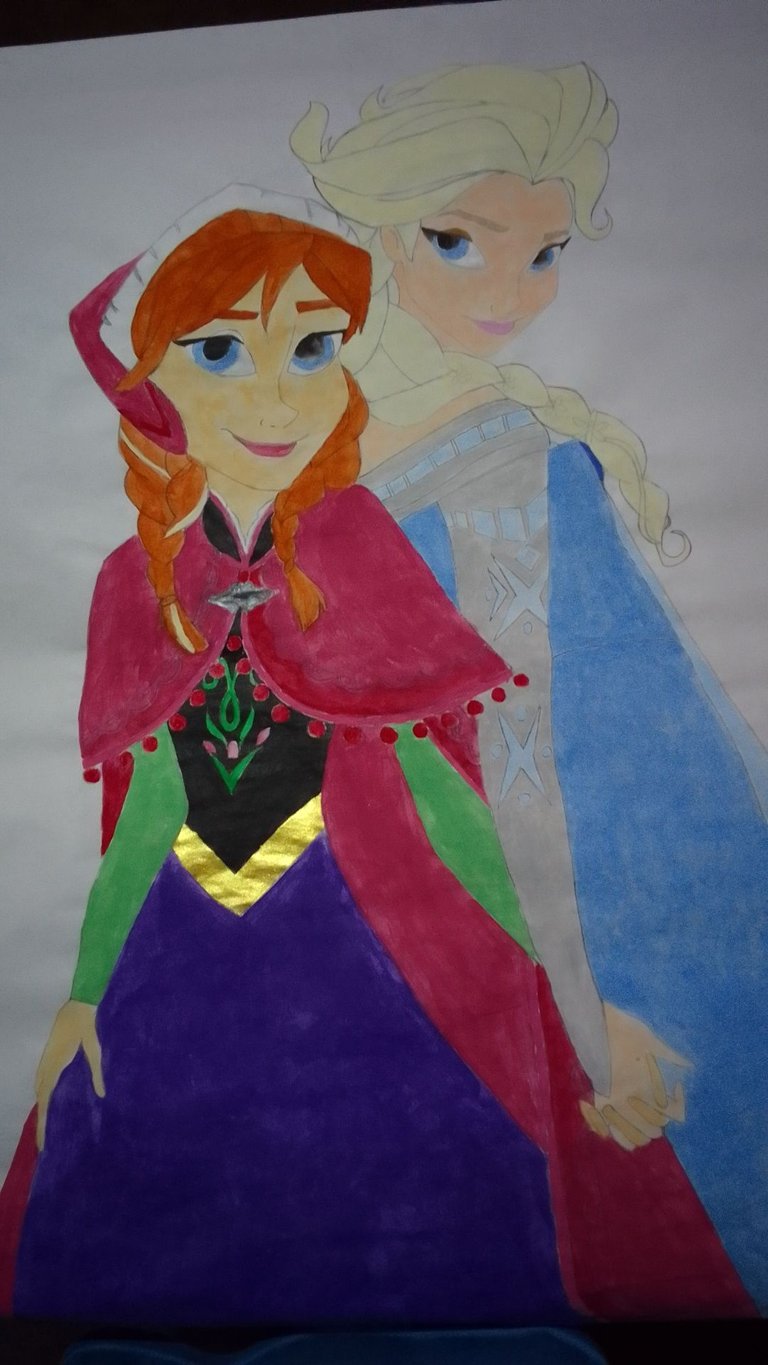
9- Una vez listo las líneas, comencé a aplicar color, por lo que a mí me pareció más fácil que fue el vestido de ELSA❄️ con azul celeste. para el hombro y brazo, mezcle negro y blanco en pequeñas cantidades para hacer un gris muy clarito, así como para los detalles del brazo y una parte del vestido en la parte delantera aclare un poco más el azul celeste...
 |  |  |
|---|
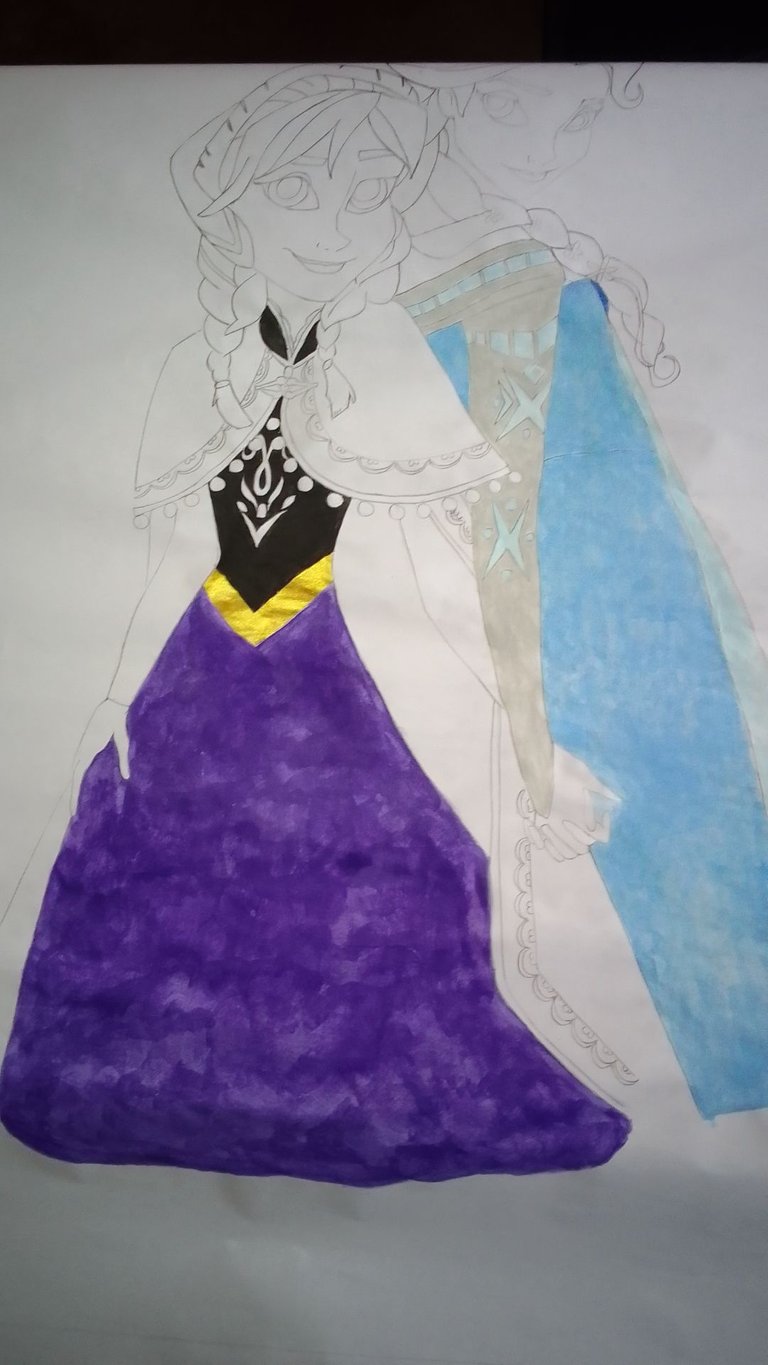
10- Luego que termine el vestido de Elsa continúe con el de Anna, no tenía muchos de colores así que también me tocó "improvisar" para los brazos que era como color turquesa mezcle verde y azul pero no conseguí el color deseado, posiblemente la cantidad, pero el color resultante me gusto y aplique.
 |  |  |
|---|
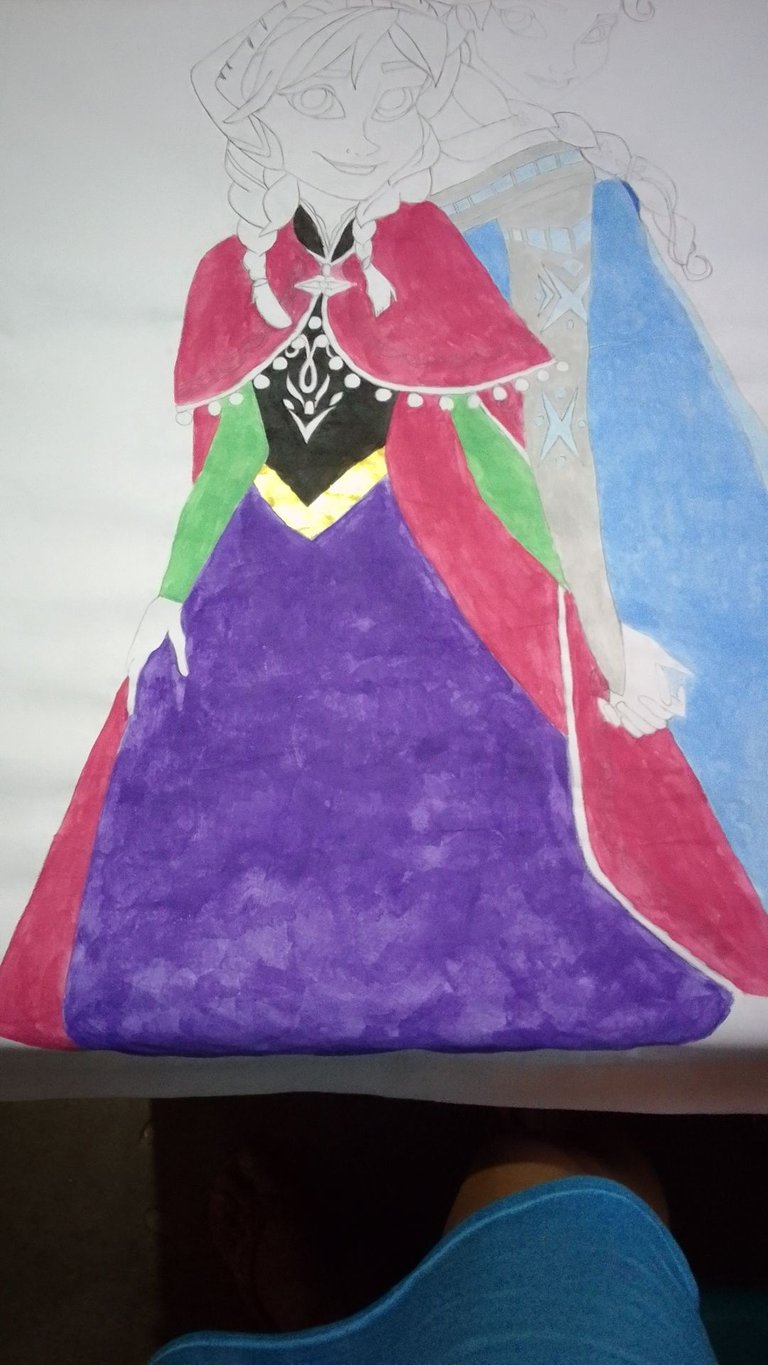
11- Cuando termine el vestido, continúe con el cabello, el color de la piel, y el rostro, para el cabello de ELSA❄️ aclare el amarillo con un poco de blanco, así como el color piel, para ANNA🍁 al color marrón le mezcle con un poco de naranja para que diera ese color me gustó mucho.
 |  |  |
|---|
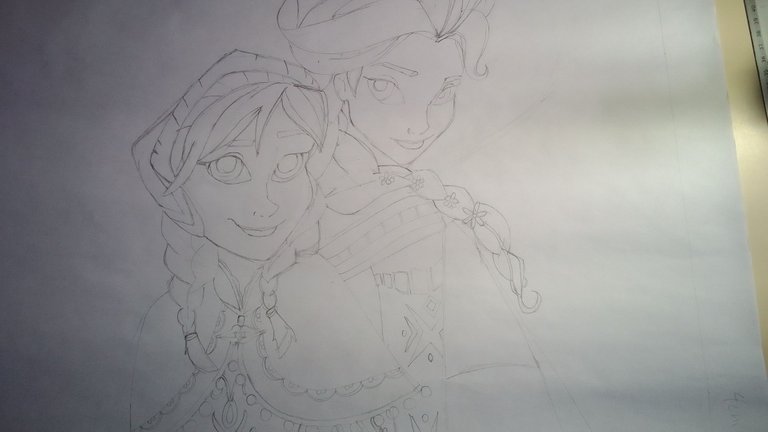
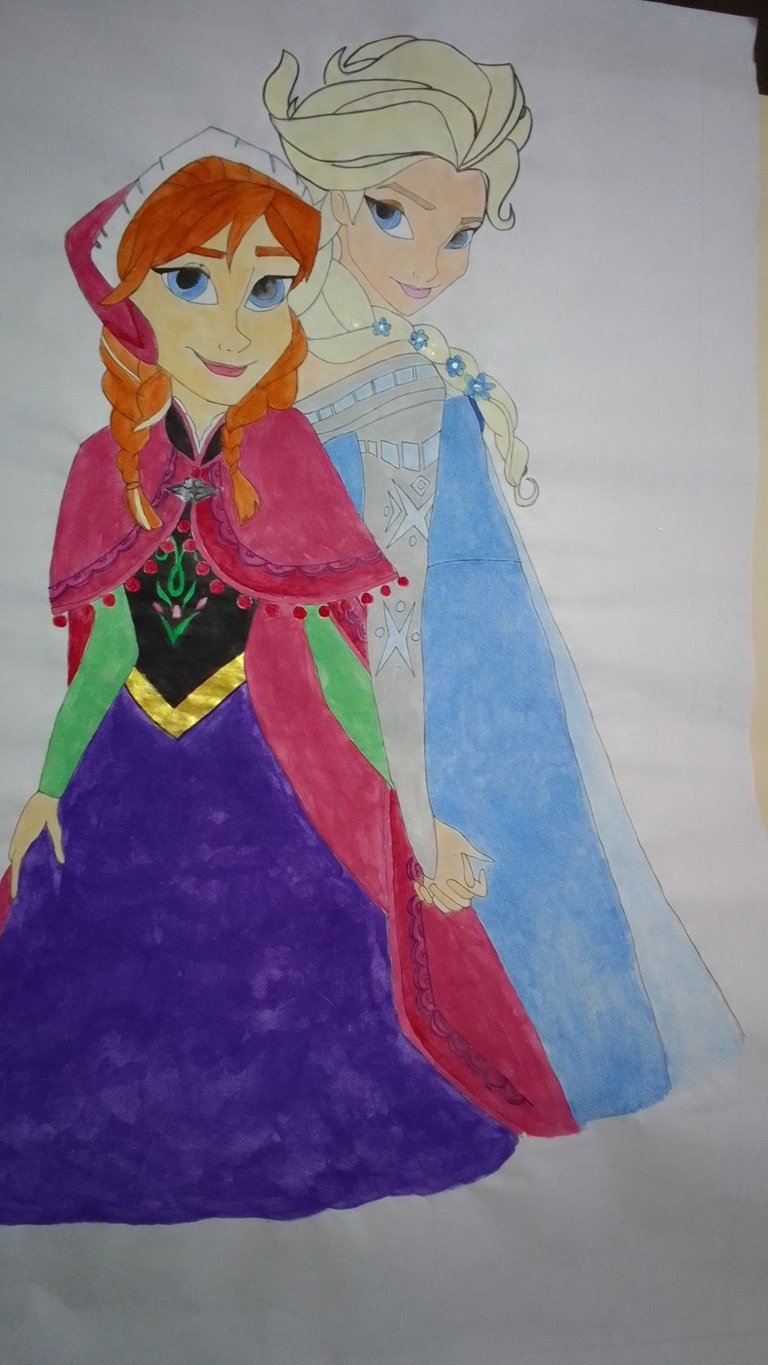
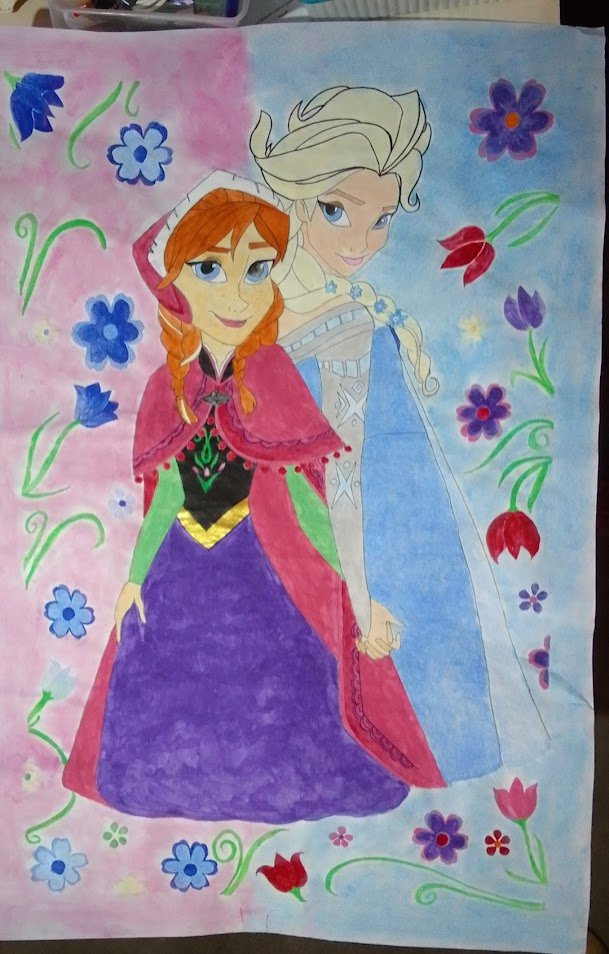
12- Una vez terminado, le realice unas flores y al fondo tiza de color... y así de hermoso quedo:
¡Muchas gracias por visitar mi post!

Greetings creative community, it is a pleasure to greet you, I hope you are very well, cheerful and happy.
A few days ago I had a special request, one of my goddaughters had a birthday and wanted her birthday in Frozen, she chose the model of her preference and godmother was going to put that touch to her wish.
So I got down to work and I show you the step by step drawing for her special day.
The materials I used for the drawing:
❄️Papel bond.
❄️Lápiz, eraser, ruler.
❄️Pintura to cold
❄️Marcador
❄️Tiza colors.
And as always, I add the main ingredient to any creation my hands have the opportunity to make: ❤️ Love ❤️, essential for everything.
Step by Step drawing ❄️Frozen❄️
1- To start with the ruler, make a border to center the drawing, approximately 4cm on each side.
2- I made a sketch of the figures and began to shape them little by little starting with the head, then I continued with the hair, I focused on detailing ANNA🍁's figure first.
| |
|---|
3- Continue with the dress, which had several details on the top, the cape is very nice and the front of the dress has a flower detail, which I tried to make as similar as possible, but I always say I do my similar version 😅
4- At the same time I started the dress from ElSA❄️ that the most remarkable details were on the shoulder and arm was easier to do, also because of the position of the figure....
5- Then I drew the hands, which in the image the sisters are holding hands, it was a part in which I erased several times, but I achieved the goal.
6- I continued with the face which is the most complicated part for me, I started with the eyes, followed by the nose and the mouth that gave me a little work.
7- And continue improving the hair part and the details of ANNA🍁 in the hair. I really liked the result.
8- Before applying color with the cold paint, I ran a black color pencil over it and erased the pencil lines.
9- Once the lines were ready, I started to apply color, for what I found easier which was the dress of ELSA❄️ with light blue. For the shoulder and arm, I mixed black and white in small amounts to make a very light gray, as well as for the details of the arm and a part of the dress in the front part I lightened a little more the light blue..
| | |
|---|
10- After I finished Elsa's dress I continued with Anna's, I didn't have many colors so I also had to "improvise" for the arms which was like turquoise, I mixed green and blue but I didn't get the desired color, possibly the amount, but the resulting color I liked and applied.
| | |
|---|
11- When I finished the dress, continue with the hair, the color of the skin, and the face, for the hair of ELSA❄️ I lightened the yellow with a little white, as well as the skin color, for ANNA🍁 to the brown color I mixed with a little orange to give that color I liked it a lot.
| | |
|---|
12- Once finished, I made some flowers and colored chalk in the background ... and this is how beautiful it was:
Thank you very much for visiting my post! .
Cover and Banner made in canva
Separator made in PowerPoint
Photos taken with my mobile device
IMAGEN REF. ELSA ❄️Y ANNA🍁
Qué lindo detalle para el cumpleaños de tu ahijada! Te quedó muy bonito, me gustó el resultado. 👏👏👏
Hola muchas gracias, me alegra te haya gustado ❤️