Buenas noches amigos de esta linda comunidad, bienvenidos sean todos los que me visitan hoy.
Utilizarás materiales económicos y fáciles de conseguir.
Entonces si ya estás listo empecemos!
Materiales:
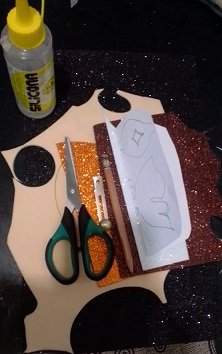
| Foami mate y escarchado | 1 Perla grande y 2 pequeñas |
|---|---|
| Nylon 10cm | Moñera, pinza |
| Tijera | Lápiz |
| Silicón | Dibujo o molde de mariposa |
| Pinceles | Pinturas |
| Plancha eléctrica | Pistola de silicón |
Ahora seguimos con el Procedimiento:
Paso 1:
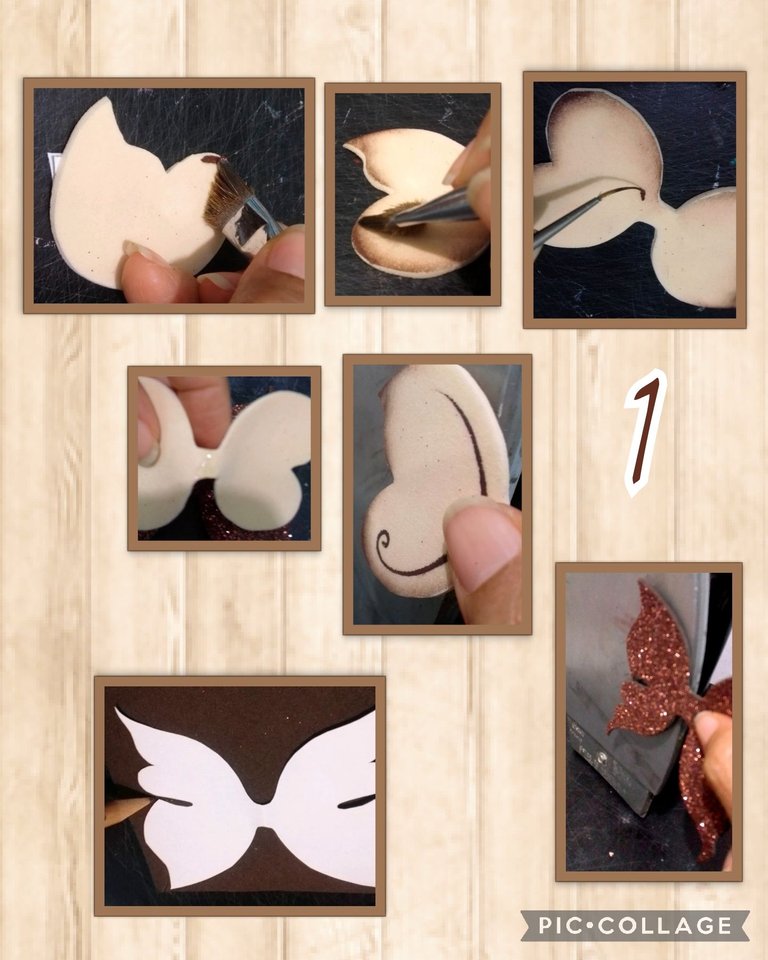
- Recorta el molde o dibujo y marca todo el contorno o silueta de la mariposa sobre el foami mate del color de tu preferencia y recorta.
- Moja un pincel angular en agua, retira el exceso pasando por un pañito y moja la punta en la pintura del color de tu preferencia y comienza a pasar por todo el borde de la mariposa, deja secar y pinta lo que quieras para decorar, calienta en la plancha y dale forma sosteniendo las alas pegadas unos segundos.
Esto para que parezca que está volando. - Luego marca las otras alas en foami escarchado, recorta y calienta en la plancha y repite el paso anterior.
Paso 2:
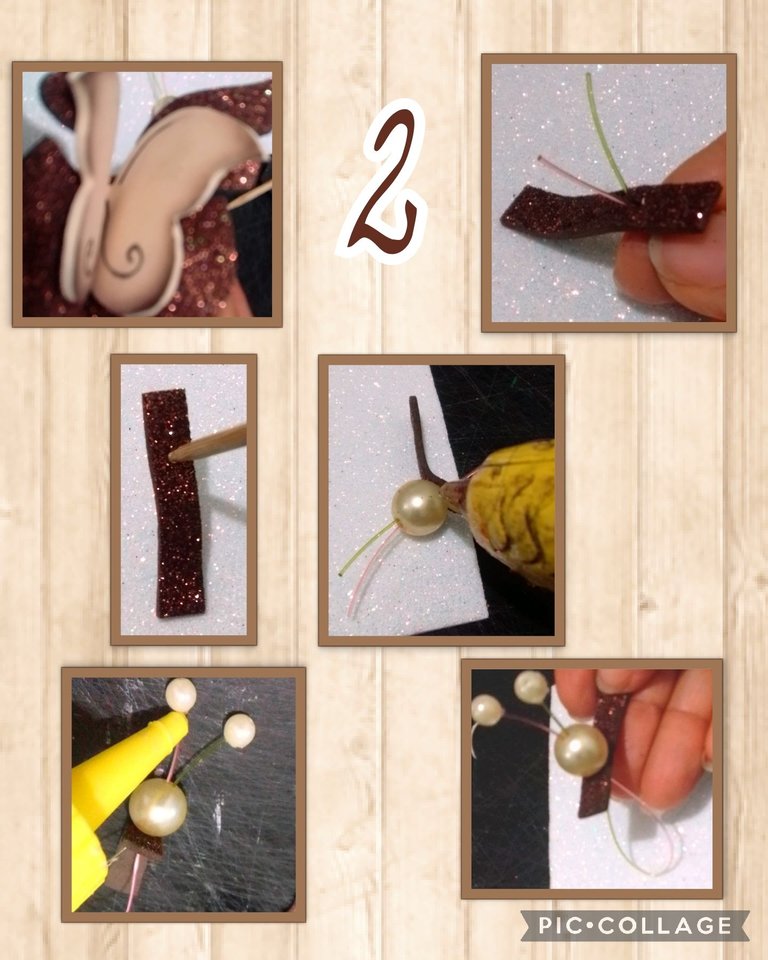
- Aplica silicón en el centro de ambas alas (beige y marrón) y pega dejando la beige en la parte de arriba de la mariposa.
- Aparte recorta una tira de 1cm de ancho x 5 de largo en foami escarchado y a 1,5cm haz un orificio con un palito de madera. (ver foto)
- Junta las dos puntas del Nylon e introduce por el orificio que hiciste en la tira de foami.
- Luego inserta la perla grande (cabeza) y pega a la tira de foami y deja las puntas hacia arriba para pegar las perlitas y formar las antenas. (ver foto).
Paso 3:
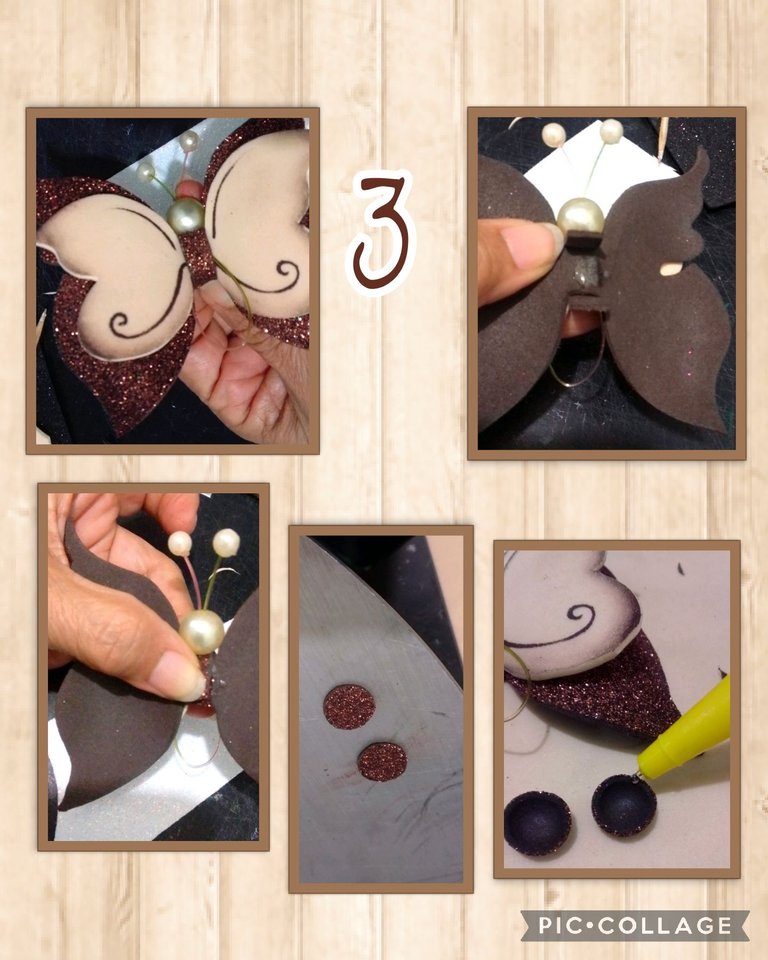
- Ahora pasa la tira por el medio de las alas y cuadra la cabeza para pegarla justo que quede en la parte de arriba la perla grande, sujeta y aplica silicón caliente en la parte de atrás de las alas y pega la tira para cerrar haciendo presión unos segundos hasta que pegue bien.
Nota: Si tienes pistola de silicón es bueno usar en las partes donde necesitamos que se peguen bien las piezas y es más rápido el secado. - Luego recorta 2 círculos pequeños y coloca sobre la plancha caliente para que tomen forma y aplicas silicón líquido por todo el borde.
Paso 4:
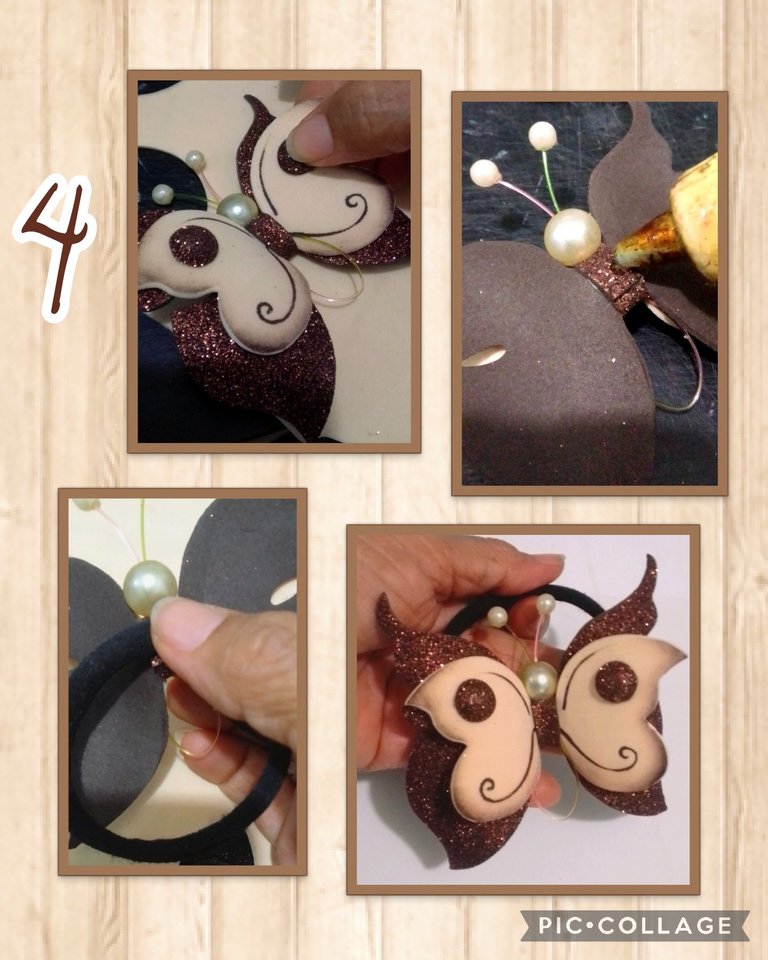
- Pega los círculos termoformados a los lados para decorar, me parece que está quedando muy bonita.
- Ahora solo queda aplicar silicón caliente en la parte de atrás de la mariposa y pegar la moñera.
- Haz un poco de presión mientras seca y ya estará lista.
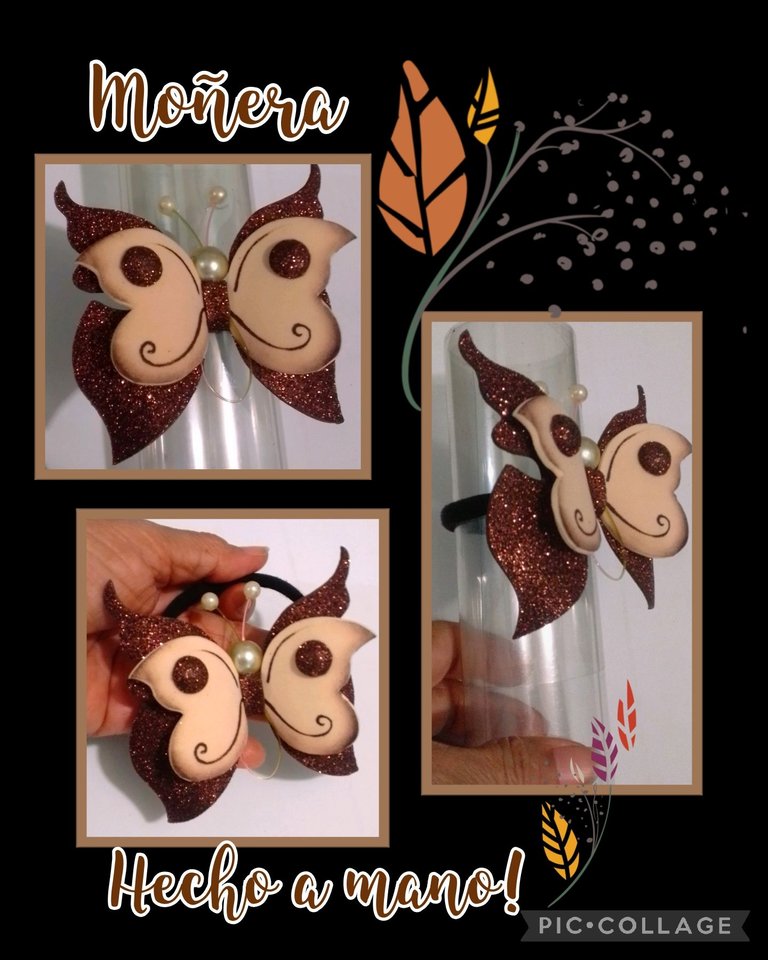
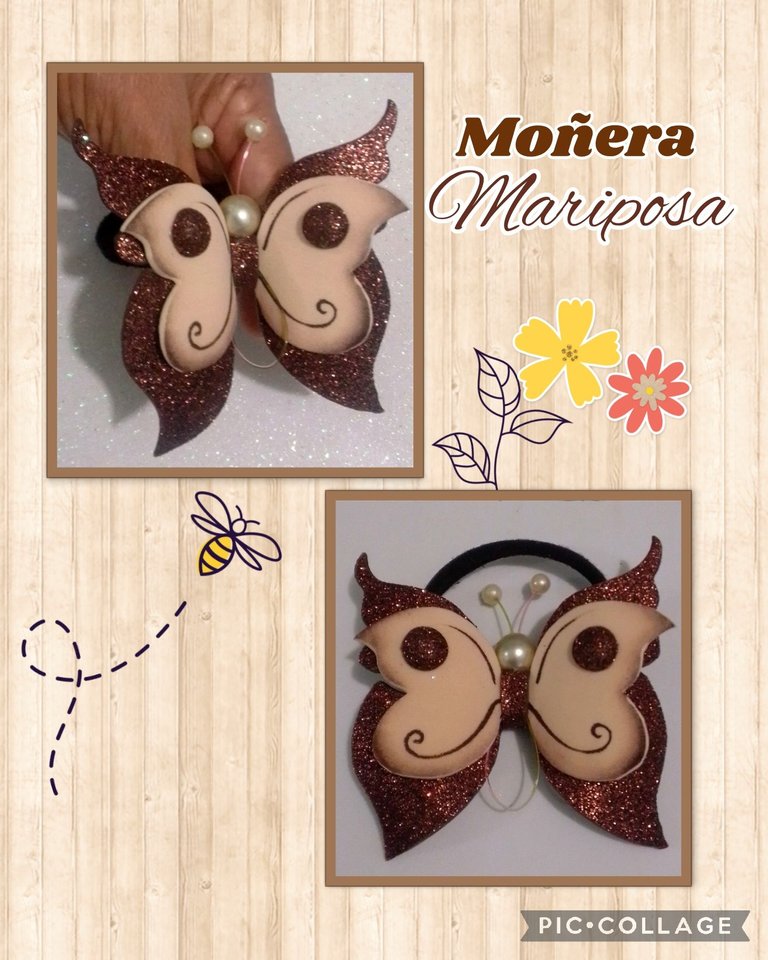
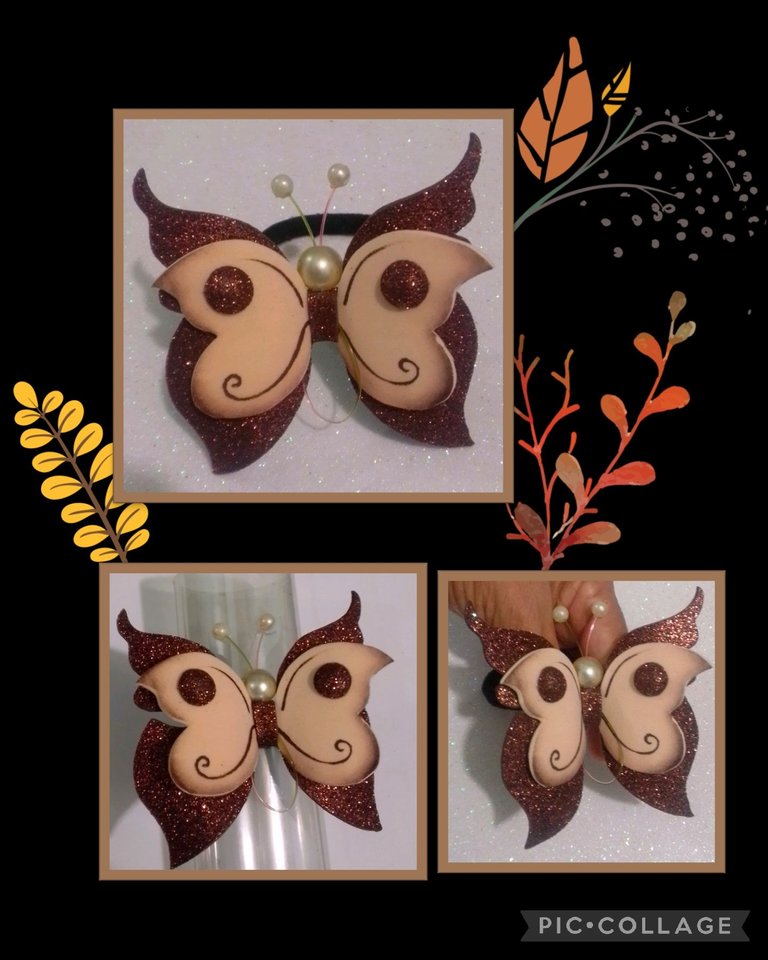
Y así quedo de hermosa!
Mi publicación la traduje con DeepL, usando etiquetas HTML y las fotos las tomé con mi Blu G5 usando Pic Collage para editarlas
Espero te guste y sea de provecho para tí.
Ahora me despido hasta mañana.
Saludos y bendiciones para todos.
Muchas gracias por tu visita.
English:
ttps://files.peakd.com/file/peakd-hive/elmundodebetty/EoEq4vymVyi1oXoNNdgHgn3bzzFJnJixFEhkKsEufpZL3FfNKe7BV49ZhpusPveyE9F.jpg
Buenas noches amigos de esta linda comunidad, bienvenidos sean todos los que me visitan hoy.
Utilizarás materiales económicos y fáciles de conseguir.
Entonces si ya estás listo empecemos!
Materiales:
| Foami mate y escarchado | 1 Perla grande y 2 pequeñas |
|---|---|
| Nylon 10cm | Moñera, pinza |
| Tijera | Lápiz |
| Silicón | Dibujo o molde de mariposa |
| Pinceles | Pinturas |
| Plancha eléctrica | Pistola de silicón |
Ahora seguimos con el Procedimiento:
Paso 1:
- Cut out the mold or drawing and mark the outline or silhouette of the butterfly on the matte foami in the color of your choice and cut it out.
- Dip an angled brush in water, remove the excess by passing it through a tissue and dip the tip in the paint of the color of your choice and begin to pass around the edge of the butterfly, let it dry and paint what you want to decorate, heat in the iron and shape it holding the wings glued for a few seconds.
Do this to make it look like it is flying. - Then mark the other wings in frosted foami, cut out and heat in the iron and repeat the previous step.
Step 2:
- Apply silicone in the center of both wings (beige and brown) and glue leaving the beige on top of the butterfly.
- Cut a 1cm wide x 5cm long strip of frosted foami and at 1,5cm make a hole with a wooden stick. (see photo)
- Join the two ends of the Nylon and insert through the hole you made in the foami strip.
- Then insert the big bead (head) and glue it to the foami strip and leave the ends upwards to glue the beads and form the antennae. (see photo).
Step 3
- Now pass the strip through the middle of the wings and square the head to glue it just so that the big bead is at the top, hold and apply hot silicone on the back of the wings and glue the strip to close by pressing for a few seconds until it sticks well.
Note: If you have a silicone gun it is good to use in the parts where we need the pieces to stick well and it dries faster. - Then cut out 2 small circles and place them on the hot plate so that they take shape and apply liquid silicone all around the edge.
Step 4.
- Glue the thermoformed circles on the sides to decorate, I think it is looking very nice.
- Now all that's left is to apply hot silicone to the back of the butterfly and glue the bow.
- Apply a little pressure while it dries and it will be ready.
And this is how beautiful it looks!
My post was translated with DeepL, using HTML tags and the photos were taken with my Blu G5 using Pic Collage to edit them.
I hope you like it and that it will be useful for you.
Now I say goodbye until tomorrow.
Greetings and blessings to all.
Thank you very much for your visit.
¡Felicidades! Esta publicación obtuvo upvote y fue compartido por @la-colmena, un proyecto de Curación Manual para la comunidad hispana de Hive que cuenta con el respaldo de @curie.
Si te gusta el trabajo que hacemos, te invitamos a darle tu voto a este comentario y a votar como testigo por Curie.
Si quieres saber más sobre nuestro proyecto, acompáñanos en Discord: La Colmena.
Your content has been voted as a part of Encouragement program. Keep up the good work!
Use Ecency daily to boost your growth on platform!
Support Ecency
Vote for new Proposal
Delegate HP and earn more
Buenos días @ecency y @la-colmena por el apoyo a mi publicación.
Saludos.
Guaooo, pero que belleza😍. Te quedó muy hermosa y delicada. Muchísimas felicidades por tan notable trabajo. 🌸🥰
Hola amiga @dayadam, muchas gracias por tu comentario.
Saludos y bendiciones.