
Buenas noches queridos amigos.
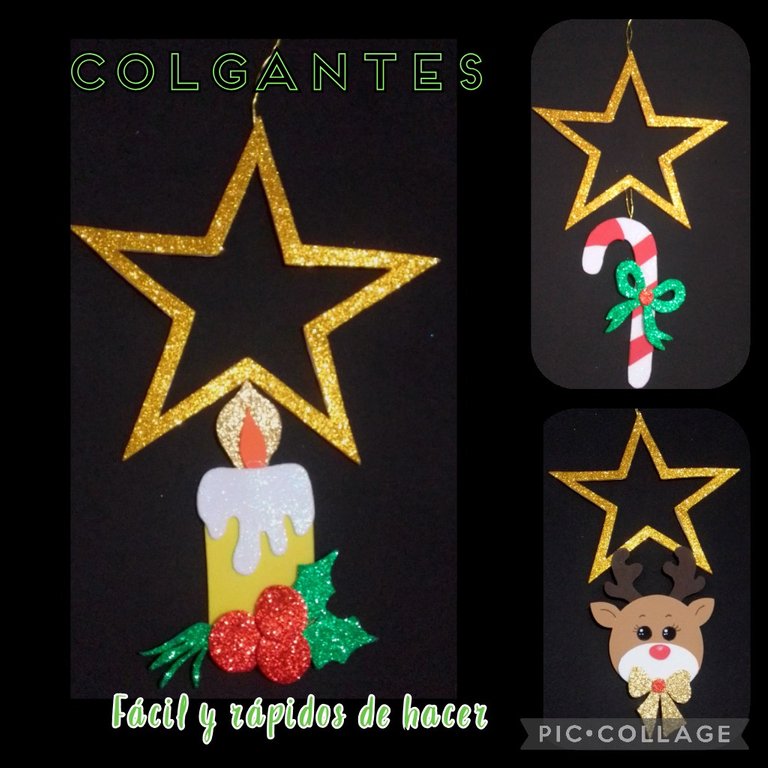
Bienvenidos a mi espacio preferido, hoy quiero compartir con ustedes este paso a paso, para que aprendas a realizar estos lindos adornos Colgantes de una manera fácil, rápida, sencilla y con los que podrás decorar el árbol, las guirnaldas o cualquier espacio que prefieras, están hechos con foami.
Te digo que son fáciles de hacer porque lo que harás es marcar, recortar, pegar y listo.
Así que, espero te animes y te invito a que me acompañes a realizarlos.
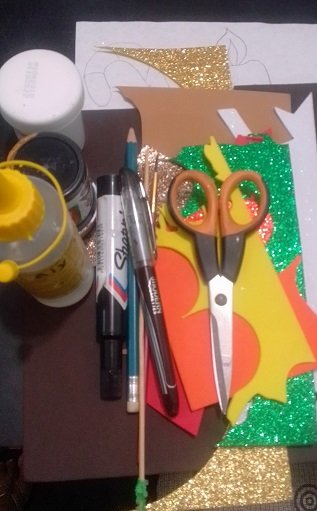
Para estos Lindos Colgantes vas a necesitar:
| Foami escarchado y mate | Molde o dibujos de piezas |
|---|---|
| Pinturas, pincel | Lápiz y marcadores |
| Tijera | Palito de madera |
| Hilo dorado | Cartulina |
Ahora comenzaremos con el procedimiento:
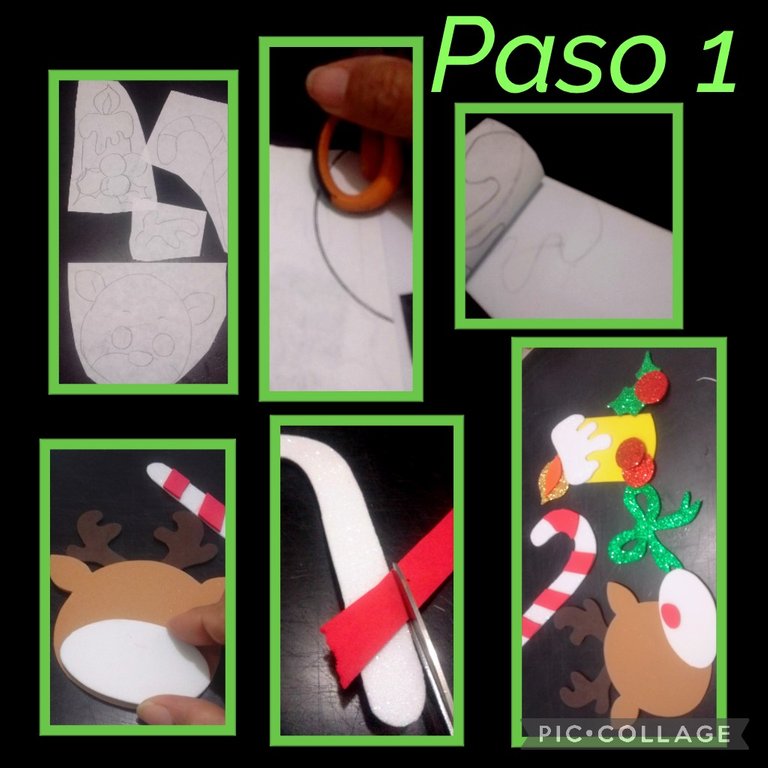
- Desglosa los dibujos y remarca con un lápiz de mina blanda, luego coloca sobre el foami y con la ayuda de una tijera frota el papel para transferir el dibujo y asegúrate de ver que se transfiera, así harás con todas las piezas que vas a realizar, tratando en lo posible de ir ordenando las piezas.
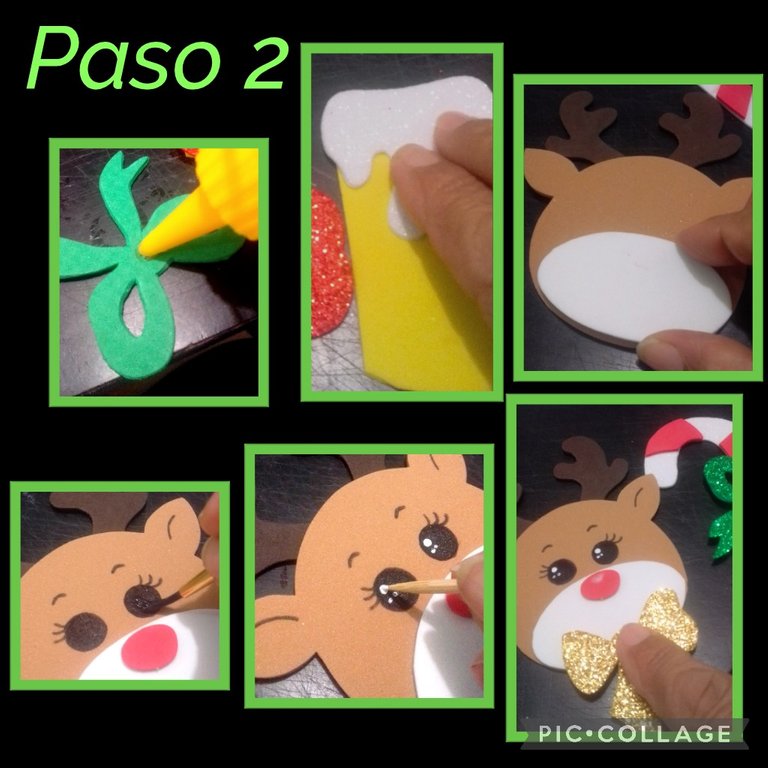
- Ahora aplica silicón y comienza a armar, como puedes ver es super rápido.
- Despuès de pegar las piezas puedes pintar los ojos del reno, con marcador o pintura y coloca el punto blanco de luz en los ojitos.
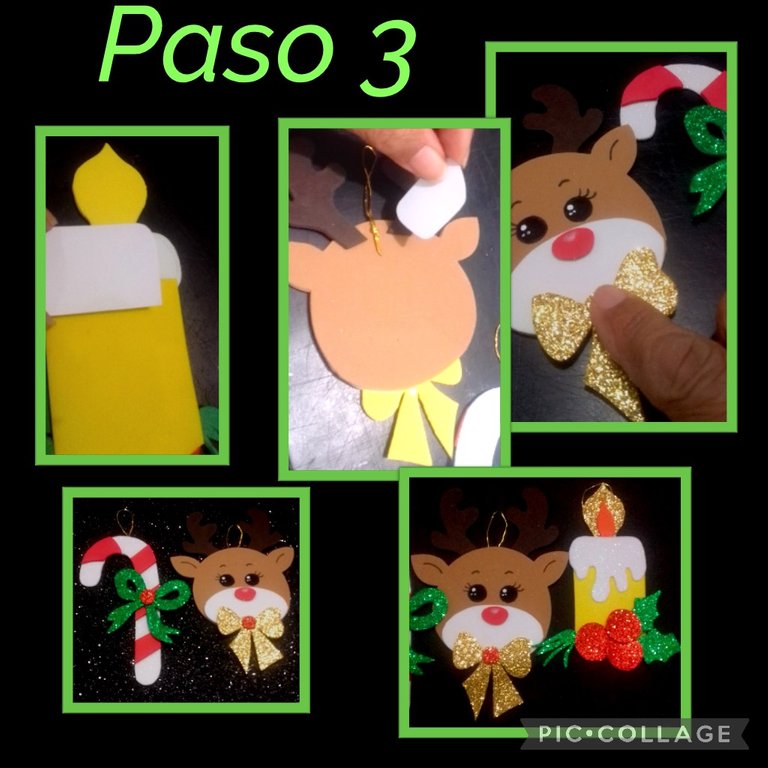
- Ya están casi terminados, solo falta, recortar en cartulina una pieza a cada uno de las figuras de foami para rematar donde le pegarás el hilo dorado para guindar y ya estarán listos estos lindos colgantes.

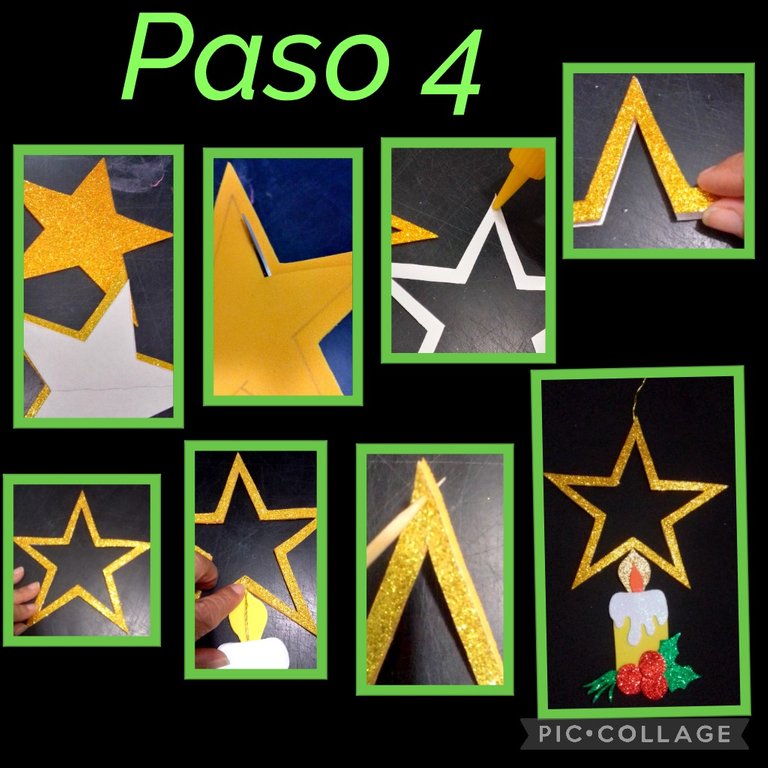
- Ahora te enseñaré otra manera de hacerlos pero con una estrella preciosa elaborada en foami escarchado y cartulina escarchada.
- Aquí solo debes marcarla estrella en foami y cartulina y recortar, luego marca 1 cm hacia adentro de la estrella y recorta sacando el centro de las dos piezas, aplica silicón y pega.
- Deja secar bien la estrella, luego aplica silicón y pega el hilo de la vela.
- Aparte introduce en el pico de la estrella un palillo de madera y amarra un pedacito de hilo dorado y listo.
- Ahora sólo queda despedirme, feliz de haber compartido con ustedes este fácil y lindo paso a paso esperando les sea de mucha utilidad y que se animen a realizarlos para decorar su casa o regalar.
Esta publicación está traducida con DeepL, editado con etiquetas HTML, y las fotos son de mi autoría, capturadas por mi Blu G5 y editadas con Pic Collage.
Muchas gracias por el apoyo y si te gustó, por favor deja un comentario.
Saludos y bendiciones.
English
Good evening dear friends.
Welcome to my favorite space, today I want to share with you this step by step, so you can learn how to make these cute Hanging ornaments in an easy, quick, simple way and with which you can decorate the tree, garlands or any space you prefer, they are made with foami.
I tell you that they are easy to make because what you will do is mark, cut, glue and ready.
So, I hope you are encouraged and I invite you to join me to make them.
For these cute pendants you'll need:
| Frosted and matte Foami | Mold or piece drawings |
|---|---|
| Paints, Brush | Pencil and Markers |
| Scissors | Wooden stick |
| Golden thread | Cardboard |
We will now start with the procedure:
- Break down the drawings and highlight with a soft lead pencil, then place on the foami and with the help of a scissors rub the paper to transfer the drawing and make sure you see that it is transferred, so you will do with all the pieces that you are going to make, trying as much as possible to go ordering the pieces.
- Now apply silicone and start assembling, as you can see it is super fast.
- After gluing the pieces you can paint the eyes of the reindeer, with marker or paint and place the white dot of light in the eyes.
- They are almost finished, you just need to cut out a piece of cardboard for each of the foami figures to finish off where you will glue the golden thread to hang and these cute pendants will be ready.
- Now I will show you another way to make them but with a beautiful star made in frosted foami and frosted cardboard.
- Here you just have to mark the star in foami and cardboard and cut it out, then mark 1 cm inside the star and cut out the center of the two pieces, apply silicone and glue.
- Let the star dry well, then apply silicone and glue the thread of the candle.
- Then insert a wooden toothpick into the star's beak and tie a piece of golden thread and you're done.
- Now it only remains to say goodbye, happy to have shared with you this easy and beautiful step by step, hoping it will be very useful and that you will be encouraged to make them to decorate your home or to give as a gift.
This publication is translated with DeepL, edited with HTML tags, and the photos are of my authorship, captured by my Blu G5 and edited with Pic Collage.
Thank you very much for the support and if you liked it, please leave a comment.
Greetings and blessings.
awww! son todos muy hermosos....
Sí, y muy fáciles de hacer.
Saludos.