
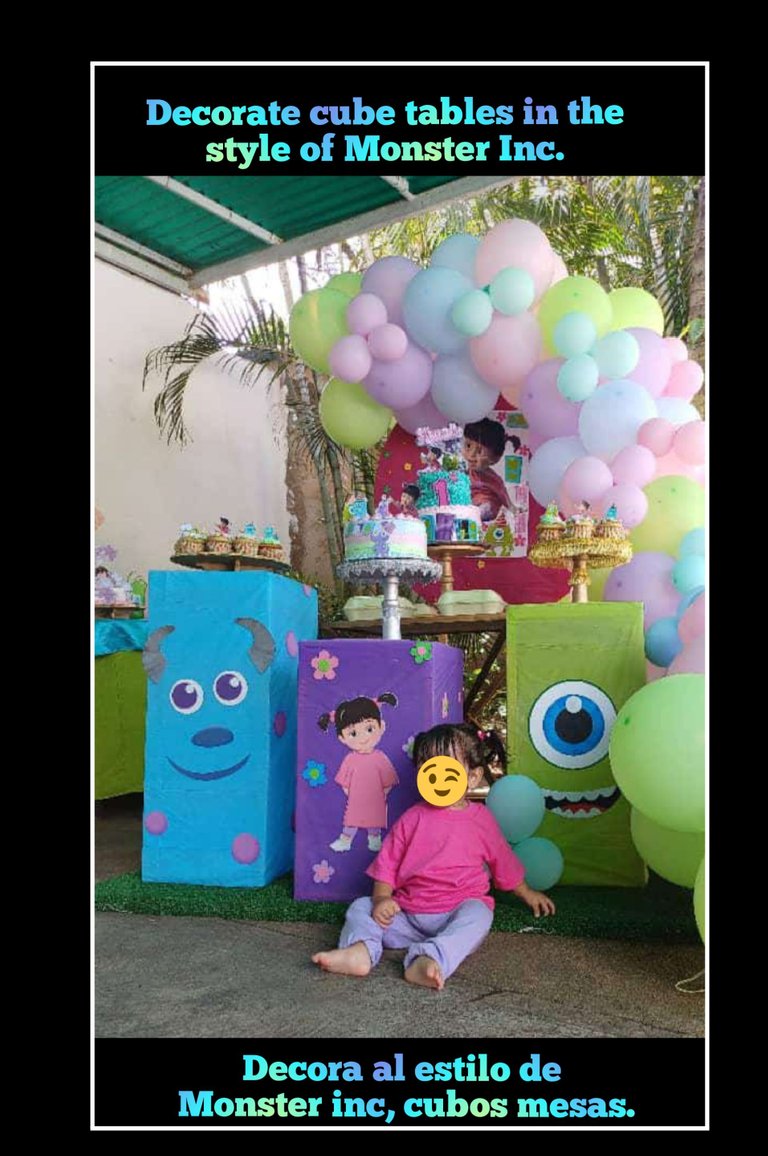
Buenas noches y bienvenidos sean todos a mi espacio favorito.
Claro está sólo hice la decoración de los cubos.
Para esto vas a utilizar los siguientes materiales:
| Manteles plásticos | Foami de colores |
|---|---|
| Pinturas y pinceles | Tijera |
| Dibujos o moldes | Lápiz |
| Silicón |
Comencemos:
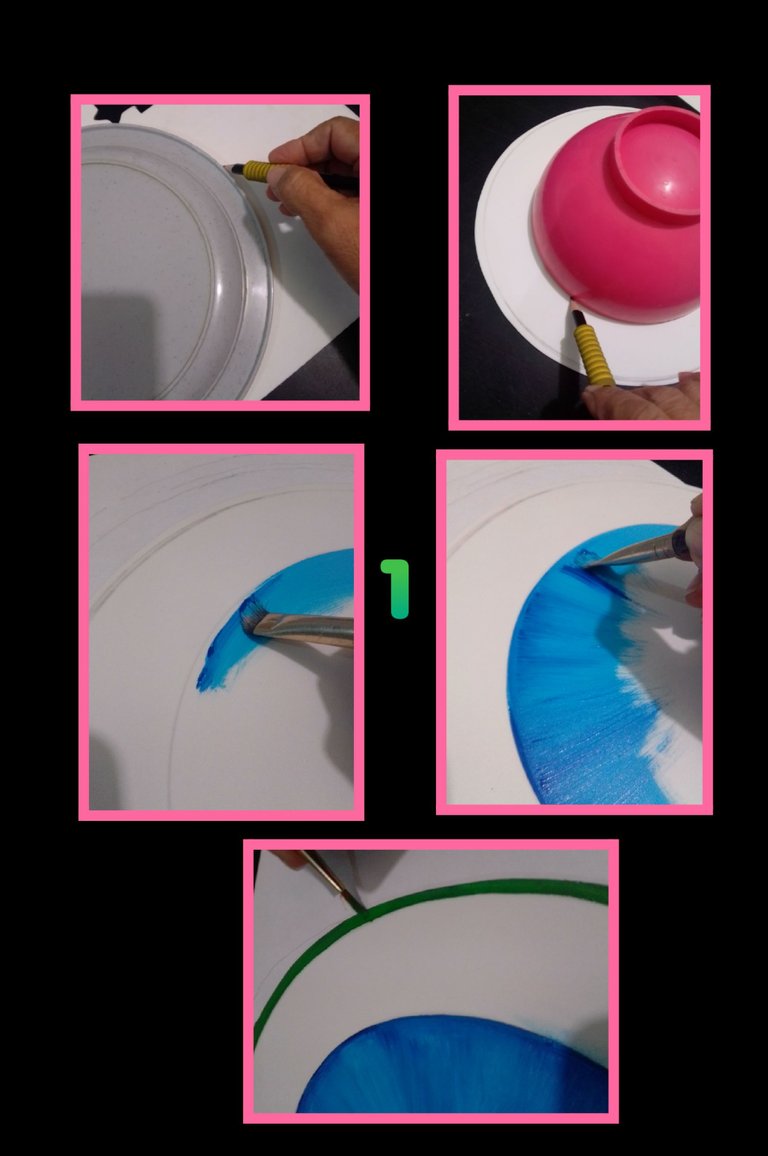
Paso 1:
- Marca una circunferencia (plato) sobre foami blanco y recorta al tamaño deseado... este mide 22cms, luego traza en el centro otra circunferencia, esto será para hacer el ojo del monstruo verde
- Aparte comienza a pintar con azul claro, marcando el borde primero con el pincel y luego moja el pincel con pintura azul fuerte y empieza a barrer la pintura desde la orilla hacia el centro hasta pintarlo todo, luego con un pincel celda fina, pinta todo el contorno del ojo con pintura verde y deja secar.
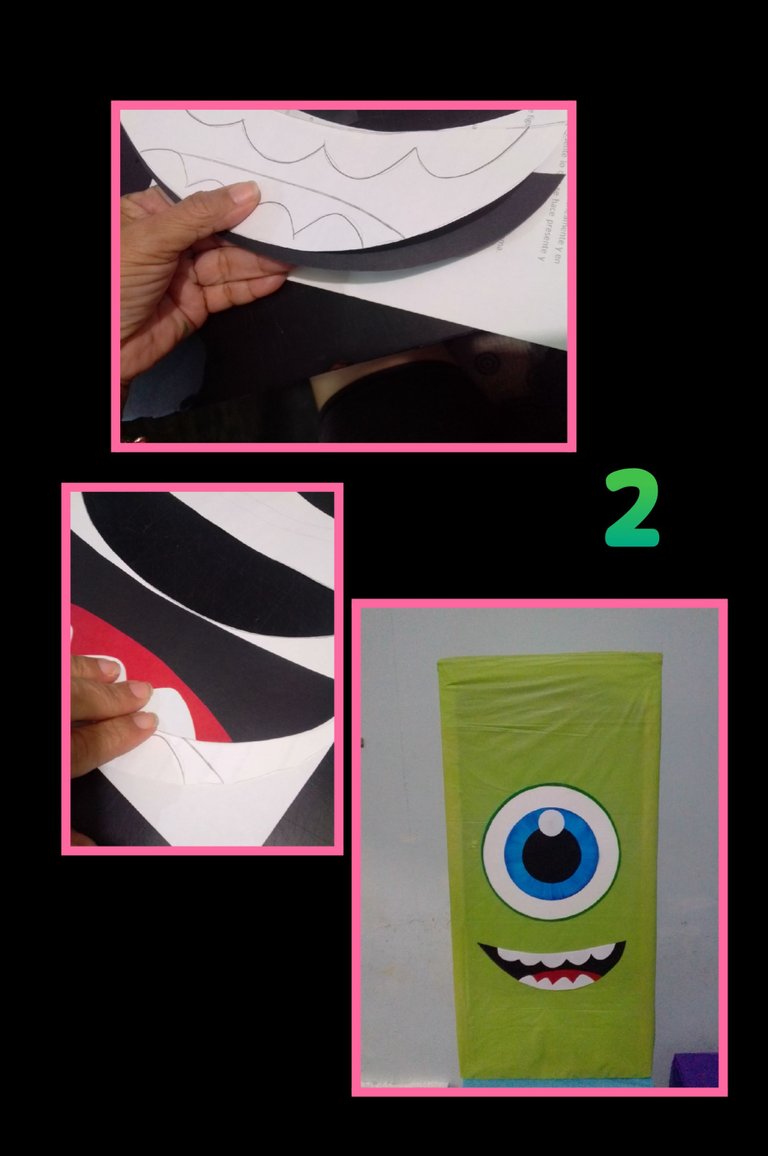
Paso 2:
- Ahora recorta la boca, dientes, lengua y comienza a pegar y armar la cara de Mikel, puedes forrar los cubos antes o después que hagas las piezas a pegar.
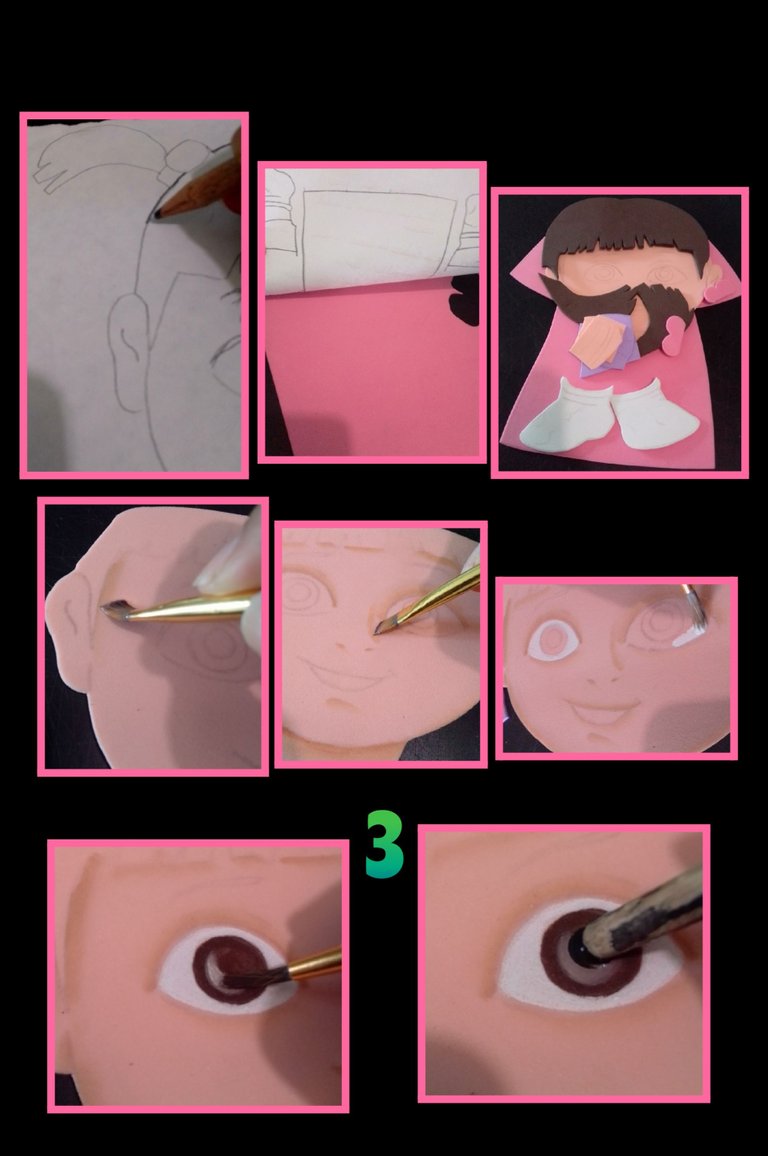
Paso 3:
- Remarca el dibujo de Boo y transfiere en foami, colocsndo
el dibujo sobre el foami y frotando con la tijera, luego recorta todas las piezas y comienza a pintar sombreando todos los rasgos de la carita, y rellena los ojos primero con pintura blanca y luego con pintura marrón, deja secar y despuéscon la punta trasera del pincel pinta el iris y luego pinta las piezas restantes.
Paso 4:
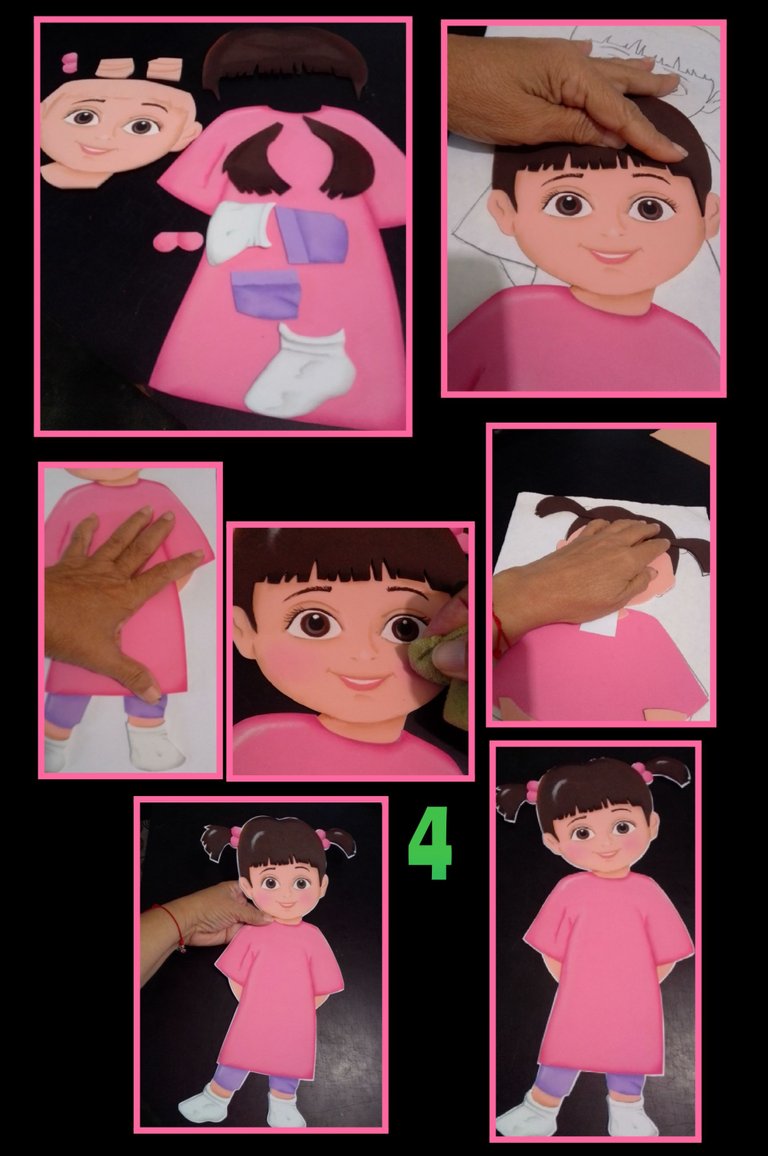
- Después de dejar secar todas las piezas, comienza a aplicar silicón y a pegar hasta armar toda la figura de Boo.
- Luego pega la figura sobre cartulina blanca y recorta dejando 1 o 2 milímetros de borde.
Paso 5:
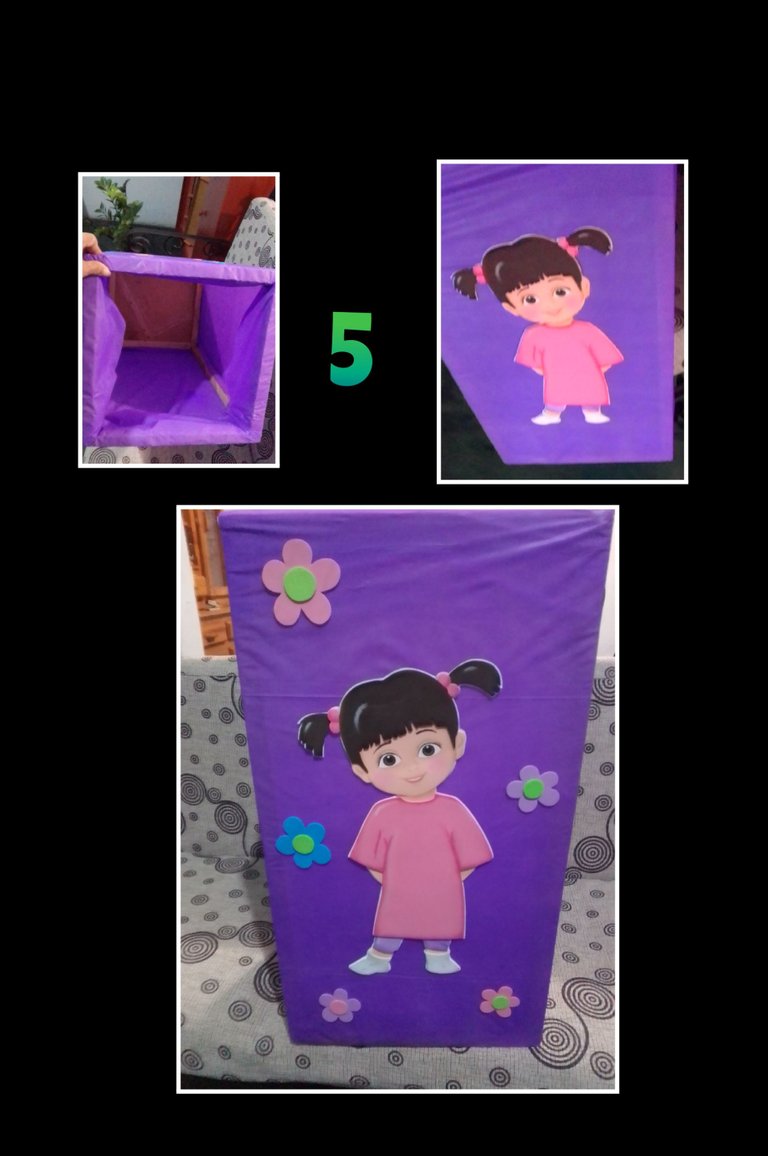
- Forra todos los cubos y luego aplica silicón y pega a Boo, recorta unas florecitas y pega para decorar frente y lados, igualmente decora el otro cubo con el monstruo azul, haciendo ojos, boca, nariz, cuernos y manchas...
Nota: también puedes forrar los cubos con papel bond, papel crepé o cartulinas, otra forma de hacer es con cartón o cartulina, si son sólo para decorar, porque estos están hechos con madera, para usar como bases de pastel y dulces.
Como puedes ver, son una manera muy bonita de decorar y ahorrar dinero.
Aquí te dejo las fuentes.
https://www.pinterest.es/pin/476255729359152752/
https://www.pinterest.es/pin/476255729358660709/
Editada con: HTML
Fotos capturadas por: Teléfono BLU G5
Editor: GridArt.
Ahora me despido esperando sea de tu agrado y provechoso mi tutorial y si tienes alguna duda, escríbeme que te ayudaré.
Y muchas gracias por visitarme, leerme y apoyarme.
Good evening and welcome to my favorite space.
For this you are going to use the following materials:
| Plastic tablecloths | colored foami |
|---|---|
| Paints and paintbrushes | Scissors |
| Drawings or molds | Pencil |
| Silicone |
Let's get started:
Step 1:
- Mark a circumference (plate) on white foami and cut it to the desired size... this measures 22cms, then draw in the center another circumference, this will be to make the eye of the green monster.
- Then start painting with light blue, marking the edge first with the brush and then wet the brush with strong blue paint and start sweeping the paint from the edge to the center until the whole thing is painted, then with a fine cell brush, paint the whole outline of the eye with green paint and let it dry.
Step 2:
- Now cut out the mouth, teeth, tongue and start gluing and assembling Mikel's face, you can line the cubes before or after you make the pieces to glue.
Step 3:
- Outline the drawing of Boo and transfer it on foami, placing the drawing on the foami and rubbing with scissors.
the drawing on the foami and rubbing with the scissors, then cut out all the pieces and start painting shading all the features of the face, and fill the eyes first with white paint and then with brown paint, let dry and then with the back tip of the brush paint the iris and then paint the remaining pieces.
Step 4:
- After letting all the pieces dry, start applying silicone and glue until the whole Boo figure is assembled.
- Then glue the figure on white cardboard and cut out leaving 1 or 2 millimeters of border.
Step 5:
- Line all the cubes and then apply silicone and glue Boo, cut out some little flowers and glue them to decorate the front and sides, also decorate the other cube with the blue monster, making eyes, mouth, nose, horns and spots...
Note: you can also line the cubes with bond paper, crepe paper or cardboard, another way to do it is with cardboard or cardboard, if they are just for decoration, because these are made with wood, to use as bases for cakes and candies.
As you can see, they are a very nice way to decorate and save money.
Here are the sources.
https://www.pinterest.es/pin/476255729359152752/
https://www.pinterest.es/pin/476255729358660709/
Edited with: HTML
Photos captured by: BLU G5 phone
Publisher: GridArt.
Now I say goodbye hoping you like and profitable my tutorial and if you have any questions, write me that I will help you.
And thank you very much for visiting, reading and supporting me.
Que lindo, me encanta ❤️ Te quedó hermosa Boo 🥰💕
Hola amiga, que bueno que te gustó.
Y muchas gracias por leer y comentar mi tutorial.
Gracias.
Excelente creatividad amiga te felicito feliz día.
Gracias amiga, igual para ti.
Feliz tarde y bendiciones.