

Buenas noches mis queridos amigos de esta comunidad.
Cómo están?
Por motivos ajenos a mi voluntad, estuve ausente, pero bueno, gracias a Dios estoy nuevamente con ustedes. Y feliz de participar en el nuevo desafío de Reciclaje de la amiga @Jennyzer
Hoy les mostraré en mi tutorial cómo hacer un Lindo Arbolito de Navidad, con materiales reciclables, económicos y fáciles de conseguir
Empezaré con los materiales que vas a usar:
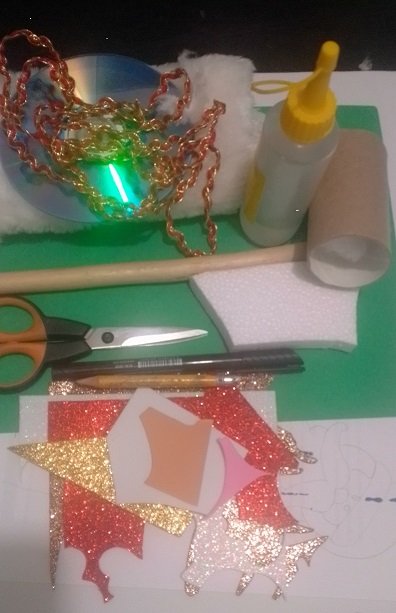
| Cartulina verde | Tubo de papel sanitario |
|---|---|
| Cd dañado | Icopor |
| Palo de madera | Peluche (Tela) |
| Retazos de fomi | Lápiz |
| Marcador negro | Tijera |
| Cuchilla | Moldes |
| Silicón líquido | Pasamanería (adorno) |
Comencemos el Procedimiento:
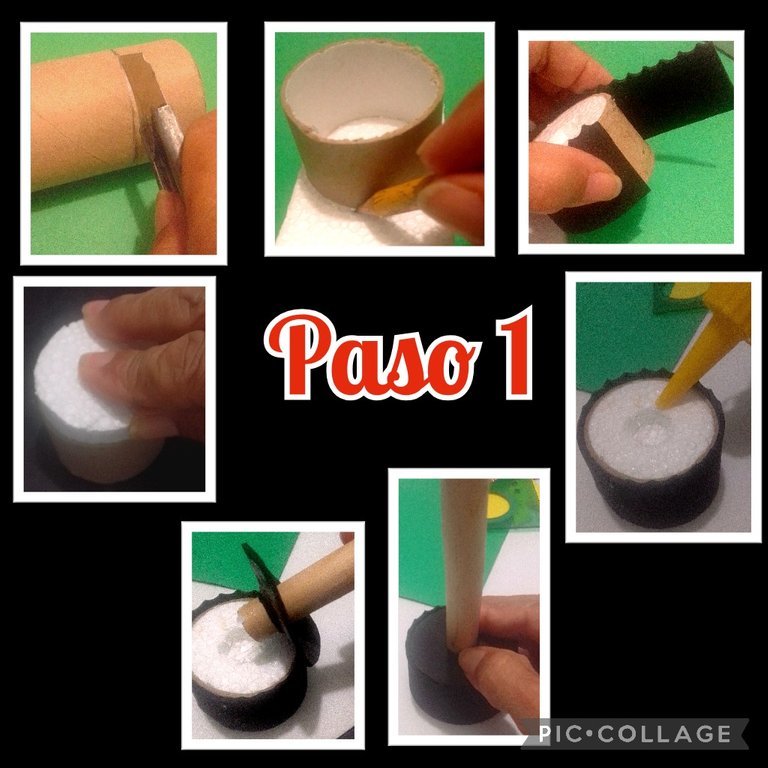
- Recorta con la cuchilla el tubo de cartulina de 4 cms de altura, luego marca sobre el anime o icopor, todo el contorno del tubo, recorta, aplica silicón y mete dentro del tubo de cartulina.
- Aparte, recorta una tira de foami de color negro y pega alrededor del tubo, después abre un orificio en el anime, aplica silicón y recorta un círculo en foami al que harás un orificio del grueso del palo, mete en el fomi y pega, introduciendo bien el palo en el anime.
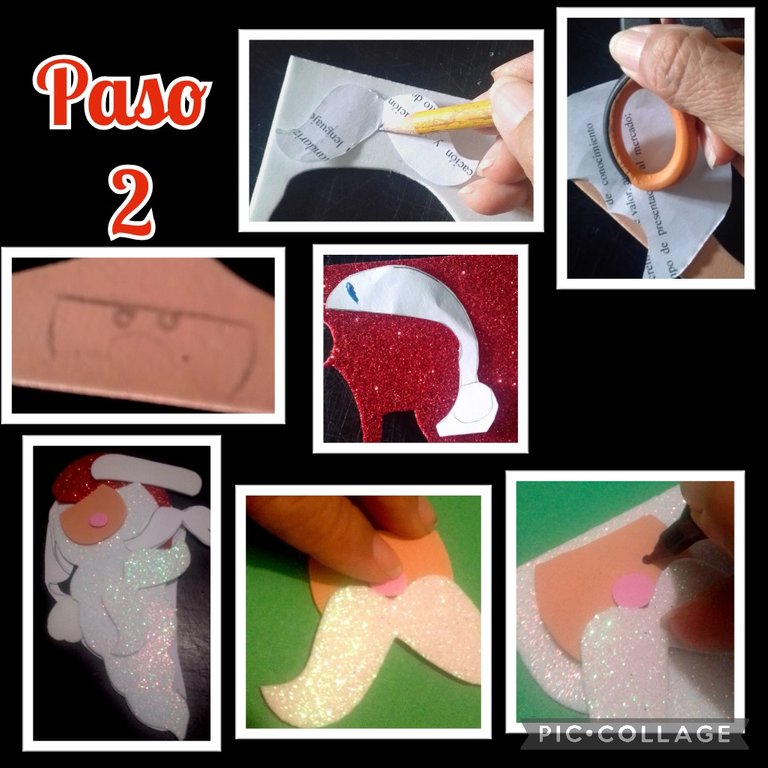
- Ahora transfiere y recorta la carita del santa en el foami, escarchado y mate, puedes desglosar el dibujo o remarcarlo con un lápiz de mina blanda y frotar con las orejas de la tijera para transferirlo y recorta cada una de las piezas, después empieza armando la carita pegando las piezas con silicón líquido y pinta los ojitos con marcador negro.
- Termina de armar la carita.
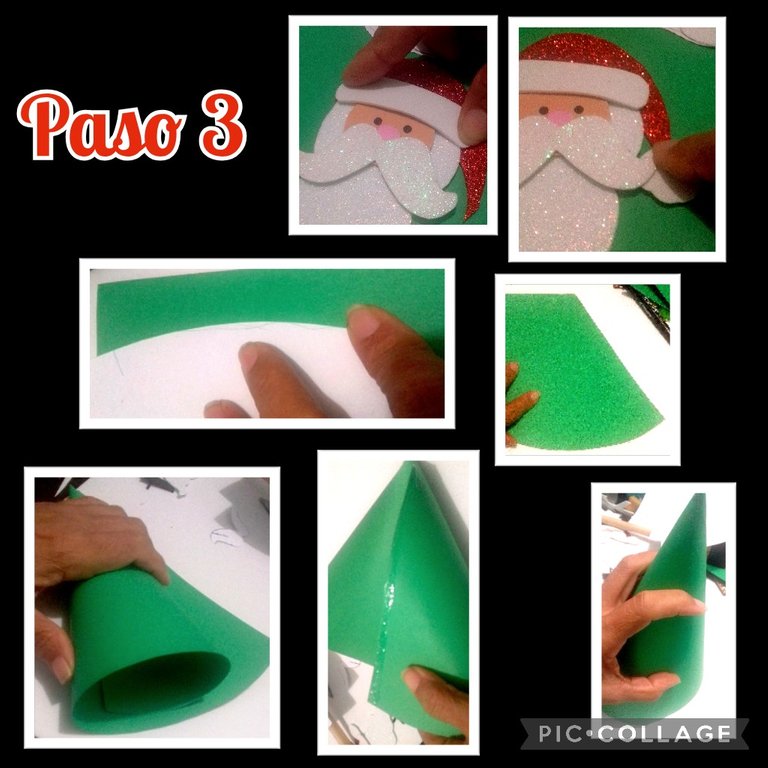
- Ahora hay que marcar el molde de un cono sobre la cartulina, si no tienes molde, lo puedes hacer usando un plato o algo redondo, marca sobre la cartulina y quitas un cuarto de la circunferencia o la mitad, depende del tamaño que quieras el cono.
- Recorta y enrolla para que tome primero la forma, luego aplica silicón en una de las orillas de cono y pega sujetando un momento hasta que pegue bien el cono.
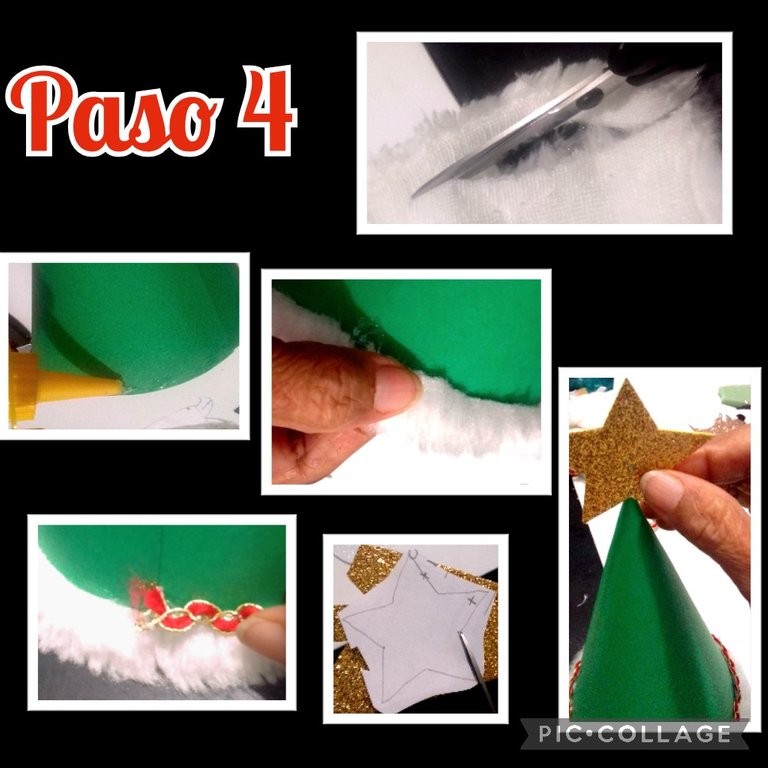
- Recorta una tira delgada en tela de peluche, aplica silicón liquido por toda la orilla del cono y pega la tira de peluche alrededor del cono.
- Aparte aplica nuevamente silicón en el contorno de la tira de peluche y pega la pasamanería roja con dorado para darle un mejor acabado y a la vez decorar.
- Ahora toca recortar la estrella de la punta del árbol y otras estrellas pequeñas para pegar en la parte baja del peluche para que guinden.
- Y así va quedando este lindo arbolito.
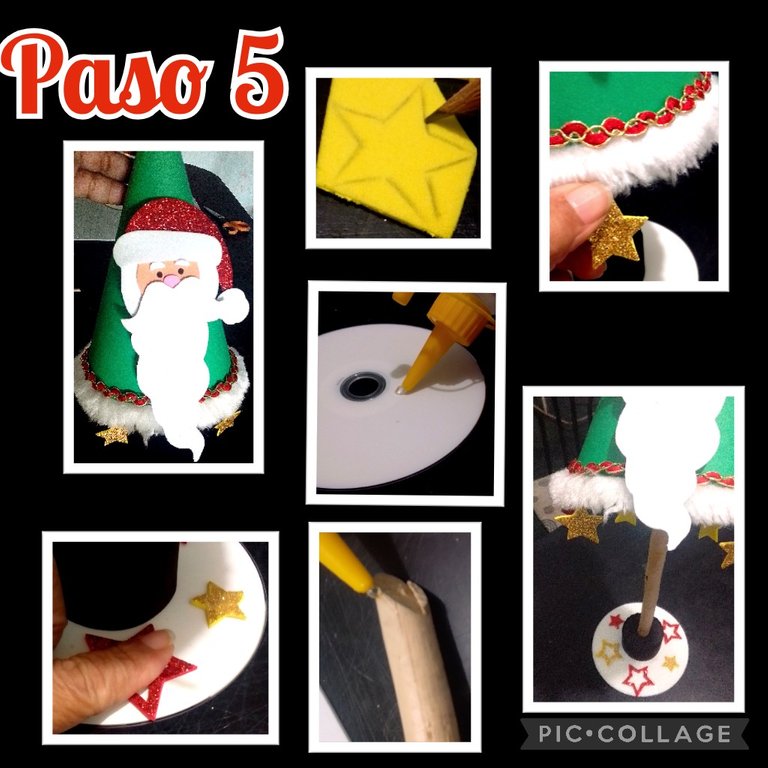
- Aparte recorta otras estrellas y le sacas la parte del centro.
- Aplica silicón y pegas el tubo forrado o la base del árbol en el Cd y decora pegando las estrellitas.
- Por último aplica silicón en la punta del palo de madera y pegas introduciendo el cono y deja secar hasta que pegue bien.
Así ya quedó terminado este lindo Arbolito de navidad para que decores cualquier espacio de tu casa.

Ahora me despido esperando te guste este lindo y fácil tutorial.
Mi publicación la traduje con DeepL, usé etiquetas HTML y las fotos son editadas con Pic Collage y capturadas por mi Blu G5.
Muchas gracias por el apoyo y si te gustó mi paso a paso me encantará ver tu comentario.
Saludos.
English:
Good evening my dear friends of this community.
How are you?
For reasons beyond my control, I was absent, but well, thank God I am again with you. And happy to participate in the new Recycling challenge from friend @Jennyzer.
Today I will show you in my tutorial how to make a nice Christmas tree, with recyclable, cheap and easy to get materials.
I will start with the materials you are going to use:
| Green cardboard | Sanitary paper tube |
|---|---|
| Damaged CD | Icopor |
| Wooden stick | Stuffed animal (cloth) |
| Fomi scraps | Pencil |
| Black marker | Scissors |
| Cutter | Molds |
| Liquid silicone | Trimmings (ornament) |
Let's start the Procedure:
- Cut out the 4 cm high cardboard tube with the knife, then mark the entire outline of the tube on the anime or styrofoam, cut it out, apply silicone and put it inside the cardboard tube.
- Cut out a strip of black foami and glue around the tube, then open a hole in the anime, apply silicone and cut out a circle in foami to which you will make a hole the thickness of the stick, put it in the fomi and glue, inserting the stick well into the anime.
- Now transfer and cut out the Santa's face in the foami, frosted and matte, you can break down the drawing or highlight it with a soft lead pencil and rub with the ears of the scissors to transfer it and cut out each of the pieces, then start assembling the face by gluing the pieces with liquid silicone and paint the eyes with black marker.
- Finish assembling the face.
- Now you have to mark the mold of a cone on the cardboard, if you don't have a mold, you can do it using a plate or something round, mark on the cardboard and remove a quarter of the circumference or half, depending on the size you want the cone.
- Cut it out and roll it so that it takes the shape first, then apply silicone on one of the edges of the cone and glue it holding it for a moment until the cone sticks well.
- Cut a thin strip of plush fabric, apply liquid silicone all around the edge of the cone and glue the plush strip around the cone.
- Apply silicone again around the edge of the plush strip and glue the red trimmings with gold to give it a better finish and decorate at the same time.
- Now it's time to cut out the star at the top of the tree and other small stars to glue to the bottom of the stuffed animal to hang.
- And this is how this cute little tree looks like.
- Cut out other stars and remove the center part.
- Apply silicone and glue the lined tube or the base of the tree on the CD and decorate by gluing the stars.
- Finally apply silicone on the tip of the wooden stick and glue by inserting the cone and let it dry until it sticks well.
This is how this cute Christmas Tree, is finished so you can decorate any space in your home.
Now I say goodbye hoping you like this nice and easy tutorial.
My post was translated with DeepL, I used HTML tags and the photos are edited with Pic Collage and captured by my Blu G5.
Thank you very much for the support and if you liked my step by step I will love to see your comment.
Salutations.