
Buenas noches queridos amigos, cómo están?
Bienvenidos sean todos a mi Blog.
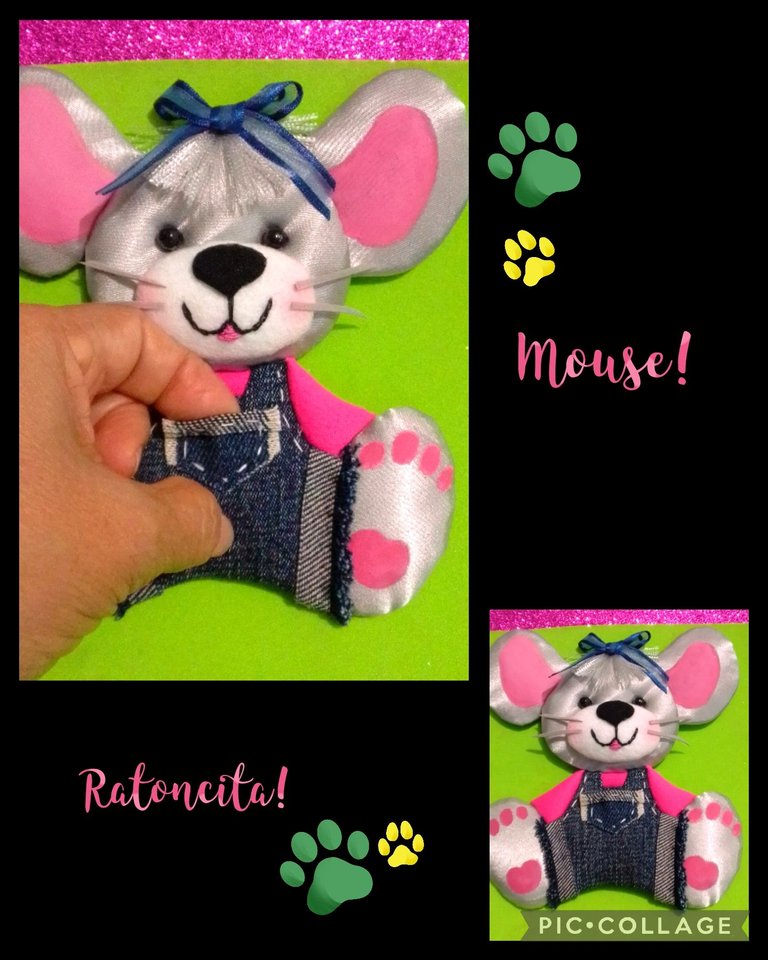
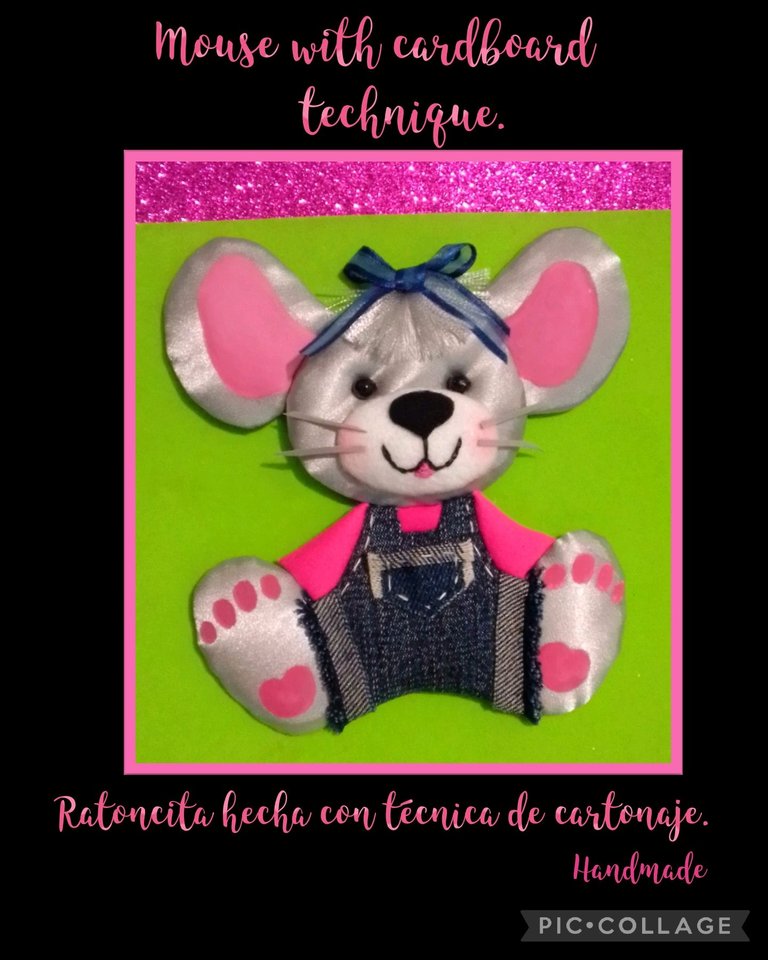
Nuevamente estoy por acá para compartir con ustedes un tutorial donde les mostraré como realicé esta Ratoncita con una técnica donde uso como base el cartón.
Hice una pequeña investigación para compartir con ustedes y descubrí que la llaman Cartonaje, pero dicho término lo utilizaban los egipcios y era un envoltorio funerario para las momias el cual realizaban con varias capas de tela y goma de resina y bueno, creo no tiene nada que ver con mi proyecto pero siempre es bueno aprender, seguí investigando y encontré que Cartonaje es el arte de elaborar objetos teniendo como base el cartón y con el cual se pueden hacer muchas manualidades, de todas maneras les dejaré más adelante las fuentes por si tienen más interés en saber sobre este término.
Entonces mi tutorial como antes lo mencioné, tiene de base el cartón el cual forré con goma espuma y tela, así que ahora me toca explicarles y de una vez los invito a que me acompañes a ver y si te gusta, lo hagamos juntos.
Para esto vas a necesitar:

| Cartón | Retazos de tela Raso, jeans y algodón |
|---|---|
| Algodón | Agujas, hilos |
| Tijera | Silicón |
| Cinta de tela | Perlitas |
| Pinceles y pinturas | Lápiz |
| Dibujo | Cartulina blanca |
| Tiza | Foami |
| Papel carbón |
Comencemos:
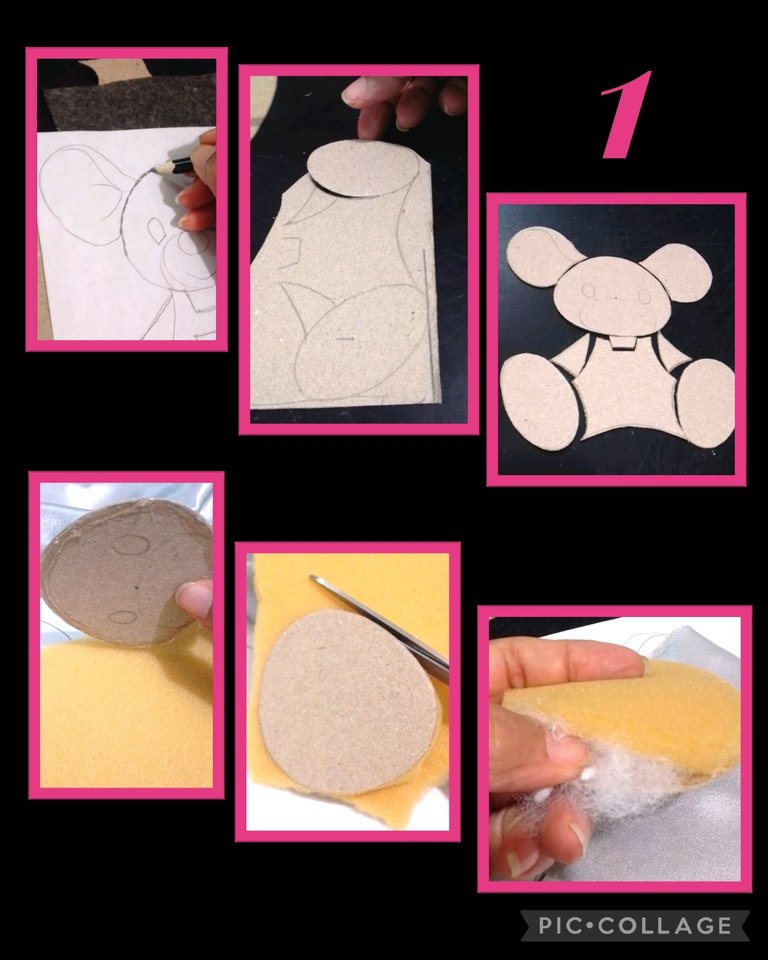
Transferir el dibujo.
- Coloca sobre el cartón el papel carbón y el dibujo, puedes fijar con un poco de cinta adhesiva y comienza a remarcar cada una de las partes del dibujo, luego recorta una a una las piezas.
- Aplica silicón por el borde de cada pieza dejando 1 ó 2 cms sin pegamento, luego pega a la goma espuma, recorta por todo el borde y si quieres puedes rellenar con un poco de algodón.

- Coloca la pieza sobre la tela y marca 1 cm más grande, recorta, aplica silicón por la parte del cartón y pega la tela haciendo pliegues hasta forrar toda la pieza, así puedes forrar todas las piezas, también puedes aplicar silicón sobre el cartón y pegar algodón. (ver foto).
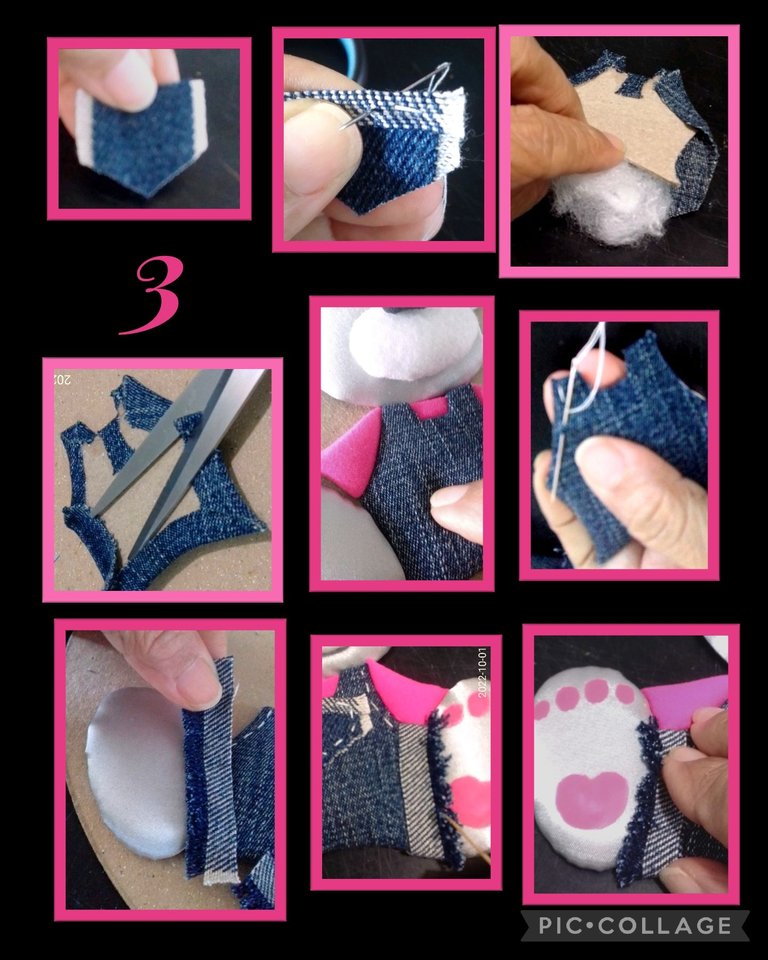
- Aparte recorta en tela de jeans, yo usé un pedacito de un pantalón dañado y recorté un bolsillo al que deshilache por los lados e hilvané por todo el borde.
- Luego recorté la forma de la braga 1 cm más grande, apliqué silicón en la parte de arriba, luego rellené con un poco de algodón para hacerle una barriguita, apliqué nuevamente silicón por la parte inferior y pegué todo el borde.
- Dejé secar y recorté los pliegues para que a la hora de pegar sobre la base no quedara levantado.
- Después forré el cuello y las mangas repitiendo procedimientos anteriores.
- Y para decorar le hice costuras hilvanando.
- Aparte recorté dos (2) tiritas y deshilaché por el lado revés de la tela y pegué para darle forma de ruedo a la braga, jajaja, recuerdo mi niñez cuando jugaba a hacerle ropa a mis muñecas..

- Ahora pinta el centro de las orejas con pintura rosada y deja secar.
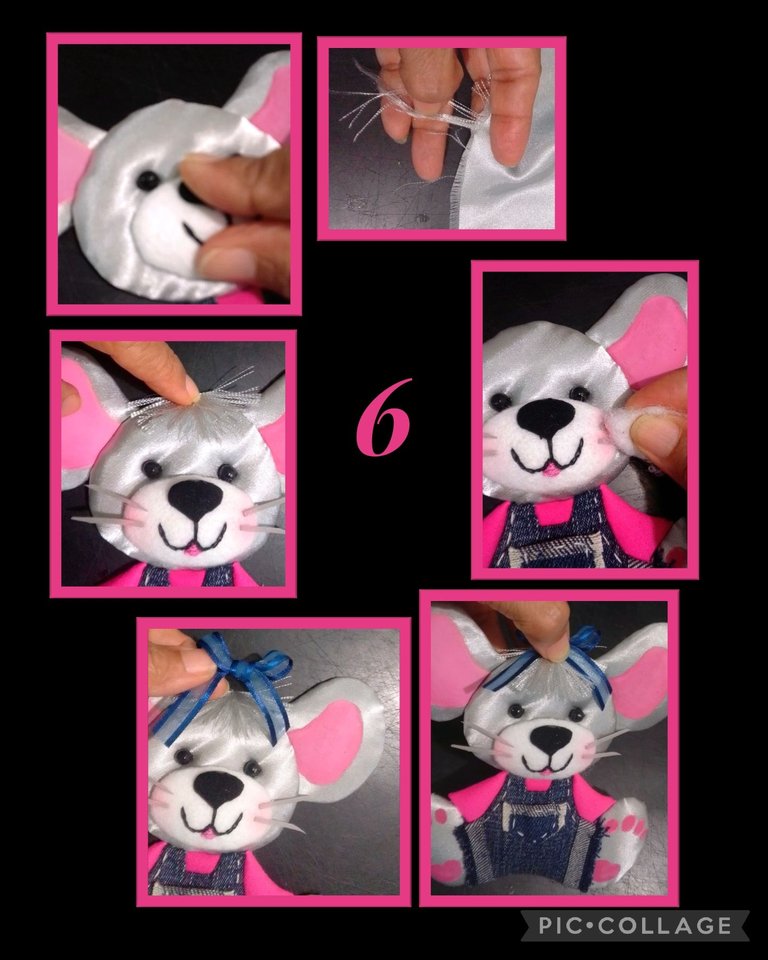
- Al hocico le hice con punto cadeneta la forma de la boca, rellene la boquita con hilo rosado y luego cosí las perlitas con una aguja un poco gruesa para traspasar el cartón y fijar así lo que serán los ojos.
Como ves ya vamos bien adelantados.
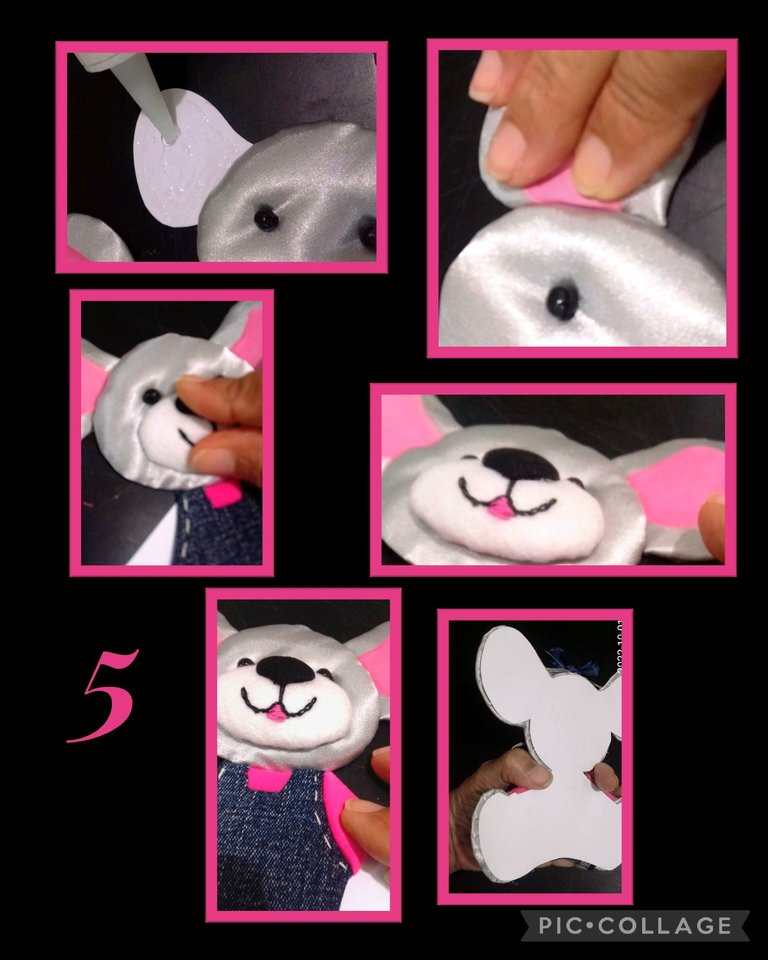
- Igual que en el primer paso, transfiere sobre la cartulina blanca el dibujo de la ratoncita y recorta dos (2) milímetros más pequeño la silueta y comienza a aplicar silicón y pega como armando un rompecabezas, cada pieza en su sitio.
- La naríz la hice igual que las demás piezas, aplica silicón y pega haciendo presión hasta que pegue bien.
- Para hacerle el flequillo, deshilacha por la orilla la tela de raso y cuando tengas suficiente hilos, amarra en el centro con un pedacito de hilo y coloca sobre la frente para medir el largo y recortar el exceso.
- Recorta en foami gris, 2 tiritas delgadas para hacer los bigotes y pega luego con un poquito de tiza ponle color a los cacheticos.
- Pega también el flequillo y haz un lacito con la cinta y pega.
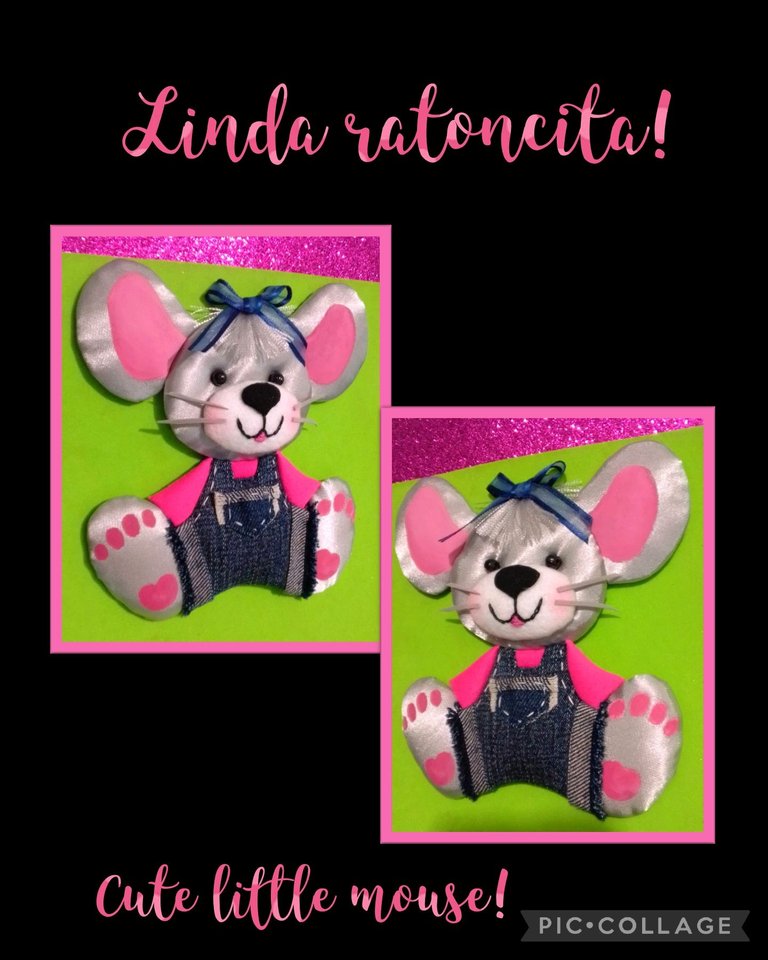
Y así quedó terminada esta linda Ratoncita.

Esta linda Ratoncita la hice para decorar un guacal el cual realicé con unos trocitos de madera que tenía, lo pinté y coloqué para decorar unas asas con rabo de ratón color rosa fluorescente para combinar con los colores de la ratoncita.
Este tipo de figuras les puedes dar muchos usos, te sirven para decorar carpetas, cuadros, repisas, habitaciones en fin para lo que desees.
Así que ahora te mostraré unas fotos para que veas lo linda y a la vez sencilla que es y que tu puedes realizar solo con un poco de paciencia y creatividad.
Fuentes:
https://es.wikipedia.org/wiki/Cartonaje
https://claudiarafaella.com/que-es-el-cartonaje/#:~:text=El%20cartonaje%20es%20el%20arte,y%20la%20estructura%20es%20compacta.
Ahora me despido muy contenta y agradecida de tu visita, espero te guste mi tutorial y de ser así me encantará ver tu comentario.
Gracias por tu apoyo.
Saludos.
Ingles:
Good evening dear friends, how are you?
Welcome to my Blog.
So my tutorial as I mentioned before, is based on cardboard which I lined with foam rubber and fabric, so now it's my turn to explain and I invite you to join me to see and if you like it, let's do it together.
For this you will need:
| Carton | Fabric scraps Satin, denim and cotton |
|---|---|
| Cotton | Needles, threads |
| Scissors | Silicone |
| Cloth ribbon | Beads |
| Brushes and paints | Pencil |
| Drawing paper | White cardboard |
| Chalk | Foami |
| Charcoal paper |
Let's start:
Transfer the drawing.
- Place on the cardboard the carbon paper and the drawing, you can fix with some tape and start to outline each of the parts of the drawing, then cut one by one the pieces.
- Apply silicone on the edge of each piece leaving 1 or 2 cm without glue, then glue to the foam rubber, cut around the edge and if you want you can fill with a little cotton.
- Place the piece on the fabric and mark 1 cm larger, cut, apply silicone on the cardboard side and glue the fabric making folds until the whole piece is covered, so you can cover all the pieces, you can also apply silicone on the cardboard and glue cotton (see picture).
- I used a small piece of a damaged pair of pants and cut out a pocket that I frayed on the sides and basted all the way around the edge.
- Then I cut out the shape of the panty 1 cm bigger, applied silicone on the top, then stuffed some cotton to make a little belly, applied silicone again on the bottom and glued all around the edge.
- I let it dry and trimmed the folds so that when I glued it on the base it would not be raised.
- Then I lined the neck and sleeves repeating the previous procedures.
- And to decorate, I basted the seams.
- Besides, I cut two (2) strips and frayed the back side of the fabric and glued to give the panties the shape of a ruffle, hahaha, I remember my childhood when I used to play at making clothes for my dolls...
- Now paint the center of the ears with pink paint and let dry.
- To the snout I made the shape of the mouth with chain stitch, filled the mouth with pink thread and then sewed the beads with a slightly thick needle to pierce the cardboard and thus fix what will be the eyes.
As you can see we are already well advanced.
- As in the first step, transfer the drawing of the mouse onto the white cardboard and cut the silhouette two (2) millimeters smaller and start applying silicone and glue it as if you were putting together a puzzle, each piece in its place.
- The nose I did the same as the other pieces, apply silicone and glue with pressure until it sticks well.
- To make the fringe, fray the satin fabric around the edge and when you have enough threads, tie in the center with a little piece of thread and place on the forehead to measure the length and trim the excess.
- Cut in gray foami, 2 thin strips to make the whiskers and then glue with a little bit of chalk to color the cheeks.
- Also glue the fringe and make a bow with the ribbon and glue.
And this is how this cute little mouse is finished.
I made this cute little mouse to decorate a crate which I made with some pieces of wood that I had, I painted it and placed to decorate some handles with fluorescent pink mouse tail to match the colors of the mouse.
This type of figures can be used in many ways, you can use them to decorate folders, pictures, shelves, rooms, whatever you want.
So now I will show you some pictures so you can see how beautiful and at the same time simple it is and that you can make it with just a little patience and creativity.
Sources:
https://es.wikipedia.org/wiki/Cartonaje
https://claudiarafaella.com/que-es-el-cartonaje/#:~:text=The%20cardboard%20is%20the%20art,and%20the%20structure%20is%20compact.
Now I say goodbye very happy and grateful for your visit, I hope you like my tutorial and if so I will love to see your comment.
Thanks for your support.
Greetings.
Te felicito amiga realmente te quedó hermoso el trabajo 😊
Muchas gracias amiga por comentar y que bueno que te gustó!
Saludos.
Qué cosita tan cute amiga!. Está finamente elaborado y muy prolijo como todos tus trabajos denotando tanto amor. Gracias por compartir con nosotros.
Que lindo tu comentario querida amiga, hecho y compartido con mucho amor.
Y a ti por visitarme.
Siempre y con mucho gusto.
Que interesante técnica, no la conocía, se ve muy fácil y el resultado es bonito, jamas me habría imaginado que se hizo de esa forma, te quedó muy linda la ratoncita, esta muy tierna y los detalles hermosos ♥️
Hola amiga, que bueno saber que aprendiste algo nuevo y me alegra mucho que te haya gustado.
Muchas gracias por visitarme y comentar.
Saludos y bendiciones para ti.
Your content has been voted as a part of Encouragement program. Keep up the good work!
Use Ecency daily to boost your growth on platform!
Support Ecency
Vote for new Proposal
Delegate HP and earn more
Muchas gracias @ecency por el apoyo.
Me encanta este ratoncito y la técnica que nos presentas es muy buena Te felicito.
Gracias amiga, por el comentario.
Esto no puede ser más adorable, tus proyectos son únicos al ver la imagen de portada ya sé que son de tu autoría, como siempre te digo tienes muchísimo talento, gracias por compartirlo.
Gracias mi querida amiga.
Siempre llenando mi vida de alegría con tus lindos comentarios.
Un placer hacerlo y con mucho cariño.
Saludos y gracias por visitarme.
Tu también haces cosas muy lindas y otras deliciosas.
Saludos y gracias por visitarme.