Buenas noches queridos amigos de esta comunidad.
Deseo que esta semana sea de bendiciones para todos.
En ese entonces nos invitaba a participar en sus Retos de Reciclaje Creativo y donde cada uno de nosotros hacía o creaba una pieza usando materiales de reciclaje, haciendo de esto una bella manera de cuidar nuestro planeta y desde la primera vez que lo ví, me pareció una magnifica idea que alguien nos incentivara a crear con materiales que la mayoría de las veces botamos, pudiendo hacer cosas útiles lindas y lo más importante cuidando nuestro planeta.
Y eso me hizo ser su fans, por eso siempre paso a ver sus publicaciones, además de las manualidades a ella le gusta el maquillaje, la costura, cocina, en fin en sus publicaciones podemos aprender de todo un poco.
Aparte quiero agradecerle el apoyo que le ha dado a mis publicaciones y por el aporte que le ha brindado a esta plataforma con cada una de sus publicaciones.
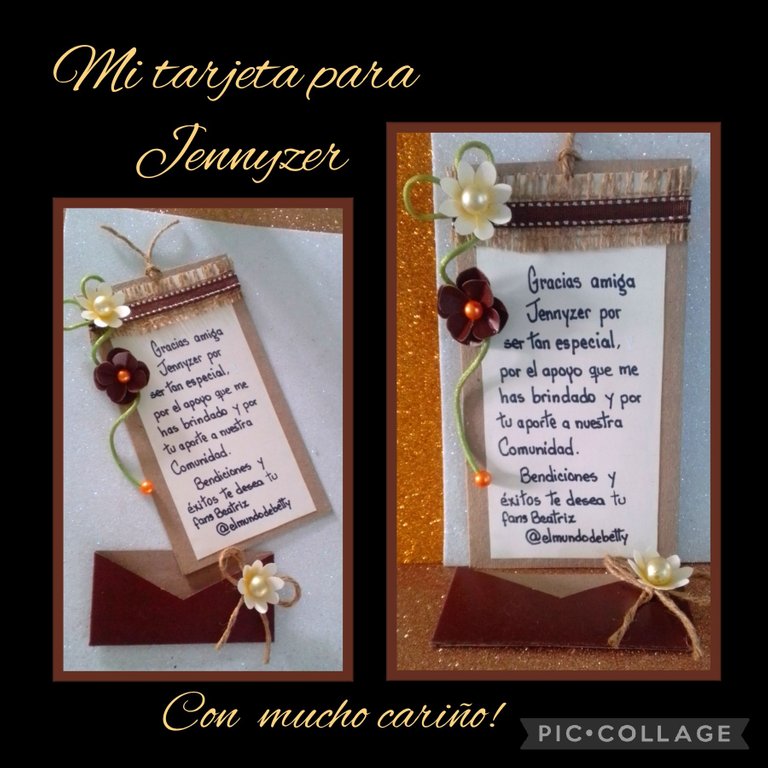
Ella es Jenny Zerpa @jennyzer.
De verdad es muy bueno y lindo tu trabajo y deseo sigas haciéndolo bien.
Entonces ahora sólo queda mostrarles el paso a paso de la Tarjeta que le hice con mucho cariño .
Los materiales que utilicé son materiales reciclables!
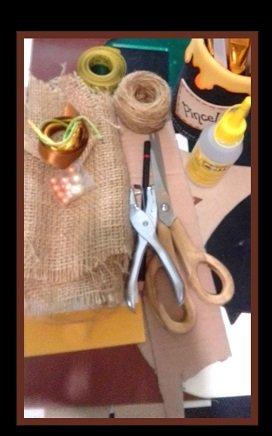
| Cartón crudo | Cartulina marrón y beige retazos |
|---|---|
| Tela de saco | Cinta de tela |
| Mecatillo hilo | Cordón rabo de ratón |
| Perlitas | Tijera |
| Regla y lápiz | Tijera y saca bocado |
| Silicón | Marcador negro |
Acompáñame a realizar el procedimiento:
Paso 1:
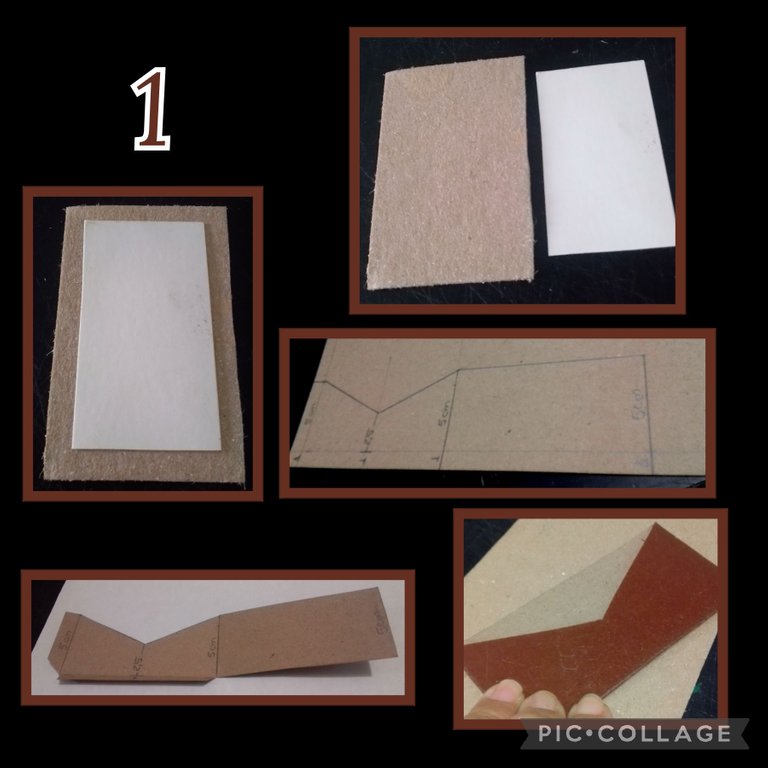
- Empezaremos recortando dos (2) rectángulos uno en cartón y otro en cartulina beige, del tamaño de tu preferencia.
Este tiene 16cm de altura por 9,8cm de ancho. - Luego traza el mini sobre en la cartulina marrón, haciendo un rectángulo de 5cm de altura por 20cm de ancho y le aumentas a la altura y al ancho 1 cm de pestaña para pegar y saca un triángulo en la parte delantera del sobre y cierra pegando con silicón para armar el sobre.
Paso 2
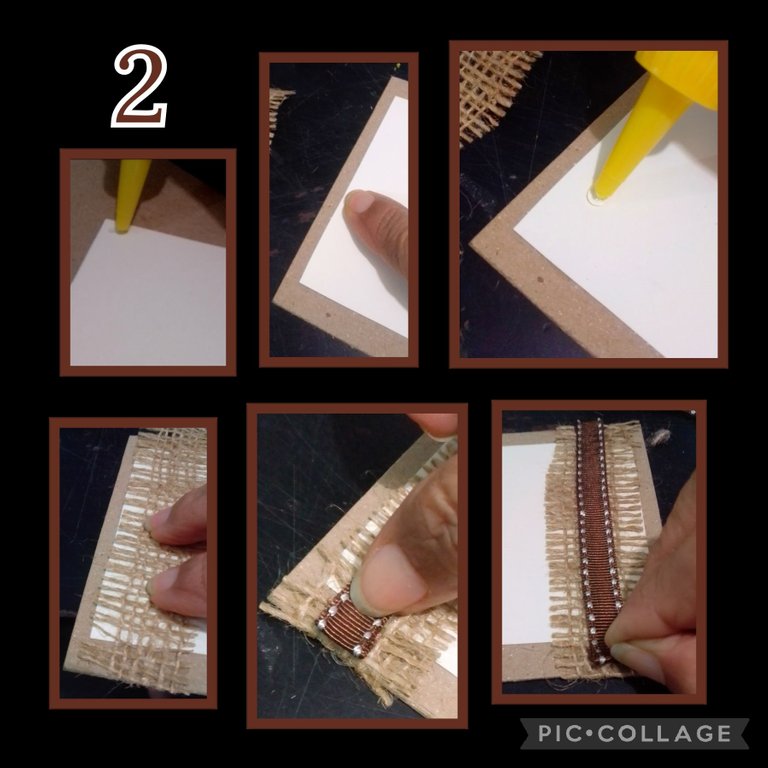
- Aplica silicón al rectángulo de cartulina beige y pega al cartón, luego aplica silicón en la parte superior de la cartulina beige y recorta y pega una tira de 2cm de tela de saco alrededor del cartón, deja secar y pega un pedazo de cinta en el medio de la tira de saco. (ver foto)
Paso 3:
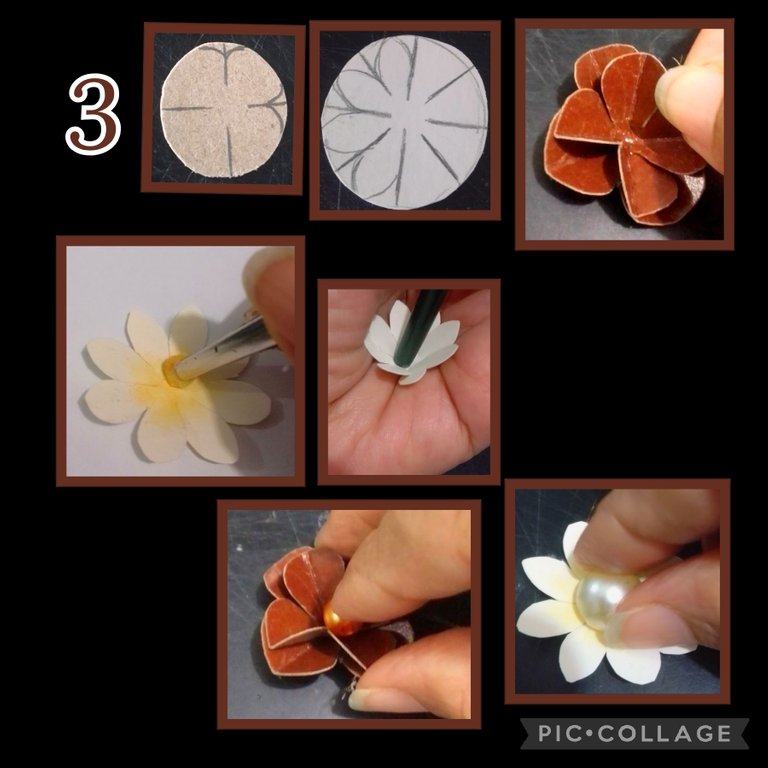
- Recorta cuatro (4)círculos, 2 marrones y 2 beige y divide en forma de cruz los marrones, recorta dando forma redondeada a las puntas para formar los pétalos y cada pétalo dobla por la mitad y pega uno dentro del otro, aparte divide igual los círculos beige pero en vez de 4 pétalos vuelve a dividir y saca 8 pétalos.
- Luego pinta el centro con un poco de tiza o color amarillo y presiona con un pincel en el centro para darle forma a las flores y luego decora pegando con silicón en el centro, las perlitas.
Paso 4:
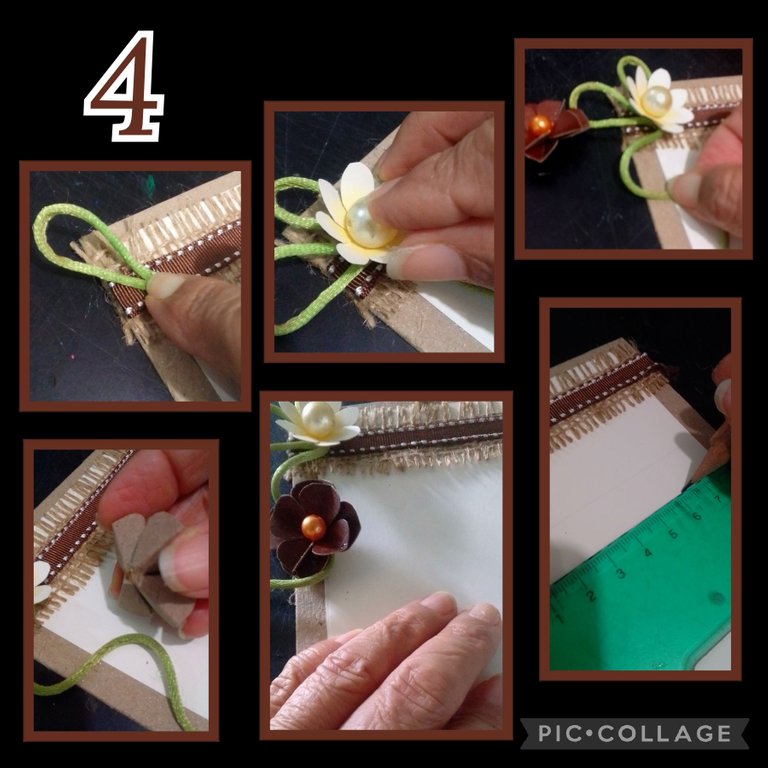
- Haz con el cordón una lazada y pega, luego haz otra al lado como que fueran hojas, aplica silicón y pega la flor beige sobre el cordón y baja el cordón como que fuera el tallo y pega más abajo (ver foto) y luego aplica silicón en la parte de atrás de la flor marrón y pega, esto lo puedes hacer a tu gusto.
- Luego traza líneas marcando con un lápiz pero sin marcar mucho para sólo guiarte al momento de escribir.
- Haz tu dedicatoria escribiendo con el marcador, deja secar bien y luego borra las líneas.
Paso 5:
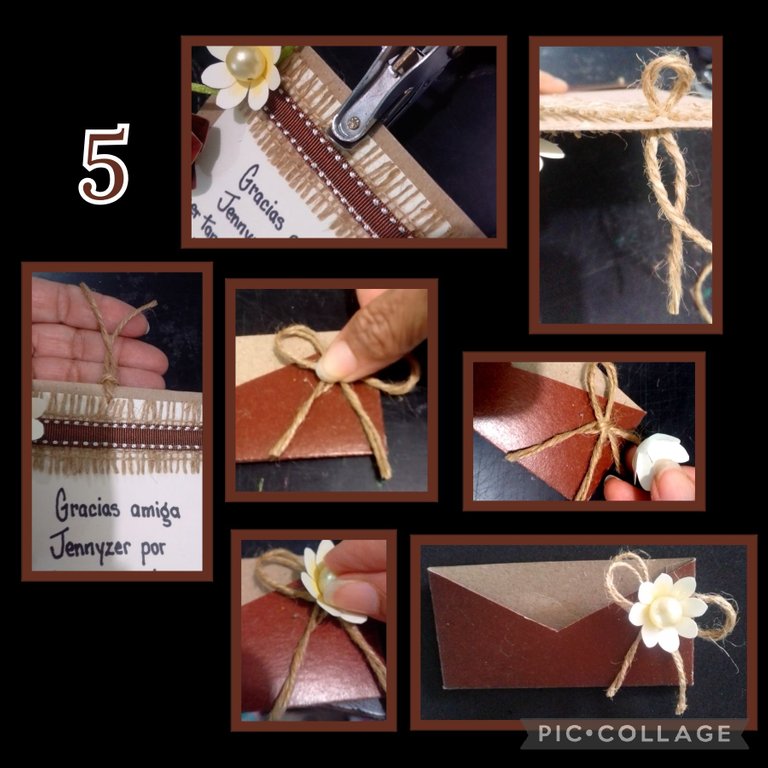
- Ahora abre un orificio en el centro superior de la tarjeta e inserta un pedacito de hilo de mecatillo y para terminar haz un lazo con mecatillo doble y pega a un lado del mini sobre y decora con la otra flor.
Y....así quedó
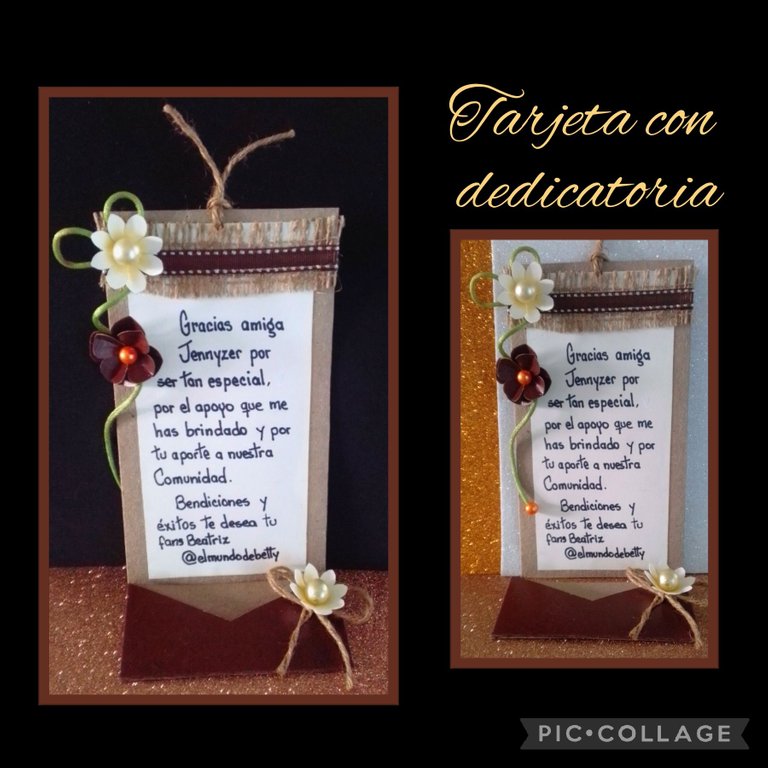
Que dicen? creen que le guste a mi querida Jenny?
Bueno espero que sí!
Para mi publicación usé:
- Traductor: DeepL
- Etiquetas: HTLM
- Fotos de mi Teléfono: Blu G5.
- Editor de fotos: Pic Collage.
Me despido deseando que a mi amiga le haya gustado mi regalo!
Saludos y bendiciones a todos por haberme acompañado en este tutorial.
English:
Good evening dear friends of this community.
I wish you all blessings this week.
At that time he invited us to participate in his Creative Recycling Challenges where each of us made or created a piece using recycled materials, making this a beautiful way to take care of our planet and from the first time I saw it, I thought it was a great idea that someone would encourage us to create with materials that most of the time we throw away, being able to make beautiful useful things and most importantly taking care of our planet.
And that made me become her fan, so I always go to see her publications, besides crafts she likes makeup, sewing, cooking, in short, in her publications we can learn a little bit of everything.
I would also like to thank her for the support she has given to my publications and for the contribution she has given to this platform with each of her publications..
This is Jenny Zerpa @jennyzer.
It is really very good and nice your work and I wish you continue to do well.
So now it only remains to show you the step by step of the card that I made with much affection.
The materials that I used are recyclable materials!
| Ecru cardboard | Brown and beige cardboard scraps |
|---|---|
| Sackcloth | Cloth ribbon |
| Mecatillo thread | Mouse tail string |
| Scissors | Ruler and pencil |
| Silicone | Black marker |
Join me as I go through the procedure:
Step 1:
- We will start by cutting out two (2) rectangles, one in cardboard and the other in beige cardboard, the size of your choice.
This one is 16cm high by 9.8cm wide. - Then trace the mini envelope on the brown cardboard, making a rectangle of 5cm high by 20cm wide and increase the height and width with a 1cm tab to glue and cut out a triangle on the front of the envelope and close it with silicone to assemble the envelope.
Step 2:
- Apply silicone to the beige cardboard rectangle and glue to the cardboard, then apply silicone to the top of the beige cardboard and cut out and glue a 2cm strip of sackcloth around the cardboard, let dry and glue a piece of ribbon in the middle of the sackcloth strip. (see photo)
Step 3:
- Cut out four (4) circles, 2 brown and 2 beige and divide the brown ones in a cross shape, cut out giving rounded shape to the ends to form the petals and each petal fold in half and glue one inside the other, apart divide the beige circles in the same way but instead of 4 petals divide again and get 8 petals.
- Then paint the center with a little chalk or yellow color and press with a brush in the center to give shape to the flowers and then decorate by gluing with silicone in the center, the pearls.
Step 4:
- Make a loop with the cord and glue, then make another one on the side as if they were leaves, apply silicone and glue the beige flower on the cord and lower the cord as if it were the stem and glue further down (see photo) and then apply silicone on the back of the brown flower and glue, you can do this as you like.
- Then draw lines marking with a pencil but without marking too much to just guide you when writing.
- Make your dedication by writing with the marker, let it dry well and then erase the lines.
Step :5
- Now open a hole in the top center of the card and insert a small piece of mecatillo thread and to finish make a bow with double mecatillo and glue to one side of the mini envelope and decorate with the other flower.
And.... here's how it turned out
What do you say, do you think my dear Jenny will like it?
Well I hope so!
For my publication I used:
- Translator: DeepL
- Tags: HTLM
- Photos from my Phone: Blu G5.
- Photo Editor: Pic Collage.
I say goodbye wishing that my friend liked my gift!
Greetings and blessings to all for joining me in this tutorial.
A @jennyzer le encantará este hermoso detalle que has creado para ella.
Está muy linda la tarjeta. Muy llamativa.
Saludos.
(El primer párrafo de la traducción se lee en español)✍️
Buen día, gracias amiga @creacioneslelys .
Sí, esos son mis deseos!.
Saludos.
Ya corregí, tengo problemas con el traductor, siempre los primeros párrafos no me los traduce, y bueno a veces se me pasa y no corrijo.
Gracias por la sugerencia.
Quedé encantada, agradezco esta hermosa muestra de cariño, también soy fan de tu contenido considero que tienes un indudable talento, tus manos crean obras de arte. Me honra que me dediques estas palabras, te envío un fuerte abrazo.
Que bueno amiga que te gustó!
La hice con mucho cariño para tí.
Y muchas gracias por tan lindas palabras.
Recibe también mi abrazo.
Bendiciones y feliz día.
Amiga te quedo hermosa, no te preocupes ,en verdad me gusta lo que haces
Hola amiga, muchas gracias.