
Saludos y bienvenidos todos a mi Blog.
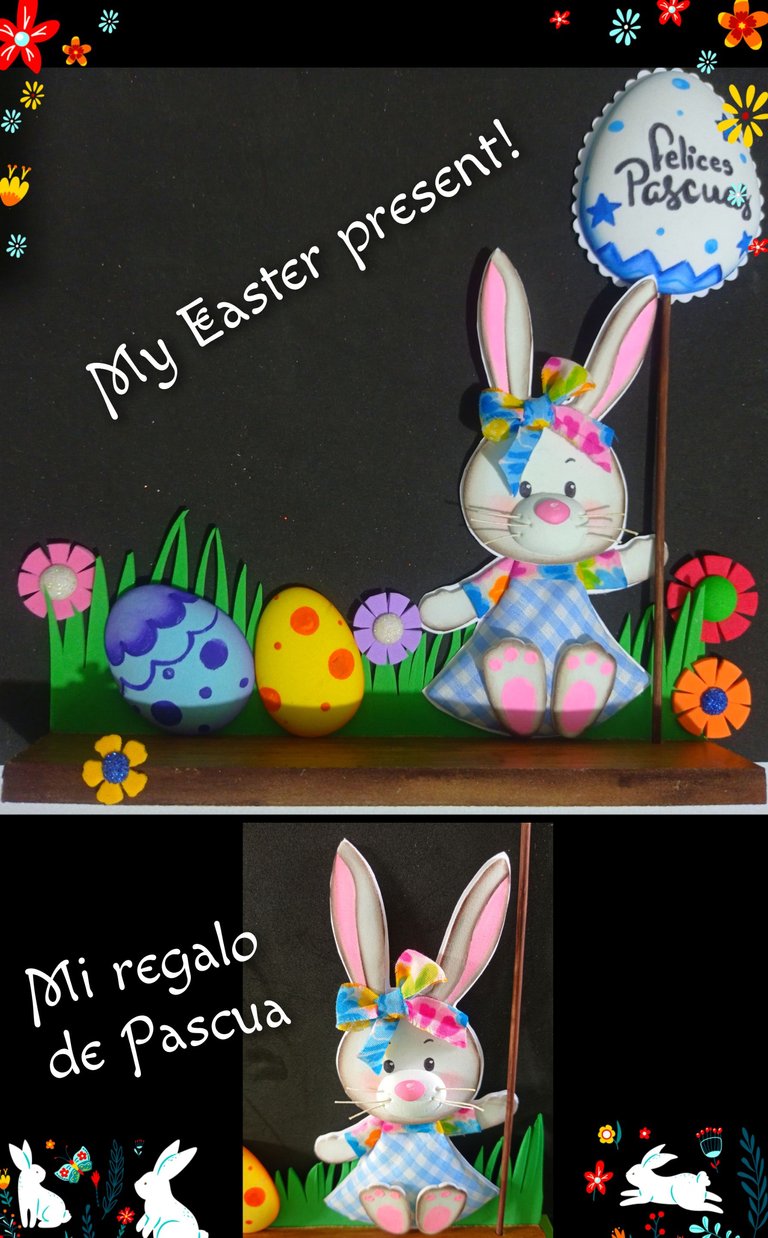
Un placer estar de nuevo compartiendo mi tutorial con todos los amigos que me visitan. Hoy les mostraré como realizar una Conejita de Pascua, aunque se trata de un personaje imaginario, en muchas partes tienen como tradición regalarlo para esta fecha, por eso aquí les dejo este mi regalo.
Lo hice con los materiales que tenía a mano retazos de telas, foami, trozo de madera, cartulina en fin puedes utilizar el material que tengas a disposición.
Ya verás que es muy fácil de realizar.
Así que te invito a que me acompañes a ver como se hace.
Para realizar este lindo detalle necesitas:

| Dibujo o impresión | Telas, foami de colores |
|---|---|
| Algodón | Cartulina |
| Trozo de madera o base | Silicón |
| Tijera | Pinturas y pinceles |
| Palito de madera | Tiza |
| Hilos | Plancha eléctrica |
| Lápiz y marcador |
Paso 1:

- Remarca el dibujo y transfiere colocando el dibujo sobre el foami y frota haciendo presión, revisa que hayas pasado todo el dibujo, así repite con cada una de las piezas.
- Para el vestido, usé cartulina como Base, recortando por todo el contorno luego apliqué silicón y forré con algodón y dejé secar.
- Luego coloqué la cartulina sobre la tela y recorté aumentando 1cm a todo el contorno, aplica silicón en la orilla y forra el vestido.
- A los bracitos, aplica silicón y pega otro pedacito de tela para formar las mangas.
- Aparte recorta una tira del mismo color de las mangas de 1,5x 12cm (lazo).
- Pinta rellenando la parte de adentro de las orejas.
Paso 2:

- Ahora pasa un poquito de algodón por una tiza marrón o el color de tu preferencia y pasa por el contorno de las piezas de la coneja.
- Para los bigotes usé restos de hilos de unos pistilos que tenía guardados, pinta ojos, cejas y boca.
Como no me gustó la boca, decidí recortar un óvalo y hacerle el hocico al que hice 3 orificios de cada lado e inserté los hilos, pegué la naríz, apliqué silicón y pegué a la carita. - También pegué la cabeza al vestido, los brazos, armé el lacito y por último pegué las paticas.
- Luego recorté dos huevos en foami, coloqué sobre la plancha caliente para termoformar.
Paso 3:
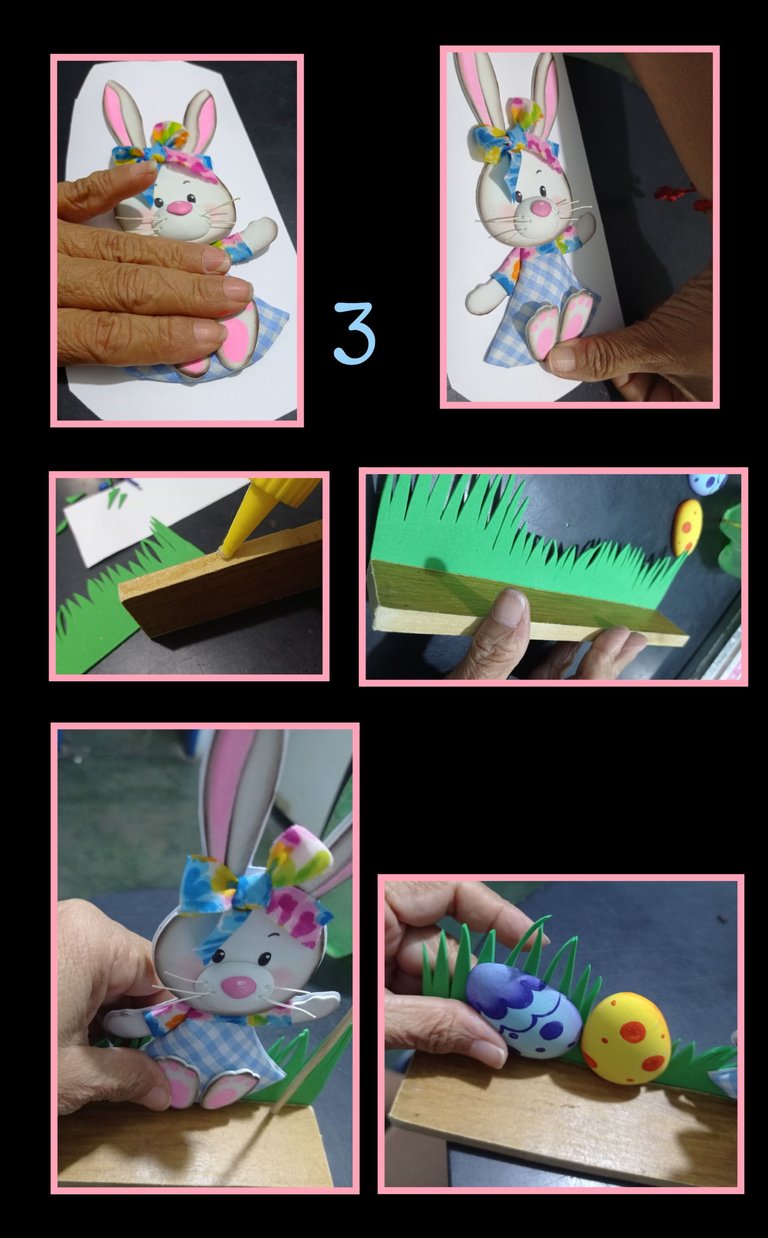
- Armada la conejita, aplica silicón y pega a un pedazo de cartulina o foami, deja secar y recorta dejando 1 o 2 milímetros de borde.
- Recorta una tira de foami y haz cortes altos y bajos haciendo similitud a hierbas, aplica silicón en el borde de la madera y pega la hierba, ahora aplica silicón en la conejita y los huevos y pega a la hierba.
Paso 4:
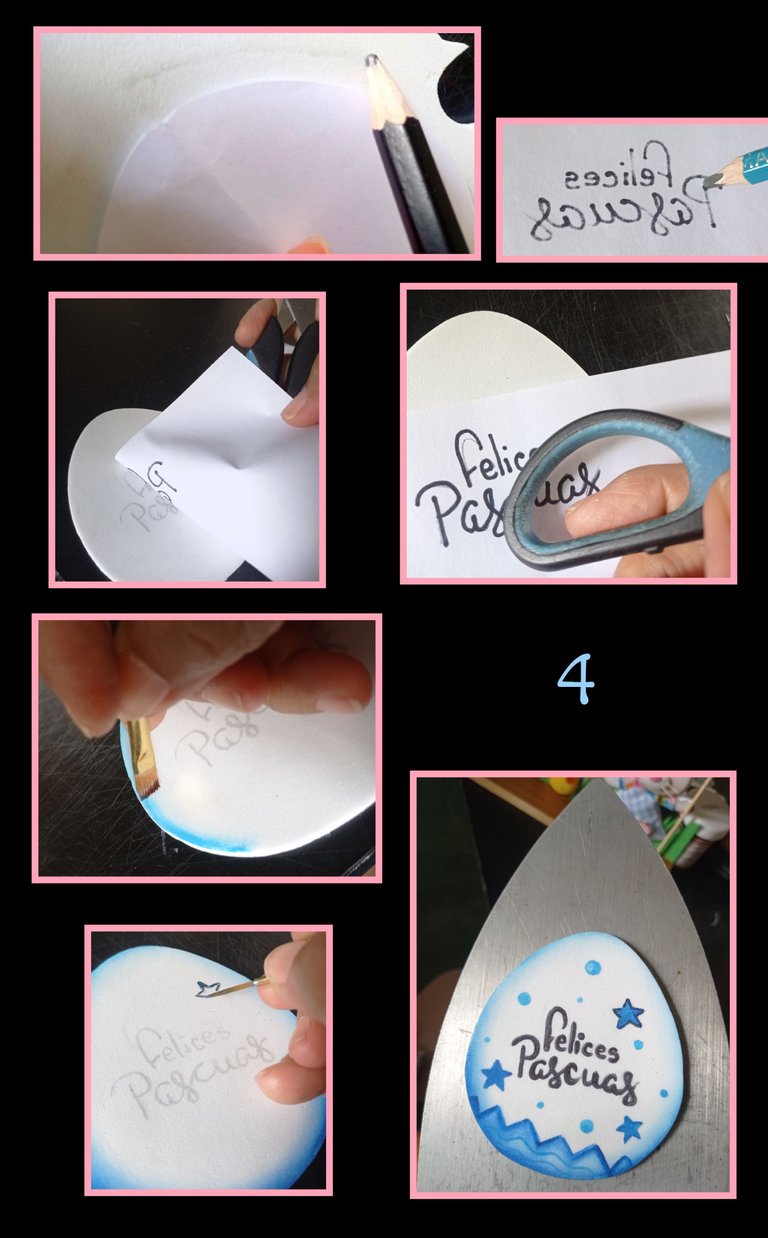
- Recorta en papel, la forma de un huevo, coloca sobre el foami y marca con el lápiz 1cm hacia afuera, esto se hace porque a la hora de termoformar, el foami reduce de tamaño y recorta.
- Cuando vayas a transferir textos: yo acostumbro a repasar con marcador, luego por la parte trasera, remarca con un lápiz de mina blanda, coloca el papel escrito sobre el foami y frota con la tijera, así te quedará el texto.
- Ahora difumina el contorno del huevo, decora los huevos a tu gusto, luego calienta la plancha para termoformar.
Paso 5:

-Aplica silicón por todo el contorno del huevo y pega a la cartulina, recorta con tijera de ondas (opcional)
- Pinta el palito de madera y pégalo en la mano de la conejita, aplica silicón y pega el huevo en la parte de arriba.
-Por último, recorta círculos de distintos tamaños y recorta en cruz luego divide cada cuarto en 2 piezas y haz las flores, pega un centro y termina de decorar.
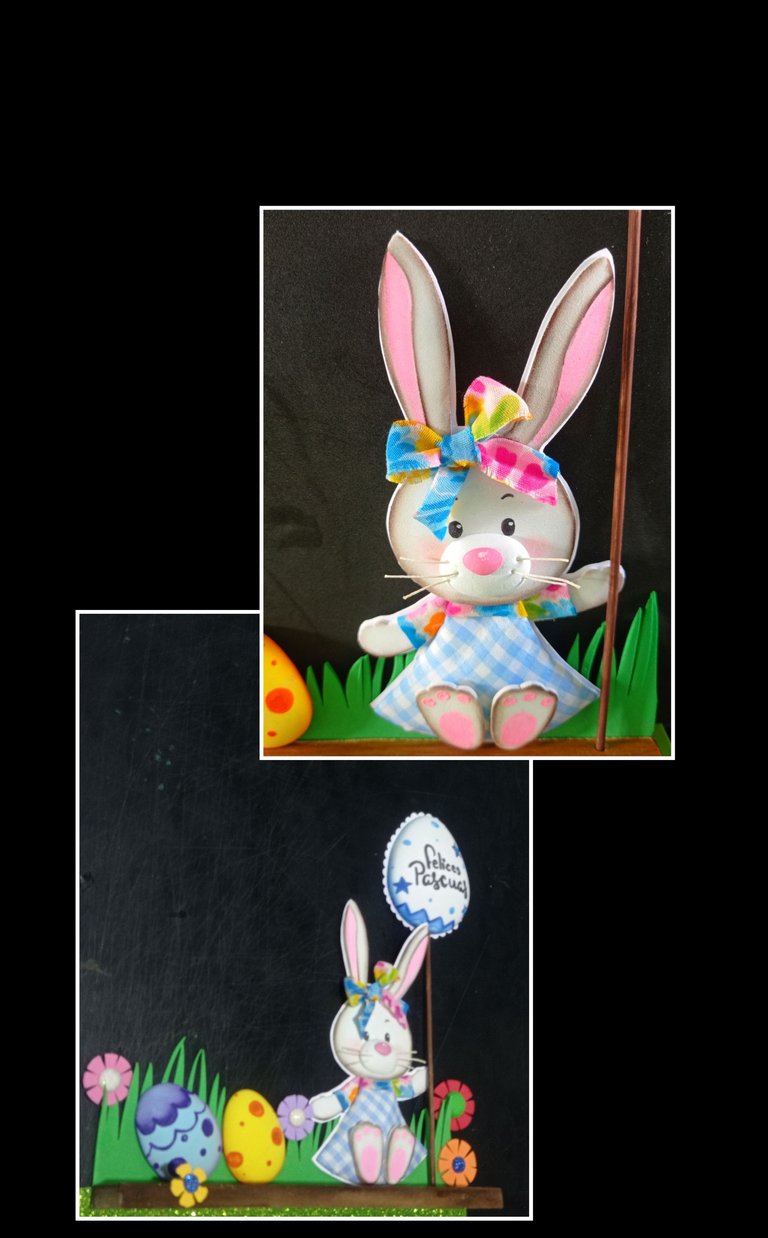
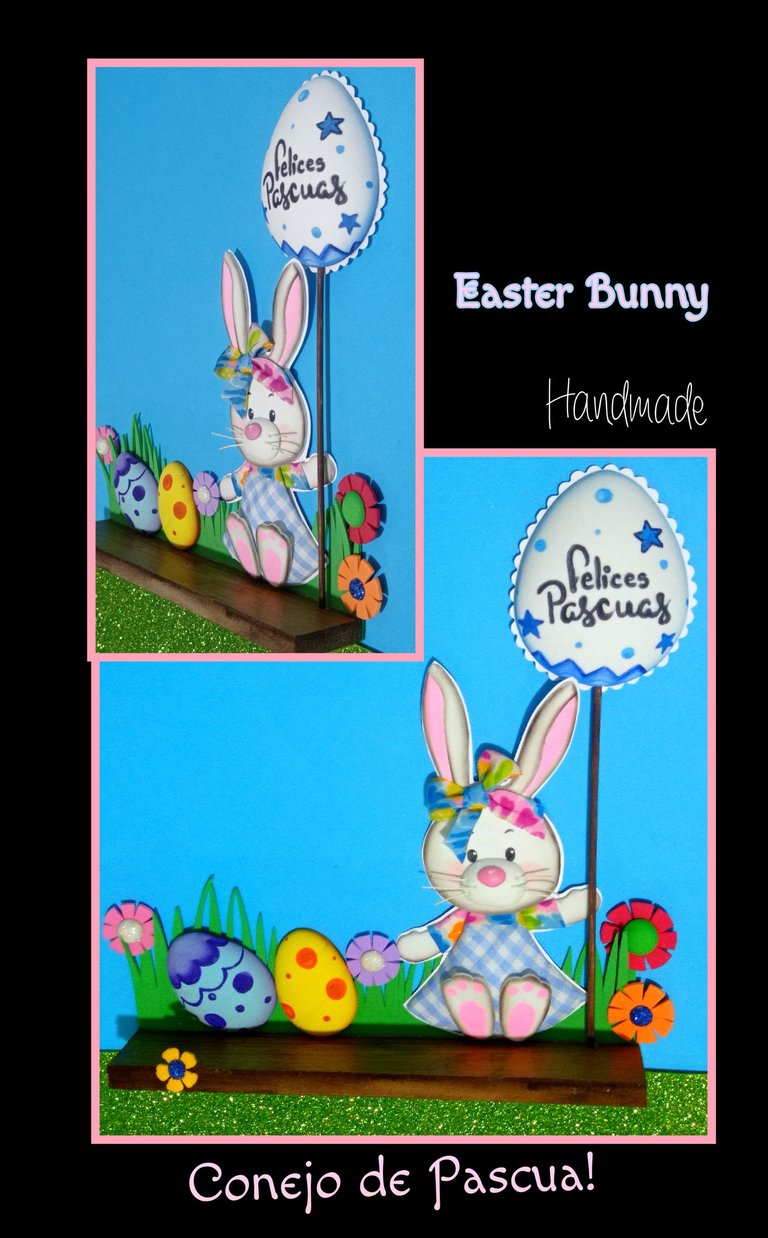
Así quedará terminado este bonito adorno de Conejo de Pascua.
Traductor: DeepL
Telefono: Redmi Note 9
Editor de fotos: GridArt.
Así termina mi tutorial, espero sea de tu agrado.
Muchas gracias por leerme y apoyarme.
English:
Greetings and welcome everyone to my Blog.
It's a pleasure to be back sharing my tutorial with all my friends who visit me. Today I will show you how to make an Easter Bunny, although it is an imaginary character, in many parts have as a tradition to give it as a gift for this date, so here I leave this my gift.
I made it with the materials I had at hand, scraps of fabric, foami, pieces of wood, cardboard, etc. You can use whatever material you have at your disposal.
You will see that it is very easy to make.
So I invite you to join me to see how it is done.
To make this cute detail you need:
| Drawing or printing | Fabrics, colored foami |
|---|---|
| Cotton | Cardboard |
| Wooden scrap or base | Silicone |
| Scissors | Paints and brushes |
| Wooden stick | Chalk |
| Wire | Electric iron |
| Pencil and marker |
Step 1:
- Outline the drawing and transfer it by placing the drawing on the foami and rubbing it with pressure, check that you have transferred the entire drawing, and repeat with each of the pieces.
- For the dress, I used cardboard as a base, cut out all the outline, then applied silicone and lined with cotton and let it dry.
- Then I placed the cardboard on the fabric and cut out 1cm around the whole contour, applied silicone on the edge and lined the dress.
- To the little arms, apply silicone and glue another piece of fabric to form the sleeves.
- Cut out a 1.5x 12cm strip of the same color as the sleeves (bow).
- Paint by filling in the inside of the ears.
Paso 2:
- Now pass a little bit of cotton through a brown chalk or the color of your choice and go around the contour of the rabbit's pieces.
- For the whiskers I used some leftover threads from some pistils I had saved, paint eyes, eyebrows and mouth.
Since I didn't like the mouth, I decided to cut out an oval and make the snout, made 3 holes on each side and inserted the threads, glued the nose, applied silicone and glued it to the face. - I also glued the head to the dress, the arms, made the bow and finally glued the paws.
- Then I cut out two eggs in foami, placed them on the hot iron to thermoform.
Paso 3:
- Once the bunny is assembled, apply silicone and glue to a piece of cardboard or foami, let dry and trim leaving 1 or 2 millimeters of border.
- Cut a strip of foami and make high and low cuts similar to grass, apply silicone on the edge of the wood and glue the grass, now apply silicone on the bunny and the eggs and glue to the grass.
Step 4:
- Cut out the shape of an egg on paper, place it on the foami and mark with a pencil 1cm outwards, this is done because when thermoforming, the foami reduces in size and cuts.
- When you are going to transfer text: I usually go over it with a marker, then on the back side, mark with a soft lead pencil, place the written paper on the foami and rub with the scissors, this way you will have the text.
- Now blur the outline of the egg, decorate the eggs as you like, then heat the thermoforming iron.
Step 5:
-Apply silicone all around the egg outline and glue to the cardboard, cut out with wave scissors (optional).
- Paint the wooden stick and glue it to the bunny's hand, apply silicone and glue the egg on top.
-Finally, cut out circles of different sizes and cut them crosswise, then divide each quarter into 2 pieces and make the flowers, glue a center and finish decorating.
This is how this beautiful Easter Bunny ornament will be finished.
Translator: DeepL
Phone: Redmi Note 9
Photo editor: GridArt.
Thus ends my tutorial, I hope you like it.
Thank you very much for reading and supporting me.
Yo quedó sorprendida con tu talento amiga! El otro día me parece que había una iniciativa para hablar sobre nuestro artesano favorito, pues yo te elegiría a ti, claro que sí.
Gracias por compartir tantas bellezas y enseñarnos tanto. 💗
Amiga, que lindo tu comentario! De verdad me siento halagada y muy feliz de saber que te gustan mis publicaciones y aún más que me elegirías como tu artesana favorita...y me siento bendecida por eso.
Es un placer para mí compartir y mostrar lo que sé, con ustedes.
Saludos y bendiciones para tí que también eres muy talentosa.
Aww toda una ternura!!
Hola amiga, muchas gracias.
@rutablockchain muchas gracias por tu apoyo!