ENGLISH
Hello beautiful HiveDIY community!!!
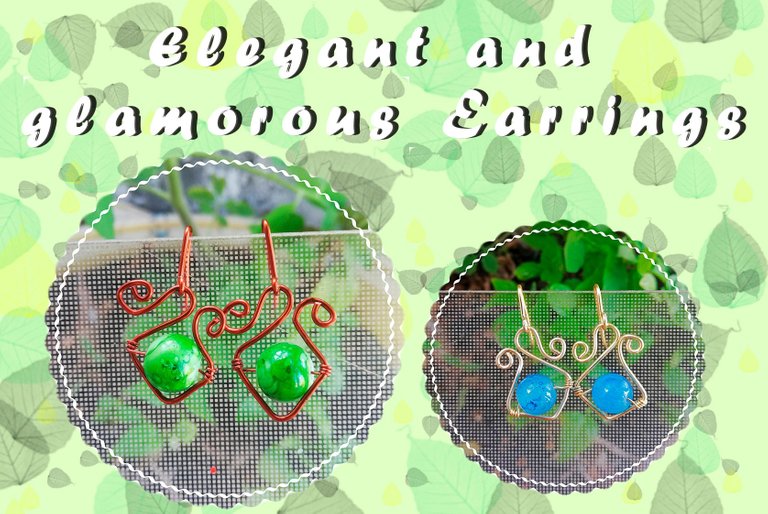
Today I want to show you how to make a beautiful earrings, they are elegant, ideal to wear at a party, a wedding or any special occasion. These earrings are the perfect accessory to give style to your outfit.
Let's get started!!!
Materials:
- 50 centimeters of #18 caliber jewelry wire.
- 15 centimeters of #22 caliber jewelry wire.
- 2 pearls of the color of your choice.
- Round nose pliers.
- Cutting pliers.
For these earrings I used copper color jewelry wire, you can also use golden jewelry wire.
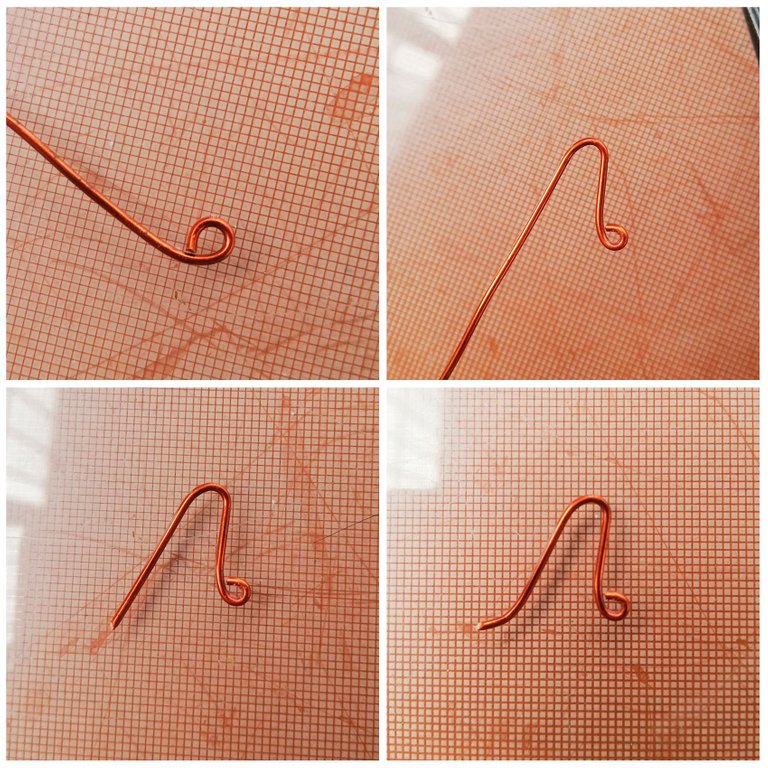
Step 1:
We start by making the hook, with the round nose pliers we make a small ring at the tip of the wire, then leaving approximately 1 centimeter we bend as I show in the photo. We cut leaving 2 centimeters and at the end with the round pliers we bend a little. This would be the hook of the earring.
ESPAÑOL
Hola hermosa comunidad de HiveDIY!!!
El día de hoy quiero enseñarles a cómo elaborar unos preciosos aretes, muy elegantes, ideales para lucir en una fiesta, una boda o cualquier ocasión especial. Son el accesorio perfecto para darle estilo a tu outfit.
Comencemos!!
Materiales:
- 50 cm de alambre de bisutería calibre #18
- 15 cm de alambre de bisutería calibre #22
- 2 perlas del color de tu preferencia
- Pinza punta redonda
- Pinza de corte
Para estos aretes utilicé alambre de bisutería color cobre, también pueden utilizar alambre de bisutería dorado.
Paso 1:
Empezamos haciendo el anzuelo, con la pinza punta redonda hacemos una argolla pequeña en la punta del alambre, luego dejando aproximadamente 1 cm doblamos como muestro en la foto. Cortamos dejando 2cm y al final con la pinza redonda doblamos un poco. Este sería el anzuelo del arete.
Paso 2:
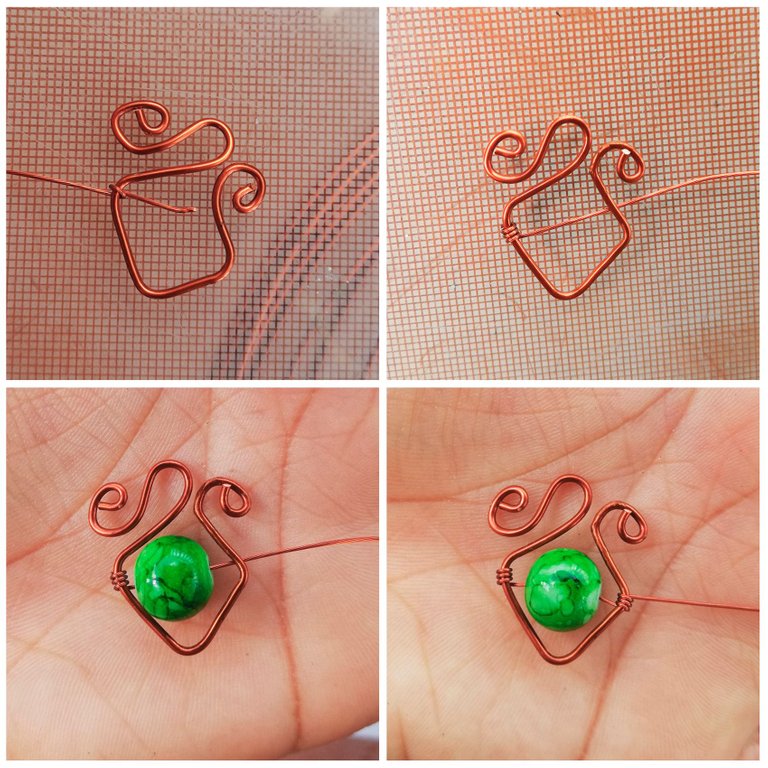
Hacemos una argolla pequeña como en el primer paso, seguidamente con la pinza redonda doblamos alrededor de esta (ver foto). Luego con la misma pinza hacemos un semi círculo en la parte de arriba, tenemos como resultado la forma de una letra “s” (ver foto).
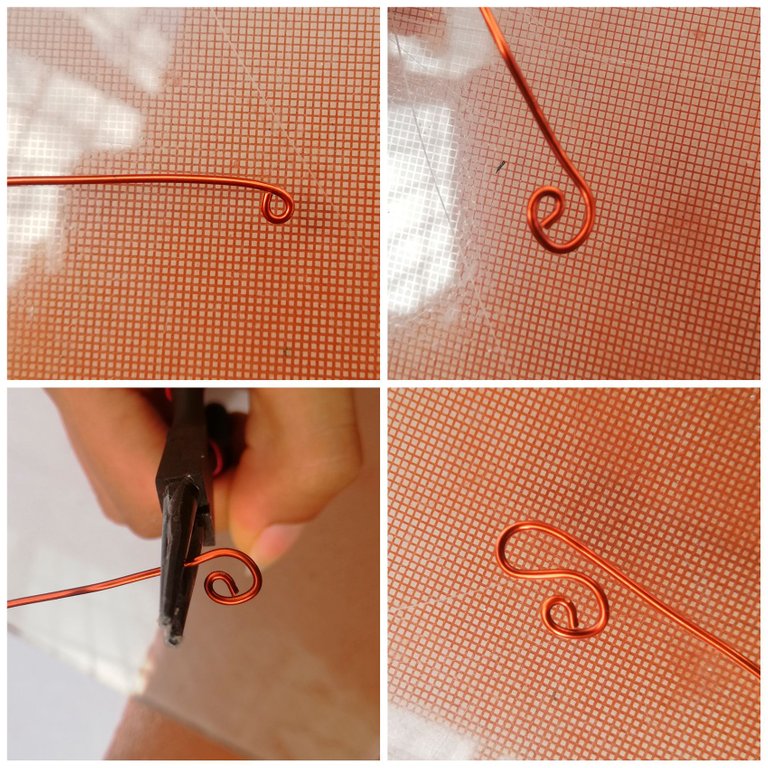
Step 2:
We make a small ring as in the first step, then with the round pliers we bend around it (see photo). Then with the same pliers we make a semi-circle at the top, we have as a result the shape of a letter "s" (see photo).
Paso 3:
Con la punta de la pinza doblamos a los 2cm aproximadamente, así como muestro en la foto. Hacemos lo mismo en la parte de abajo (ver foto) y luego al otro lado (ver foto). Tenemos como resultado un rombo.
Step 3:
With the tip of the pliers we bend at about 2 centimeters, as shown in the photo. We do the same at the bottom (see photo) and then on the other side (see photo). We have as a result a rhombus.
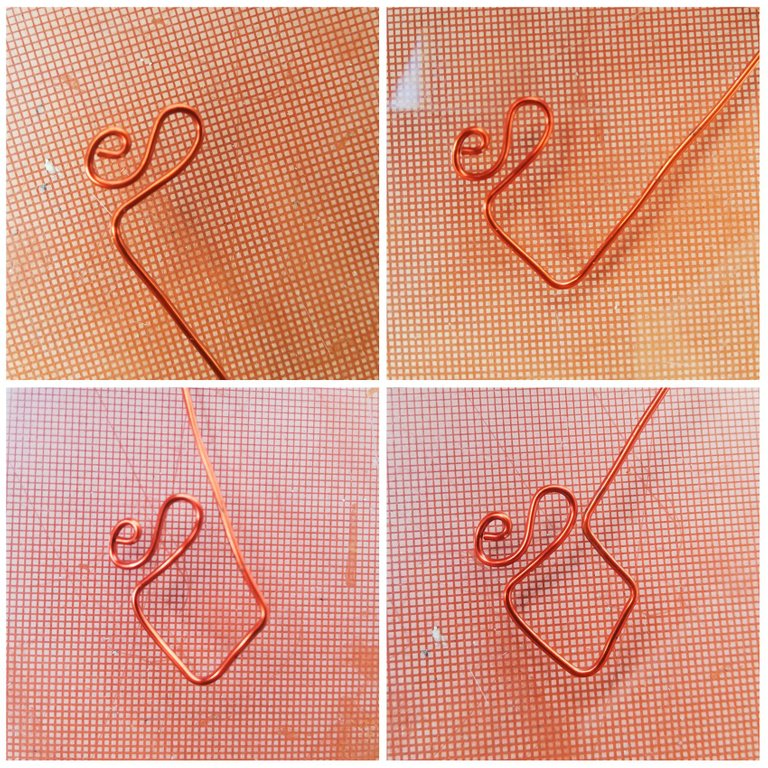
Paso 4:
Ahora con la pinza redonda doblamos el alambre, nos debe quedar parecido al otro lado (ver foto), la diferencia es que haremos una argolla simple (ver foto). Recomiendo hacer la argolla antes de cortar el alambre para que no quede muy pequeña.
Step 4:
Now with the round pliers we bend the wire, it should be similar to the other side (see photo), the difference is that we will make a simple ring (see photo). I recommend making the ring before cutting the wire so that it is not too small.

Paso 5:
El alambre calibre #22 lo entorchamos a un lado, a la altura del doblez (ver foto), entorchamos con 3 o 4 vueltas. Luego introducimos la perla y centramos. Entorchamos nuevamente del otro lado, a la misma altura y con la misma cantidad de vueltas, para finalizar cortamos. Es importante que el entorche quede ajustado para que el alambre no se mueva en el arete.
Step 5:
We twist the #22 jewerly wire to one side, at the height of the bend (see photo), we twist with 3 or 4 turns. Then we insert the pearl and center it. We twist it again on the other side, at the same height and with the same number of turns, and finally we cut. It is important that the twisting is tight so that the wire does not move in the earring.
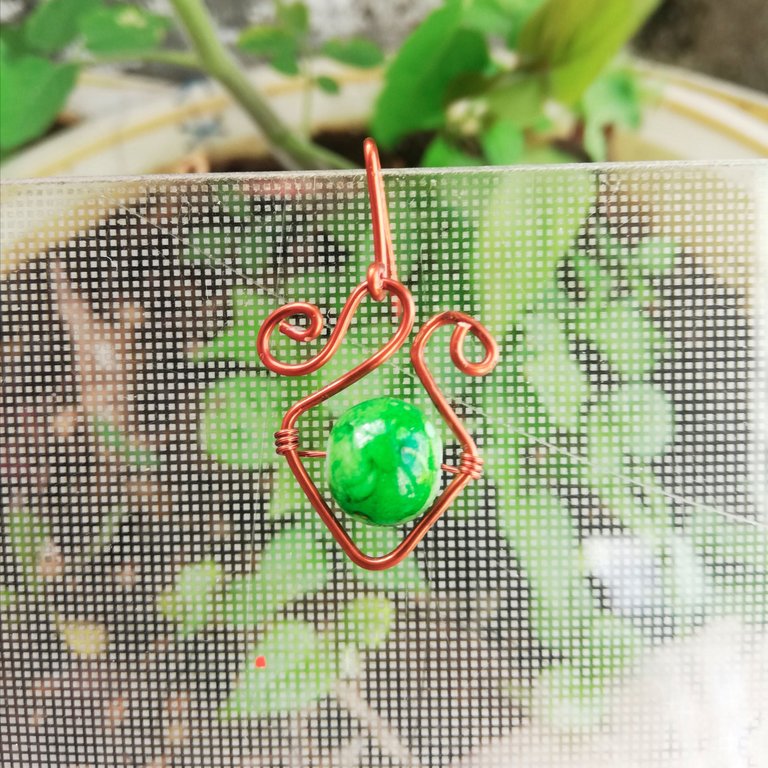
Paso 6:
Abrimos un poco la argolla del anzuelo, lo introducimos en el arete y cerramos, es importante cerrar bien para que no perdamos el arete.
Para fabricar el otro arete, repetimos todos los pasos anteriores.
Step 6:
We open a little the ring of the hook, we introduce it in the earring and we close, it is important to close well so that we do not lose the earring. To make the other earring, we repeat all the previous steps.
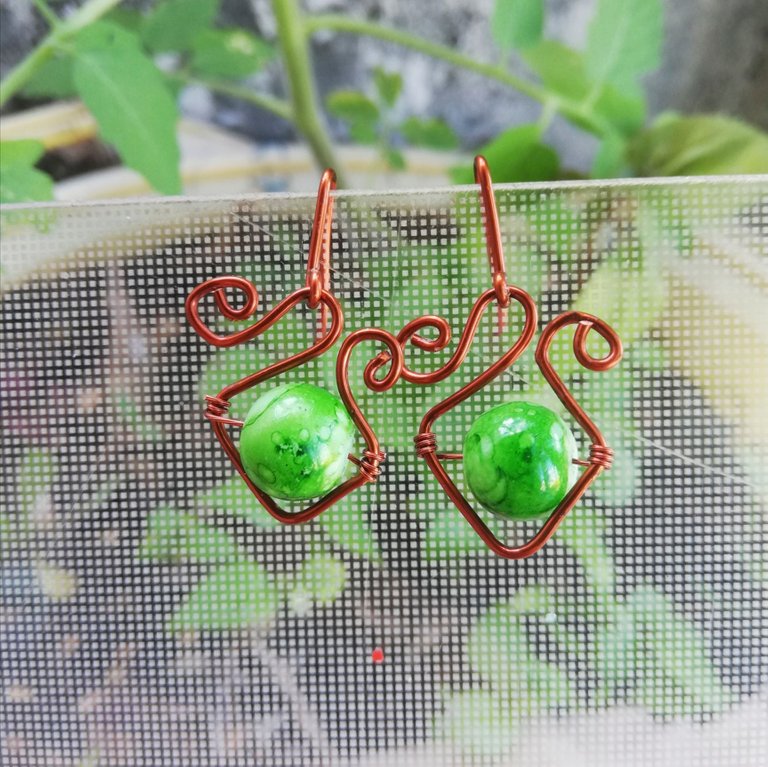
No es tan difícil de elaborar, necesitamos bastante paciencia y amor para que nuestros aretes queden lindos. Recuerden que pueden adaptarlos al color de su preferencia.
Espero que les haya gustado. Gracias por leer hasta el final ❤️
It is not so difficult to make, we need a lot of patience and love to make our earring look beautiful. Remember that you can adapt them to the color of your preference.
I hope you liked it. Thank you for reading ❤️
Todas las fotografías fueron editadas en Picsart y Photoshop.
The text was translated by DeepL.
All photographs were edited in Picsart and Photoshop.
This is a one-time notice from SCHOOL OF MINNOWS, a free value added service on hive.
Getting started on hive can be super hard on these social platforms 😪 but luckily there is some communities that help support the little guy 😊, you might like school of minnows, we join forces with lots of other small accounts to help each other grow!
Finally a good curation trail that helps its users achieve rapid growth, its fun on a bun! check it out. https://som-landing.glitch.me/
Te quedaron hermosos 😍...me encantó tu trabajo. Gracias por compartir esta técnica de bisutería.
💫🎉🌈💐⭐😘🌹🎊🌱🌙🍁🍀✨🌟🌵🍂🌳🌟🌲🌼🌻🏵️💮🌸🌷🌺🥀🍄☺️
Congratulations @elybert24! You have completed the following achievement on the Hive blockchain and have been rewarded with new badge(s):
Your next target is to reach 500 upvotes.
You can view your badges on your board and compare yourself to others in the Ranking
If you no longer want to receive notifications, reply to this comment with the word
STOPSupport the HiveBuzz project. Vote for our proposal!
Thank you for sharing this amazing post on HIVE!
Your content got selected by our fellow curator @rezoanulvibes & you just received a little thank you via an upvote from our non-profit curation initiative!
You will be featured in one of our recurring curation compilations and on our pinterest boards! Both are aiming to offer you a stage to widen your audience within and outside of the DIY scene of hive.
Join the official DIYHub community on HIVE and show us more of your amazing work and feel free to connect with us and other DIYers via our discord server: https://discord.gg/mY5uCfQ !
If you want to support our goal to motivate other DIY/art/music/homesteading/... creators just delegate to us and earn 100% of your curation rewards!
Stay creative & hive on!
Greetings, excellent work, I invite you to join the jewelry community and show us your art or just talk about jewelry and stones, greetings.
https://peakd.com/@hive-189504