I really love to make unique candles. And I want to show you how you can make them too! 😃
Its actually not hard at all, it just takes time. I recommend you to read everything in this post, before starting this project. If you want to add gold foil on your candles, I have written how to do that too 😍
🔥 Be aware of this before you start! 🔥
This is a project that can damage your skin, cause meltet stearin is really hot! Do not put your fingers into the melted stearin, because stearin hardens fast on your finger. Always use a good substrate: I use an old cutting blade in plastic. You dont want your kitchen to be damaged cause of stearin.
These candles are not ment to be lit up, cause it can make a lot of burn damage and in worst case start a fire. 😨
Lets start with shopping for the right candles:
- Use 100% stearin. This is important because its so much easier to use and the final product will look amazing. I used candles in parafin once, and it was hard to work with and did not got a good final product. The candles looked really bad. You CAN mix it with stearin, but only use a small amount.
- Find the right color for the candles. You have to be prepared for an another lighter color if the candle have a white color inside. A lot of candles have only color on the outside. You can still use the white stearin to get a lighter color. Remember that the melted stearin mass looks darker, than the final product.
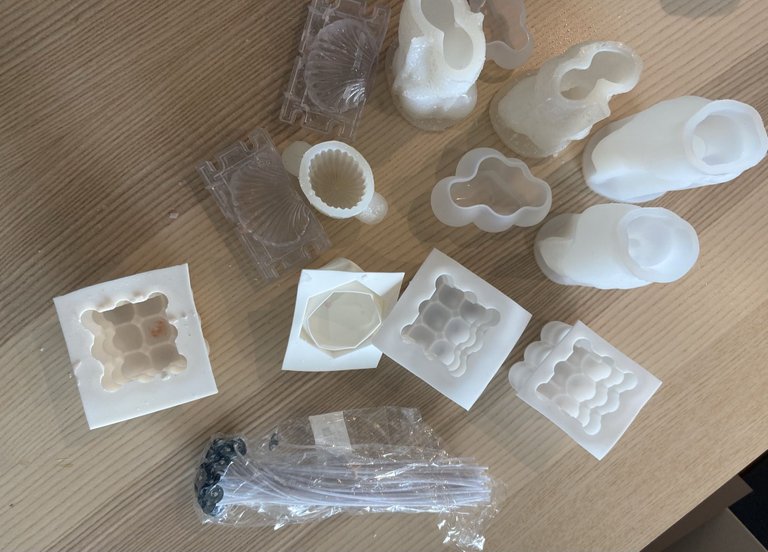
- Find some molds you like in silicone. I tried with molds in hard plastic, and those molds didnt handle the heat, cause it started leaking.
I buy my molds and wicks on ebay.com. Make some noise in the comment section if you want the links! 😍
Lets start with what you need:
- A metal bowl you can use to melt your candles. I always use a bowl who fills out the pan so it holds its position in the pan. Dont use a bowl that dont handle heat, because the water is going to boil.
- A pan with ca 1/3 of water.
- A small scoop to move the melted candles into the molds
- Candles/stearin to melt
- Molds in silicone. You can also use molds for making soap.
- Wicks
- A good substrate. Don't use your newest substrate!
- Something small and sharp to stick your wicks into the molds.
- If you want the wicks to be in the middle of the candles, you can tie the wicks on a stick, and place the stick on the candle. I don't use this technique, because these candles aren't ment to be lit up.
This is how you do it:
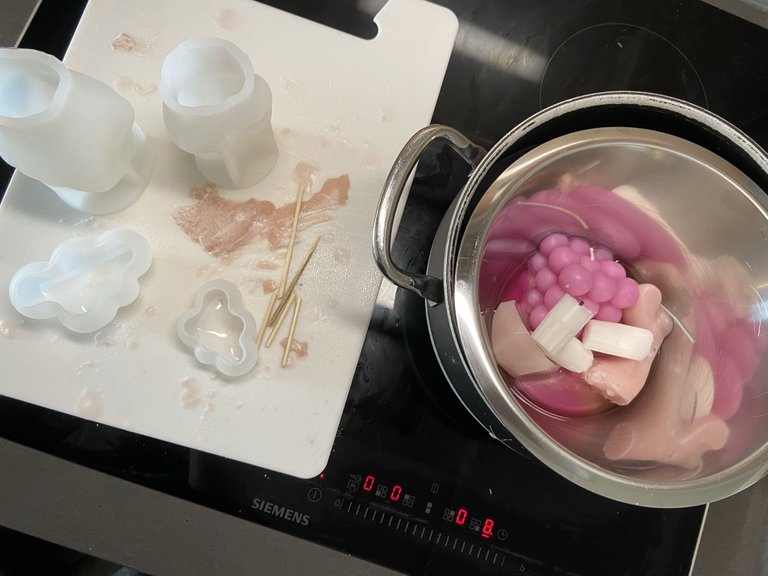
Put your pan (with water) on the stove, and the metal bowl into your pan. Turn the heat on (it need to be boiling-hot), and put your candles/stearin in the metal bowl.
Let the water boil for a few minutes, before you turn the heat down a little bit. But keep it hot at all time while melting.
This time I melted old candles that I wasn't pleased with. Even tho it have wicks, it's easy to remove them when the candles is melted. I use a cheap thin bamboo stick to remove the wicks.
Before you put the stearin in the molds, use a sharp and thin equipment to stick trough the ends of the molds. Then put your wicks through the hole(s) you just made. Since this is candles for decorations, you dont need to have the wicks all the way through the candles. I only have a few cm down in the candles.
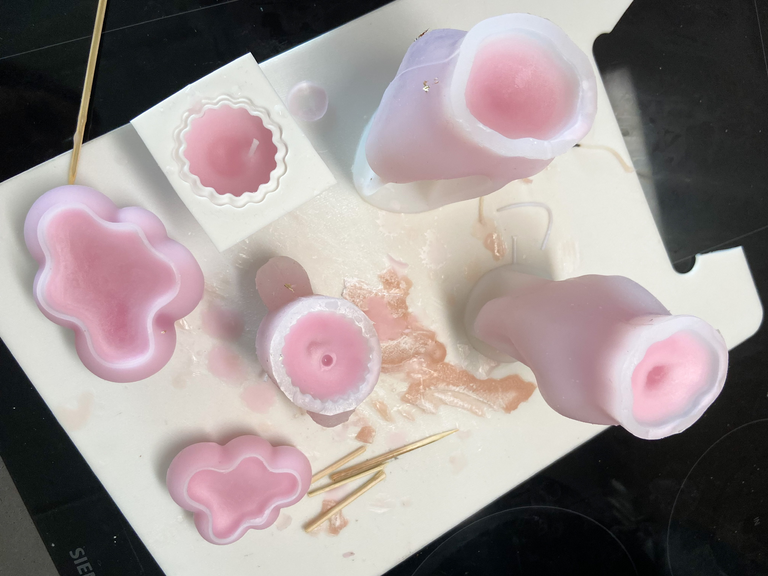
Then put the melted stearin in the molds with the scoop. Make sure the molds are standing safely on the substetute. Its normal that the stearin sinks down in the molds when it cools down, so fill them all up (see the picture down below). Don't refill them when the stearin sinks.
It takes few hours for stearin to cool down. Let it cool down in room temperature. If you put them in the fridge or somewhere cold, it will get holes in the stearin, and it really looks bad.
Don't take the stearin out of the molds if its still warm. If you do that, the candles will be bent and stretched.
Things to be aware of:
Im not good at knowing how much stearin you need for every candle. But if you have some stearin left, put it in a mold or an used candleholder. You can use this to melt new candles later.
When you are done, remember to clean the metal bowl (and pan) right away in hot water. I always use a glove to remove the metal bowl into the sink. Wash it with warm water and soap.
Stearin can plug your sink, so if you have a lot of stearin left, let it cool down and throw it in the trash.
I recommend you to boil water and pour the hot water it in the sink after you are done washing.
How to: Gold flakes (leaf foil paper) on the stearin:
If you want to add a little bit of gold flakes, I tried these two methods.
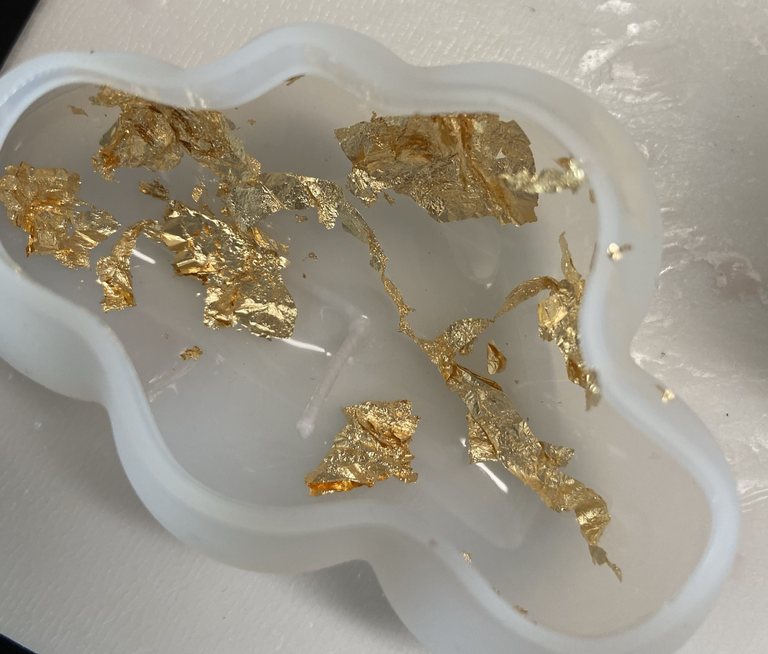
- Goldflakes inside of the candle
- Goldflakes glued on outside of the candle
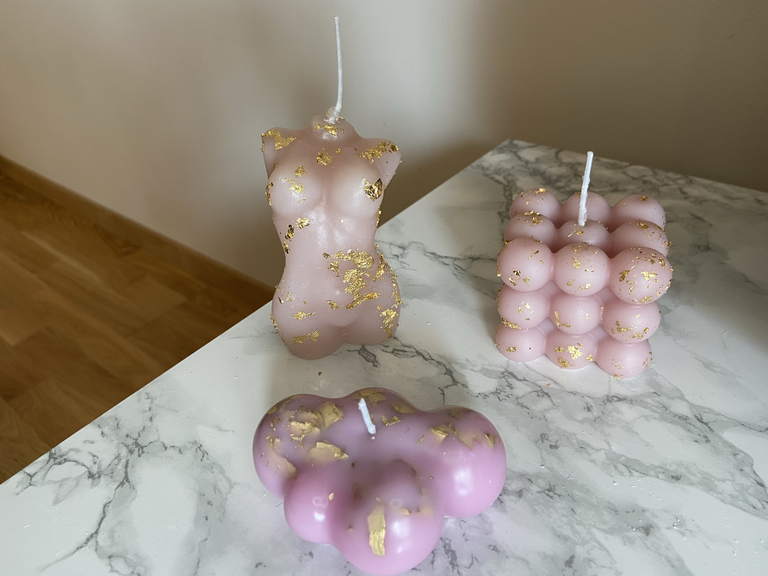
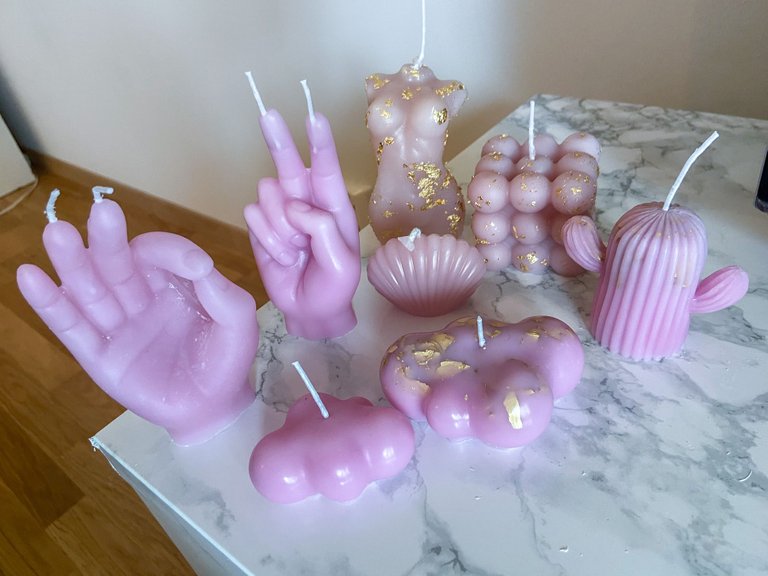
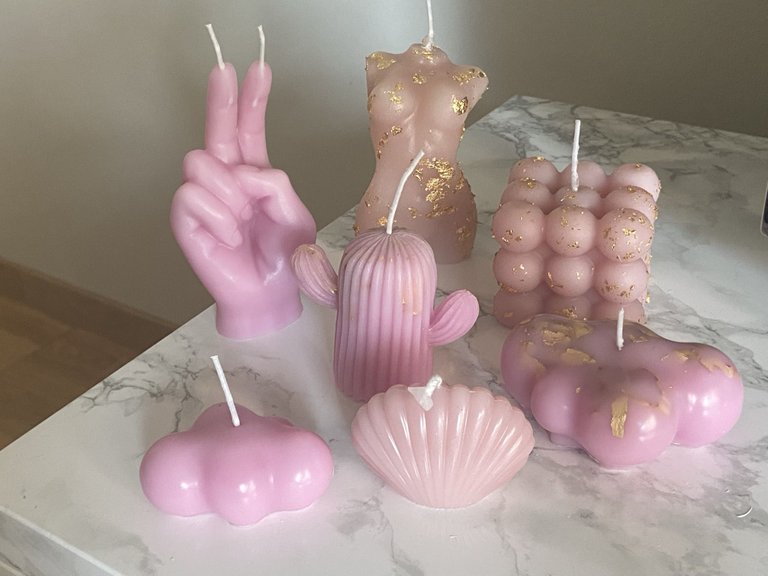
This is the final product. The Bubblecandle and the womans body are with goldflakes outside. And the sky have it on the inside.
If you put gold inside of it, remember that the gold will move down in the mold and it wont show as good.
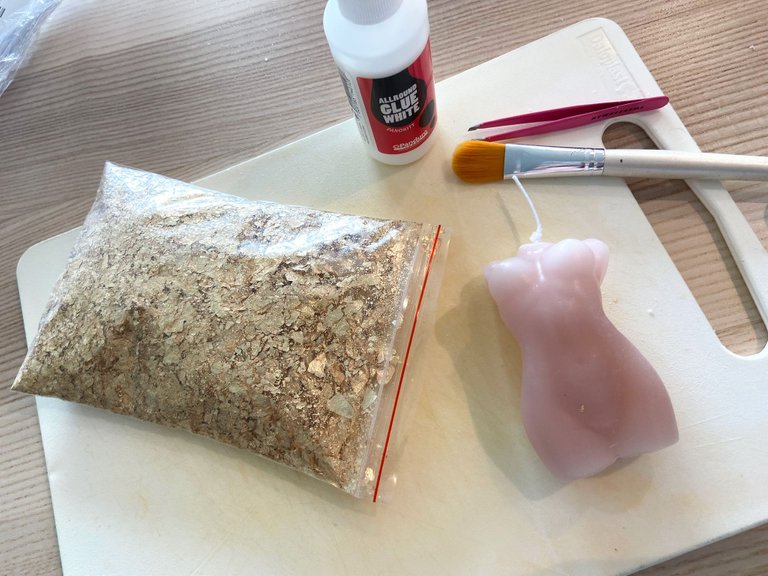
If you want to have gold outside of the finished candles
- Use a little bit of glue (I used an all around glue I had).
- Then pick up the the gold foil with a tweezer, and put the gold on the glue.
- Work the gold on the candle with a brush. I used a flat brush, but Im sure the results will be even better if you use a rounder and smoother brush. Its important to use time with you brushing on the foil. Because the result will be better
- Then let it dry for some hours (depends ofc on the glue you use).
I hope you got inspired to try it out. Its amazing gifts, and xmas is right around the corner (Its kind of not, but I always make my presents early. I dont want the typical December stress).
A lot of my friends and family really love these, and want these for xmas. Isn't it more personal to make a gift, than buying it?
These candles gives you a little extra touch to your home too!
😍 If you have any questions, don't be afraid to ask. I would REALLY love to see your candles in the comment section! 😍
The rewards earned on this comment will go directly to the person sharing the post on Twitter as long as they are registered with @poshtoken. Sign up at https://hiveposh.com.
Welcome to our big HiveDiy family, I am a fan of candles, my favorites are the scented ones and the ones with original shapes like the ones you show us how to make. The foil leaves give it that touch of amazing elegance. You have a lot of molds, they are all great! Thanks for sharing with us and showing us how to do it ourselves.
Thank you so much for your feedback! There is going to be more DIYs from me. I have planned a few posts
Congratulations @emuse! You have completed the following achievement on the Hive blockchain and have been rewarded with new badge(s) :
Your next target is to reach 400 upvotes.
Your next target is to reach 50 comments.
Your next target is to reach 100 replies.
You can view your badges on your board and compare yourself to others in the Ranking
If you no longer want to receive notifications, reply to this comment with the word
STOPTo support your work, I also upvoted your post!
I'm really fan of candles! Lucky to have some tips from your blog. 💜
Me too, I like to try different combos and search for new molds. I recommend you to try this. Its very easy, and its so pretty to decorate your home or give it as gifts 😃
Will definitely try this 💜