
¡¡Hola amigos de Hive!!, tenía unas buenas vacaciones en la plataforma, y en todo este tiempo libre lo he aprovechado al máximo. Las dificultades de estudiar medicina son eso, el poco tiempo libre, pero me he hecho de una rutina fabulosa que me aportará mucho más tiempo libre.
En esta oportunidad quise traer una preciosa y divertida manualidad que además es muy fácil de elaborar. Un día recordé las tantas manualidades que de pequeña hacía en la escuela y lo bien que me la pasaba con mis compañeras diseñando y dibujando.
Entonces pensé que muchas maestras y madres con muchos pequeños podrían aprovechar diversas ideas, porque es cierto, a veces estamos cortos de ideas. Por eso decidí hacer varias manualidades y traerlas a la plataforma, hoy les traigo un precioso espiral de dos colores que me ha encantado y tiene un efecto muy lindo cuando lo hacemos girar.
Es muy sencillo y fácil de hacer pero lleva un poco de tiempo, utilicé papel en blanco que tuve que pintar porque no encontré de colores, pero una fascinante idea es usar ojas ya elaboradas que no usemos, ya sean de un dibujo o una partitura, y veremos el grandioso efecto que tiene.
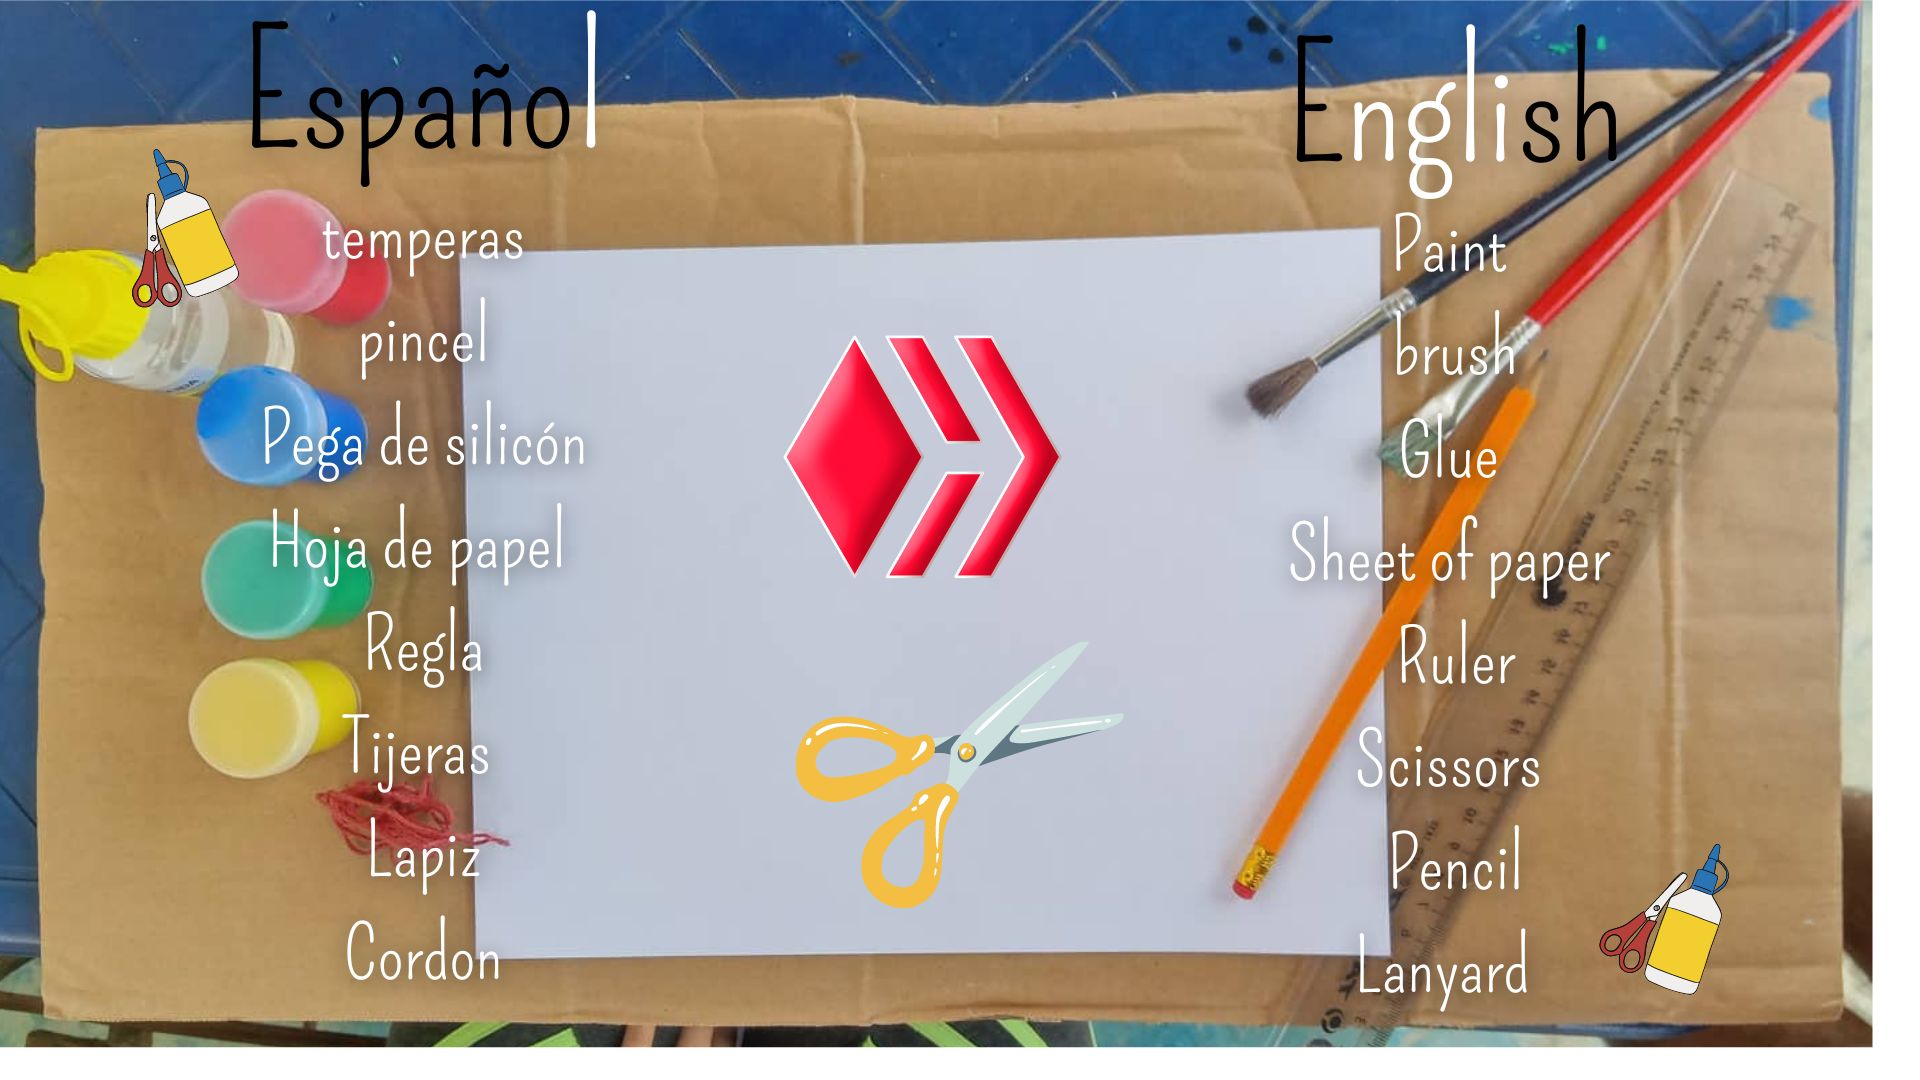
Vamos a los materiales!!!
Hello Hive friends!!!, I had a good vacation on the platform, and in all this free time I have taken full advantage of it. The difficulties of studying medicine are just that, the little free time, but I have made a fabulous routine that will bring me much more free time.
This time I wanted to bring a beautiful and fun craft that is also very easy to make. One day I remembered the many crafts I did at school when I was a child and how much fun I had designing and drawing with my classmates.
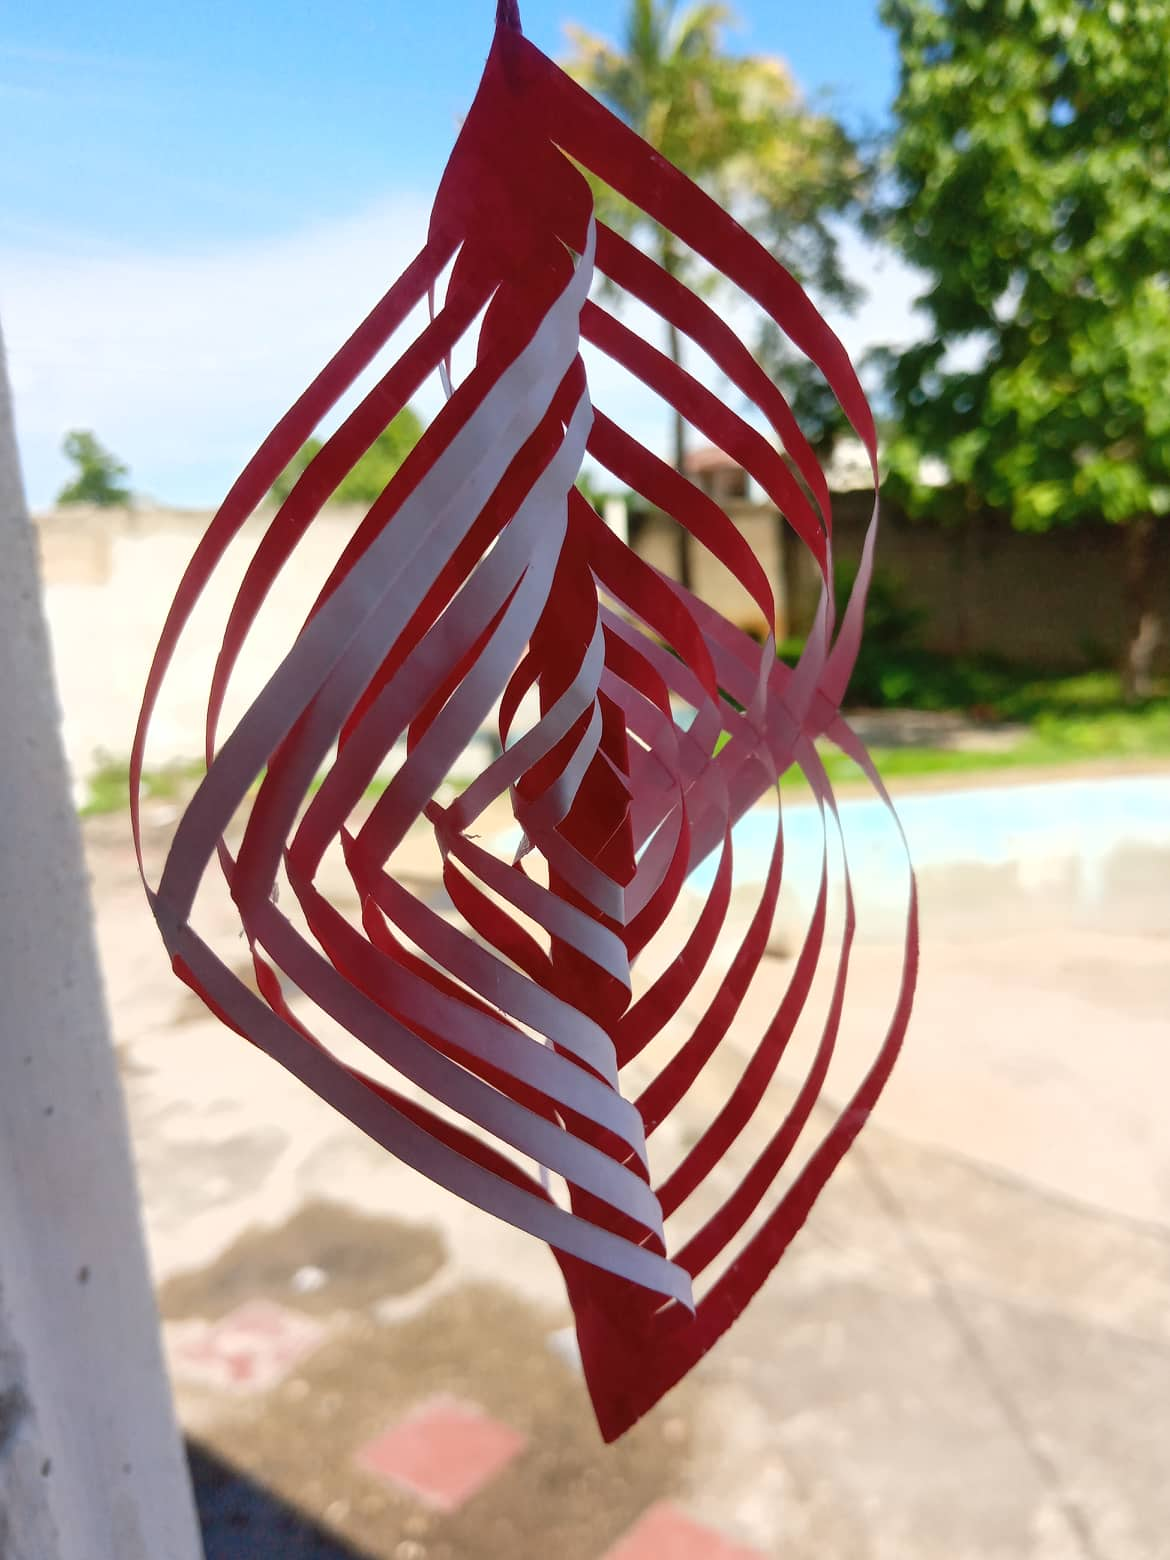
Then I thought that many teachers and mothers with many little ones could take advantage of different ideas, because it is true, sometimes we are short of ideas. So I decided to make several crafts and bring them to the platform, today I bring you a beautiful spiral of two colors that I loved and has a very nice effect when we spin it.
It is very simple and easy to make but it takes a little time, I used blank paper that I had to paint because I could not find colors, but a fascinating idea is to use already made sheets that we do not use, either from a drawing or a score, and we will see the great effect it has.
Let's get to the materials!
Debo aclarar que si usamos materiales de reciclaje como una partitura que ya no usemos o un dibujo con bonitos colores, nos ahorraríamos las pinturas o el papel de color.
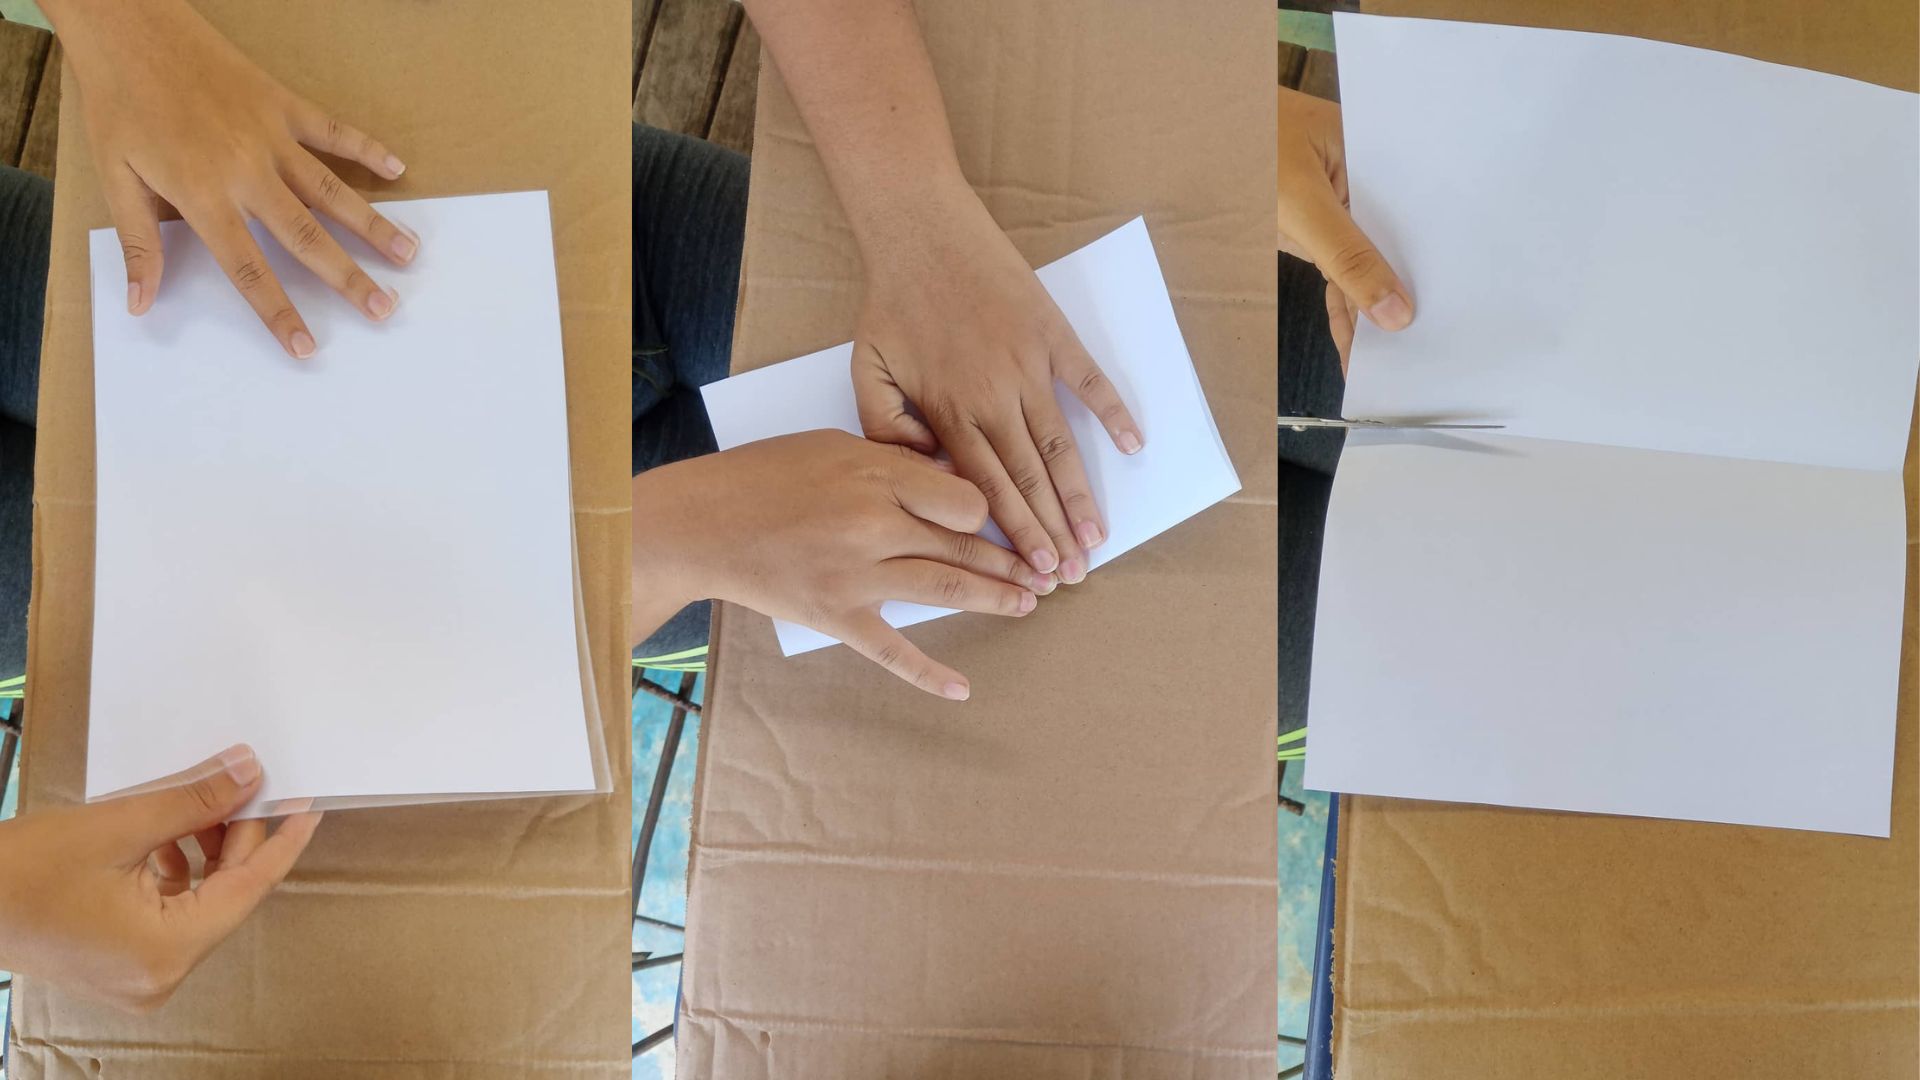
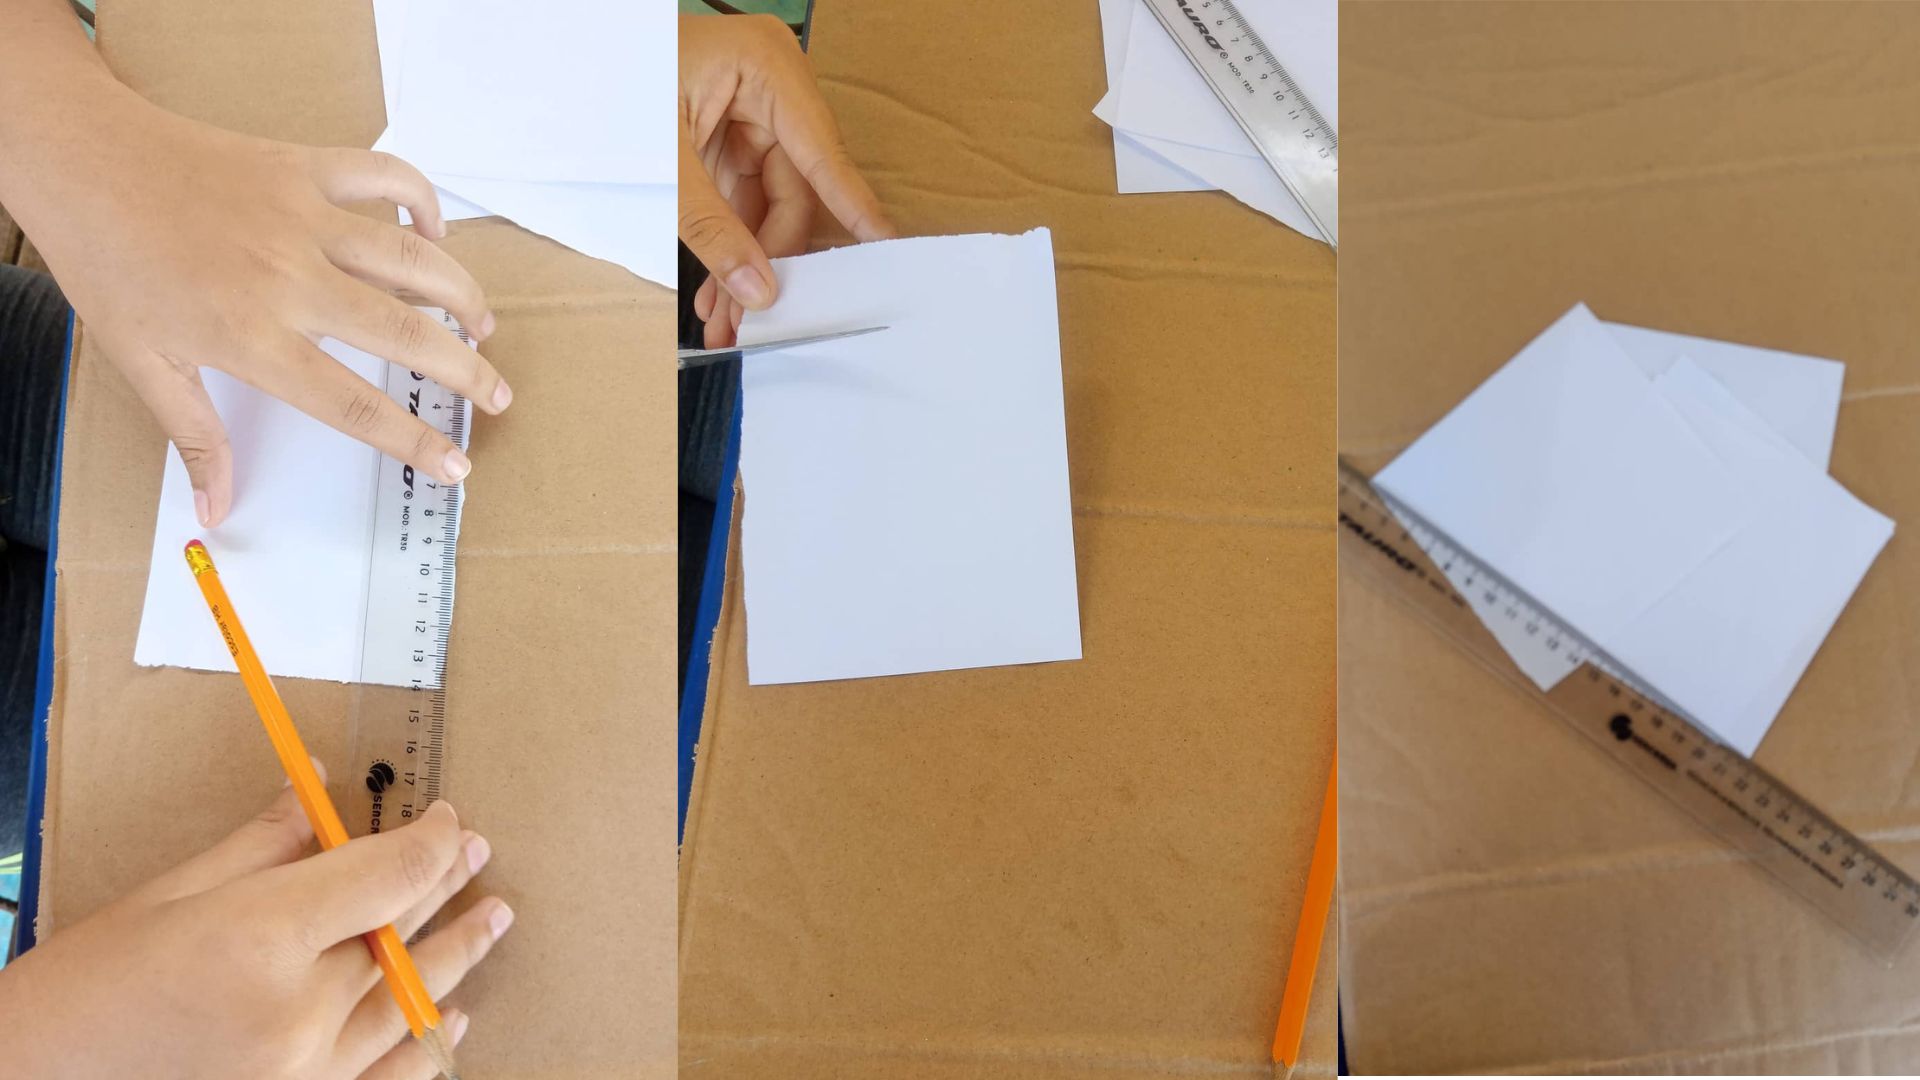
Para hacer éste precioso espiral me tomó unos cuantos pasos, lo primero fue hacer dos pliegues al papel en blanco, para de esa forma recortarlo y dejar cuatro partes de él.
I should clarify that if we use recycled materials such as a sheet of music that we no longer use or a drawing with beautiful colors, we would save the paints or colored paper.
To make this beautiful spiral it took me a few steps, the first thing was to make two folds to the blank paper, to cut it and leave four parts of it.

1
2
3
4
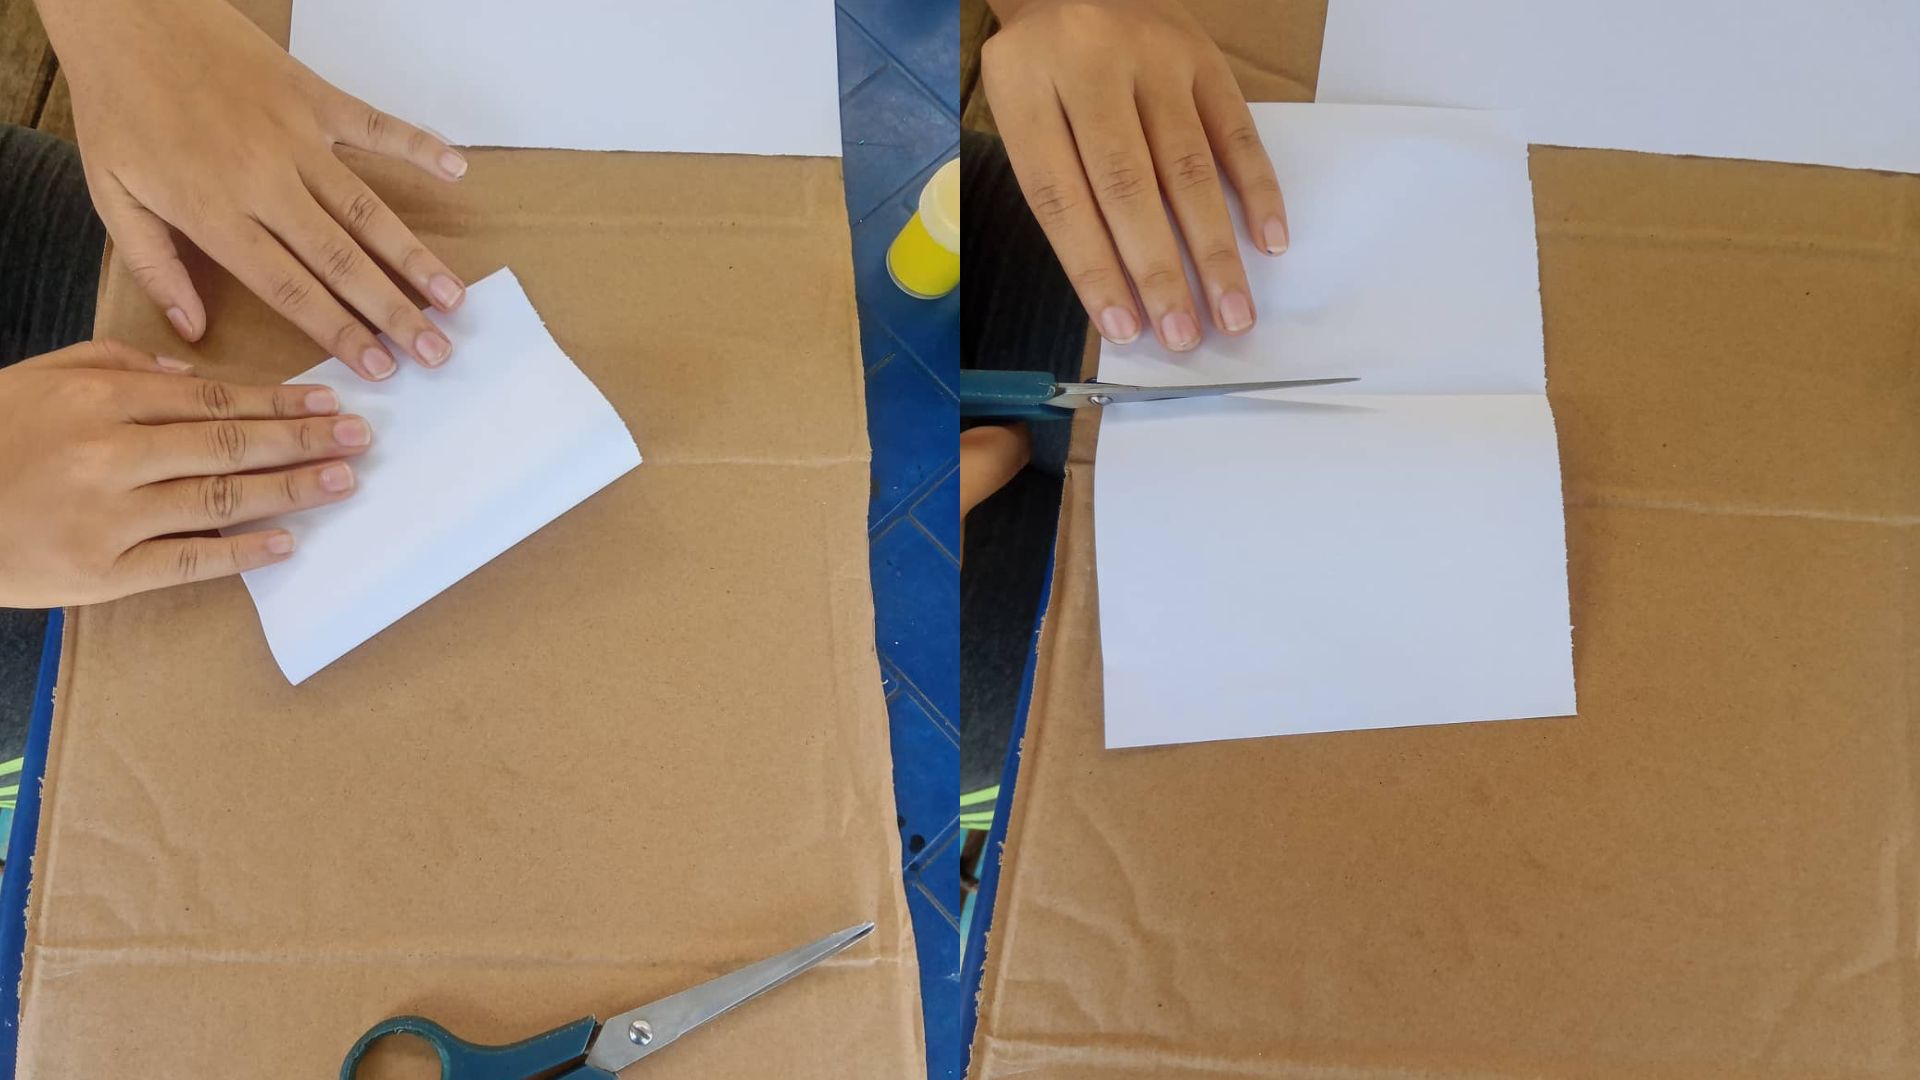
Como tenían forma de rectángulo fue necesario medir con una regla y marcar 10cm en cada extremo para recortarlos y que de esa forma tuvieran una medida de 10x10.
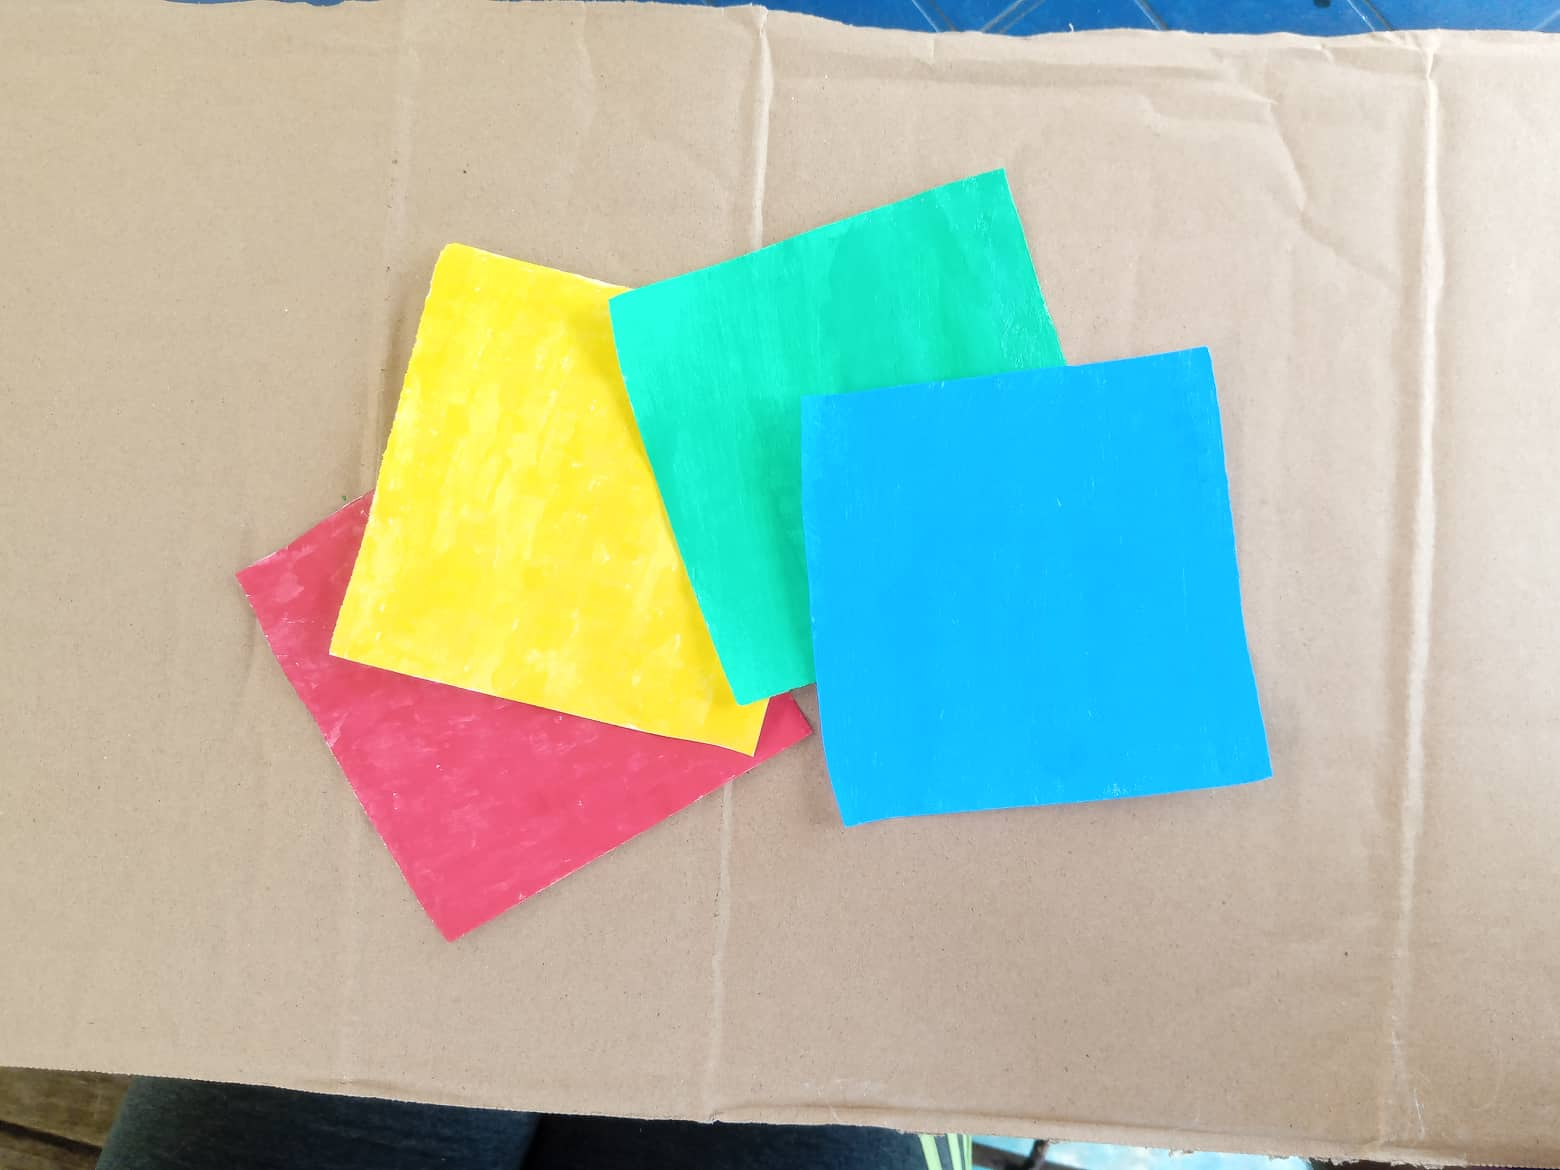
El paso más divertido fue pintarlos.
¿Ahora que sigue?
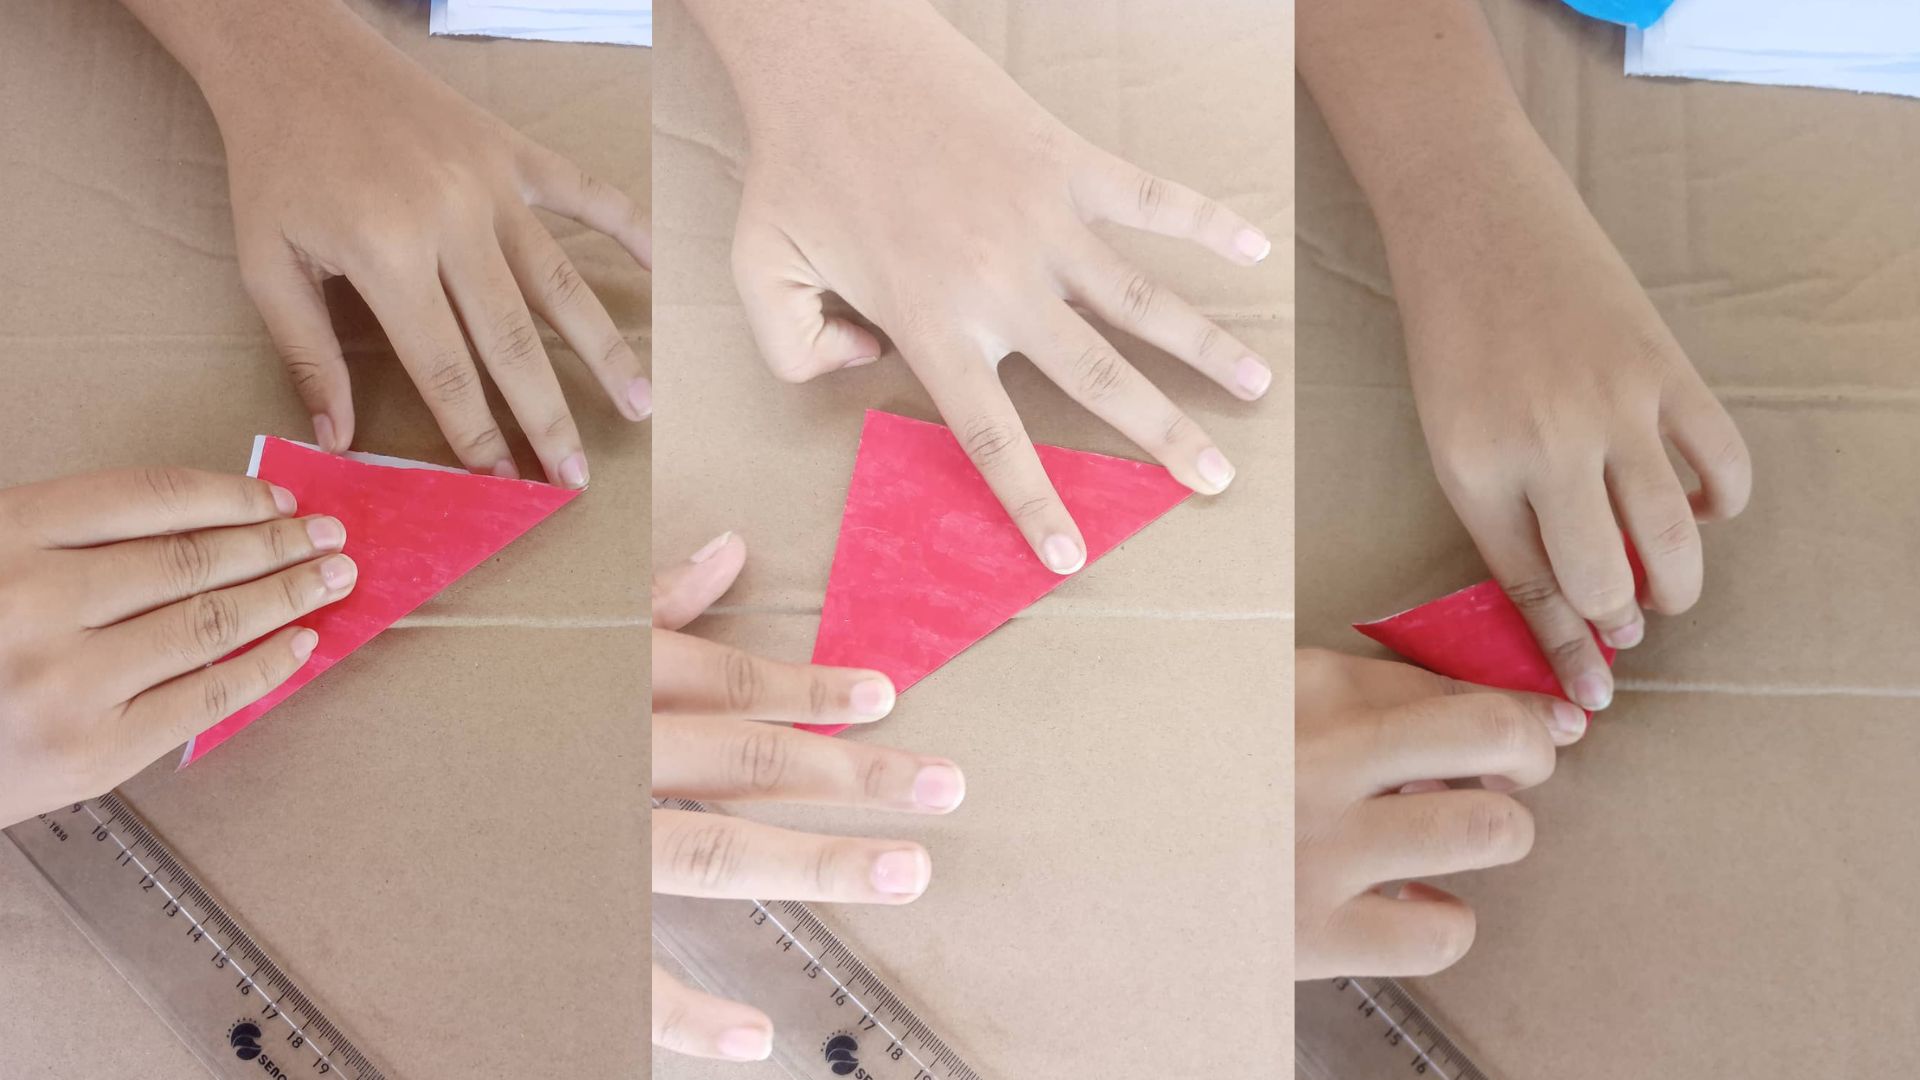
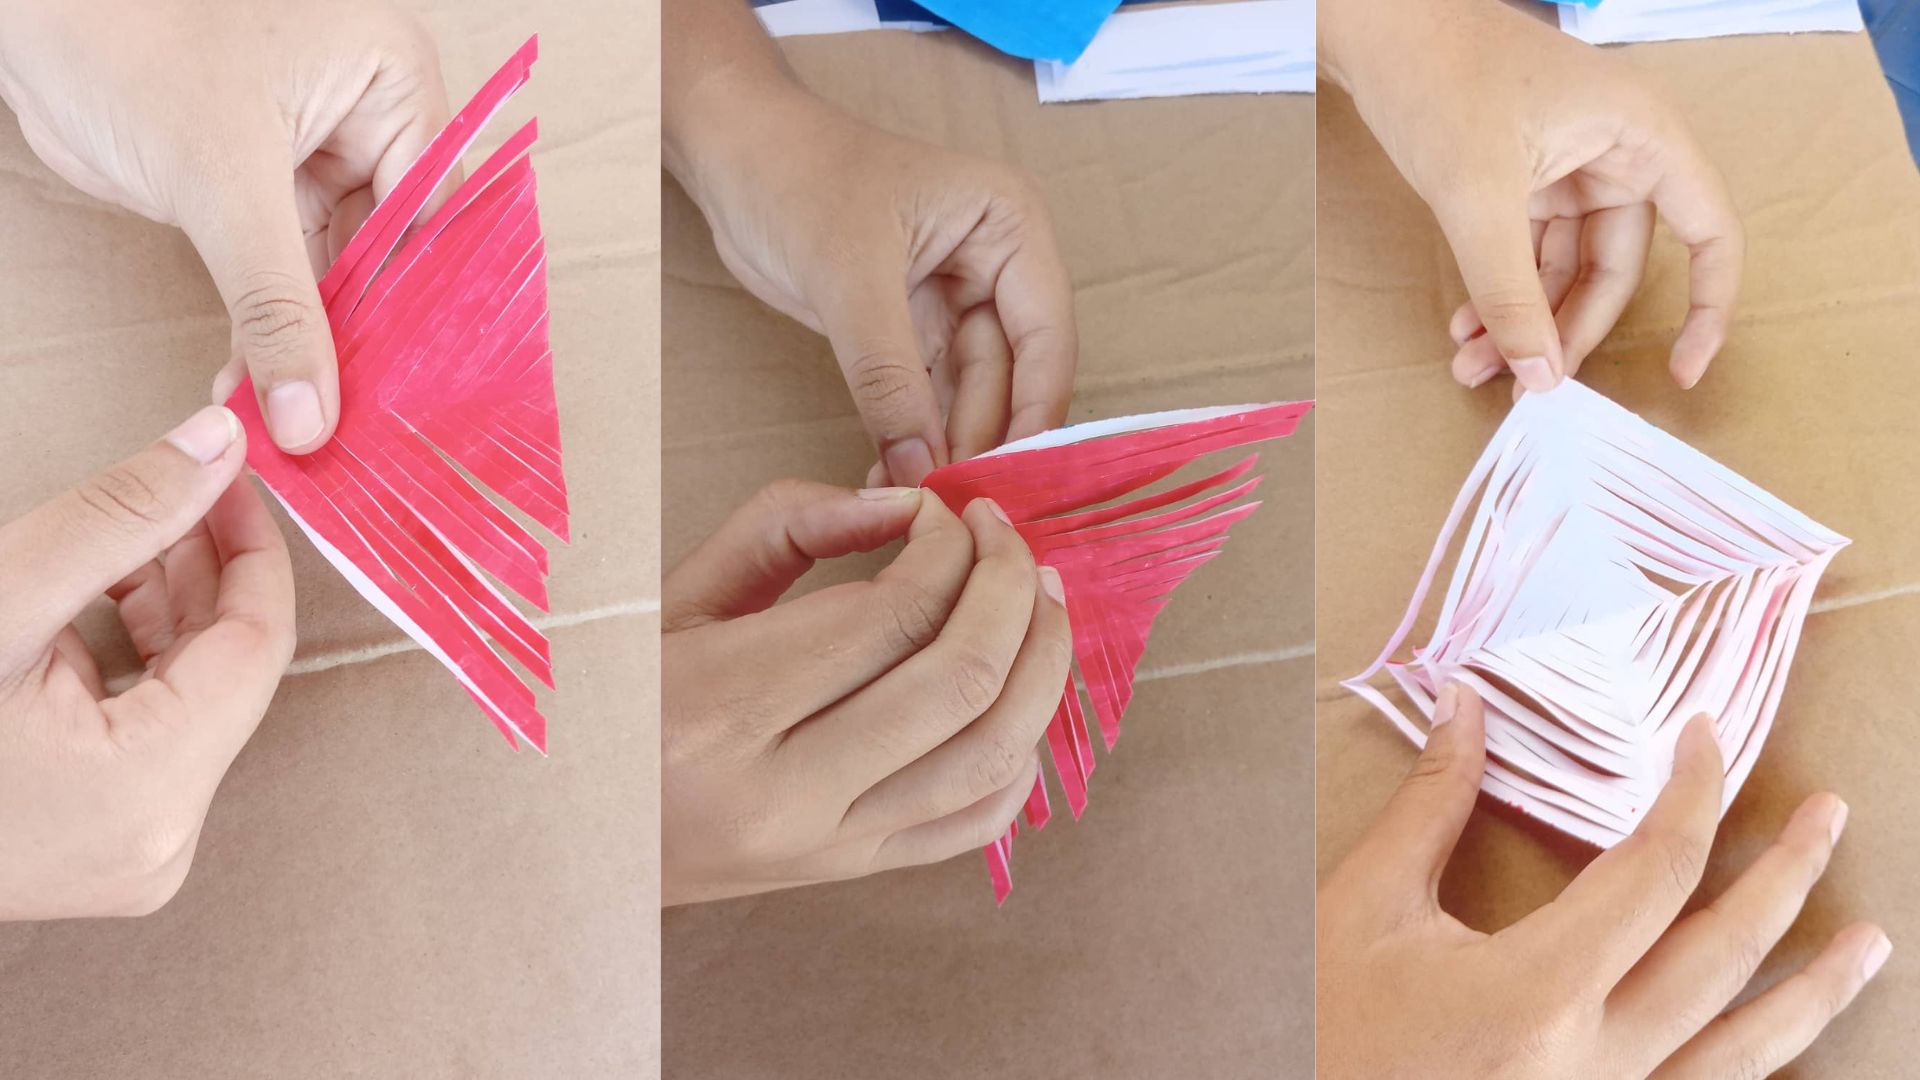
Lo siguiente sería hacer un pliegue de una esquina superior a la otra inferior, dejando una forma de triángulo, para luego hacer un pliegue similar para hacer un triángulo con un ángulo de 90°, todo es aproximado, tampoco es que estuve midiendo cada paso jejejejej, al ojo por ciento ha salido así.
As they had a rectangle shape, it was necessary to measure with a ruler and mark 10cm at each end to cut them so that they would have a 10x10 size.
The most fun step was to paint them.
Now what's next?
Next would be to make a fold from one upper corner to the other lower, leaving a triangle shape, and then make a similar fold to make a triangle with an angle of 90°, everything is approximate, not that I was measuring each step hahahahah, to the eye percent has come out well.
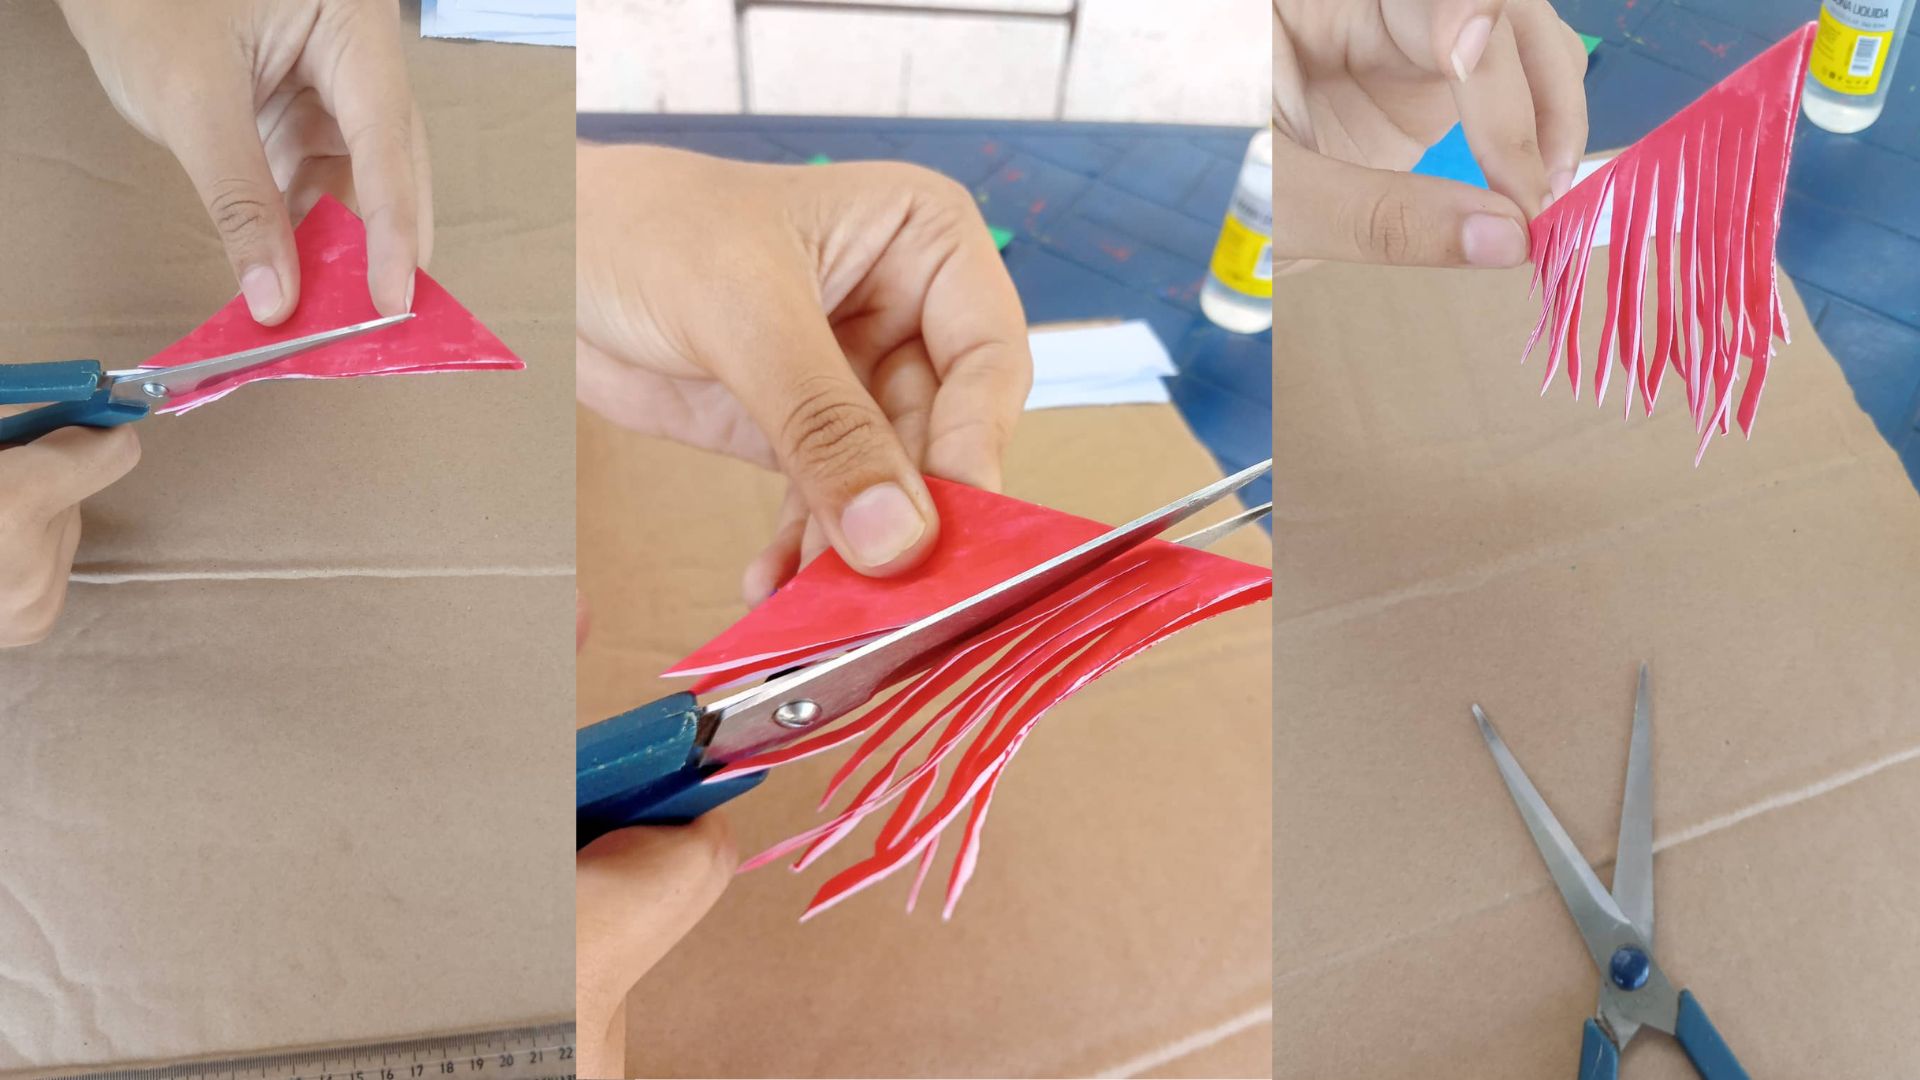
Lo siguiente e hacer unos recortes de la parte dónde tiene la apertura el triángulo con cuidado de no cortarlo por completo, dejando un espacio de más o menos unos 5mm.
The next thing to do is to make some cuts in the part where the triangle has the opening, being careful not to cut it completely, leaving a space of about 5mm.
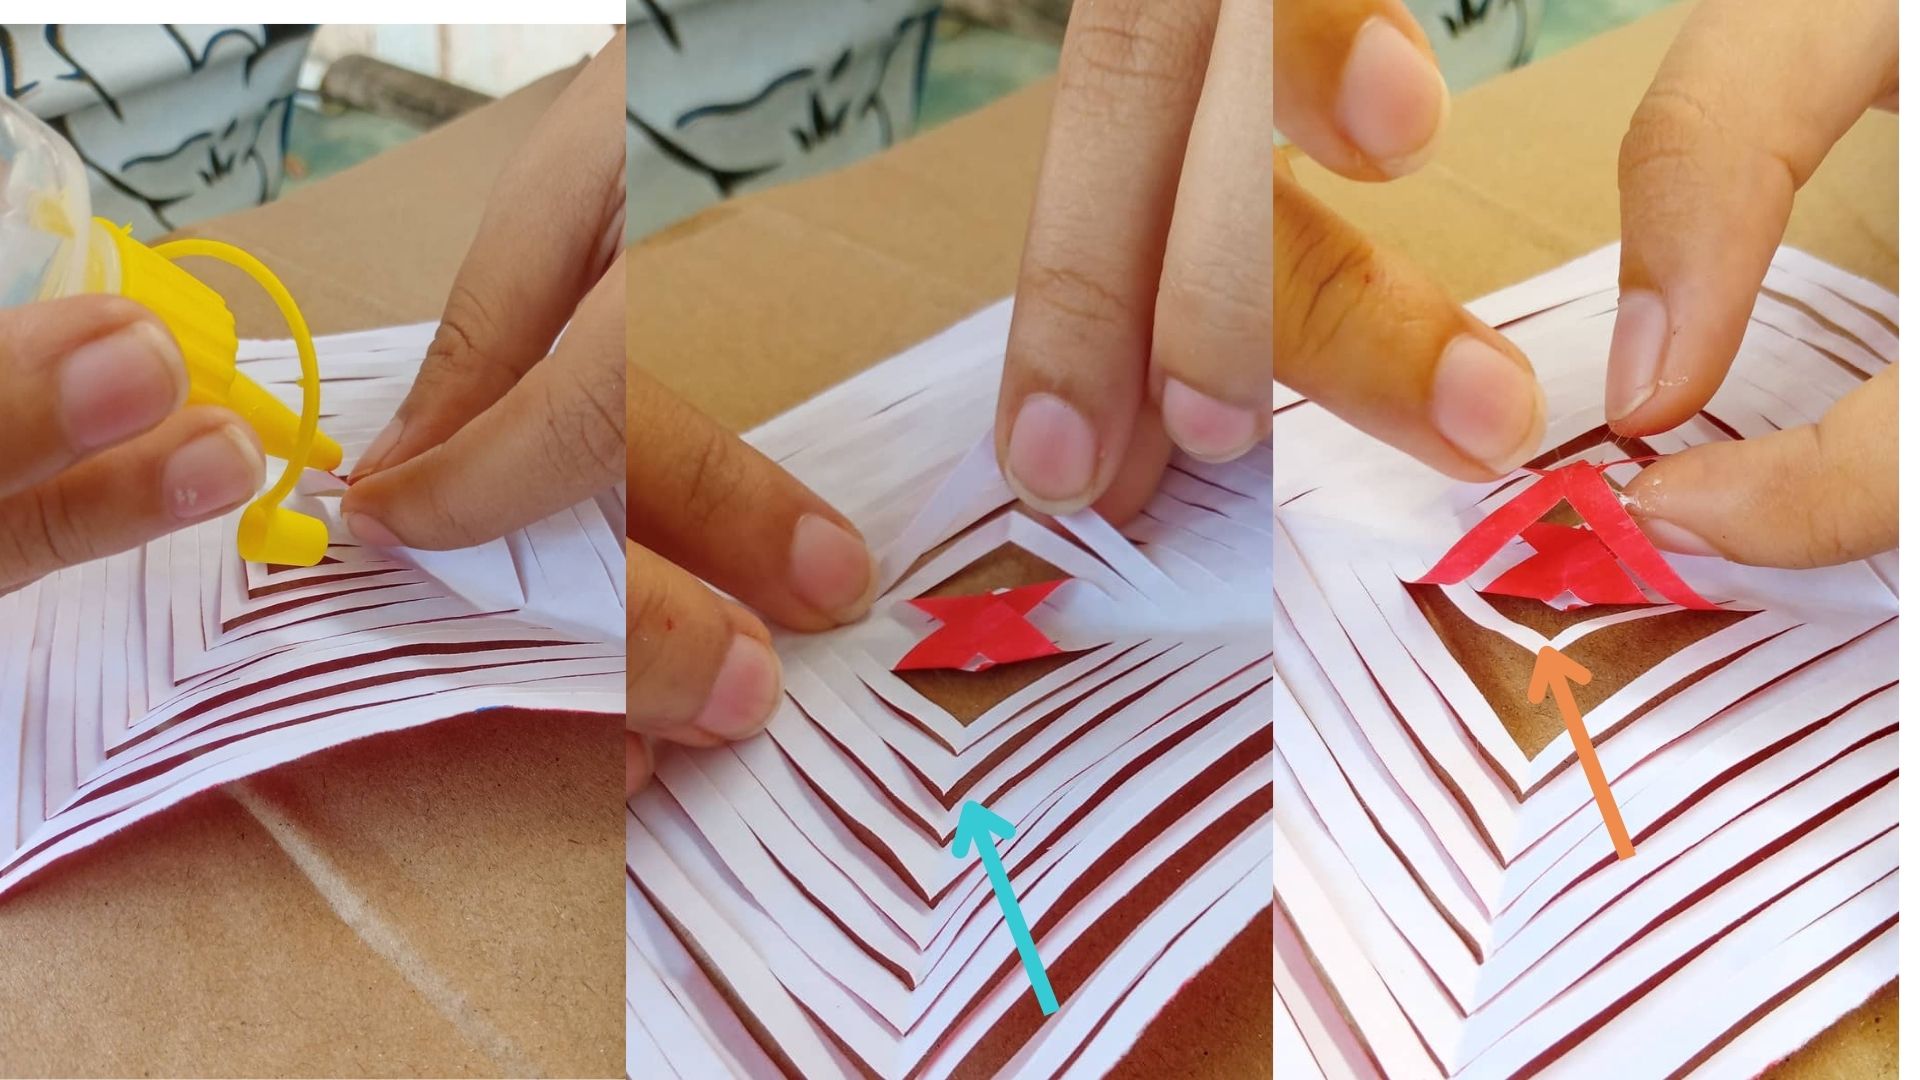
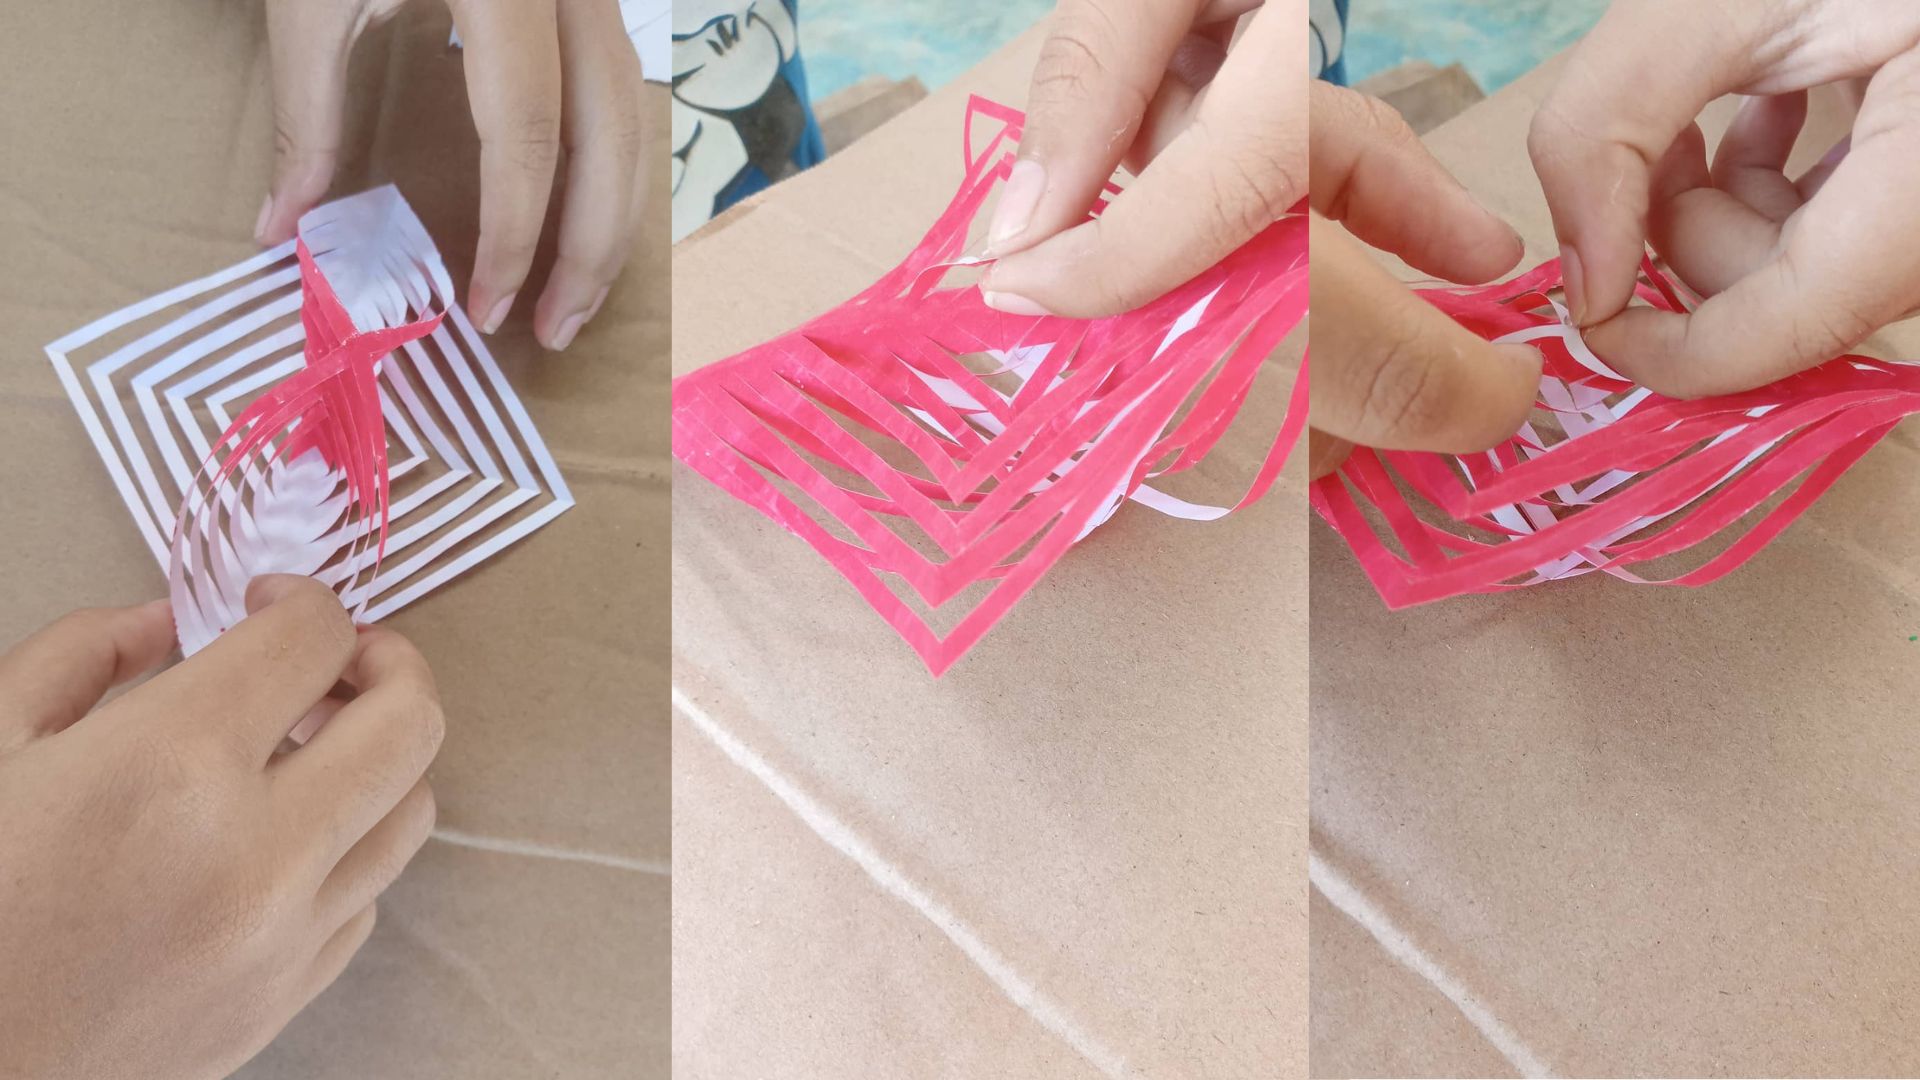
Abrimos nuevamente el cuadrado para comenzar a pegar cada recuadro que hay dentro de él dejando un recuadro sin pegar. Sería entonces, el primer recuadro lo pegamos pero el siguiente no, el tercero lo pegamos pero el cuarto no, así sucesivamente hasta que ya no haya recuadros.
Luego de tener todos los recuadros pegados quedarán otros recuadros sin pegar, lo que haremos es darle la vuelta al cuadrado y pegar todos los recuadros faltantes a la inversa de los ya pegados.
We open the square again to start pasting each box inside it, leaving one box unpasted. Then, the first square is glued but the next one is not, the third one is glued but the fourth one is not, and so on until there are no more squares.
After having all the squares glued, there will be other unglued squares, so we will turn the square upside down and glue all the missing squares in reverse order of those already glued.
1
2
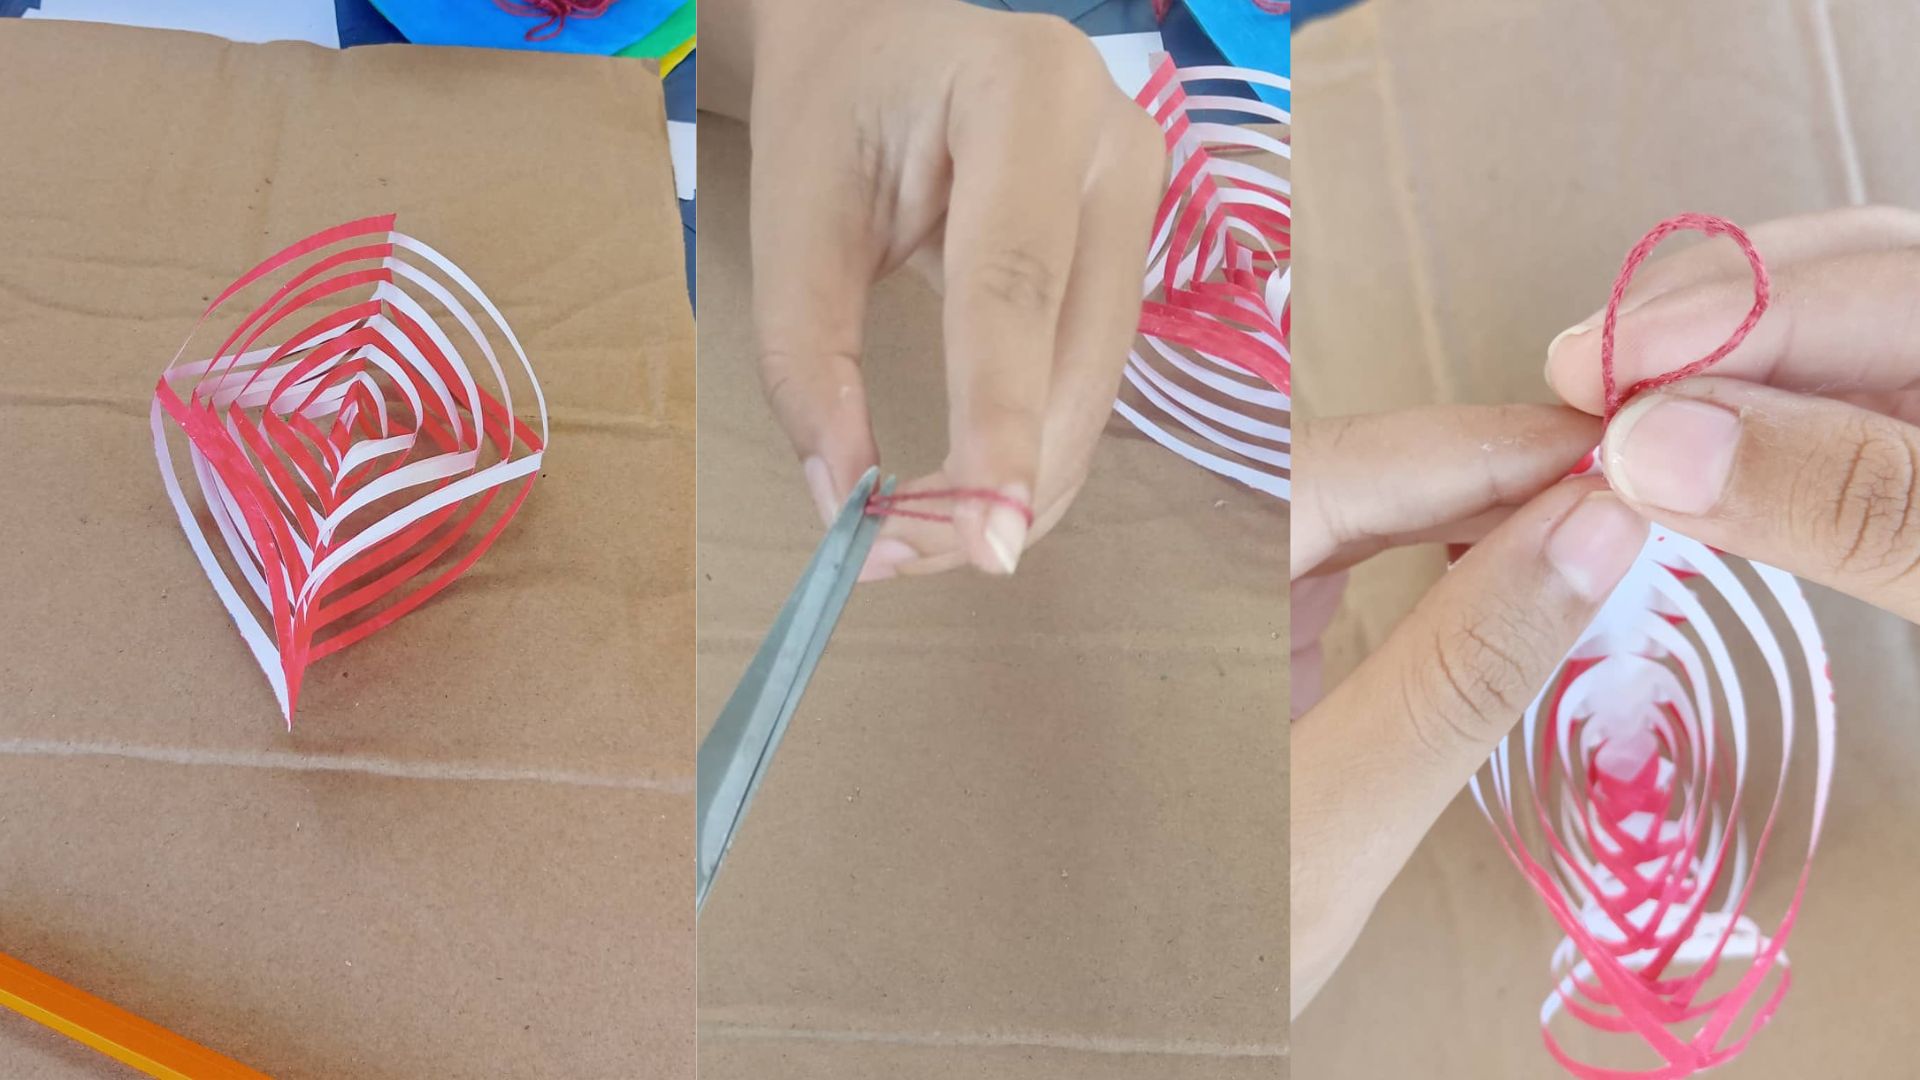
Para finalizar solo haría falta una cosa!!!
El cordón para poder colgarlo en cualquier sitio, de preferencia uno donde haya corrientes de aire suaves, para que de esa forma cuando gire se note el efecto visual que hace.
To finish, only one thing would be needed!!!
The cord to be able to hang it anywhere, preferably one where there are soft air currents, so that when it turns you can notice the visual effect it makes.
Espero les haya Gustado Muchísimo!!
I hope you liked it a lot!!

Congratulations @enmarisc! You have completed the following achievement on the Hive blockchain and have been rewarded with new badge(s):
Your next target is to reach 50 upvotes.
Your next target is to reach 100 comments.
You can view your badges on your board and compare yourself to others in the Ranking
If you no longer want to receive notifications, reply to this comment with the word
STOPTo support your work, I also upvoted your post!
Support the HiveBuzz project. Vote for our proposal!