
¡Hola Chicos!
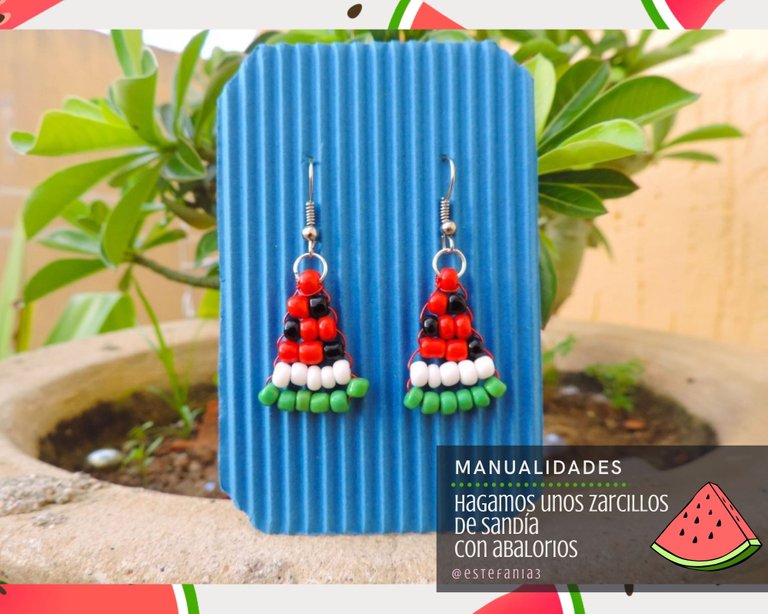
Hoy quiero mostrarles esta lindura de zarcillos que he creado súper fáciles y que además le dan un toque único a quien los lleve puestos.
La idea de hacerlos nació del post anterior en donde le compartí un collar en forma de helado de fresa. De ahí surge la curiosidad por saber que otras figuras podía crear con abalorios.
Así que comencé a investigar por Pinterest y me topé con esta linda idea para hacer unas sandías.
En el caso del pin era para hacer un anillo, pero yo quería hacer unos aretes de sandía. Así que tomé mi alambre, mis abalorios y me puse manos a la obra.
El resultado fue mejor del que imaginé y hoy les comparto la idea para que también puedan hacerlos.
Estos yo lo he creado para mi venta de bisutería. Ya luego les compartiré todo lo que he creado hasta ahora. ♥
Así que sin más comencemos con el tutorial.
Hey guys!
Today I want to show you this cuteness of earrings that I have created super easy and that also give a unique touch to whoever wears them.
The idea of making them was born from the previous post where I shared a necklace in the shape of strawberry ice cream. Hence the curiosity to know what other figures he could create with beads.
So I started researching on Pinterest and I came across this nice idea to make some watermelons.
In the case of the pin, it was to make a ring, but I wanted to make some watermelon earrings. So I took my wire, my beads and got to work.
The result was better than I imagined and today I share the idea so that you can also make them.
I have created these for my jewelry sale. Later I will share everything I have created so far. ♥
So without further ado let's get started with the tutorial.
- 20 centímetros de alambre de cobre esmaltado
- Abalorios en color negro, rojo, verde y blanco
- 2 argollas plateadas
- 2 bases para zarcillos
- Tijera
- Pinza de bisutería
- 20 centimeters of enameled copper wire
- Beads in black, red, green and white color
- 2 silver hoops
- 2 bases for earrings
- Scissors
- Jewelry nipper
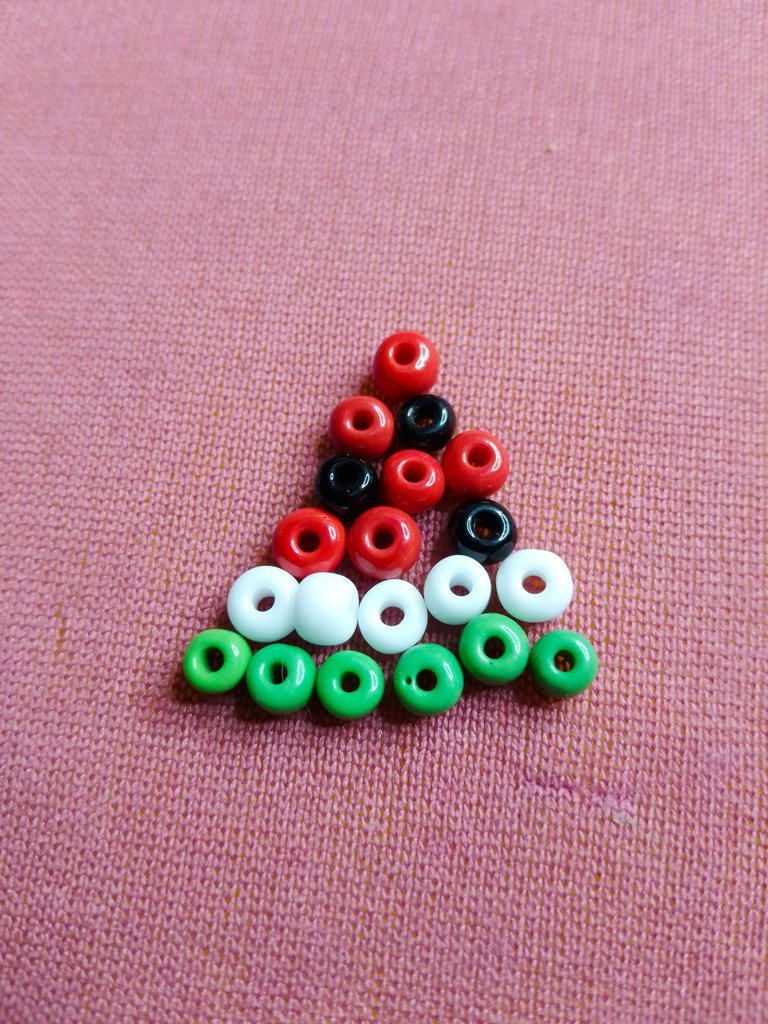
Lo primero que debemos hacer es un boceto de como queremos que luzca nuestra sandía.
Yo había hecho uno similar al de la idea, pero haciendo las pruebas me di cuenta de que había unos abalorios más grandes que otros y este fue el orden que me funciono perfecto.
The first thing we must do is a sketch of how we want our watermelon to look.
I had made one similar to the one in the idea, but doing the tests I realized that there were some beads larger than others and this was the order that worked perfectly for me.
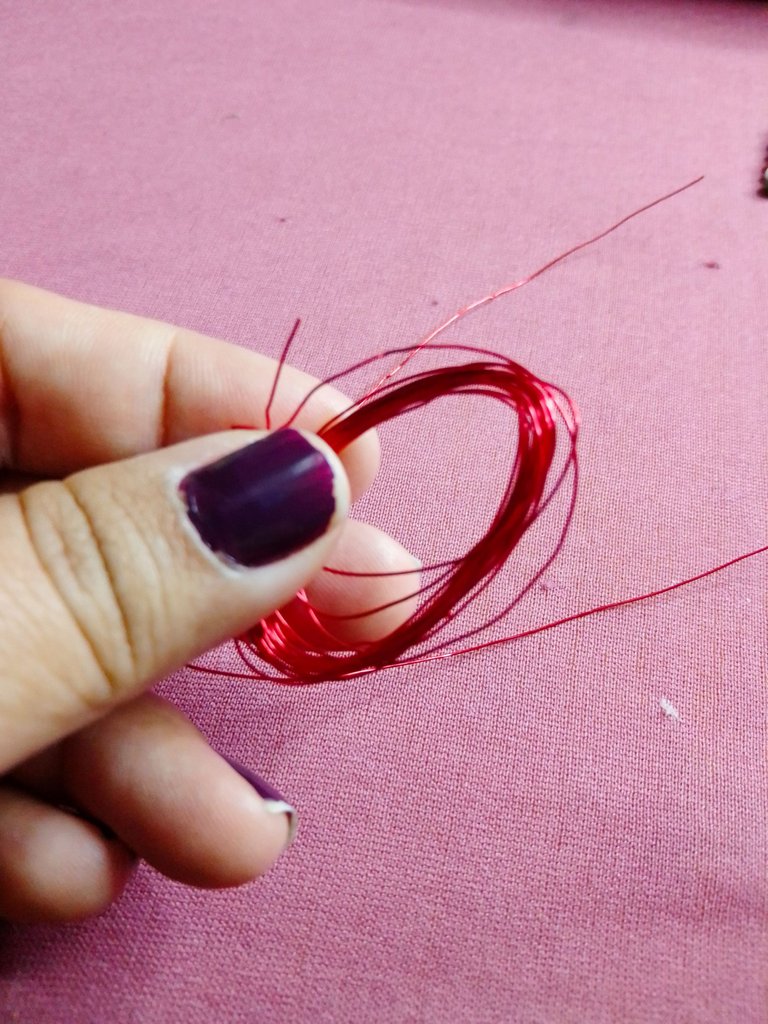
Es importante que el alambre de cobre sea fino y te permita introducir al menos 3 vueltas dentro de los abalorios.
It is important that the copper wire is fine and allows you to insert at least 3 turns inside the beads.
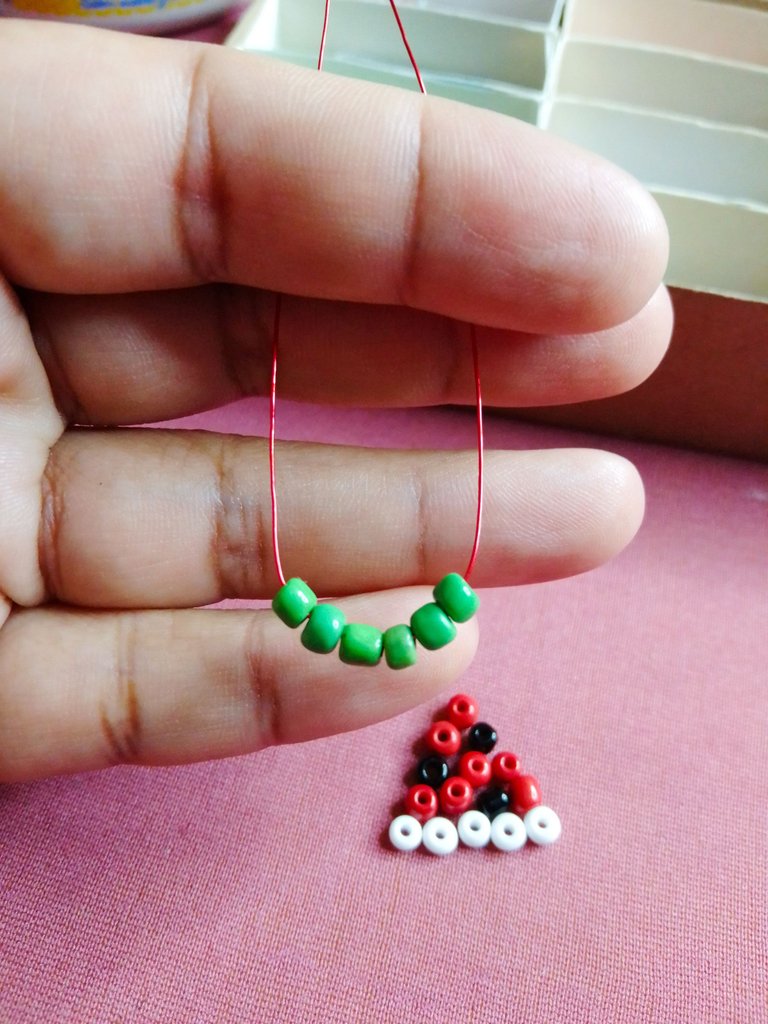
Colocamos en el centro del alambre los abalorios verdes, luego introducimos los de color blanco e interceptamos el alambre en el centro hasta lograr sacar cada uno de los extremos por el lado contrario.
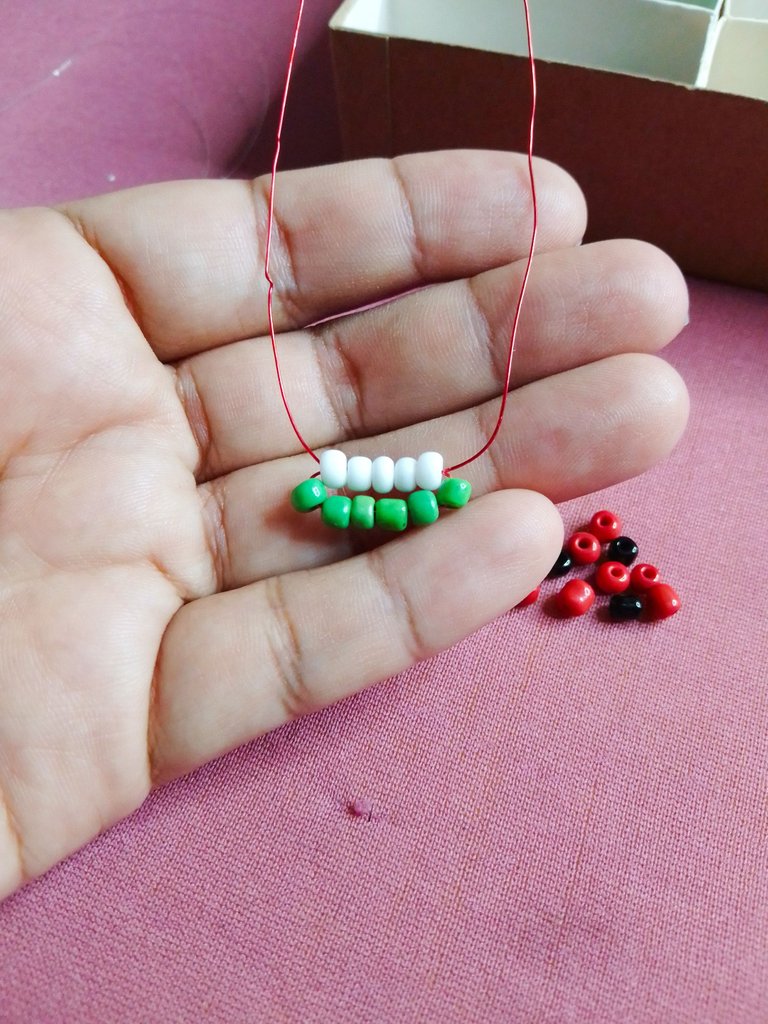
We place the green beads in the center of the wire, then we introduce the white ones and intercept the wire in the center until we manage to remove each of the ends from the opposite side.
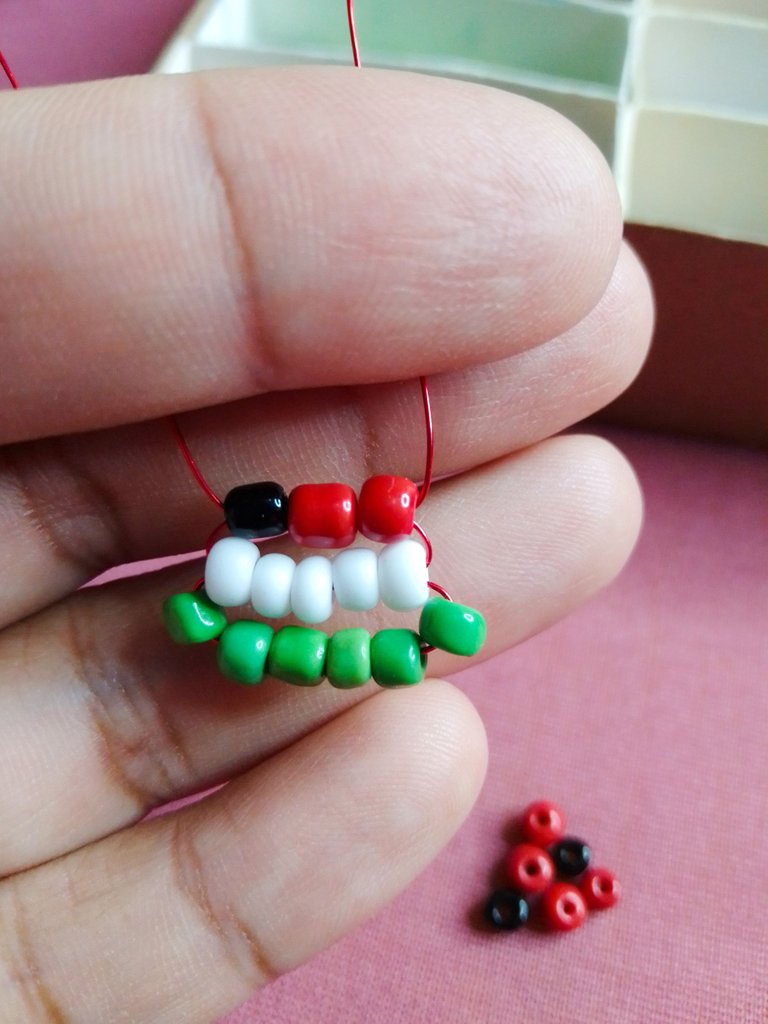
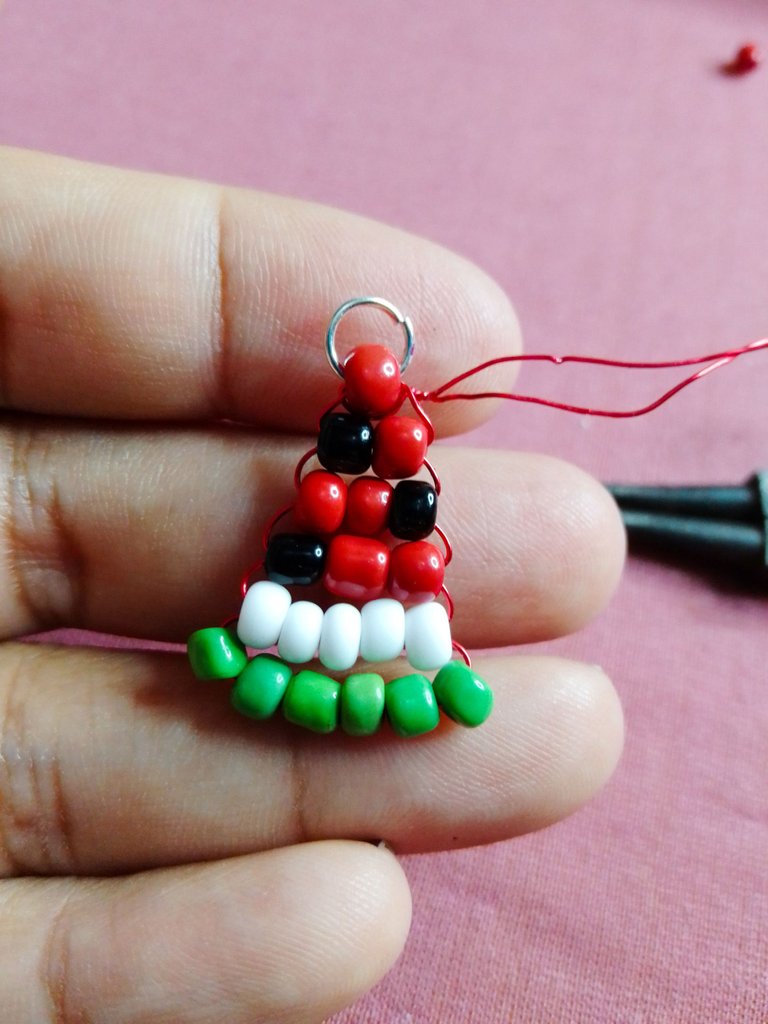
Seguimos con la secuencia que habíamos creado al inicio hasta llegar a la penúltima fila.
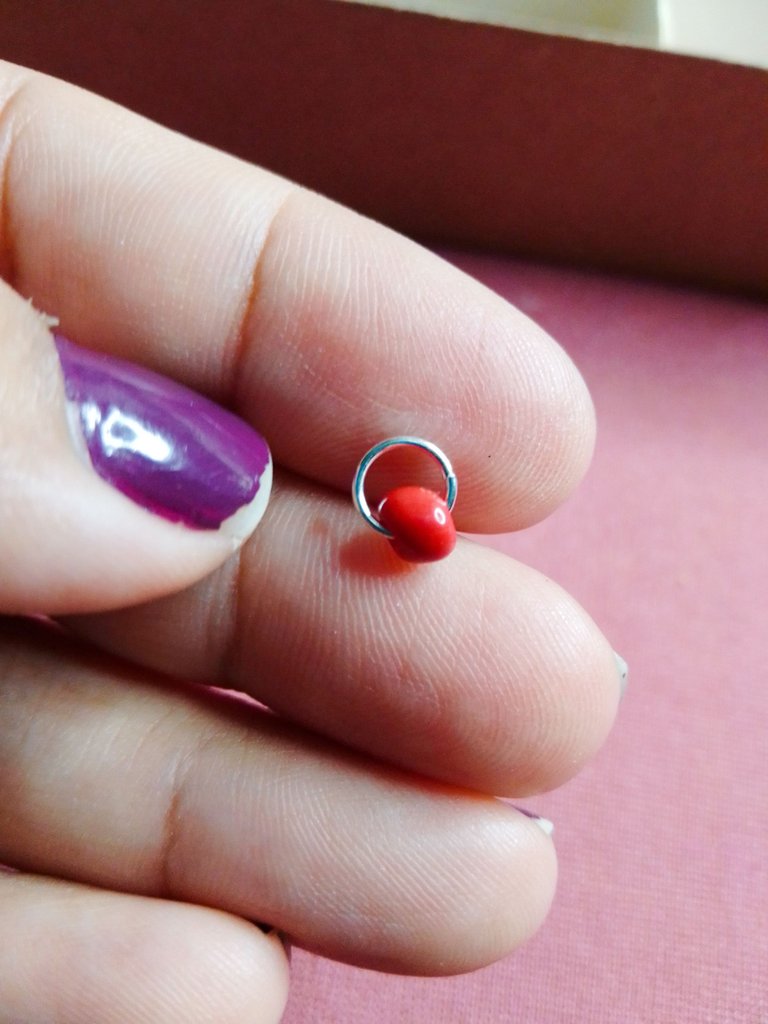
En el último abalorio rojo vamos a introducir una de las argollas plateadas para luego pasar los alambres dentro de él. Esto me facilitó mucho el armado final del zarcillo.

We continue with the sequence that we had created at the beginning until we reach the penultimate row.
In the last red bead we are going to insert one of the silver rings and then pass the wires inside it. This made the final assembly of the earring much easier for me.
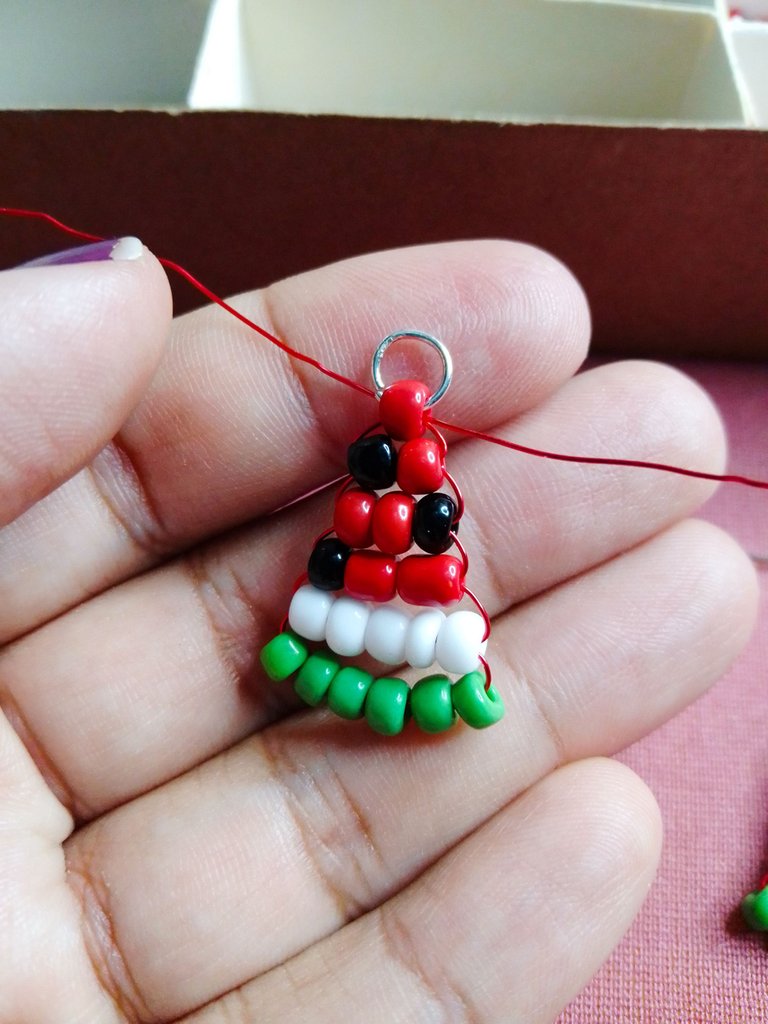
Una vez logrado esto, vamos a tomar uno de los extremos del alambre y lo vamos a pasar por detrás del último del abalorio.
Con ayuda de una pinza le vamos a dar vueltas para asegurar los abalorios y con la tijera cortamos el excedente.
Once this is achieved, we are going to take one of the ends of the wire and we are going to pass it behind the last one of the bead.
With the help of a clamp we are going to turn it to secure the beads and with the scissors we cut the excess.
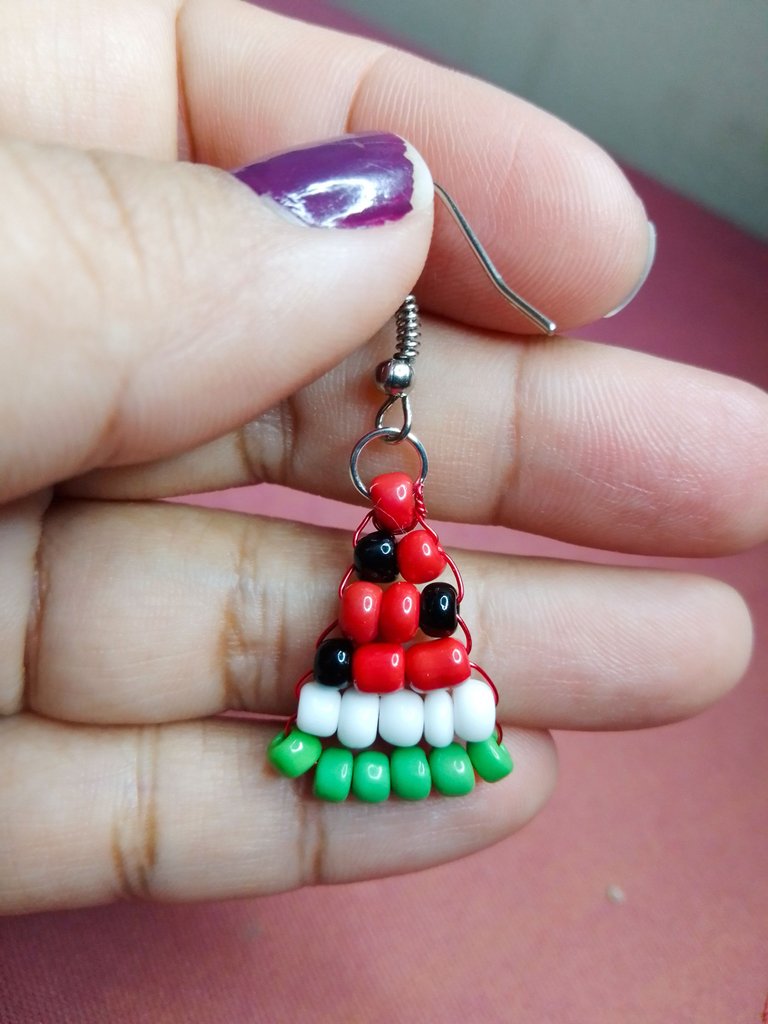
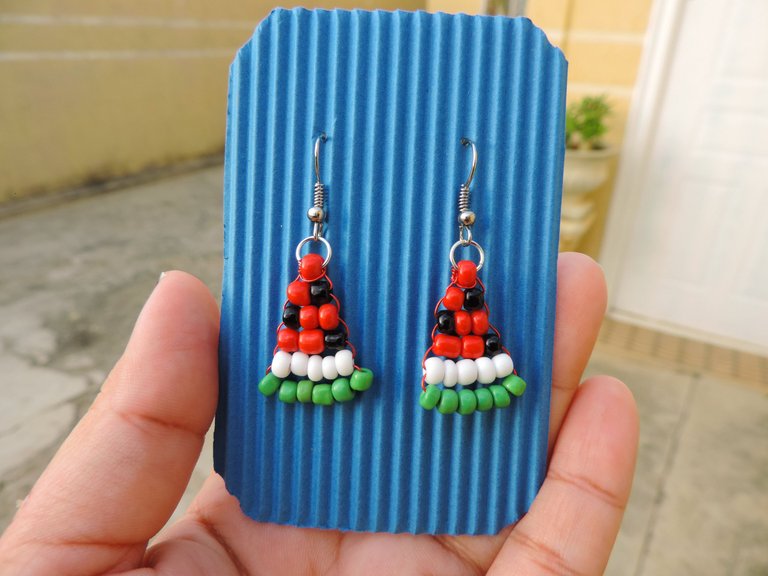
Como último detalle, agregamos la base de zarcillos y listo. Repetimos el proceso desde el inicio para crear el par, y ahora si tenemos nuestros lindos zarcillos de sandía.
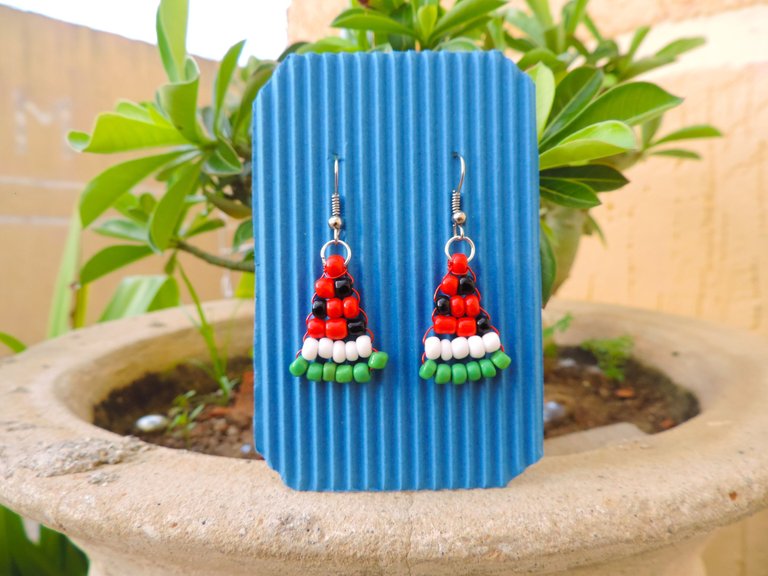
Sin duda son una hermosura y espero vender muchos de estos prontos. ♥
Espero les haya gustado la idea y cualquier duda me dejas un comentario y con gusto responderé.

As a last detail, we add the base of tendrils and that's it. We repeat the process from the beginning to create the pair, and now we have our cute watermelon tendrils.
They are certainly a beauty and I hope to sell many of these soon. ♥
I hope you liked the idea and if you have any questions, leave me a comment and I will gladly answer.

Espero haya sido de tu agrado y provecho.
Un gran abrazo a todos, y nos leemos en un próximo post
• Lakrearte en Hive •
Att: Estefania Garcia ♥

Imágenes y separadores de mi autoría
Portada editada en Canva
Fotografías tomadas con un Moto E7i power y Nikon Coolpix P520
Texto traducido en Google ImTranslate v.14.19
Hola, señorita muy hermoso y practico.
usare en una pulsera a ver ,feliz fin de semana exitoso.
Muchas gracias. Sii en uns pulsera también se vería genial. Luego me cuentas como te fue. Un abrazo 🤗💕
Bello trabajo 🙂👍🏼...
💞🍉🍉🍉
🎆🎇🎉🎊🌧️💐✨🌾🌱🌹🌙🌿🍃🥀⚡🌺☘️🍀🌈🌷⭐🪴🌵🌸🌟💮🌴🌳💫☀️💮☔🌲🌳🌍🌌🌠☄️🏵️🐝🌻🌼🍄🐞🦋💙☕💜🍍🎆🎇🎉🎊🎆🎇🎉🎊🌧️💐✨🌾🌱🌹🌙🌿🍃🥀⚡🌺☘️🍀🌈🌷⭐🪴🌵🌸🌟💮🌴🌳💫☀️💮☔🌲🌳🌍🌌🌠☄️🏵️🐝🌻🌼🍄🐞🦋💙☕💜🍍🎆🎇🎉🎊🎆🎇🎉🎊🌧️💐✨🌾🌱🌹🌙🌿🍃🥀⚡🌺☘️🍀🌈🌷⭐🪴🌵🌸🌟💮🌴🌳💫☀️💮☔🌲🌳🌍🌌🌠☄️🏵️🐝🌻🌼🍄🐞🦋💙☕💜🍍🎆🎇🎉🎊
Muchas gracias 😊✨🤗
Thank you for sharing this amazing post on HIVE!
Your content got selected by our fellow curator @rezoanulvibes & you just received a little thank you via an upvote from our non-profit curation initiative!
You will be featured in one of our recurring curation compilations and on our pinterest boards! Both are aiming to offer you a stage to widen your audience within and outside of the DIY scene of hive.
Join the official DIYHub community on HIVE and show us more of your amazing work and feel free to connect with us and other DIYers via our discord server: https://discord.gg/mY5uCfQ !
If you want to support our goal to motivate other DIY/art/music/homesteading/... creators just delegate to us and earn 100% of your curation rewards!
Stay creative & hive on!
Se ve fácil de realizar, me gusto mucho el resultado🍉