Hola amig@s de la comunidad de hive diy, a todos los artesanos y creativos, esperando se encuentren muy bien en este día, y muy saludables.
Hello friends from the hive diy community, to all the artisans and creatives, hoping you are very well on this day, and very healthy.
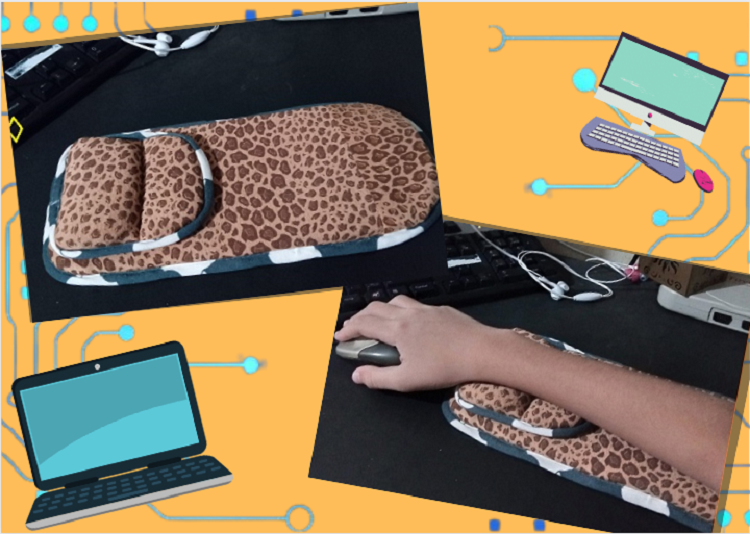
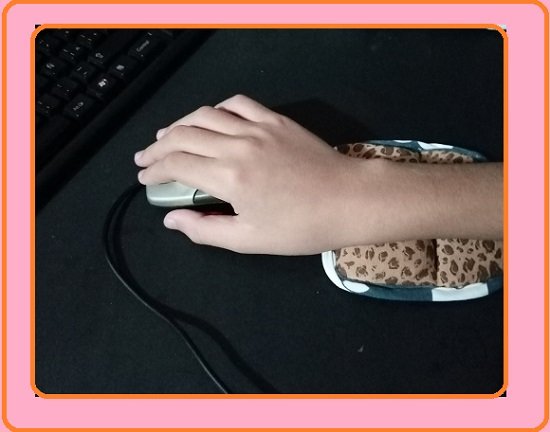
Nuevamente por aqui, en esta oportunidad les voy a enseñar como hice unas almohadillas especial para apoyar el brazo y mano en la mesa de la PC o de tu lapto, ya que para muchos que pasamos tiempo en la PC, realizando cualquier actividad y pasamos horas, el brazo necesita tener un mejor apoyo mucho más cómodo, así realizamos nuestro trabajo con menos cansancio, es por eso que hice uno, para tener mejor comodidad, tanto en el antebrazo como en la muñeca.
En la parte de la muñeca de la mano es la que más necesita este apoyo, porque es ahí donde estamos realizando más movimientos, y muchas veces terminamos con algún dolor o molestia, y para esto es ideal también realizar movimientos en la muñeca para evitar que los tendones de la mano se tensen.
Here again, this time I am going to show you how I made some special pads to support the arm and hand on the PC table or your laptop, since for many of us who spend time on the PC, doing any activity and spend hours , the arm needs to have better support, much more comfortable, so we can carry out our work with less fatigue, that's why I made one, to have better comfort, both in the forearm and in the wrist.
The wrist part of the hand is the part that needs this support the most, because that is where we are making the most movements, and many times we end up with some pain or discomfort, and for this it is also ideal to make movements in the wrist to prevent the tendons of the hand tense.
Así pues empiezo los pasos realizados en esta creación.
So I begin the steps taken in this creation.
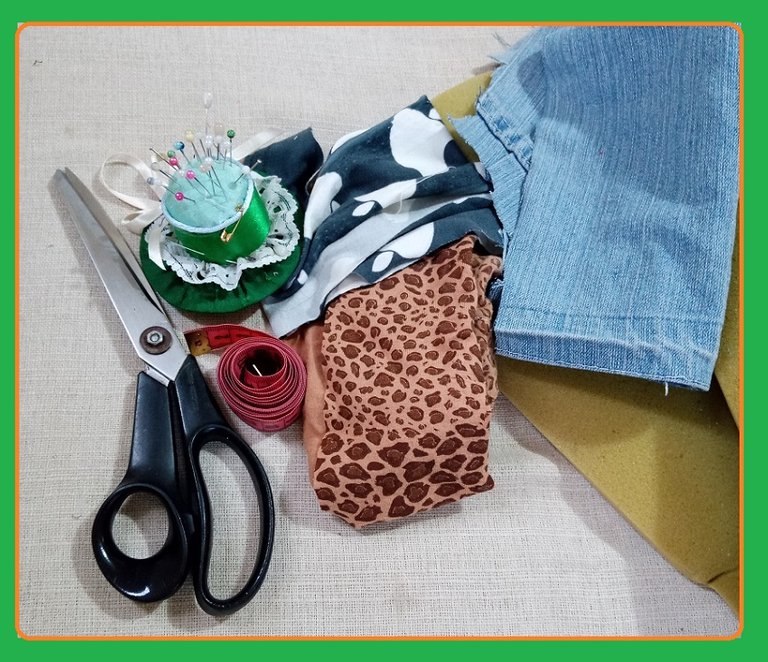
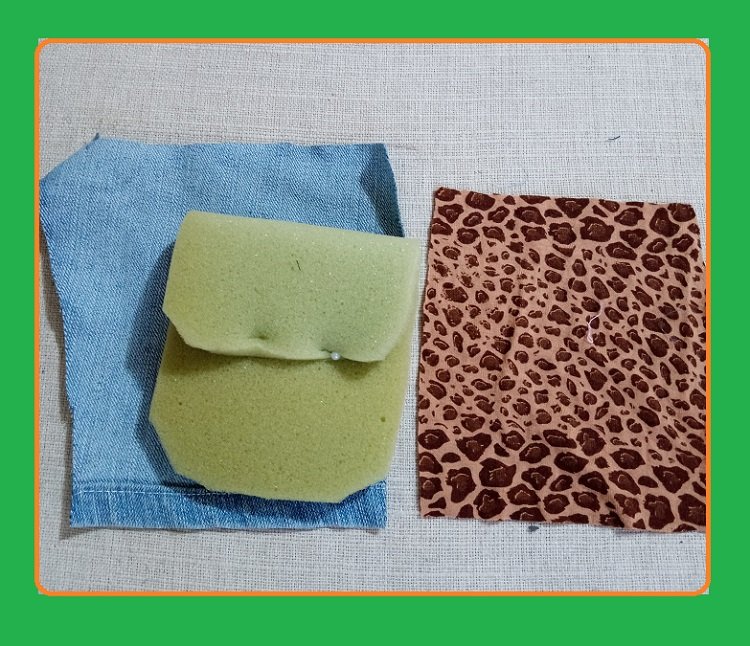
💻Mis materiales:
Goma espuma de 1cm de ancho.
Retazos tela.
Tela de jean.
Hilos, agujas, tijera, cinta métrica.
💻My materials:
1cm wide foam rubber.
Fabric scraps.
denim fabric
Threads, needles, scissors, tape measure.
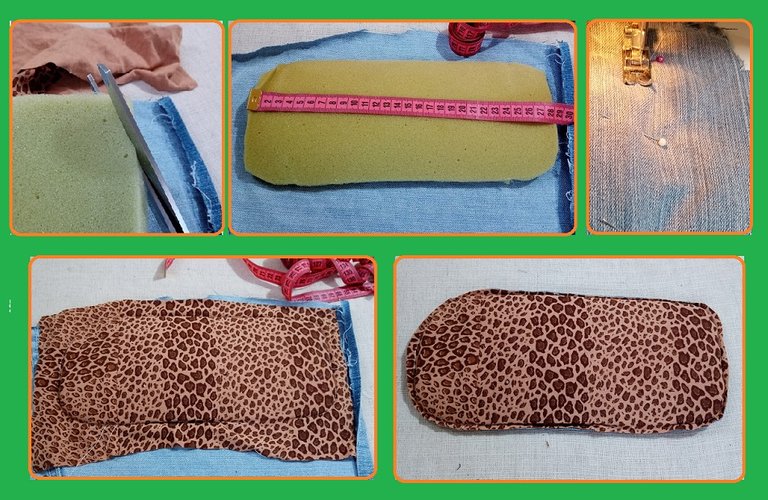
Comienzo tomando la medida del antebrazo, ya que este es el que apoyamos en la mesa de la PC, en este caso son 28cm, aproximado y de ancho 14cm.
I start by taking the measurement of the forearm, since this is the one that we support on the PC table, in this case they are 28cm, approximate and 14cm wide.
Marco en la goma espuma y corto, en las esquina le hice un corte curvo, luego coloco dentro de las dos telas, la prenso con alfileres, paso la costura y despues corto el sobrante de la tela dejando 1cm para pegar el sesgo.
I frame in the foam rubber and cut, in the corners I made a curved cut, then I placed it inside the two fabrics, I pressed it with pins, I passed the seam and then I cut the excess of the fabric leaving 1cm to glue the bias.
Luego con otra tela, saque unas tiras largas para el sesgo o bis, de 3cm de ancho, y empiezo a coserla por todo alredor de toda esta pieza.
Then with another fabric, take out some long strips for the bias or bis, 3 cm wide, and start sewing it all around this piece.
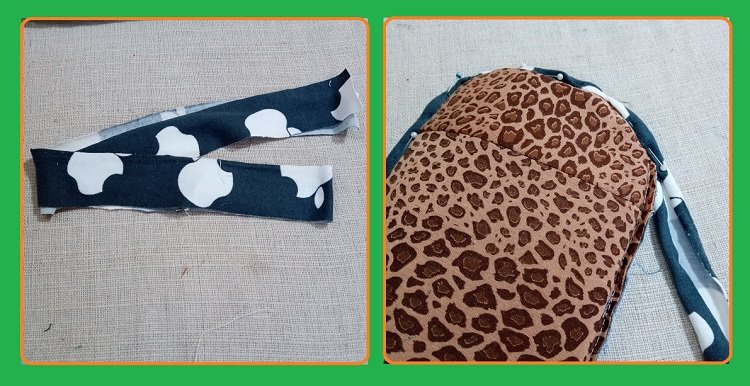
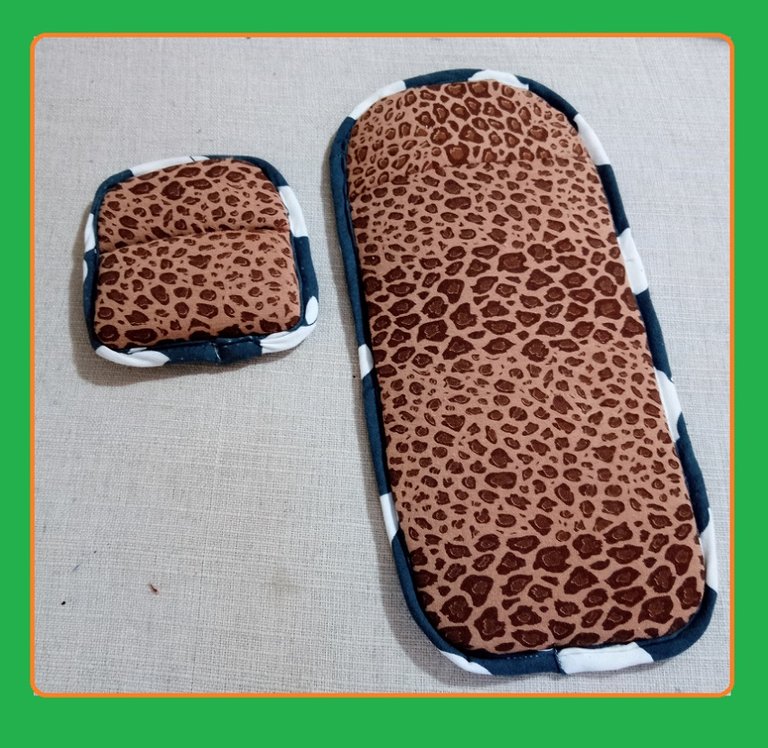
Con el más pequeño lo hago de 16cm de largo, por 10cm de ancho.
Igual corto en goma espuma, y hago un doblez de 6cm, que este quedara un poquito más abultado.
With the smallest I make it 16cm long by 10cm wide.
I cut the same in foam rubber, and I make a 6cm fold, so that it will be a little more bulky.
Luego a esta medida corto las telas estampada y de jean, tambien dejando 1cm de los lados paso la costura.
Y le paso una costura justo donde está el doblez de la goma espuma.
Le coloco el bis o el sesgo y empiezo a coserlo, por todo su alrededor.
Then to this measure I cut the printed and jean fabrics, also leaving 1cm from the sides for the seam.
And I pass a seam right where the fold of the foam rubber is.
I put the bis or bias and begin to sew it, all around it.
Una vez terminadas estas piezas muy bien se puede usar por separado o pegarlas y asi tenemos una sóla pieza con su apoyo de la muñeca incorporado.
Once these pieces are finished, they can very well be used separately or glued together and thus we have a single piece with its built-in wrist support.
Y así quedó este proyecto realizado con mucho cariño, para una mejor comodidad en todo momento.
And so this project was made with great care, for better comfort at all times.
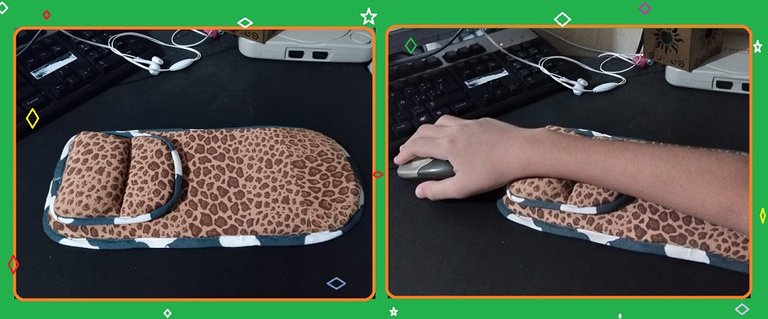
Espero les haya gustado este tutorial de estas almohadillas ya que son muy fácil de hacer, y de mucha utilidad, siempre las he usado porque son muy cómodas. Gracias por su visita, hasta la proxima, chau!
I hope you have enjoyed this tutorial on these pads since they are very easy to make, and very useful, I have always used them because they are very comfortable. Thanks for your visit, until next time, bye!

Las fotos son de mi autoria, con mi celular Tecno Spark go.
Traductor deepl.
Diseño canva.
The photos are my own, with my Tecno Spark go cell phone.
Translator deepl.
Canvas design.
I need one, I'll take your idea and see if I can make one just like it, although I don't have fabric with a design as great as yours, I'll see how I can manage it, thanks for sharing 😊
Gracias a ti amigo @oscargonzalez123, por tu visita, y cualquier tipo de tela sirve, sólo consigue el color que más te guste y se que lo haras muy bien, cuando intentes hacerlo.
@tipu curate 2
Upvoted 👌 (Mana: 35/55) Liquid rewards.
Útil y creativo...me encantó el diseño y los colores gracias por compartir.
🎆🎇🎉🎊🌧️💐✨🌾🌱🌹🌙🌿🍃🥀⚡🌺☘️🍀🌈🌷⭐🪴🌵🌸🌟💮🌴🌳💫☀️💮☔🌲🌳🌍🌌🌠☄️🏵️🐝🌻🌼🍄🐞🦋💙☕💜🍍🎆🎇🎉🎊
Muchas gracias a ti amiga por tu visita.
Quedó excelente, te felicito amiga @eylis, creo que es una idea 💡 maravillosa. Saludos y Bendiciones 🙏🏻😊
Hola @kathelopez77, muchas gracias.
😊👍🏻