

Greetings to this beautiful community of great ideas, every day with new projects, prepared by each one of us, many blessings.
The Christmas atmosphere is already felt in many places, and especially in schools where, at least in preschool, the teachers have asked that you please bring flannels alluding to Christmas, and thus motivate these little ones to integrate into this beautiful environment. where they put them to sing and do mini Christmas plays.
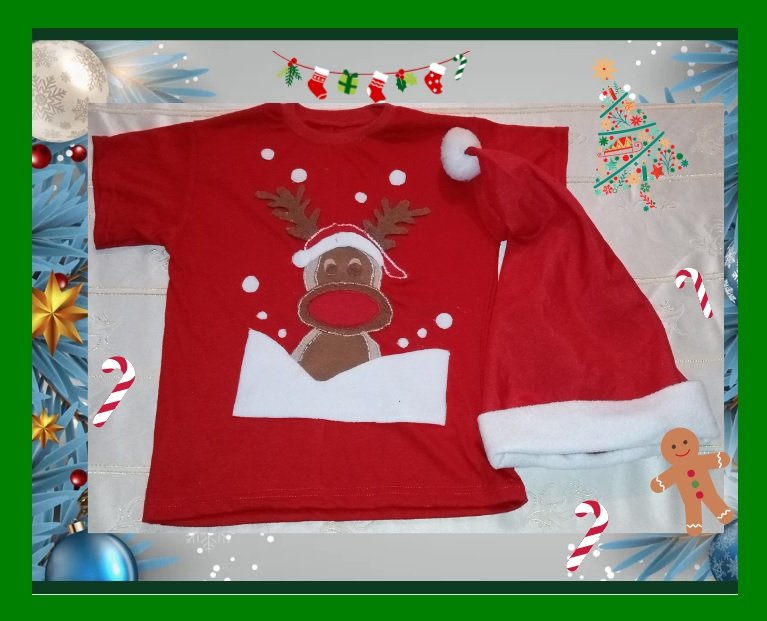
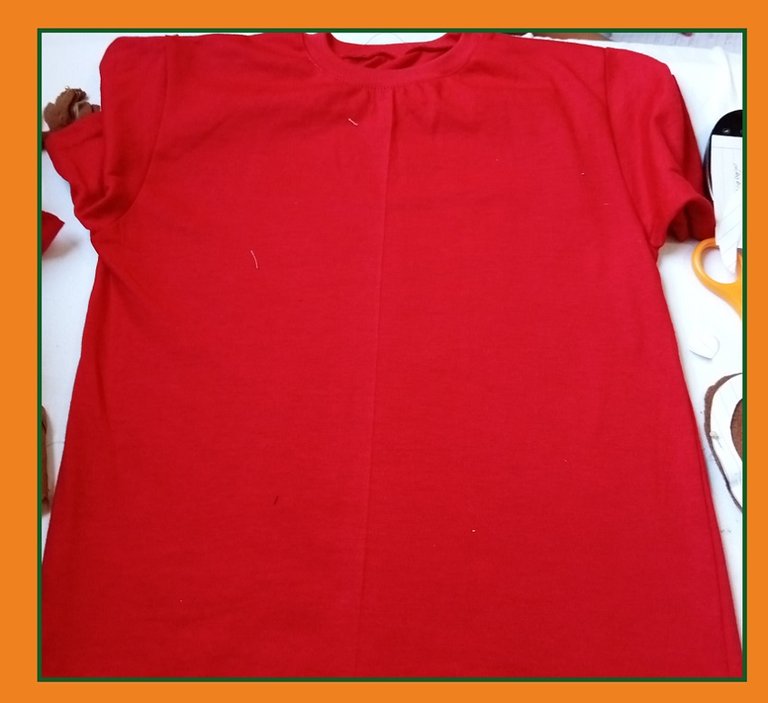
That is why today I show you how I made this design on a red flannel, since my neighbor asked me for this help and brought the drawing that she likes, a reindeer.
Very well, I will show you the steps carried out and the materials that many of us surely have at home, since they are fabric cutouts.
I used blanket fabric, which is much easier, since it doesn't lint when you cut it.
My materials:
red flannel.
Desired drawing or design.
Brown, red, white, beige fabric.
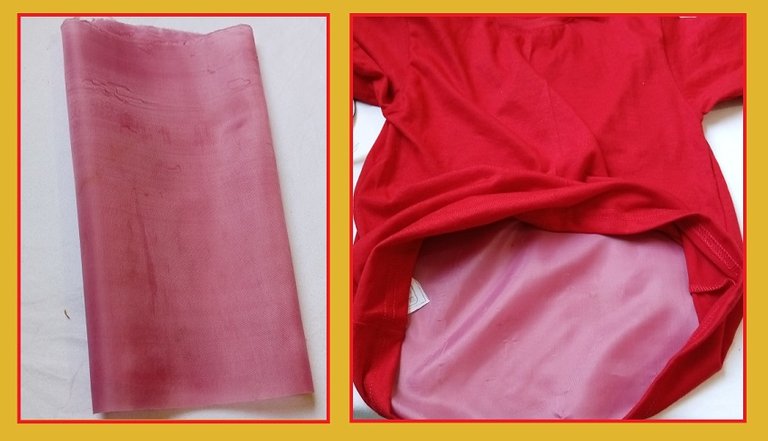
Lining fabric.
Thread of these colors.
Liquid silicone glue.
Pins, scissors, sewing machine.
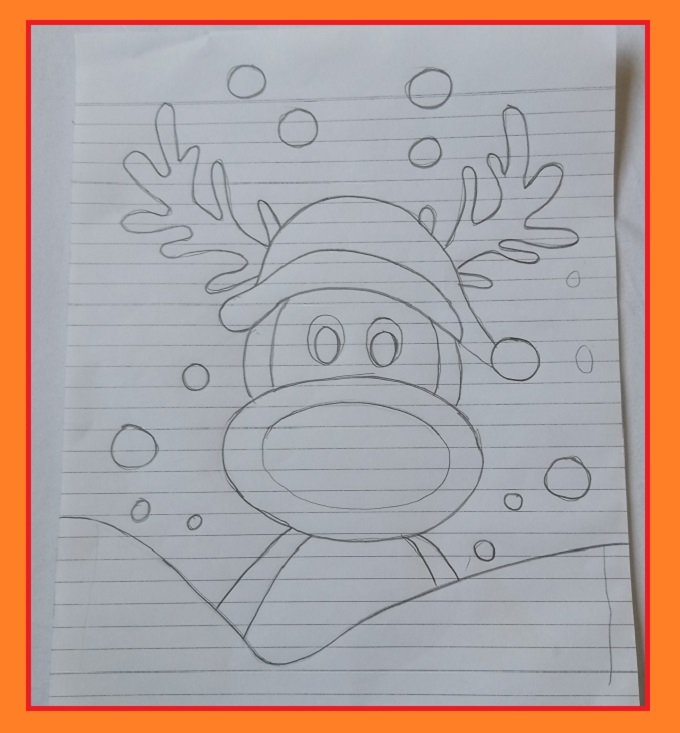
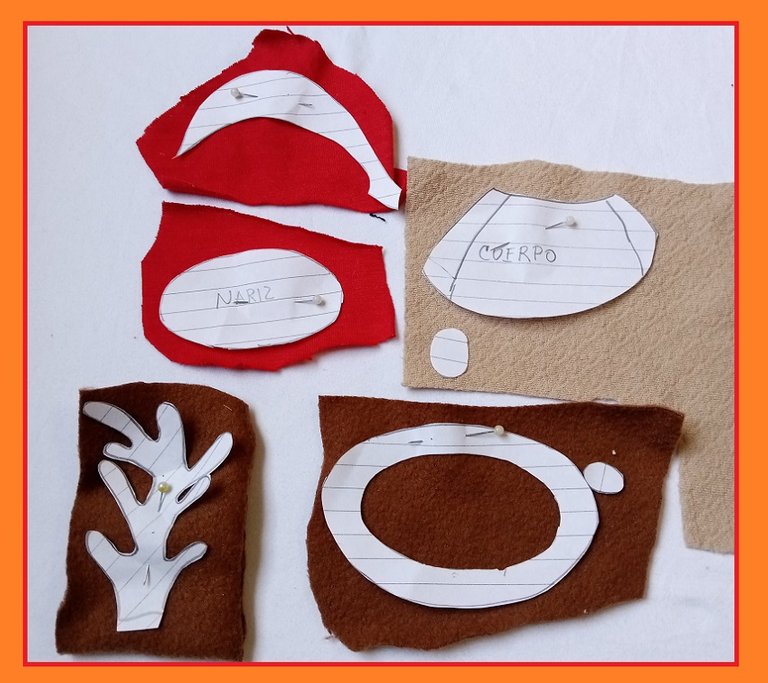
The design has to be smaller than the size or width of the flannel, so I mark it on another sheet and cut each piece, to be able to get it in the different colors needed.
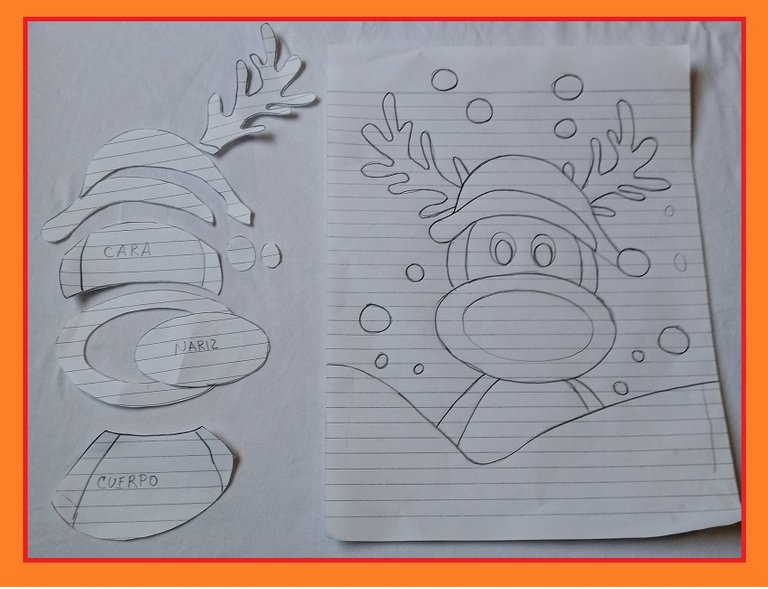
Placing each piece I press it with pins and cut it, the only thing that is double are the horns and the eyes.
I place the lining fabric inside the flannel since it will be easier, to be able to sew on the machine,
I start by sewing the part of the body, I always start with the pieces that are in the bottom and then continue with the ones that go on top.
I started with the body, passing the zig-zag, both in beige and brown, and I also made the part of the face, leaving space for the mouth.

I also put liquid glue on the mouth, so it doesn't move when I'm sewing, and I also made its red part.
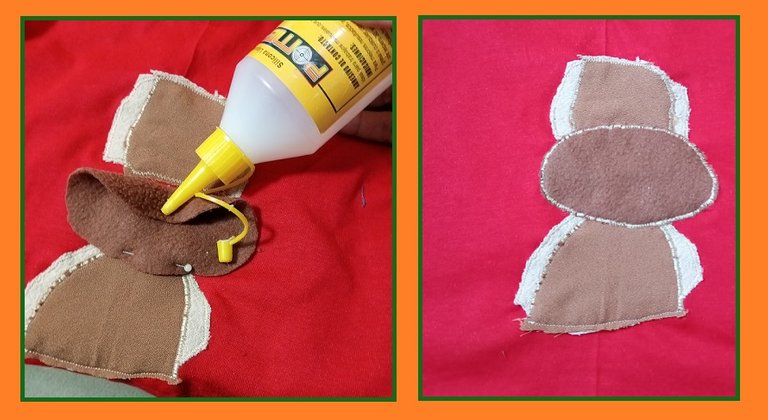

Here I placed the horns, I put the glue on these, and then on these at the bottom I placed part of the hat, since its edge is red I did it with white thread to make it stand out.
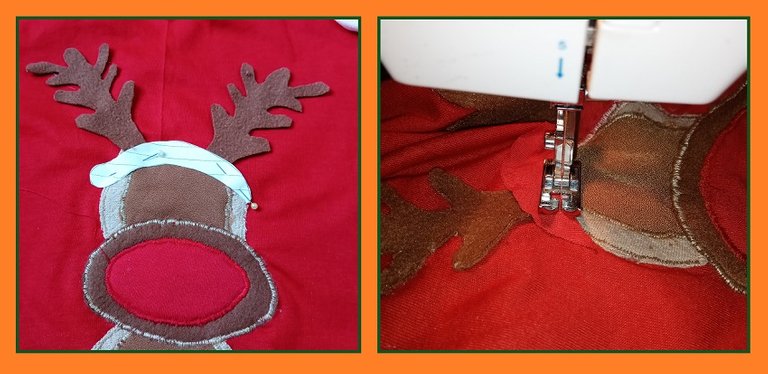
Once these parts are ready, I finish with the details, which are some blank circles, and the white stripe at the bottom of the reindeer, I did all this with silicone glue.
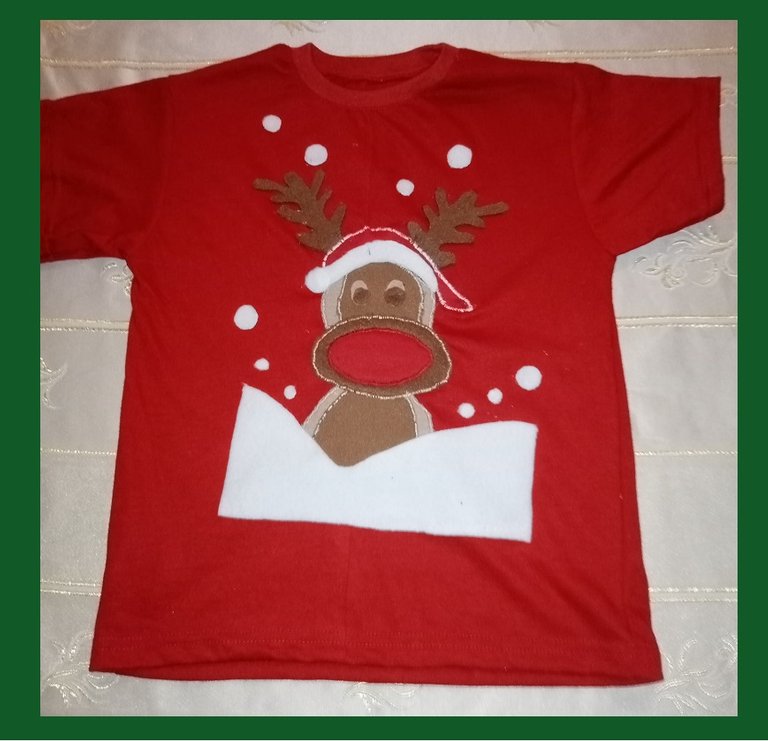
Now this beautiful design is ready on the flannel, you can make Christmas trees or another design to everyone's liking.
Thank you very much for your time and visit my blog, I hope you liked this beautiful design, until the next presentation, continue to have a great time, bye!

The photos are my own, with my Tecno Spark go cell phone.
deep translator
Canvas design.
The photos are my own, with my Tecno Spark go cell phone.
Translator deepl.
Canvas design.

Saludos a esta bella comunidad de grandes ideas, cada día con nuevos proyectos, elaborados por cada uno de nosotros, muchas bendiciones.
Ya se siente el ambiente navideño en muchos lugares, y sobre todo en las escuelas donde, por lo menos en preescolar las maestra han pedido que por favor llevar franelas alusivas a la navidad, y así motivar a estos pequeños a integrarse en este bello ambiente, donde los ponen a cantar y hacer mini obras navideñas.
Es por eso que hoy te muestro como hice este diseño en una franela roja, ya que mi vecina, me pidio esta ayuda y trajo el dibujo que le gusta, un reno.
Muy bien te enseño los pasos realizados y los materiales que seguro muchos tenemos en casa, ya que son recortes de telas.
Yo usé tela de cobija que es mucho más facil, ya que al cortala no se hilacha.
Mis materiales:
Franela roja.
Dibujo o diseño deseado.
Tela marron, roja, blanca, beige.
Tela de forro.
Hilo de estos colores.
Pega de silicon liquida.
Alfileres, tijera, maquina de coser.
El diseño es tiene que ser más pequeño que el tamaño o ancho de la franela, entonces lo marco en otra hoja y corto cada pieza, para poder sacarla en los distintos colores necesarios.
Colocando cada pieza lo prenso con alfileres y corto, lo unico que son doble son los cuernos y los ojos.
La tela de forro la coloco dentro de la franela ya que sera más fácil, poder coser en la maquina,
Empiezo cosiendo la parte del cuerpo, siempre empezar por la piezas que estan en el fondo para luego seguir con las que van encima.
Empecé por el cuerpo, pasandole el zig-zag, tanto en el color beige, como en el marron, e igualmente hice la parte del rostro dejando el espacio para la boca.
Con la boca tambien le puse pega liquida, para que no se mueva cuando este cosiendo, y tambien le hice su parte roja.
Aqui coloque los cuernos, estos le puse la pega, y luego sobre estos en la parte debajo le coloque parte del gorro, como es rojo su borde lo hice con hilo blanco para que resaltara.
Ya teniendo estas partes listas, entonces termino con los detalles, que son unos circulos en blanco, y la franja blanca en la parte debajo del reno, todo esto lo hice con la pega de silicon.
Ya listo este bello diseño en la franela, se puede hacer arbolitos de navidad u otro diseño al gusto de cada quien.
Muchas gracias por su tiempo y visita a mi blog, espero les haya gustado este bello diseño, hasta la proxima presentación, que la sigan pasando super bien, chau!.
Las fotos son de mi autoria, con mi celular Tecno Spark go.
Traductor deepl.
Diseño canva.
The photos are my own, with my Tecno Spark go cell phone.
Translator deepl.
Canvas design.
Thank you for sharing this post on HIVE!
Your content got selected by our fellow curator desro & you just received a little thank you upvote from us for your great work! Your post will be featured in one of our recurring compilations which are aiming to offer you a stage to widen your audience within the DIY scene of Hive. Next time make sure to post / cross-post your creation within the DIYHub community on HIVE and you will receive a higher upvote ;) Stay creative & HIVE ON!
Please vote for our hive witness <3
Muchas gracias a ustedes.
Que bonita te quedó, mucho mejor que comprarla en una tienda y mas economica y a tu gusto, ideal para las fotos navideñas 🎄
Hola, @mariajcastro28, sí, muy economica, y con el diseño deseado, muchas gracias.
The rewards earned on this comment will go directly to the people( @mariajcastro28 ) sharing the post on Twitter as long as they are registered with @poshtoken. Sign up at https://hiveposh.com.
Congratulations @eylis! You have completed the following achievement on the Hive blockchain and have been rewarded with new badge(s):
Your next target is to reach 9000 upvotes.
Your next target is to reach 500 replies.
You can view your badges on your board and compare yourself to others in the Ranking
If you no longer want to receive notifications, reply to this comment with the word
STOPCheck out the last post from @hivebuzz:
Support the HiveBuzz project. Vote for our proposal!
This is amazing, I can feel the smell of Christmas right up with these lovely outfits shared, your hands are truly gifted.
Muchas gracias @balikis95, por tu valioso tiempo y visita.
Gracias amiga😁😁😁
Amiga @eylis que bonita te quedó está franela. En tu tutorial lo haces ver tan tan fácil que dan ganar de realizar una. Gracias por compartir siempre cosas tan lindas.
Hola, amiga @yusma21, con mucha paciencia y haciendo cada paso podras hacer el diseño que más te guste, gracias por tu visita y tiempo.
Muy lindo