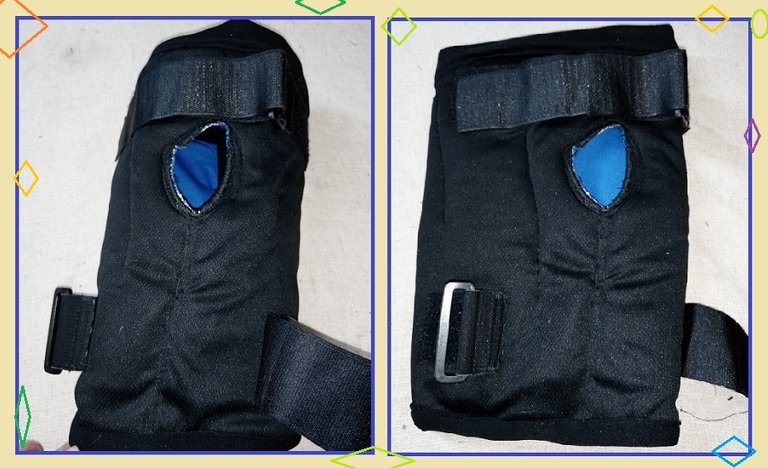

Greetings to all the hiver's, hoping you are very well every day. Today I want to show how I made a knee pad, replacing an already used one that was deteriorated, my neighbor asked me for a favor to see if it could be fixed, and he had to sew it himself every time it broke, since he cannot buy a new one due to the cost , and of course if it can be fixed.
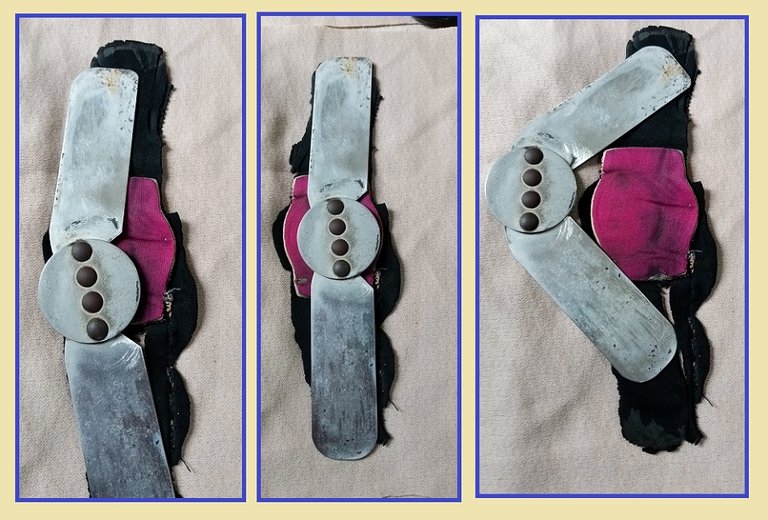
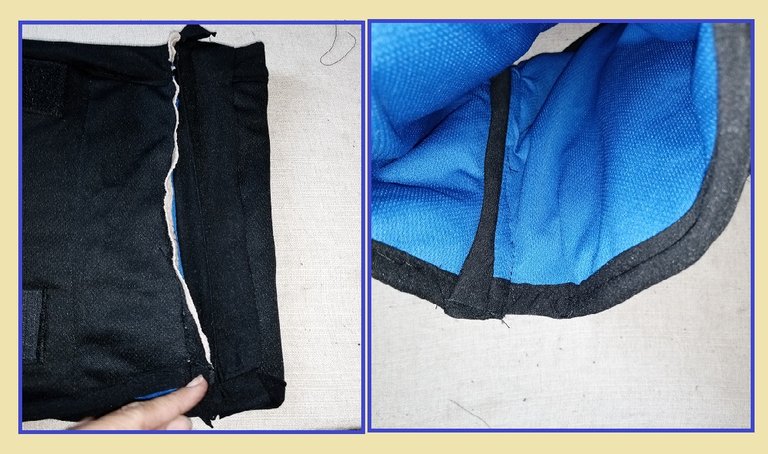
I took out the pattern, to the same size, I opened it, that is, I cut it to be able to remove the pattern and I took out the metal part, where the hook that folds when walking is, this is your orthopedic support, which maintain movement between the legs.
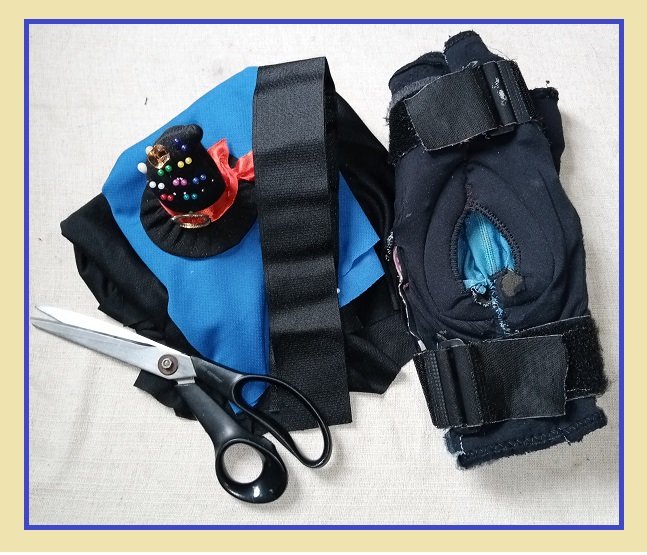
Now I will show you how I made his new knee pad, only with scraps of fabric, with his new magic closure, since he had to replace it.
My materials:
Scraps of fabric, both inside and out.
Beige fabric, for the center.
Measurement knee pad.
magic closure.
Threads, needle, pins, sewing machine.
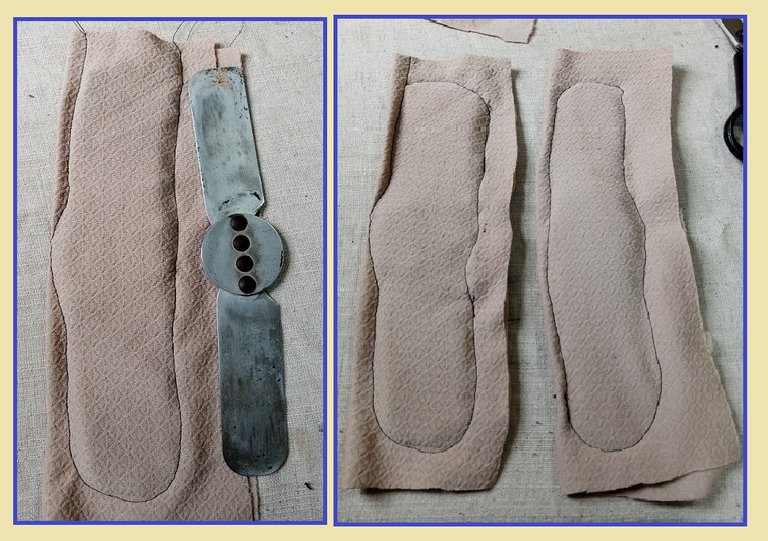
I start cutting to be able to get the same pattern, where it has a hole in the center, for the knee.
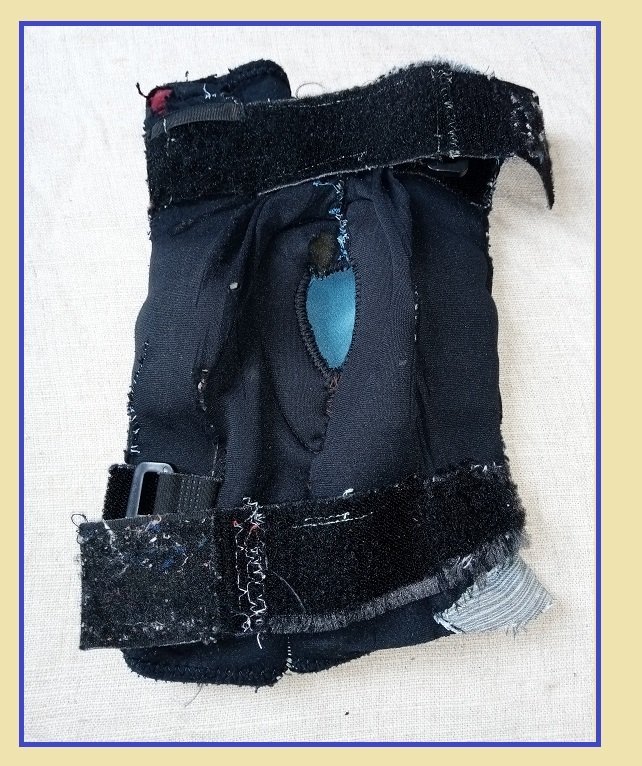
Cutting a rectangle, I place inside the black and beige fabric, this beige fabric is a little thicker but flexible, all the fabrics have to be flexible, for better mobility.
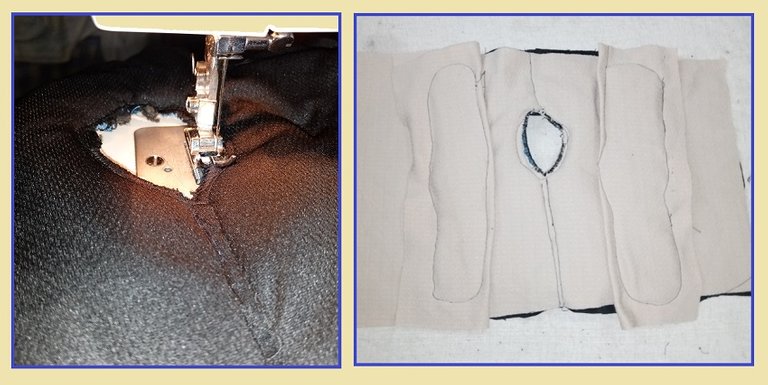
In the center I put the part with the hole, since it comes with its shape, then I pass the seam, and then I make the opening in the center.

For the metal part, I put each one in a lining, which I made with the same fabric, so it doesn't bother so much, then I sew it in the rectangular fabric, placing it at the distance that remains on each side, since this part They will be on the sides, where the leg is flexed.
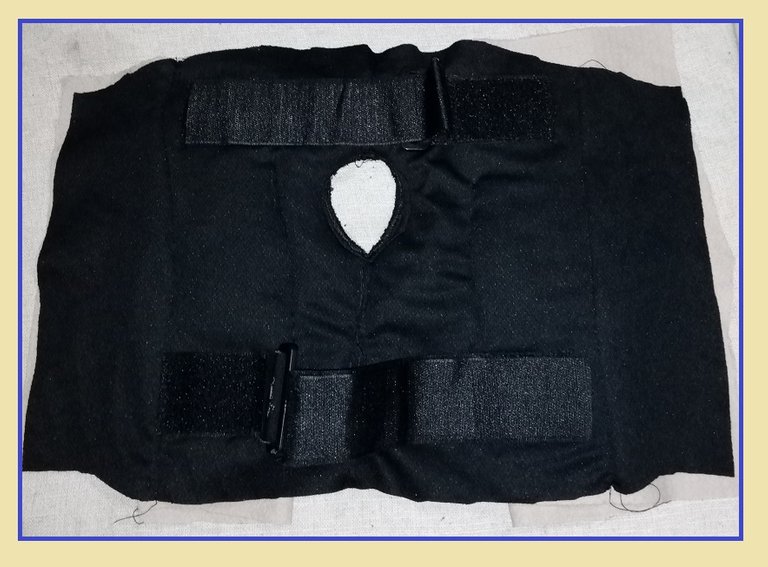
Before I hit the magic closure, with its buckle, placing one on the left side and the other on the right, so that it has more security.
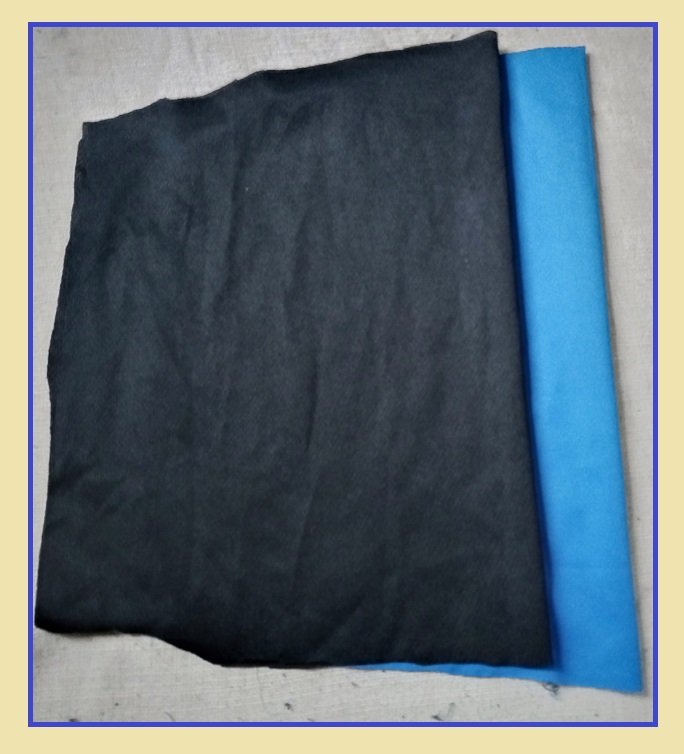
Sewing very carefully, gluing the metal hooks, and then I put the other blue fabric that goes inside, sewing it all together and opening the hole again.
Then with another strip of black color I make its edge by sewing as its bias or encore.
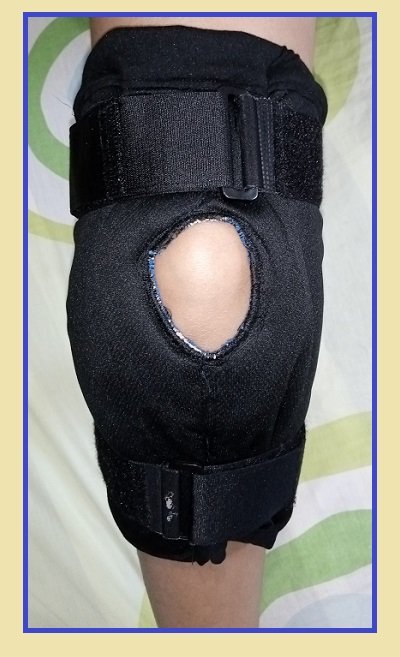
Having this part, then I close the knee pad, sewing on the machine up to half, then I turn and sew the other half, since with the support it is not easy to sew it all on the machine.
But it can also be sewn by hand, ensuring that it will not open.

This knee pad is completely closed, it is not like others that are open when they are put on.

The photos are my own, with my Tecno Spark go cell phone.
deep translator
Canvas design.
The photos are my own, with my Tecno Spark go cell phone.
Translator deepl.
Canvas design.

Saludando a todos los hiver´s, esperando esten muy bien cada día. Hoy quiero mostrar cómo realicé una rodillera, reemplazando una ya usada que estaba deteriorada, mi vecino me pidio el favor para ver si tenia arreglo, y él mismo tuvo que coserla cada vez que se rompia, ya que no puede comprarse una nueva por el costo, y claro que si tiene arreglo.
Saque el patron, a la misma medida, yo la abri es decir la corté para poder sacar el patron y le saque la parte de metal, donde está el gancho que hace el doblez en el momento de caminar, este es su soporte ortopedico, que mantiene el movimiento entre las piernas.
Ahora bien te enseño cómo hice su nueva rodillera, tan sólo con retazos de tela, con su nuevo cierre mágico, ya que tenia que reemplazarlo.
Mis materiales:
Retazos de tela, tanto por podentro como por fuera.
Tela beige, para el centro.
Rodillera de medida.
Cierre mágico.
Hilos, aguja, alfileres, máquina de coser.
Empiezo cortando para poder sacar el mismo patron, donde trae en el centro un orificio, para la rodilla.
En el centro puse la parte del orificio, ya que esta viene con su forma, luego paso la costura, y despues hago la abertura del centro.
Para la parte de metal, las coloque cada una en un forro, que le hice con la misma tela, para que no moleste tanto, luego la coso en la tela rectangular, colocando a la distancia que quede en cada lado, ya que esta parte van a quedar a los lados, donde se haga la flexion de la pierna.
Ya antes le pegue el cierre magico, con su hebilla, colocando que cierre una de un lado izquierdo y la otra hacia la derecho, para que tenga mas seguridad.
Cosiendo con mucho cuidado, pegando los ganchos de metal, y luego le coloco la otra tela azul que va por dentro, cosiendola toda y abriendo nuevamente el orificio.
Luego con otra tira de color negro le hago su borde cosiendo como su sesgo o bis.
Teniendo esta parte, entonces cierro la rodillera, cosiendo en la maquina hasta la mitad, luego volteo y coso la otra mitad, ya que con el soporte no es fácil coserla toda en la máquina.
Pero tambien se puede coser a mano, asegurando que no se vaya abrir.
Esta rodillera queda toda cerrada, no es como otras que son abiertas, cuando se ponen.
**
Las fotos son de mi autoria, con mi celular Tecno Spark go.
Traductor deepl.
Diseño canva.
The photos are my own, with my Tecno Spark go cell phone.
Translator deepl.
Canvas design.
Que excelente, lástima que estemos lejos pues yo necesito una. Buena suerte amiga siempre con tus ideas tan útiles.
Gracias amiga @yusma21, por tu visita y comentario, con gusto te haria una que sé que la necesitas.
Thank you for sharing this post on HIVE!
Your content got selected by our fellow curator sharminmim & you just received a little thank you upvote from us for your great work! Your post will be featured in one of our recurring compilations which are aiming to offer you a stage to widen your audience within the DIY scene of Hive. Next time make sure to post / cross-post your creation within the DIYHub community on HIVE and you will receive a higher upvote ;) Stay creative & HIVE ON!
Please vote for our hive witness <3