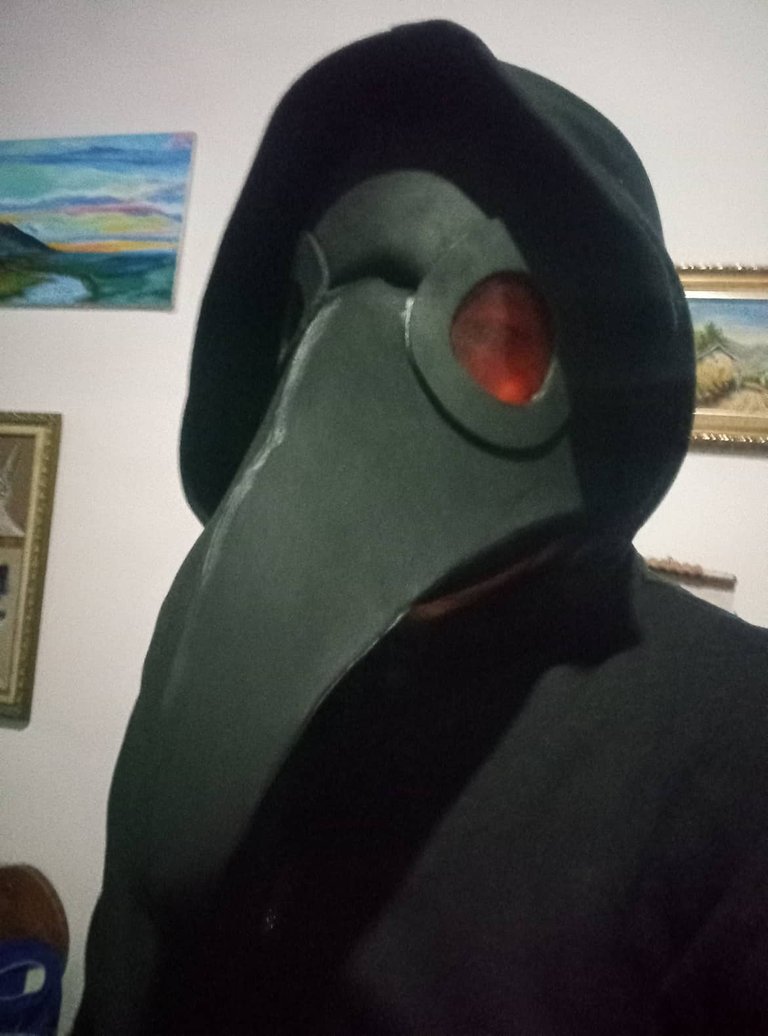
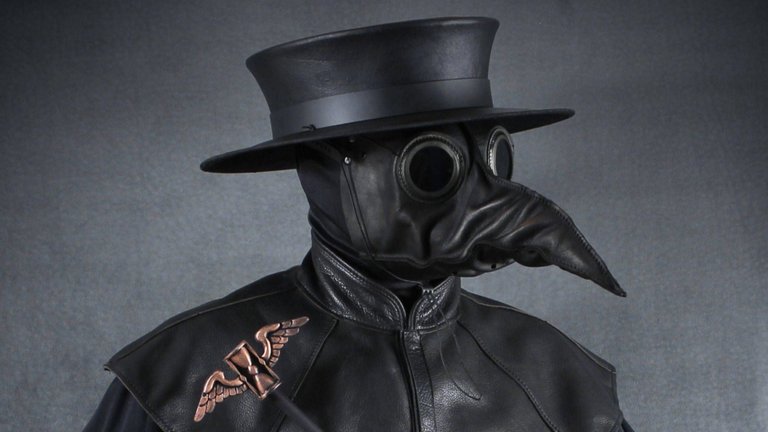
Hello friends of the Hivediy community, I hope you are very well, this Halloween night I want to share with you a mask that I made with eva rubber or better known as foami, this mask represents the old masks used by doctors of high Middle Ages in Europe, when it was devastated by the Black Death. At that time, doctors used a face shield that was shaped like a bird's beak and that at the tip, inside, was covered with aromatic herbs and potions, since it was believed that the virus was transmitted by the terrible smells of corpses. . The illustrations that we know now are very different, because pop culture was in charge of giving these outfits another aesthetic and especially the mask, the most used or known being the plague doctor mask of steampunk aesthetics. I have made mine following this as a model but with some slight modifications, I hope you like it.
Hola amigos de la comunidad de Hivediy, espero que se encuentren muy bien, esta noche de Halloween quiero compartir con ustedes una máscara que realicé con goma eva o mejor conocida como foami, esta máscara representa a las antiguas máscaras usadas por los médicos de la alta edad media en Europa, cuando fue asolada por la peste negra. En aquella e´poca los médicos usaban un protector facial que tenía forma de pico de pájaro y que en la punta, en su interior estaba cubierno con hierbas aromáticas y posiones, pues se creía que el virus se transmitía por los terribles olores de los cadáveres. Las ilustraciones que conocemos ahora son muy diferentes, pues la cultura pop se encargó de darle otra estética a estos atuendos y en especial a la máscara, siendo la mas utilizada o conocida la máscara de doctor plaga de la estética steampunk. Yo he realizado la mía siguiendo esta como modelo pero con unas ligeras modificaciones, espero que les guste.

 |  |  |
|---|---|---|
 |  |  |
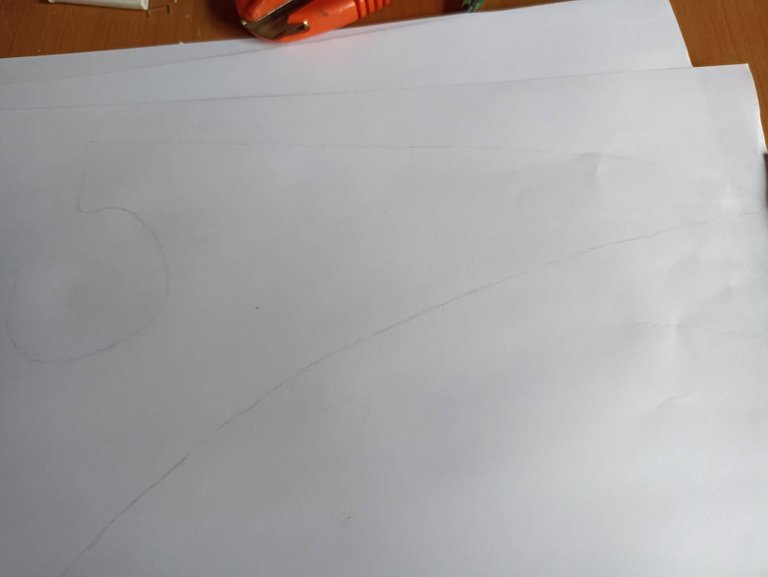
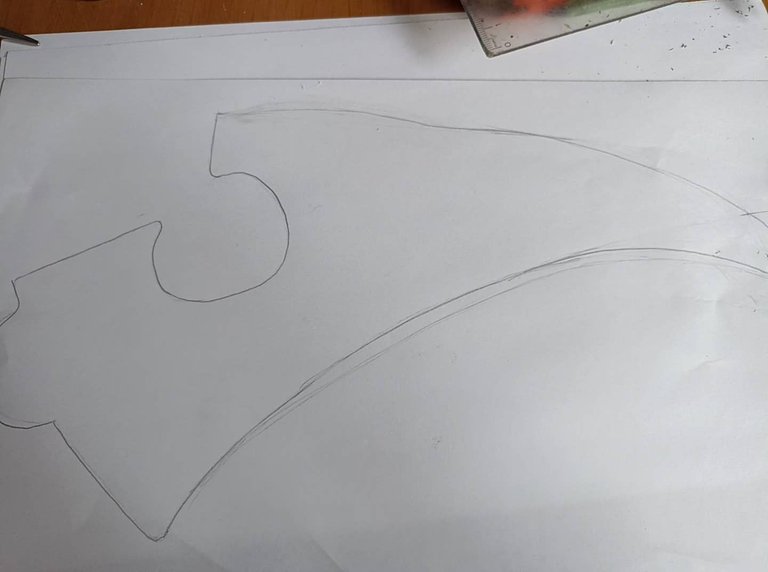
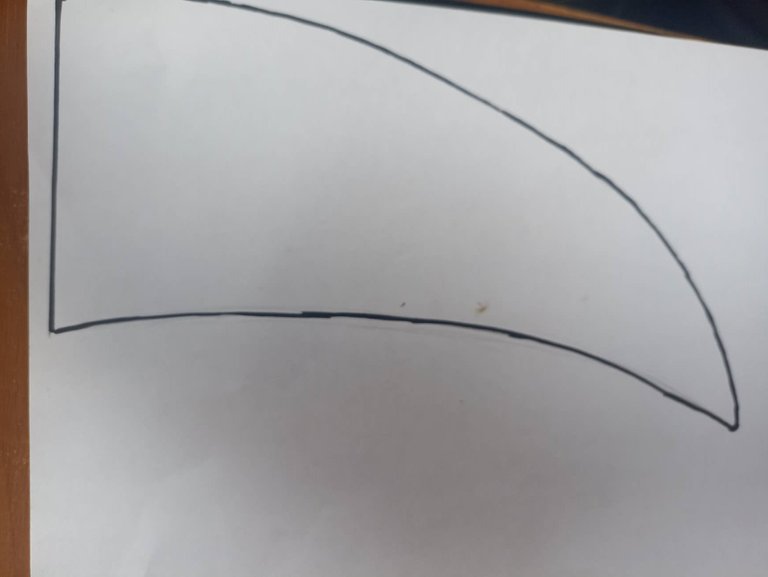
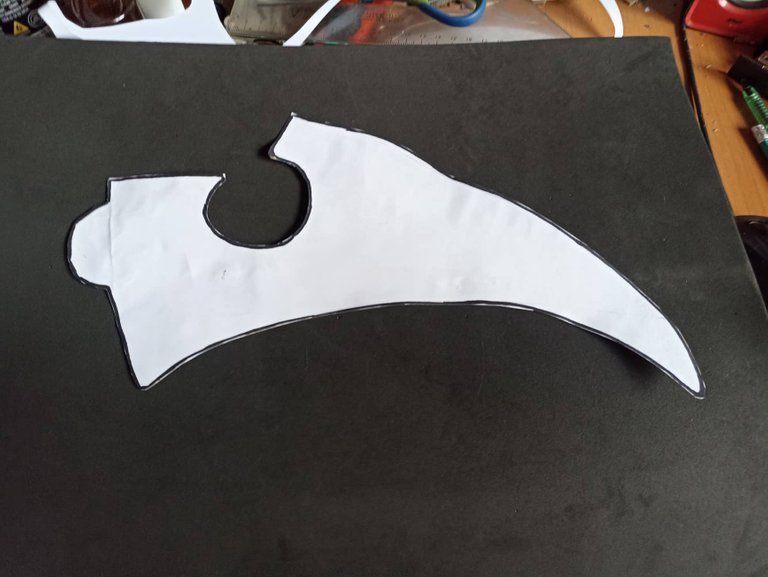
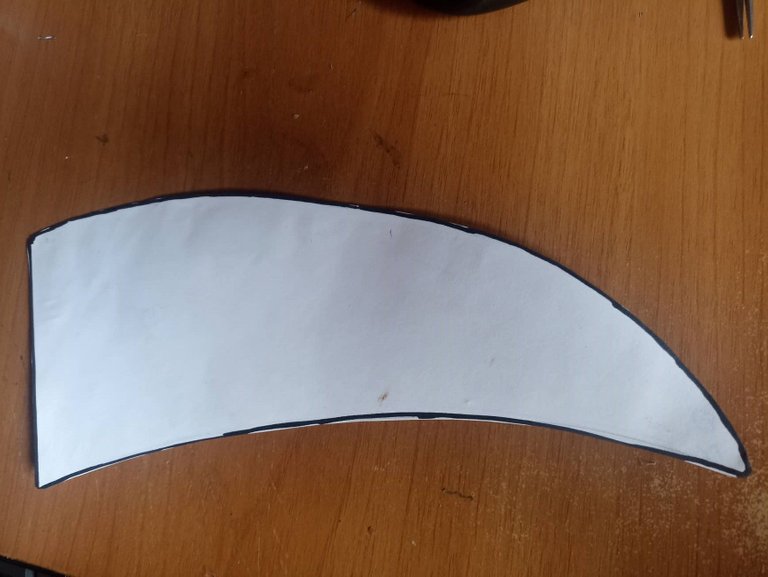
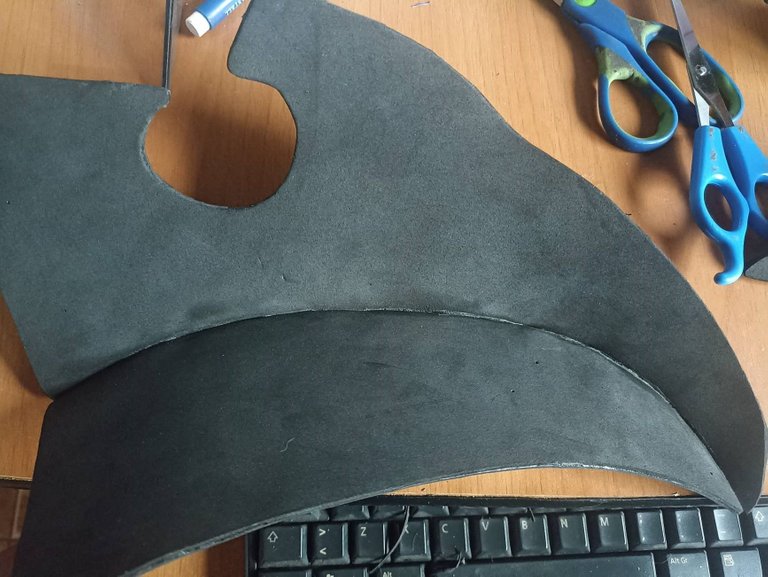
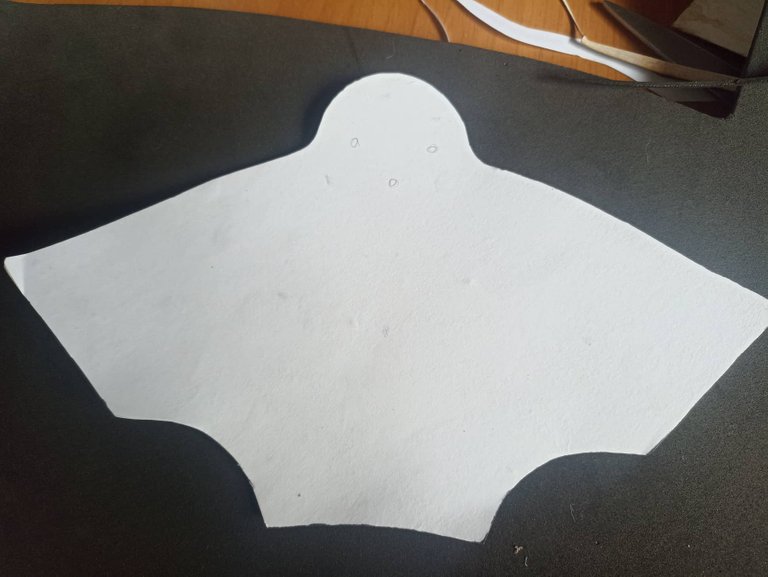
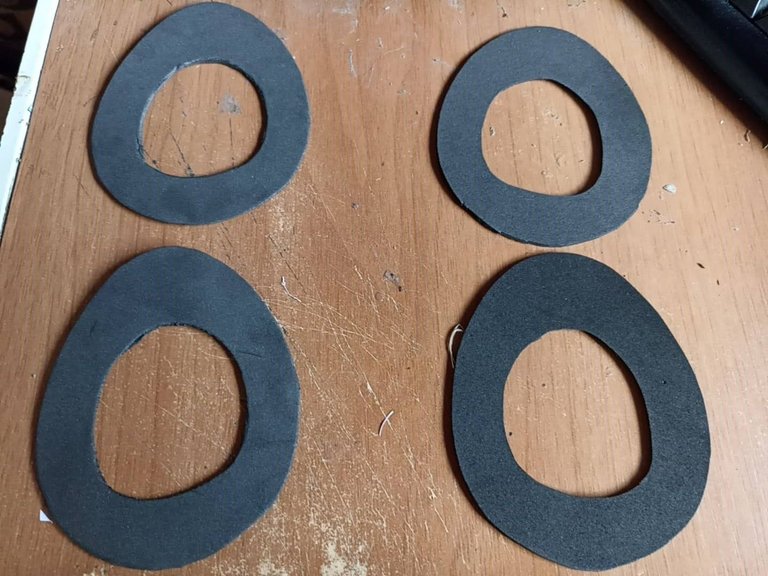
As I mentioned at the beginning, I made my mask following the model of the steampunk masks but I made a few slight modifications to mine. I looked for some templates when I saw the shapes, so I made the changes, I made my mask with a more arched beak and I also made a small mountain near the eyes of the beak, so that it would look like the beak of a raven. I made the templates on paper and then cut them out on cardboard, since cardboard is harder and it serves as a mold. Later I got a large piece of foami of more than 80 centimeters that I used to remove all the pieces.
Como mencioné al principio, hice mi máscara siguiendo el modelo de las máscaras steampunk pero la mía le hice unas ligeras modificaciones. Yo busque unas plantillas al ver las formas entonces hice los cambios, mi máscara la hice con el pico más arqueado y tambien cerca de los ojos al pico le hice una pequeña montaña, para que quedara como el pico de un cuervo. Hice las plantillas en papel y luego las pequeé en cartulina, ya que la cartulina es mas dura y me sirve como molde. Despues consegui un gran trozo de foami de mas de 80 centímetros que utiliuce para sacar todas las piezas.
 |  |  |
|---|---|---|
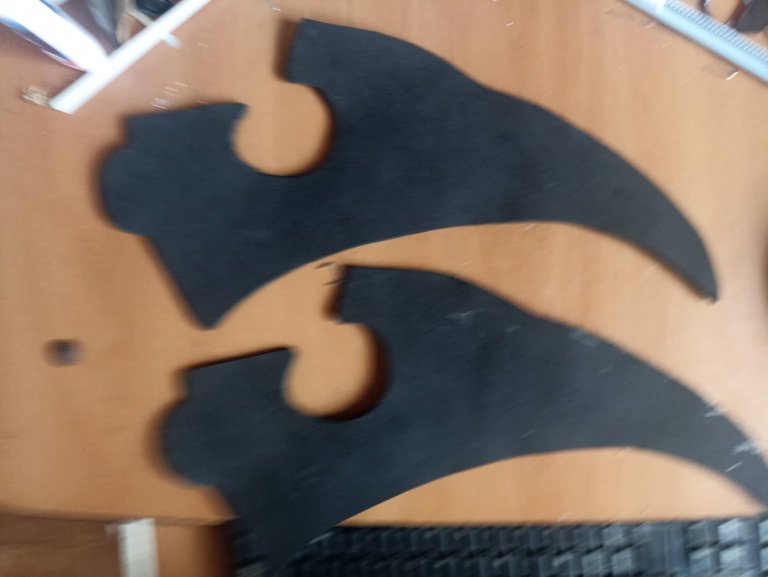 |  |  |
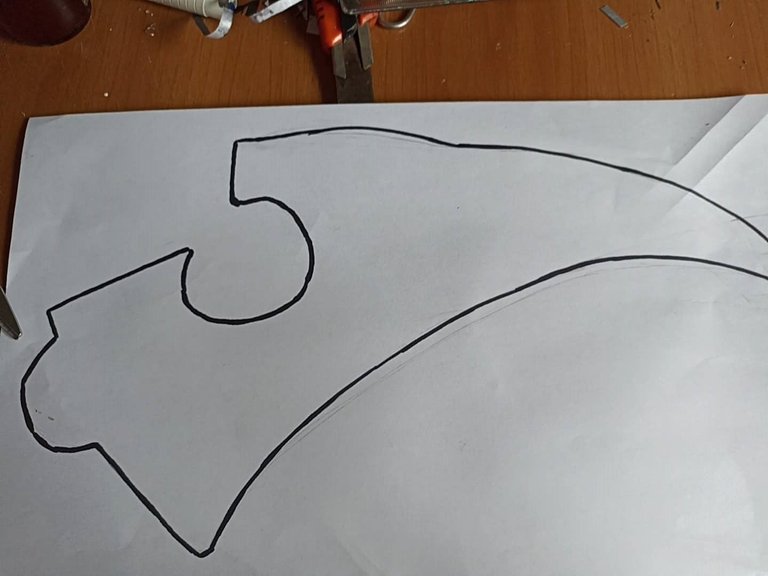
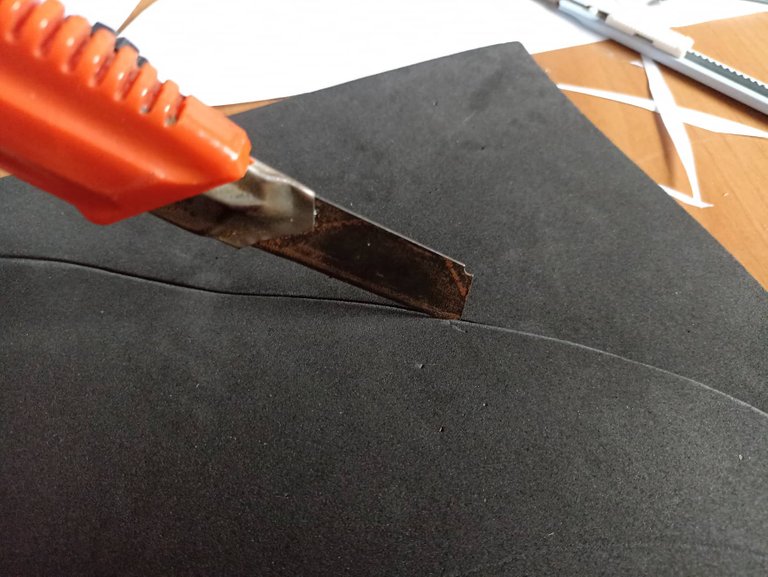
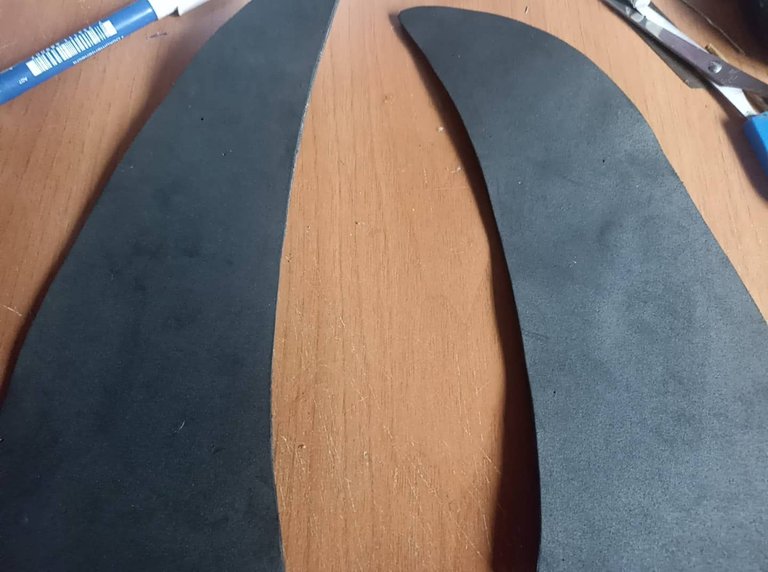
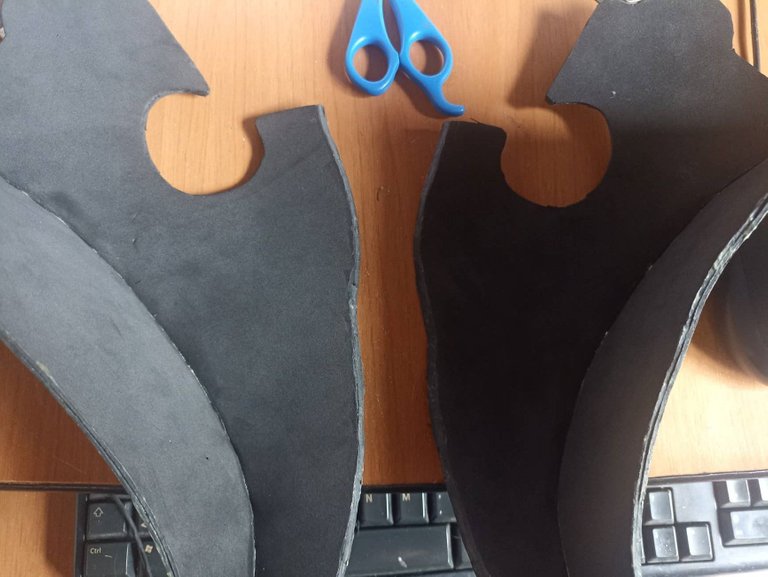
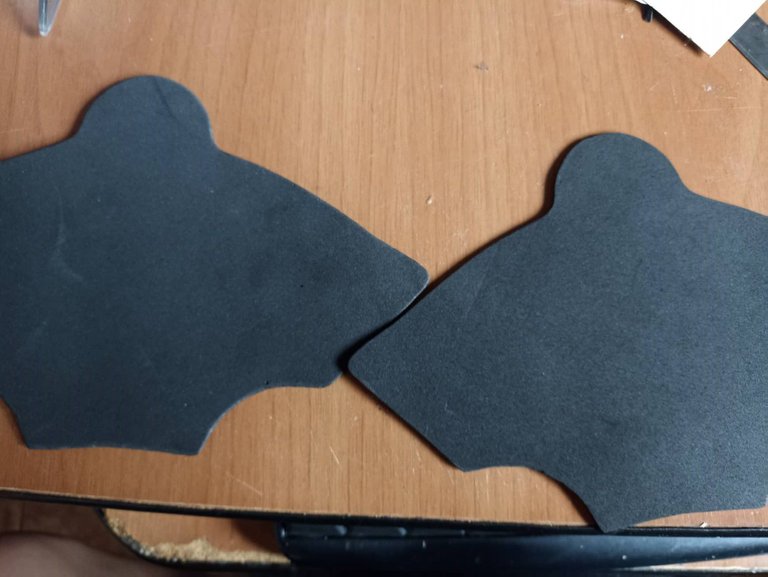
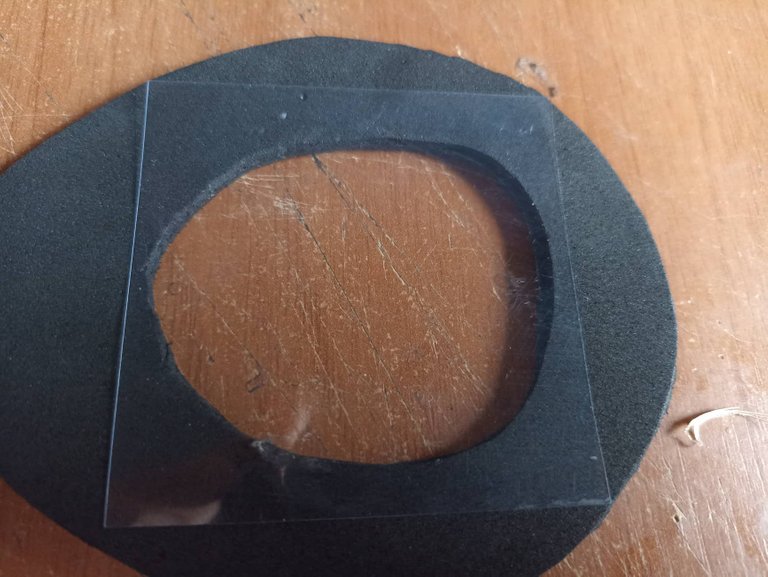
Now once all the templates are ready we begin to take out the patterns to then shape the mask, first we start with the upper part of the beak, we cut it and put it on top of the foami and with a pencil we make the mark, then with a cutter we can cut to more easily or also a pair of scissors. From this piece we are going to make 4 molds since the foam is very thin, it is 2 millimeters thick, so what we are going to do is take out 4 molds and then glue them and thus obtain two more layers that will help the mask to be harder when finished.
Ahora una vez listo todas las plantillas comenzamos a sacar los patrones para luego darle forma a la mascara, primero comenzamos con la parte superior del pico, recortamos y ponemos encima del foami y con un lápiz hacemos la marca, depsues con un cutter podemos cortar para más facilidad o también unas tijeras. De esta pieza vamos a sacar 4 moldes ya que el foami es muy fino, tiene 2 milímetros de grosor, entonces lo que haremos sacar 4 moldes para luego pegarlos y así obtener dos capas más que ayudará a que la máscara quede más dura al terminar.
 |  |  |
|---|---|---|
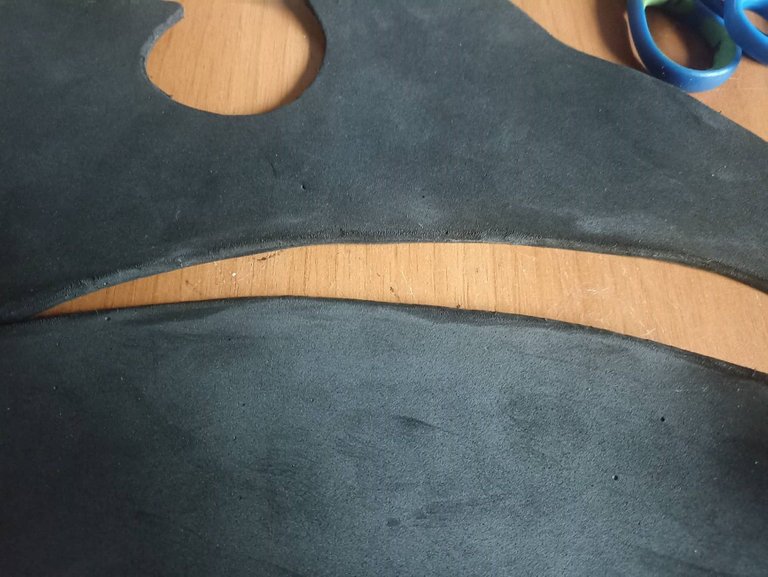 |  |  |
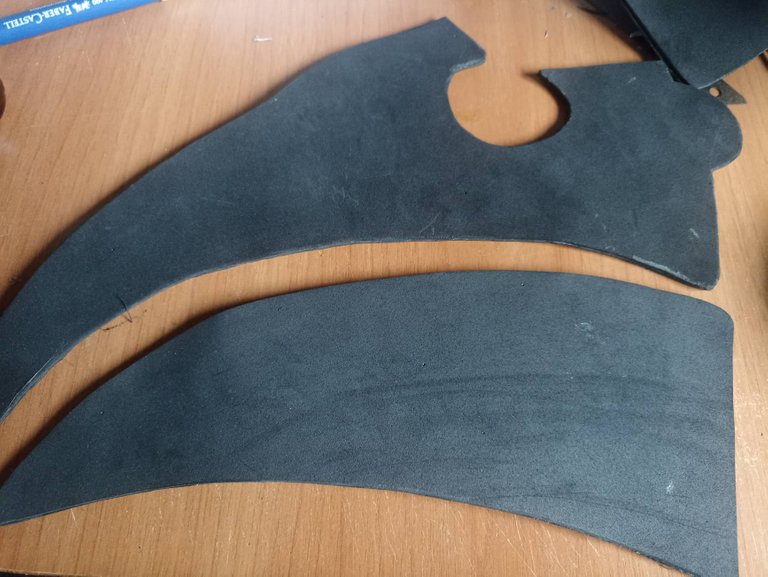
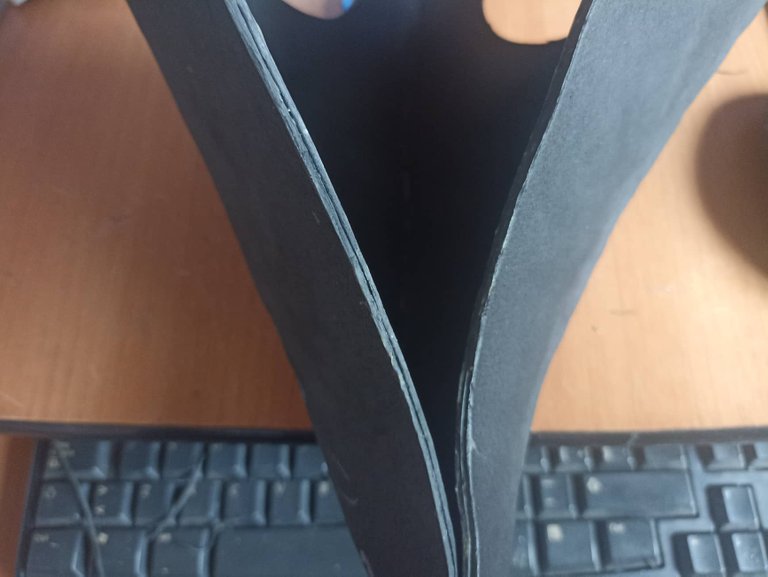
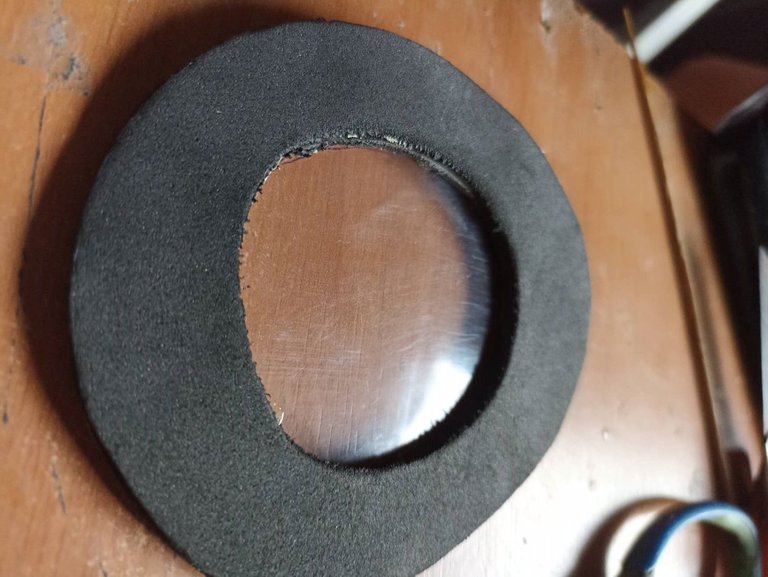
Then I repeat the same previous step but with the lower part of the beak, I also take out 4 molds to then glue two and two and thus the strongest mold is left. After that I place the top and bottom pieces in the position of the third image, I put glue on the two lines and then I join from one end to the other, so I also do with the other missing part.
Luego repito el mismo paso anterior pero con la parte de abajo del pico, tambien saco 4 moldes para luego pegar dos y dos y así quede el molde más fuerte. Despues de eso coloco la pieza de arriba y las de abajo en la posición de la tercera imagen, poengo pegamento en las dos líneas y después voy uniendo desde un extremo hasta el otro, así haago también con la otra parte que me falta.
 |  |  |
|---|---|---|
 |  | 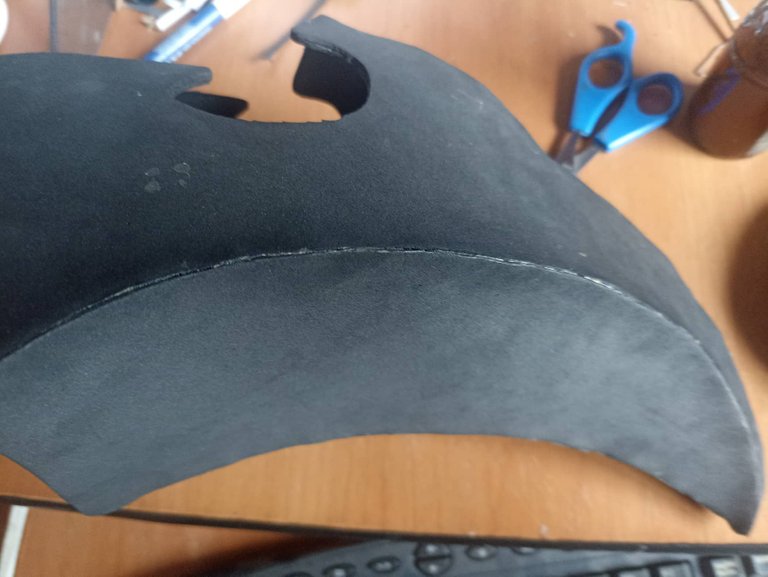 |
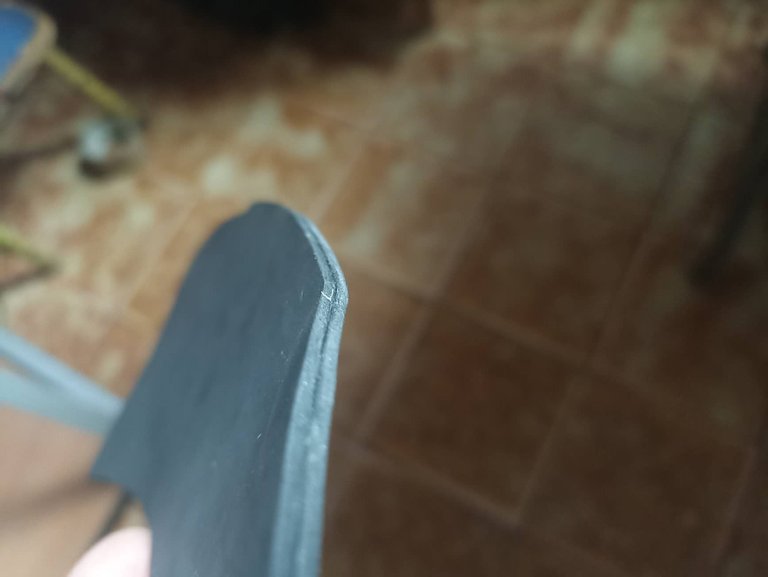
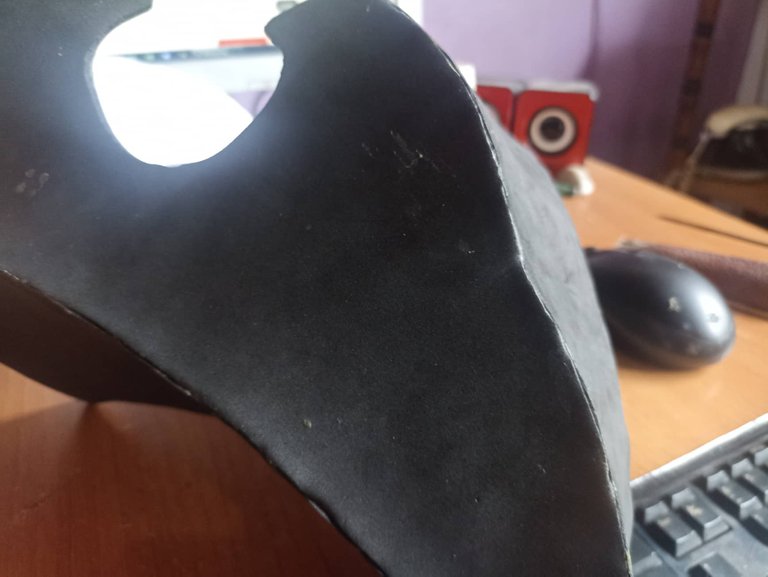
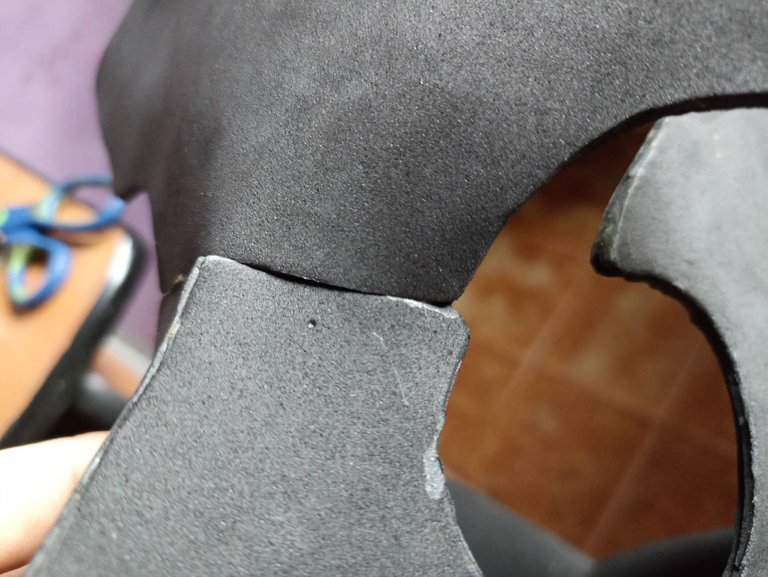
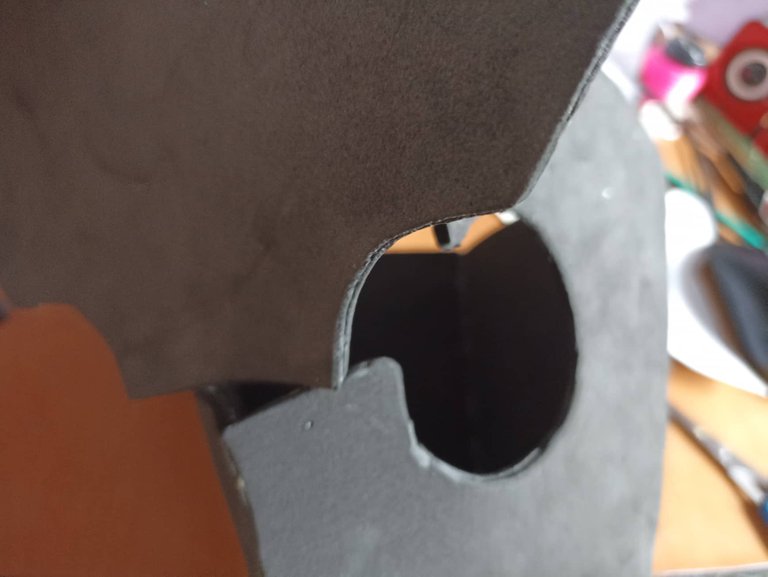
Now I proceed to glue both parts of the sides of the beak, this process was a bit complicated so I took my time to do it. I started at the top, where the eye sockets meet, little by little I joined the parts after letting the glue dry. Something important that must be done is to cut the edges of the pieces with scissors, you have to make a 45 degree cut, since this part is inclined, if we leave it square as it is, the part of the beak will be deformed. After gluing the upper part, I turned the mask upside down and began to join the lower parts also little by little.
Ahora procedo a pegar ambas partes de los lados del pico, este proceso fue un poco complicado así que me tomé mi tiempo para hacerlo. Comencé por la parte superior, por donde se unen las cuencas de los ojos, poco a poco fue uniendo las partes luego de dejar secar el pegamento. Algo importante que se debe hacer es cortar los bordes de las piezas con una tijera, hay que hacer un corte de 45 grados, ya que esta parte es inclinada, si la dejamos cuadrada como está la parte del pico quedará deform.e Luego de pegar la parte superior, puse de cabeza la máscara y comencé a unir las partes inferiores también poco a poco.
 |  |  |
|---|---|---|
 | 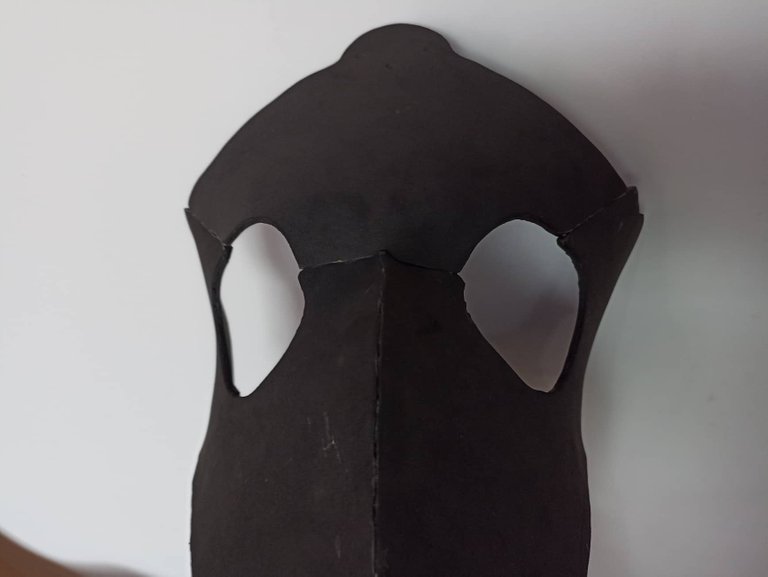 | 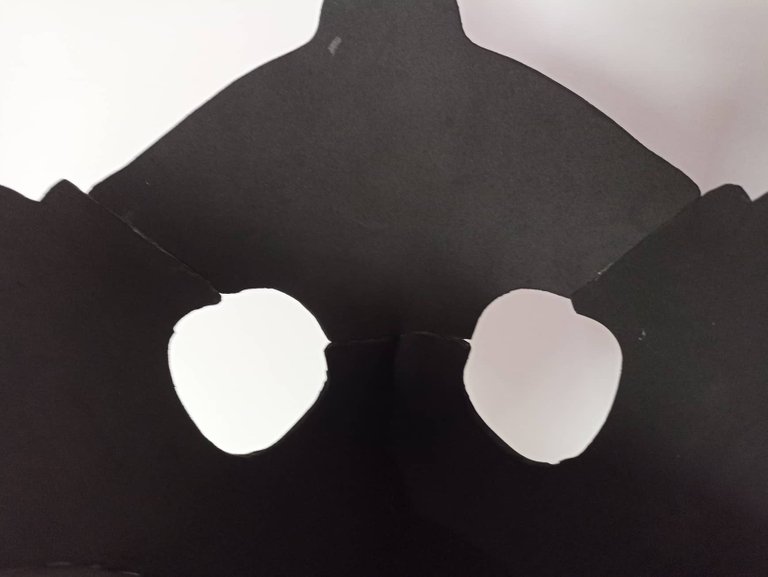 |
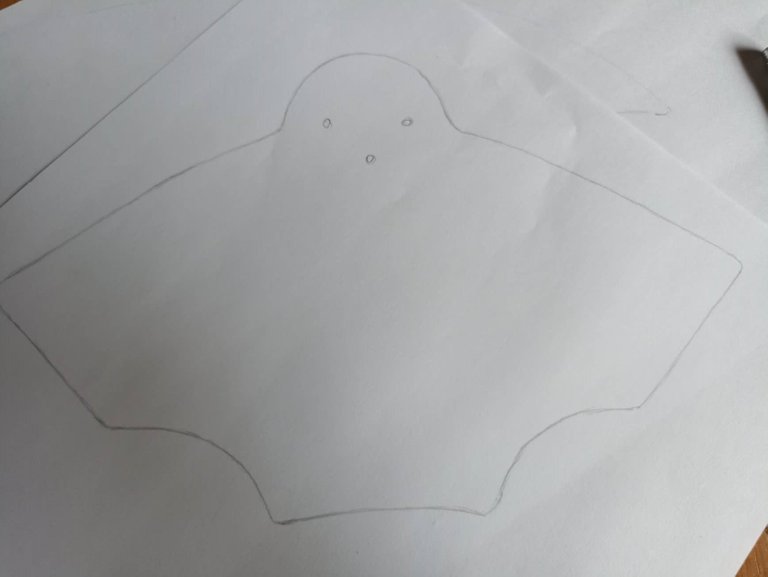
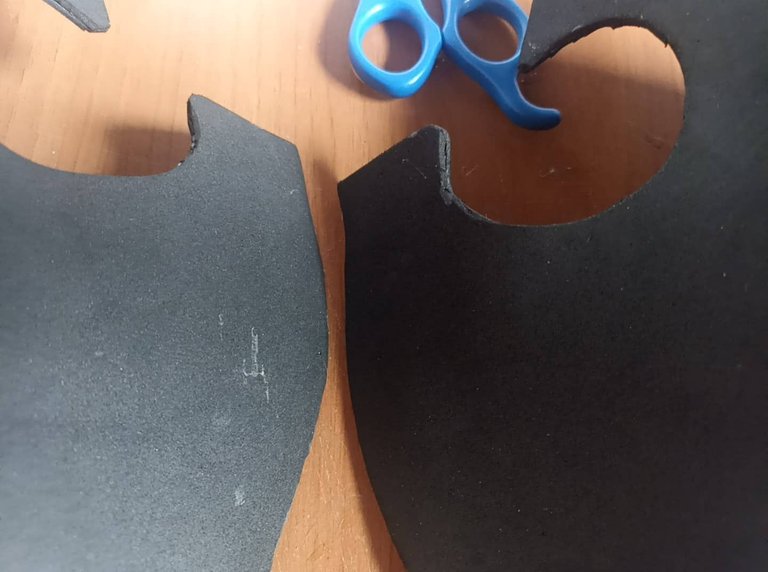
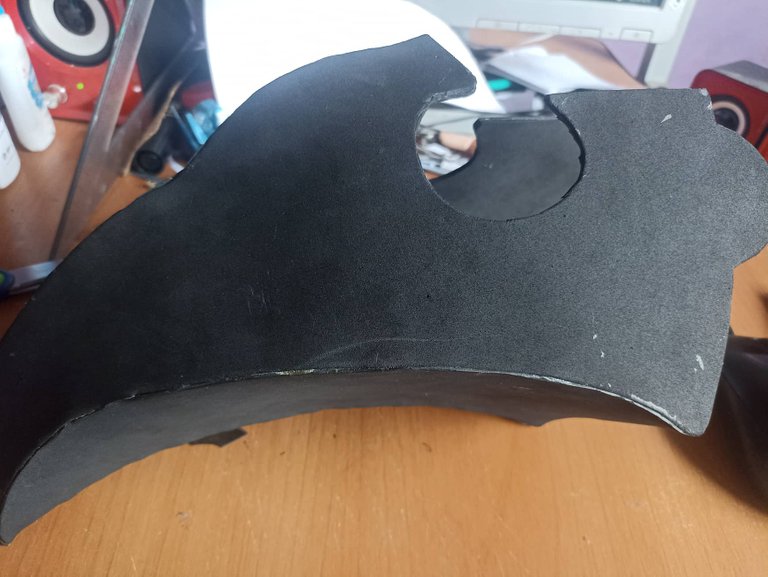
The next step is to make the upper part of the eye sockets and that covers the forehead of the face of whoever wears the mask, we cut the template and we also take out two molds, this to continue with the thickness that I have been working on. Then I put glue on the tabs of the beak and on the piece that I just made and start joining them. As you can see, this is how the mask looks once all these pieces are joined.
El siguiente paso es hacer la parte superior de la cuencas de los ojos y que cubre la frente del rostro de quien use la máscara, cortamos pla plantilla y sacamos también dos moldes, esto para seguir con el grosor que vengo trabajando. Despues coloco pegamento en las pestañas del pico y en la pieza que acabo de hacer y comienzo a unirlas. Como pueden ver, así queda la máscara una vez unida todas estas piezas.
 |  |  |
|---|---|---|
 | 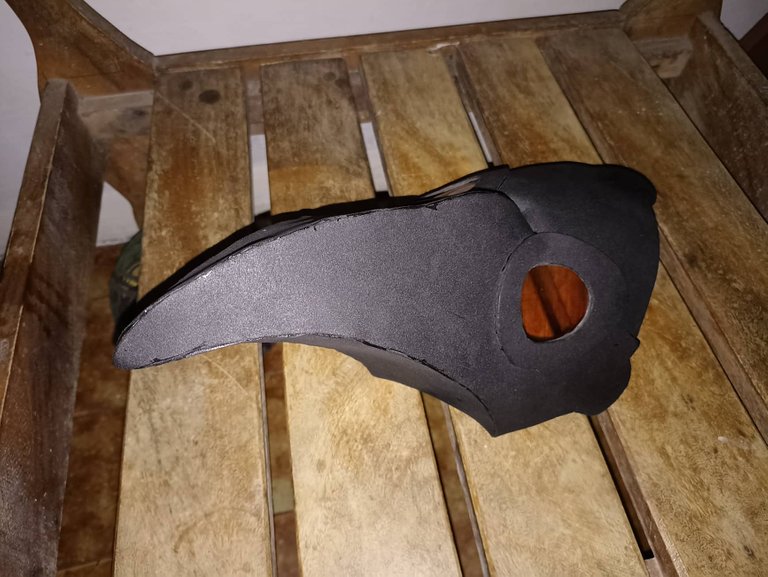 | 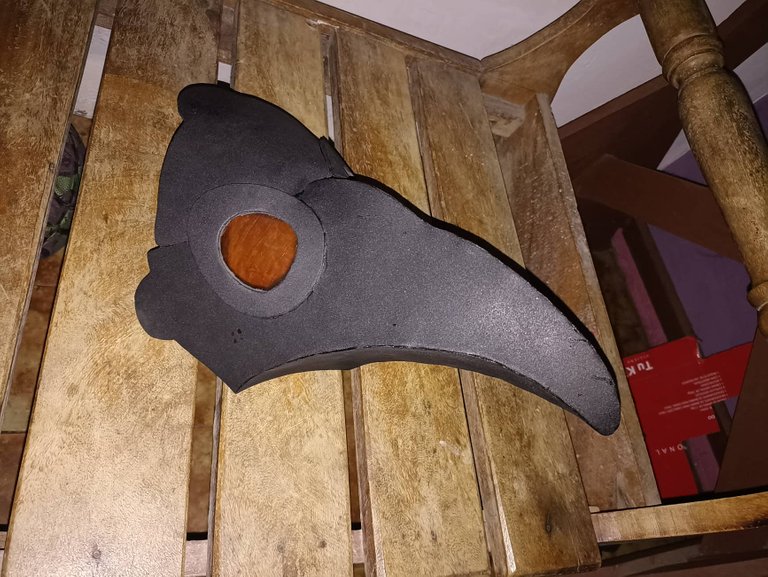 |
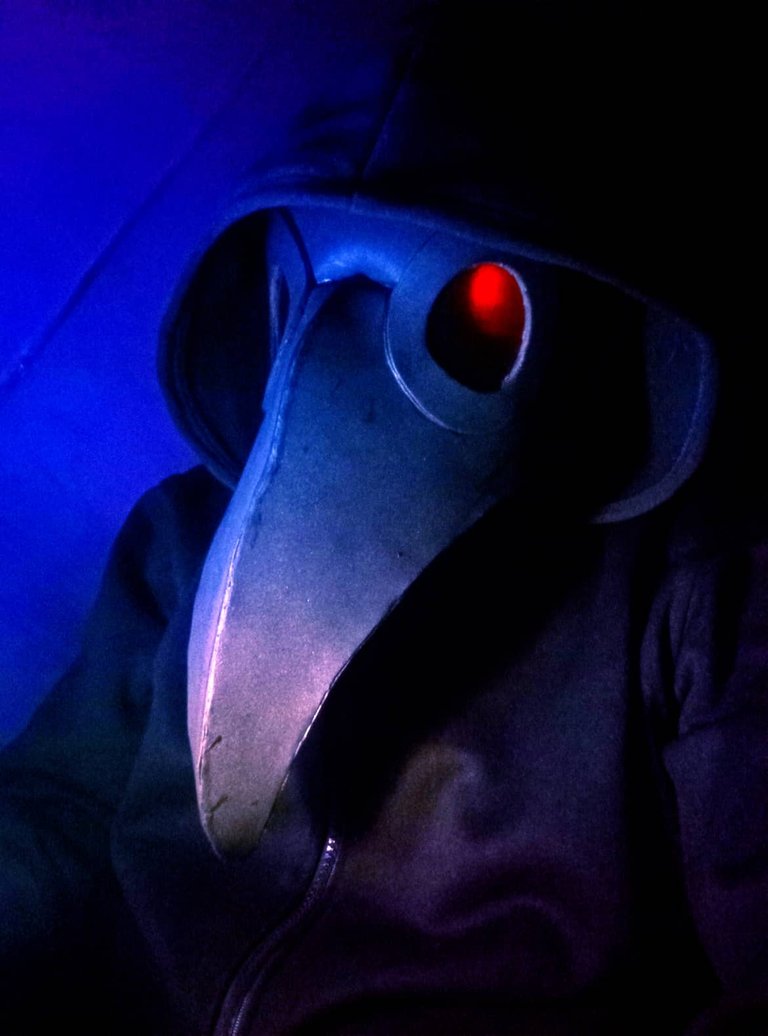
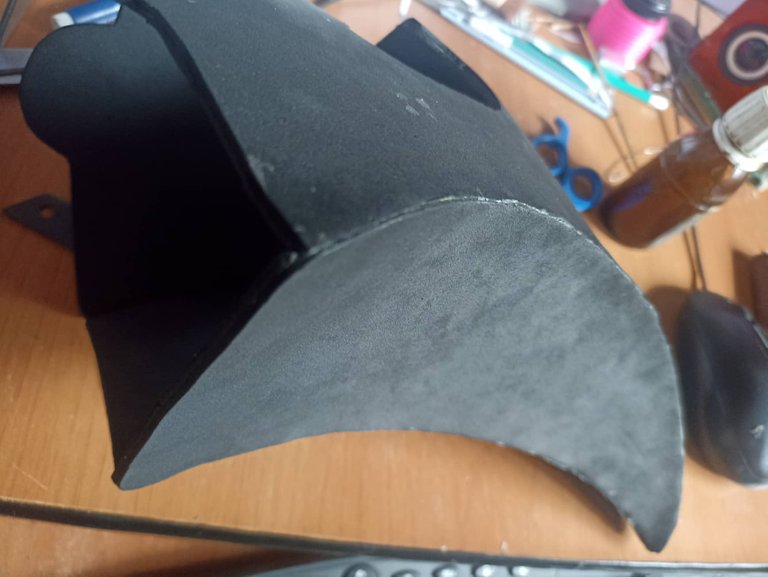
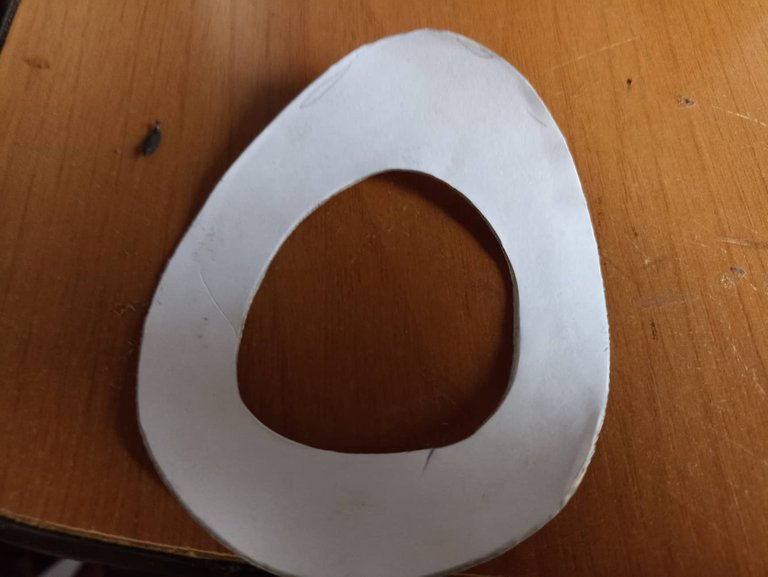
Finally I make the protector for the eyes, I made four foam circles which I then joined together, I used transparent plastic from an old package for the lenses and then I painted it with an orange marker. Once finished I put glue in the eye socket as in the protectors and joined them together and thus this terrifying Plague doctor mask was finished.
Por último hago el protector para los ojos, hice cuatro círculos de foami quie luego uni entre ellos, utilice para los lentes plástico transparente d eun viejo empaque y luego lo pinté con marcador de color naranja. Una vez terminado puse pegamento en la cuenca de los ojos como en los protectores y los uní entre ellos y así quedó finalizada esta máscara terrorífica del doctor Plaga.
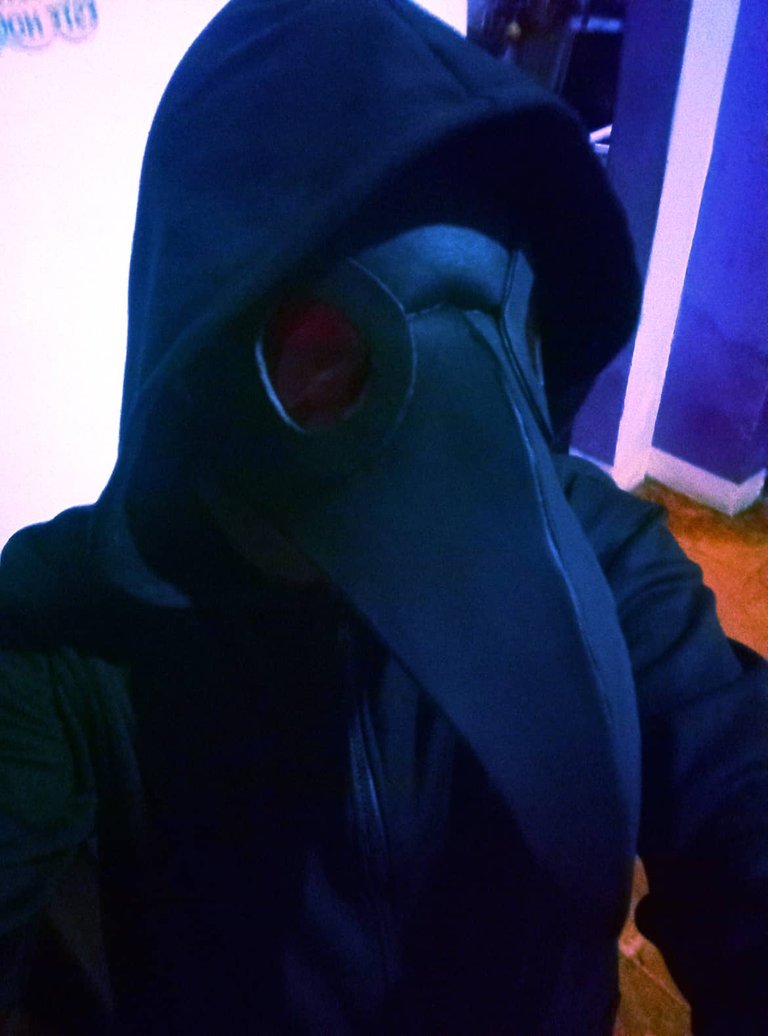
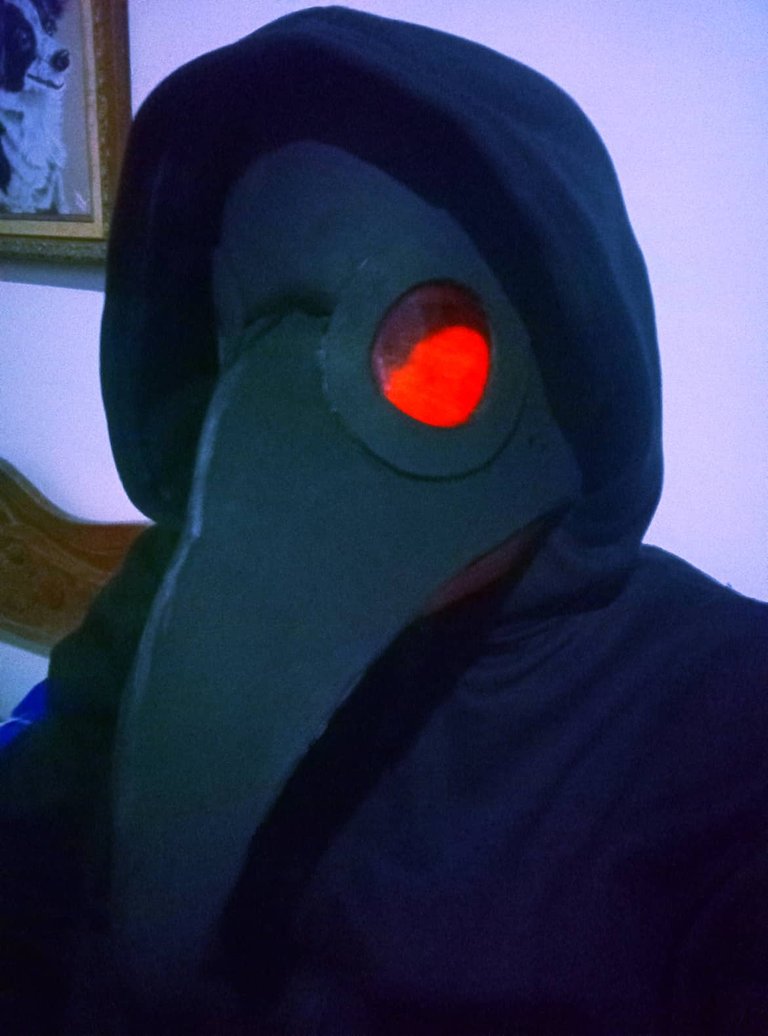
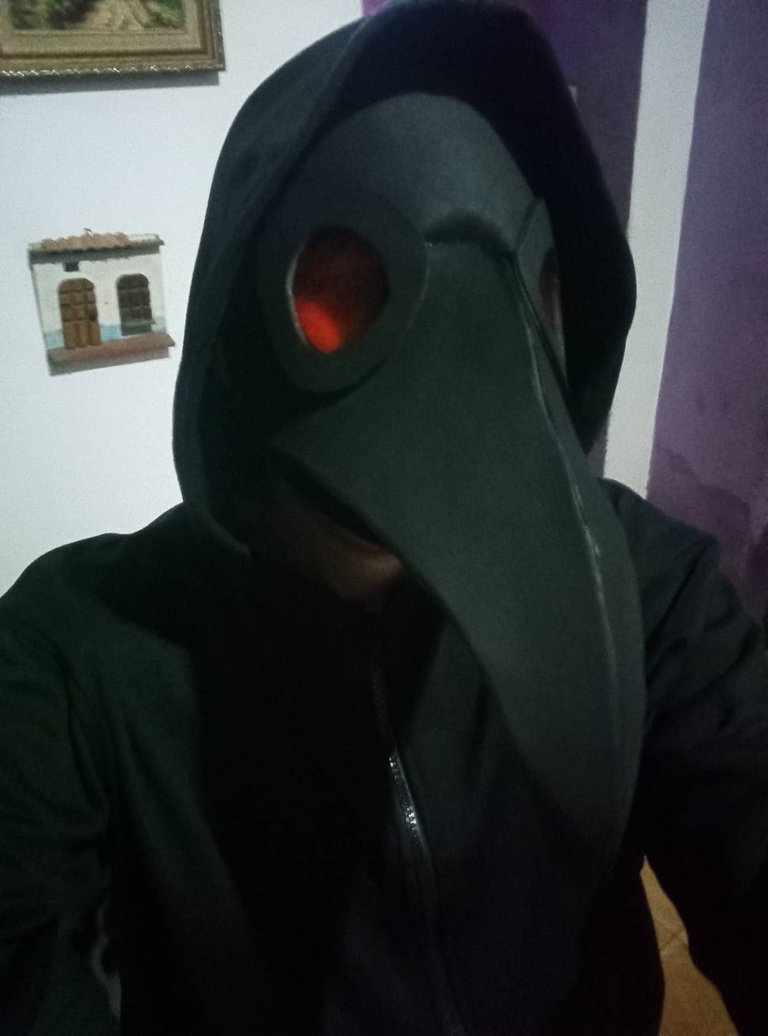
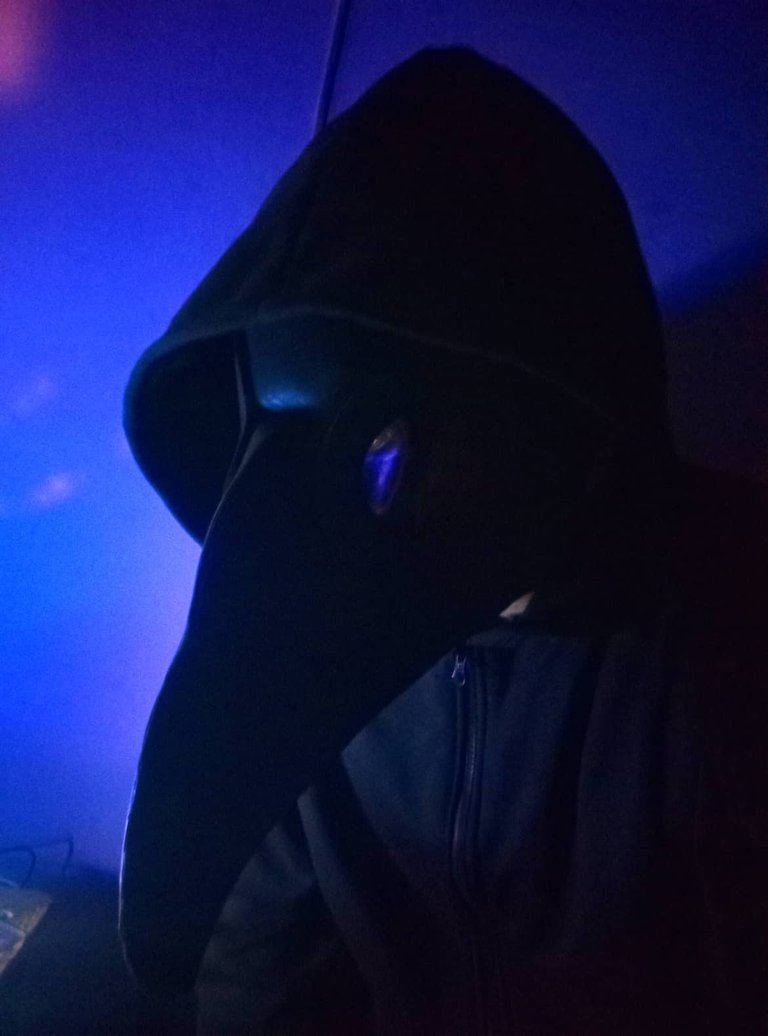

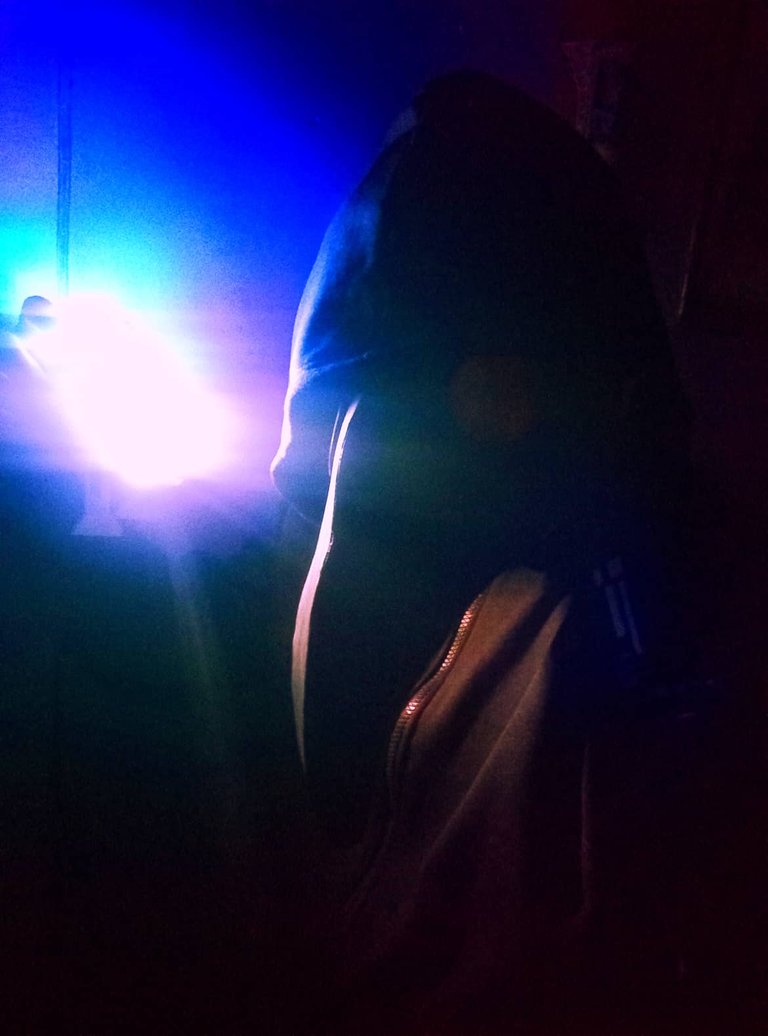
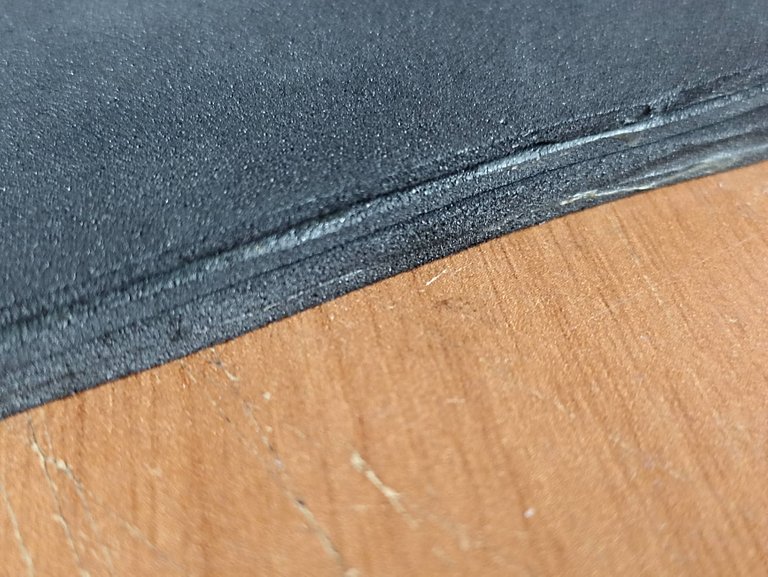
I forgot to mention that before gluing the lenses of the mask I made a mixture of school glue with water to cure the foami, in this way the surface was harder, in the same way I applied two layers of matte black paint, so that It would be similar to worn leather, so I finished the mask. The truth is that I was reading about those times and it was really something frightening, the population of Europe dropped dramatically and it cost a lot to recover. Even so, these doctors went down in history for wearing these striking and terrifying uniforms, although reviewing the original design well, it is very different from what pop culture later accustomed us to. Well this has been for today, I hope you have a fun Halloween night and don't forget your masks, I say goodbye see you soon.
Olvidé mencionar que antes de pegar los lentes de la máscara hice una mezcla de pegamento escolar con agua para curar el foami, de esta manera quedó mas duro la superficie, de igual forma apliqué dos capas de pintura negra en tono mate, para que quedara semejante al cuero gastado, así di por finalizado la máscara. La verdad es que estuve leyendo acerca de aquellas épocas y realmente fue algo espantoso, la población de Europa descendió de forma dramática y costó mucho la recuperación. Aún así estos médicos pasaron a la historia por usar estos uniformes llamativos y aterradores, aunque revisando bien el diseño original es muy diferente a lo que la cultura pop luego nos acostumbró. Bueno esto ha sido por hoy, espero que pasen una divcertida noche de Halloween y no olviden sus máscaras, me despido hasta pronto.
~~~ embed:1587315487867912194 twitter metadata:MTQ4NDI4MTAxMzQxMzAyMzc1Nnx8aHR0cHM6Ly90d2l0dGVyLmNvbS8xNDg0MjgxMDEzNDEzMDIzNzU2L3N0YXR1cy8xNTg3MzE1NDg3ODY3OTEyMTk0fA== ~~~
The rewards earned on this comment will go directly to the people( @fixie, @dayadam ) sharing the post on Twitter as long as they are registered with @poshtoken. Sign up at https://hiveposh.com.
Que genial amigo @fixie, me encanto tu creación, ya estas listo para salir de paseo a espantar brujas, jajajja. Feliz Halloween... ☠️ 🎃 ☠️
Saluditos ✨
jajaja que bueno que te gustó, si quedó aterradora. Anoche iba a ir a una fiesta Halloween pero comenzó a llover cántaros así que solo pude usarla para las fotos jajaj
Wow, this is great, when the pandemic started I was thinking of making myself one as a face mask, I tried it, it went wrong and I put the idea aside, although now seeing you do it so easily made me want to go out on the street again with something like that 😂
This model is very easy, although I made small modifications. Others can still be made and make it more personalized. You should give it a try and see how it goes.
Está máscara si que quedó genial ❣️. Por suerte nuestra pandemia no nos obligó a usar cosas así jaja. La gente sí que se veía terrorífica, fue una buena idea para Halloween.
Por otro lado, recuerda interactuar con otros usuarios comentando sus publicaciones. A todos nos gusta ser valorados y leídos ☺️.
Saludos, que tengas un lindo día ❣️.
Siempre lo hago en la medida que el internet me lo permite.. Las máscaras originales eran un poco más rudimentarias pero no dejaban de ser aterradoras. Luego con la estética Steampunk le hicieron unas modificaciones para hacerlas mas terroríficas y llamativas. Falta una película de un asesino en serie que use estos atuendos!
Congratulations @fixie! You have completed the following achievement on the Hive blockchain and have been rewarded with new badge(s):
Your next target is to reach 70000 upvotes.
You can view your badges on your board and compare yourself to others in the Ranking
If you no longer want to receive notifications, reply to this comment with the word
STOPCheck out the last post from @hivebuzz:
Support the HiveBuzz project. Vote for our proposal!
Super genial!! quiero una
Quiero hacer una pero con cartón y periódico, quiero hacer que se vea como si fuera de hueso, estilo cráneo de pajaro, para hacerla aun mas aterradora!
Genial! quisiera ver que tal queda
me pregunto como quedaría una de tus ilustraciones así con ese estilo.. Debe verse super!
Lo he pensado varias veces de hecho jaja me encantan estas mascaras, quizas pronto me anime 😁
es que son geniales, especialmente estas tan tétricas jeje.. También estan las famosas máscaras venecianas. Ojalá suceda pronto, para ver que tal queda..
This is amazing! I wish I am creative as you. Maybe I'll save this one and use this as my guide in creating a costume for next Halloween. Thanks for this :))
I never knew this before. Thank you again for the knowledge 😅
!PIZZA
I hope you can make this mask, it is very easy. You can also make it personalized and add details that you like, that's the wonderful thing about all this.
I gifted $PIZZA slices here:
@cli4d(1/5) tipped @fixie (x1)
Please vote for pizza.witness!
Querían evitar el Miasma, que era como llamaban a la infección que se transmitía por el aire. Se acercaron a la idea, pero no lo suficiente. Es una buena máscara, luce siniestra.