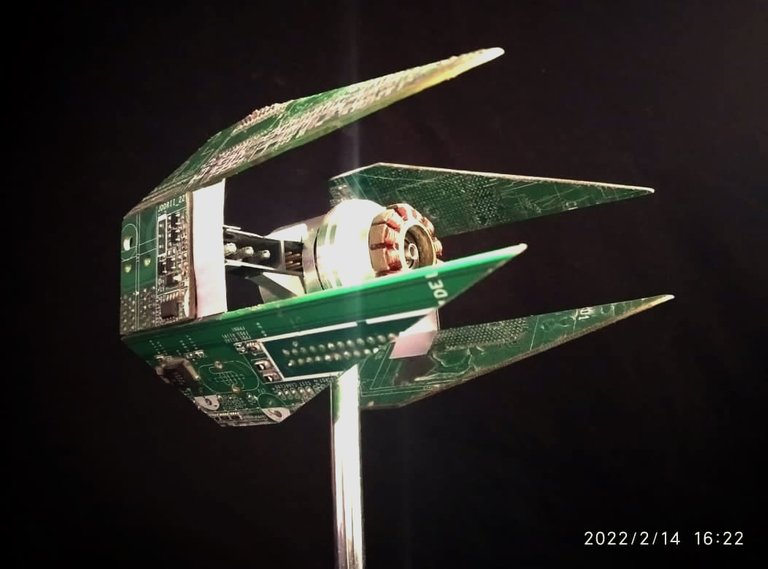
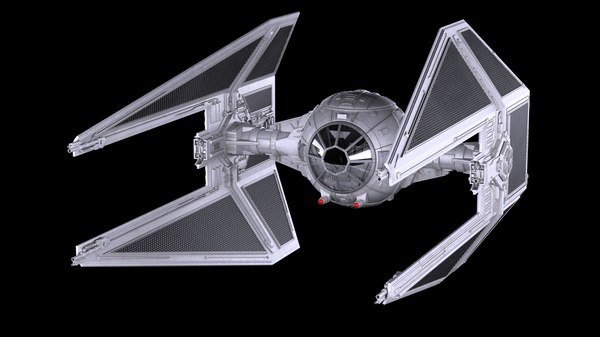
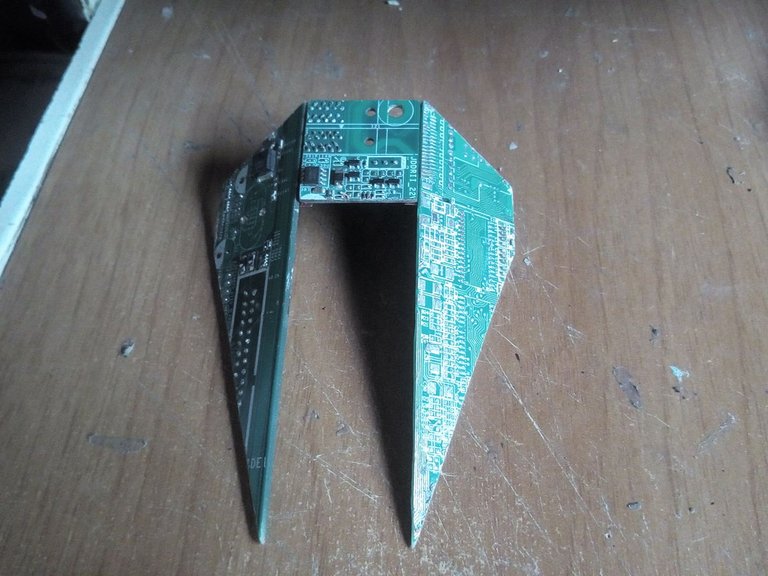
Hello friends, I hope you are very well, today I want to share another sculpture made with electronic parts, specifically PC parts. It had been a while since I used these elements so I decided to use them in a Star Wars ship, if this franchise has something it is its variety of ships, whether from the Galactic Empire or the Rebel Alliance, they are iconic ships that will never go out of style. For this publication I have made the fighter known as Tie Interceptor, this ship is part of the forces of the Empire. It is made with parts of the motherboard and hard drive and other parts that I will show at the time, I hope you like it.
Hola amigos espero que se encuentren muy bien, hoy quiero compartir otra escultura hecha con partes electrónicas, específicamente partes de PC. Tenía rato que no utilizaba estos elementos así que decidi usarlos en una nave de Star Wars, si algo tiene esta franquicia es su variedad de naves, ya sea del Imperio Galáctico o de la Alianza Rebelde, son naves icónicas que jamás pasaran de moda. Para etsa publicación he realizaco el caza conocido como Tie Interceptor, esta nave hace parte de las fuerzas del Imperio. Esta realizado con partes de placa madre y disco duro y otras partes que iré mostrando en su momento, espero les guste.

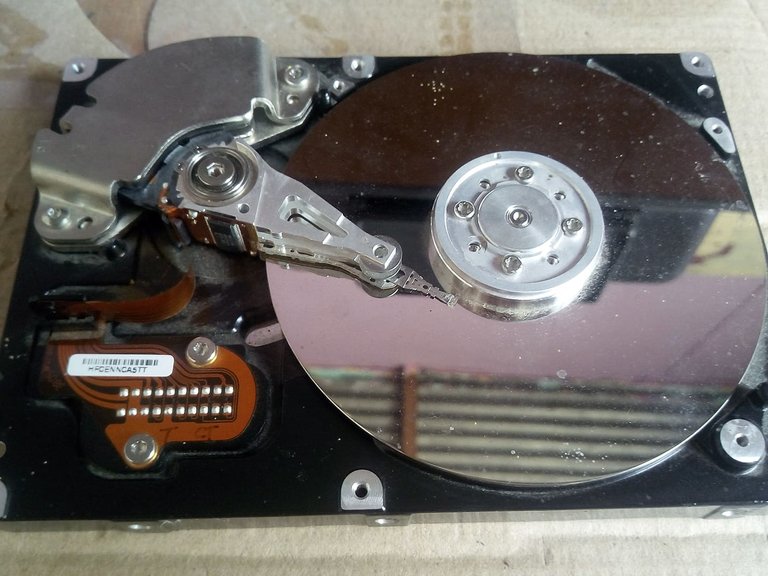
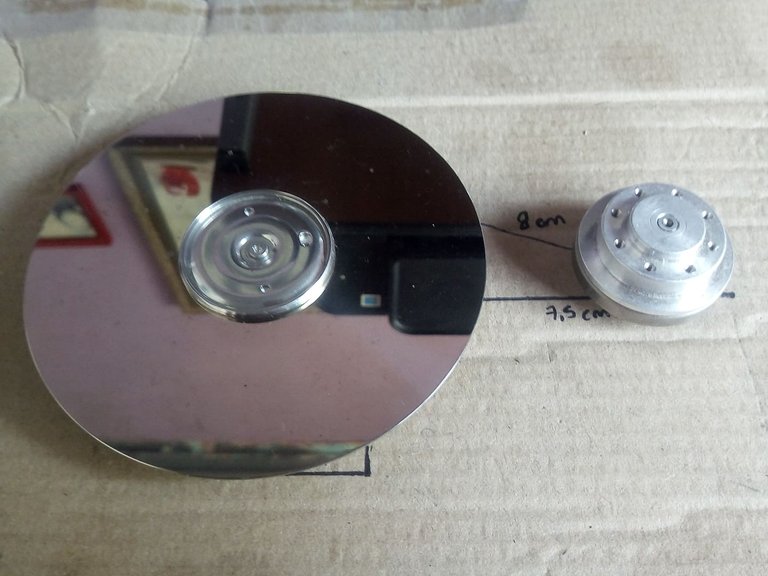
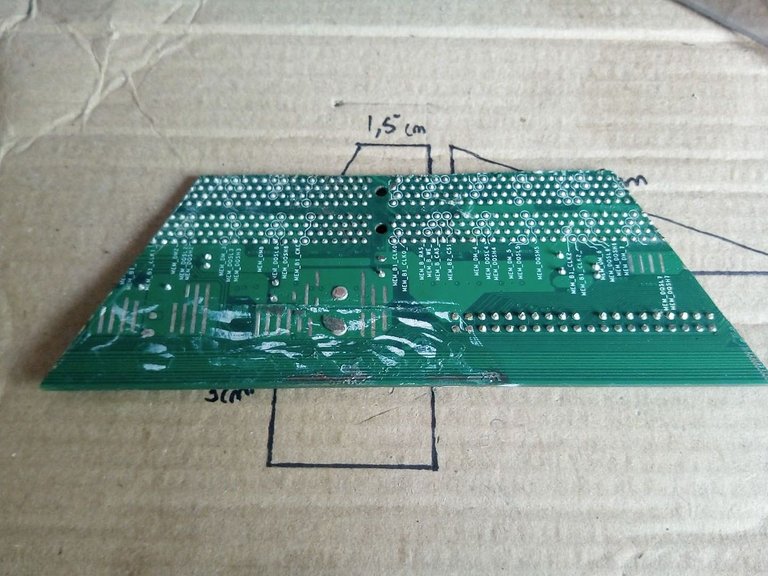
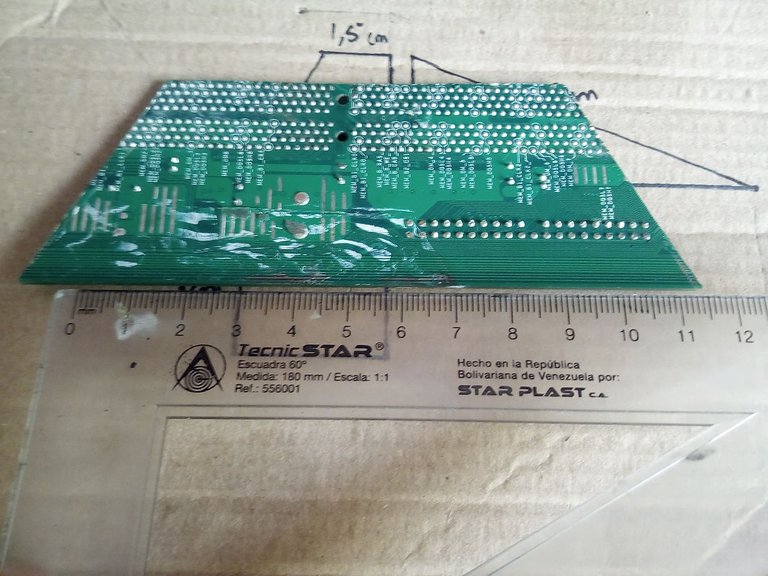
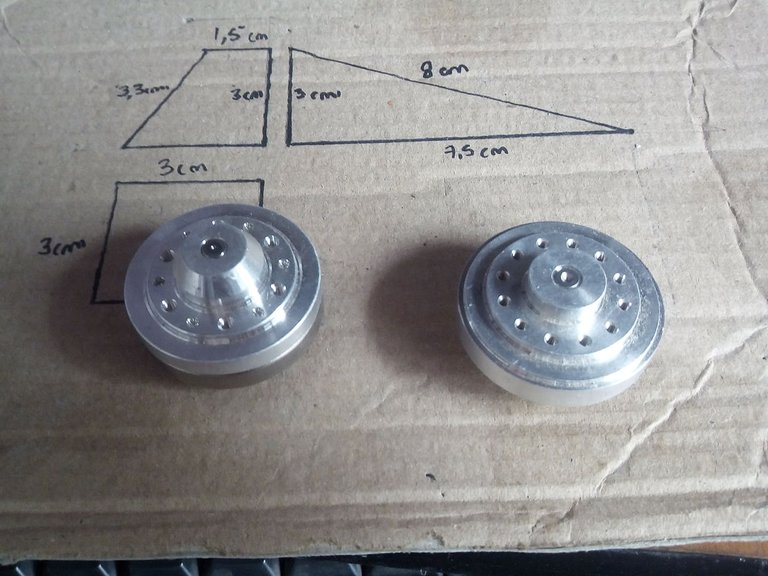
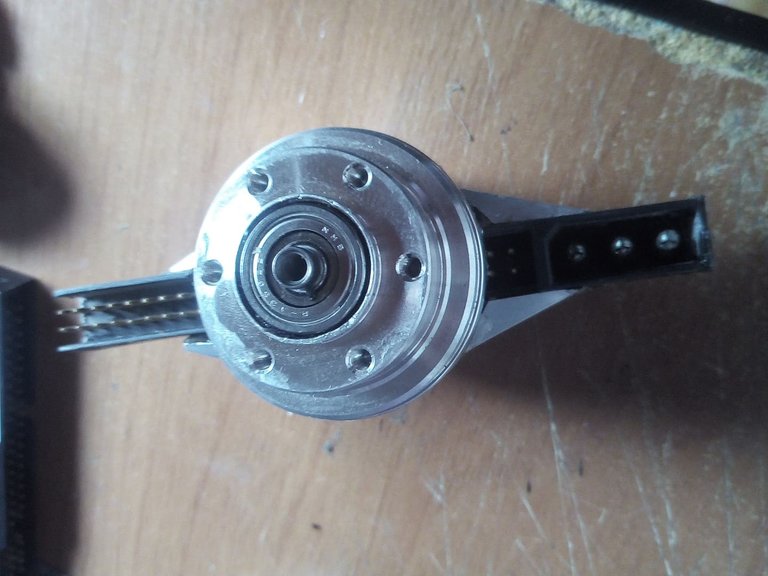
To make this ship we take a PC hard drive that is damaged and we disassemble it in all its parts, we remove the disk and we will use the motor and the plate that they have on the bottom. The plates come in square shapes but the ones I am using are smaller and have irregular shapes.
Para hacer esta nave tomamos un disco duro de PC que esté dañado y lo desarmamos en todas sus partes, le quitamos el disco y utilizaremos el motór y la placa que tienen por la parte inferior. Las placas vienen en forma cuadradas pero estas que estoy utilizando son más pequeñas y tran formas irregulares.
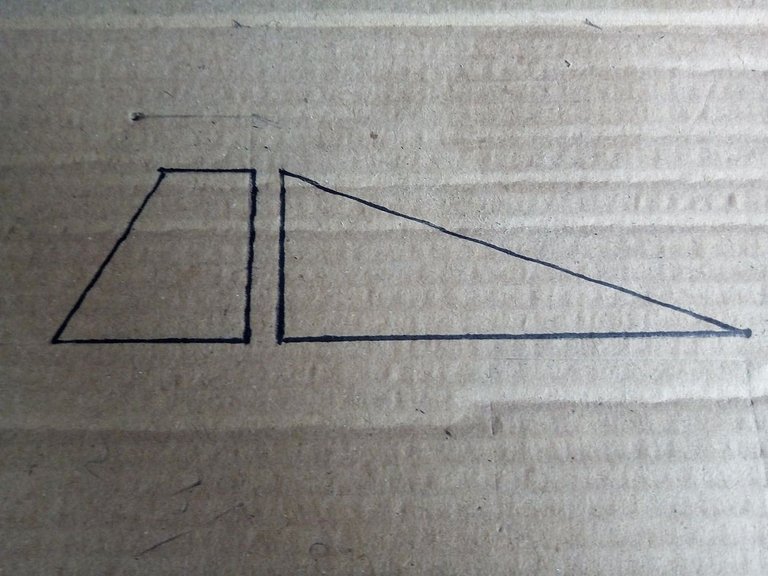
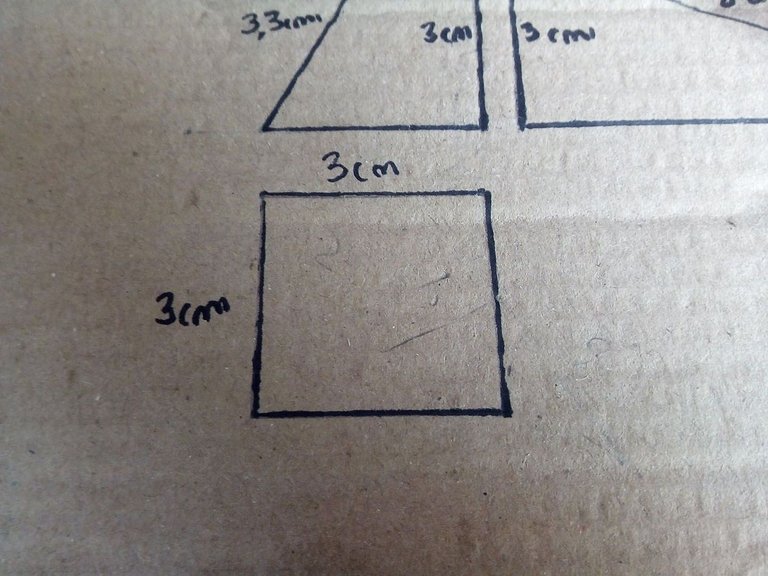
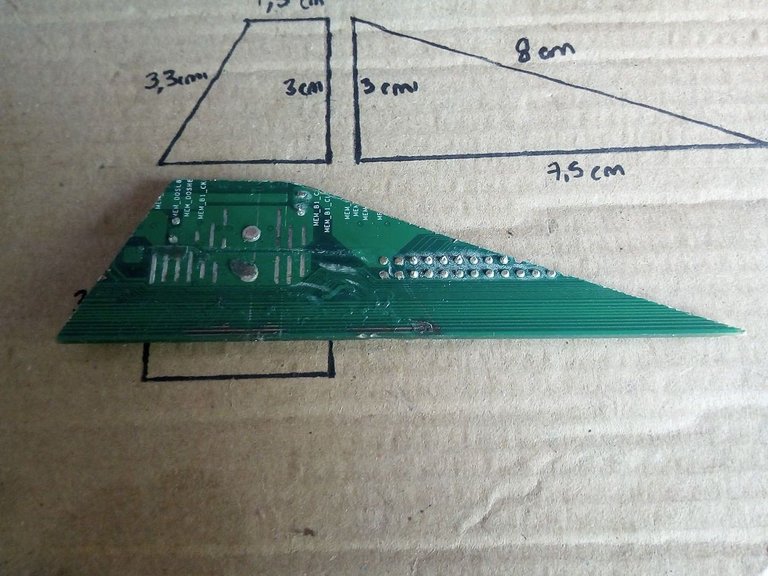
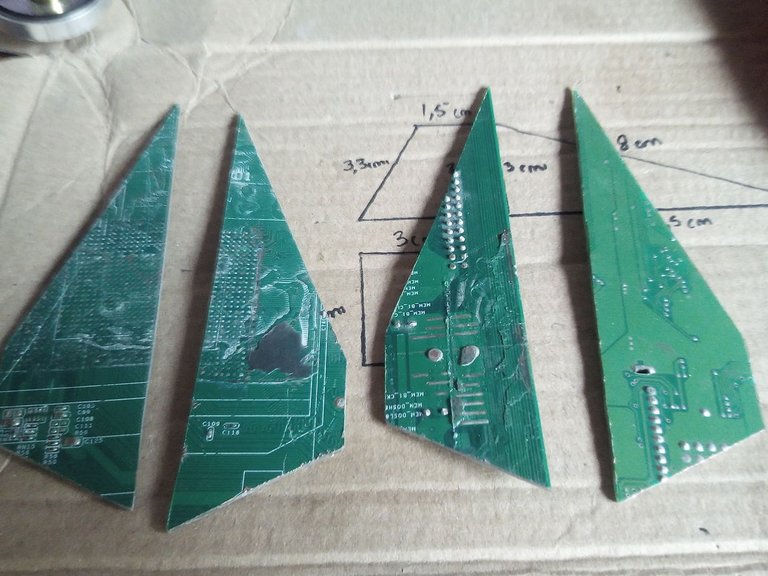
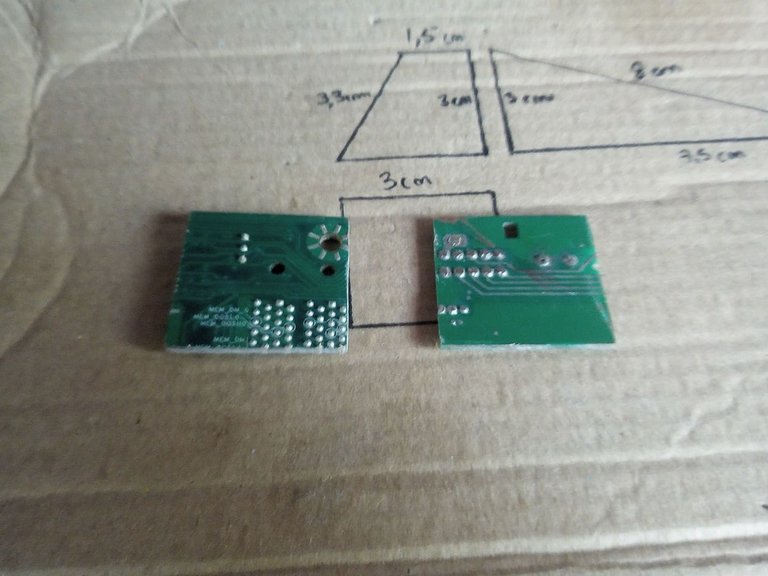
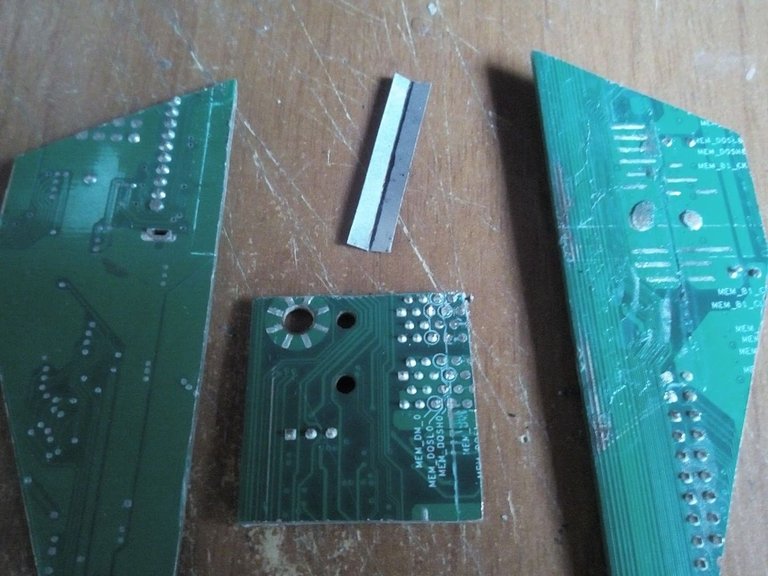
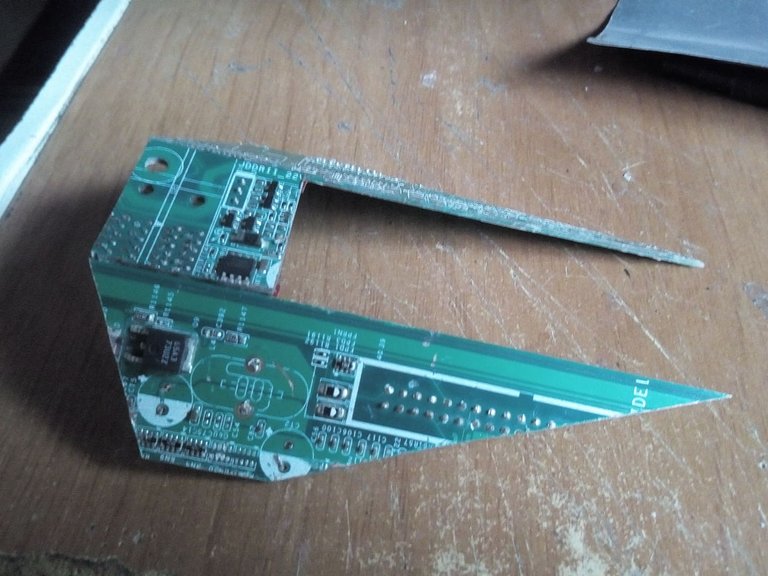
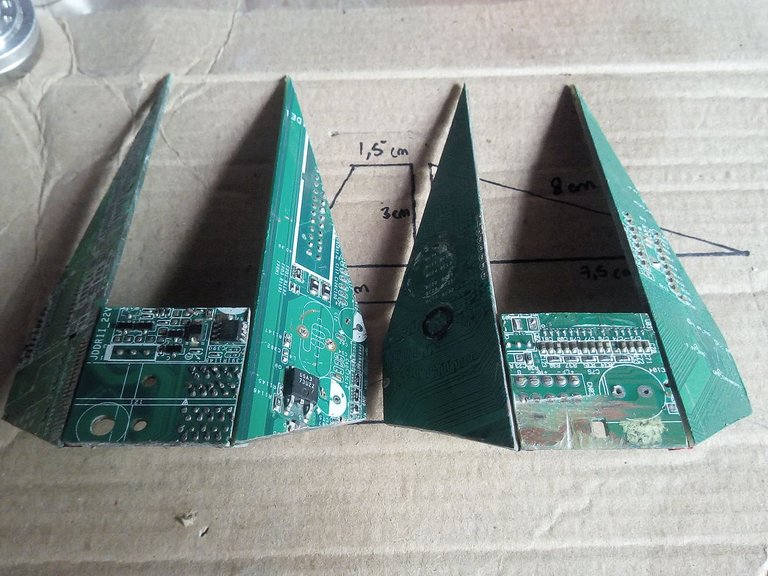
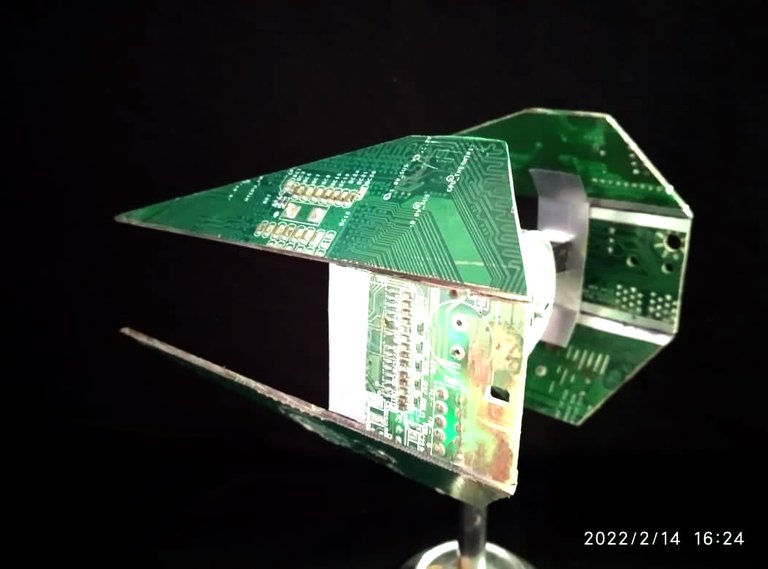
On a cardboard board we will draw the measurements that we will use for the wings of this ship. After drawing them we begin to make them on top of the motherboard, with a pointed object we trace the measurements and take out the pieces. There will be six pieces in total, two pointed for each side of the ship and between them two square figures that will serve to unite them and to be the base of the pilot's cabin.
En una tabla de cartón sacaremos las medidas que utilizaremos para las alas de esta nave. Despues de dibujarlas comenzamos a hacerlas encima de la placa madre, con un objeto puntiagudo trazamos las medidas y sacamos las piezas. Seran seis piezas en total, dos puntiagudas para cada lado de la nave y entre ellas dos figuras cuadradas que servirán para unirlas y para ser la base de la cabina del piloto.
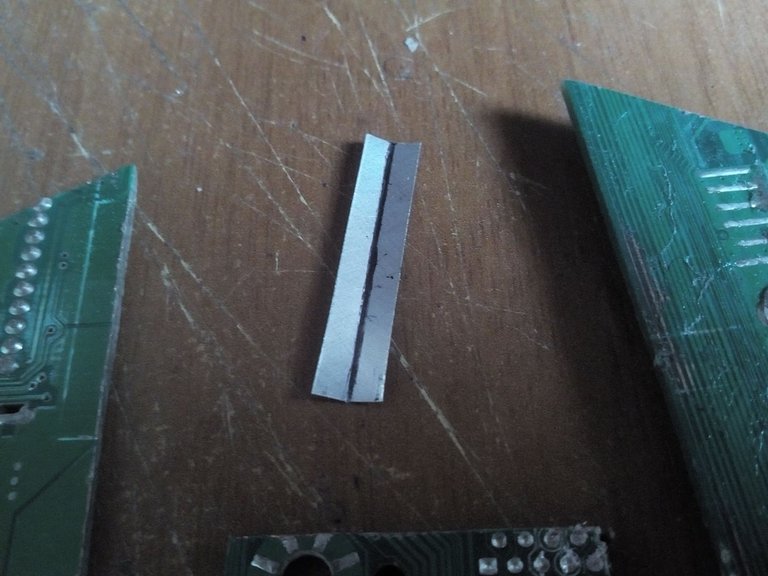
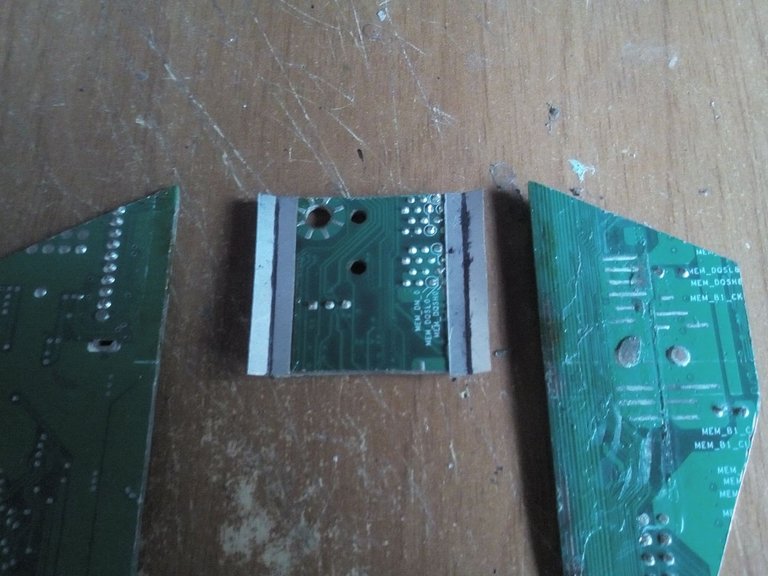
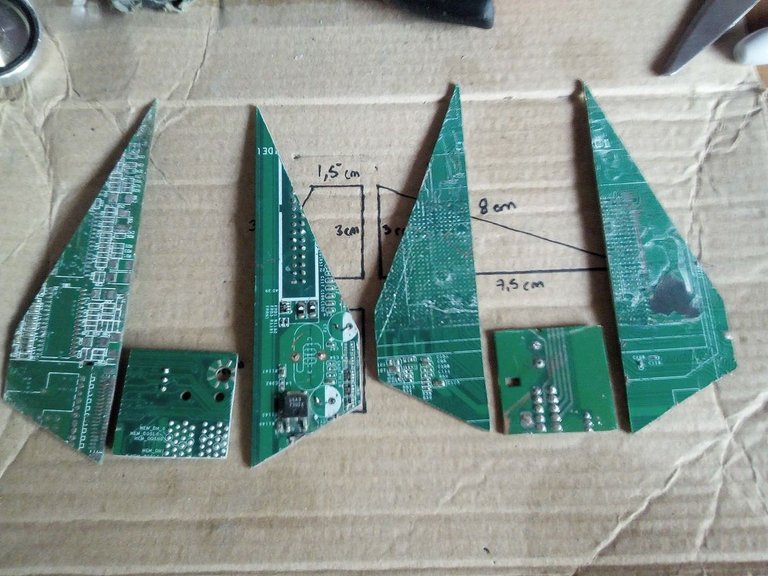
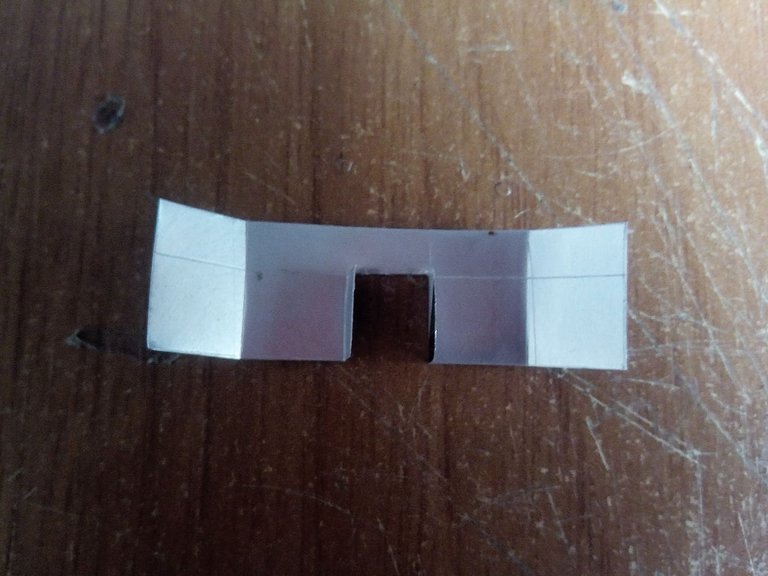
Now we proceed to assemble the wings, for this we are going to use some small strips of aluminum foil. It is 3 centimeters long and 8 millimeters wide, in the middle we make a line and fold, we do this to glue the motherboard that we cut from each part. In total we make 4 sheets of this and join all the mother plates that we have cut and the wings should be this way.
Ahora procedemos a armar las alas, para ello vamos a utilizar unas pequeñas tieras de lámina de aluminio. Tiene de largo 3 centímetros y de ancho 8 milímtros, por la mitad hacemos una linea y doblamos, esto lo hacemos para pegar de cada parte la placa madre que cortamos. En total hacemos 4 lamínas de esta y unimos todas las placas madre que hemos cortado y las alas deberían quedar de esta forma.
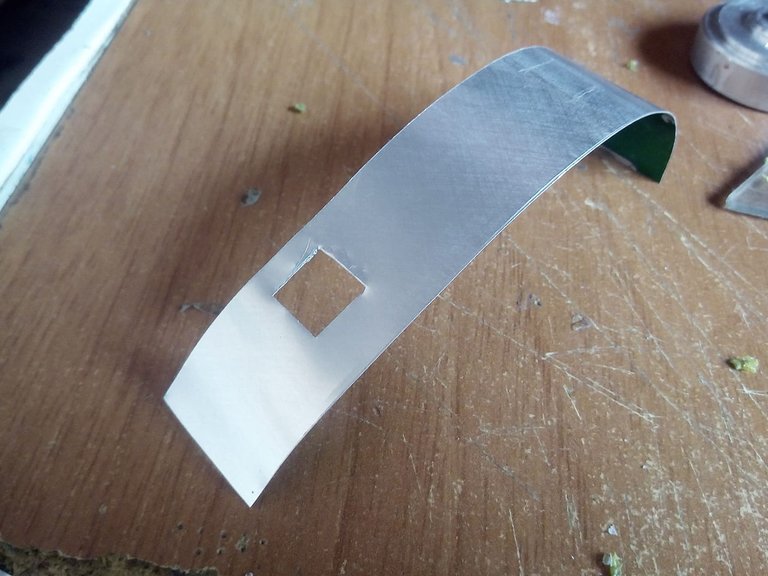
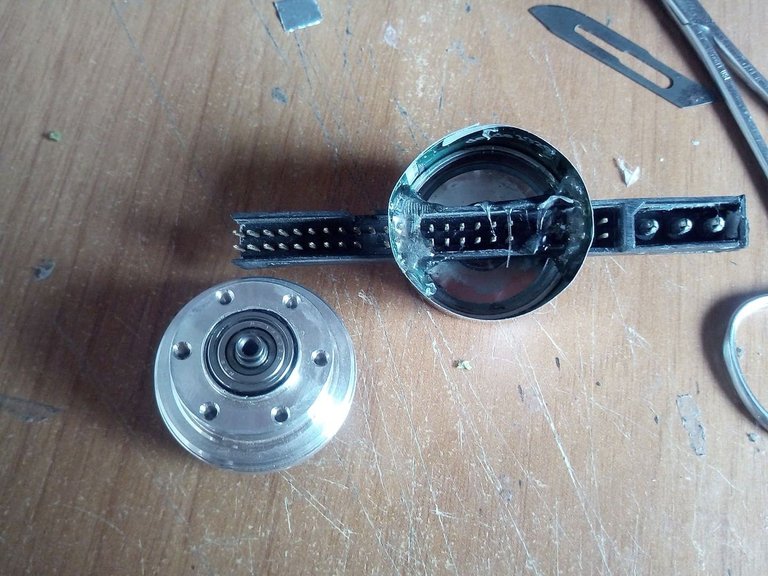
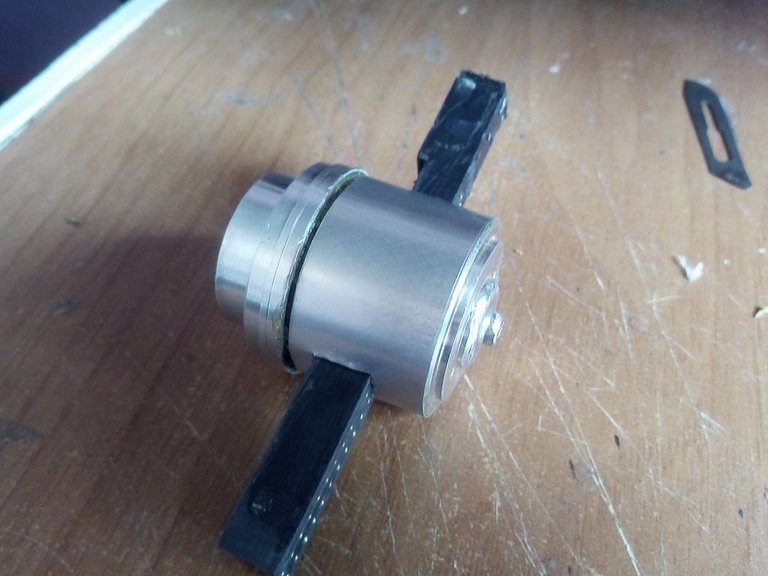
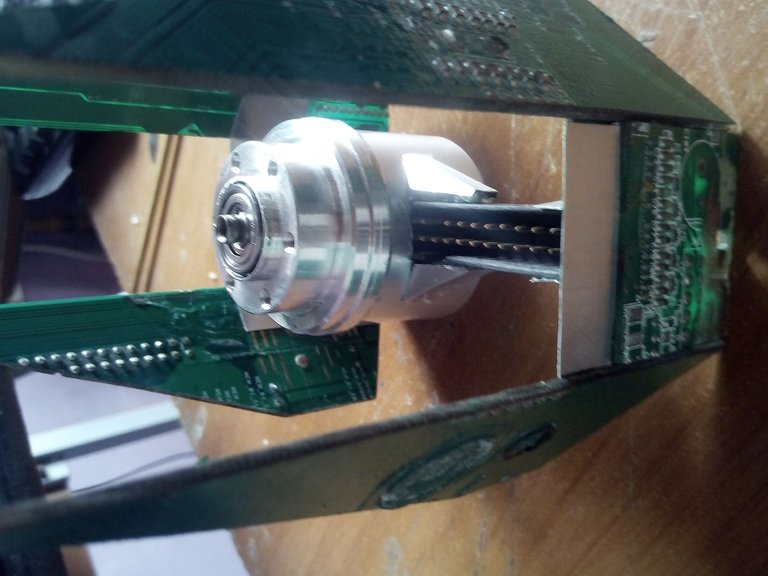
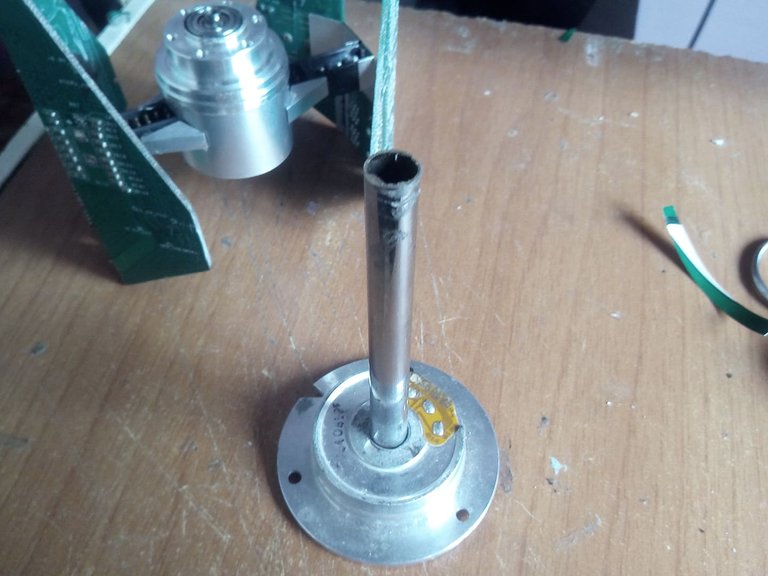
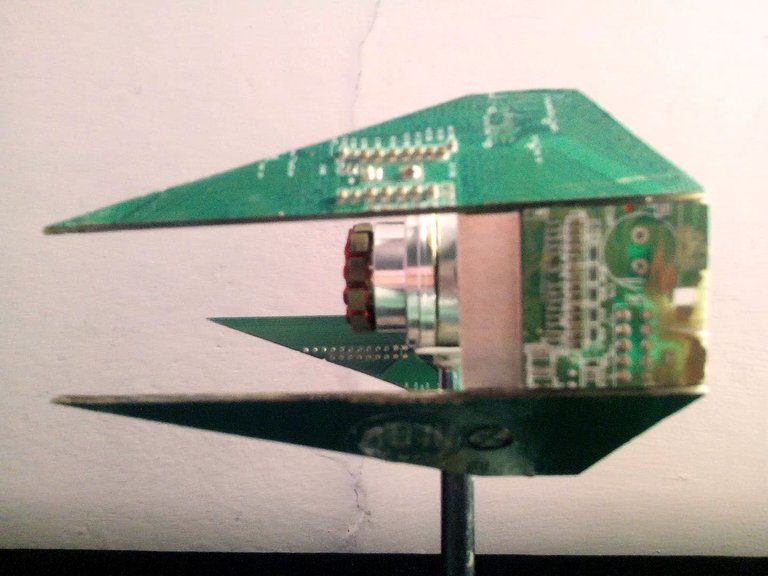
The next step is to make the cockpit for the pilot. We take two hard disk motors and one of them we are going to stick an aluminum tape around and we will make a square hole, then we are going to insert the socket that the hard disks have, we introduce it and on the other side we mark and open the other hole, in this way we pass everything completely. Then we take the other motor and seal this whole part.
El paso siguiente es hacer la cabina para el piloto. Tomamos dos motores de disco duro y a uno de ellos le vamos a pegar una cinta de aluminio alrededor y haremos un hoyo de forma cuadrada, por ahí luego vamos a introducir la toma que tienen los disco duros, lo indroducimos y del otro lado marcamos y abrimos el otro agujero, de esta forma pasamos todo por completo. Luego tomamos el otro motor y sellamos toda esta parte.
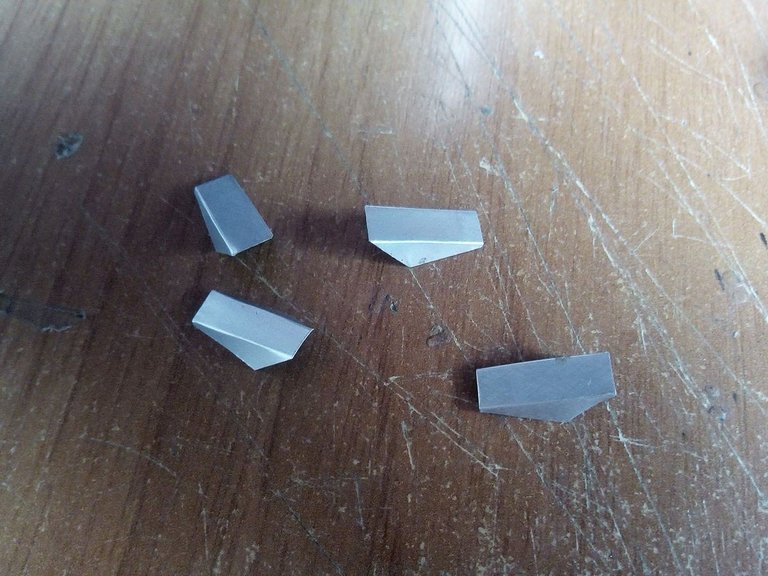
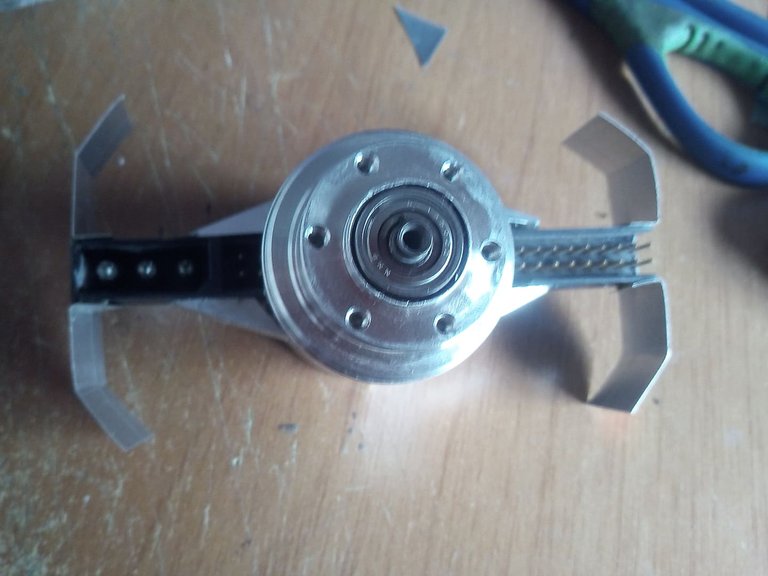
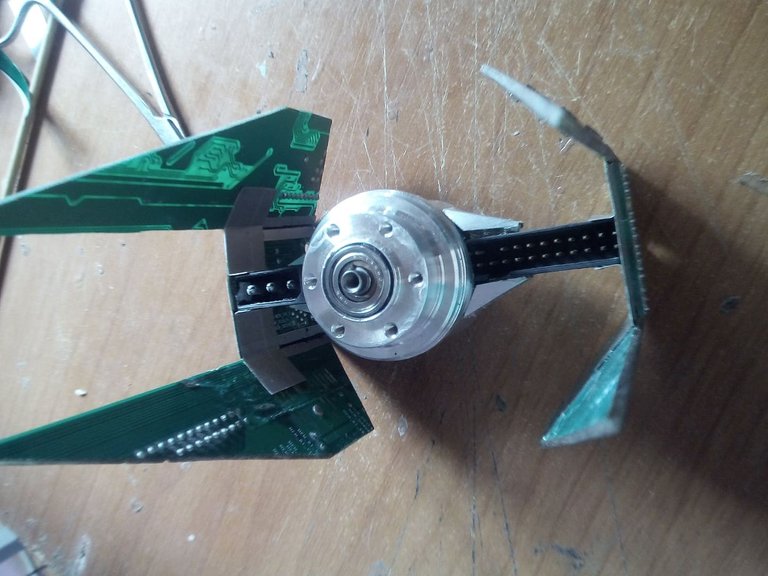
Next we will make some small details that we will place around the cockpit, we make 4 small pieces in the shape of a triangle that we will place near the cockpit. We will also make 2 pieces of aluminum sheet that we will place at the ends of the arms of the cabin and that will serve to put the wings. We use contact glue that is more resistant so the wings will be well fixed, lastly we will make a base to place our ship.
Seguidamente haremos unos pequeños detalles que colocaremos alrededor de la cabina del piloto, hacemos 4 pequeñas piezas en forma de triángulo que colocaremos cerca de la cabina. También haremos 2 piezas de lámina de aluminio que colocaremos en los extremos de los brazos de la cabina y que nos servirán para poner las alas. Utilizamos pegamento de contacto que es más resistente así las alas quedarán bien fijadas, de último haremos una base colocar nuestra nave.
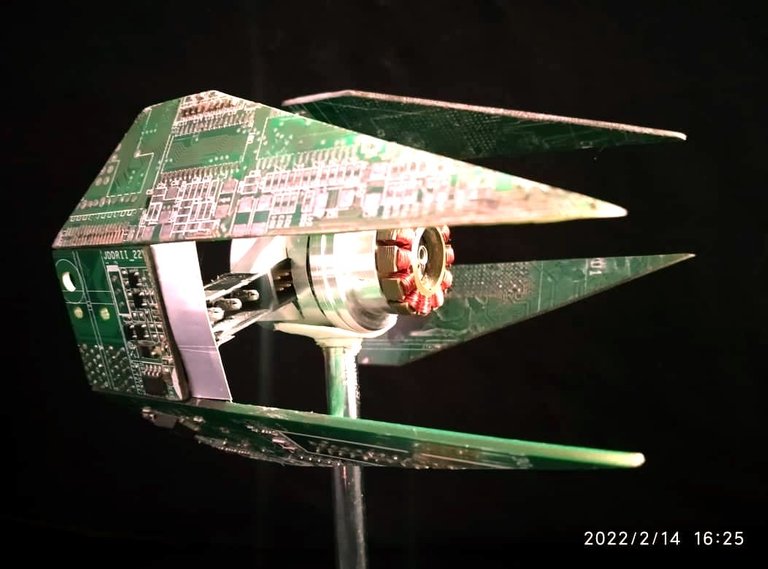
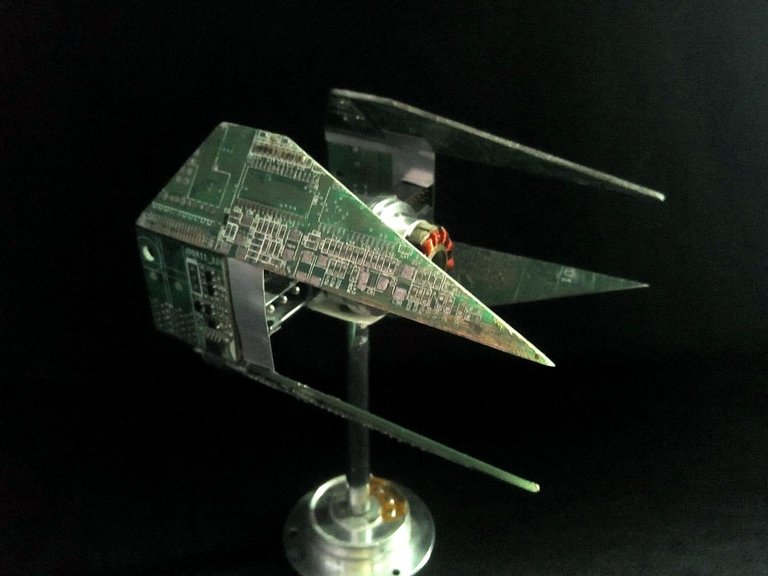
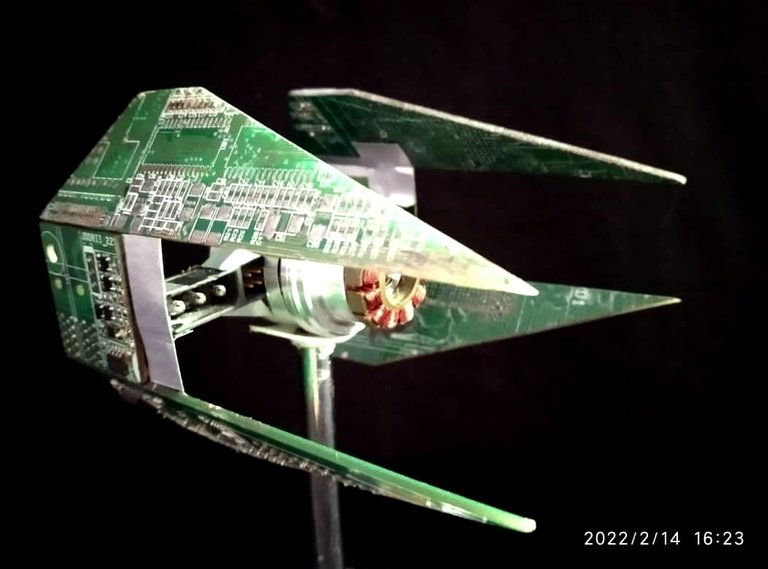
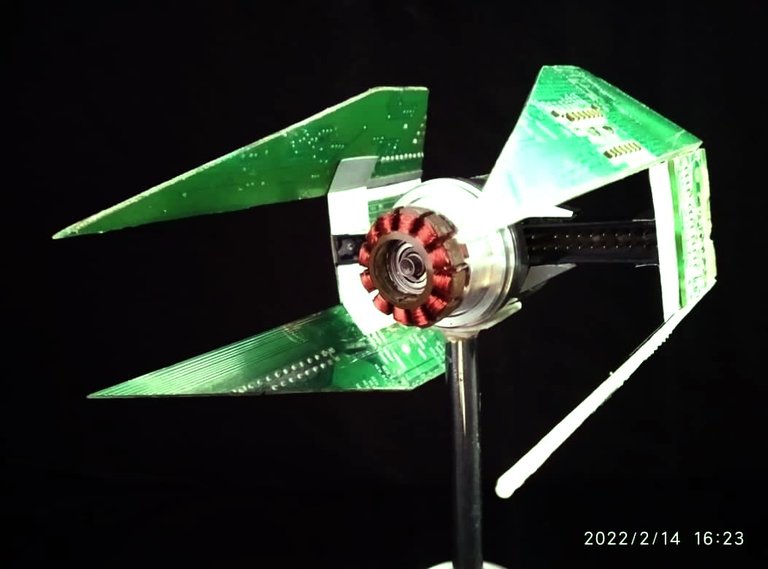
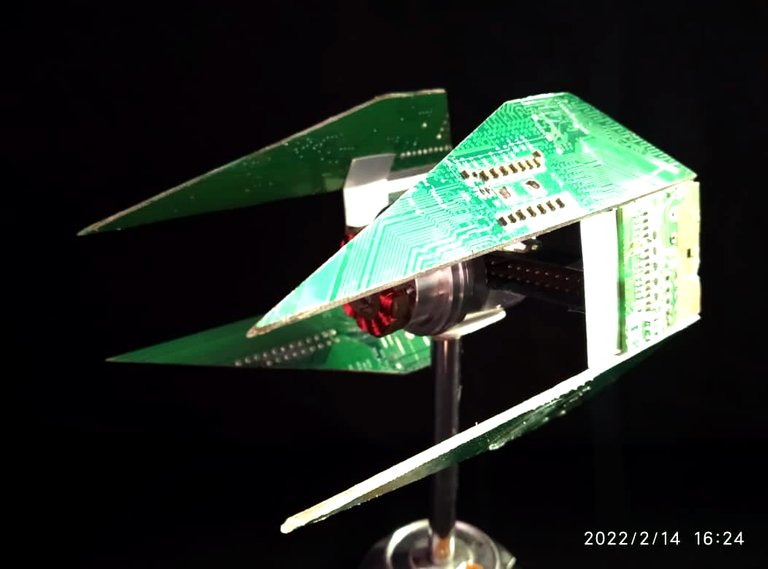
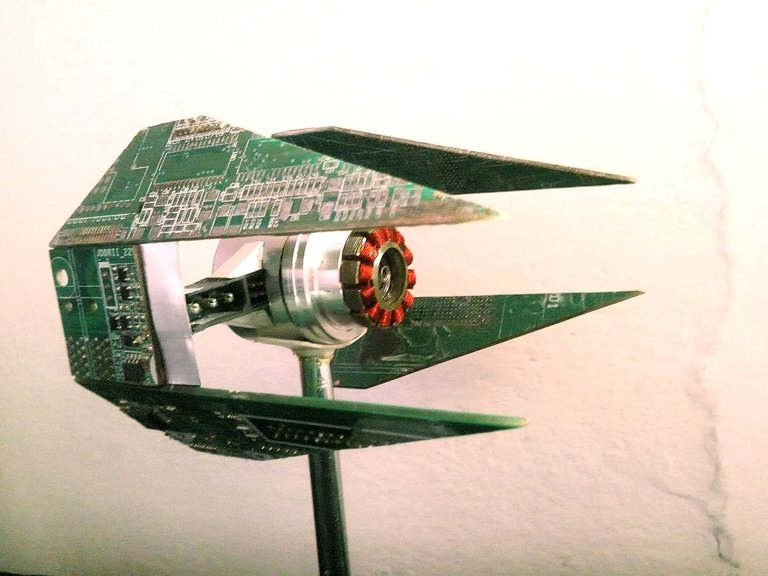
This is how the Star Wars TIE Interceptor ship has turned out, at the end I added one more detail, the cobra coil that the hard disk motors have inside, I placed one in the front part of the ship. I also put a transparent acrylic varnish to give more shine to the parts of the ship. It is well known how fanatical I am of Star Wars, so my collection of ships has grown, although this piece already has someone interested in obtaining it. I hope you liked it, this tutorial can also be done with cardboard and painted like papercraft works. I say goodbye soon with the desire to share something new soon. Greetings to all.
Así ha quedado la nave TIE Interceptor de Star Wars, al final agregué un detalle más, la bobina de cobra que tienen los motores de disco duro por dentro, coloqué una en la parte frontal de la nave. También le puse barníz acrílico transparente para darle más brillo a las partes de la nave. Es más que conocido lo fanático que soy de Star Wars, así que mi colección de naves ha crecido, aunque esta pieza ya tiene alguien ineteresado en obtenerla. Espero que les haya gustado, este tutorial también podemos hacerlo con cartón y pintarlo como las obras de papercraft. Me despido hasta pronto con el deseo de compartir algo nuevo pronto. Saludos para todos.
The rewards earned on this comment will go directly to the person sharing the post on Twitter as long as they are registered with @poshtoken. Sign up at https://hiveposh.com.
Bro eres un crack, que brutal resultado de verdad está demasiado genial.
Saludos hermano, gracias por pasar me alegra que te haya gustado.
Eres increíble Fixie, quedó genial!!! Y sobretodo las fotos al final, te quedaron superrr!!!!!!
One of my favorite starfighters! Amazing work, looks like it was a fun project to do.
YES it was a great project, if you use this kind of materials in the Star Wars ships they look great, I really like the aesthetics. In this style I already have several ships that I have made. Thanks for going through my post, I'm glad you liked it.
Excelente trabajo🤩 y creatividad felicitaciones👍
Muchas gracias, me alegra que te haya gustado el diseño, saludos.
Buenísimo, me gusta mucho tu trabajo y tu creatividad.
Hola hermano, saludos, siempre es un gusto leer tu opinión cuando pasas por mis publicaciones, me alegra que sean de tu agrado.
Excelente trabajo, se ve la dedicación y esmero que le pones a cada diseño que realizas. Te felicito. Saludos @fixie
Saludos para ti tambien y por tomarte el tiempo para apreciar mi aporte. En cuanto a estos diseños me gusta imprimirle toda mi pasión y fanatismo por la franqucia.. Me alegra que te haya gustado.
Hi. Un trabajo realmente asombroso. Estoy impresionada que cada vez más logras superar tus piezas de arte en la complejidad y el acabado. Excelente. Gracias por compartir.
Esta publicación ha recibido el apoyo de The Creative Coin Fund, voto directo de @gislandpoetic como curadora desde el servidor de Discord. ¡Te invitamos a seguir creando y compartiendo contenido de calidad!
This post has received support from The Creative Coin Fund, direct vote from @gislandpoetic as a curator from the Discord server. We invite you to continue creating and sharing quality content!
Hola muchas gracias por pasar por mi publicación y apoyar con tu comentario. Saludos.
Muy buen trabajo, Es un uso interesante para las placas de circuitos recicladas.
Thank you for sharing this amazing post on HIVE!
Your content got selected by our fellow curator @priyanarc & you just received a little thank you via an upvote from our non-profit curation initiative!
You will be featured in one of our recurring curation compilations and on our pinterest boards! Both are aiming to offer you a stage to widen your audience within and outside of the DIY scene of hive.
Join the official DIYHub community on HIVE and show us more of your amazing work and feel free to connect with us and other DIYers via our discord server: https://discord.gg/mY5uCfQ !
If you want to support our goal to motivate other DIY/art/music/homesteading/... creators just delegate to us and earn 100% of your curation rewards!
Stay creative & hive on!
Muchas gracias por su apoyo!