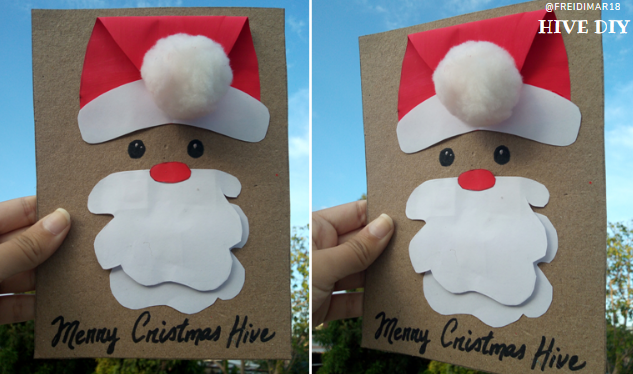
Hello to the whole Hive Diy community! Welcome to a new content. Today I come with a craft that I personally liked a lot, and is that in two days we will be entering the month of December, the month of Christmas. Therefore, I wanted to make a nice Card for Hive wishing you a Merry Christmas. In this way, I made use of materials that I had already bought before, adding to this some scraps of kilo cardboard. Without further ado, I hope you can enjoy and take the opportunity to make it at home and give it as a gift to your loved one. Here are the materials and step by step.
¡Hola a toda la comunidad de Hive Diy! Bienvenidos a un nuevo contenido. Hoy vengo con una manualidad que en lo personal me gustó muchísimo, y es que ya en dos días estaremos entrando al mes de Diciembre, el mes de la navidad. Por ello, quise llevar a cabo la realización de una linda tarjeta para Hive deseándoles una Feliz navidad. De esta forma, hice uso de materiales que ya había comprado con anterioridad, sumado a esto algunos retasos de cartón kilo. Sin más que decir, espero y puedan disfrutar y aprovechar la ocasión de hacerlo en casa y obsequiarlo a ese ser amado. A continuación los materiales y paso a paso.
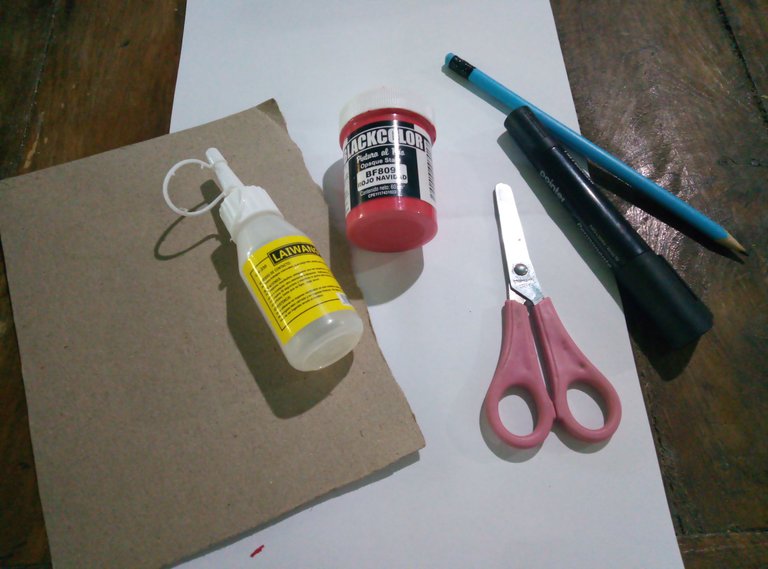
Materials to be used:
| -A piece of cardboard kilo, the size you choose to your liking, in my case it was half of a white sheet. | -Un pedazo de cartón kilo, el tamaño lo elijes a tu gusto, en mi caso fue la mitad de una hoja blanca | |
|---|---|---|
| -A white sheet of paper | -Una hoja blanca | |
| -Red cold paint | -Pintura al frio rojo | |
| -Pencil and black fine tip marker | -Lápiz y marcador punta fino negro | |
| -Scissors | -Tijera | |
| -Silicone | -Silicón |

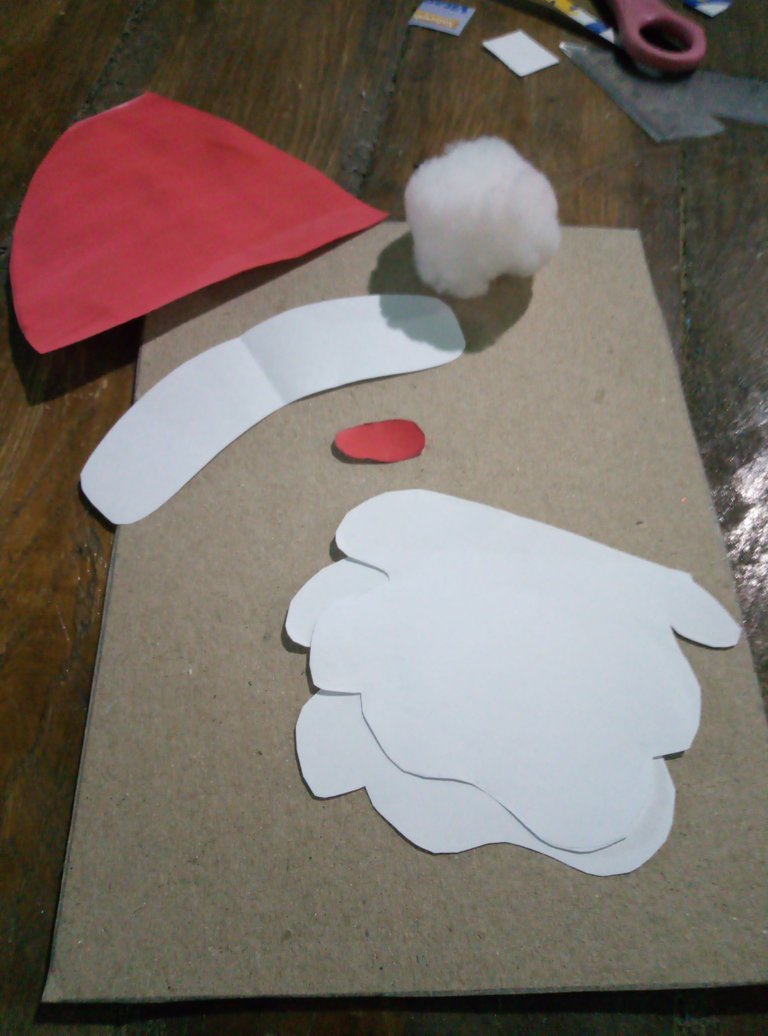
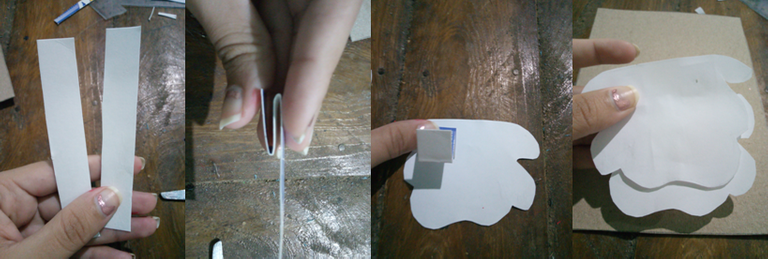
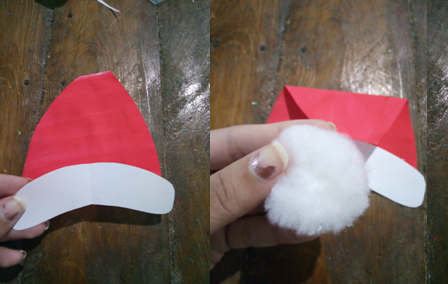
Step by step

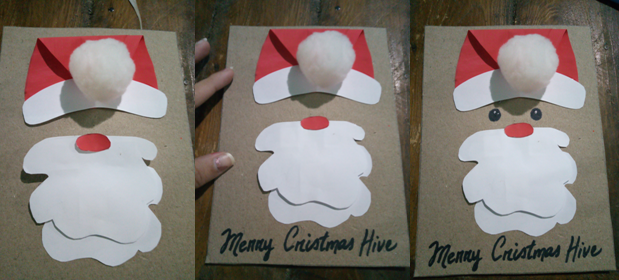
Final result! | ¡Resultado final!


Amiga que bella te quedó esa carta ♥️ me encantó, y esta muy fácil para hacer a los niños, linda idea ♥️
Gracias amiga hermosa, un abrazo ❤️
Muchas gracias por la valoración de mi contenido @mayvileros ¡Saludos!
Hola freidimar18, linda tu tarjeta. Propicia para la fecha y con muy pocos materiales.